It’s been one year since we completed our retro glam kitchen renovation. We completed it as part of the Spring 2019 One Room Challenge, and DIYed as much as we hired-out for. Over the past year we’ve lived with the space, used every corner of it, and put everything we changed through its paces. Now it’s time to show you how it’s all holding up.


I’m gonna let you in on a few secrets, show you how well everything has held-up, and tell you what I would have done differently if I could do things over.

Kitchen Renovation Update One Year Later
You can catch it all in video form you feel like a watch, otherwise start scrolling for more detailed updates.

The White Cherokee Marble Counters
After a few logistical struggles getting it all together, once the last piece went into place, we had sheer perfection. We still do.
Over the past year we’ve spilled dye, food, paint and more on the countertops. We made sure to clean them every day with soapy water, to use a magic eraser on any dye drips (from food or craft dye), and to generally treat them like we would any other surface in the house.

We made sure to follow the stone’s guidelines: don’t put hot pots or pans directly on the stone (it can cause yellowing), don’t use marble cleaning products (it will wear down the natural protective finish), and generally keep them clean.

No fancy products, no weekly treatments. Just soapy water. Even the area around the sink and the stove show no signs of time. The backsplash behind the stove can be wiped down with a wet cloth.

There are a few water rings if you catch the counters with the light hitting just-so, but otherwise they look impeccable. Here’s a shot of a seam around the sink, you can see it’s doing well.

The DIY Painted Kitchen Cabinets
Painting these cabinets was a labour of love. I did them while 20 weeks pregnant, and I regret nothing – except not wearing comfier shoes. Everyone was skeptical because there was no primer involved, but because we chose the right paint formula, everything has help up as promised.

No scratches, no bubbling paint, no peeling paint, no fading.
Yes, grease and food stains can appear around the handles on the doors, but regular cleaning with a damp cloth takes care of that.

The White Silgranit Sink
Everyone, and maybe including myself, was unsure how a white (non enamelled) kitchen sink would hold-up to stringent daily use. We drink a lot of coffee, love our sauces, and often leave dishes in the sink.

We quickly noticed that there was a slow build-up of food and grime in the sink, but nothing more than a regular sink. Just more visible because it’s white.
The solution? Clean the basin 1x a week with a magic eraser, and it looks brand new. After a clean, you can’t even tell it’s a year old, and used daily.

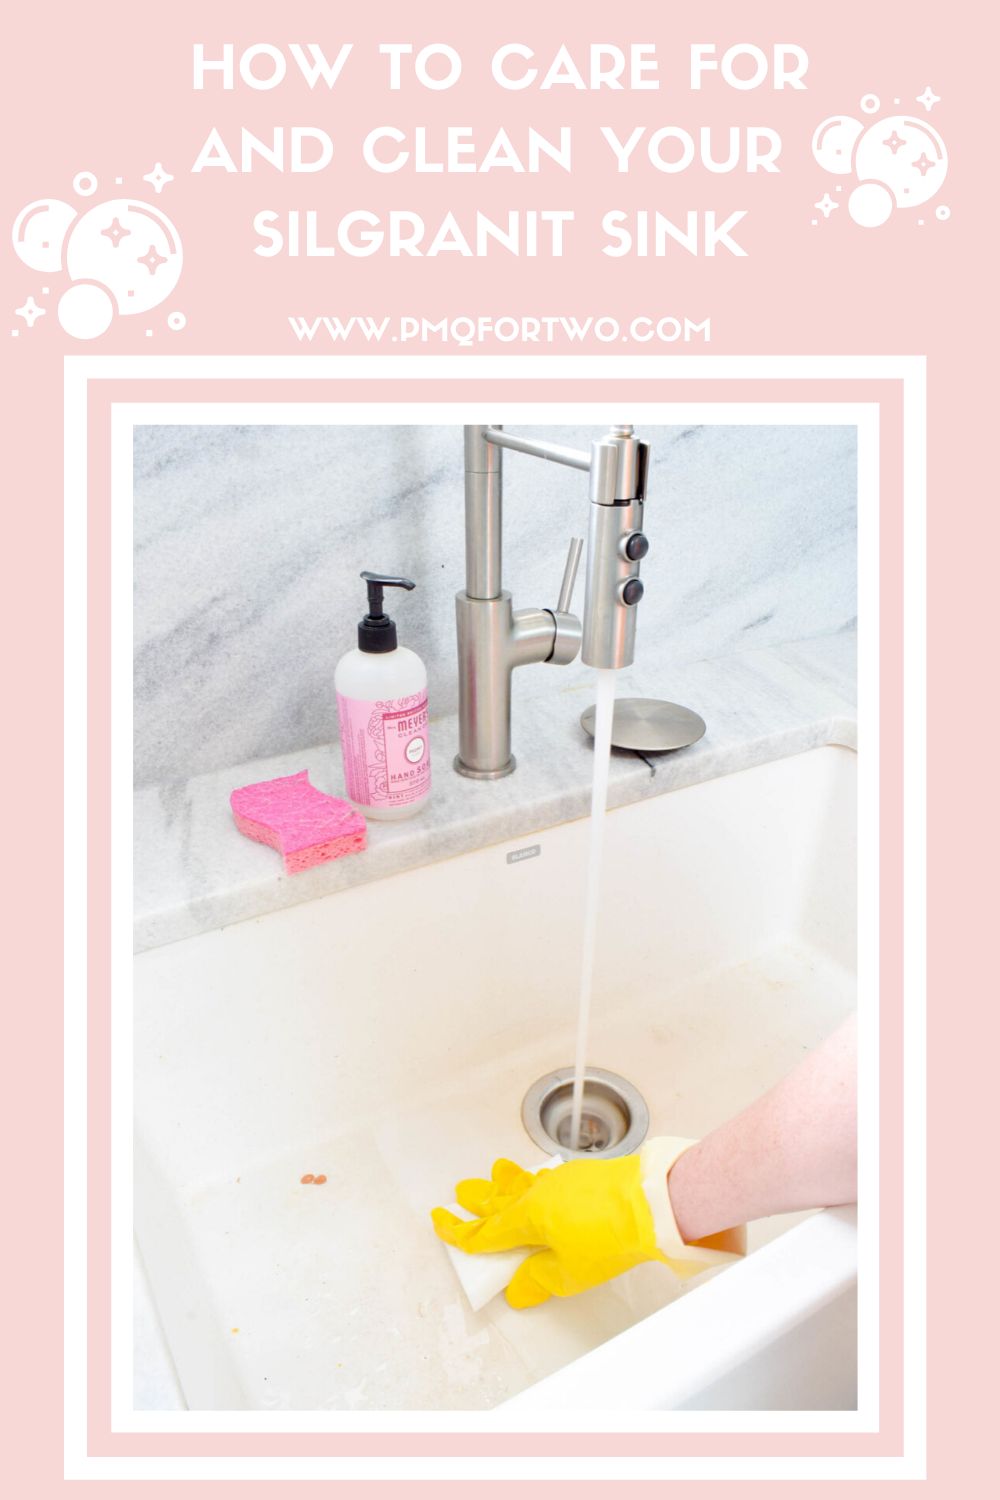
There have no been stains, no cracks, and no warpage. So we’re still very pleased with how it turned-out.


The Painted Stainless Steel Dishwasher
You guys have been the most curious about this particular project.

I am oh-so-pleased to report that there has been no chipping, peeling or bubbling. I wipe it down once a month when I notice food residue on the outside. Other than that, there’s less maintenance than when it was stainless steel.

I love that it blends right in with the kitchen cabinets. It’s an exact colour match (because it’s the same paint), and it doesn’t show smudges or weird water fog. I love it!
If only Dan would let me paint the fridge…
The Cement Checkerboard Floor Tiles
This one has been tricky for us. The tiles were perfect until we sealed them. We didn’t do the best job sealing them, so this summer we’ll have to use an acidic coat to remove foggy stains, and then re-seal the entire kitchen to ensure better coverage.

Turns out, when you’re sealing cement tile you can get a fog if it’s not done correctly. Thankfully it’s a straightforward (if time consuming) fix, so once the weather allows us to eat from the BBQ and use the basement fridge, we’ll switch family operations down there while we fix the floor.
Other than that, no chipping, no stains, no cracks.

Everything Else
The wallpaper, the lighting, the doors etc. everything else is still going strong. Nothing to report there!


I’ve changed the decor seasonally, moved some things around as needed, but for the most part, the kitchen is pretty much the same.

I did add DIY Plate Racks to the dish cupboard, and those are fab because my rainbow system wasn’t working so well.
What would I have done differently?
A few things actually! I love our kitchen, but if this was going to be our forever home, we might have done the following:
- bought a new wall-mount oven. We love that it’s still going strong, but the internal temperature is starting to get a little wonky, and it seeps heat onto the cupboards above.
- Added another skylight above the kitchen table. We love all the light it provides, the extra shaft of natural light would have been incredible.
- Made the trash-can a built-in feature under the peninsula. Other than the drawers, we don’t really use the cupboard space, so that could have been set aside of some hidden trash.
- Added a past arm over the stove. But that would have required costly plumbing, and would have been dead last on our priority list.
- I love the blue, but I am sometimes tempted by the though of cream cupboards *gasp*.

I love, love, love your kitchen! The transformation was shocking to me the first time I saw it! Its not only beautiful but it’s functional too. Makes me want to paint my whole kitchen!
I love it all! The blue cabinets are perfect
aren’t they?! they’ve help up so well. It was one of our concerns with DIYing them, but you’d never know.
Great posts, original dishwasher DIY and this follow up! I am going to paint my stainless fridge using this same method and I want to do the oven door as well. My only question is, did you not apply a top coat, or sealer? excellent work on your kitchen!
no top coat, but you could always do so!
You are lucky to have such a beautiful kitchen! Thanks for sharing the update!