PMQ for two

Bold, Bright and Colourful Home Decor & DIYs

  • HOME
  • ABOUT ME
    • POLICIES
  • BUSINESS BABES
  • PROJECT GALLERY
  • PRESS
  • WHAT IS A PMQ?
    • THE DUPLEX
    • The Row House Tour

How To Paint Your Plywood Kitchen Cabinets

April 10, 2019~ dream house, kitchen, one room challenge, painting

This has got to be one of the more contested subjects in the world of house remodelling, especially if you’re in a retro home and trying to keep its charm. Seeing how we bought a retro fixer-upper, we wanted to keep as much of the charm as possible. However, the kitchen cabinets aren’t charming as is, so we set about painting our plywood kitchen cabinets, and I’m gonna tell you how we did it.

P.s Welcome to week 2 of the ORC! Make sure you go check out the link-up with all the other linking participants, and check out what the official ones are up to.

*BEHR sponsored this post, but all thoughts are my own. Thank you for supporting the brands that make PMQ for two possible.
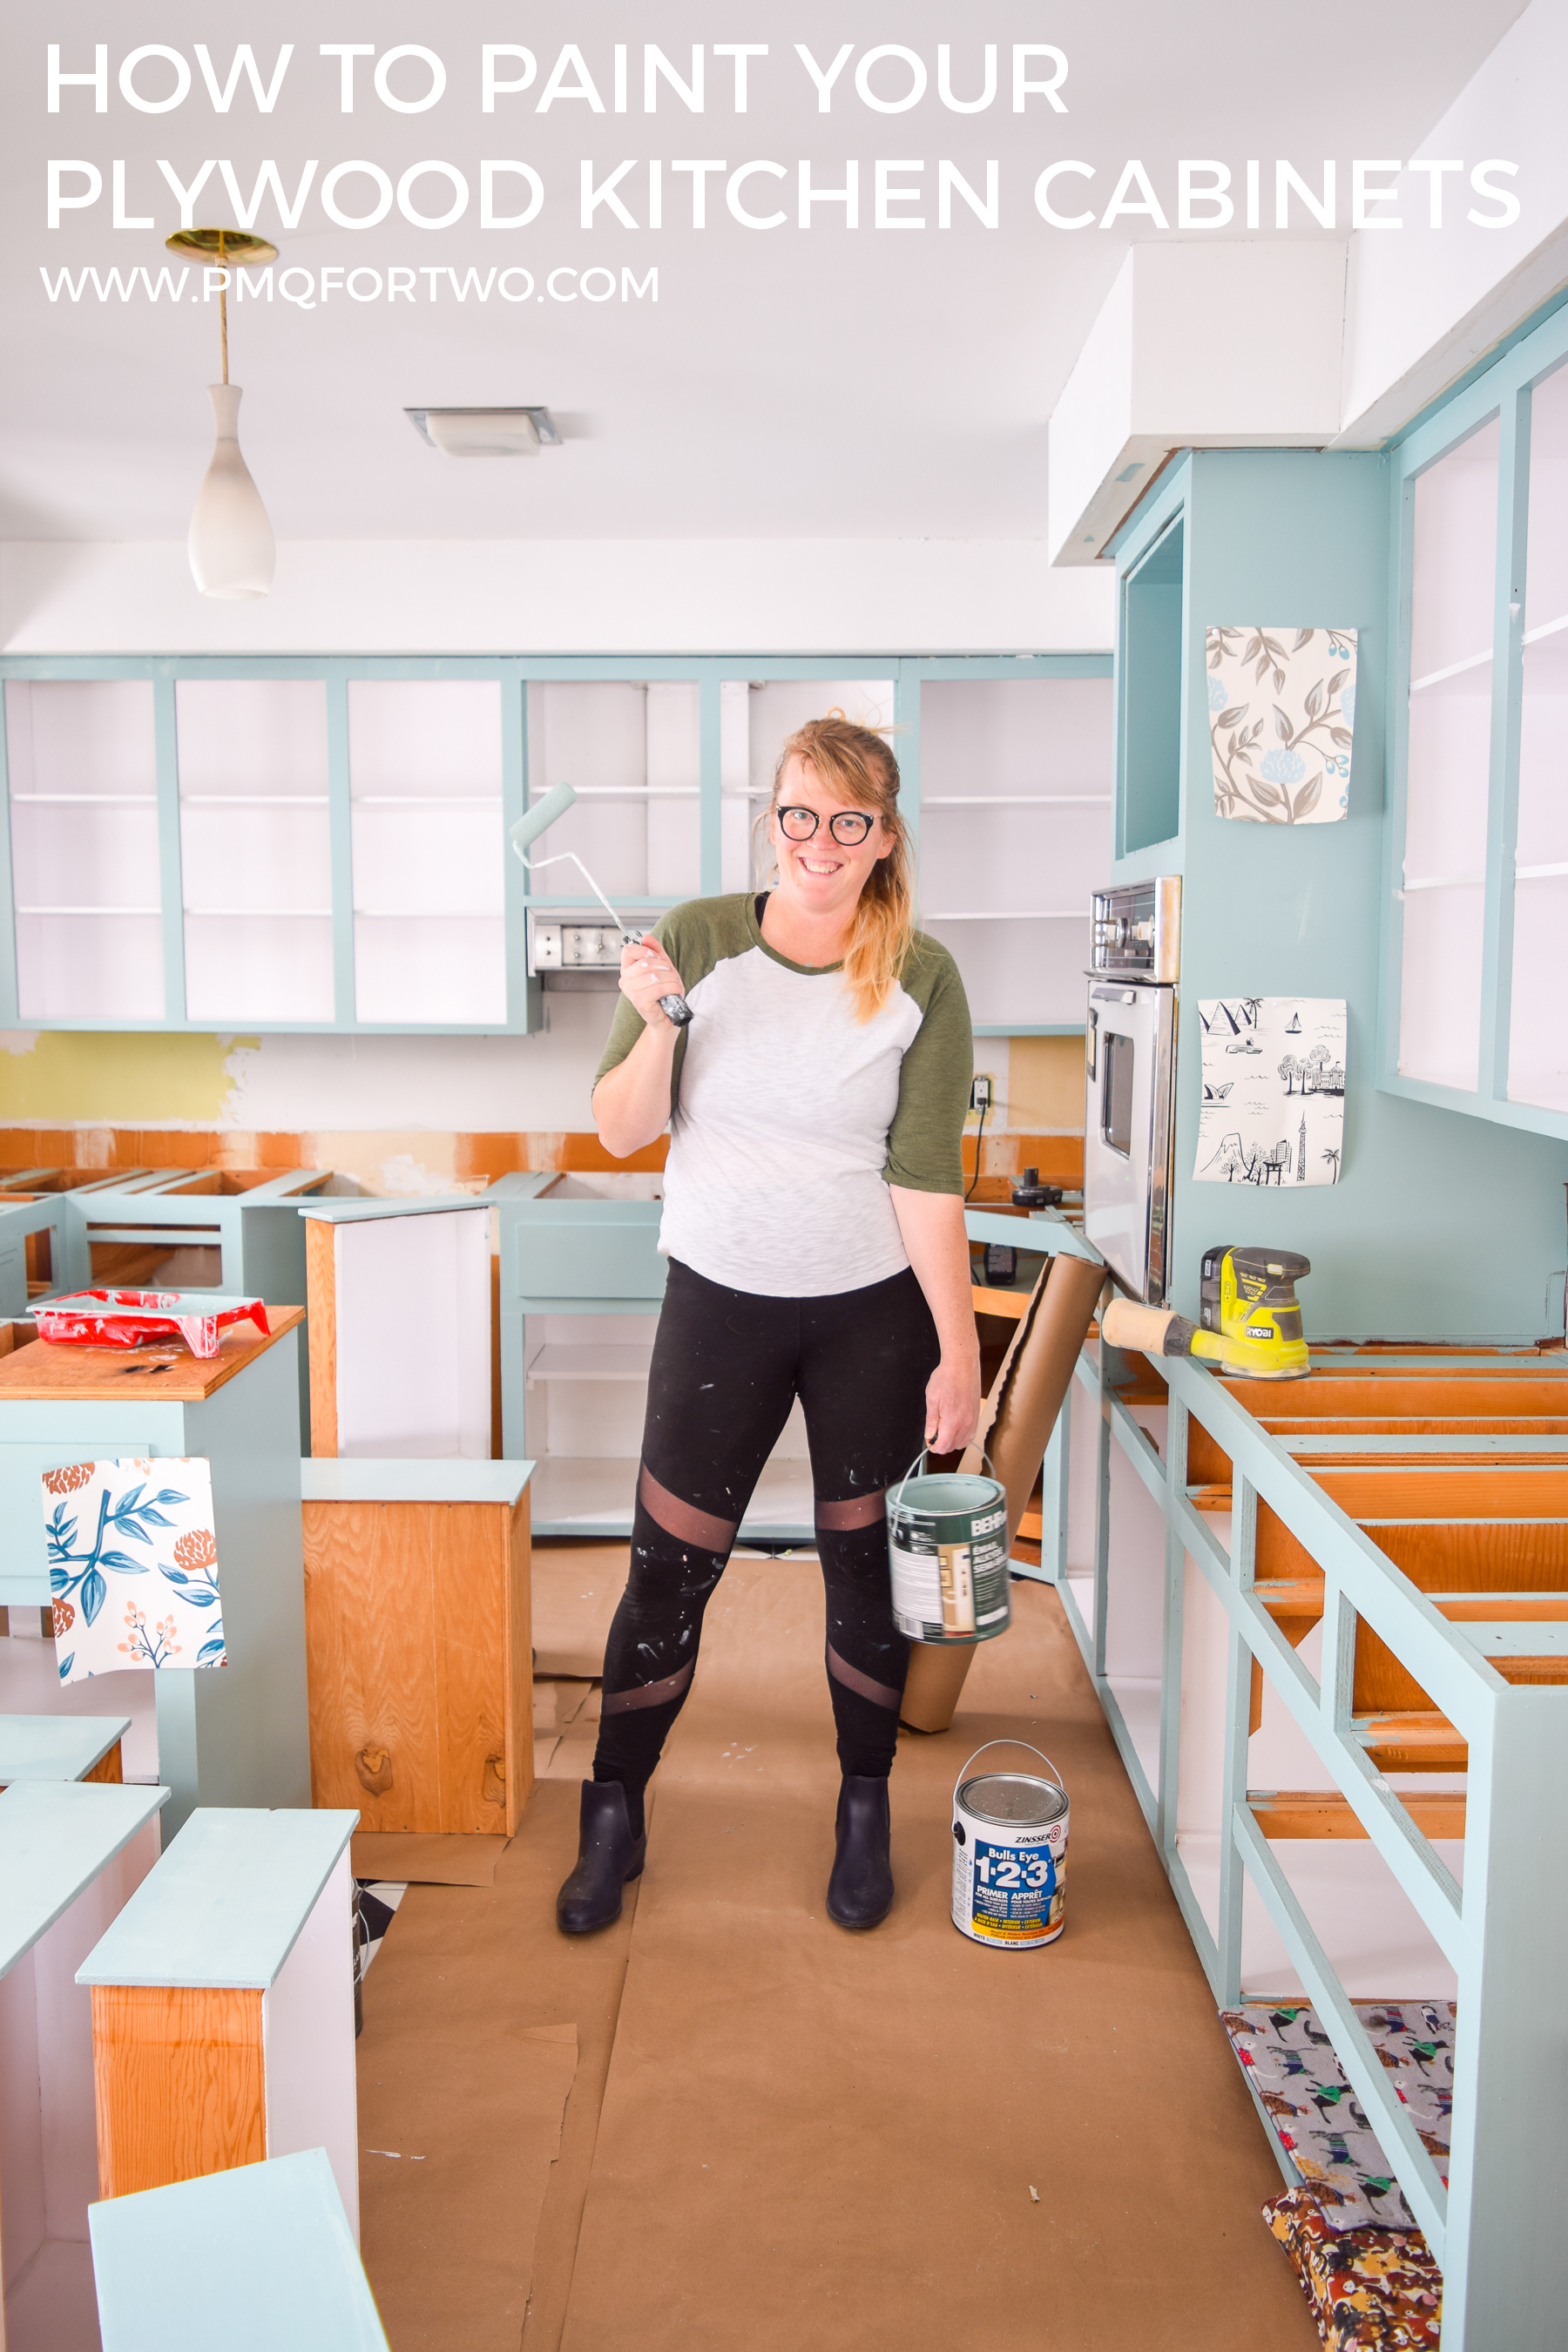
how to paint your plywood kitchen cabinets: first of all, do you even? Yes, paint them, and use the right paint formula and tools! Retro Kitchen can be cute again.

In case you’re new around here, a quick recap of how the One Room Challenge (ORC) works! The featured designers (and the rest of us) get 6 weeks to makeover a space from start to finish. The budget is up to us, how we go about it is up to us, and we’re encouraged to go big or go home! Each week we’ll all link-up to share our progress, our success and our failures, and cheer each other on.

I outlined my plans for our Retro Glam Kitchen Renovations in last week’s post, and I’ll be un-rolling our progress as we go. Make sure you follow me on Instagram for updates in between.

Painting Your Retro Plywood Kitchen Cabinets

Lovers of retro homes will tell you that all the original features should be saved — and when possible, they should — but sometimes you just gotta update. As we found out during our demolition phase of this renovation, they did some poorly thought out upgrades in here, and they also didn’t show the cupboards much love.

We could have stripped them down and then tried to stain them in a uniform colour, but that sounded like a lot of work (more work than I feel like doing at 20 weeks pregnant), and we were ready for some fresh colour in here. Instead of turning these into a modern monstrosity, we decided to paint them to keep the retro flair. And in the process, make them better.

Prepping your Kitchen Cupboards To Paint

So as with all paint projects, prep work is half the battle. A well prepared space will paint much faster, require fewer fixes, and just be easier all around. I like the sound of that!

P.s I wrote a super comprehensive guide about all things related to painting interiors, and you should check it out.

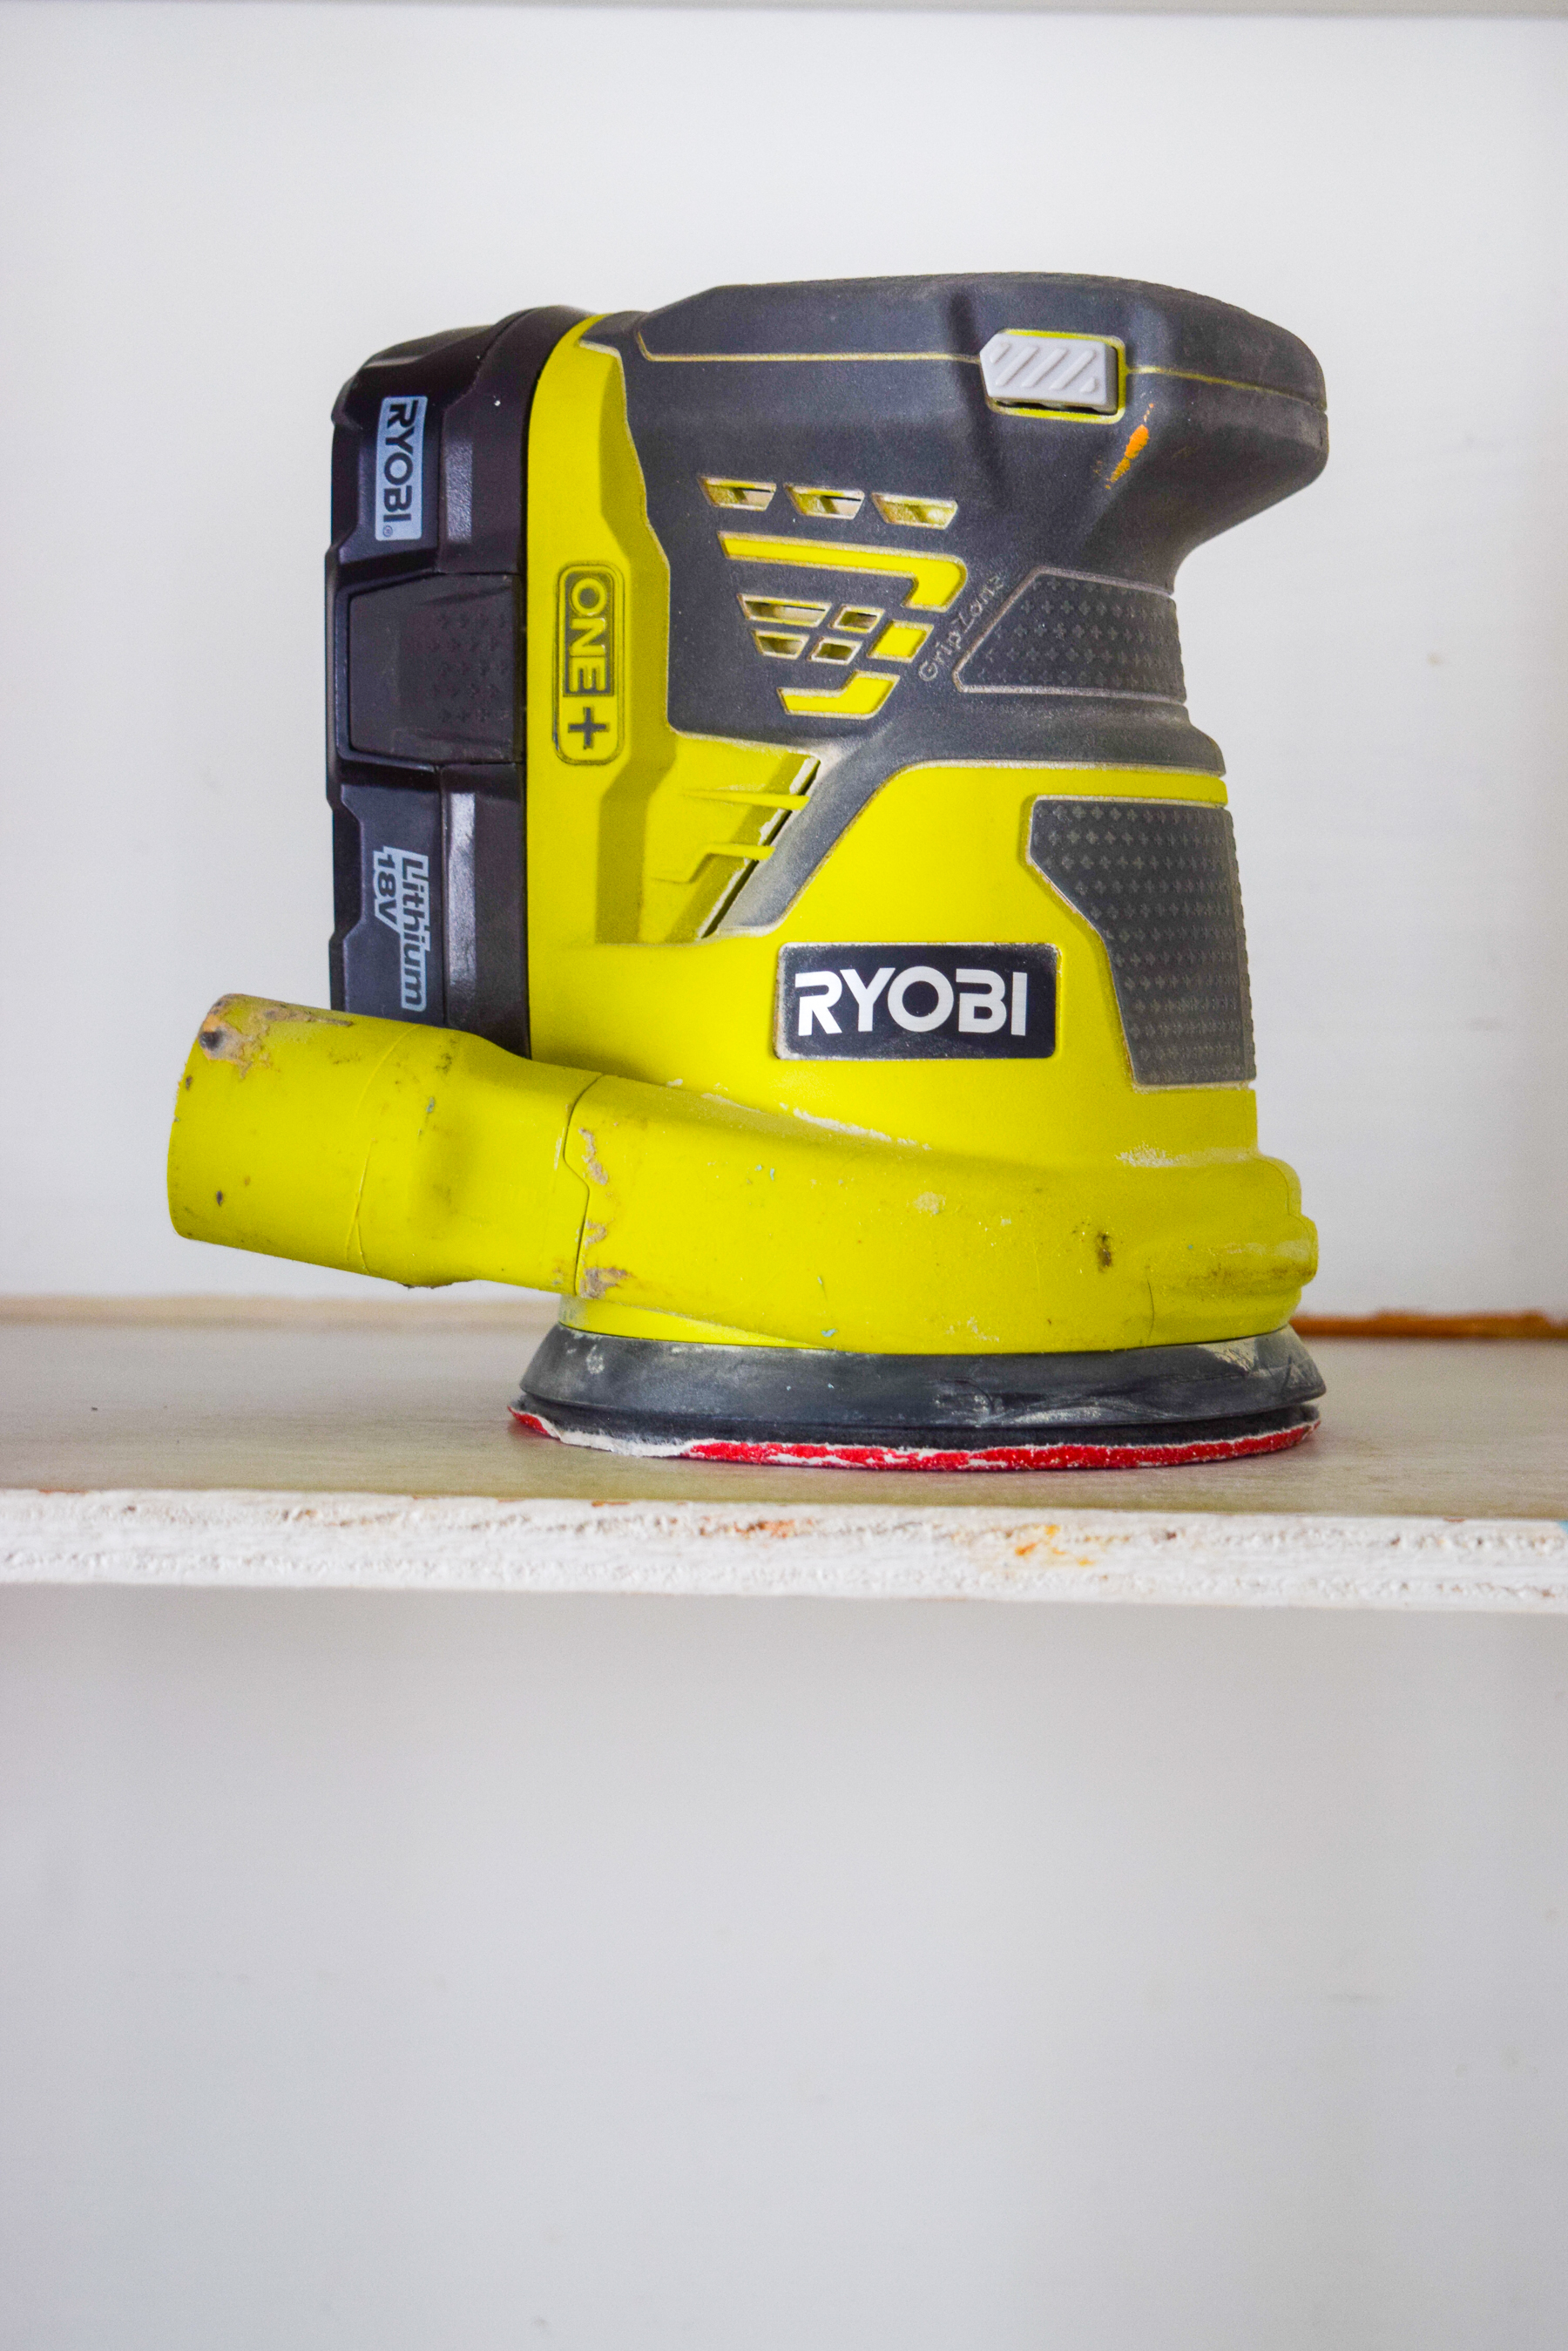
In our case, that meant patch filling any natural wear and tea, removing cupboard doors and hinges, patching screw holes from areas where we corrected sags, and then sanding all the cupboards — outside and in. We planed on painting the inside a fresh coat of white, so everything had to be prepped, and that included removing some truly awful shelf liners that just wouldn’t leave.

Pro tip: if something adhesive is having a hard time coming up, steam it off! We used our wallpaper steamer to remove a lot of the contact paper, but some has stubbornly remained, and I just painted over it.
how to paint your plywood kitchen cabinets: first of all, do you even? Yes, paint them, and use the right paint formula and tools! Retro Kitchen can be cute again.

how to paint your plywood kitchen cabinets: first of all, do you even? Yes, paint them, and use the right paint formula and tools! Retro Kitchen can be cute again.

how to paint your plywood kitchen cabinets: first of all, do you even? Yes, paint them, and use the right paint formula and tools! Retro Kitchen can be cute again.

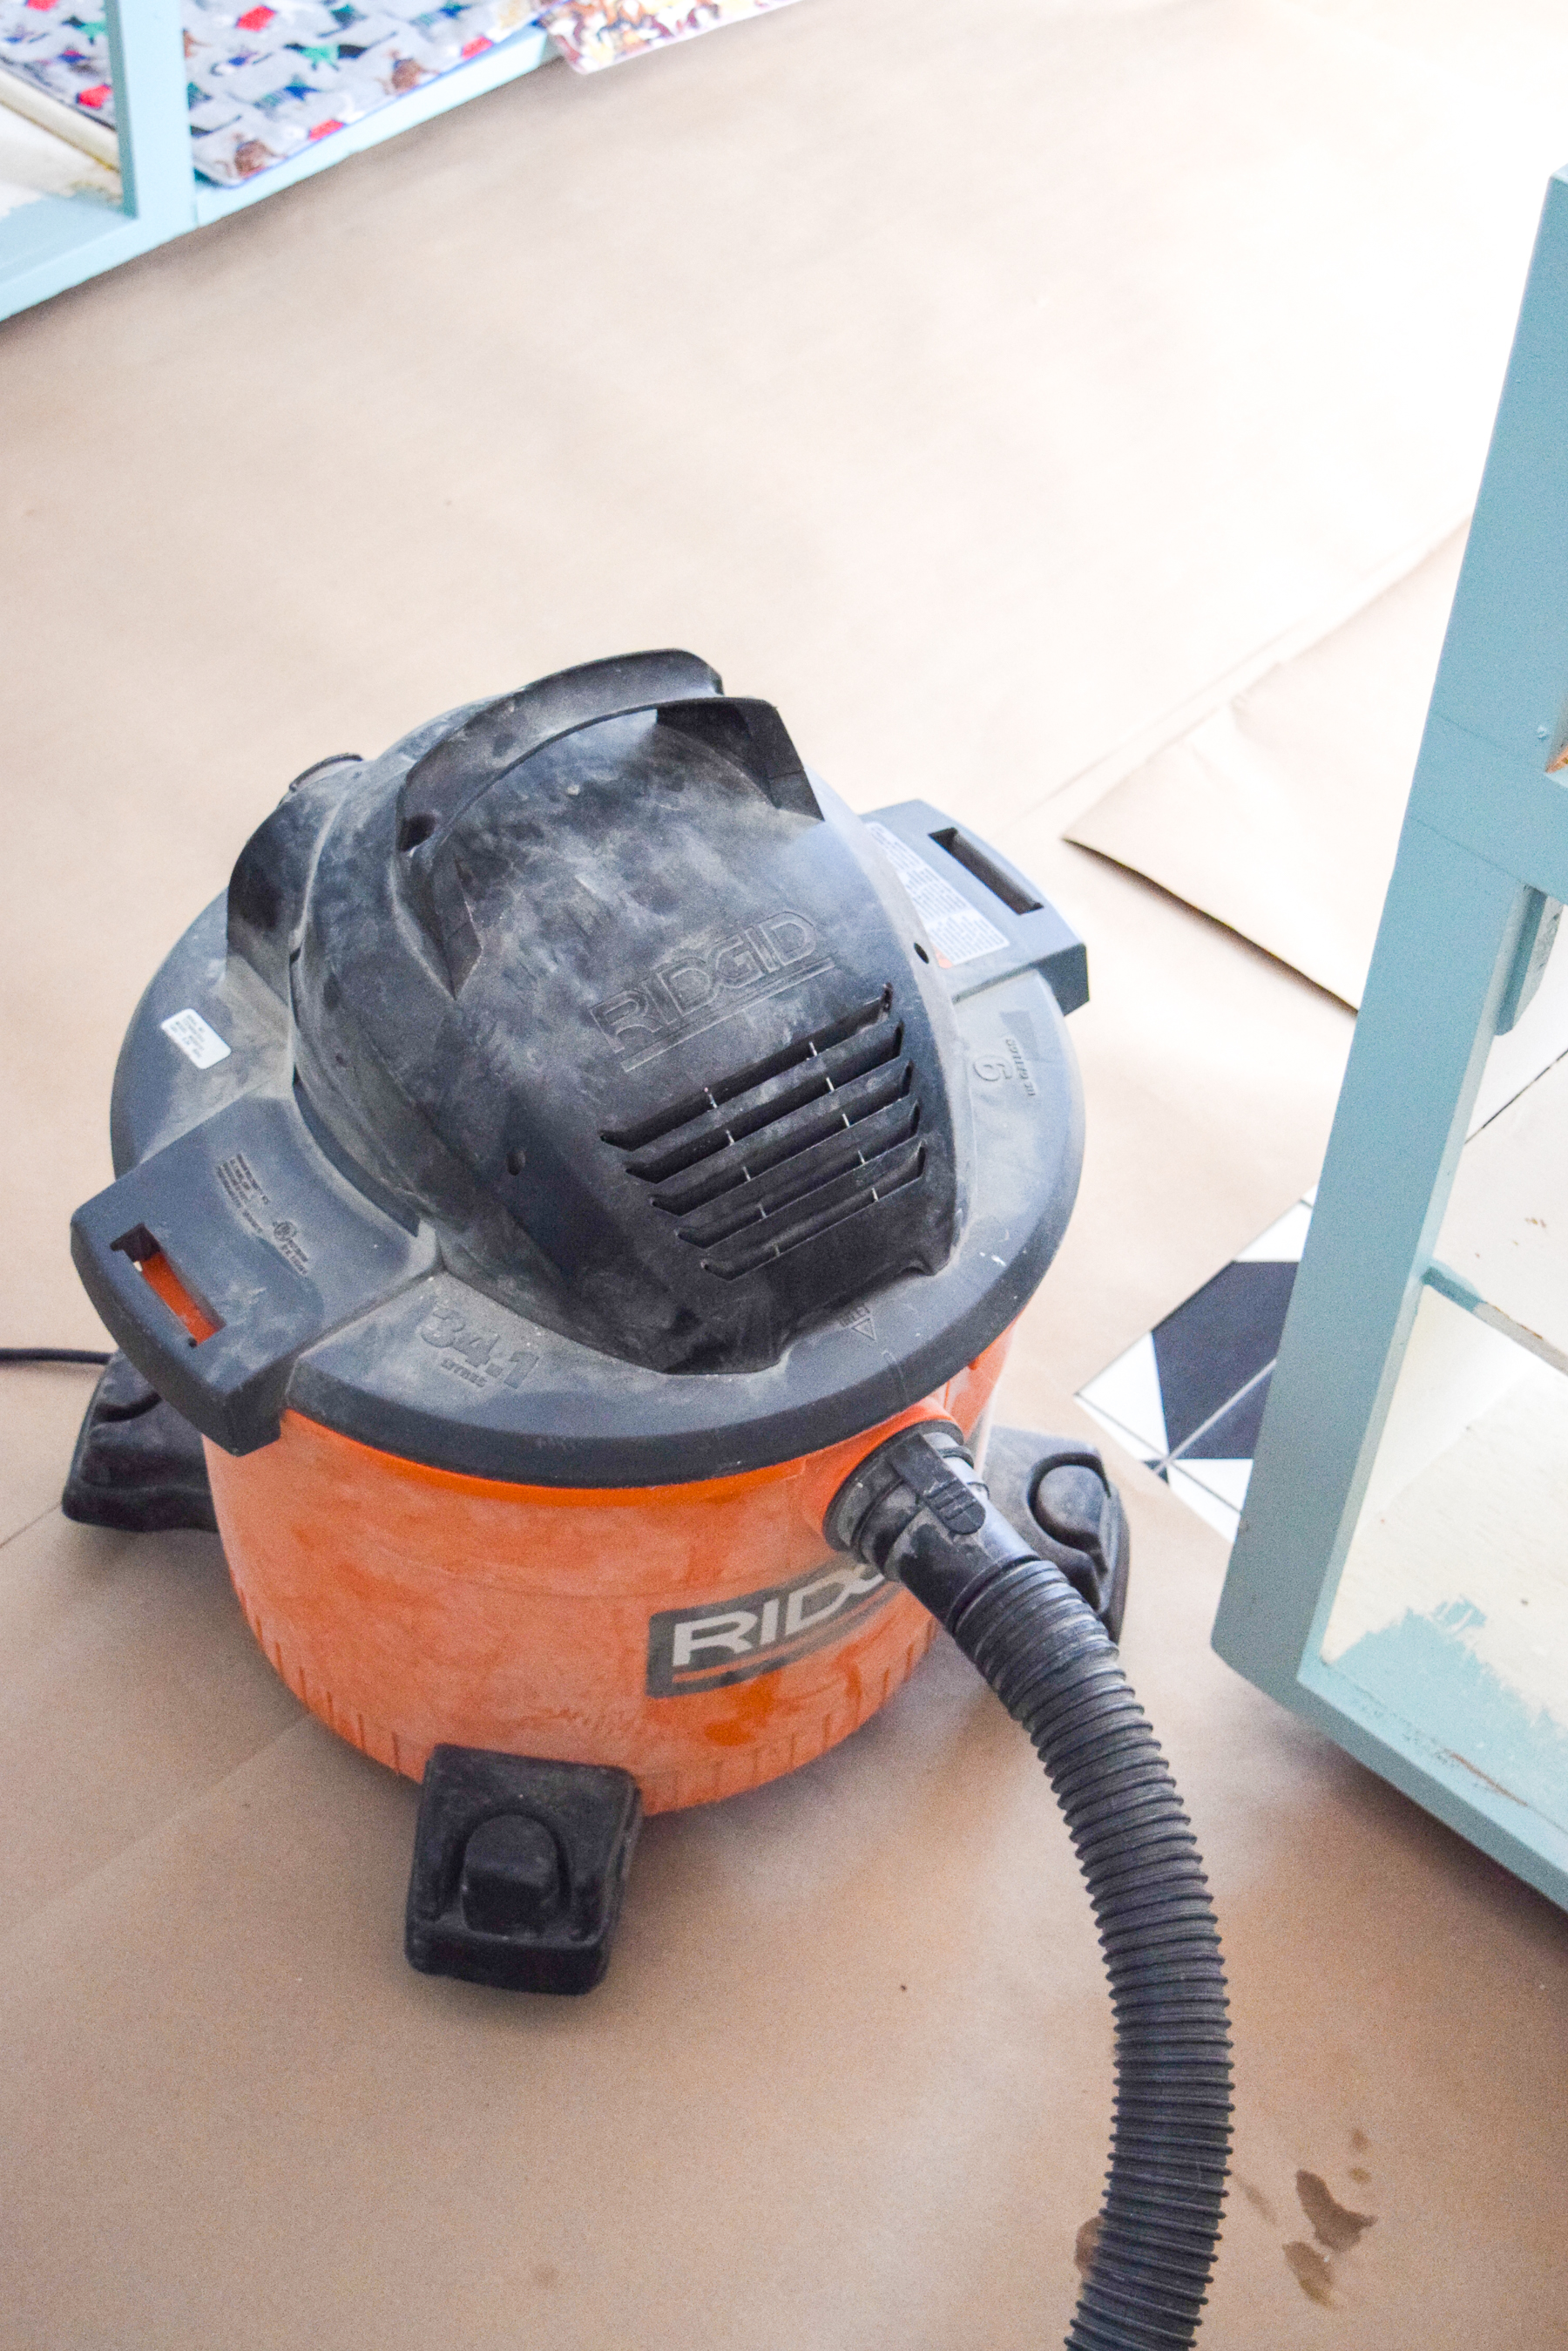
After sanding you always want to wipe things down with a wet rag to remove the dust, otherwise you’re just painting on dust. I also give things a quick once over with the shop vac, because sanding dust somehow gets everywhere. I then let everything completely air dry, and fix any remaining or unseen holes (there’s always a few that you miss).

Other things to do before painting your plywood kitchen cabinets: remove drawers, switch plate covers, and protect your countertops (unless you’re getting new ones like we are). I also laid kraft paper over our newly installed tile floors to protect them, but I would have done the same regardless of flooring newness. It also makes it easier to track where you’re spreading paint once you step in it (because you will).

Painting Your Plywood Kitchen Cupboards

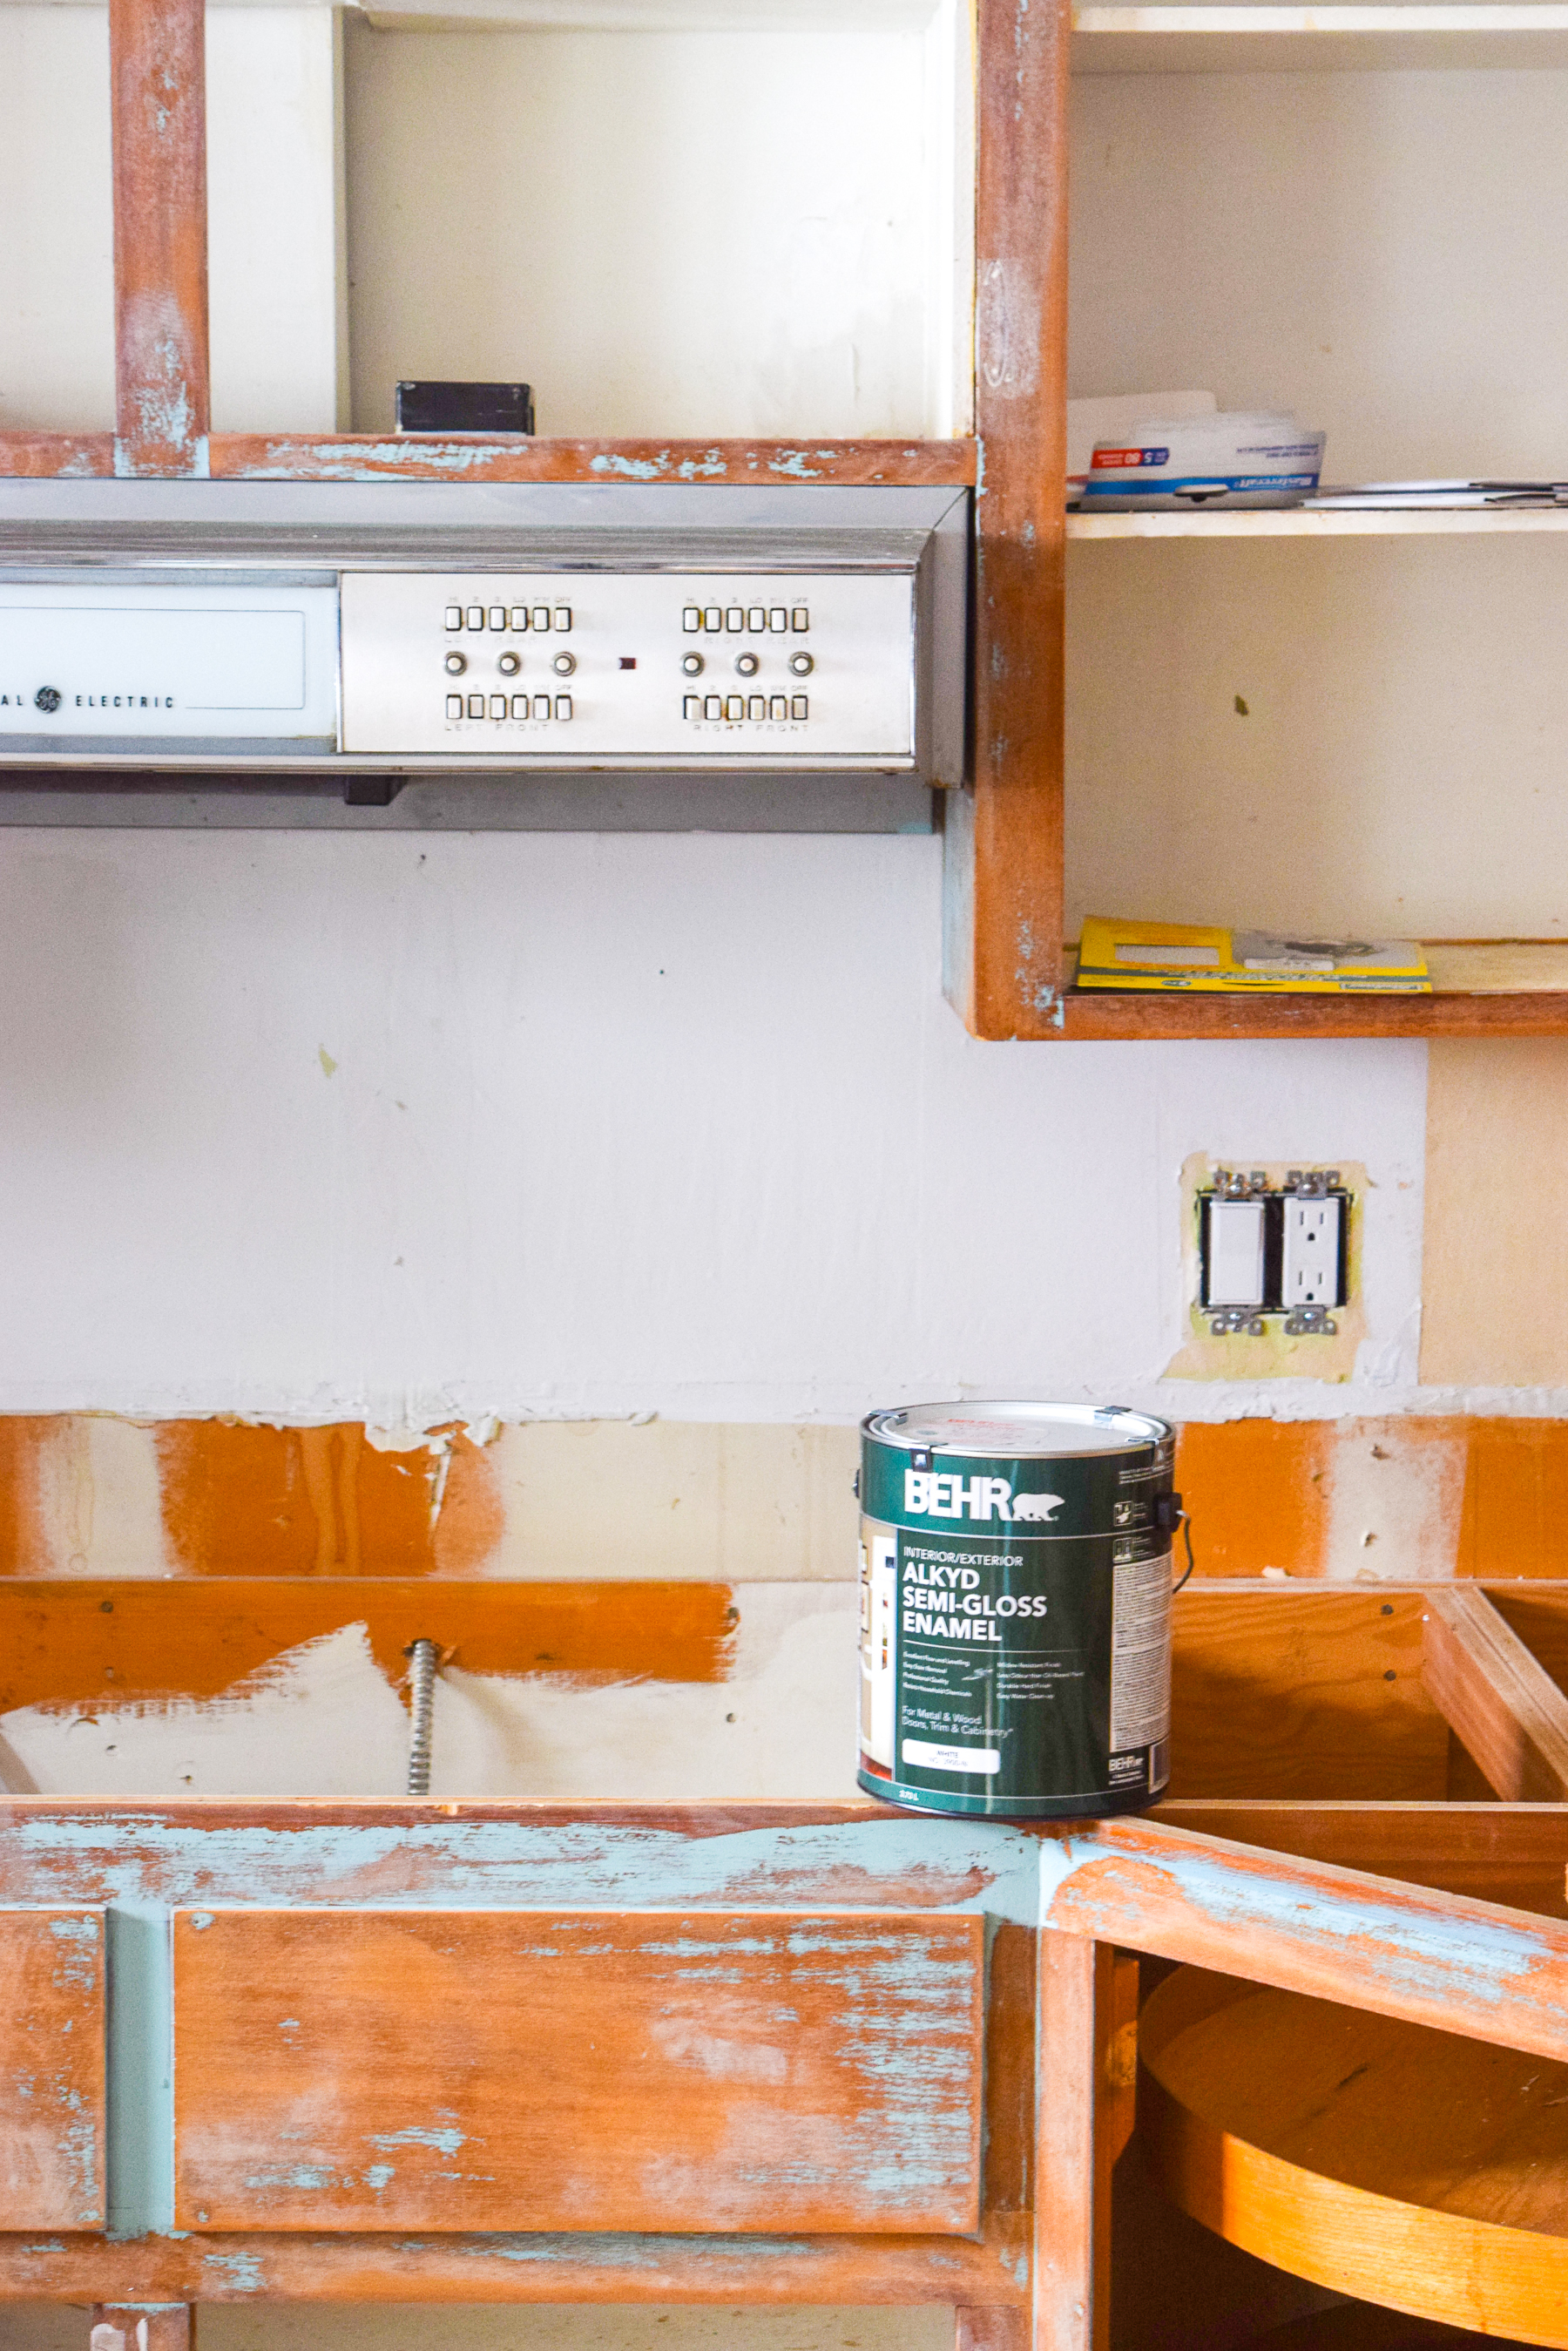
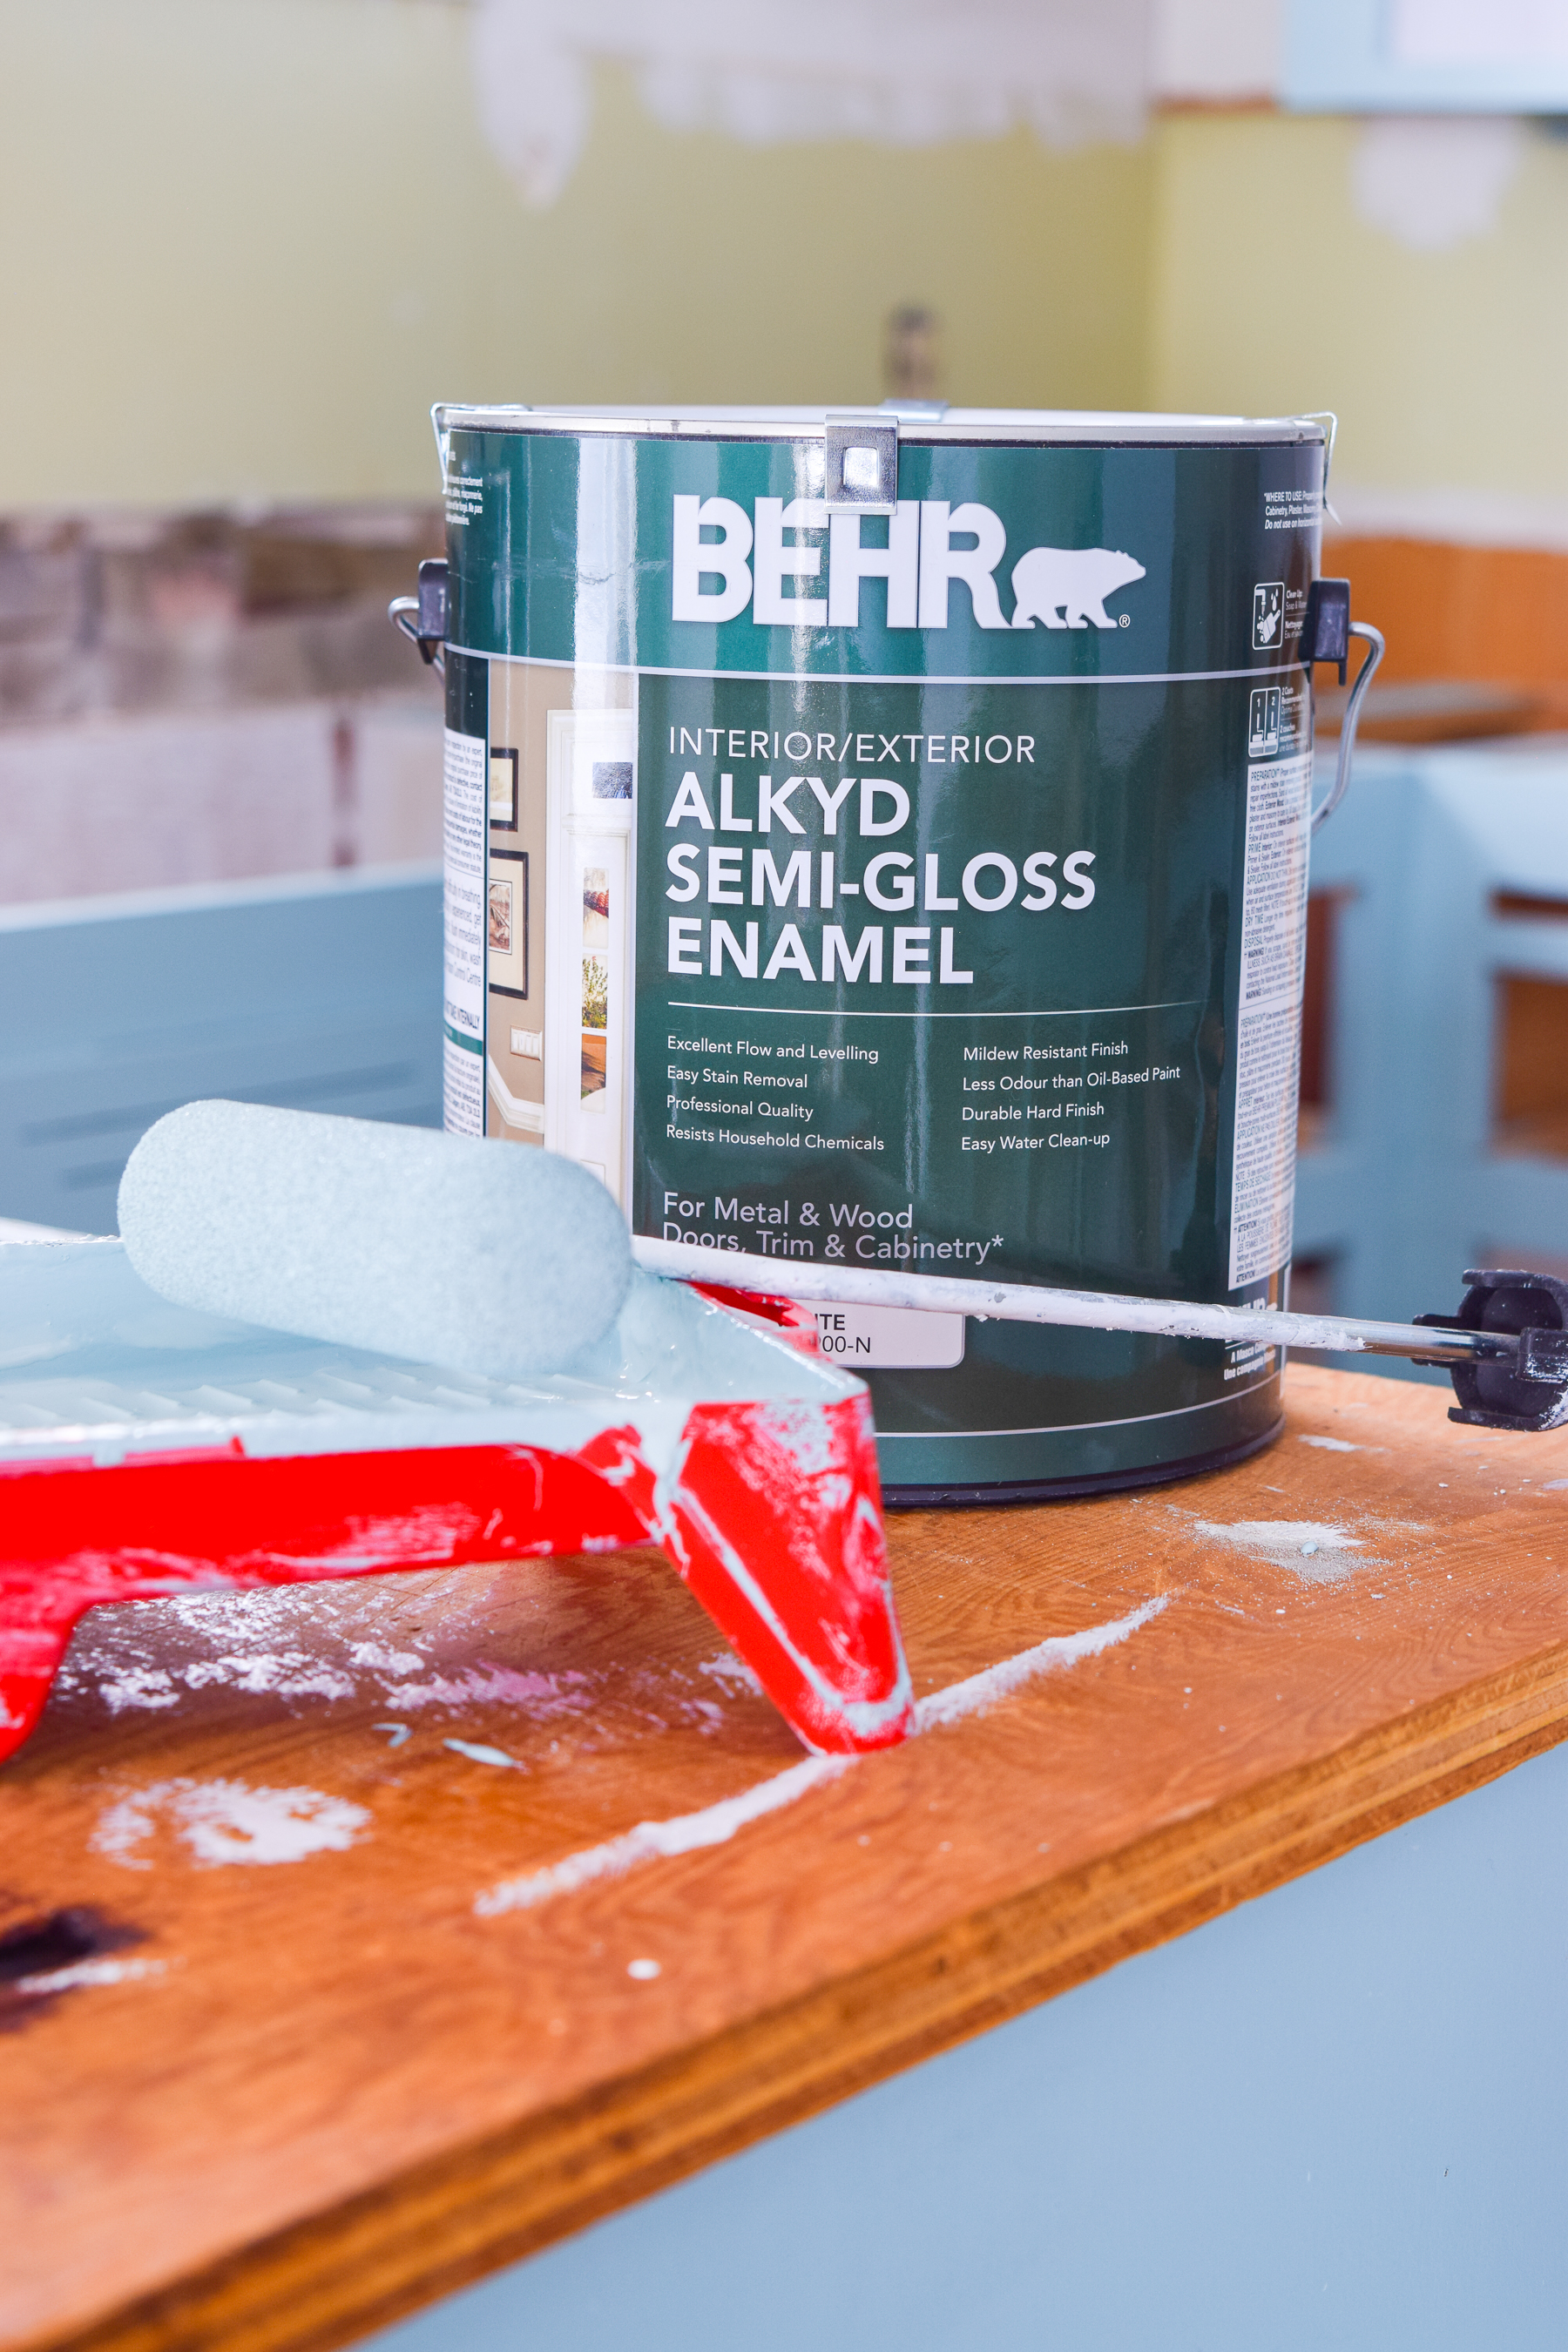
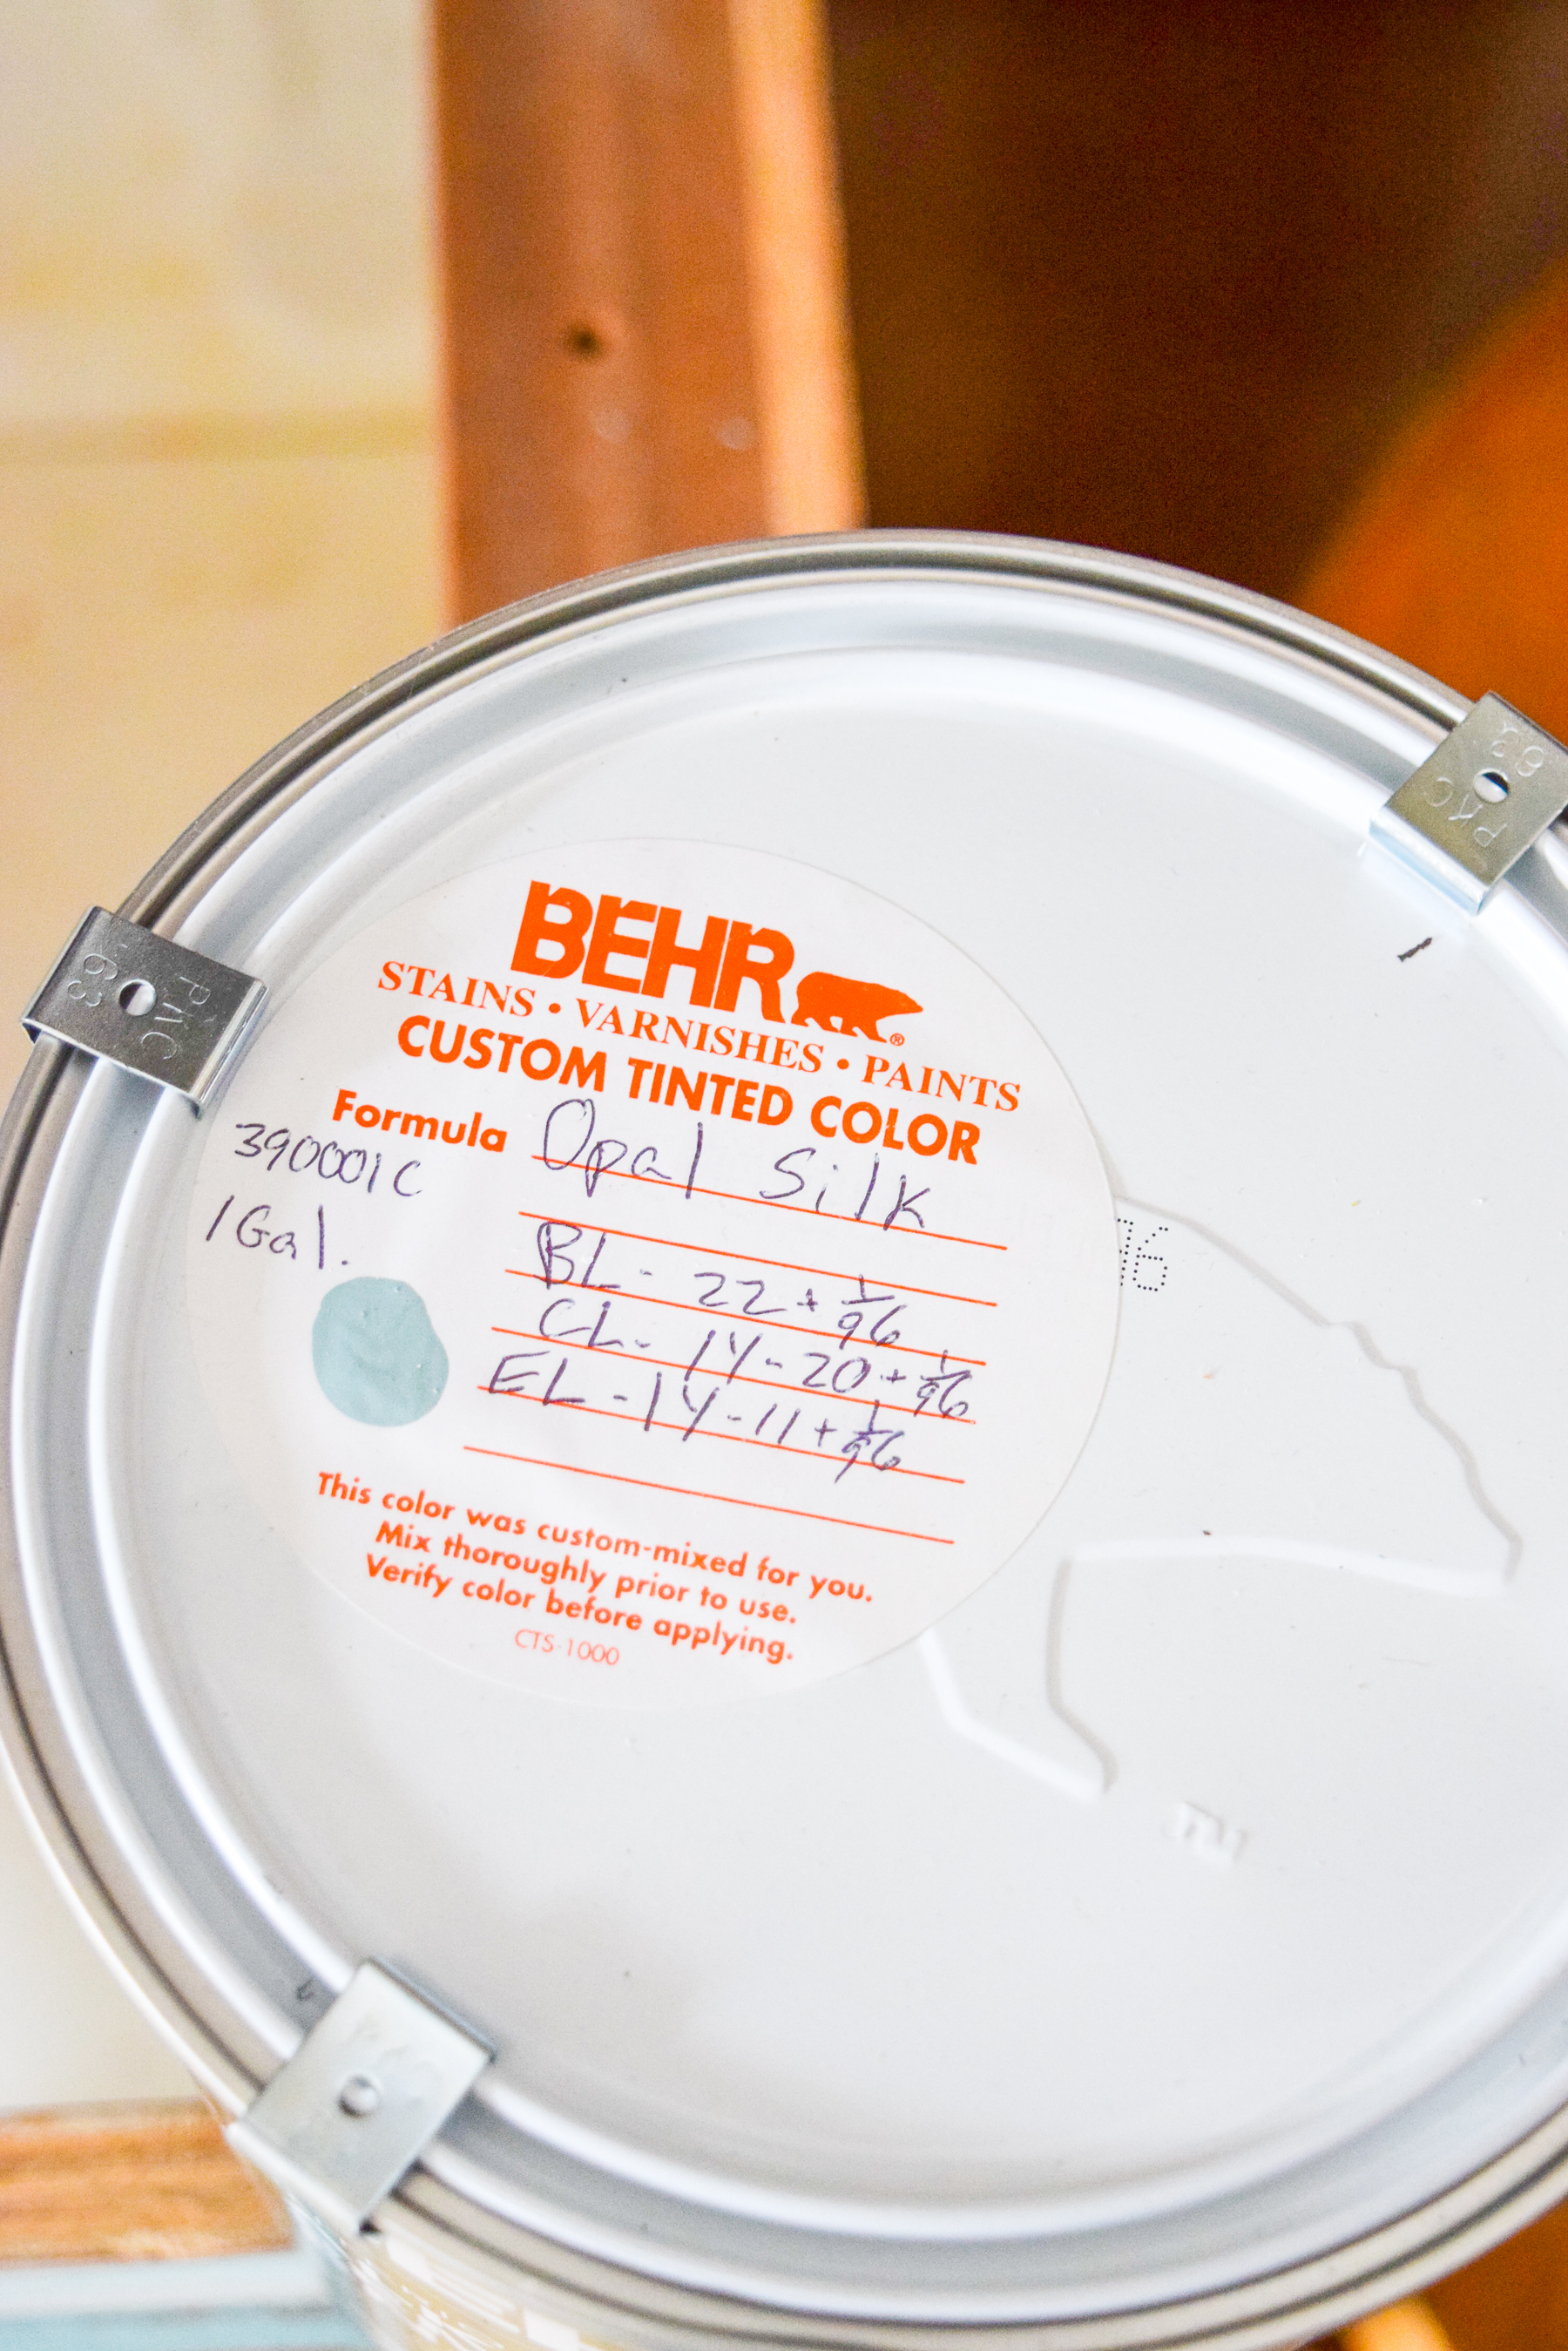
Choosing the right paint formula is KEY. I consulted with the BEHR experts at the Home Depot, and we settled on the Interior/Exterior Semi-Gloss Alkyd solution, that they were able to colour match a marquee colour to for me. As you may have seen in the mood board last week, we chose Opal Silk PPU12-8m.

For the cabinet and drawer interiors, we went with the base white in the same formula. Keep it simple right?
how to paint your plywood kitchen cabinets: first of all, do you even? Yes, paint them, and use the right paint formula and tools! Retro Kitchen can be cute again.

how to paint your plywood kitchen cabinets: first of all, do you even? Yes, paint them, and use the right paint formula and tools! Retro Kitchen can be cute again.

Using A Roller to Paint Your Kitchen Cabinets

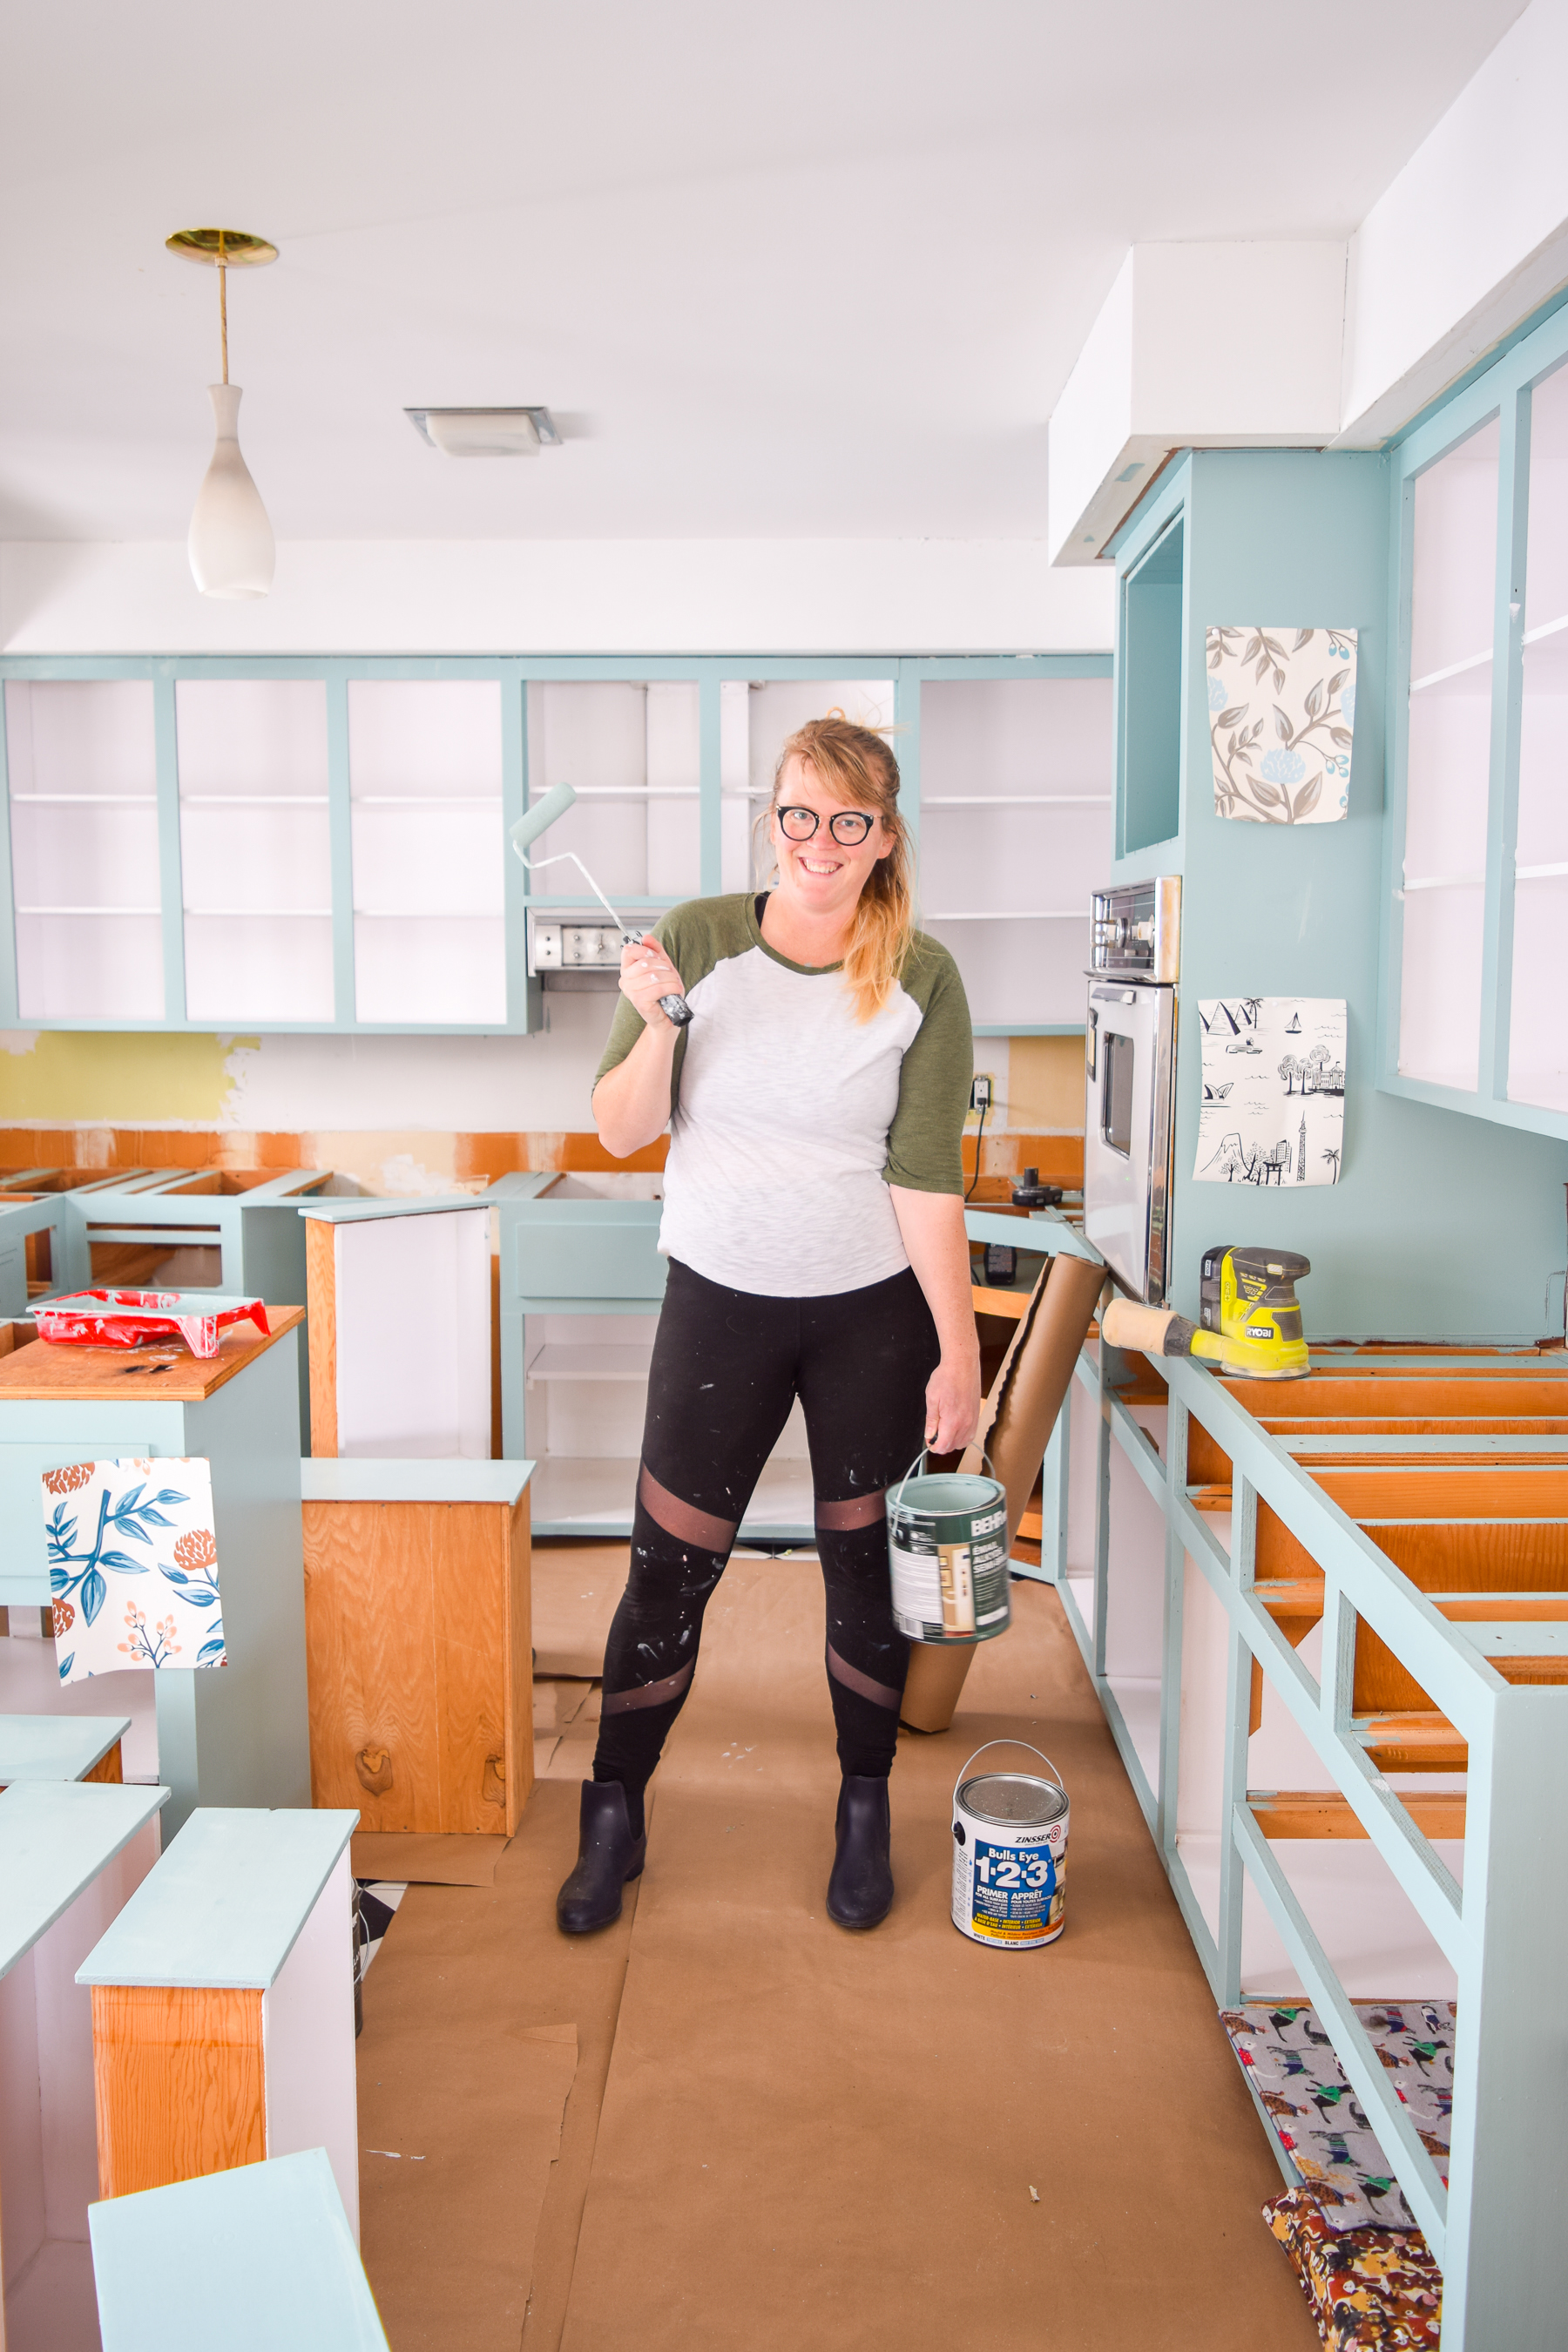
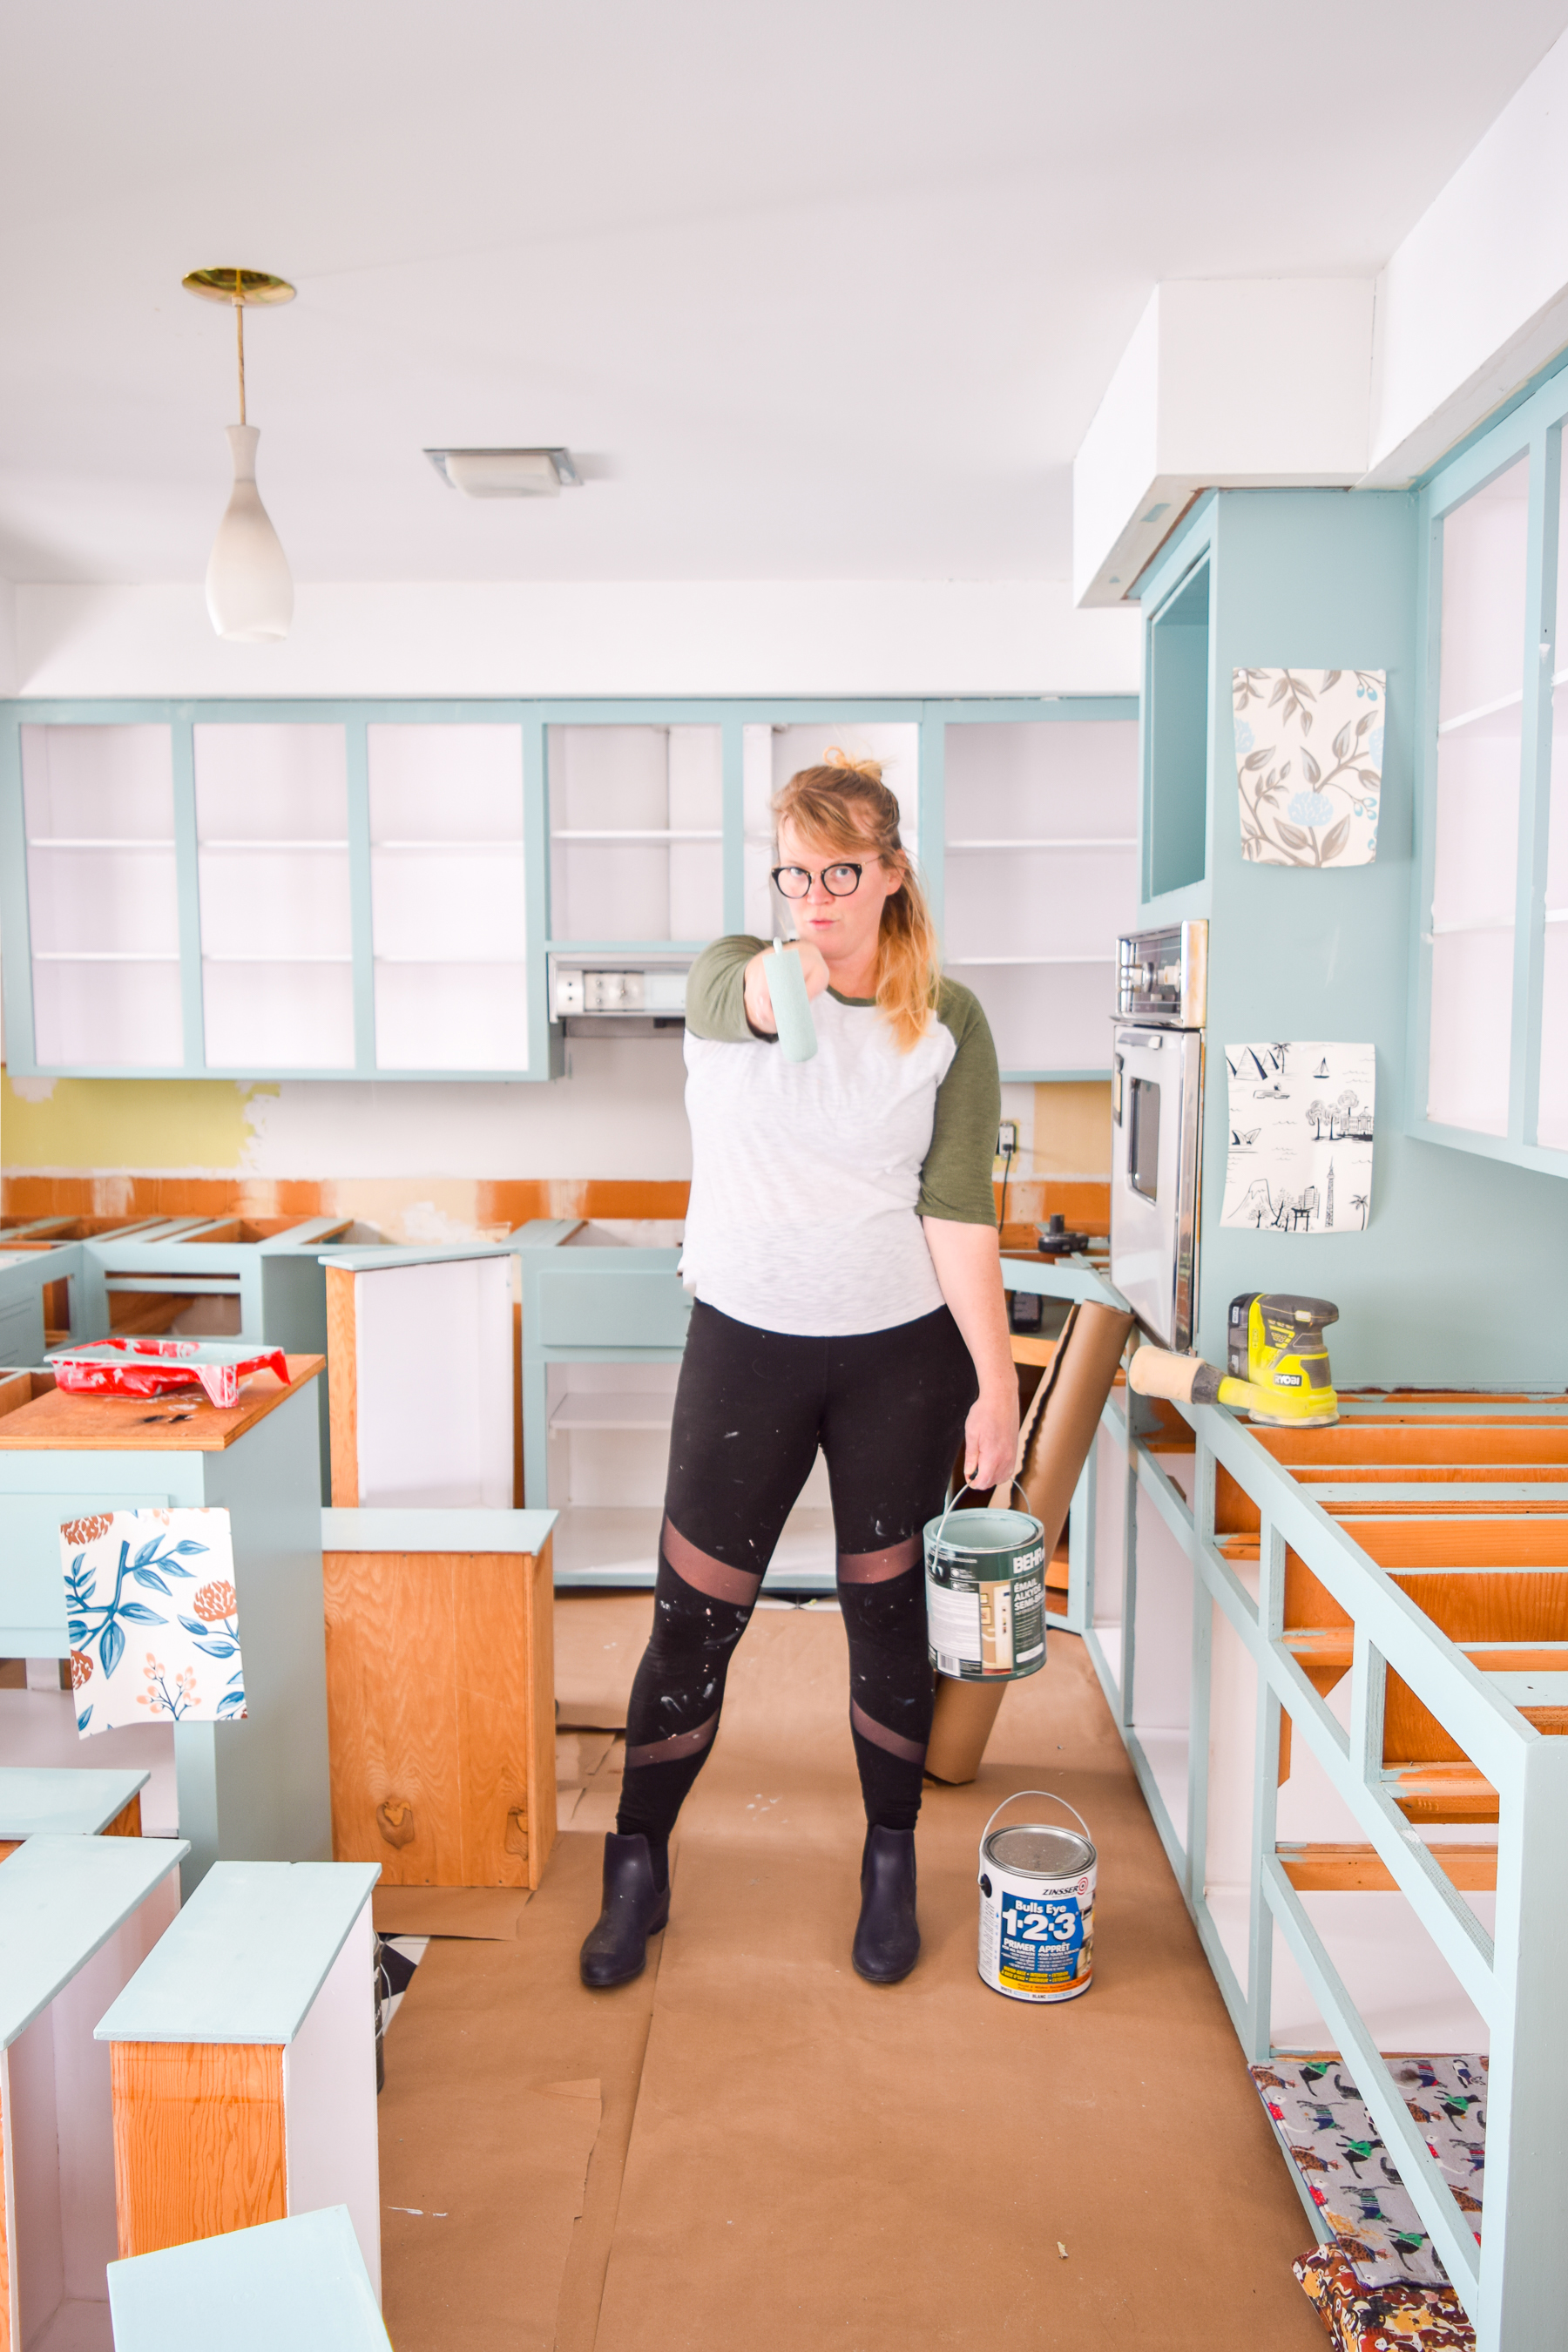
I asked about using a sprayer, but ours didn’t have enough flow capacity to handle the semi-gloss alkyd solution, we decided to use a foam roller to paint the plywood cabinets. We got a lovely finish with the rollers, and because they aren’t too expensive I could toss them after thoroughly ruining them. Is it just me, or the plush ends are end up getting ripped off?
how to paint your plywood kitchen cabinets: first of all, do you even? Yes, paint them, and use the right paint formula and tools! Retro Kitchen can be cute again.

how to paint your plywood kitchen cabinets: first of all, do you even? Yes, paint them, and use the right paint formula and tools! Retro Kitchen can be cute again.

Painting Cabinet Doors & Drawer Fronts

Remember all the prep work we did on the cabinets? we also did it to the cabinet doors and drawers, so when you get to painting those, they should be easy and ready to go.

Depending on the type of cabinet doors/ drawer fronts you have you may also need a short angled brush. We have doors with a slight inlay, so I needed to do some detail work with a brush, but most cabinet doors are flat on the back, so this wouldn’t be an issue.
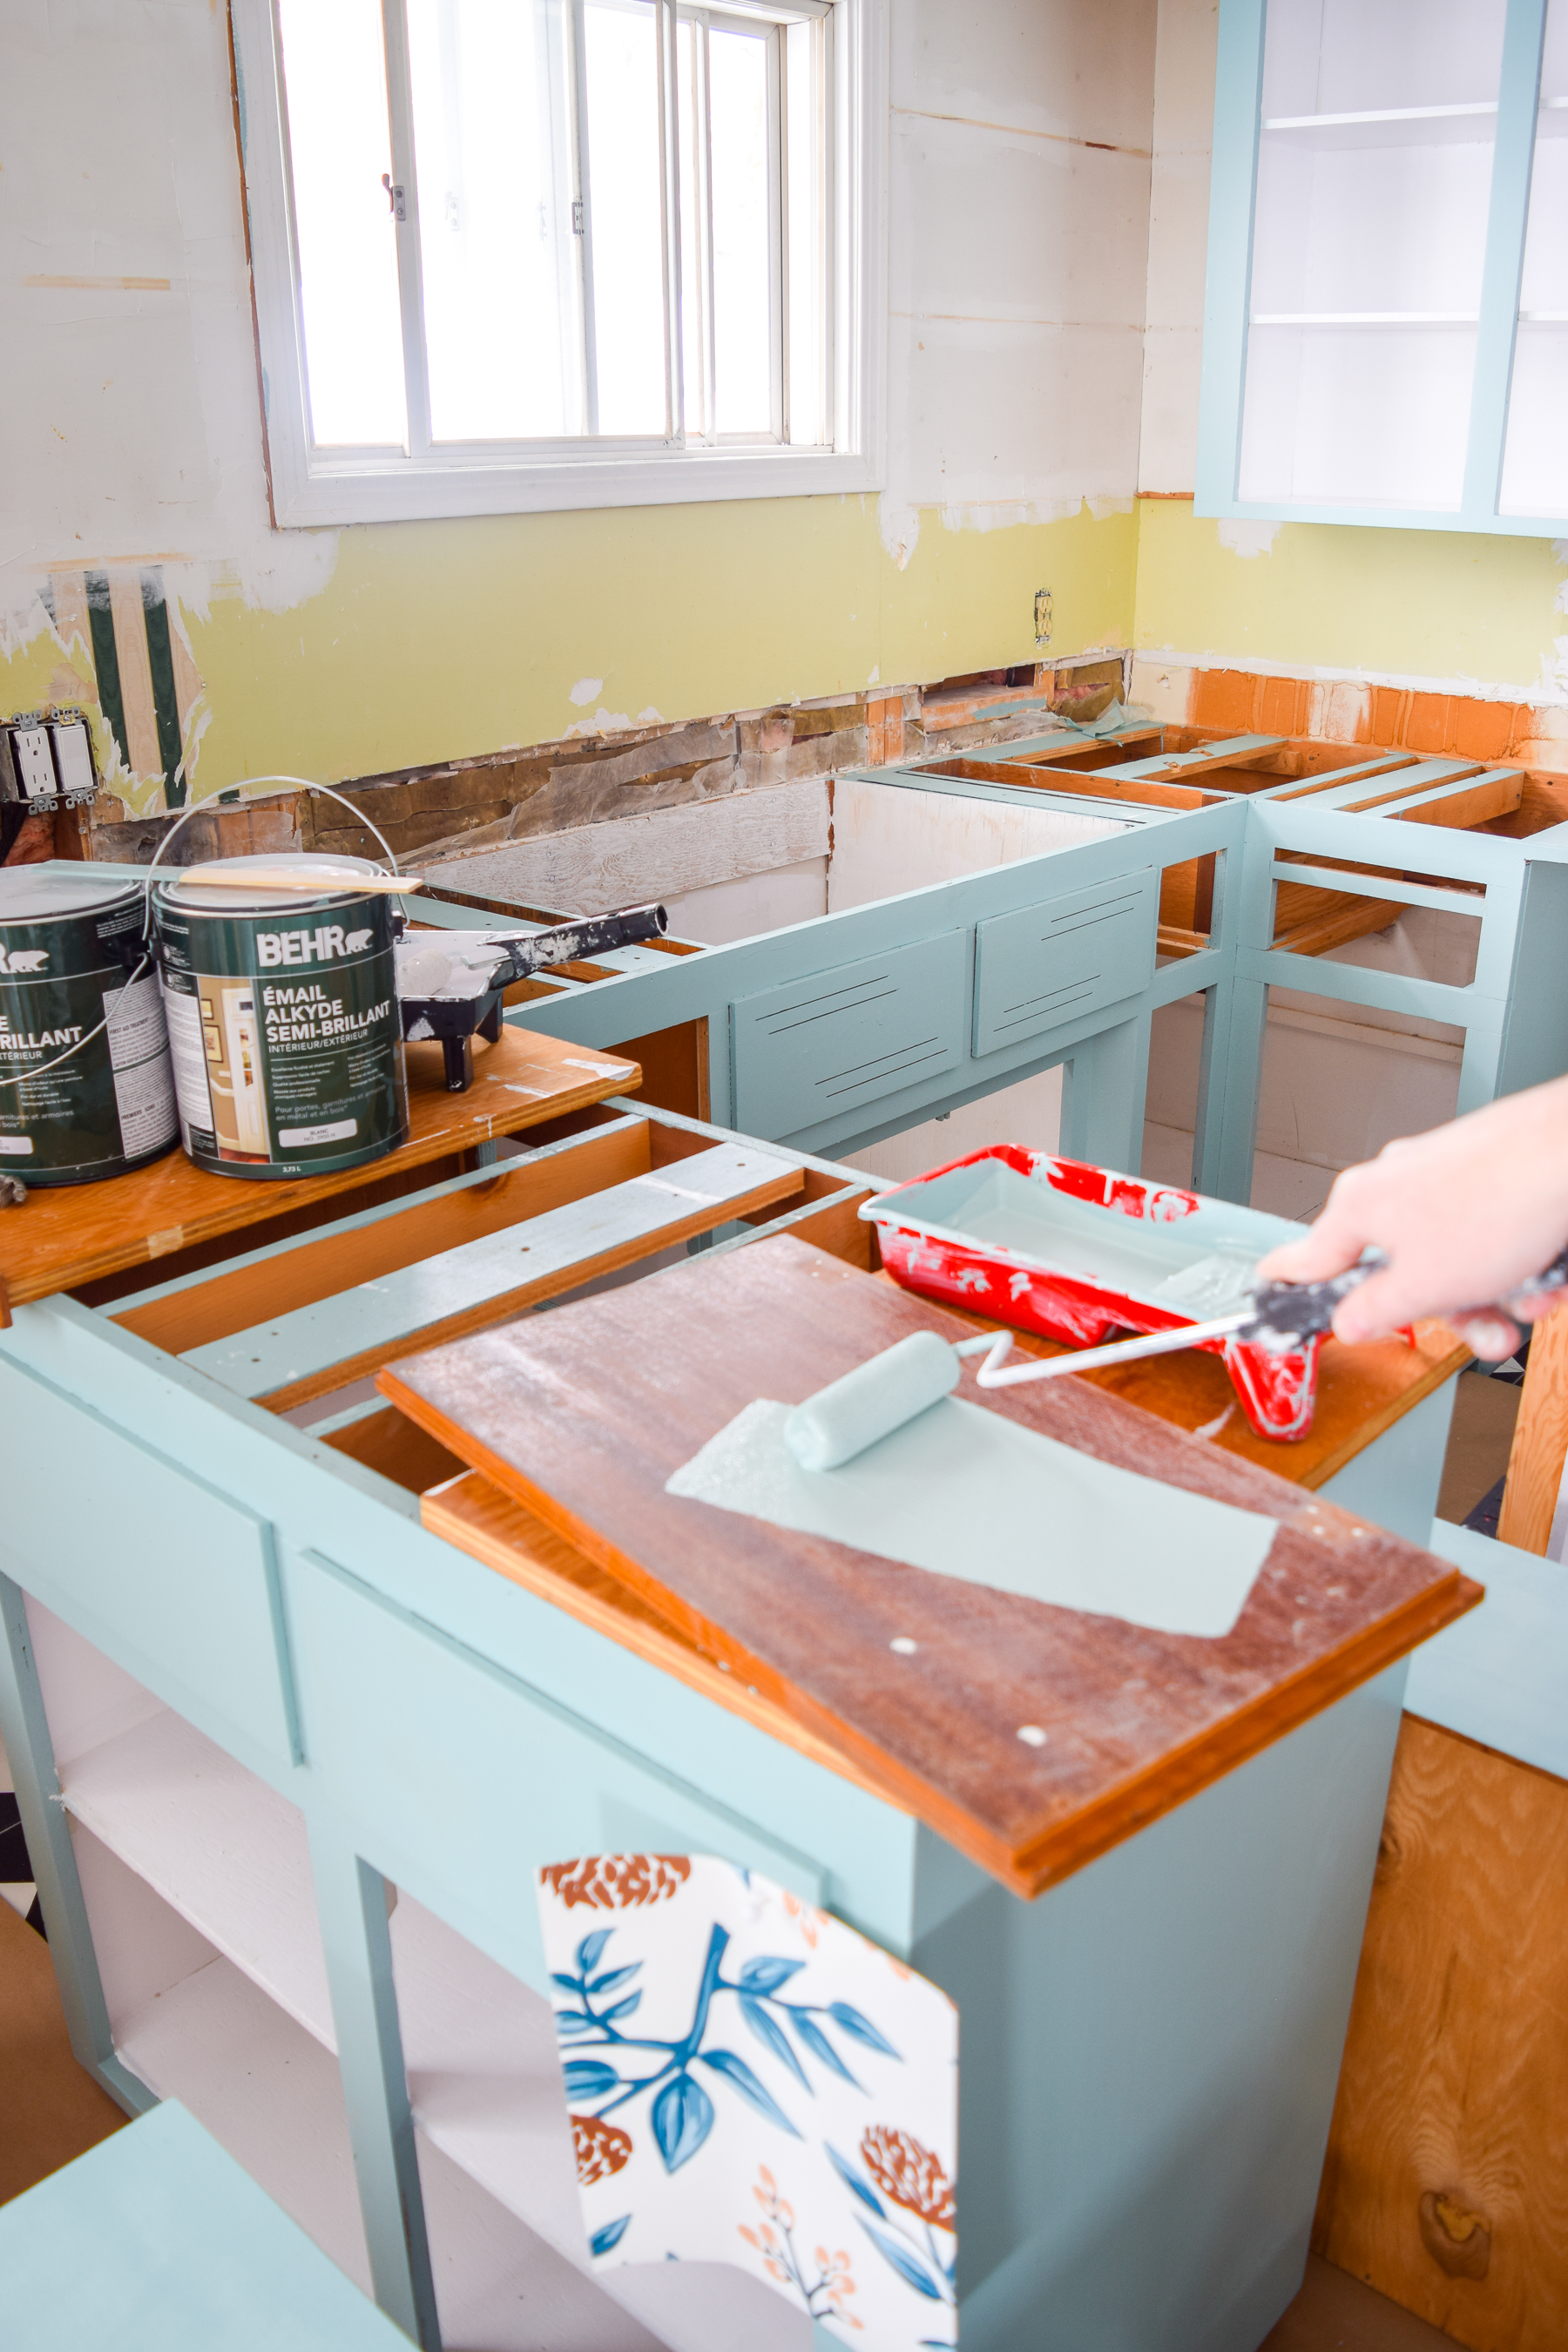
how to paint your plywood kitchen cabinets: first of all, do you even? Yes, paint them, and use the right paint formula and tools! Retro Kitchen can be cute again.

Painting Inside Cabinets & Drawers

There are no hard and fast rules about painting the fronts or interiors first, I just found it easier to alternate coats and do detailed touch-ups as I went. I don’t use painter’s tape for a variety of reasons.

When it comes to painting the “inside” though, I start with my angled brush and do all the seams. You know, the parts where your roller just won’t reach no matter how hard you try. Because you’re painting quite a few here, by the time you’re done the last corners you’ll be able start rolling.

I used another foam roller to get the big surfaces. Because the interiors required a few coats, I just alternated corners/seam and then rolling, until I had the coverage I wanted. Simple! Just make sure you respect dry times to prevent smudging.
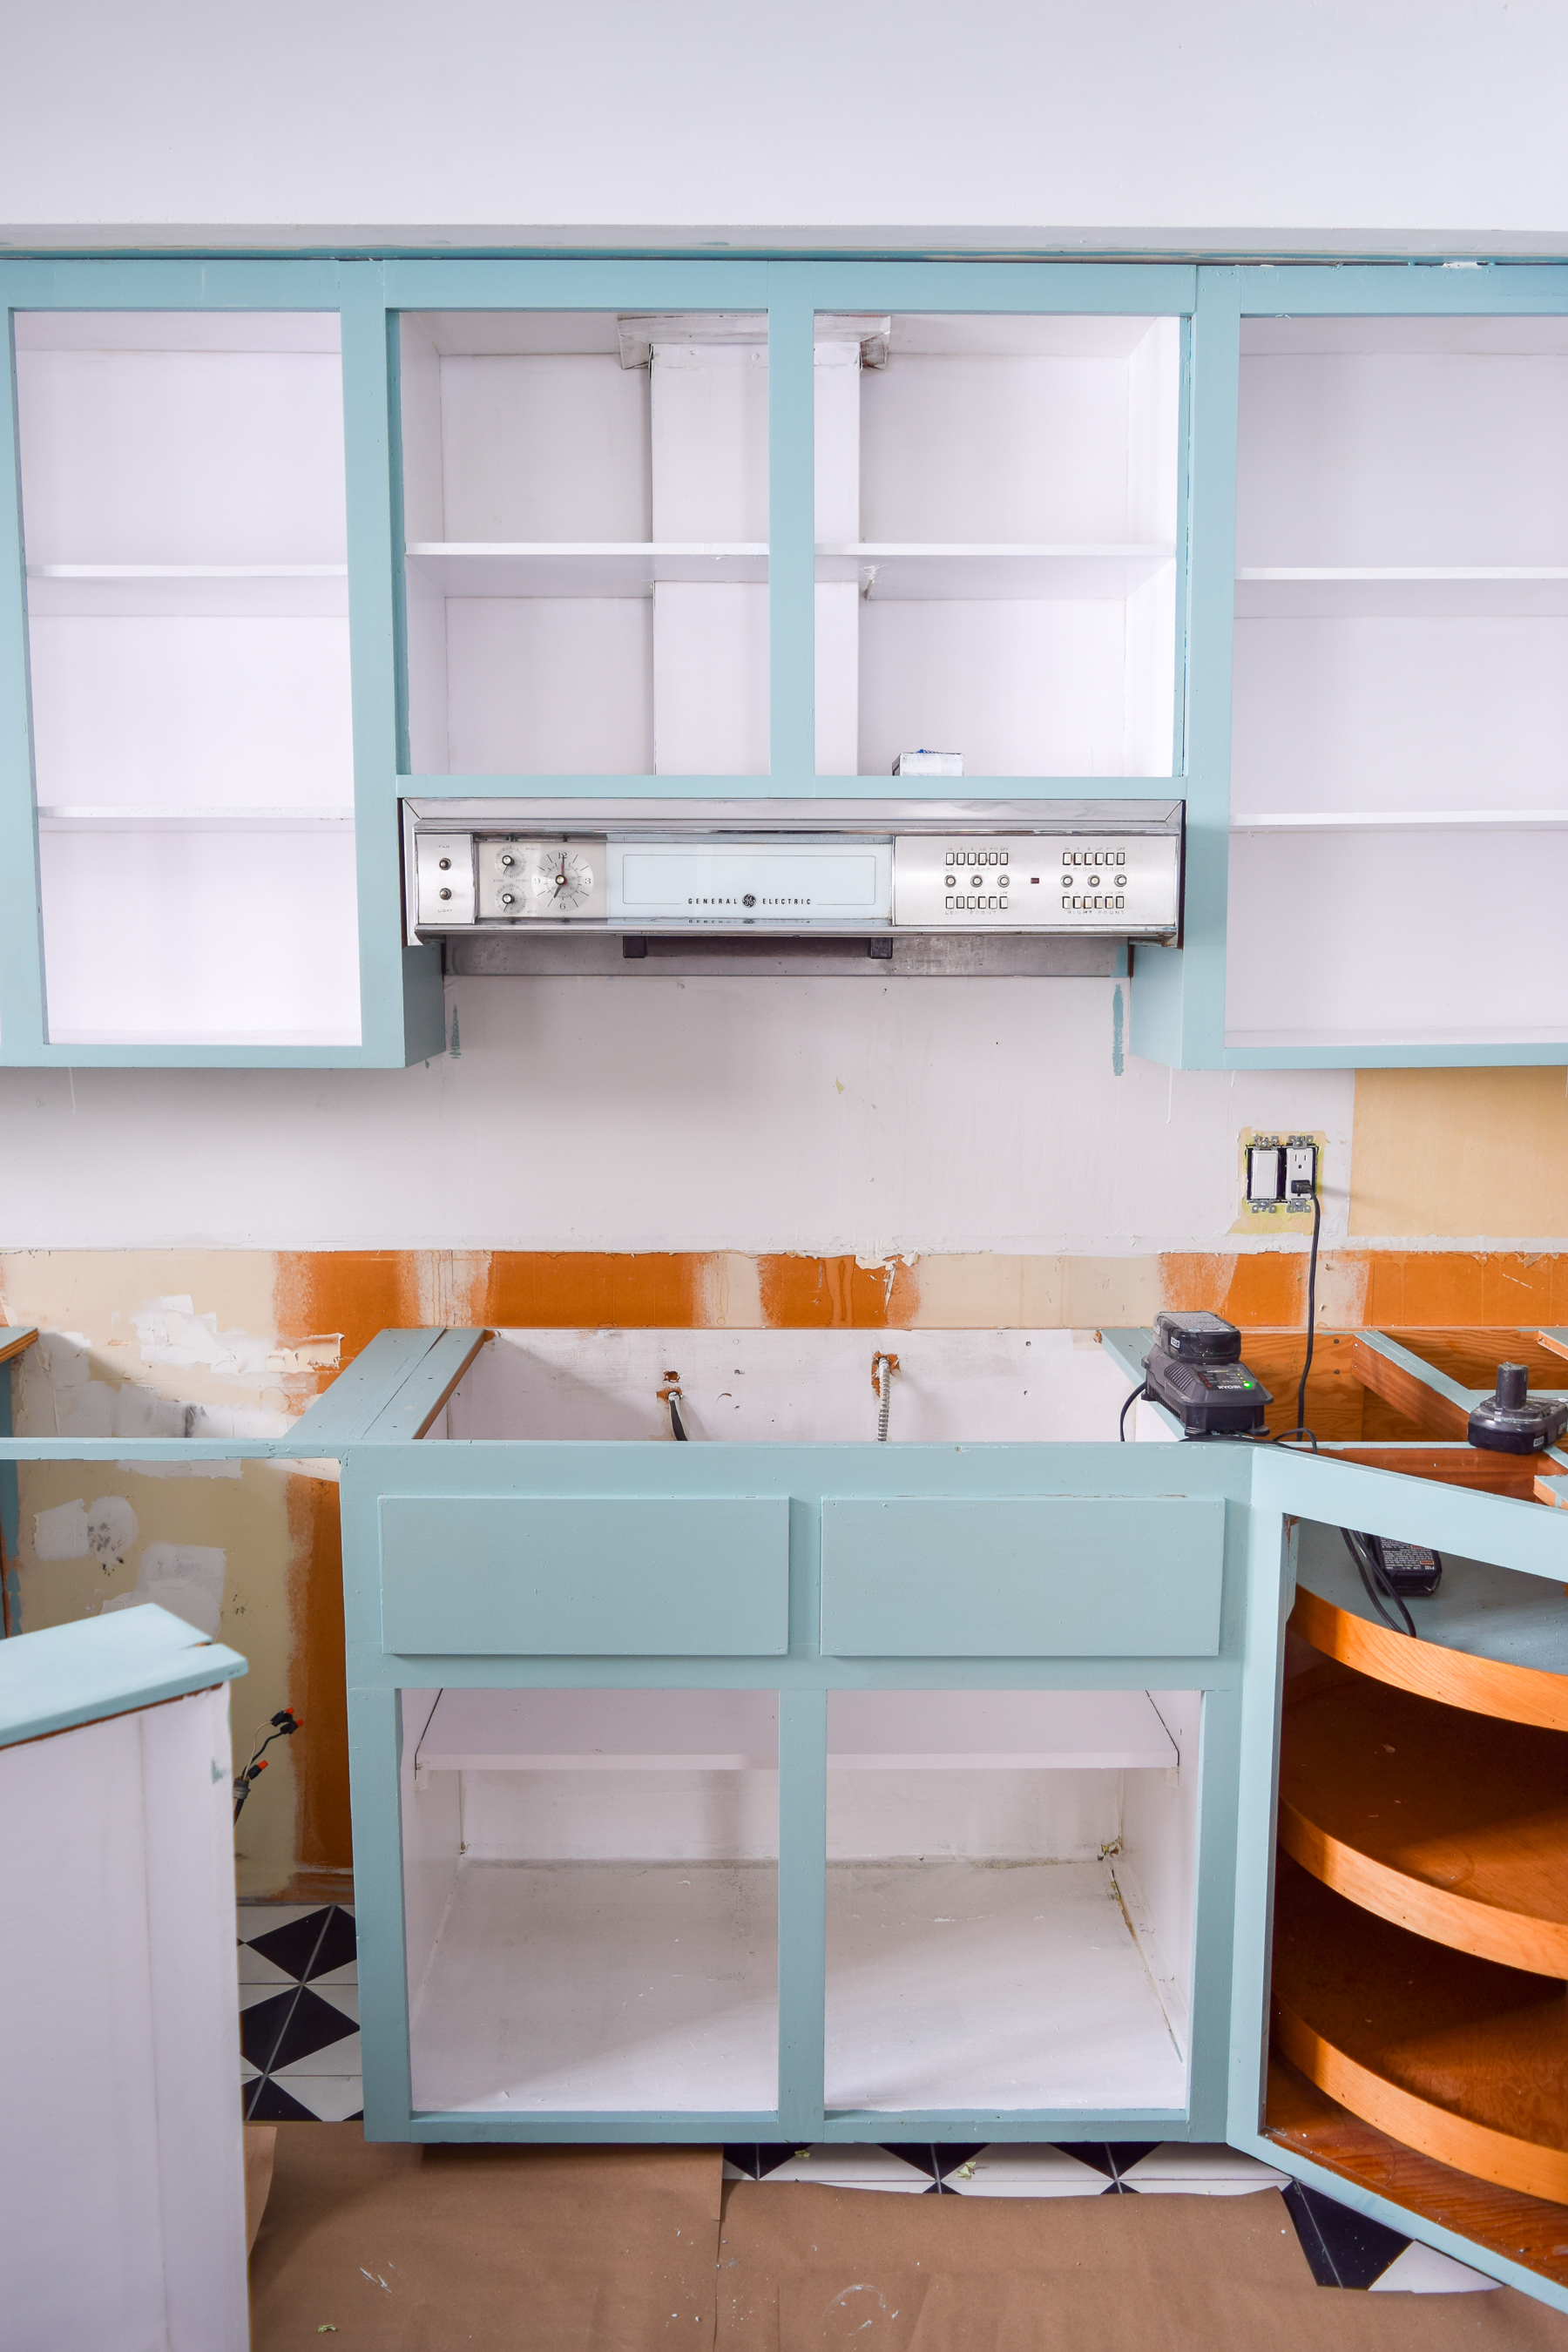
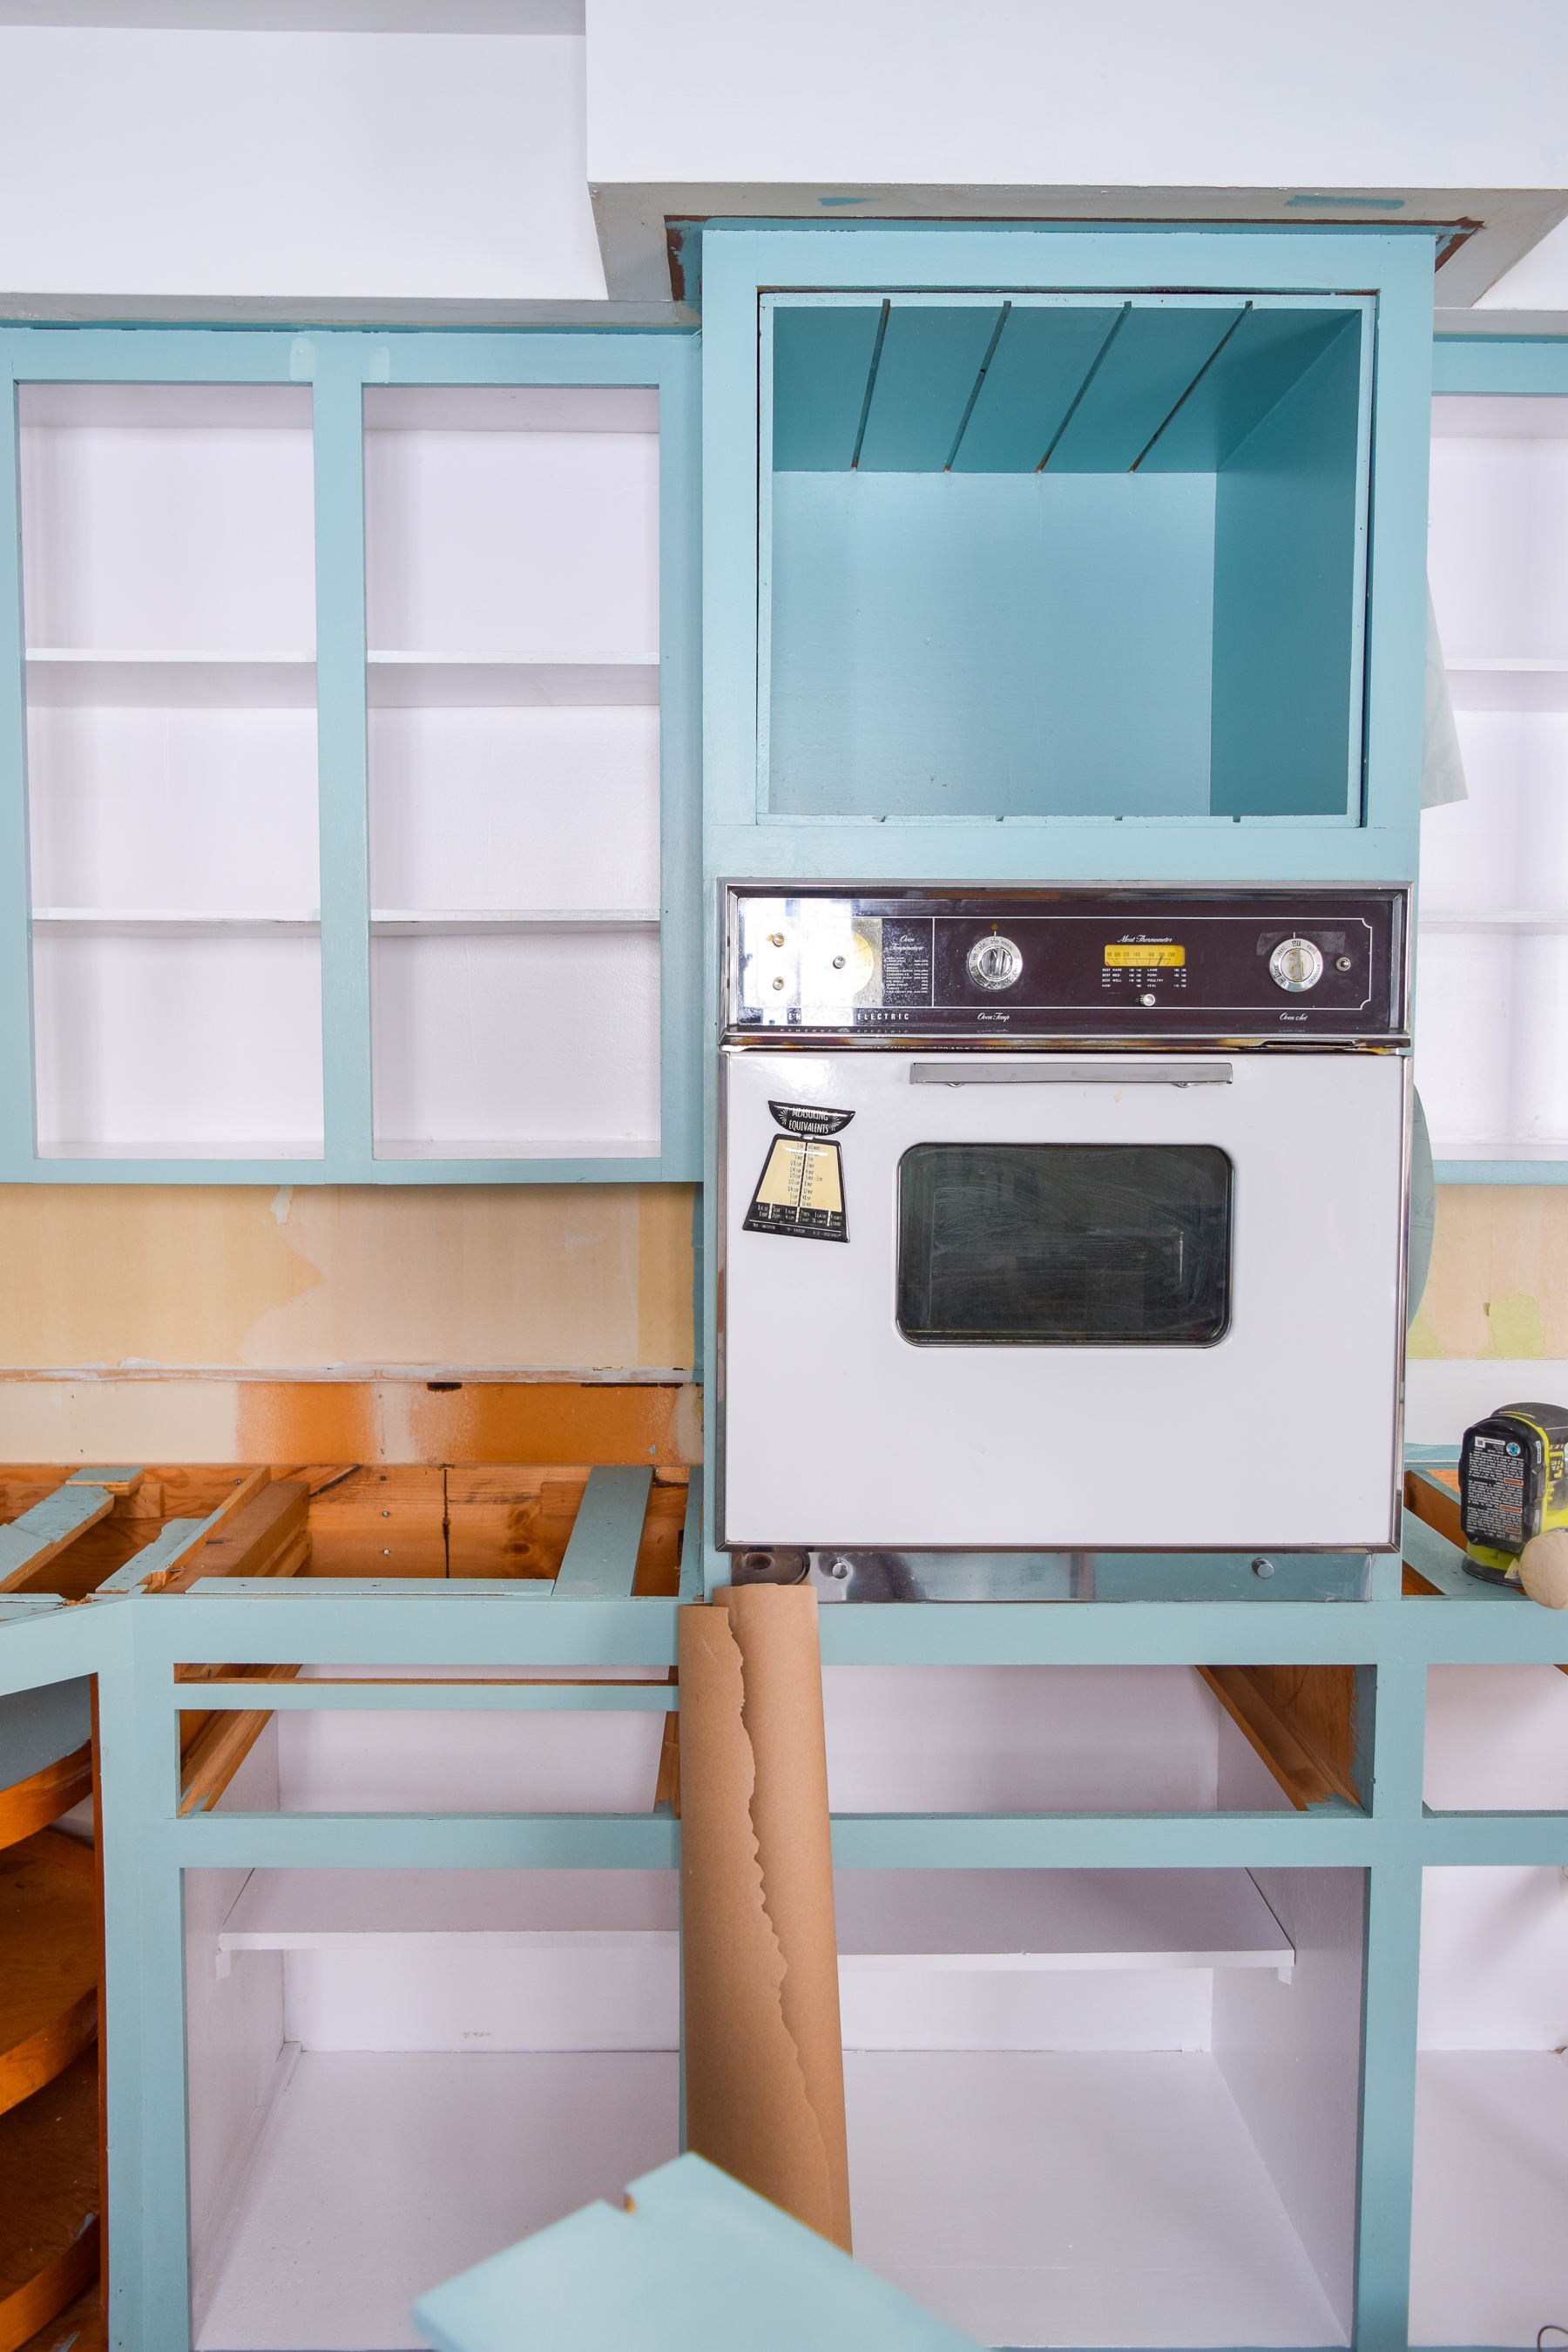
how to paint your plywood kitchen cabinets: first of all, do you even? Yes, paint them, and use the right paint formula and tools! Retro Kitchen can be cute again.

how to paint your plywood kitchen cabinets: first of all, do you even? Yes, paint them, and use the right paint formula and tools! Retro Kitchen can be cute again.

As you can see in the cupboard underneath where the stovetop goes, I still have another coat and some seems to do, but you get the picture!

As for painting Lazy Susans, I’m going to use a combination of brushing and rolling to get all the tiers done. It’s a massive corner piece, and I can’t just leave it as is.

The Final Result

You’ll have to wait and see! I won’t be showing that off until next week when we talk flooring, so in the meantime you get to imagine what this space will look like. That being said, you can also see which wallpapers we’re considering for the eating nook. The nice thing about having the cupboards painted now, is that I can get a better idea of how things will look in the space, so holding up the samples and moving them around is a heck of a lot easier.
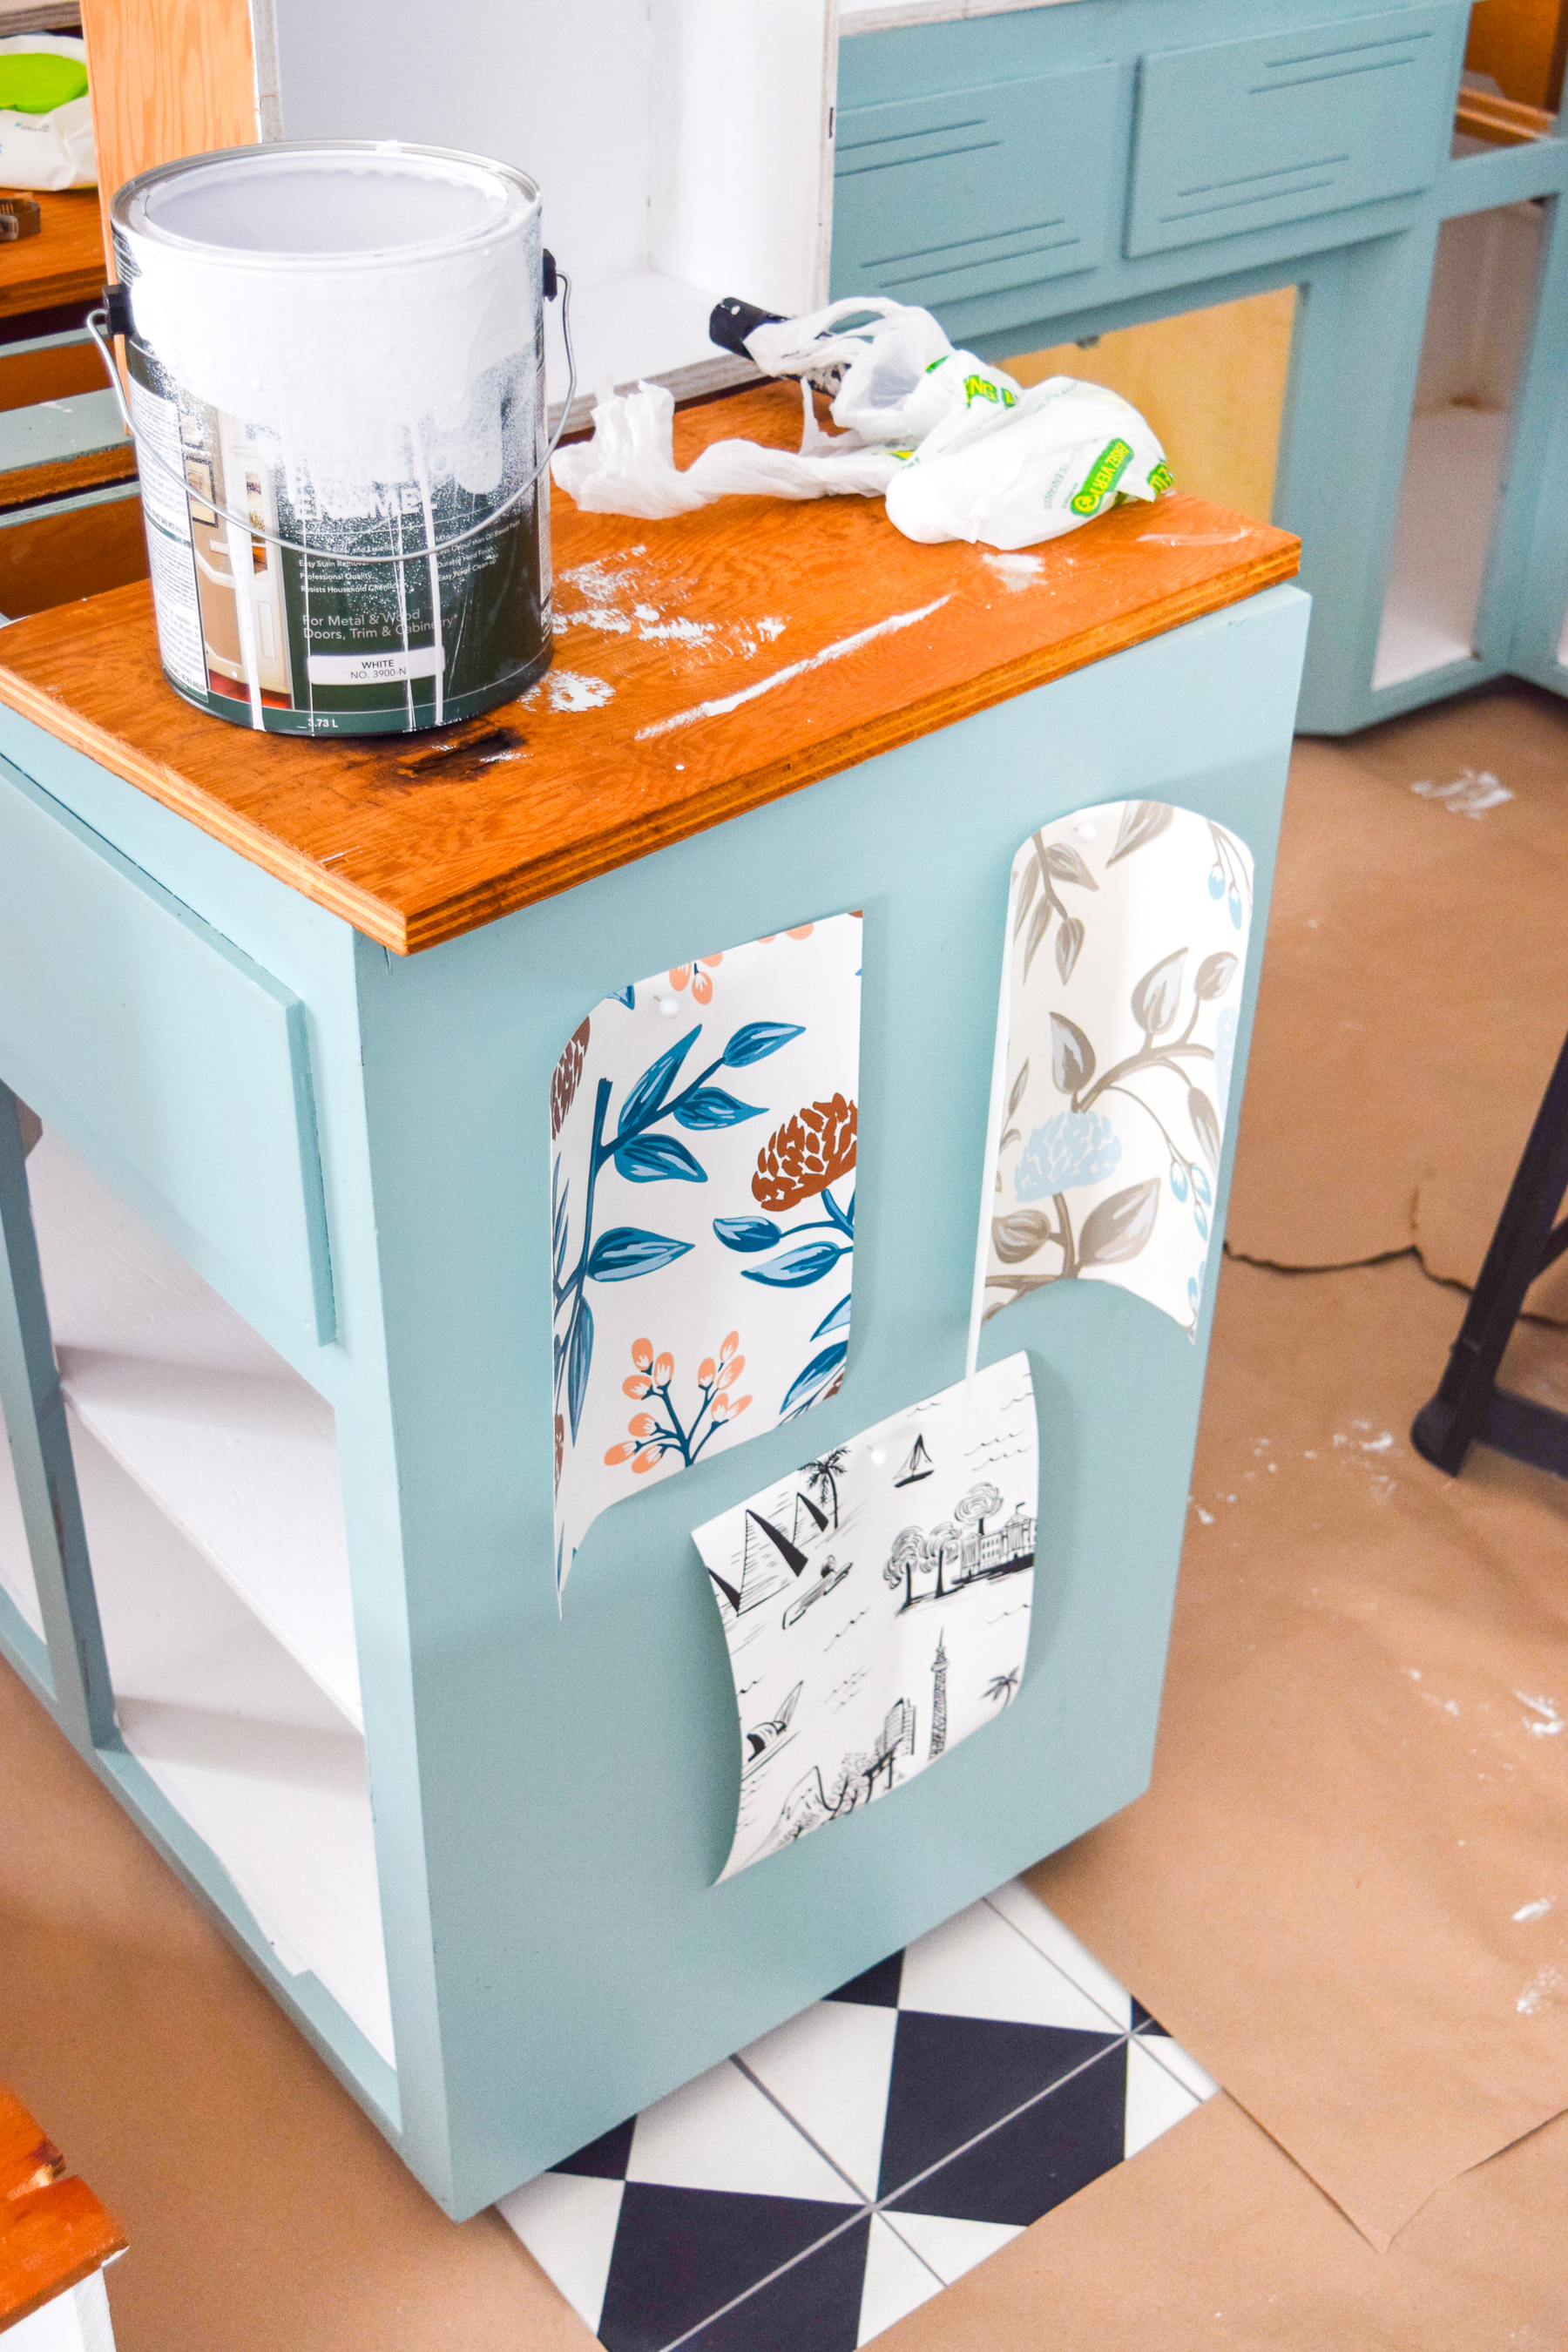
how to paint your plywood kitchen cabinets: first of all, do you even? Yes, paint them, and use the right paint formula and tools! Retro Kitchen can be cute again.

Let’s all marvel at the fact that I’ve absolutely popped at 20 weeks, but that these black spandex make it hard to tell. I’ll take a photo where I look normal, thanks.

And as with all home reno projects when you have pets, sometimes you have to catch them mid-leap before they land on wet drawer fronts.
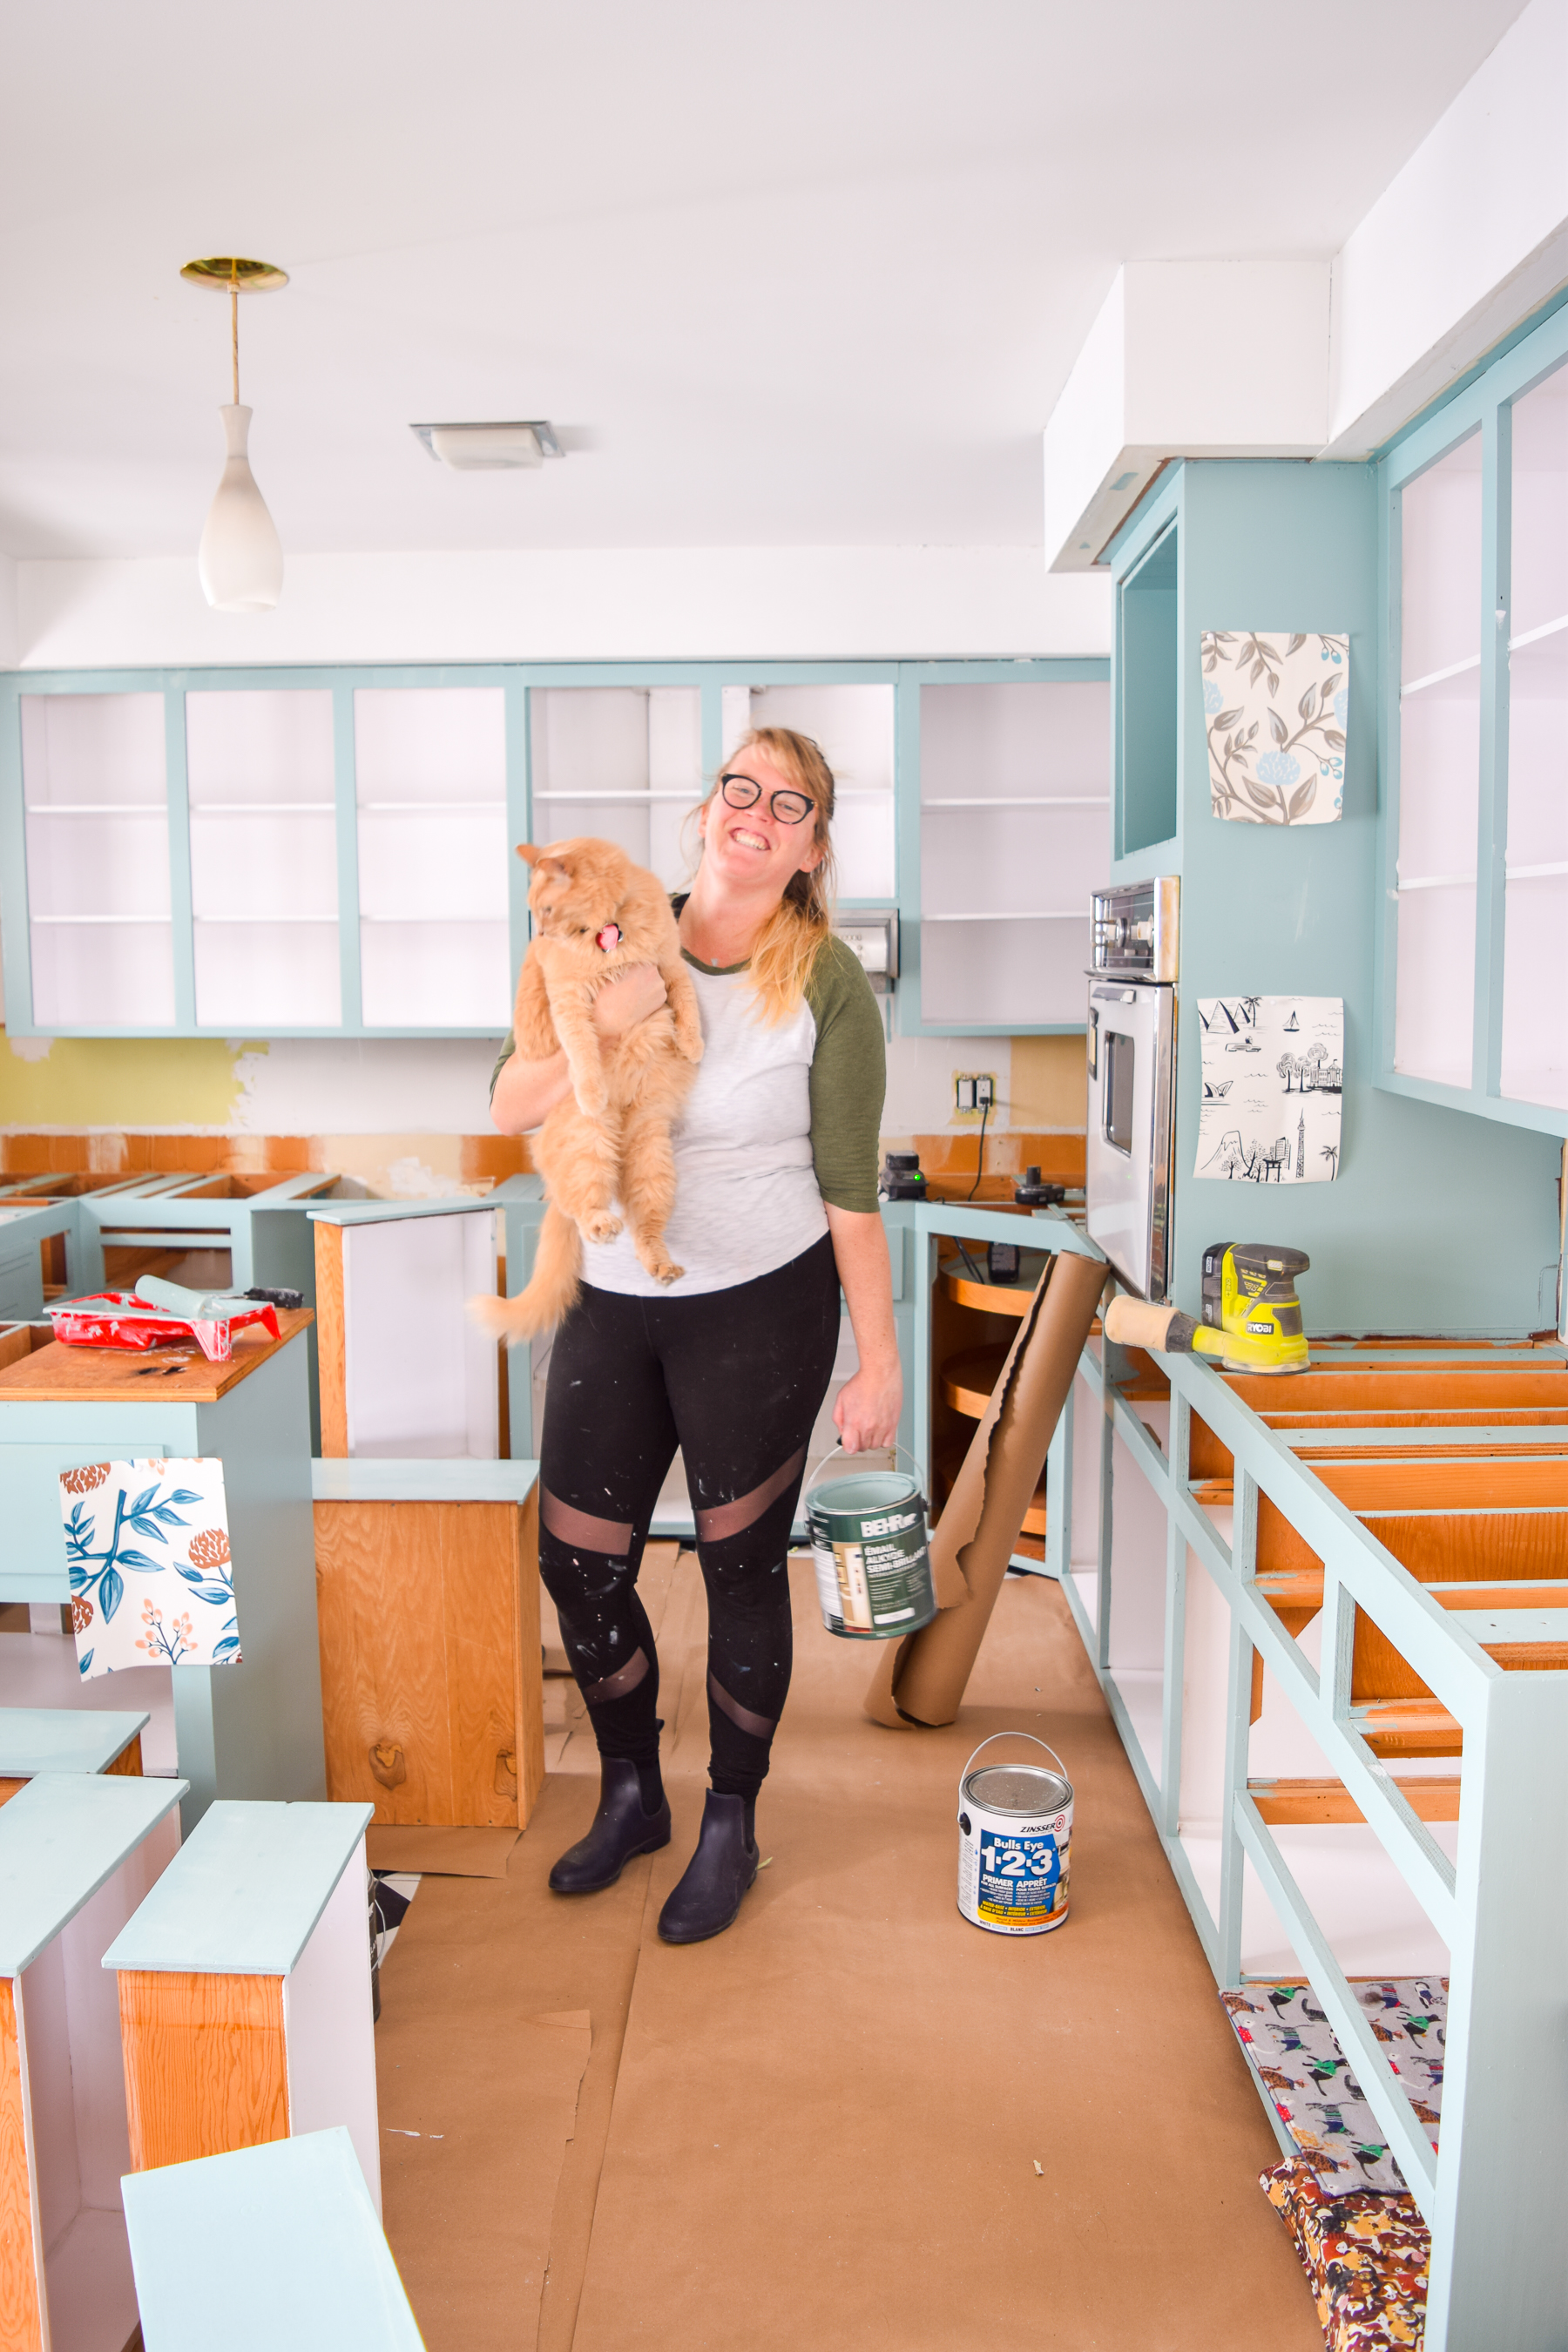
how to paint your plywood kitchen cabinets: first of all, do you even? Yes, paint them, and use the right paint formula and tools! Retro Kitchen can be cute again.

Tune in next week to see the flooring unveiled, as we’re one week closer to completing our retro glam kitchen renovations!



✨Are you signed-up for my new post updates? ✨

* indicates required

Email Format

26 Comments

Home Painting Tips from an Expert »
« Bold & Colourful Easter Tablescape

Comments

  1. mary johnson says

    April 10, 2019 at 10:07 pm

    The kitchen cabinets are beautiful! The white interiors are great. Be Proud of all you are doing to this room. It’s on its way to awesome and then some:)

    Reply
    • Ariel says

      April 10, 2019 at 11:01 pm

      I feel the same way! Can’t wait to see the next step in the evolution

      Reply
  2. Ainsley Congdon says

    April 10, 2019 at 10:12 pm

    They look great!!

    Reply
    • Ariel says

      April 10, 2019 at 11:01 pm

      Thanks! I can’t wait to see them with the drawers in, and the doors on!

      Reply
  3. Jewel says

    April 10, 2019 at 11:03 pm

    What an informative post my friend. Love that blue so much

    Reply
    • Ariel says

      April 11, 2019 at 6:50 am

      Thank you! Trying to make all these updates count for something 😉

      Reply
  4. Virginia Fynes says

    April 10, 2019 at 11:22 pm

    looooooove the color you went with! Can’t wait to see which one of the wallpaper samples you go with.

    Reply
    • Ariel says

      April 11, 2019 at 6:50 am

      Thank you! I’ve gotta make that decision like, TODAY ????

      Reply
  5. Angela says

    April 10, 2019 at 11:47 pm

    That color is amazing! I can’t wait to see what comes next. Bravo, my fellow vintage-lover!

    Reply
    • Ariel says

      April 11, 2019 at 6:48 am

      Thanks! We’ve got some big “next” steps, so hopefully we can get them all done in time!

      Reply
  6. alisa bovino says

    April 11, 2019 at 7:04 am

    Oh my goodness Ariel!!! This is amazing – I love a good DIY and the paint color you chose is stunning. i can’t wait to see how your kitchen turns out!!!

    Reply
  7. Jen @ NOting Grace says

    April 11, 2019 at 7:23 am

    These are some great tips! Love the color you chose! can’t wait to see your progress next week!

    Reply
    • Ariel says

      April 11, 2019 at 8:54 am

      Thanks! Everything’s essentially painted, just waiting to seal the floors to reveal them!

      Reply
  8. Holly says

    April 11, 2019 at 8:52 am

    I love it… the blue gives it such a fresh feel!

    Reply
    • Ariel says

      April 11, 2019 at 8:54 am

      It sure does! So much more so than I could have expected

      Reply
  9. Angie says

    April 11, 2019 at 9:25 am

    Omg! I can’t wait to see it all done! Good job, mom! ????

    Reply
    • Ariel says

      April 11, 2019 at 11:11 am

      Thanks mama! Feeling really good in here

      Reply
  10. Mary K Hunnicutt says

    April 11, 2019 at 10:04 am

    I completely agree that it is OK to paint over retro cabinets, if they are ugly…like ours. I am glad you shared these tips because I am going to start on my cabinets this weekend. I feel behind already! That color is gorgeous and I can’t wait to see the whole kitchen come together!

    Reply
    • Ariel says

      April 11, 2019 at 11:11 am

      Glad we’re on the same page! We’re going to go the extra mile to salvage the basement bar area, but some things need a new coat of paint

      Reply
  11. Lindsey @hilltown_house says

    April 12, 2019 at 9:15 pm

    That color is AMAZING!!! IT’S GOING TO LOOK SO GREAT WITH THE BLACK AND WHITE FLOORS

    Reply
    • Ariel says

      April 13, 2019 at 7:31 am

      I know right?!?!

      Reply

Trackbacks

  1. DIY Retro Melamine Heart Mugs • PMQ for two says:
    April 23, 2019 at 5:56 am

    […] made some Retro Melamine Heart Mugs in a few minutes this past weekend – in between sanding, painting and building for our Retro Glam Kitchen Reno. They were easy to make, super cost efficient (less […]

    Reply
  2. Glam Kitchen Details • PMQ for two says:
    May 1, 2019 at 5:55 am

    […] up on our progress so far: How to Paint Plywood Kitchen Cabinets, Choosing A Retro Kitchen Floor Tile & Retro Kitchen […]

    Reply
  3. Retro Glam Kitchen • PMQ for two says:
    May 19, 2019 at 6:28 pm

    […] up on our progress so far: Plans for out Retro Glam Kitchen Renovations, How to Paint Plywood Kitchen Cabinets, Choosing A Retro Kitchen Floor Tile,  Retro Kitchen Details, Glam Kitchen Finishes & How To […]

    Reply
  4. DIY Retro Doll Fridge Magnets says:
    July 25, 2019 at 8:20 pm

    […] on the front, but we can along the side. Thankfully we’ve got one exposed next to our lovely blue kitchen cabinets. From there, you can clearly see my DIY Retro doll fridge […]

    Reply
  5. Our Basement Bar • PMQ for two says:
    December 17, 2019 at 5:56 am

    […] you check out my tutorial on painting plywood kitchen cabinets, you can see how we did these ones as well. Same process, down to the type of paint we used – […]

    Reply

Leave a Reply Cancel reply

Your email address will not be published. Required fields are marked *

woman in red dress on counter

Hi! My name is Ariel and I'm the voice behind PMQ for two. I create bright, bold, colourful, and eclectic home decor, DIYs and lifestyle content.

  • Bloglovin
  • Facebook
  • Instagram
  • Pinterest
  • Twitter

PMQ for three

Time For A Cocktail

pmqfortwo

Ariel - PMQ for two
Y’all Après Ski is a mood,and it is the spirit Y’all Après Ski is a mood,and it is the spirit with which I decorate for winter. Cozy furry things? ✅ Champagne ✅  Oversized sunglasses? ✅ hot cocoa with homemade marshmallows? ✅ a roaring fire? ✅  what’s on your chilly winter must list?
•
•
•
#apreski #apresski #winterwonderland #winterdecor #winterdecorating #winterdecoration #glamdecor #vintageski #skichalet #bhghowiholiday #vintageholiday #vintageaesthetic #eclecticdecor #eclectichome #cozyvibes #cozyhome
JB’s Montessori playroom is looking pretty good, JB’s Montessori playroom is looking pretty good, especially now that all the Christmas decor is gone. Bear in mind, this is what it looks like before a child has actually had a chance to play in it 😂 
•
•
•
#montessoriathome #montessoritoddler #montessoriinspired #montessoribaby #montessoriplayroom #playroomdecor #playroominspo #playroomideas #bhghome #society6 
#eclectichome #lorenacanals #thrifteddecor
It’s winter. It’s snowing here, and it’s col It’s winter. It’s snowing here, and it’s cold. Time for snowflake shaped tea cup cookie rims, and @jacksonmorgancream in your afternoon tea. ✌🏻🫖🍫
•
•
•
#hyggehome #hyggelife #hyggelifestyle #whiskeygram #teatime☕️ #teatime #afternoonteatime #cocktailsofinstagram #cocktailrecipes #bhgstylemaker #bhgfood #anthropologiehome
I think we’ve all been feeling a little powerles I think we’ve all been feeling a little powerless these days, but @laybabylay made a great point in her stories the other day: you can always do something nice. You can buy the order of the person in line behind you at the drivethru. You can donate to charitable organizations doing things you believe in. You can make a meal for your neighbour who might be having a hard time with lockdown. It’s amazing how much better I feel when I do something nice, and I bet you will too ❤️
•
•
•
#lookforthehelpers #dogoodfeelgood #dogoodthings #colorfullife #colorfulhome #wallpaperdecor #sodomino #mymitzi #bhghome #eclectichomedecor #rugsusa #atomicranch #retrohome
“Life is what happens when you’re busy making “Life is what happens when you’re busy making other plans” - John Lennon. 😎 As a family who moves a lot, we’re ready for a new chapter/ new house, but I’m not sure if I’ll be able to leave all the memories! We brought June home here 😭 she learned to walk here, and said her first words here. I wonder what other “firsts” she’ll have before we move. [pictured, June in a messy kitchen last year]
•
•
•
#babygirl #toddlermomlife #memoriesforlife #lifeiswhathappenstoyouwhileyourebusymakingotherplans #stokketripptrapp #stokke #westcoastkids #behrpaint #wallpaperwednesday #aestheticwallpapers #momlife #mommyandme
We sold the house! ✨ After 2.5 years were moving We sold the house! ✨ After 2.5 years were moving on. No, we’re not posted. We’re just ready for a new adventure! 😎✨ big thanks to our dedicated realtor @ang.ripped.realtor ✨ We’ll be staying local, and can’t wait to share our plans and next steps (once they’re more firm) And yes, the chickens come with us. 
•
•
•
#movingontobetterthings #movinghouse #movinghome #behrpaint #targettswindowsanddoors #atomicranch #houseandhomemag #midcenturymodern #bhghome #bhgstylemaker
*insert pun about light* AD: our Kai sconces from *insert pun about light* AD: our Kai sconces from @mymitzi make this wet bar. Sure, secret thing else contributes to the #retroaesthetic , but lighting sets the mood. These brass sconces blend right in when they need to, but gleefully take center stage after dark. What do ya think? 
•
•
•
#midcenturymodern #midcenturyhome #midcenturydecor #hudsonvalleylighting #mymitzi #aestheticwallpapers #wetbar #wetbardesign #atomicranch #retrohome #lightingdesign #lightingiseverything #brassdecor
Load More... Follow on Instagram

- THEME BY ECLAIR DESIGNS -

Cookies ????

This site uses cookies: Find out more.