Do you have a really ugly patio umbrella kicking around? Is it still fully functional, just covered in some old, mystery stains and is severely sun faded? Don’t worry about buying a new one; the really funky ones cost $$$ and what you can find at your local big box is probably in a primary colour or a shade of beige. Read on to get the skinny on painting the patio umbrella!
Nothing wrong with that, but if you want something in a particular colour or with a fun design element you’re better off DIYing.
I was faced with a similar conundrum last weekend while prepping our yard for the Canadian Blogger Summer Patio Tour. Our patio umbrella had seen better days.
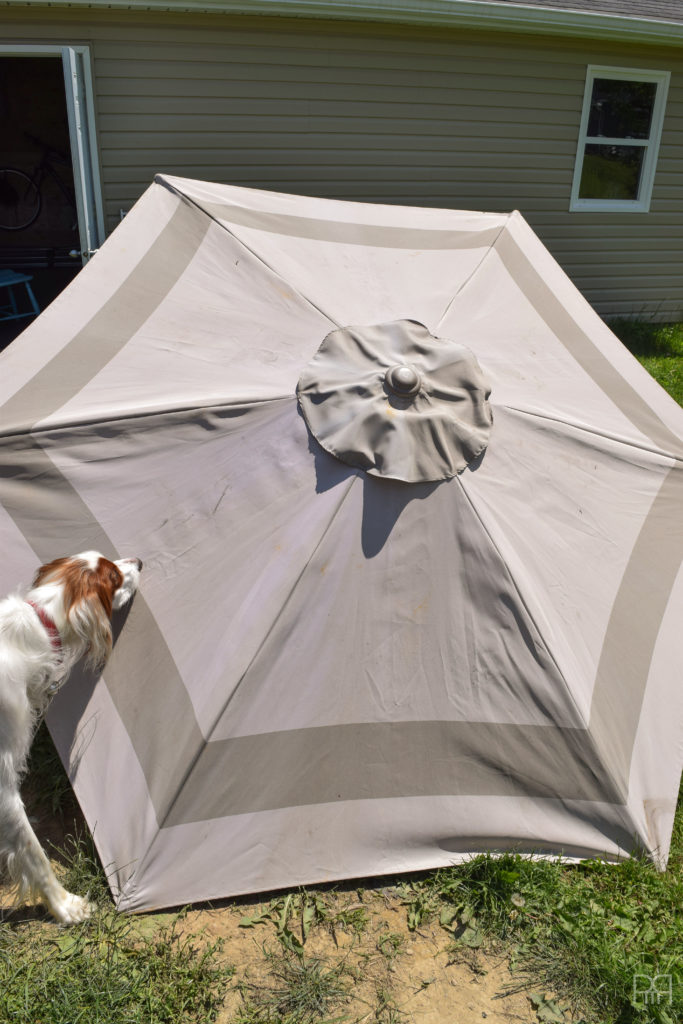
I mean look at it. It’s seen better days. It’s faded, stained, and doesn’t really belong in my colourful yard. What to do?
PAINT IT OF COURSE! Duh
I’ve heard tell of this magical process before, but it was always kind of like a DIY urban myth.
Paint… an outdoor umbrella? what?
I did some internet sleuthing and stumbled across a couple of legitimate sources that said I could either paint or spray-paint it, so I tried both.
Spray painting didn’t really work. I would have gone through about 20 cans to get decent coverage, and I don’t have that budget. Painting was by far the best option.
I already had some ideas in mind for what I wanted to do with the umbrella, so I thought I’d share some inspiration.
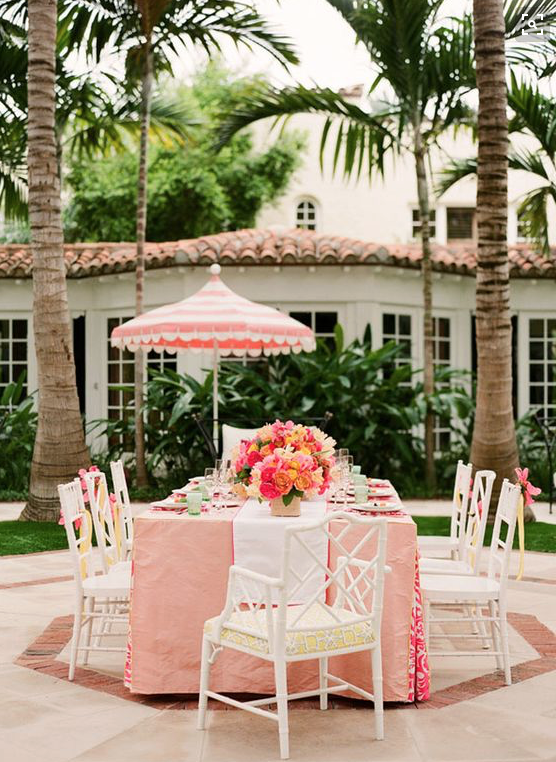
Image credit Golden White Decor.com (A Lilly Pulitzer Luncheon)
Materials required
- Primer – I used the Zinser 1-2-3 which I had left-over from my IKEA nightstand remodel this spring.
- Small paint roller
- Large (standard) paint roller
- 1″ paint brush
- Paint tray
- 1 L of paint in whatever colour you’d like + enough to do the cap
- 8 M Fringe/trim/tassel/bead work of whatever persuasion you’d like
- Hot glue gun and 4 sticks
*The spray paint didn’t cover well at all. It almost ALL bled through, and it was hard to get consistent coverage.
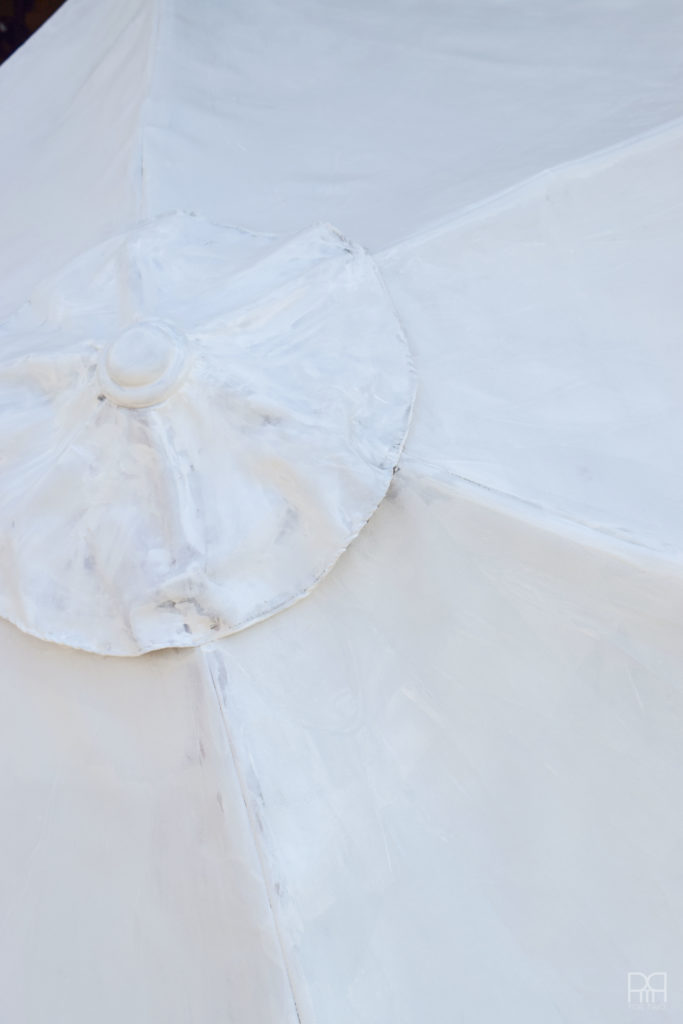
Step 1: Make sure your umbrella is dry, clear of any debris or other icky things that stick and hide in umbrellas. I laid mine out in the shade of the garage so that I could paint without frying in the sun.
Step 2: Start painting with the primer!
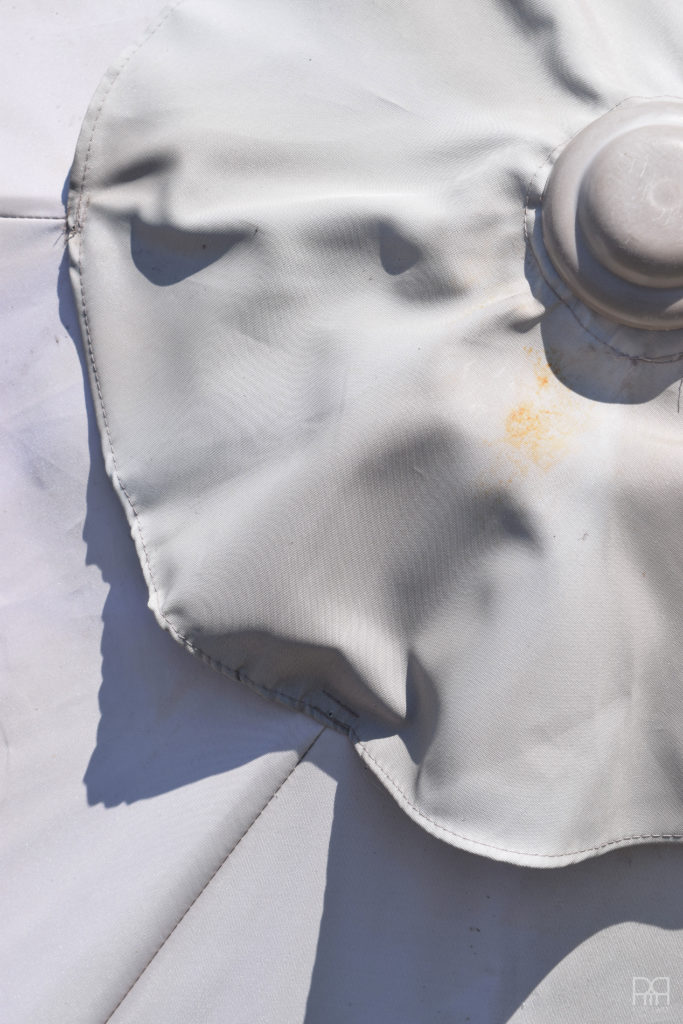
This is tricky. I’m not going to lie. You need fair bit of pressure to ensure even coverage of the toile, some of it will bleed through the toile to the other side, and getting all those nooks and crannies caused by the mechanisms underneath.
Take your time and try and get as much on there as possible. It’ll look absolutely hideous while you do it, but that doesn’t matter since you’ll be painting over it.
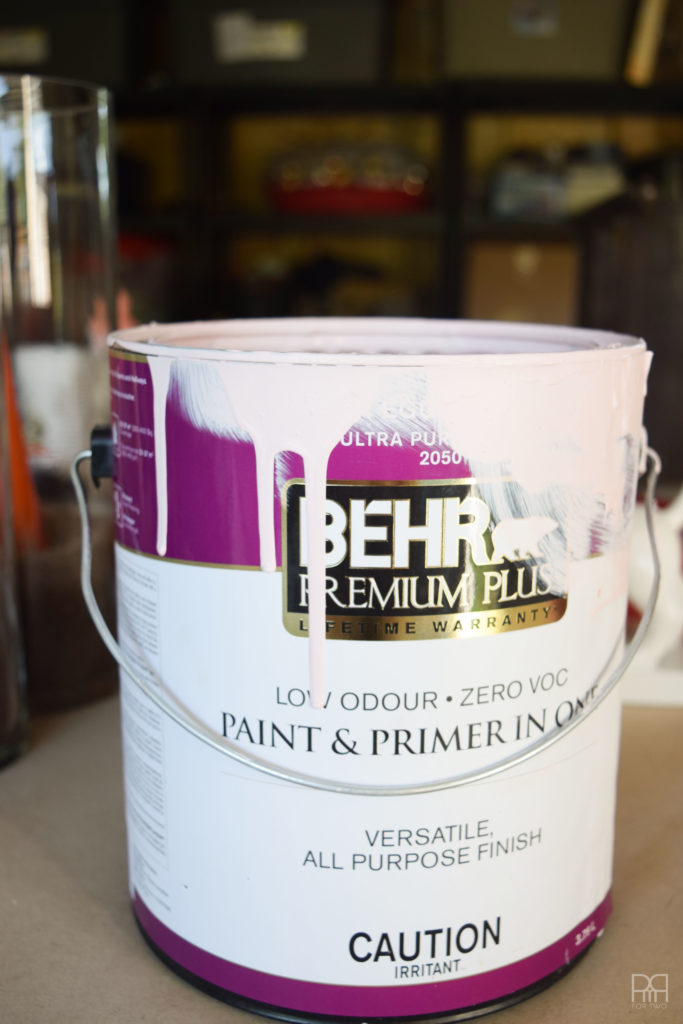
I really can’t recommend the Zinser 1-2-3 primer enough – it helps prevent against told, rust, discolouration etc. It’s a touch expensive, but very worth it. The quality is superb and sticks to anything (including IKEA furniture) so get a big can and forget about it. (P.S. this is not a sponsored post – this is my legit advice).
Step 3: Respect drying times and then apply a second coat of primer. Trust me.
Chances are good that your primer looks uneven, is scraggly in parts, and seems to have disappeared in others. This is why we apply second coats.
Step 4: After the primer is bone dry, get to work with your colour of choice! If you are doing a design of some sort, this is where you would do the taping.
If not, paint away! It took me two coats like with the primer, but in the end everything was covered. I used some left-over house paint (that’s right – this colour is also somewhere in the PMQ!) so this project has cost me nothing so far.
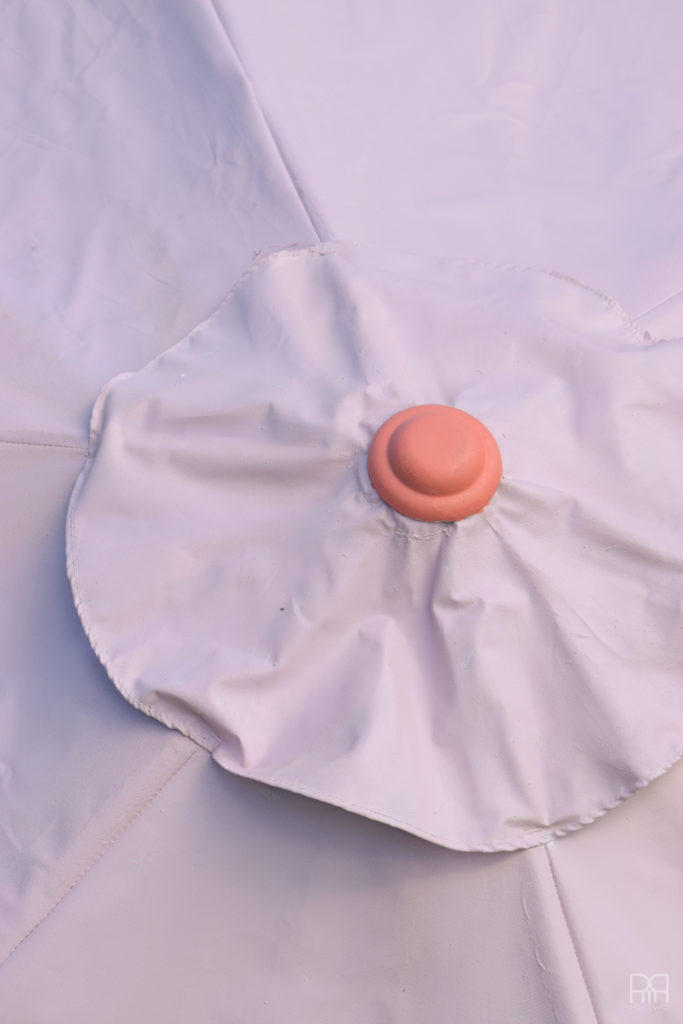
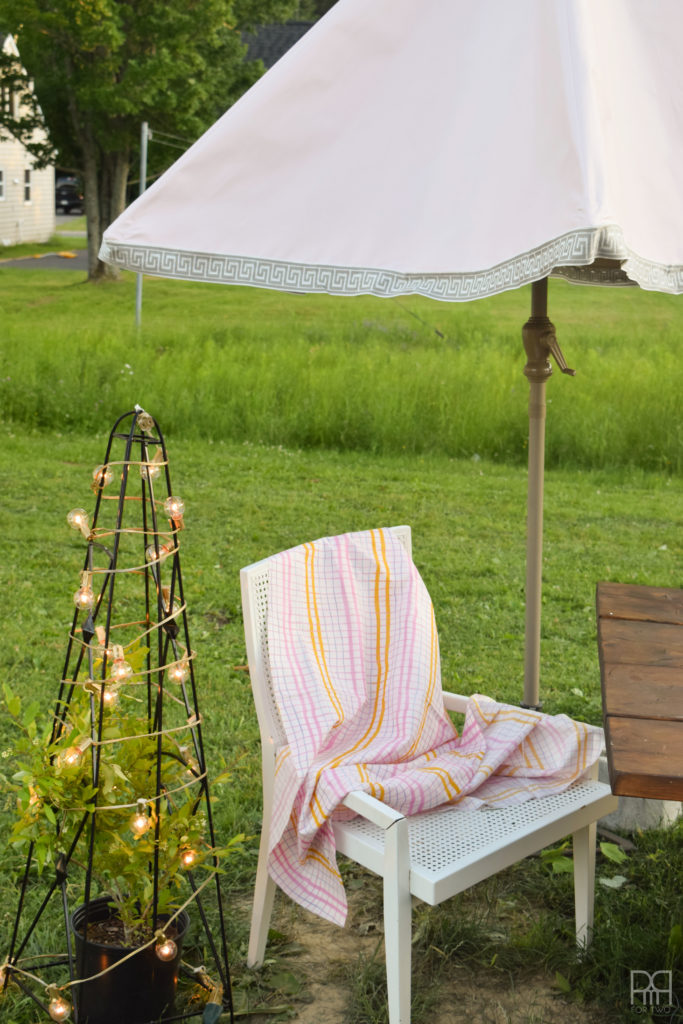
Step 5: Don’t forget the little plastic cap on top! I decided to do mine in an accent colour – also using a paint I already owned 😉
Step 6: Let it dry overnight! Thankfully we had a rain-free evening so I was able to leave it out in the backyard to dry.

Step 7: Hot glue your fringe/trim/detail into place. I found this beautiful trim at Fabricville while it was 50% off. It’s 100% cotton (i.e it’s meant for indoor pillows not a f*cking patio umbrella) so I have to be careful not to leave it out in the rain or get it dirty.
Hey guys this is a kid-free home for now, so everything is still possible.
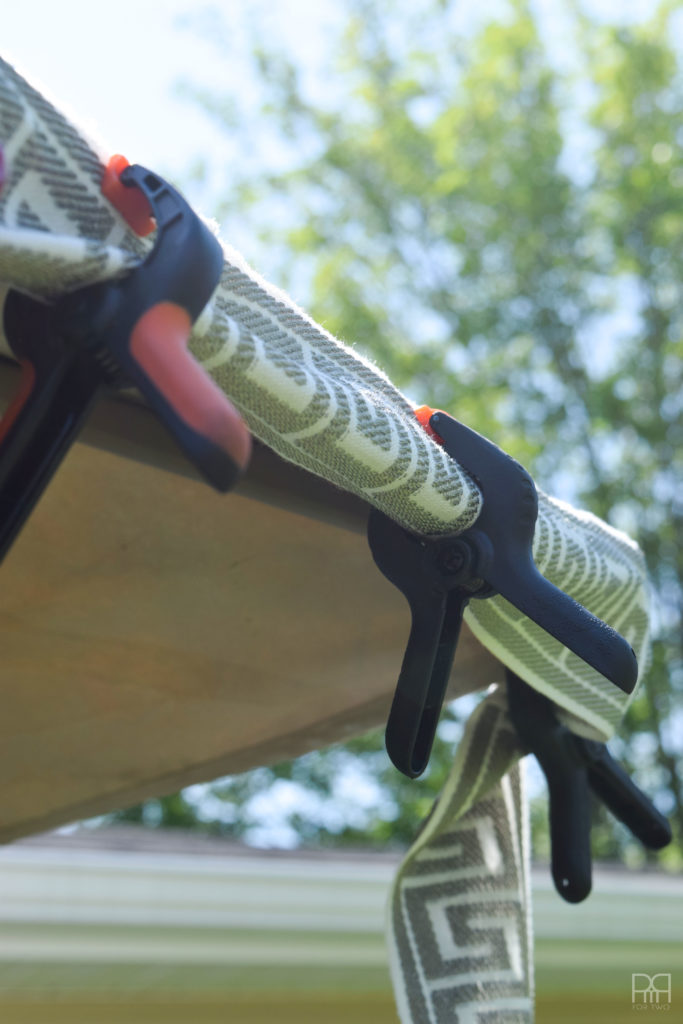
I used clamps to hold it into place while it dried. This was actually super easy and way less fussy than I though. The glue dried fast and the trim applied easily.
I needed 8m exactly to go around the edge of the umbrella, and I have a standard hexagon shaped (6 sides) umbrella.
 Step 9: You could technically paint the underside of the umbrella as well, or glew/sew a fun fabric to the underside. I’m not there yet. Maybe in a couple of weeks.
Step 10: Enjoy! Break-out the gin and tonics and get to enjoy your afternoon underneath a beautiful new umbrella!
NOTES: I WOULD NOT leave this umbrella out in the rain. Yes, it’s painted, it’s great. But, I used left-over house paint and would hate to see what a maritime deluge could do to it. Also, the trim would not fare well.
This is standard for any fancy umbrella though. You guys should have seen me in Fabricville debating whether or not to buy 8 tassels… it was a bad scene.
You’ll also notice that my backyard has taken a striking resemblance to my ORC florida room design board. Funny how that happens eh?

Definitely, maintenance is must for the patio umbrellas. That’s a great information on how to make a good looking patio umbrella with painting.
Thanks!
I would like to find out what material your umbrella is and was I a problem with the paint bleeding to hide it from inside the umbrella?