*updated October 23rd 2019
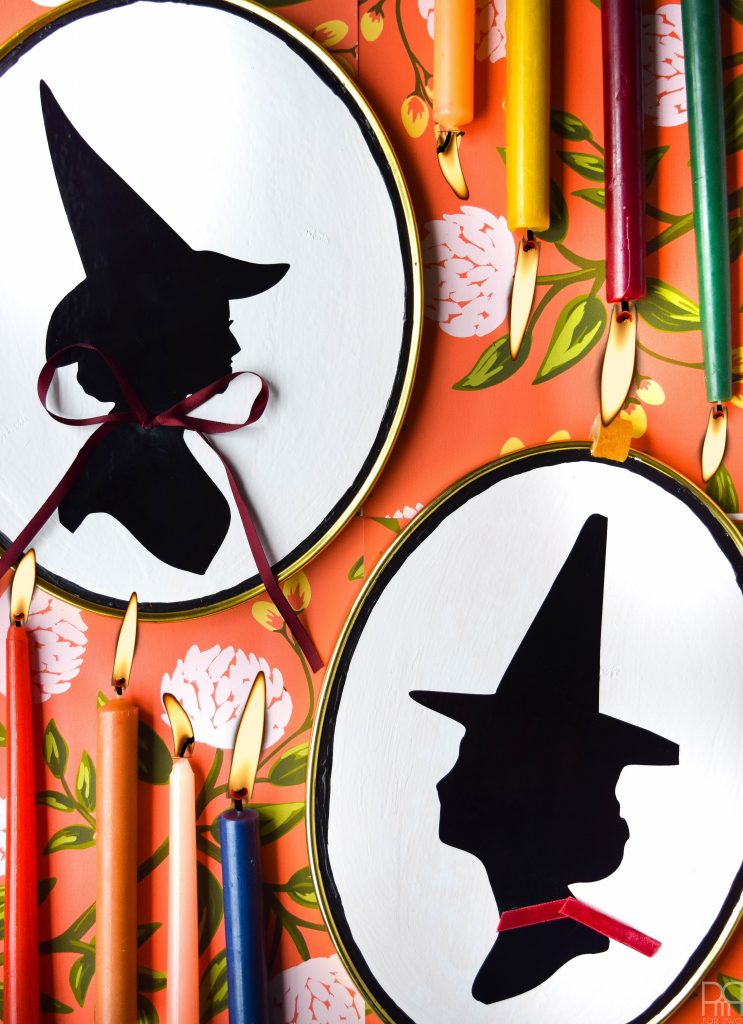
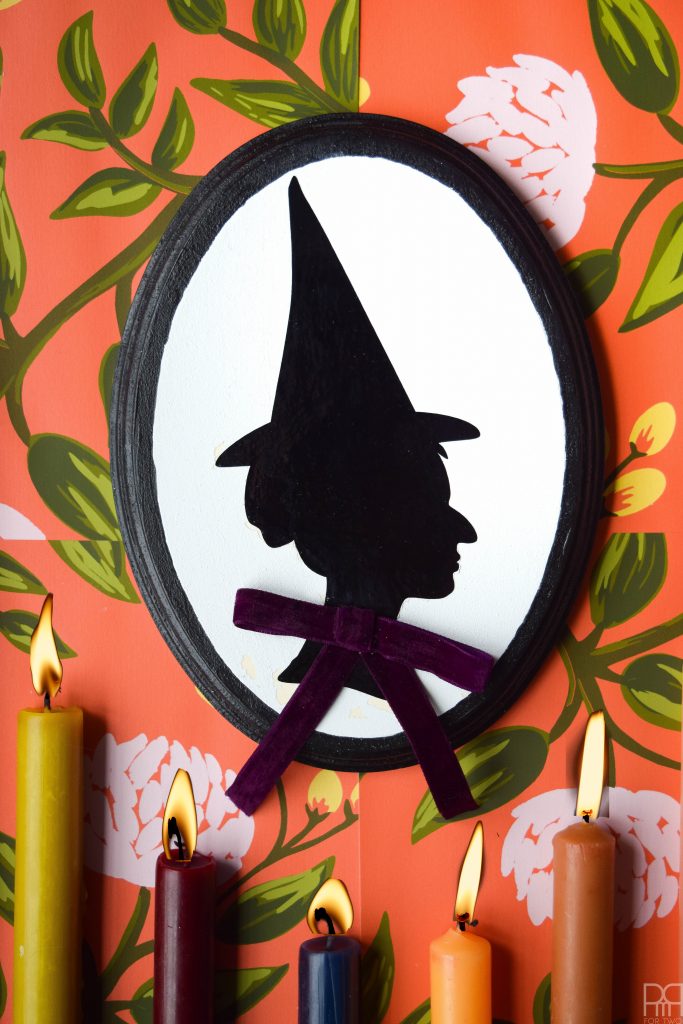
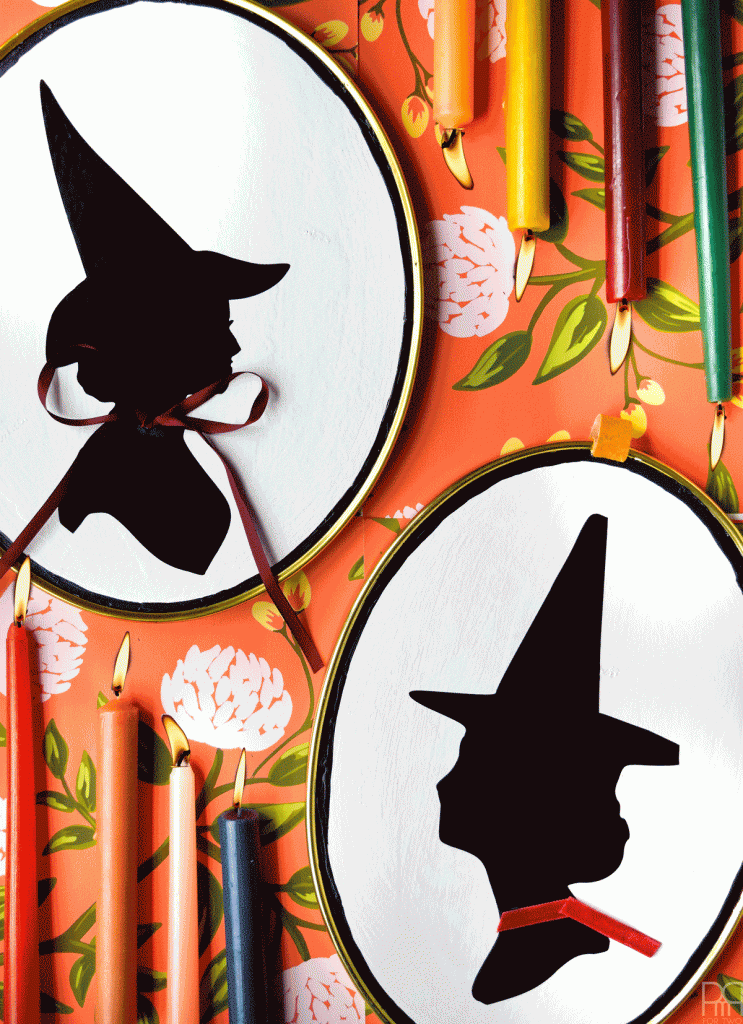
There’s something to be said for a simple craft that makes an impact. My DIY witch silhouette decor is just that! Using thrifted frames, vinyl and paint, I created some beautiful silhouettes to hang amongst the gallery wall display this halloween.
DIY Hocus Pocus Mirror // DIY Bitchin Witchin Cape
Don’t forget to check out my Mommy & Me Witch Halloween costume, or my DIY Masked Portrait Gallery
These may be a bit more “me” than “spooky” but they’re plenty fun, and you can easily put all kinds of creepy silhouettes in the frames. I’ll be adding mine to our entryway decor this year (to be unveiled in the next few weeks) but you could easily sprinkle them throughout the house to turn up the dial on spooky. P.S. Last year I created a spooky adult Halloween Playlist, so if you’re in the mood // here // P.P.S.I hinted at these in this week’s newsletter. So if you’re not already signed-up…
*Expressions Vinyl provided the paint for review, but all thoughts are my own. Thank you for supporting the brands that make PMQ for two possible.
*The following product links contain affiliate links. Thank you for supporting the brands that make PMQ for two possible.
What you need to create Witch Silhouette Decor
- Oval frames / art – I found mine at Value Village
- 3 x Glossy Permanent Vinyl Sheets in Jet Black by Expressions Vinyl
- Cricut Explore Air™ 2 machine– totally worth purchasing FIY
- Witch Silhouettes ( #M1722627 & #M17B3ED)
- Cricut Design Space™
- Cricut® Tools Basic Set
- DecoArt Americana Acrylic Paint, 2-Ounce, Titanium White
- DecoArt Americana Acrylic Paint, 2-Ounce, Lamp Black
- Loew Cornell 842 25-Piece Foam Brush Set, 1-Inch
- Ribbon scraps
- eZthings® Professional 8″ Heavy Duty Gold Scissors for Leather arts and crafts
How to create diy silhouette witch decor

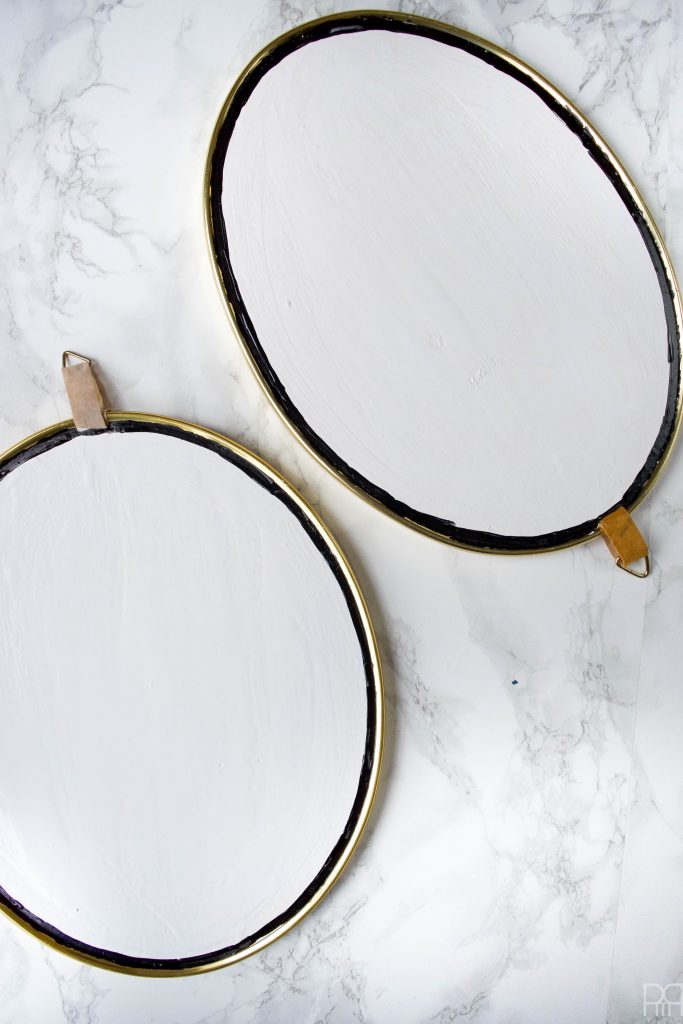
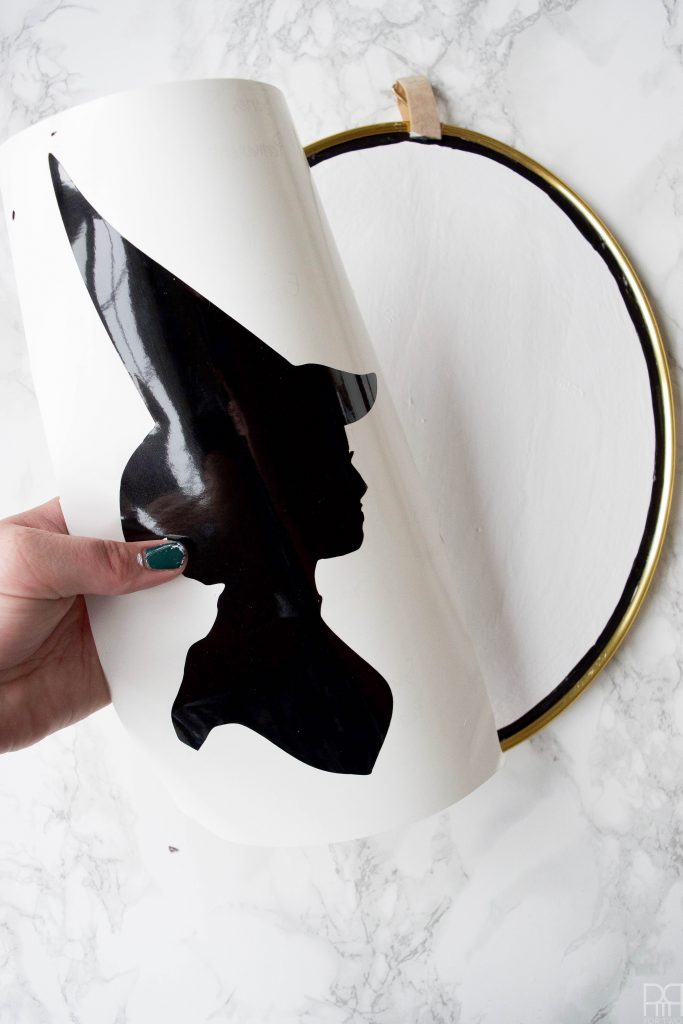
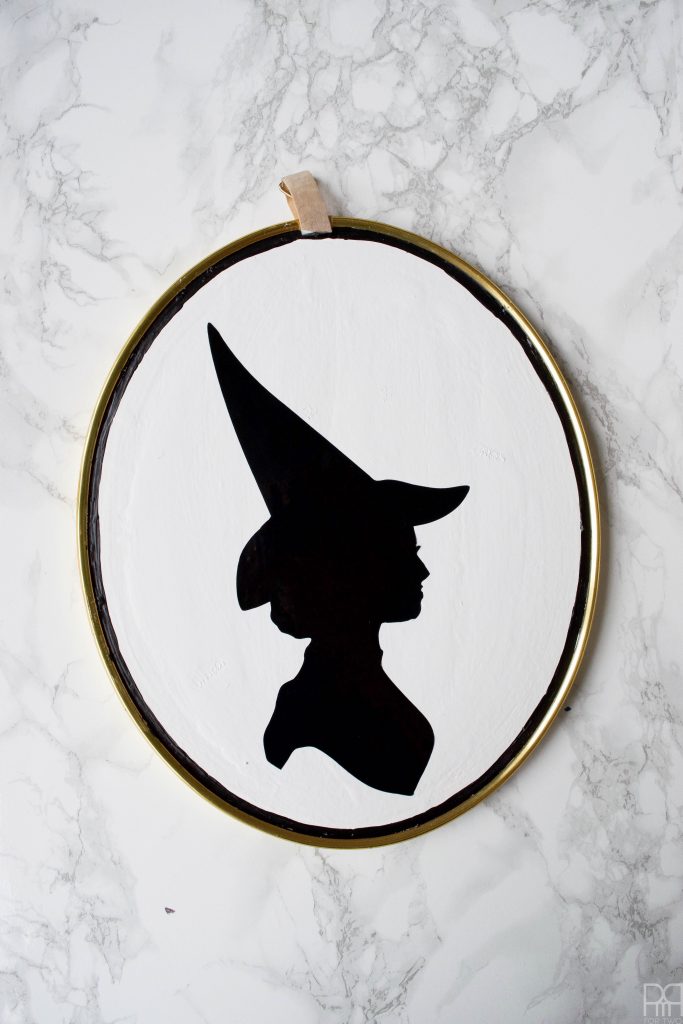
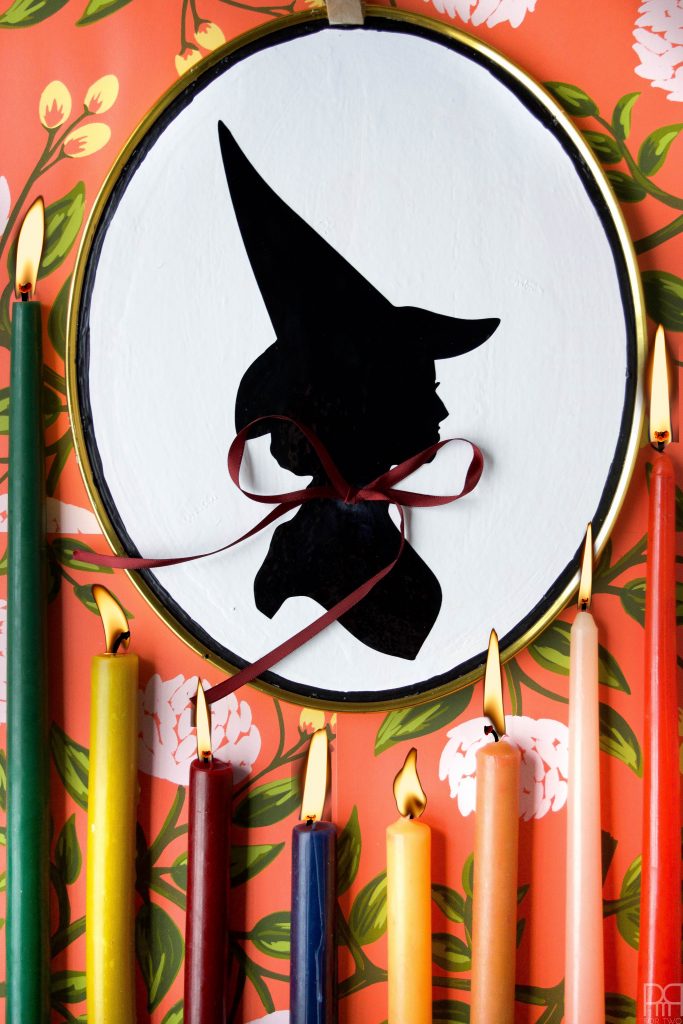
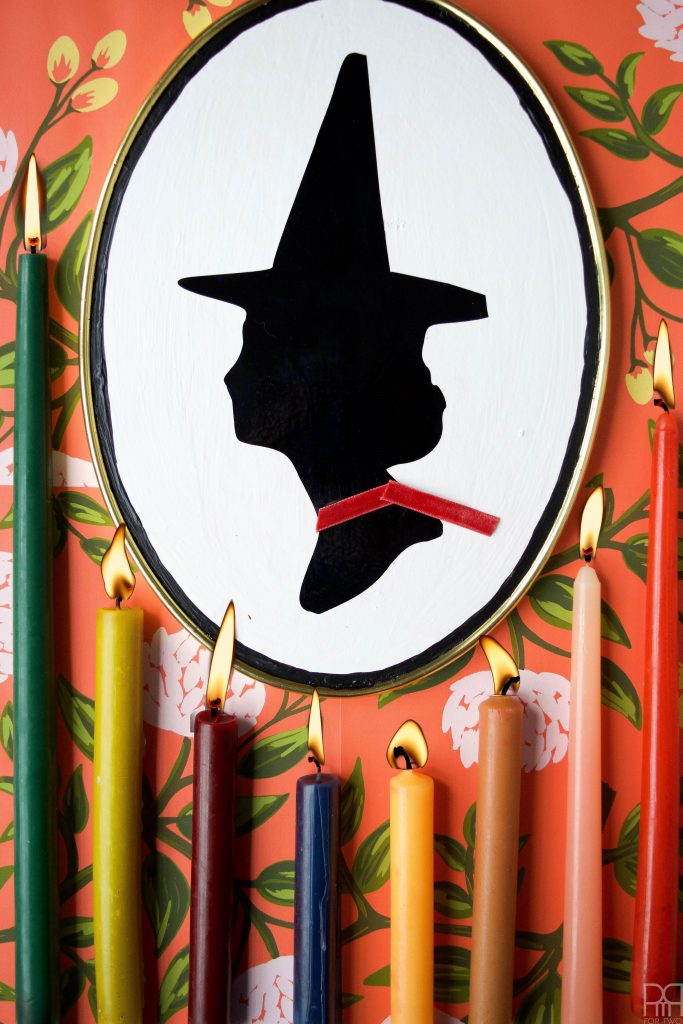
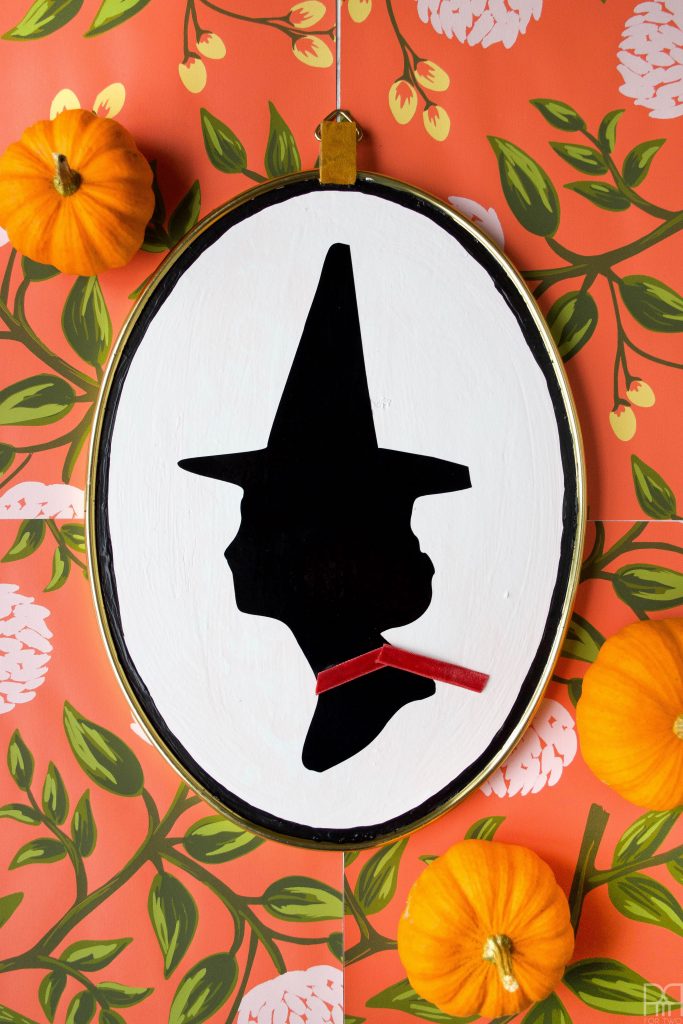
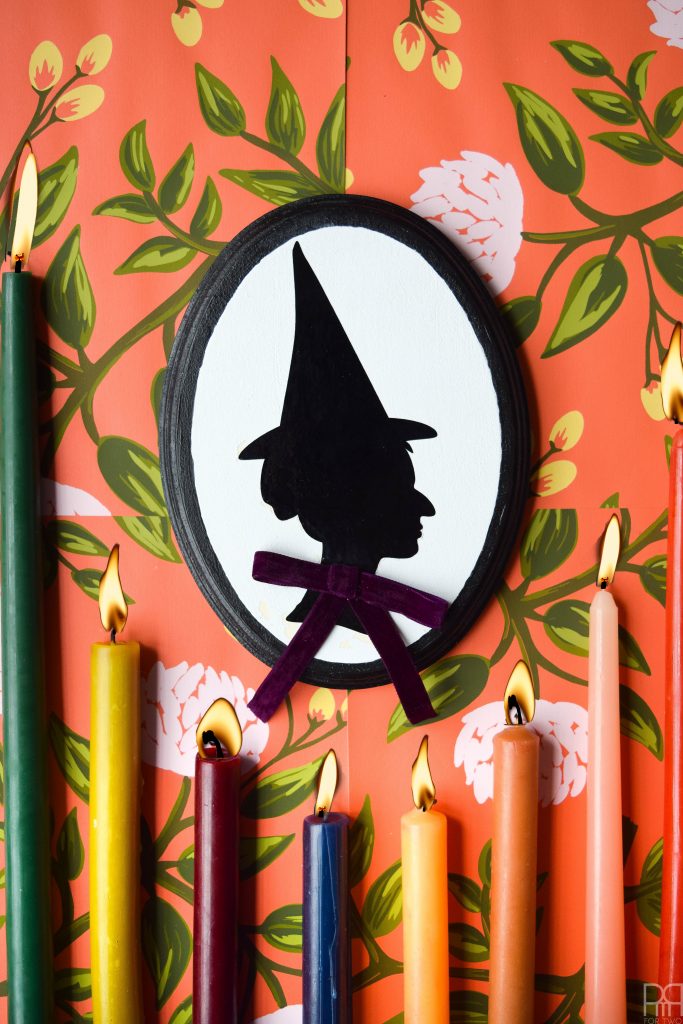
Paint your frames white. I used a simple sponge brush and applied 2 coats. If it’s a good paint it will dry quickly.
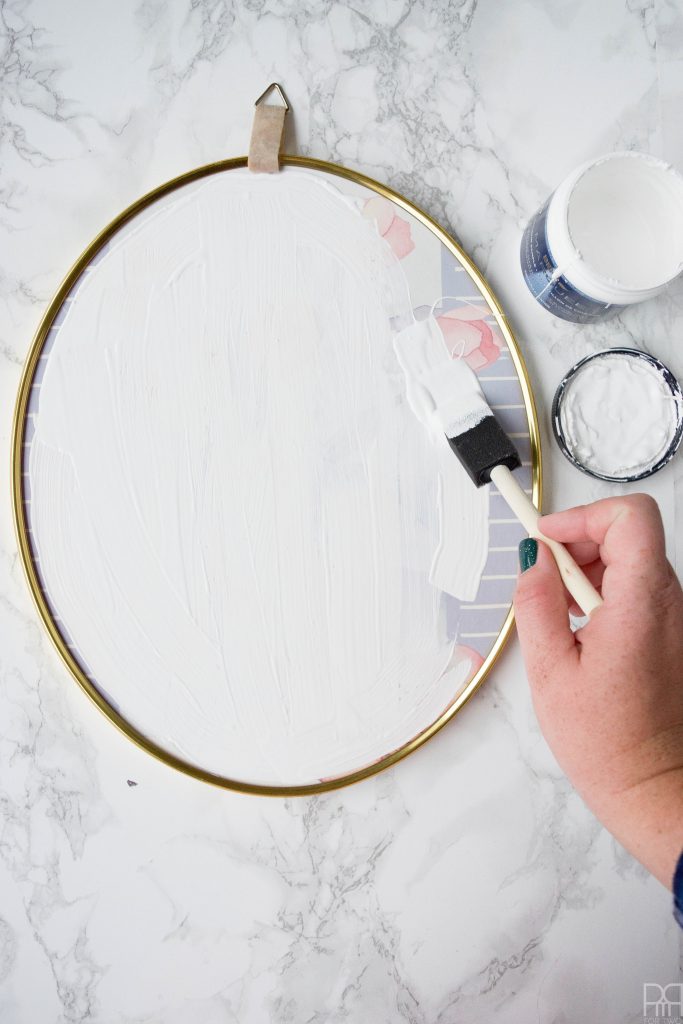
Using a finer paint brush, I applied a black border around the inside of the frame along the edges. You could add another border in gold or brown, or make it bigger. Whatever you want! For this step you can be as precise as you want to be. As you can see, my lines aren’t the straightest, but since these silhouettes are supposed to look “found” I didn’t want them to be too perfect.
Cut-out your with silhouettes using your Cricut Explore Air. p.s they just came out with new colours!
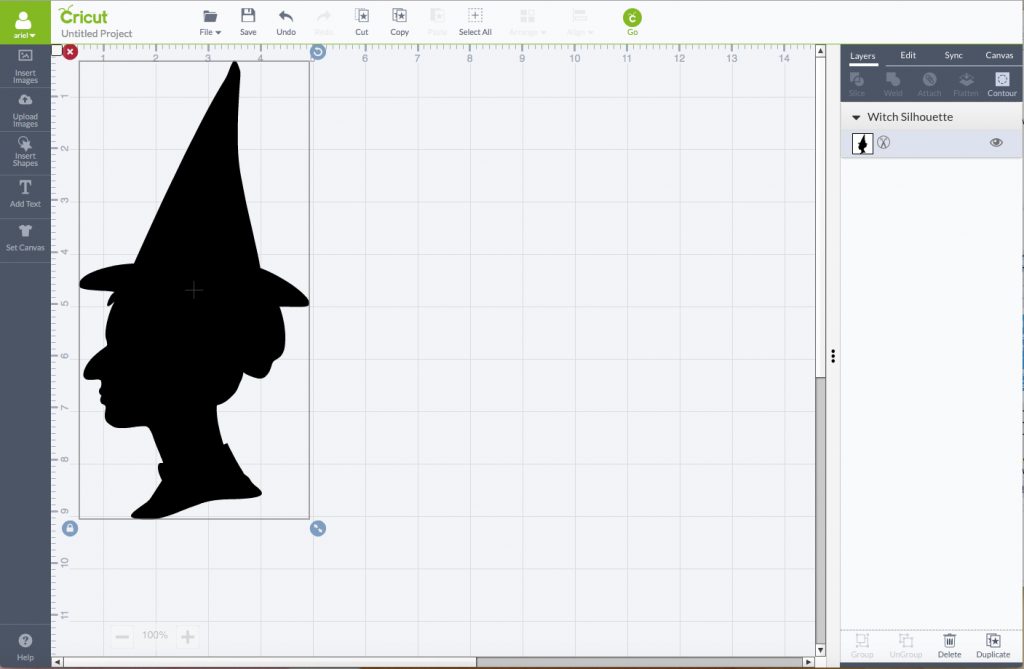
Don’t forget to scale it to the right size! My oval portraits were quite large, so I needed to cut 5″x 9″ but could have cut bigger.
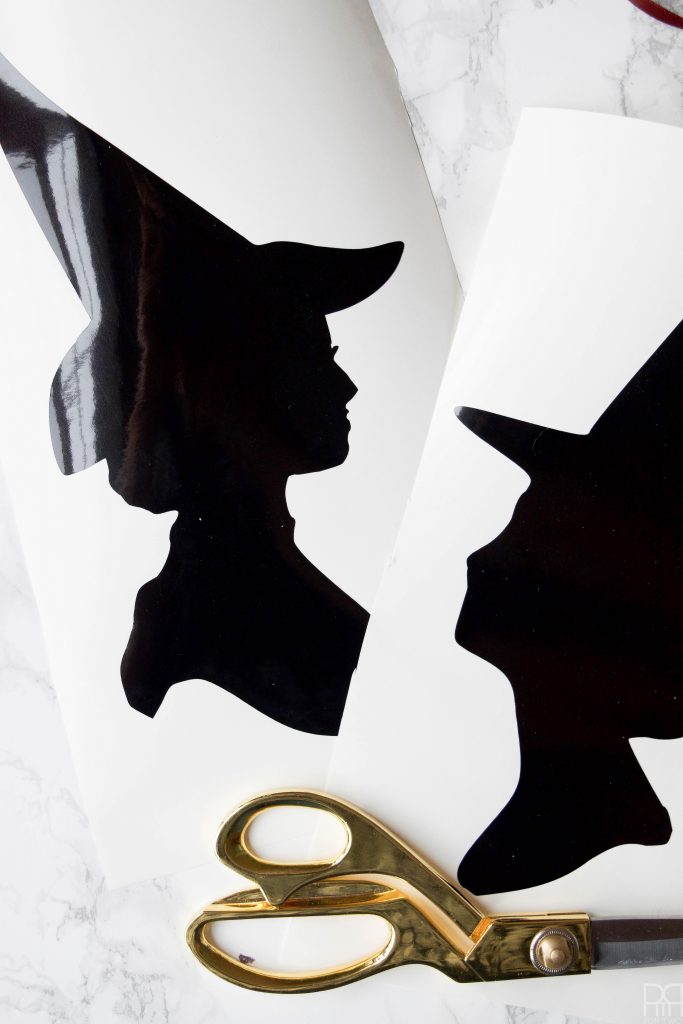
You’ll need a Circut Design Space account and a credit card to purchase the two witch silhouettes. Don’t forget to peel away the negative space vinyl. Using transfer tape or a tool of your choice, remove the witch silhouettes from their backing and place them on the dry frames.
OPTIONAL: If you don’t have a Cricut, you can always sketch your own witches and paint them in, or find a stencil to create your own DIY Witch Silhouette Decor.
Using ribbon scraps you can apply little foulards, bows etc. You get the point! I added the little pops of colours because it wouldn’t be “me” without them. I also have a ribbon collection that would impress Marie Antoinette.
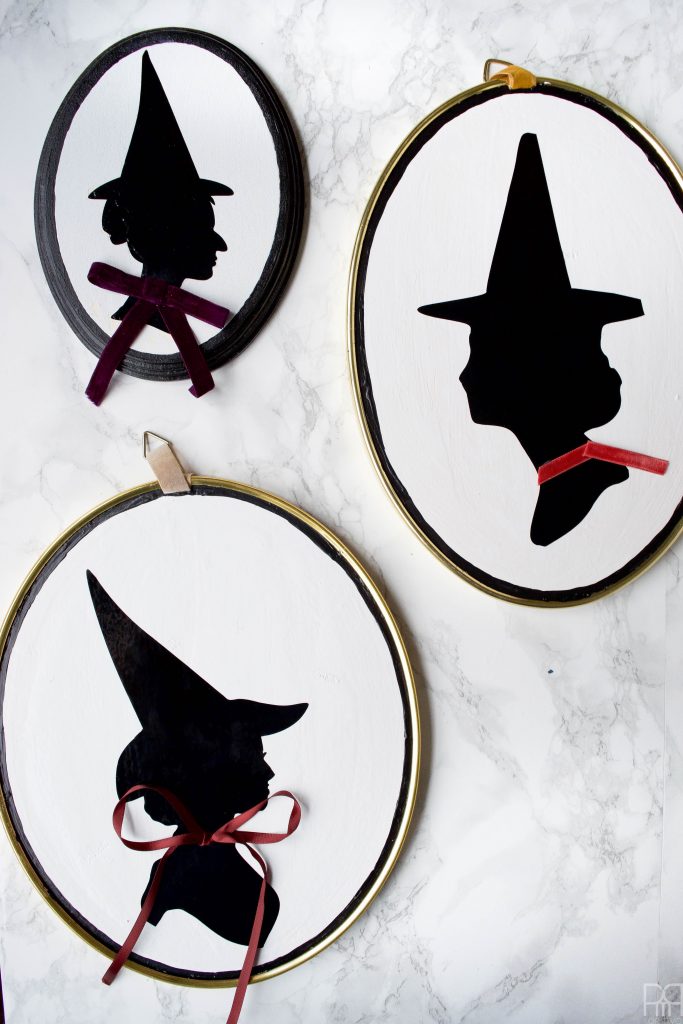
DIY Witch Silhouette Decor
Hang them in your house and among your decor. Go on! Lead the kids to believe your blood line narrowly escaped from Salem 😉 Meet the sisters – Margaret, Goodie, and Brumhilda. These ladies will put a spell on you.

How do they do it? Maybe a little magic.
What silhouettes would you put for your DIY Witch Silhouette Decor? I’ve also seen silhouettes with bat wings, Frankenstein, as well as a host of other spooky characters.


these are so fun, ariel! love the touch of ribbon, too!
Thank you! The ribbon was a perfect touch I think. Without it they’re too plain!
What a fun project!!! One of these days, I must get myself one of those fancy cutting machines so I can do awesome projects like this! 🙂
You should! I can pass on a contact there if you’re interested…? They’re exceptionally versatile, and I like that I can create my own designs.
So fun! I think I may be the only person that doesn’t own a cricuit! I think its about time I got one!
You should absolutely get one! They’re so versatile, I can’t believe I waited as long as I did to get one.
Sharing in my Halloween round up!!! LOVE!
Thanks girl! 🙂
Fabulous! And I love how you styled them with the candles and that beautiful wall covering!! Gorgeous!!!
Thanks girl! Would you believe it’s a flat-lay?
Thank you for the blog post. ???? I’ll be busy this week.
shoot me a pic if you make your own 🙂
These are awesome! It would be fun to turn silhouettes of your kids into witches and monsters. pinned!
Oh! I hadn’t even thought of that! Great idea!
Such a fun project! Love the ribbons you added too – it’s the perfect touch!
thanks 😉 Those are my favourite part!
This is a great idea for Halloween decor, something I haven’t seen before. Pinning!
Thank you so much Roxanne 🙂 I’d love to see your version if you end up creating some witches of your own.
So cute, I can’t wait to get a cutting machine! Pinning!
You absolutely need one! They’re so incredibly versatile
Adorable!
thanks girl!
Adorable! I love the contrast of the black and white, it feels like a great modern fall look.
Where did you find the SVG files? many thanks!
In the Cricut design space
These are insanely cute and just the right amount of spooky! I’m with you, I’d need to add color to mine too! I totally want to try this with my cricut.
You should! I made these years ago and still cherish them