For this month’s #12monthsofDIY we’re actually on time! Back in January we set out to hold the blog hop on the third Wednesday of every month, but we always end up pushing it back a week due to conflicts and schedules. This month we have collectively got our sh*t together! Huzzah! So if you’re thinking “Hey, I saw your painted glassware post like 3 weeks ago. Why so soon?!” you’re not crazy – we’re just on time.
This month’s project is centred around spray paint. You’ve seen our Instagram posts, you know about the challenge, so don’t forget to follow along with the hashtag #junespraypaint and share your projects with us. We’ll all regram our favourite on the 30th!
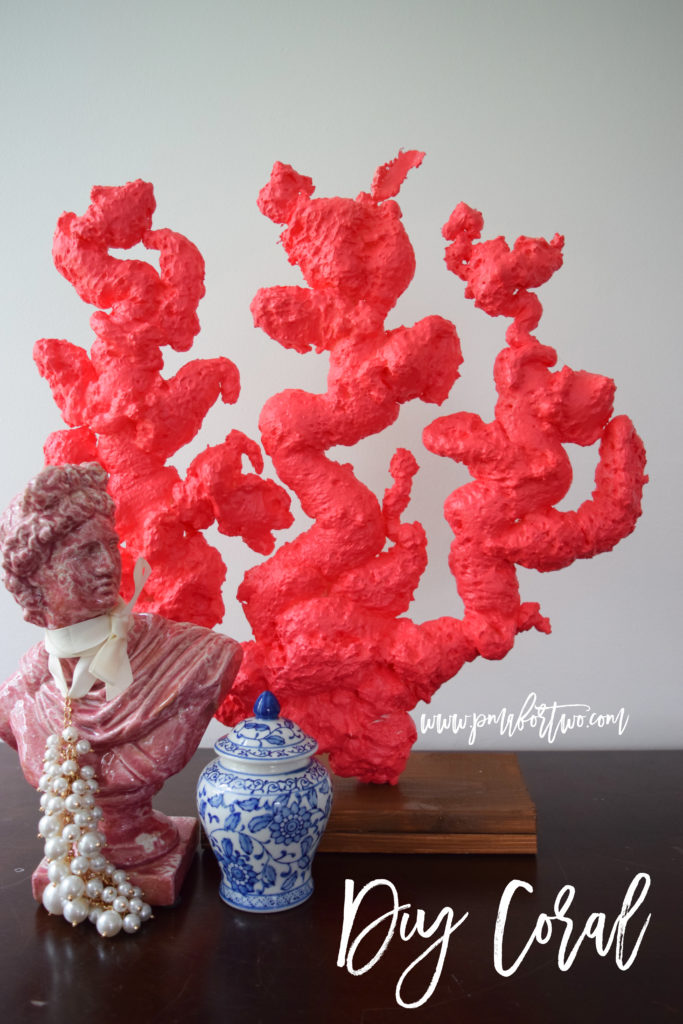
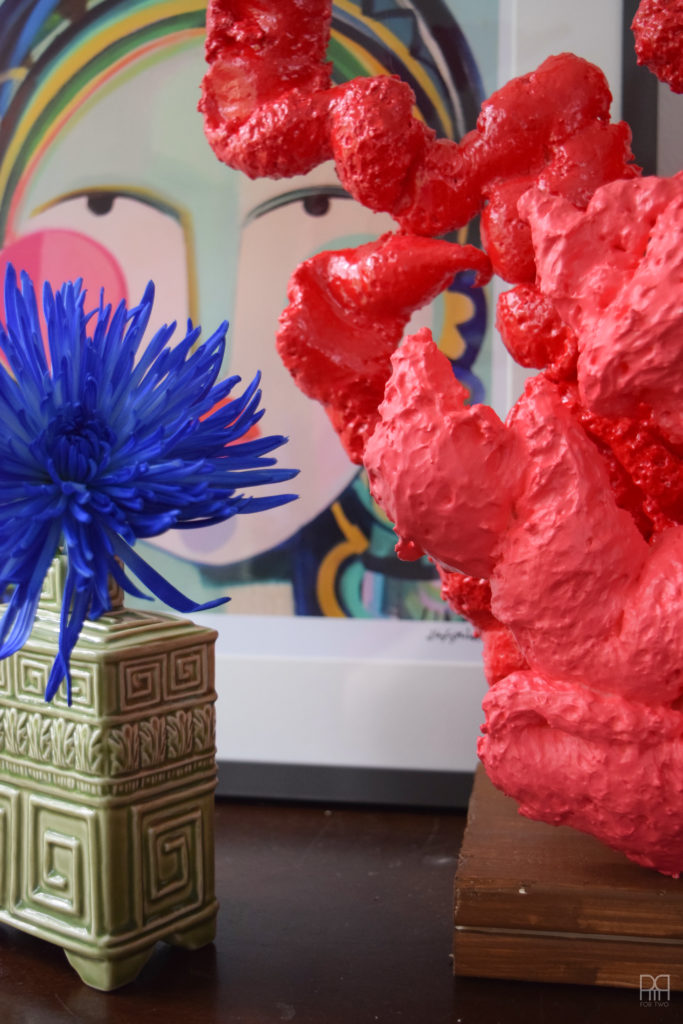
For this month’s project I had originally planned to do some really cool spray painted cushions for our harvest table, but I don’t have the time or the money at the moment given that our household got loaded into a van yesterday for our move, so that’ll be another project for a later date. Instead, I decided to DIY a decor piece I’ve wanted for a while; faux coral!
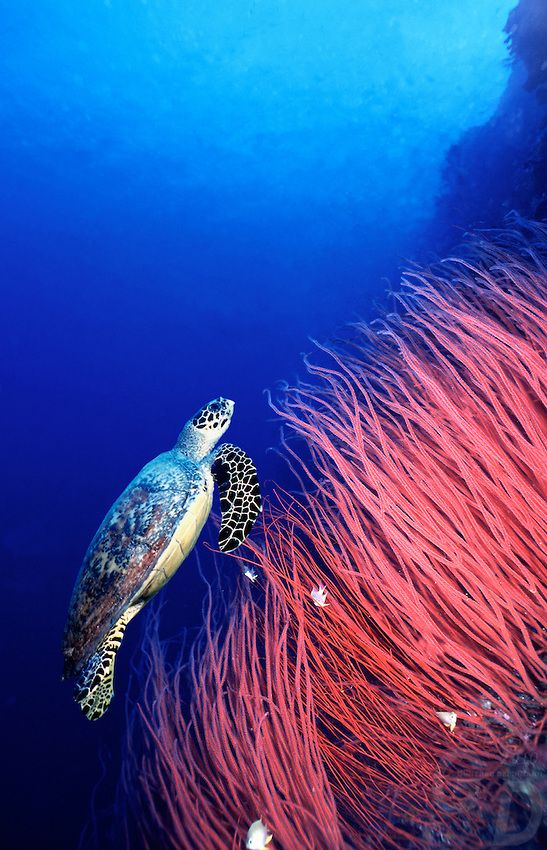
Image credit Gunther Deichmann
Image source unknown
I had seen some previous versions of this craft, but they called for a brush and paint – not spray paint – and they never included a wood base like mine. If I had the time I would up my game and make a proper acrylic base using any number of acrylic blocks that you can find on amazon.
This DIY took me about 3 hours to do, but that includes drying time, and it was surprisingly affordable.
Materials required
A can (or two) or insulating spray foam
Wax paper
Wooden dowels (or metal, depending on your end game)
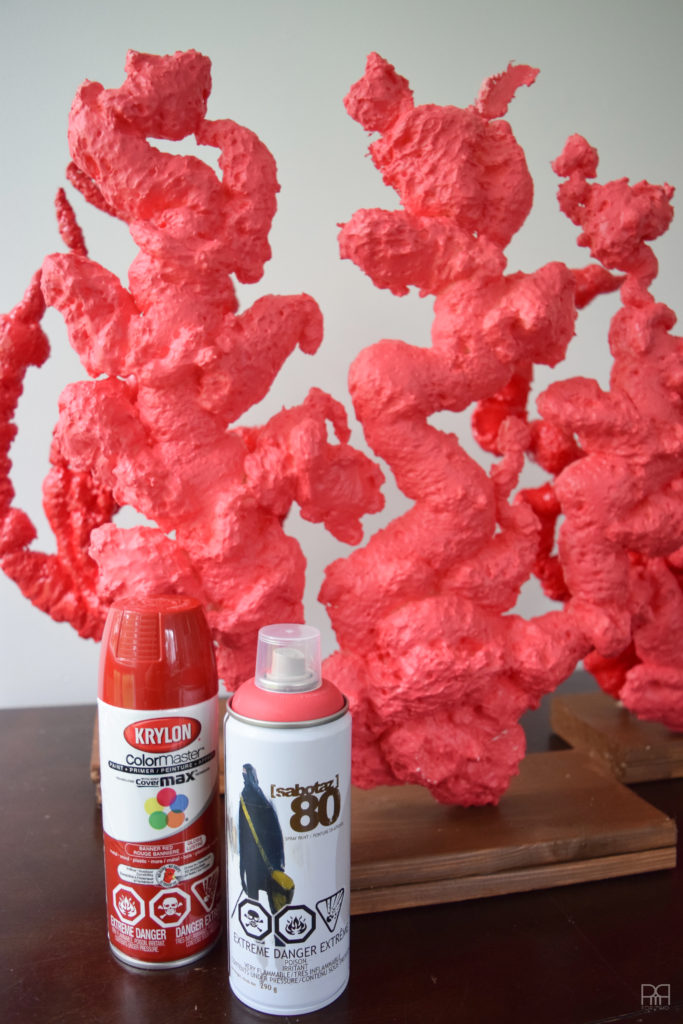
Spray paint in various colours (I chose red and coral pink)
Wood base (or acrylic or cement)
Hand saw
Wood Glue
Instructions
Step 1: Clear your area. I sprayed my designs while they rested on the floor, but I then moved them up onto the table to dry. Do what you gotta do, but make sure you have space for it to dry in peace.
Step 2: Lay down two sheets of wax paper so that they overlap, and place the dowel on the paper.
Step 3: You’ll be spraying the foam in the design you want, on the wax paper, and making sure to cover the dowel. You’ll be using the dowel to hold the piece of coral in place and to insert it into the wood block.
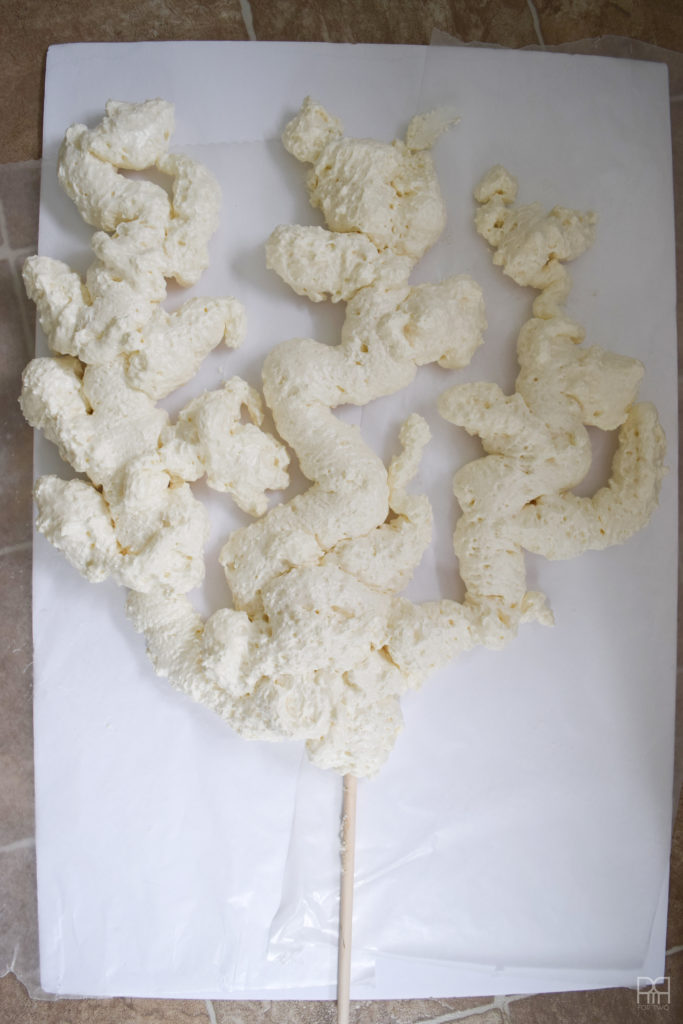
Step 4: Spray the foam in a natural form, you can chose to make your coral look like a classic branch, or give it a more fluid design.
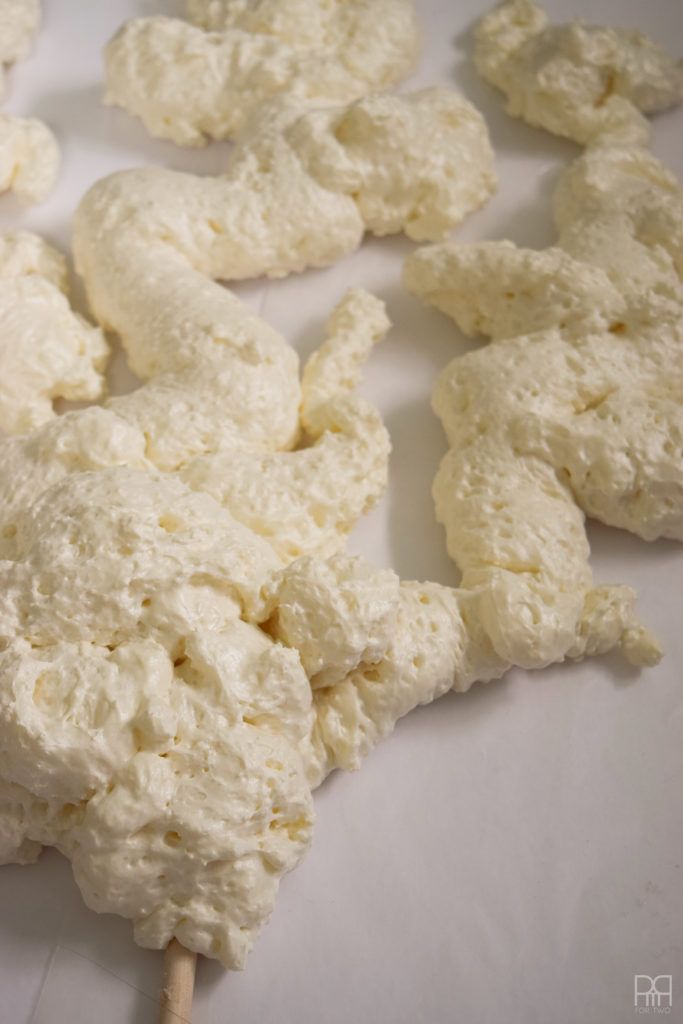
I did both and highly recommend it. It looks more natural and is visually interesting.
Step 5: Let the spray foam dry. My can said it would take about an hour, but I left it for 4 hours before doing anything to it.
Since we’re spraying in relatively thick gobs, sometimes it may take longer for the foam to stabilize.
Step 6: Once you’re sure the foam is dry, slowly peel back the wax paper (it should come right off).

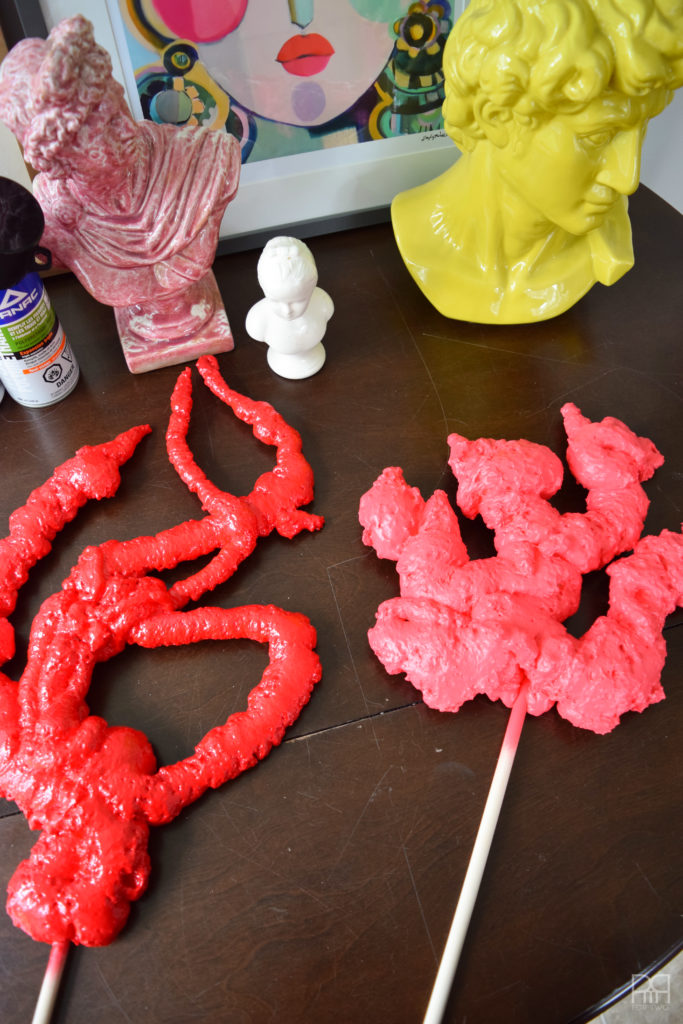
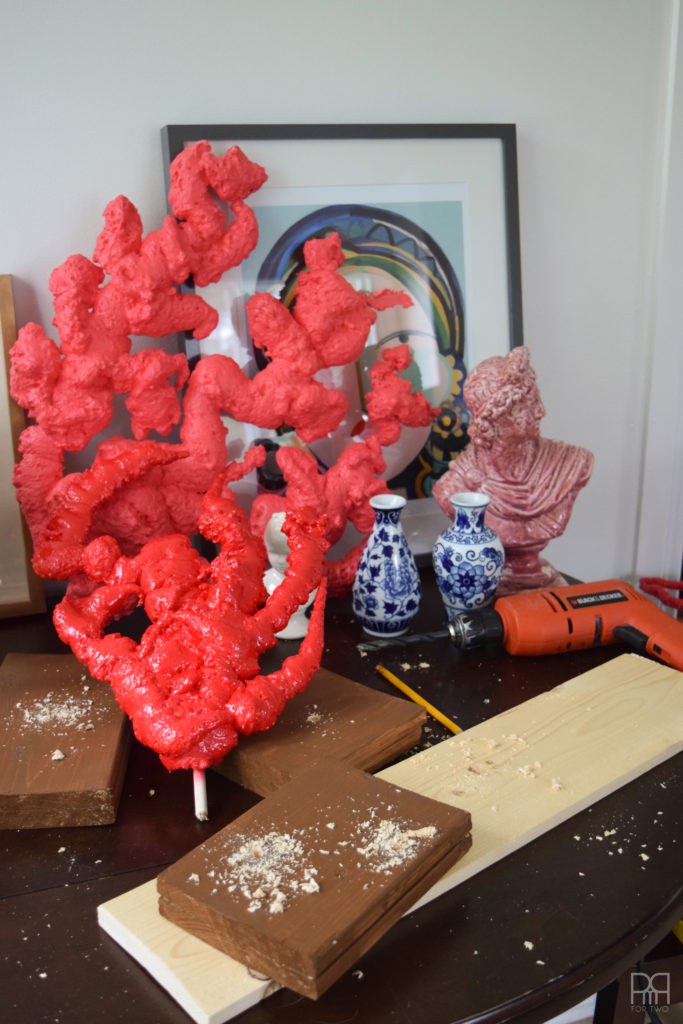
Step 7: Spray paint your foam structures in whatever colours you want! Like I said above, I chose a fire engine red and a coral pink.
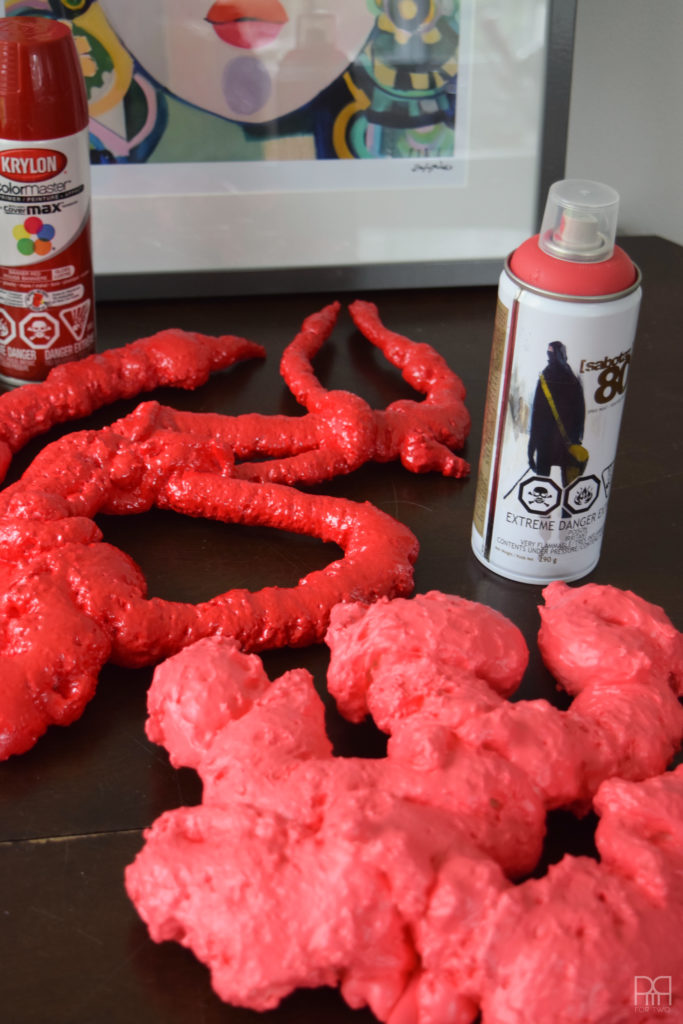
The Krylon is available at your local hardware store, but the coral pink brand was purchased at Omer de Serres, it’s a particular brand to that chain of stores. Although any good crafting store will have a more complete range of colours.
Step 8: Make sure you got some good coverage and then let dry.
Step 9: During all of this, make sure you’ve assembled your base and prepped it.
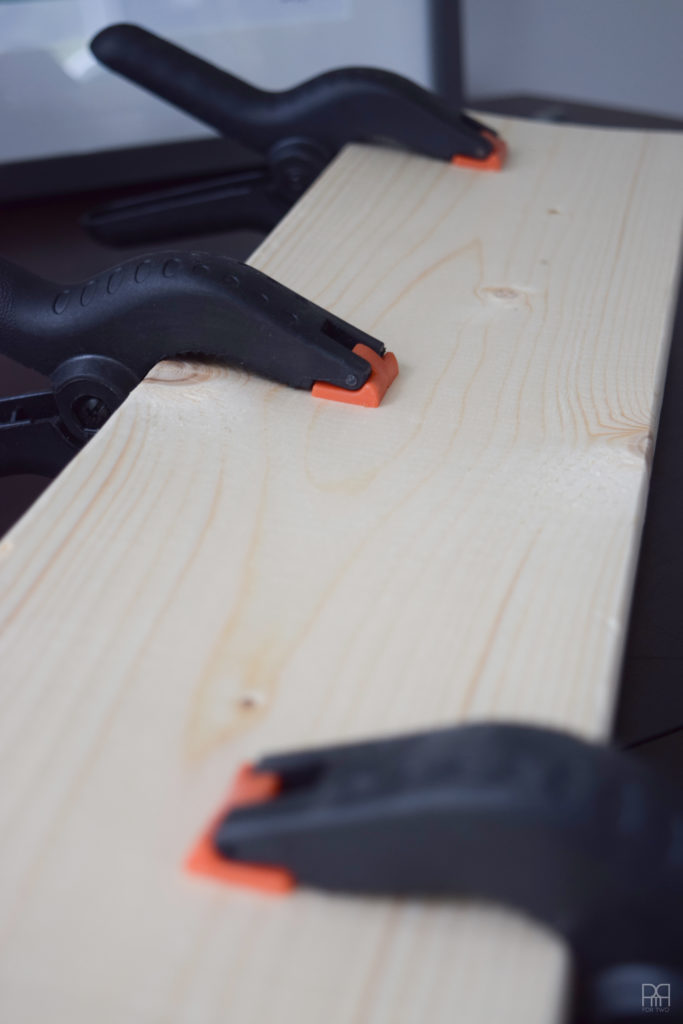
In my case, I had two 1x4s kicking around, so I glued them together, stained them, cut them into three and then drilled holes into them for the dowels.
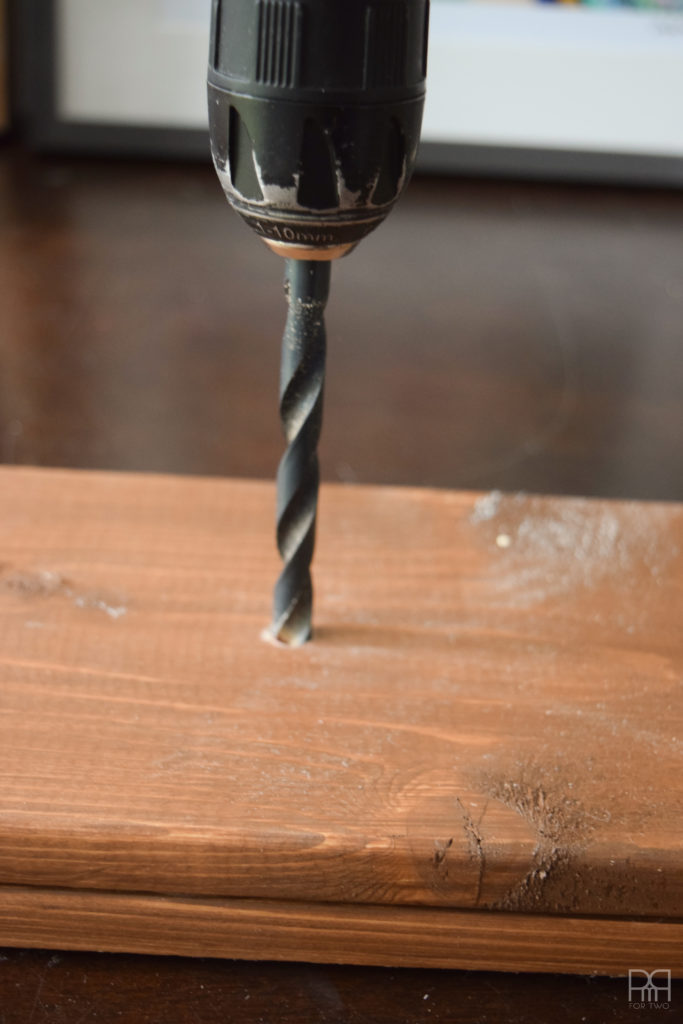
Step 10: Using the saw, cut the dowels down to the correct length so that you can insert them into your base without seeing too much dowel.
Step 11: Add a little dab of wood glue into the hole before inserting the dowels.
Step 12: Voila!

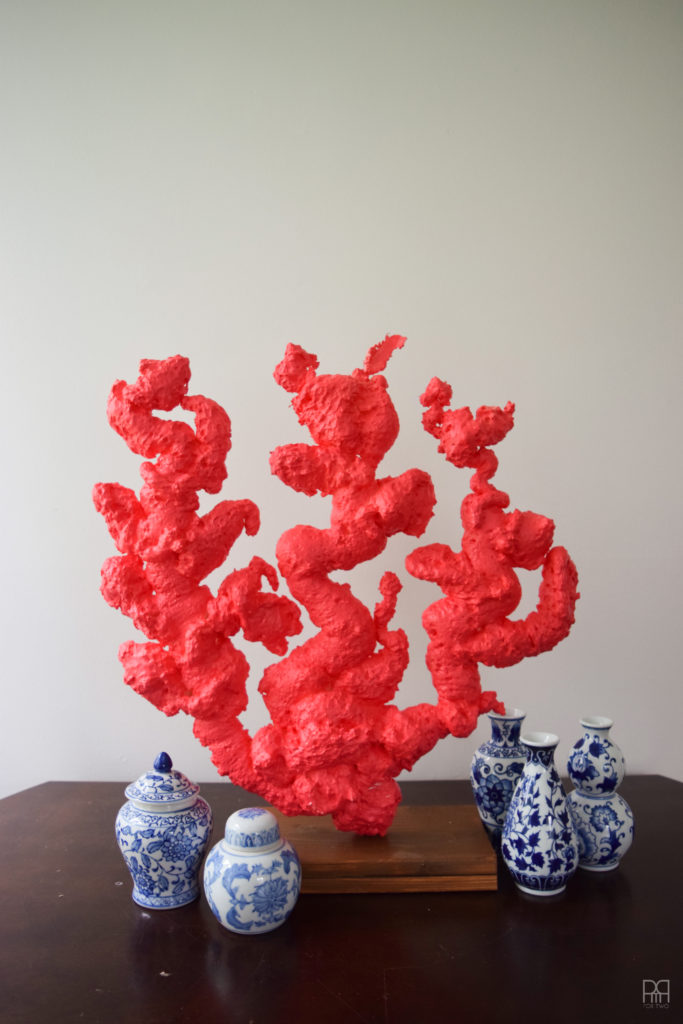
I’ve got mine styled and ready to go! If they survive the move they’ll be going a little all over the place, and one will get an honorary resting place in our bathroom.
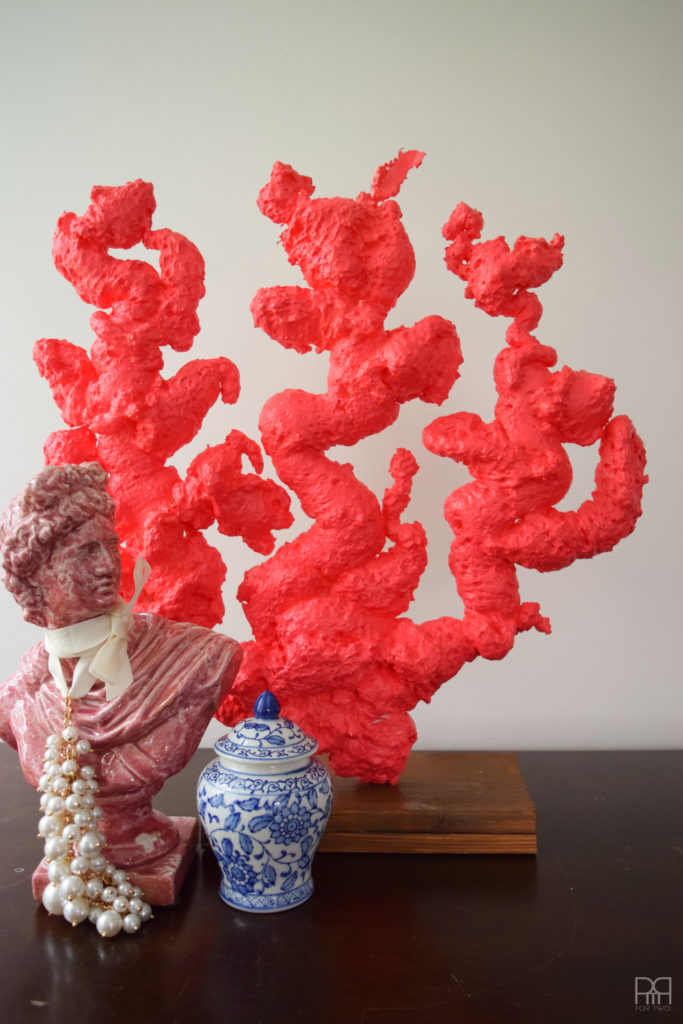

You can see that I didn’t quite get the dowel short enough on this one… maybe next time! Or, I could spray around the dowel with foam and then paint over it. But that sounds like a project for another day!

One this block I included one pink and one red piece of coral to create a more diversified palette. I love the end product!
If they don’t survive the move it’s not the end of the world. A can of spray foam is about $4 and I already owned the paints, so we’re good!

DIY Spray Painted Terra Cotta Planter from Woman in Real Life
DIY Pencil Holder from Love Create Celebrate
Spray Paint Wicker Chair Makeover from Life is a Party
Recycled Outdoor Plant Pot Using Spray Paint from Time with Thea
Upcycling Outdoor Home Decor with Spray Paint from Sustain My Craft Habit
Painted Closet Doors from Fresh Crush
Gold Straw Himelli Plant Holders from Brooklyn Berry Designs
Repurposed Antique Crib DIY Secret Garden Gate from Vin’yet Etc.
DIY Coral from PMQ for Two <– that’s me! YOU ARE HERE
DIY Spray Painted Pink Living Room Side Table from Woman in Real Life
How to Update Your Home on a Budget with Spray Paint from The DIY Mommy
DIY Mirror and Photo Frame from Fresh Crush

Ariel I am so impressed with your creativity and your style! Bravo for another amazing project and it looks fabulous in your home decor!
Thank you very much Thea 🙂 High praise coming from you!
Very bold colours and design! Love it! You could do this in any colour and it would look great!
Thank you! I would love to see your take on DIY coral 😉
This looks like so much fun! I just quizzed my hubby to see if he could guess what the coral décor was made of and he couldn’t! Very creative idea.
muahahah! You know it was a good idea if I stumped a hubby!
Great way to get the look for less. Love the bold colours too. Best of luck with your move!
Thanks Dannyelle!
That is super cool! I would have never thought to use spray foam. And I love the colours you chose!
Thanks! The spray foam was a stroke of genius and a cost-effective one at that too!