PMQ for two

Bold, Bright and Colourful Home Decor & DIYs

  • HOME
  • ABOUT ME
    • WORK WITH ME
    • POLICIES
  • BUSINESS BABES
  • PROJECT GALLERY
    • backyard
    • bathroom
    • bedroom
    • dining room
    • kitchen
    • office
    • Nursery
    • living room
    • DIY and craft projects
    • Fall
    • Halloween
    • Christmas
    • spring
    • easter
    • Cinco de Mayo
    • Summer
    • Cocktails
    • Decor
    • Parties & entertaining
    • recipe
    • Furniture DIY
  • PRESS
  • SHOP
  • WHAT IS A PMQ?
    • THE DUPLEX
    • The Row House Tour

Black And White Stripe Removable Wallpaper

March 13, 2018~ bathroom, DIY and craft projects, Room design

Where has the time gone?! I blinked and we’re a week into the Primp and Pamper bathroom challenge // here //, hosted by Jewel of Jeweled Interiors. We’ve got 4 weeks to revamp a bathroom using some fabulous products. It’s like a mini ORC! This week I put up a black and white stripe removable wallpaper using Tempaper‘s fabulous mini stripes in black. MAN was I sweating that, but once it came down to it, it was actually much easier than I thought. So read on! I wanna tell you about it.

*Tempaper sponsored this post, but all thoughts are my own. Thank you for supporting the brands that make PMQ for two possible.

Ever wanted to go for a bold striped wall, but were afraid of the commitment? With Tempaper's stripes, you can easily create your own pattern. The best part is that you can remove and re-position things!

I planned my whole bathroom update around a bold black and white stripe. In case you haven’t noticed, I’ve been trying to bring that pattern into each room in the house, and this is where I’m going for broke! Tempaper is a lovely temporary wallpaper company that I ALMOST worked with last summer, but I totally fudged my opportunity and ended up passing it along to another. I reached-out for this space and they were more than happy to send me a few rolls.

As you know, we live in a rental, so everything I do has to be undone when we leave. This means I am the prime candidate for quality temporary wallpaper. It’s exactly what I got with Tempaper. If this installation was overly complicated there would be like a million steps, but it’s really simple once you get down to it.

Before we get to the installation though, I wanted to quickly show you guys what my space currently looks like.

Ever wanted to go for a bold striped wall, but were afraid of the commitment? With Tempaper's stripes, you can easily create your own pattern. The best part is that you can remove and re-position things!

Ever wanted to go for a bold striped wall, but were afraid of the commitment? With Tempaper's stripes, you can easily create your own pattern. The best part is that you can remove and re-position things!

Ever wanted to go for a bold striped wall, but were afraid of the commitment? With Tempaper's stripes, you can easily create your own pattern. The best part is that you can remove and re-position things!

Ever wanted to go for a bold striped wall, but were afraid of the commitment? With Tempaper's stripes, you can easily create your own pattern. The best part is that you can remove and re-position things!

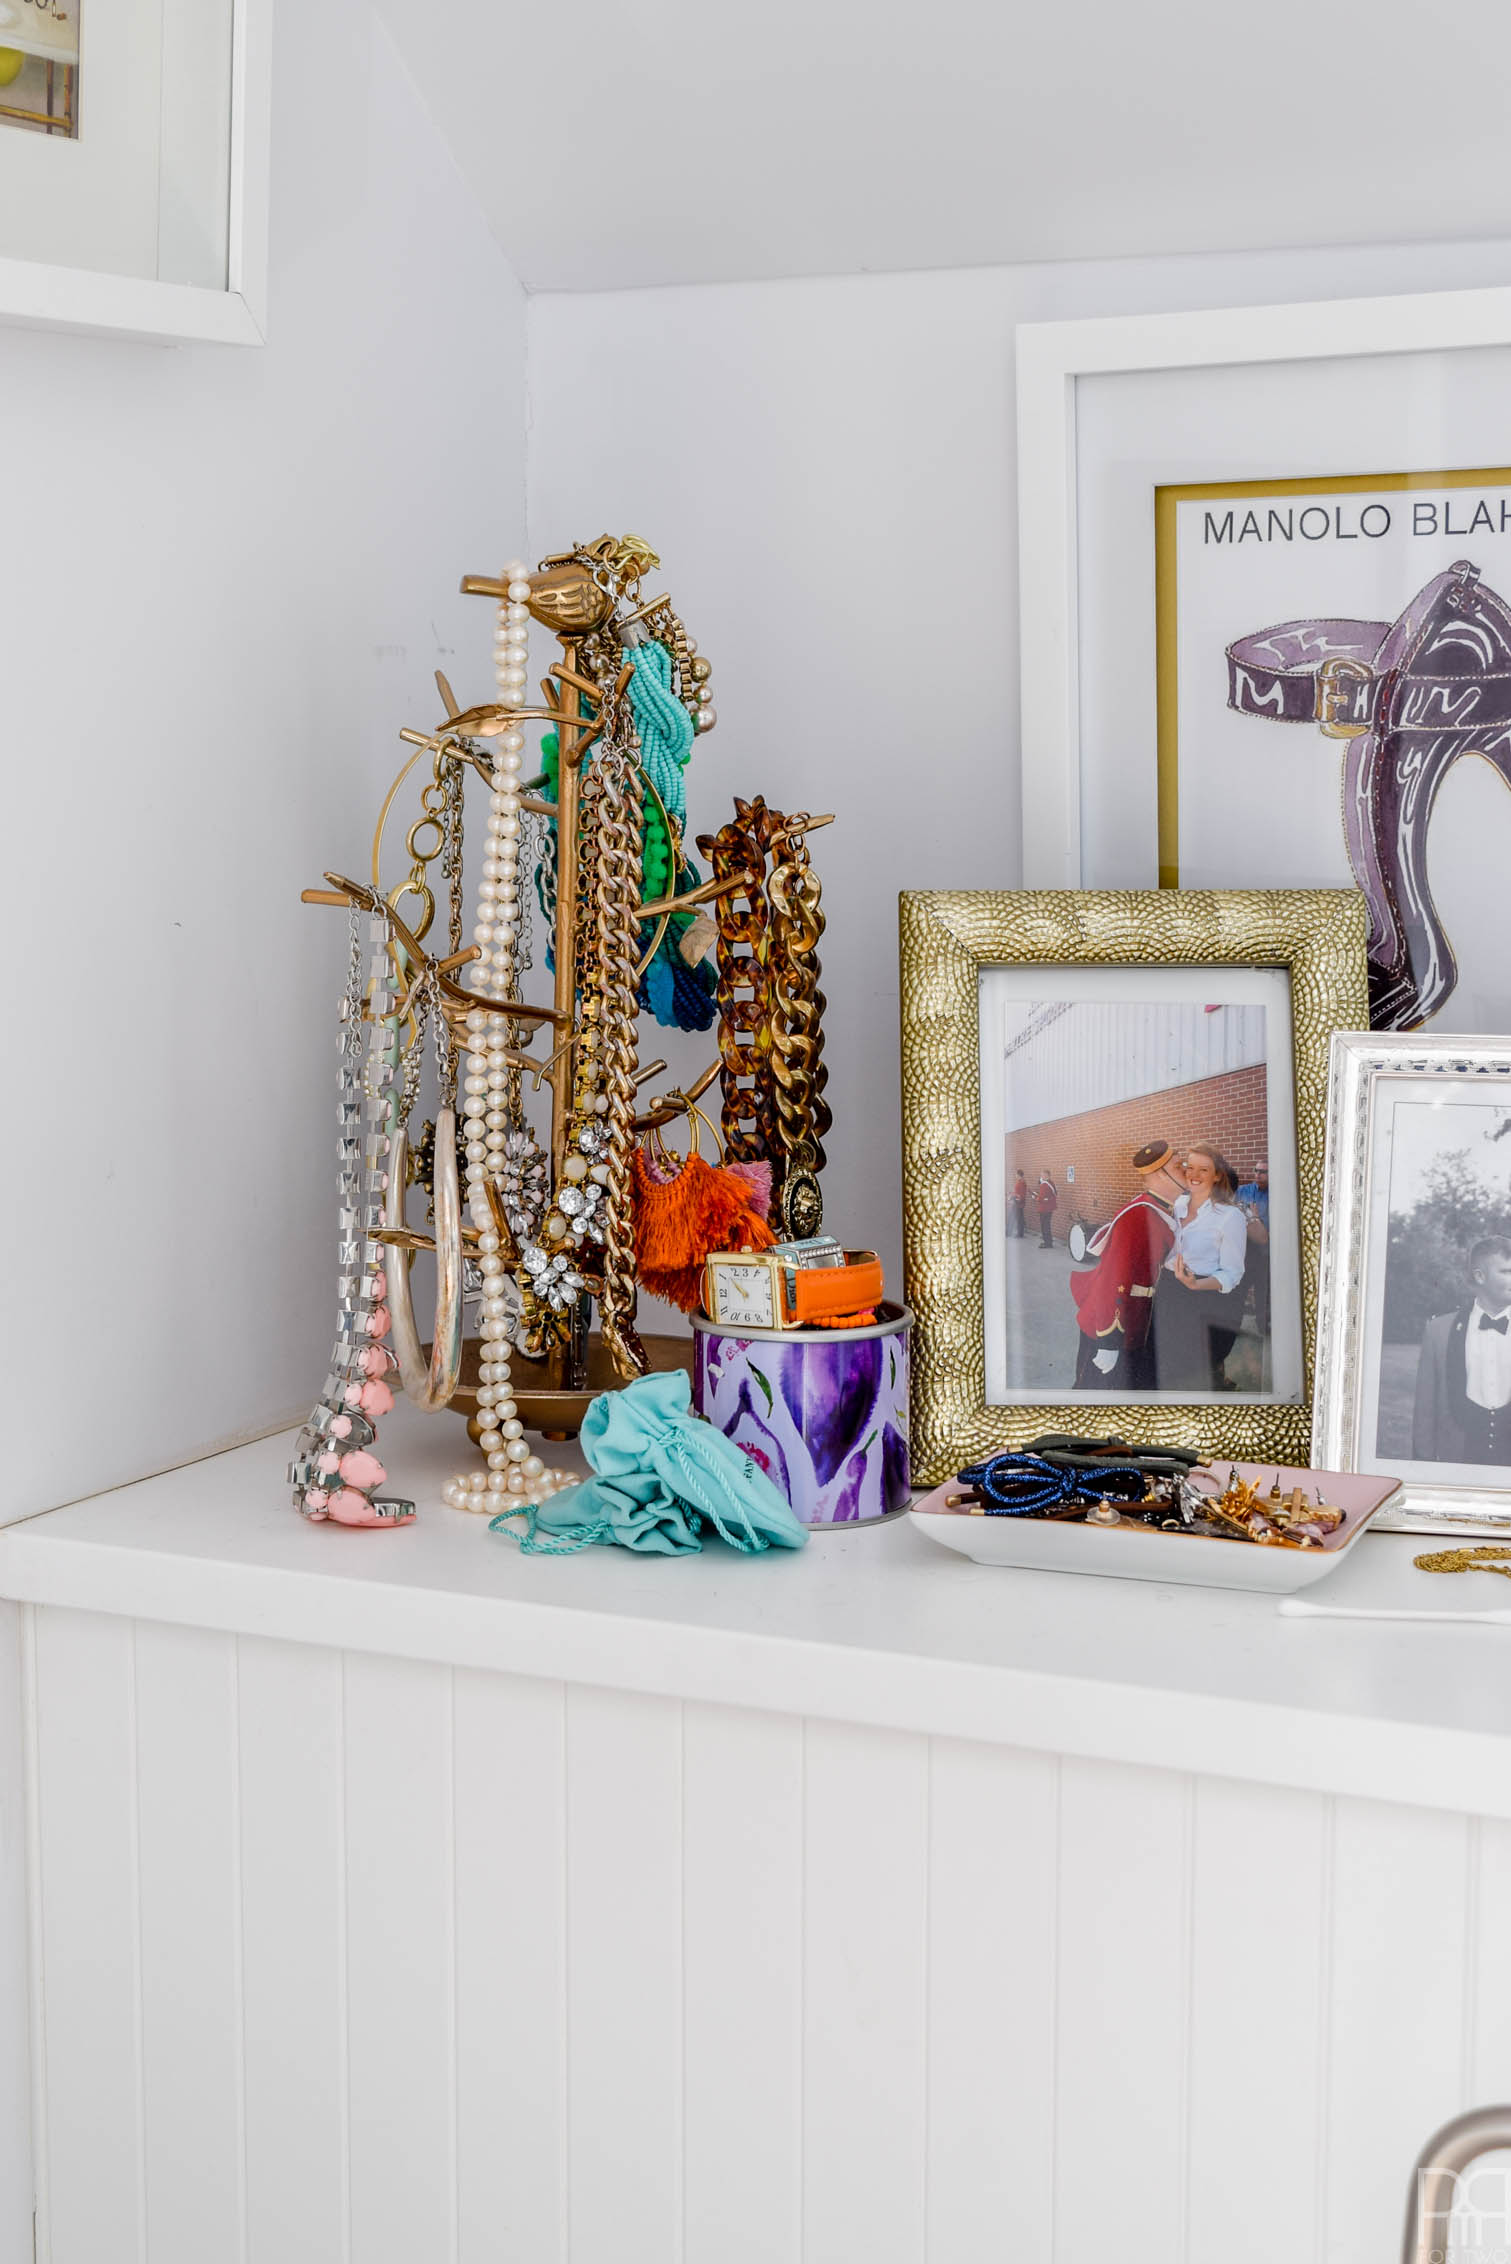
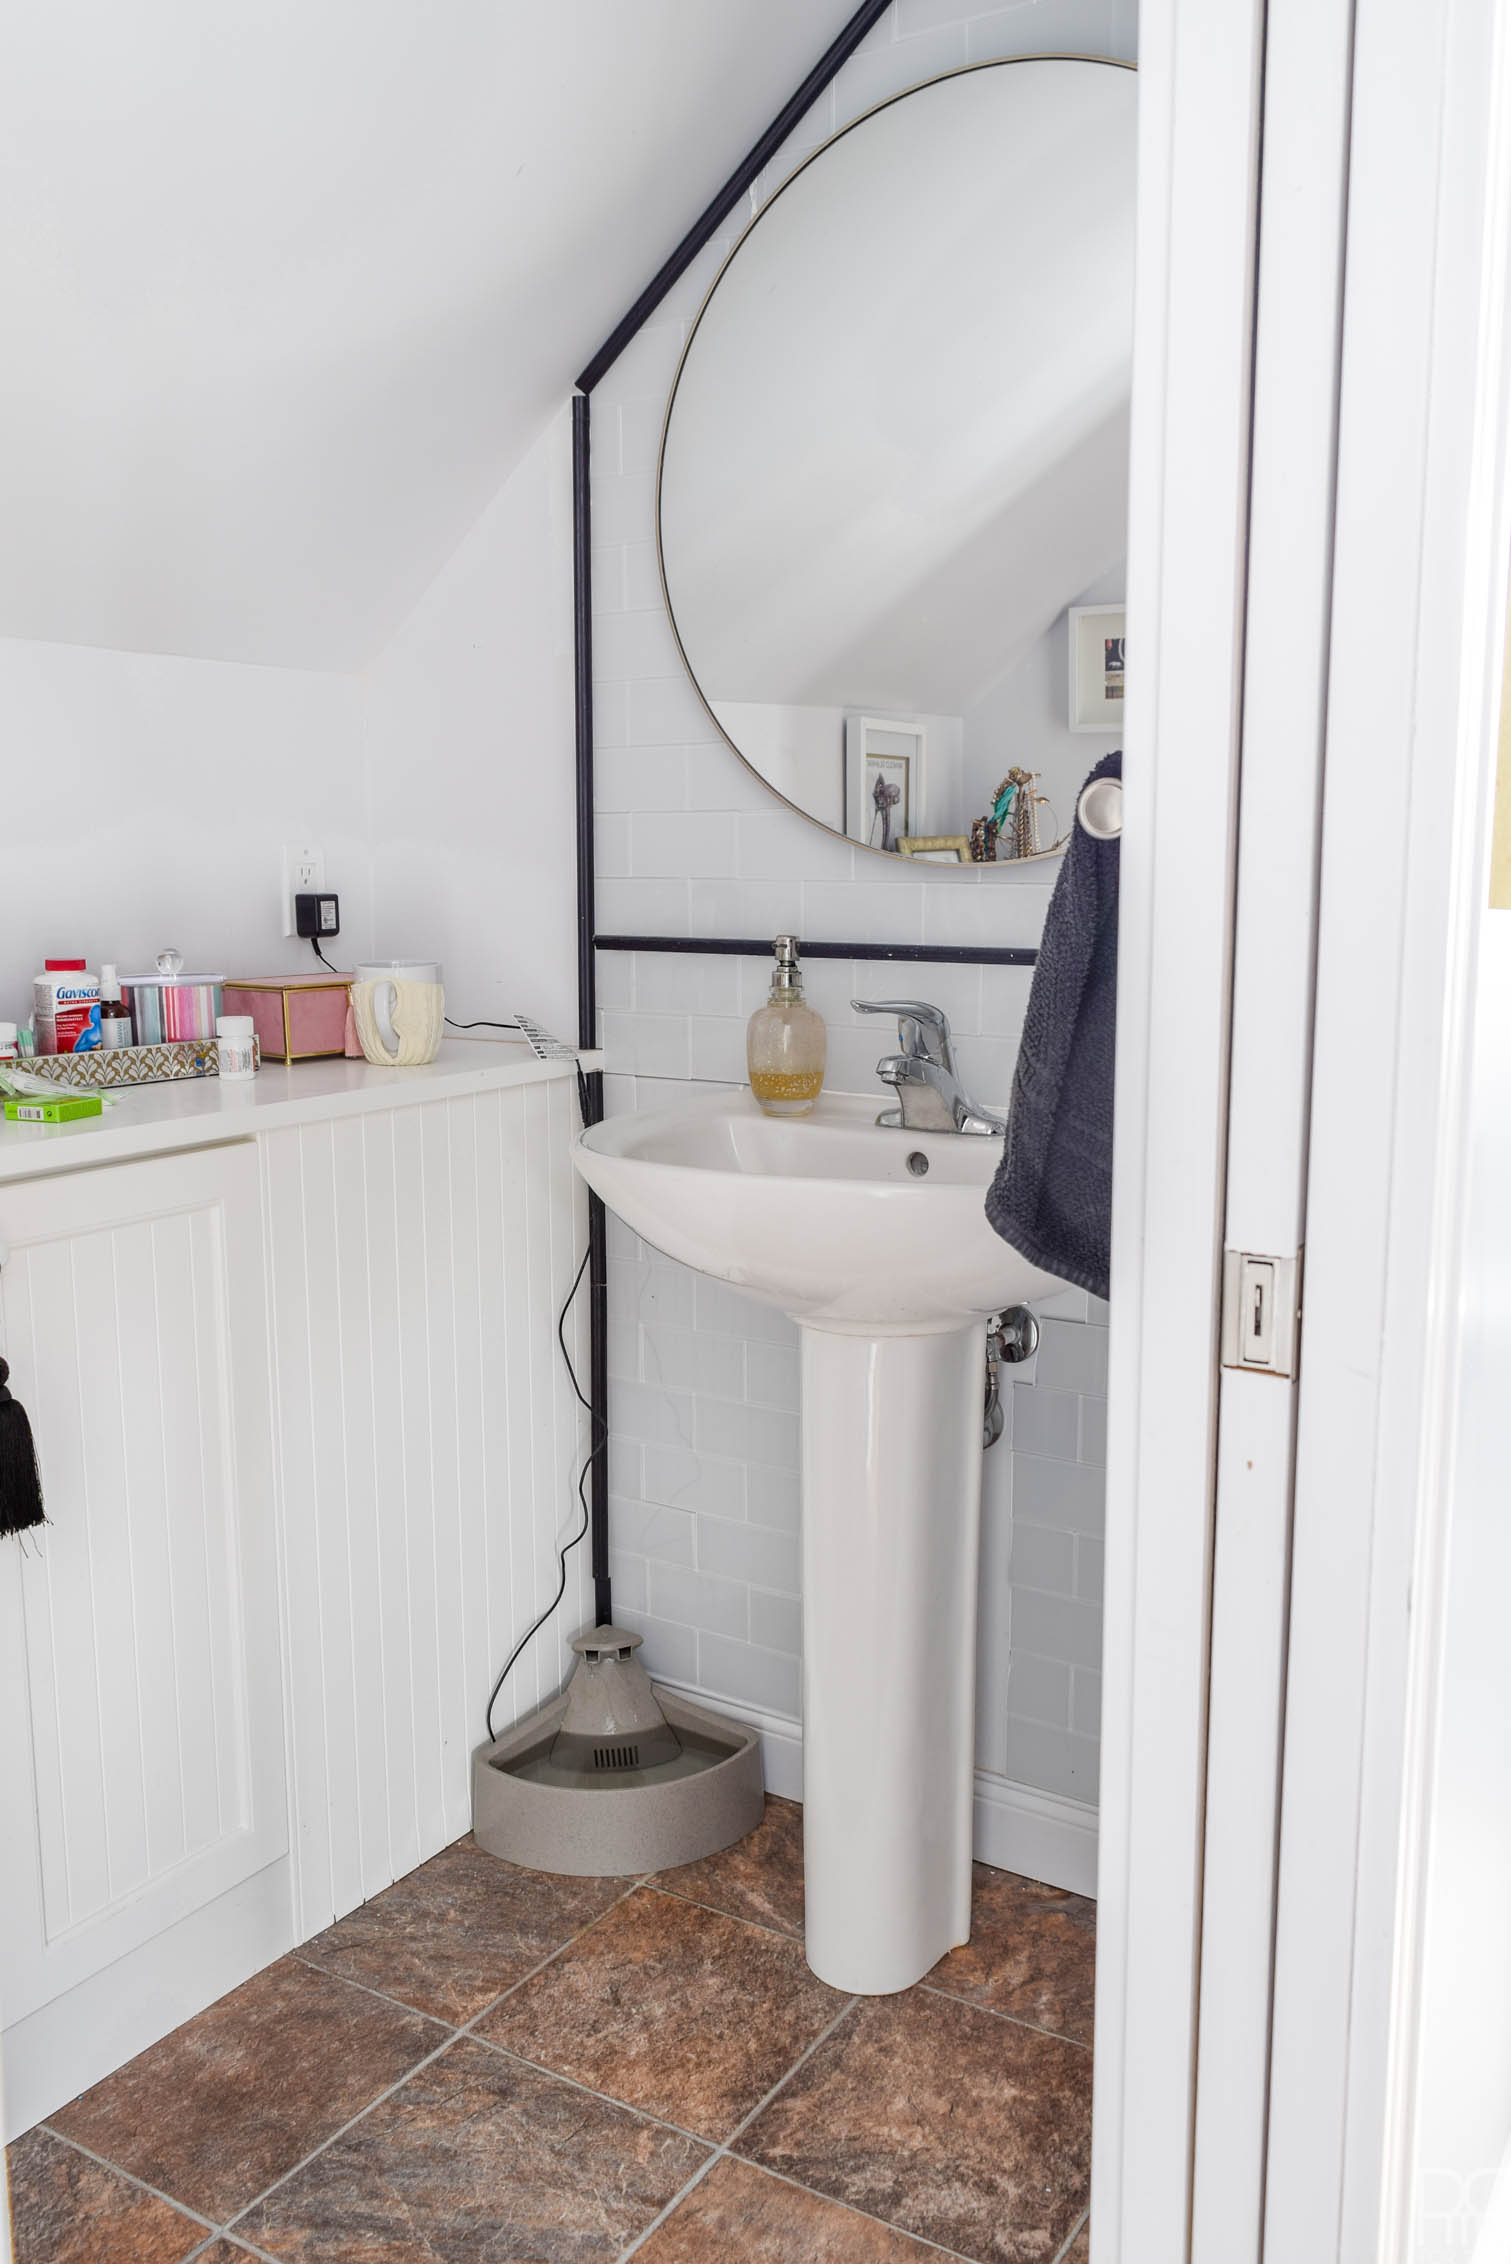
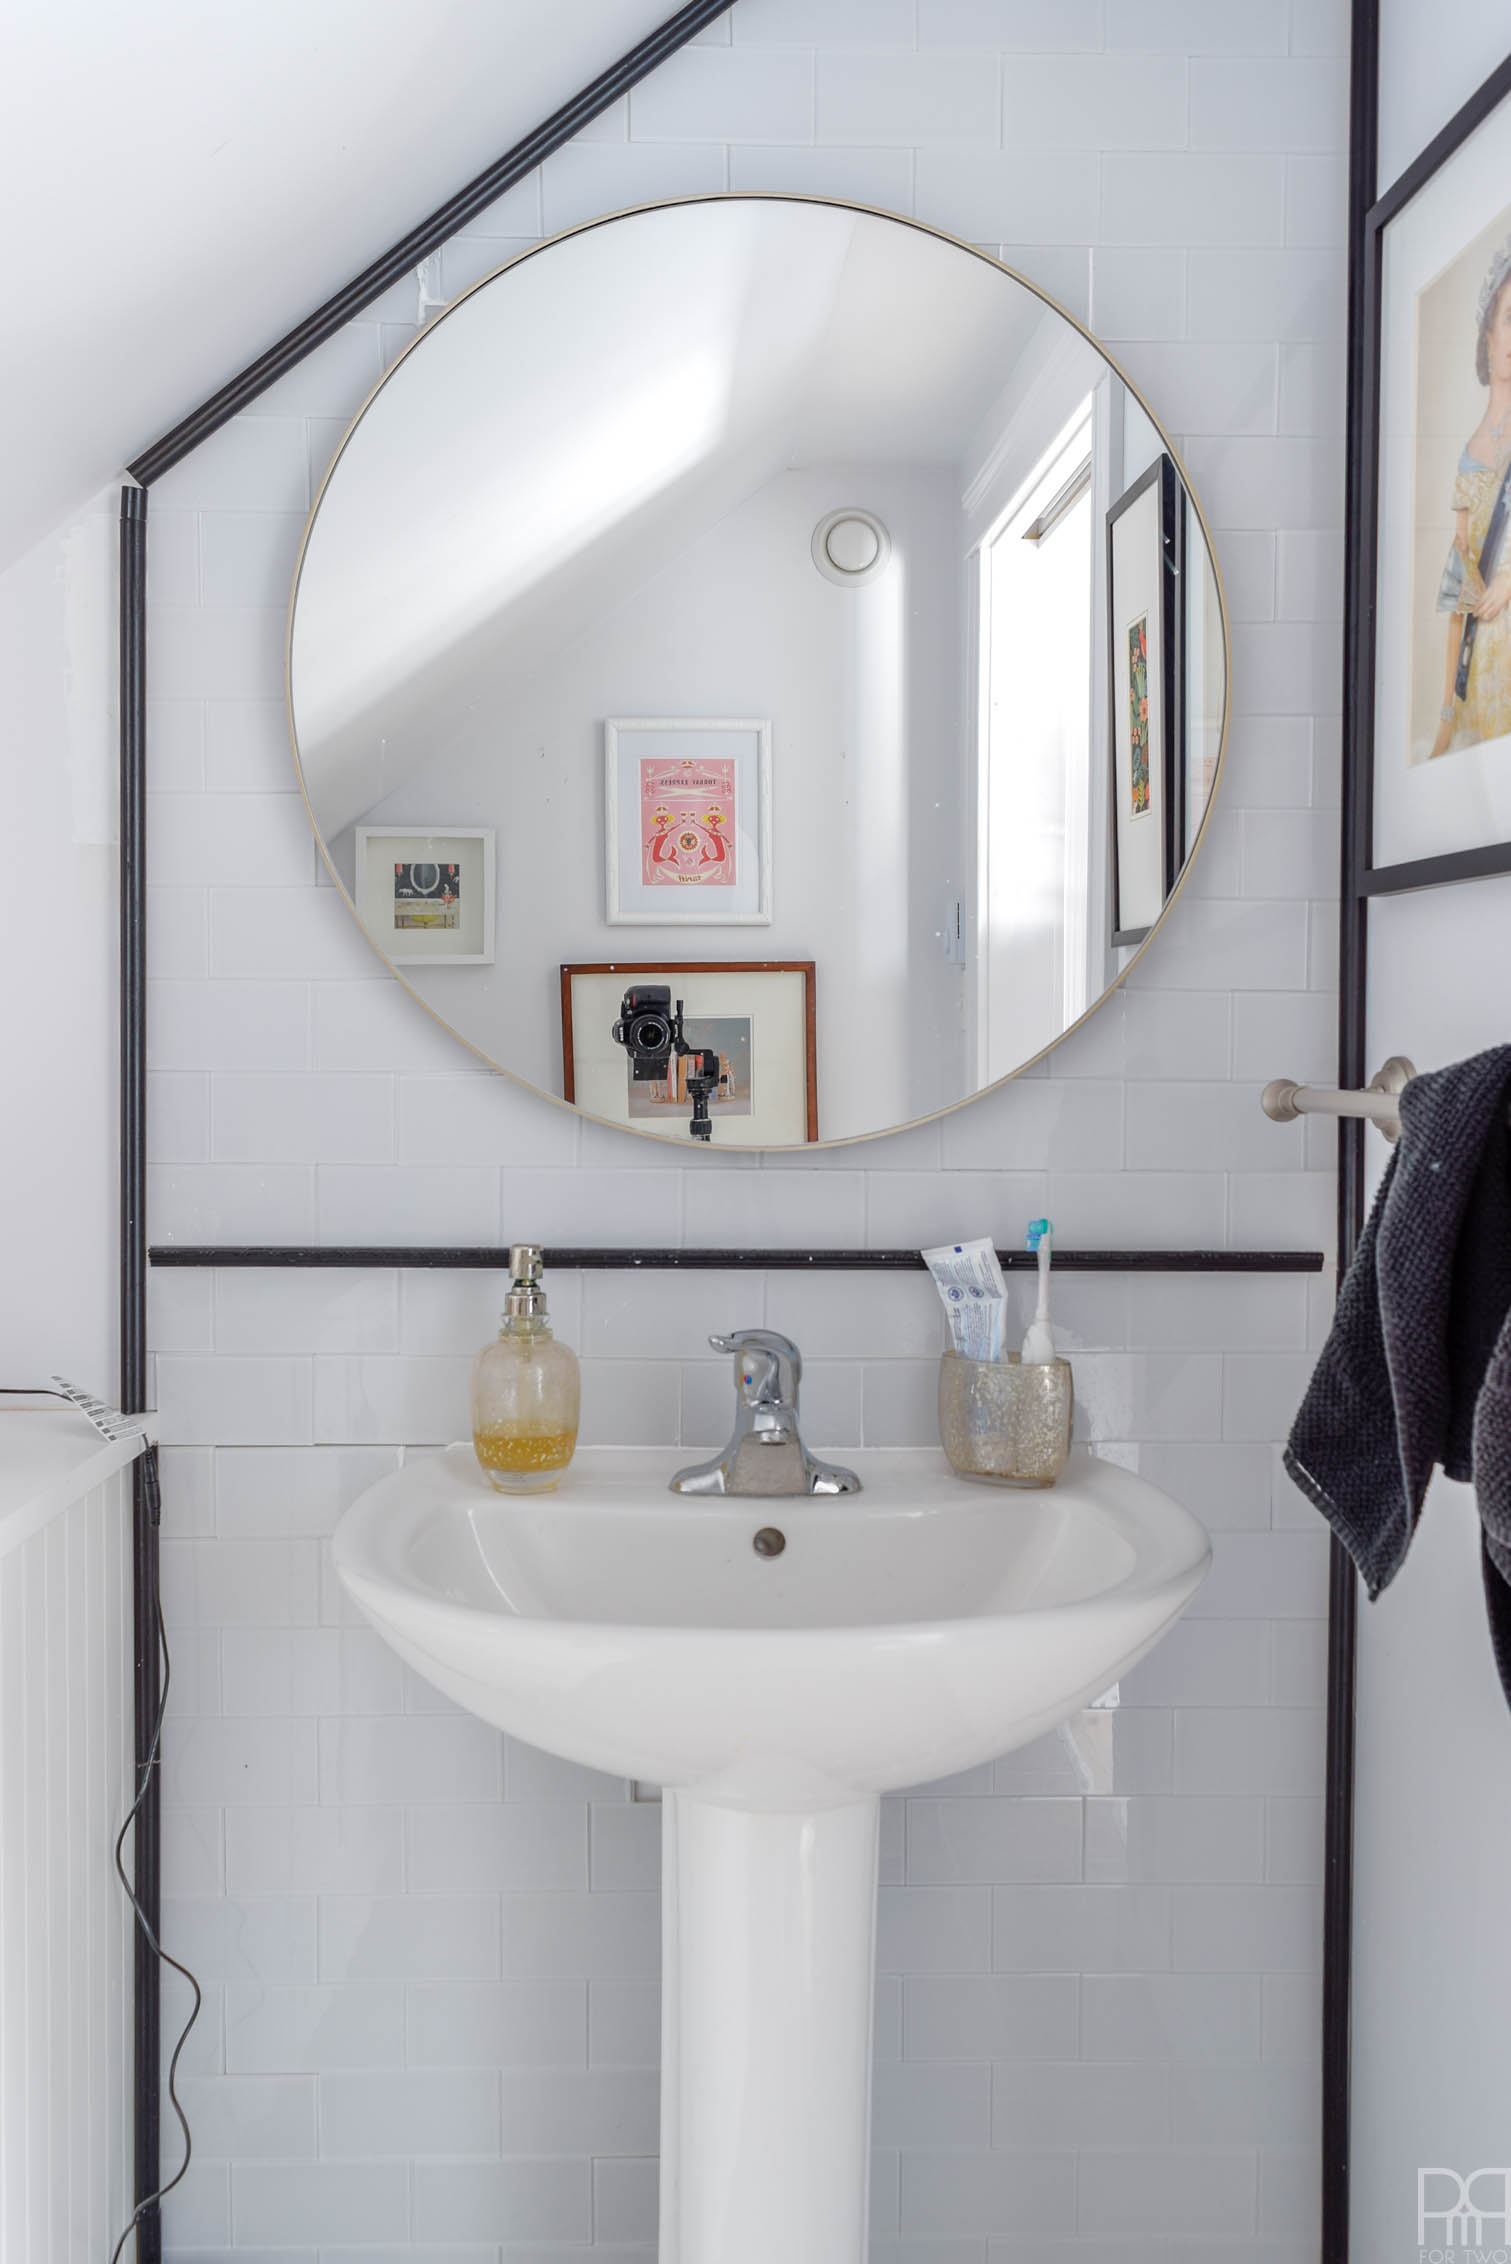
Aren’t tiny powder rooms the best?! *EYE ROLL OF THE CENTURY* But hey, at least we have a second bathroom – that’s a rarity in PMQs. So I’ll take what I can get. P.s that’s a cat water fountain beneath the sink, not some weird foot bath.

Ever wanted to go for a bold striped wall, but were afraid of the commitment? With Tempaper's stripes, you can easily create your own pattern. The best part is that you can remove and re-position things!

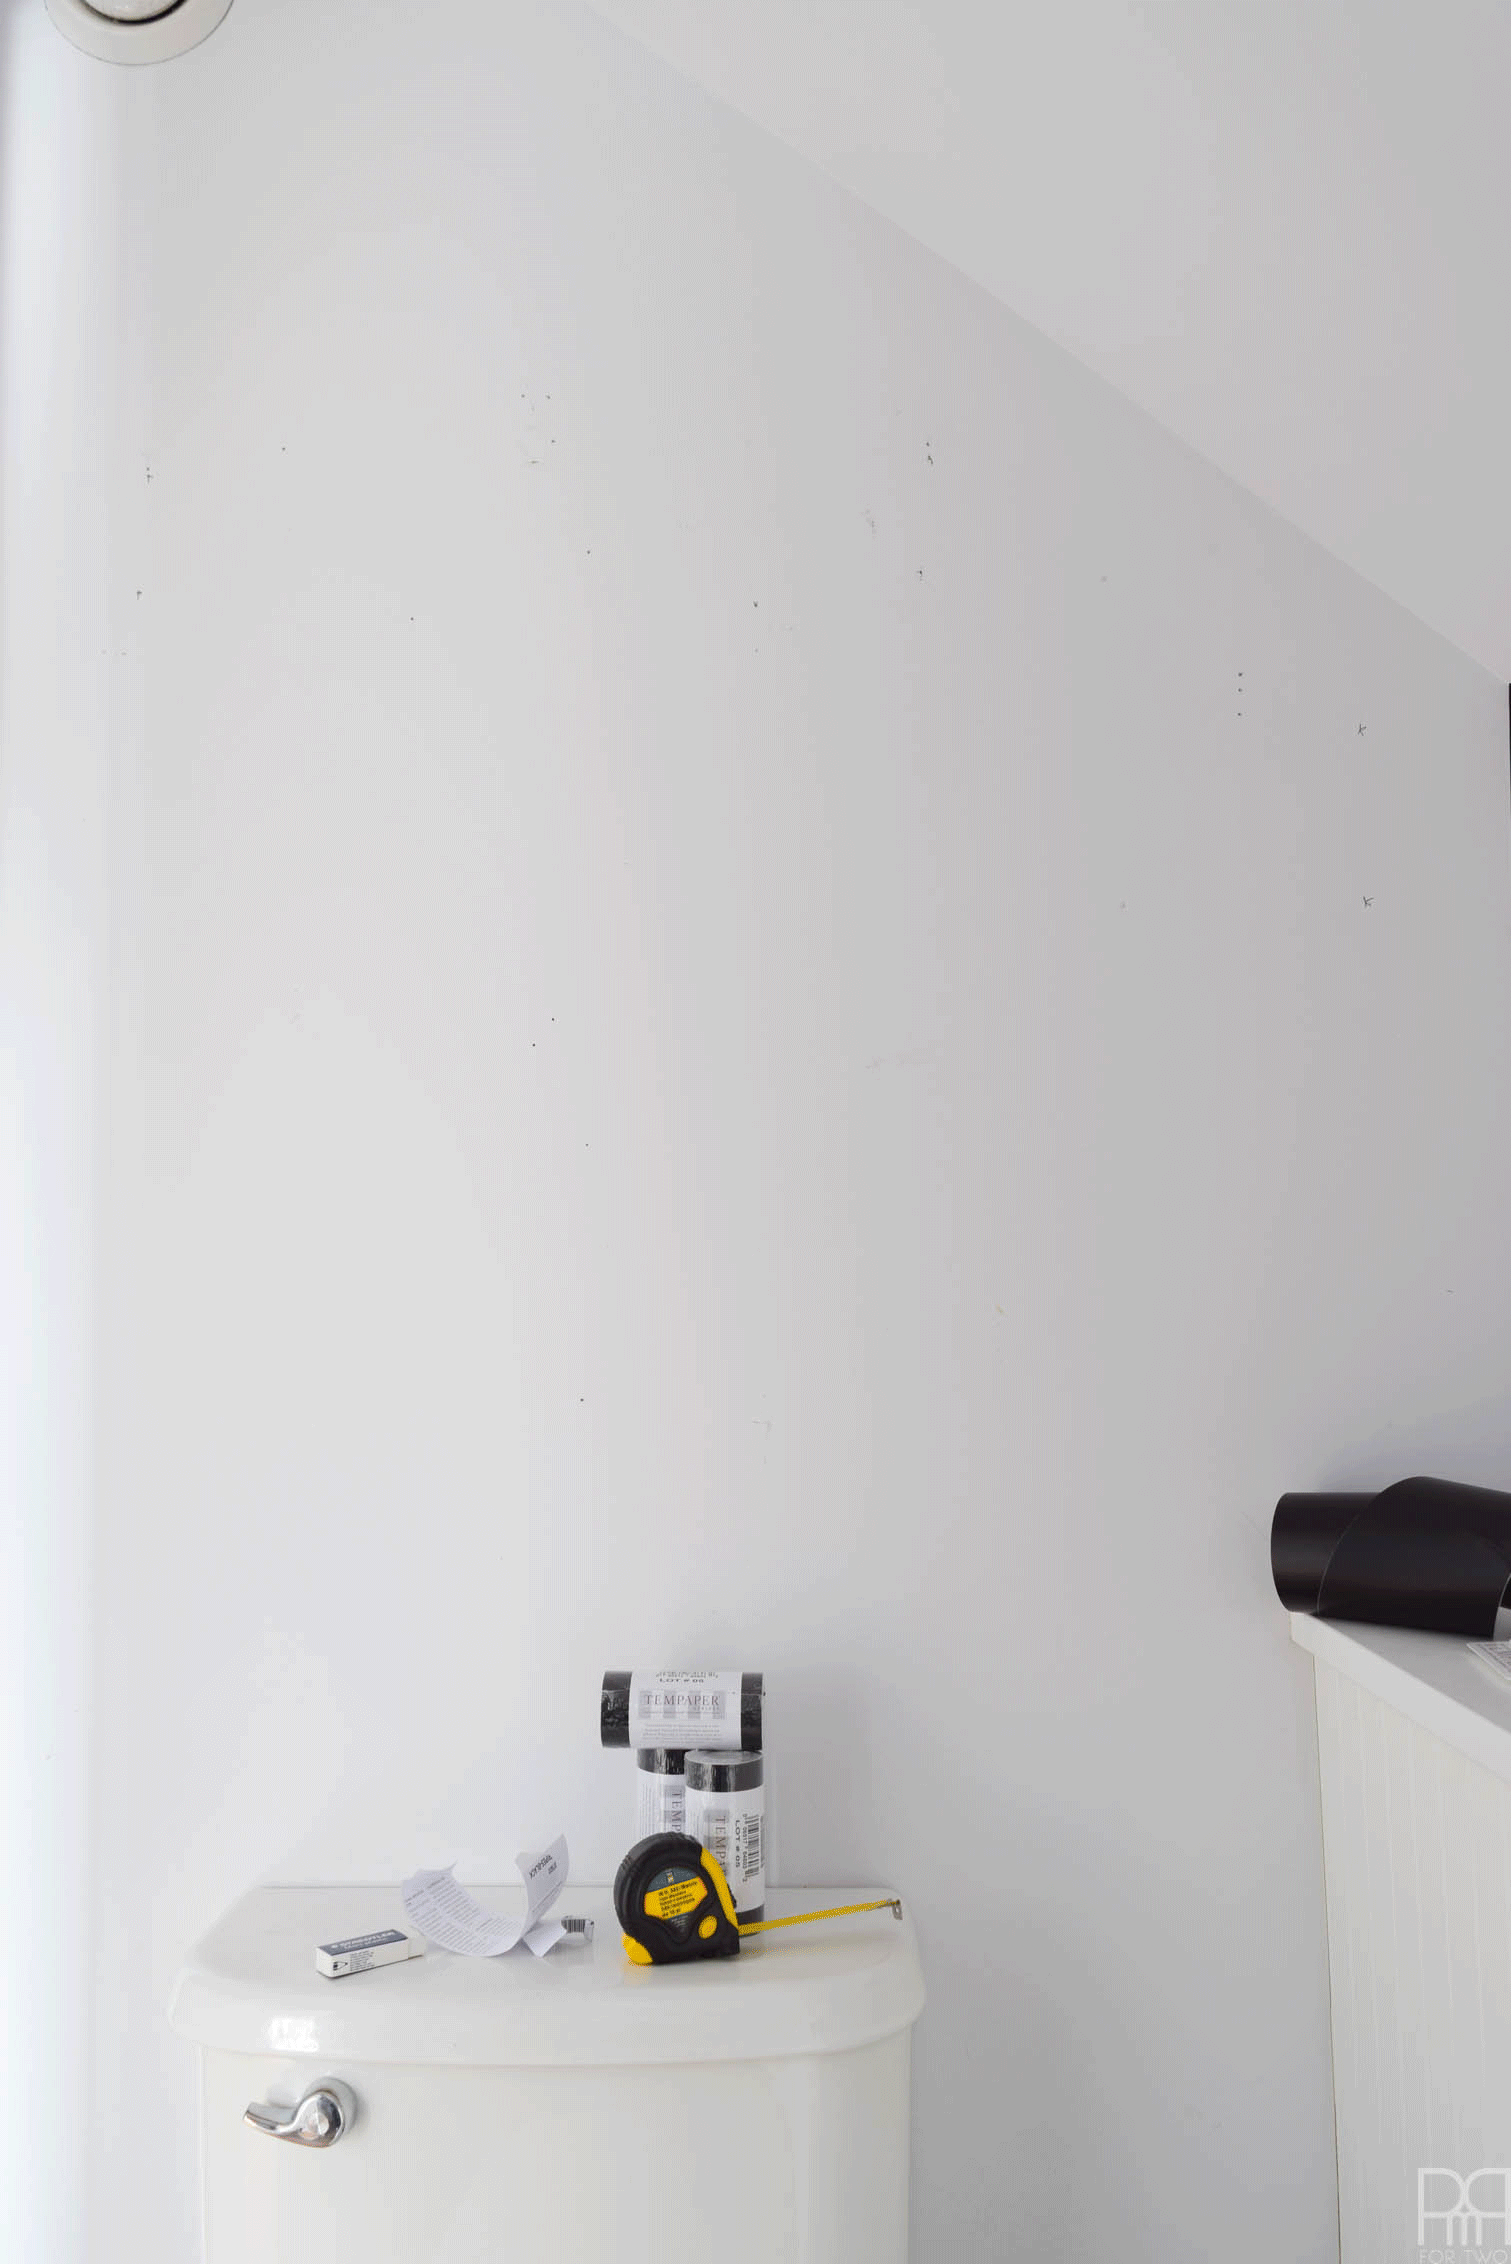
Because I was working with stripes and not large rolls of paper, I had to be a bit more precise than usual, but even that fell apart because none of the walls are straight. Womp womp.

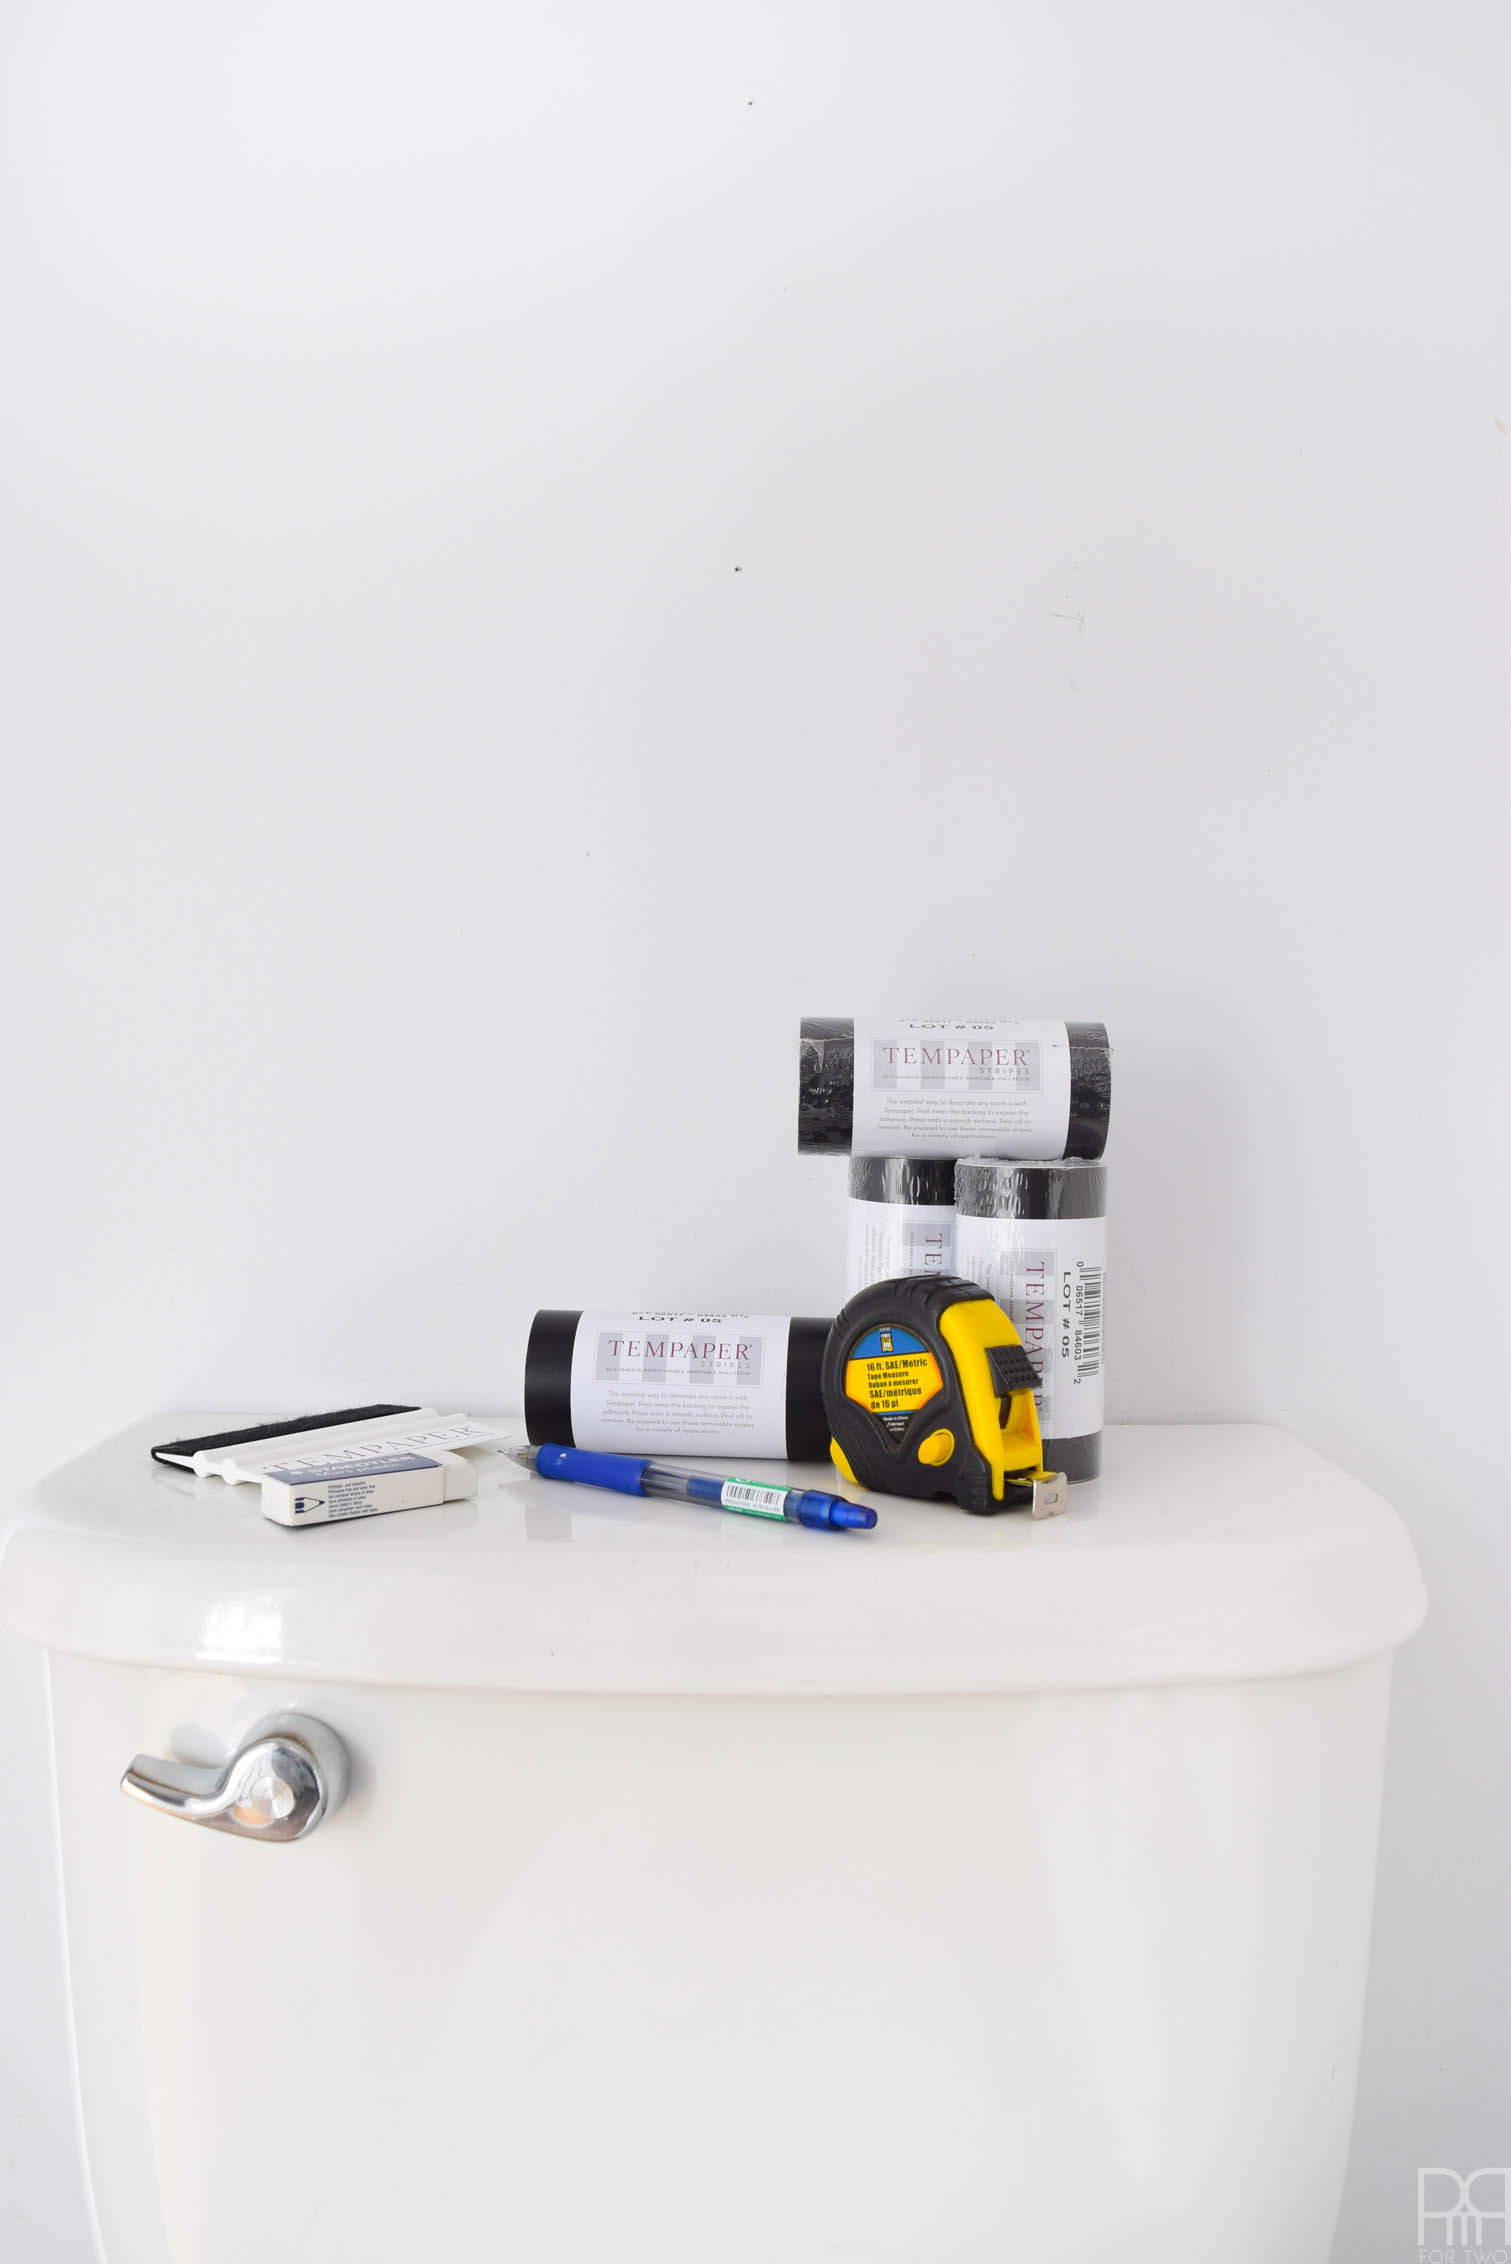
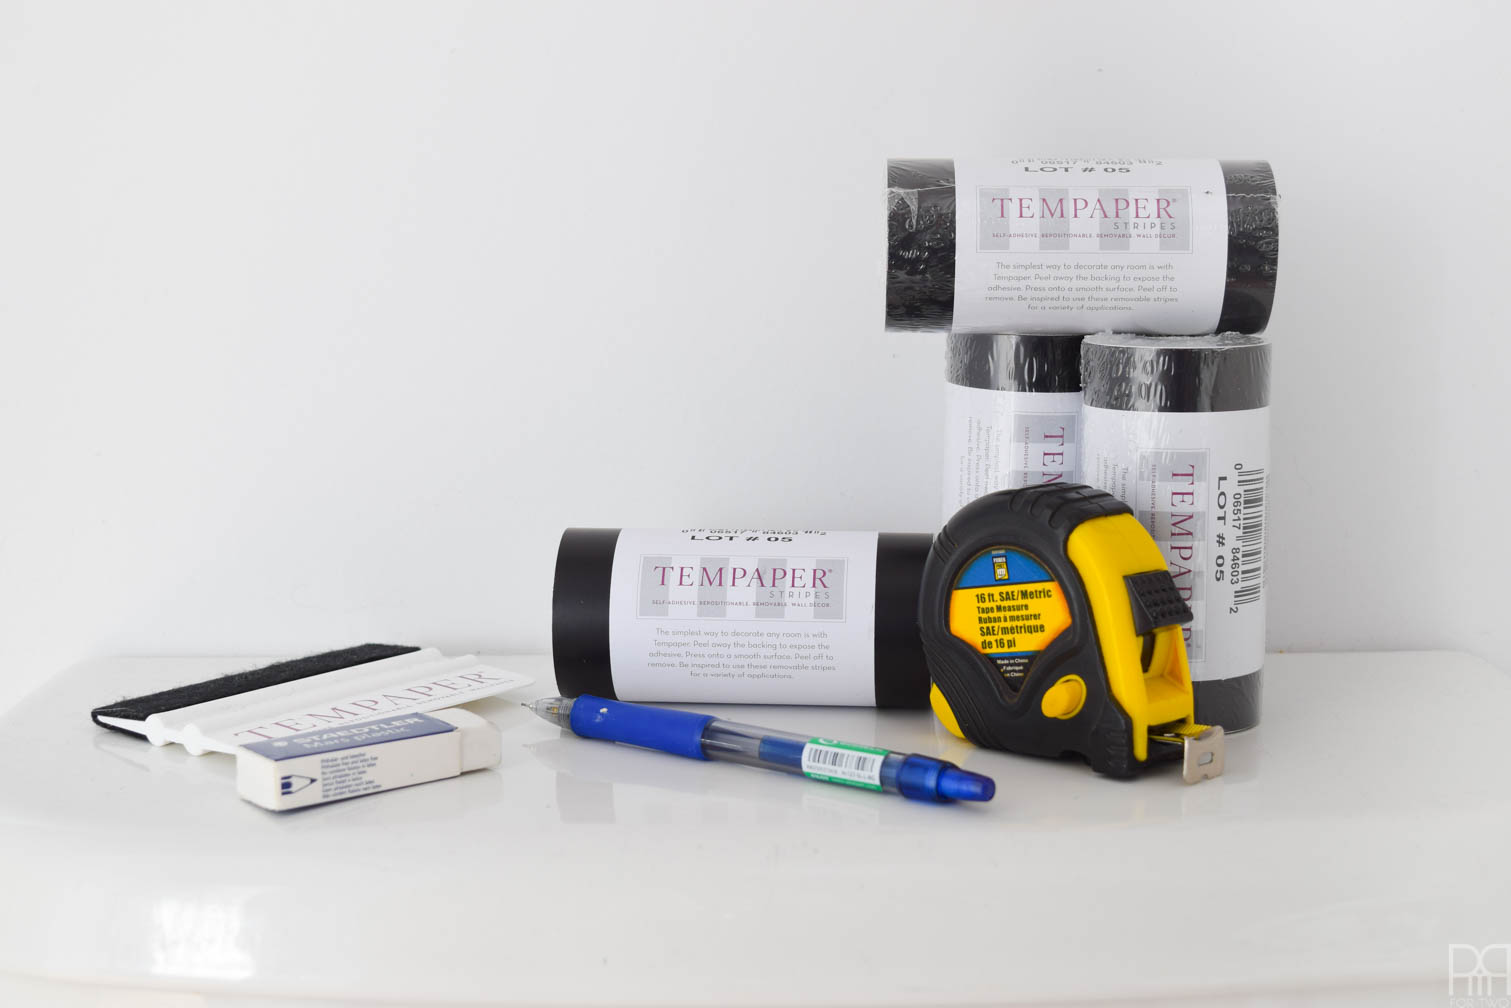
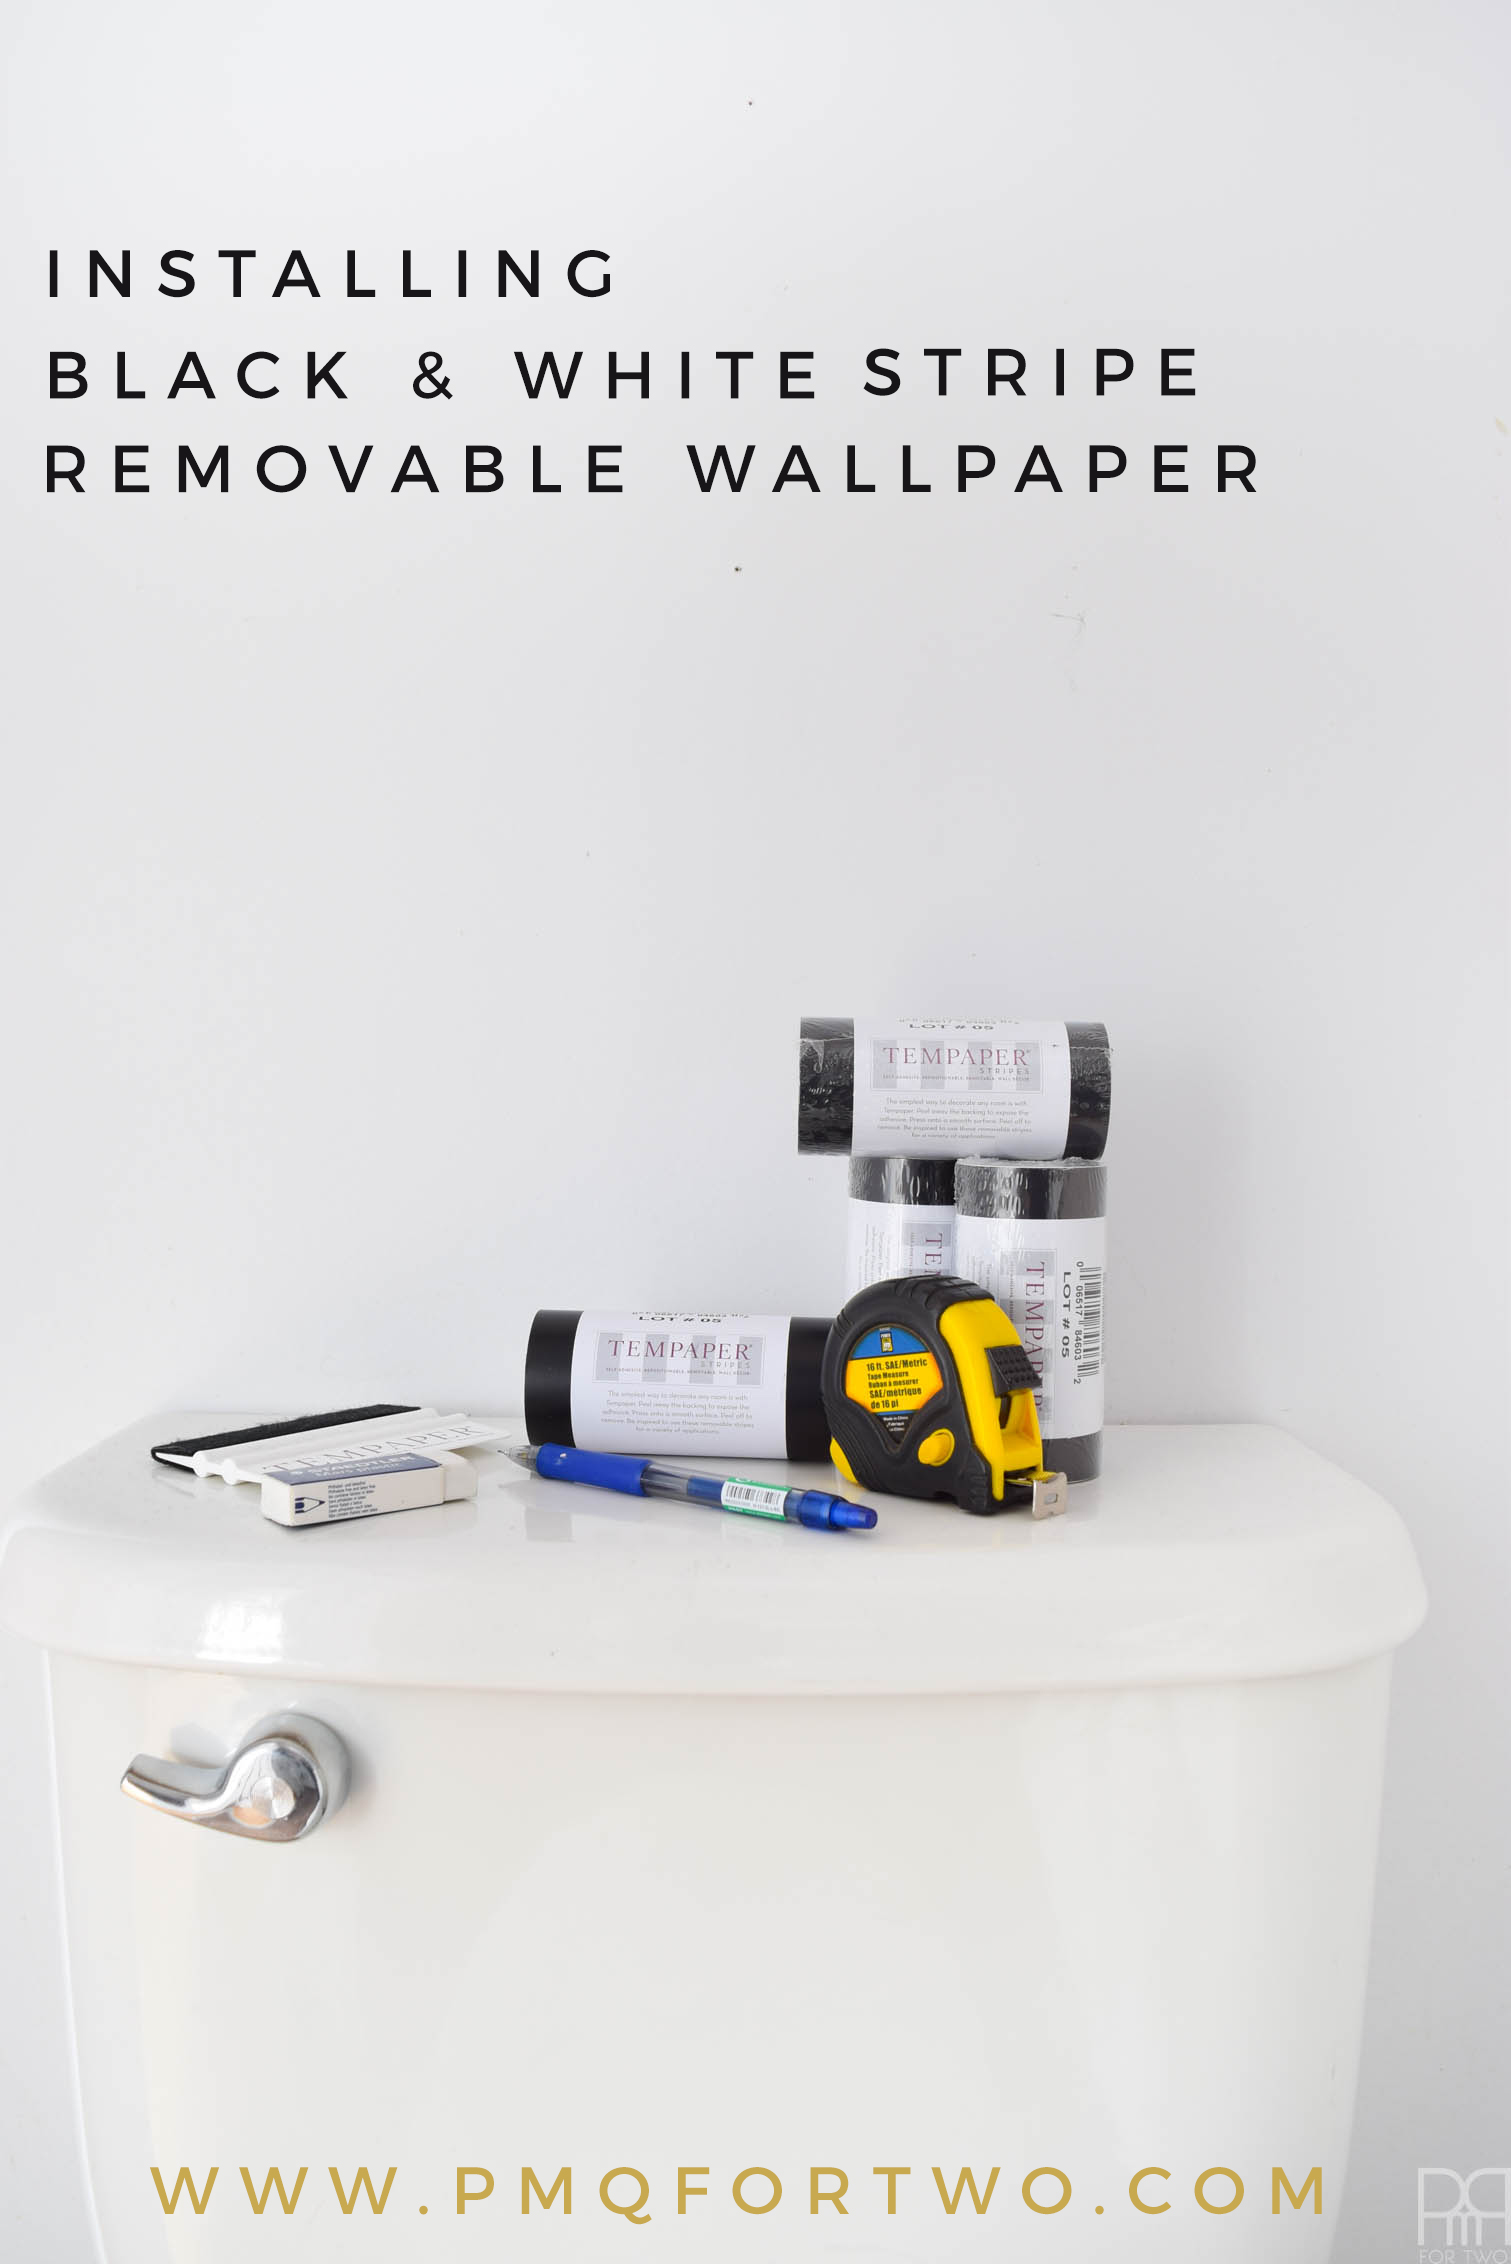
Materials required to instal a black and white stripe removable wallpaper

  • Rolls of Tempaper mini stripes
  • Tempaper applicator/squeegee
  • Pencil + eraser
  • Measuring tape
  • Scissors

Step 1: Much like with tiling, you need to start from a plum line, and the rest is easy. I took a few minutes to painstakingly install a small stripe, making sure it was straight.

Step 2: Using your pencil, mark even intervals where you’ll be applying the rolls of paper.

*note: this is a lot easier when the ceiling isn’t slanted, and when the walls are straight.

Step 3: Like with vinyl crafts, apply a small bit of the roll, and then slowly peel back the backing while applying the black roll with the squeegee.

Step 4: Take time to re-adjust and double check the distance as you go. In many instances I then took the entire strip off and re-applied it while eye-balling it. But once again, that’s more due to the fact that nothing is straight in this bathroom.

Ever wanted to go for a bold striped wall, but were afraid of the commitment? With Tempaper's stripes, you can easily create your own pattern. The best part is that you can remove and re-position things!

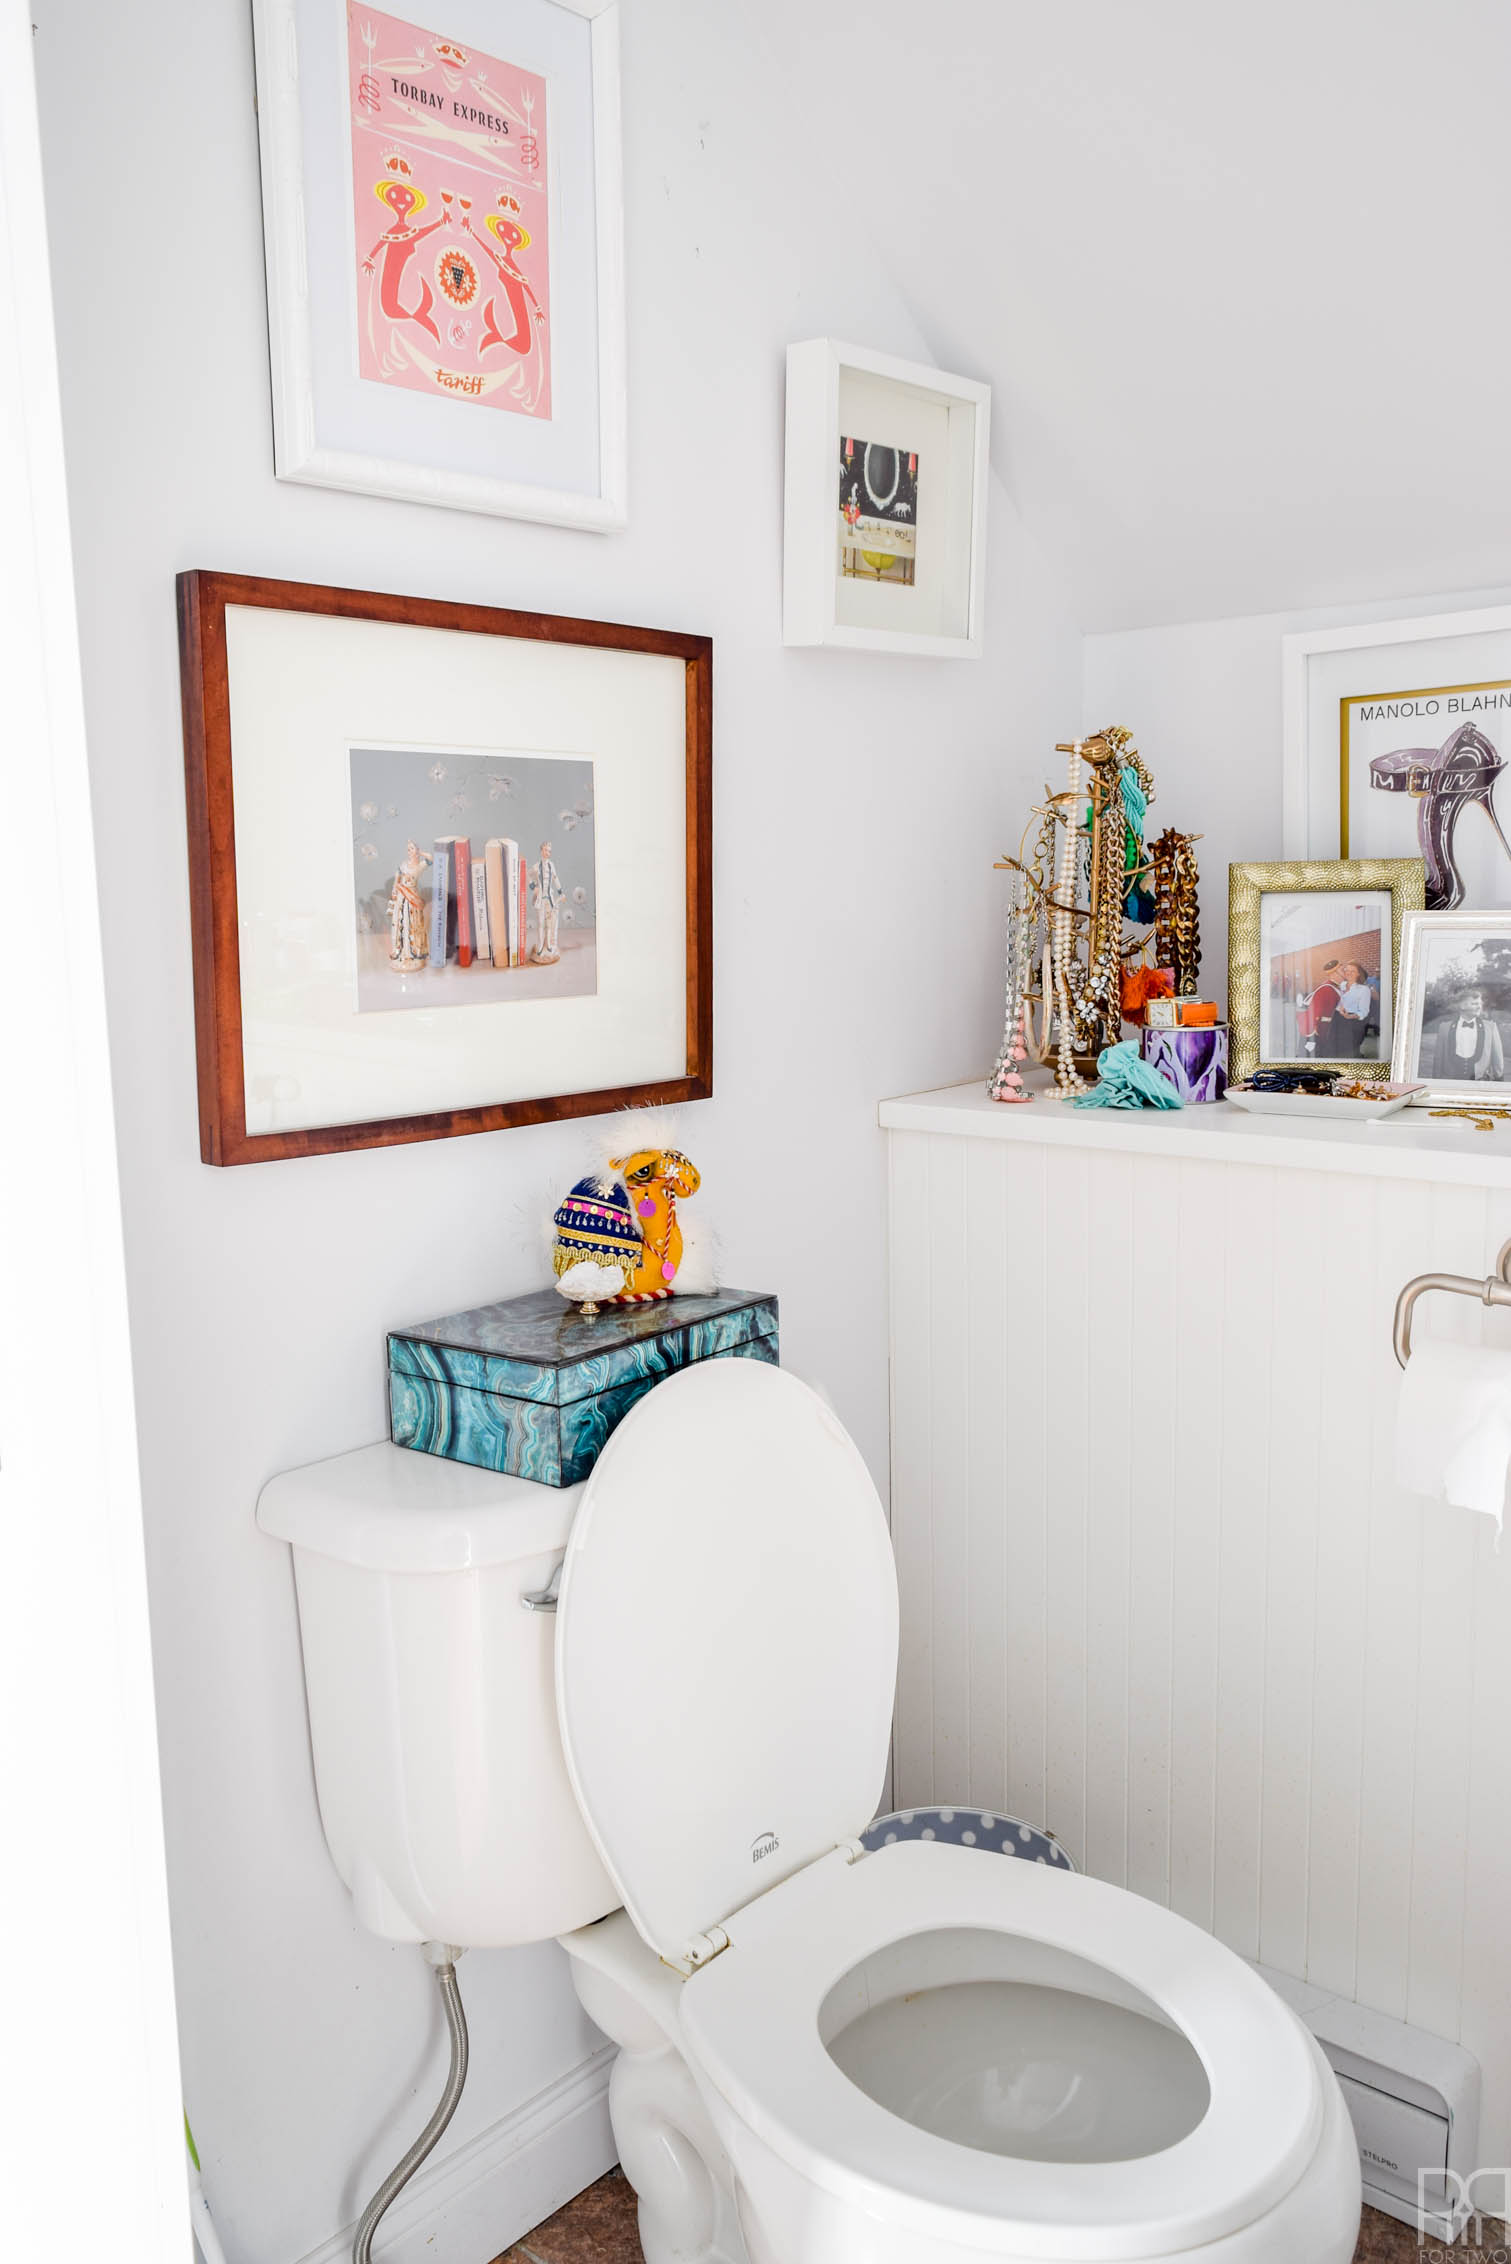
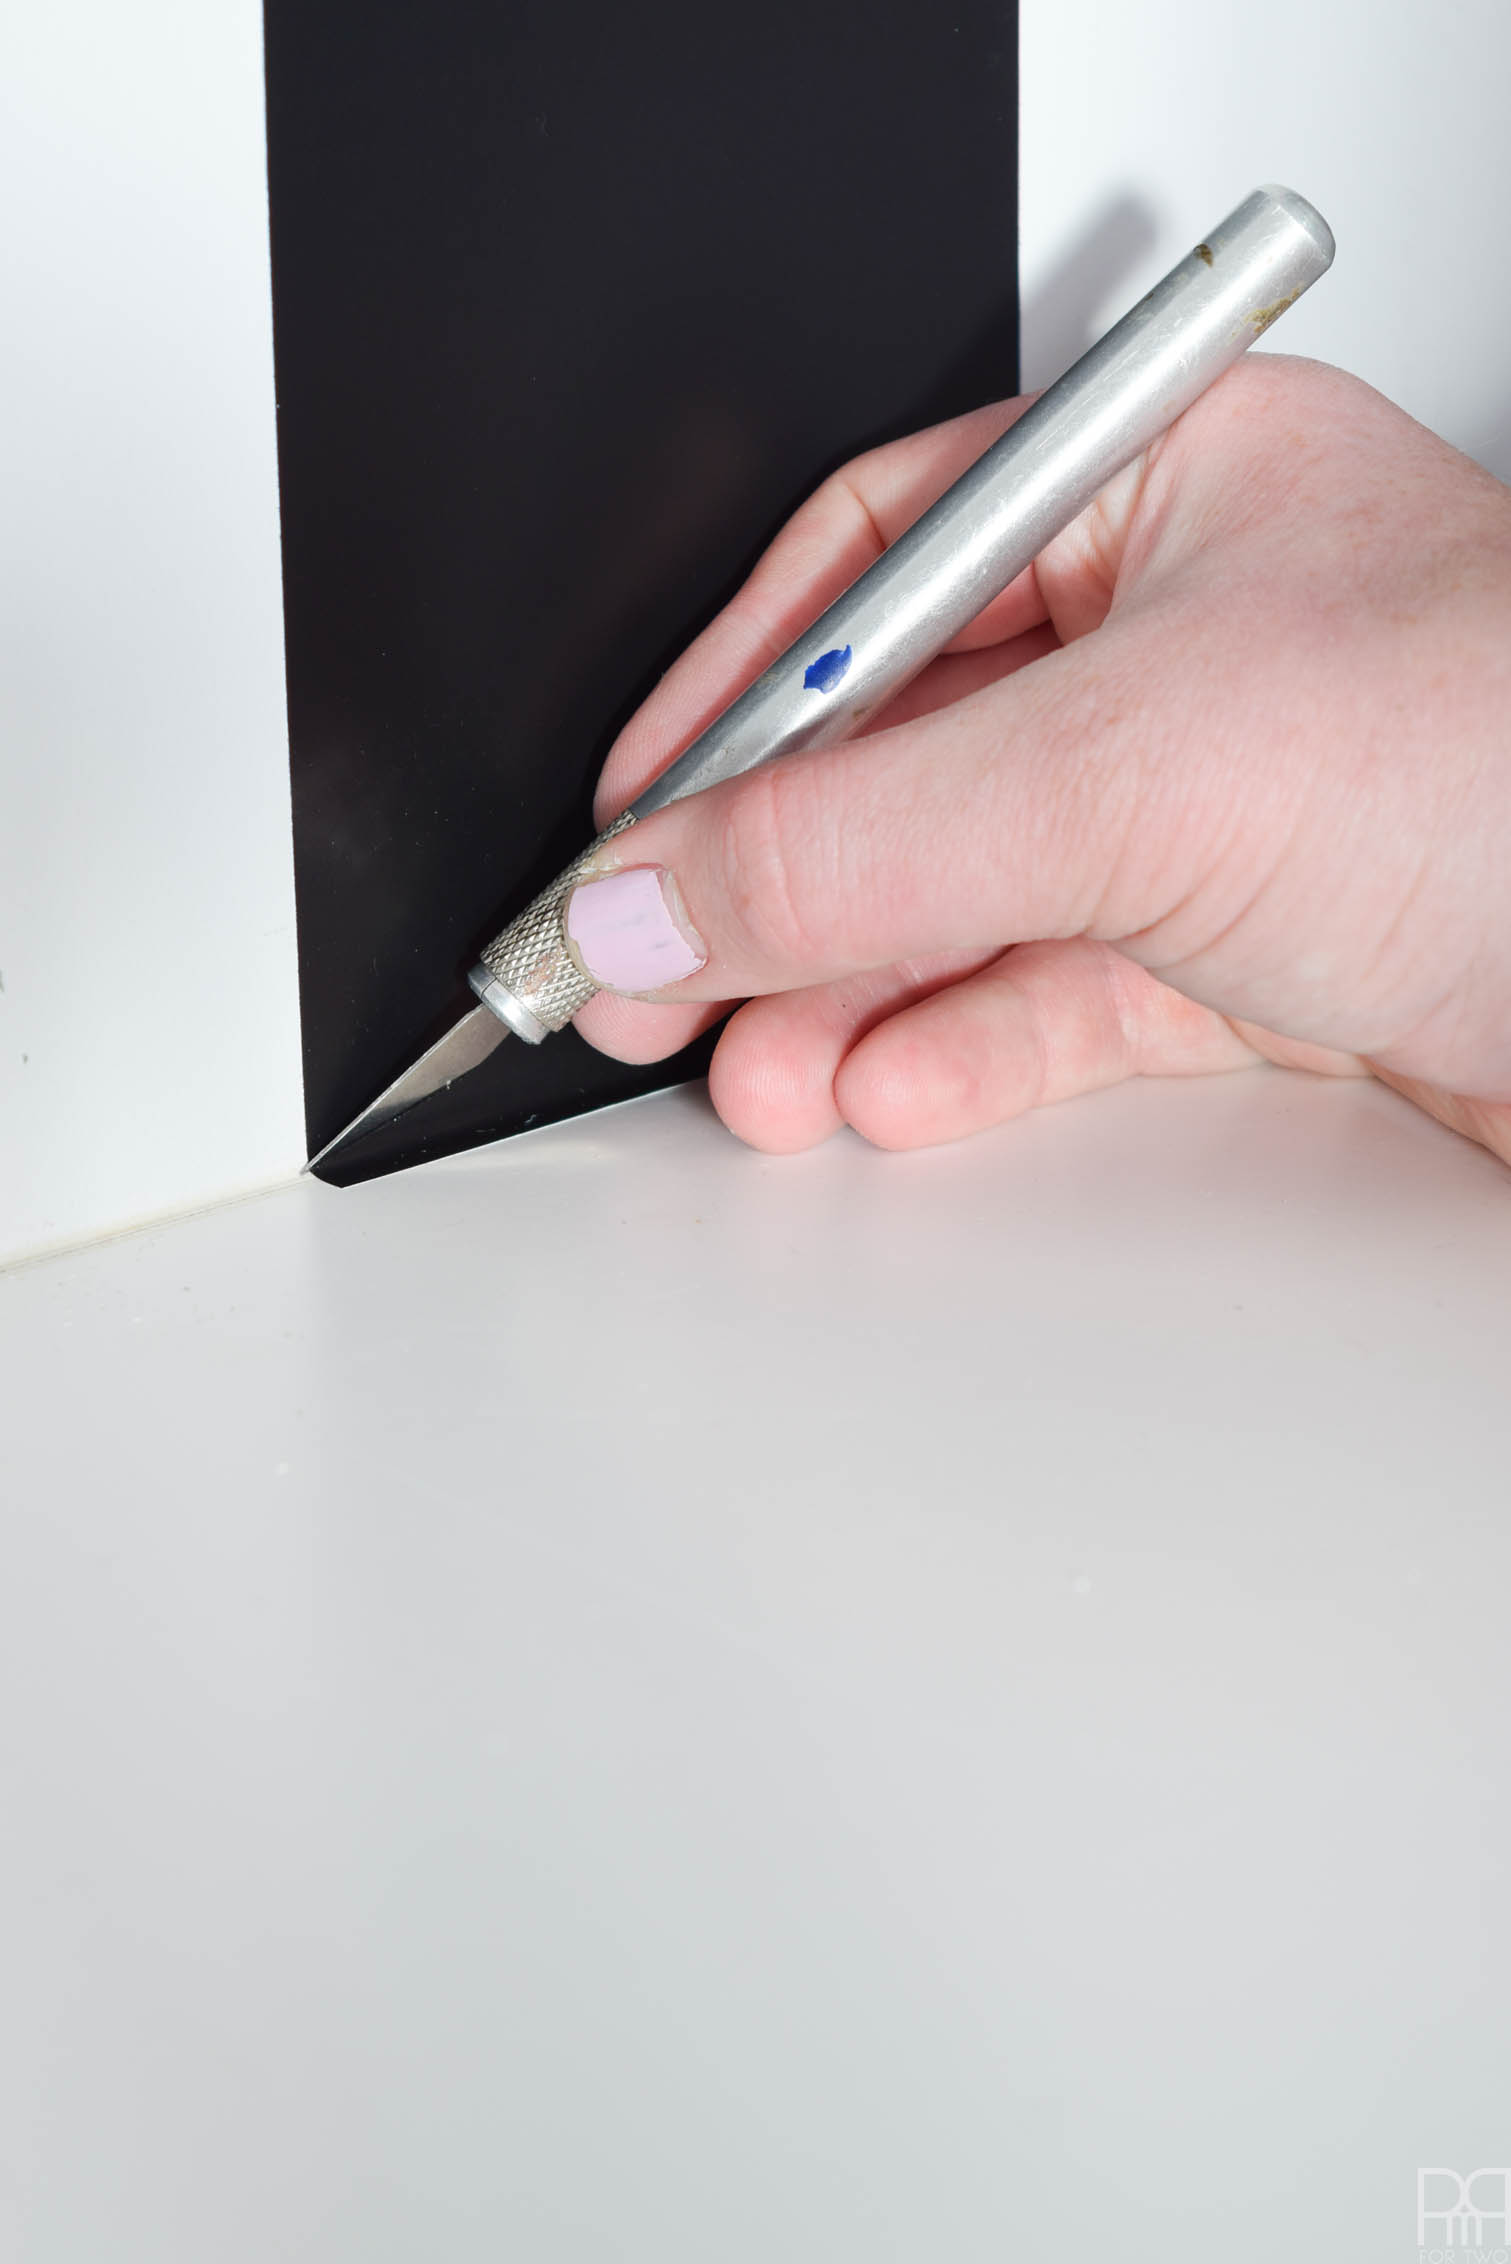
You’ll notice that where the stripe falls on this wall, I stopped it at the counter. I need to finish cutting the custom width to run down the side of the cupboard, I just didn’t have time to do it today.

Note: When you’re working with slanted ceilings like this, it can be a bit much to line-up the top of the strip with the slant and keep things straight – trust – so I gave myself permission to make it easy, and finish up the top with more precision, without the weight of the roll dragging the stripe in a different direction.

I then repeated the process on 2 of the other walls in the space. You’ll remember that I have a renter friendly tiled wall behind the sink // here // so that one is staying in place, I’m just adding stripes.

Thankfully all of my outlets lined-up with the edge of rolls, so it was as simple as taking the covers off, and putting them back on.

Ever wanted to go for a bold striped wall, but were afraid of the commitment? With Tempaper's stripes, you can easily create your own pattern. The best part is that you can remove and re-position things!

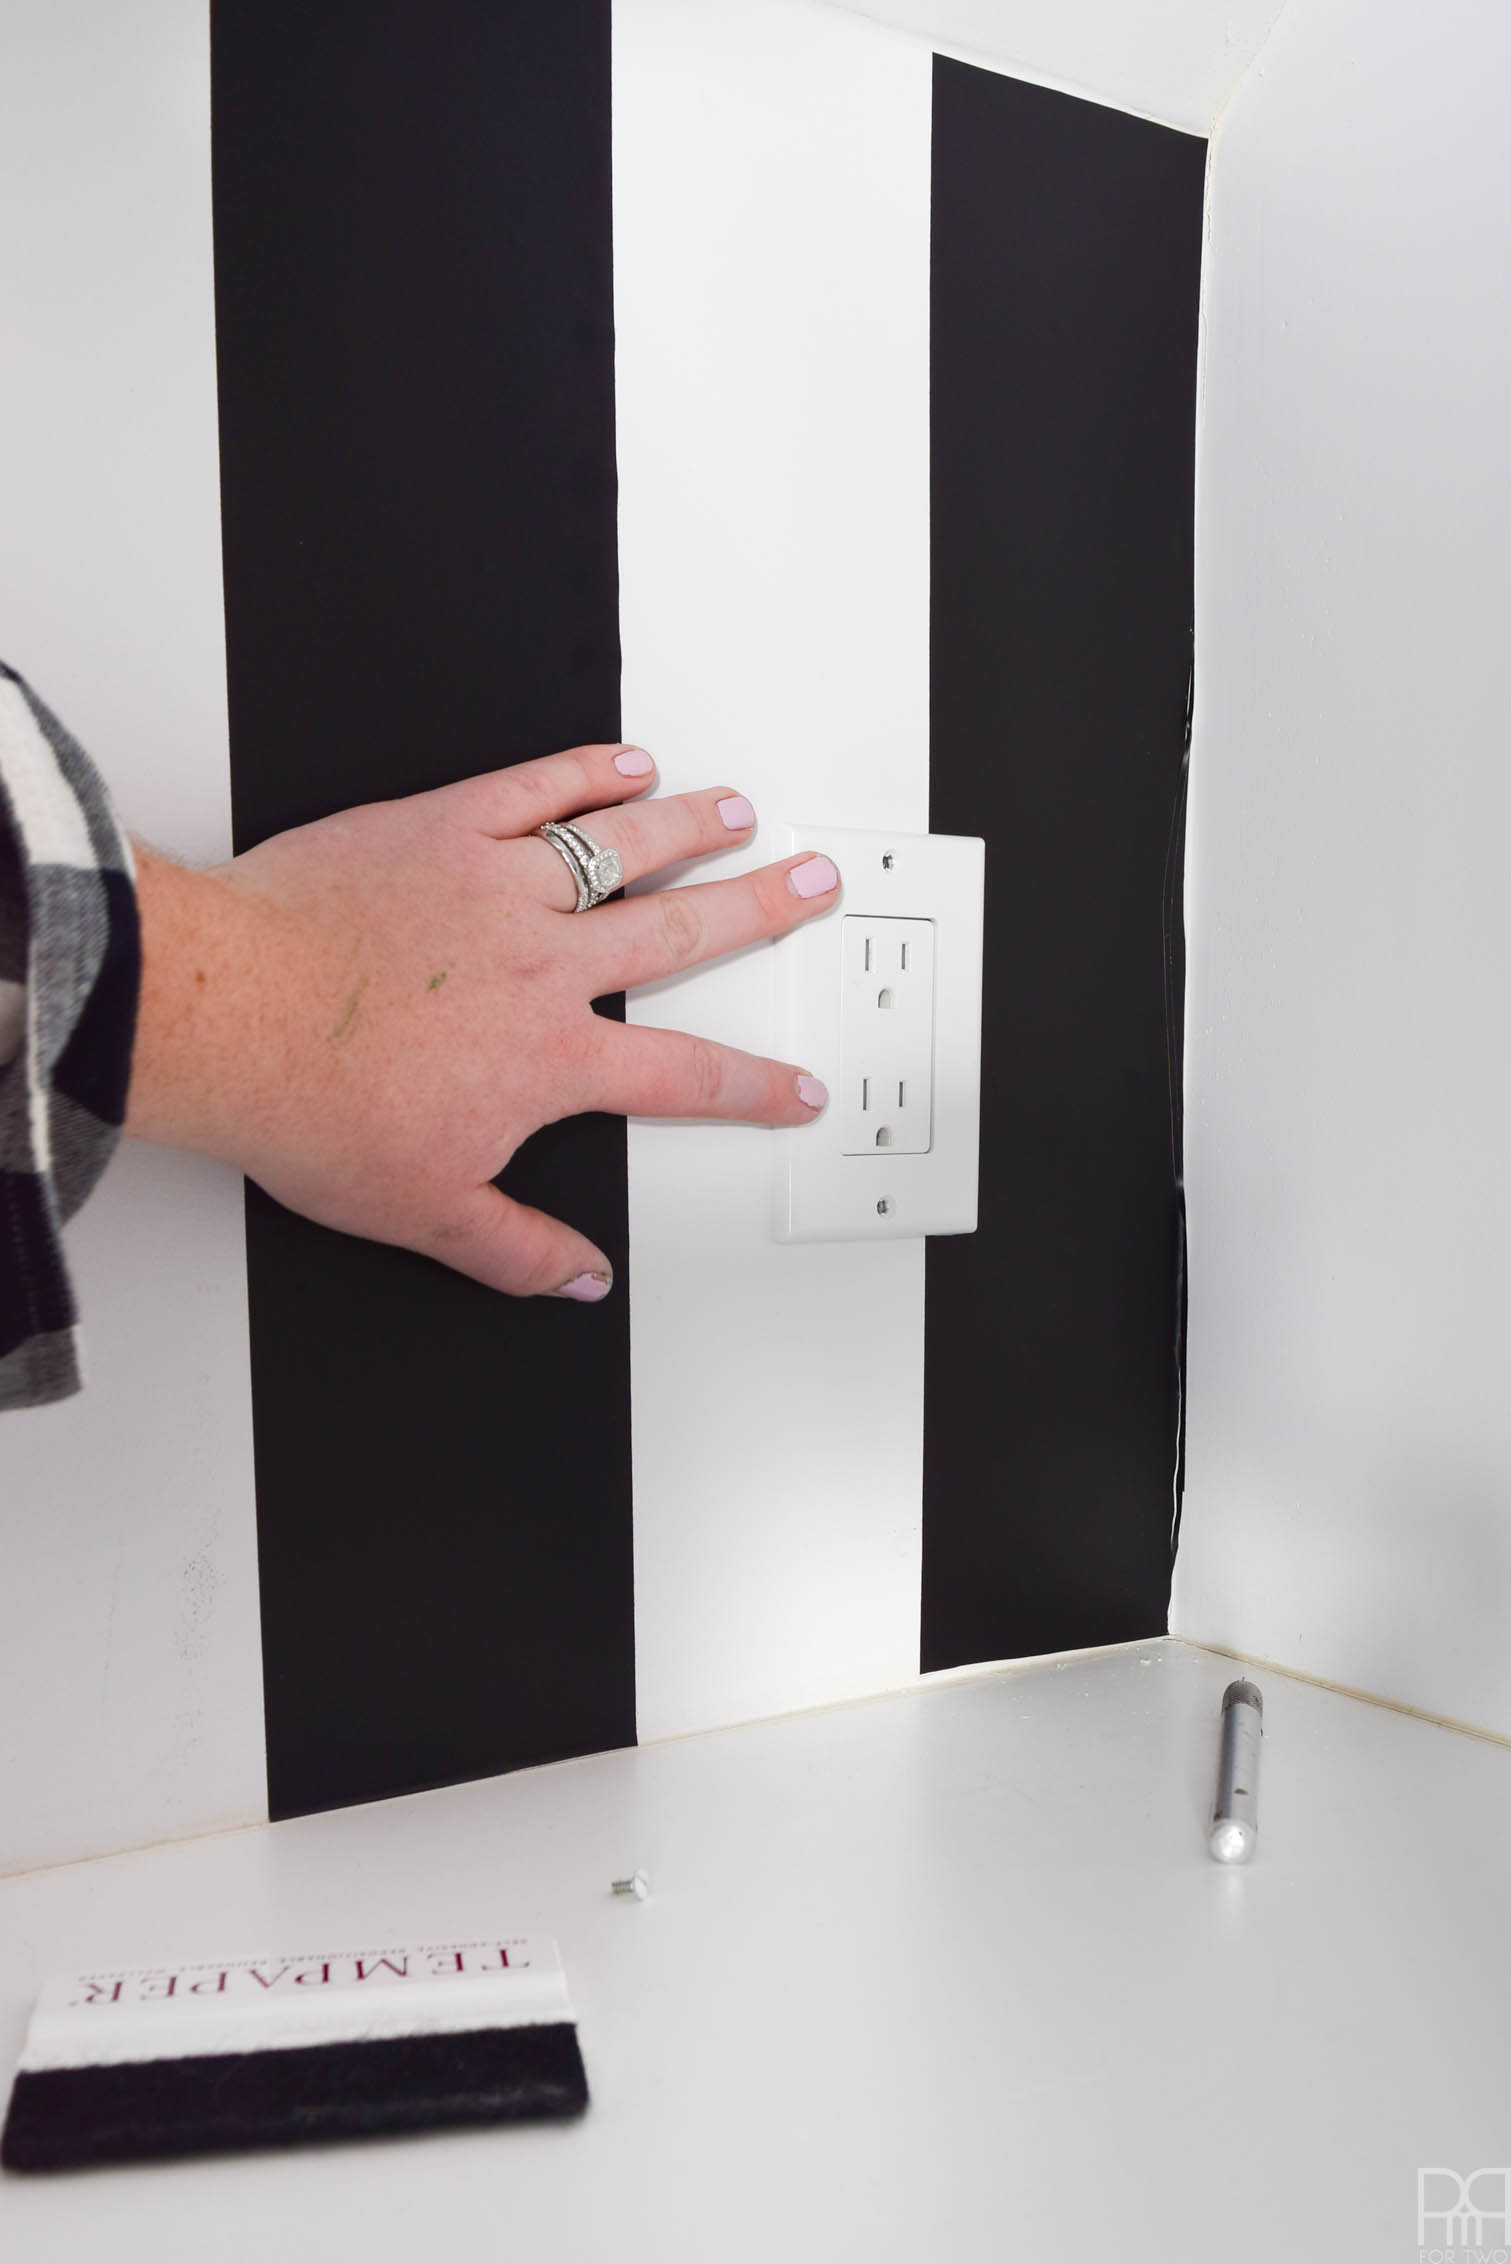
Because when you’re eye-balling the length of some strips, you’ve bound to end up with a little bit of extra, I then used a crafting blade to cut away the excess.

Ever wanted to go for a bold striped wall, but were afraid of the commitment? With Tempaper's stripes, you can easily create your own pattern. The best part is that you can remove and re-position things!

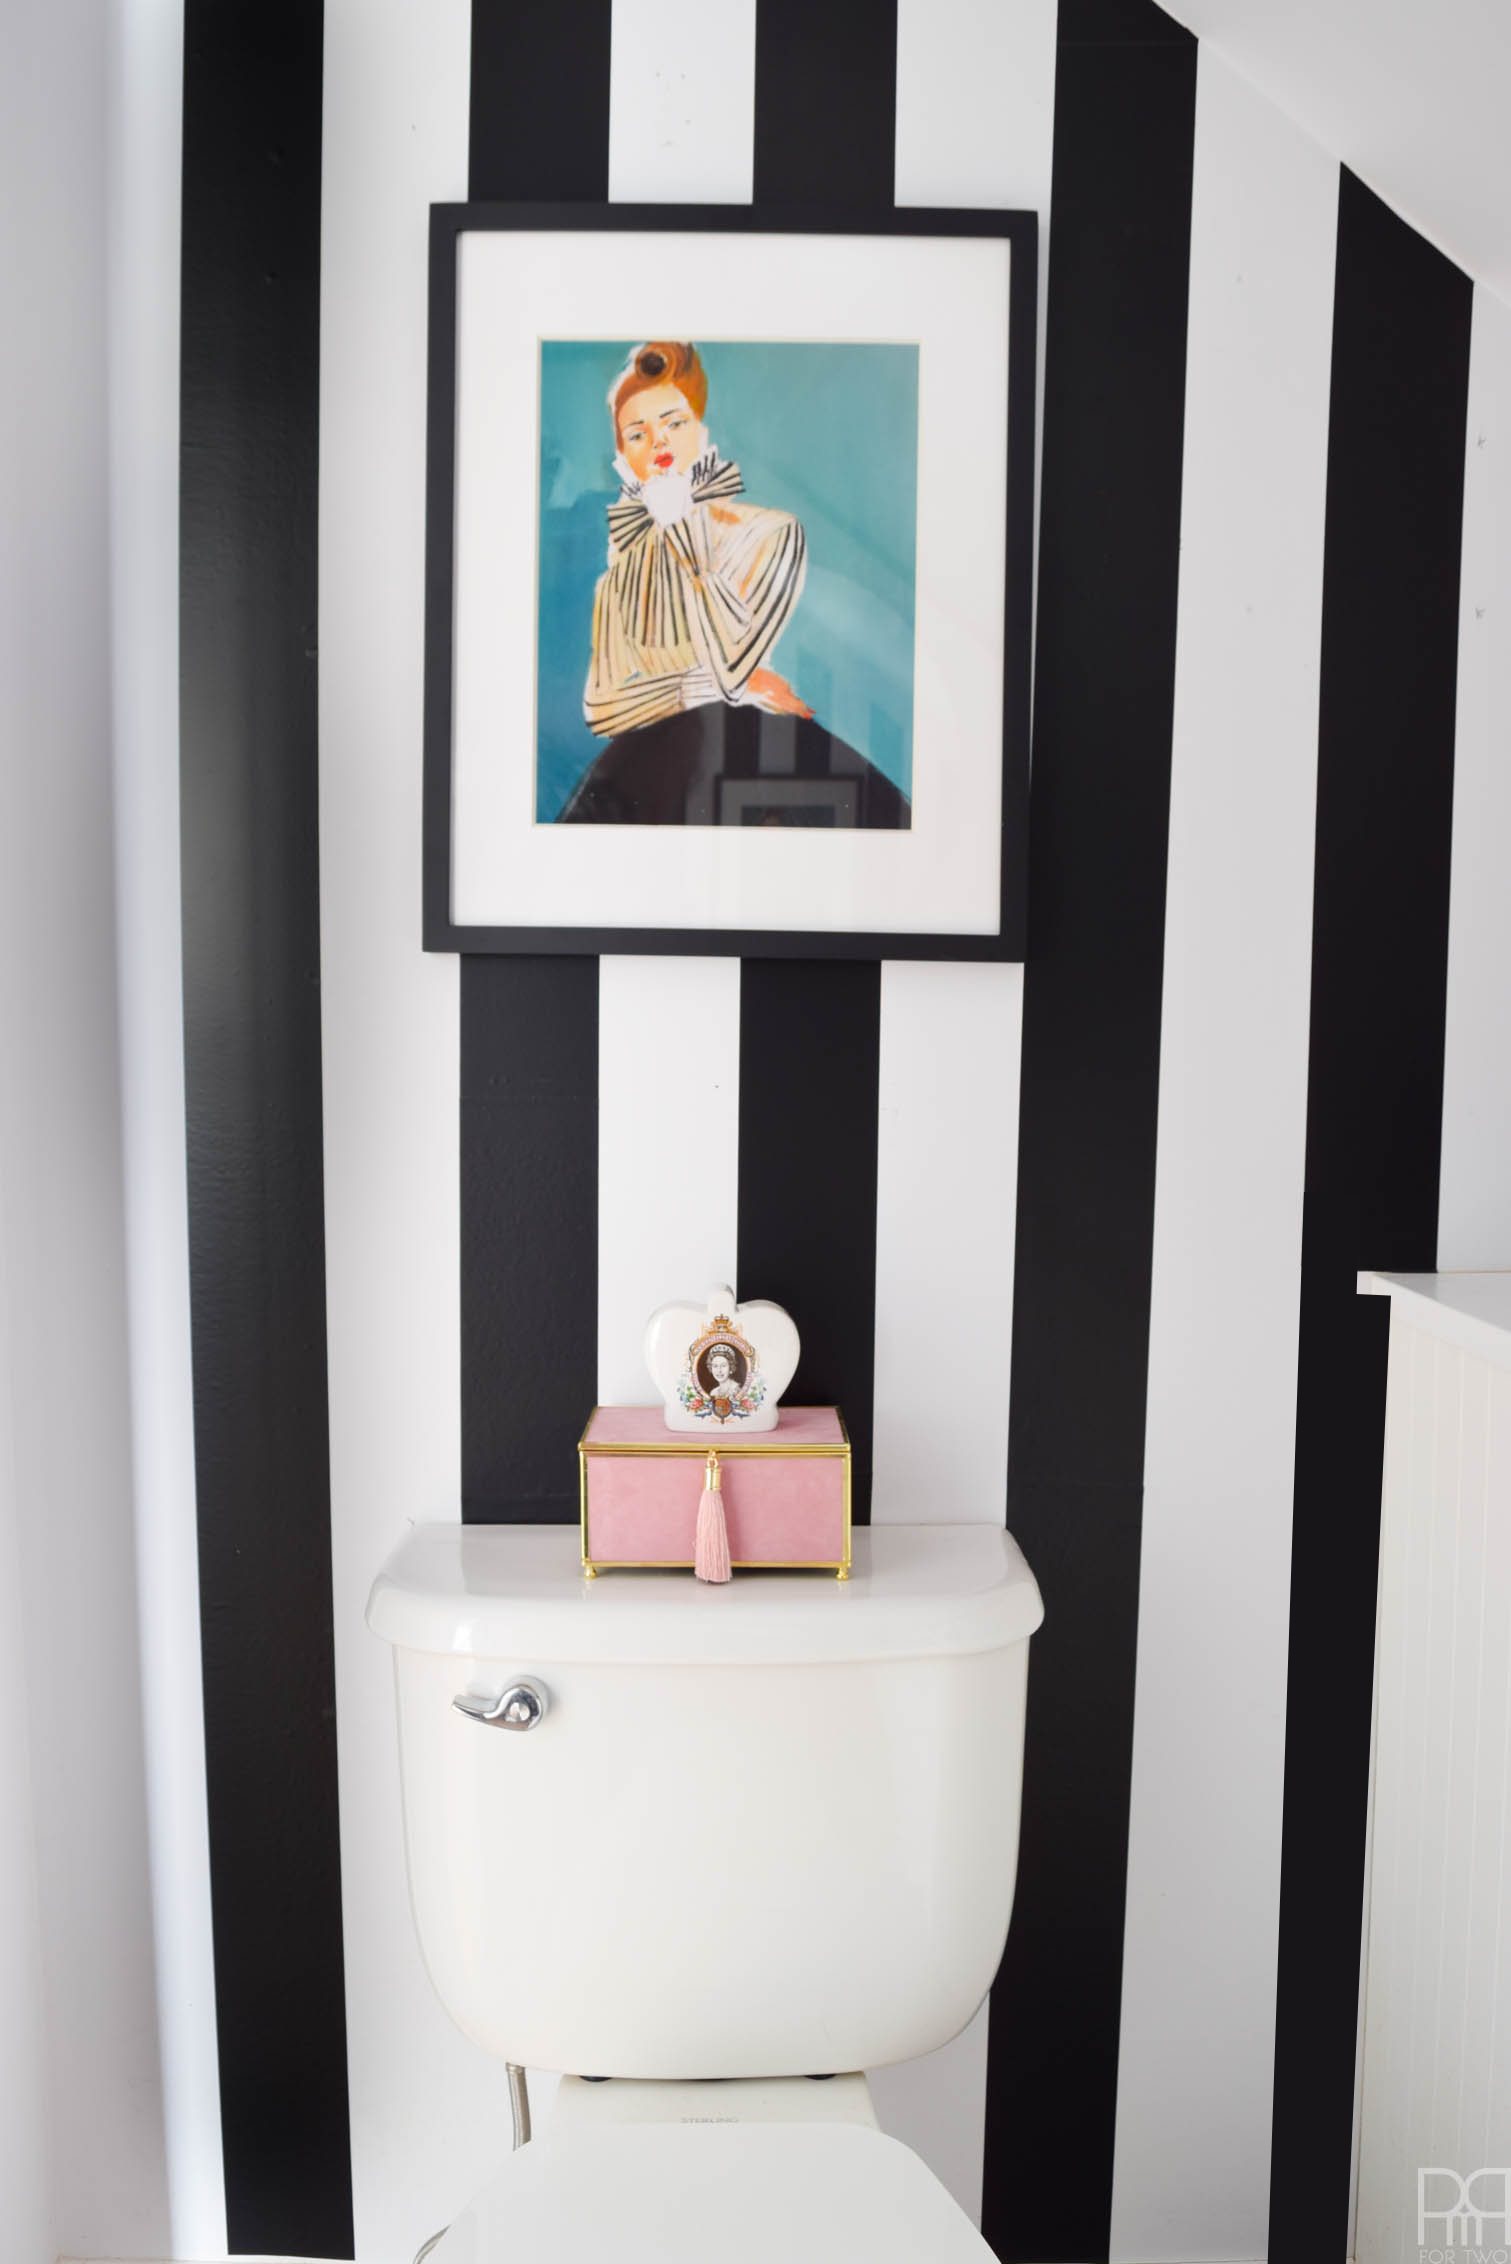
I can’t really show you what it all looks like without giving away a large part of the reveal, so instead I’ve got a quick peek at the scene I illustrated in my mood board for week 1 // here //. And if nothing looks straight, it’s because everything is off in this bathroom. I’ll have it all tightened up for the reveal at the end of the month though. All in all, applying a black and white stripe removable wallpaper was so easy! I highly recommend.

Ever wanted to go for a bold striped wall, but were afraid of the commitment? With Tempaper's stripes, you can easily create your own pattern. The best part is that you can remove and re-position things!

Make sure you catch-up with all the other participants by clicking through! I’m excited to see what they’ve gotten up to.

Jeweled Interiors // Jeweled Interiors 2 // Street Flea Style // Monica Wants It // Domicile 37 // Maggie Overby Studios // Tessie Fay // A Designer At Home // A Pinterest Addict // Mary Meyers Interiors // My Eclectic Nest // This Is Our Bliss // Southern State of Mind // PMQ for two 


Ever wanted to go for a bold striped wall, but were afraid of the commitment? With Tempaper's stripes, you can easily create your own pattern. The best part is that you can remove and re-position things!

✨Are you signed-up for my new post updates? ✨

* indicates required
Email Format

Share this

  • Share
  • Facebook
  • Pinterest
  • Twitter
  • Tumblr

19 Comments

Curated Spring Living Room Decor »
« DIY Felt Flower Print

Comments

  1. Maggie @ Maggie Overby Studios says

    March 13, 2018 at 6:38 am

    Love me some Tempaper and these black and white stripes. Love the contrast but keeping the stripes straight must have been a doozy.

    Reply
    • Ariel says

      March 13, 2018 at 11:00 am

      it was an absolute doozy because the walls aren’t straight! applying the stripes itself was easy ( as was repositioning them) but man, the shitty PMQ construction really grates me sometimes.

      Reply
  2. jewel marlowe says

    March 13, 2018 at 7:01 am

    AHHHHH! It’s so great! It looks amazing Ariel! Like Maggie to love tempaper too!

    Reply
    • Ariel says

      March 13, 2018 at 10:59 am

      Thanks! Although I can totally see one stripe that is crooked, so now I have to fix it and hope it doesn’t mess with the rest of them!

      Reply
  3. Mary Meyer says

    March 13, 2018 at 9:49 am

    YAY! looks amazing. job well done.

    Reply
    • Ariel says

      March 13, 2018 at 10:58 am

      thanks Mary!

      Reply
  4. Tiffany says

    March 13, 2018 at 10:57 am

    The walls are perfection and the art was made for this room!

    Reply
    • Ariel says

      March 13, 2018 at 10:58 am

      It sure was 😉 I love when my spaces together together like my mood boards.

      Reply
  5. Kelly says

    March 13, 2018 at 11:01 am

    Ahhhh! love the look of the stripes! makes the space for sure!

    Reply
    • Ariel says

      March 13, 2018 at 11:04 am

      Thanks girl!

      Reply
  6. Angie says

    March 13, 2018 at 11:29 am

    Looks great so far 👍

    Reply
  7. Eliesa @ Pinterest Addict says

    March 13, 2018 at 12:26 pm

    Holy crap! I didn’t know it was a roll of wall paper like that! It looks amazing!

    Reply
    • Ariel says

      March 18, 2018 at 10:42 pm

      sure is! it’s all the stripes, and you apply them yourself.

      Reply
  8. Erin says

    March 13, 2018 at 9:28 pm

    This is super cute. Makes the space look taller. Well done.

    Reply
    • Ariel says

      March 18, 2018 at 10:40 pm

      Thanks!

      Reply
  9. Corinna henderson says

    March 16, 2018 at 10:14 am

    The stripes make such a big difference! They look fabulous with the art.

    Reply
    • Ariel says

      March 18, 2018 at 10:39 pm

      it sure does! thanks 🙂

      Reply

Trackbacks

  1. Powder Room Hardware Choices • PMQ for two says:
    March 20, 2018 at 11:32 am

    […] Glam Kate Spade Inspired Powder Room: The Plan // Removable Wallpaper […]

    Reply
  2. Kate Spade Inspired Powder Room - The Reveal • PMQ for two says:
    March 27, 2018 at 9:54 am

    […] first! Catch up on Week 1: The Plans // Week 2: The Wallpaper // and Week 3: The Hardware […]

    Reply

Leave a Reply Cancel reply

Your email address will not be published. Required fields are marked *

woman in red dress on counter

Hi! My name is Ariel and I'm the voice behind PMQ for two. I create bright, bold, colourful, and eclectic home decor, DIYs and lifestyle content.

  • Bloglovin
  • Facebook
  • Instagram
  • Pinterest
  • Twitter

PMQ for three

Time For A Cocktail

pmqfortwo

Instagram post 2197281245222564406_483183181 AD: Ya sure, I can peacefully watch JB snooze from anywhere in the house with our new @letsvava baby monitor, but I can also set it up to catch Santa in the act when he stops by on the 25th! The handy infrared video monitor means that JB and I can spy on him from the bedroom when he goes for his cookies. Pretty slick eh? What else would you use your baby monitor for? •
•
•

#vava #babymonitor #santacam #christmastree #whitechristmastree #babysfirstchristmas #pocketofmyhome #familymatchingoutfits #christmasjammies #matchingjammies #mommyanddaughter #babyessentials #livingroomdesign #livingroomdecor #christmaseve #santaclaus #letsvava #eclecticdecor #eclectichomemix #bhghowiholiday
Instagram post 2196555291982441586_483183181 Decorating for Christmas is something that brings me great joy. Placing colours and textures in contrast scratches an itch, and then appreciating it all on a daily basis is even better. Today in my stories I’m sharing pics and tips from Christmases past, so make sure you go tell me how amazing it all is. My ego needs the boost! While you’re at it, check out the other colourful bloggers in the IG only tour (tagged in this photo). Happy hump day! •
•
•
#chinoiseriechic #chinoiserie #retrokitchen #retrochristmas #vintagechristmas #vintagechristmasdecor #bhghowiholiday #ihavethisthingwithcolor #christmasdecor #kitchensink #vintagekitchen #eclecticdecor #bluekitchen #poinsettiasforchristmas #poinsettias #abmhappylife #pocketofmyhome #atomicranch #kitschmas
Instagram post 2195829762291490111_483183181 We have one nutcracker for each year together. Should I add one for JB? Would you believe that I themed our house tour around different materials!? (Because I have a lot of time) The entryway is wood, the bedroom is yarn, the nursery is metallics, so on and so forth. Go check it out on the blog! Tell me what ya think. @raintinroof @ourfifthhouse and @camilapavone are also sharing theirs today! •
•
•
#nutcracker #nutcrackers #christmasdecor #christmasdecorations #christmasdecorationseverywhere #abmlifeissweet #12daysofchristmas #eclectichome #eclectichomedecor #curatedvintage #pocketofmyhome #fleamarketdecor #kitschmas #retrochristmas #nutcrackercollection #anthropologiehome
Instagram post 2195107465469473095_483183181 Wipe your paws on the way in! AD: Using our @fiskarsamericas multipurpose garden ships to cut through a doormat, I hacked the Anthro gingerbread house doormat for 5$. Full tutorial is on the blog for the curious!
•
•
•
#anthropologiehome #anthropologiehack #retrochristmas #retrochristmasdecorations #gingerbreadhouse #gingerbreadhouses  #anthropologiechristmas #ihavethisthingwithcolor #abmlifeissweet #pocketofmyhome #retrokitchen #kitschmas #christmastime🎄 #ihavethisthingwithfloors #fiskars #christmascrafts #christmasdiy #wipeyourpaws #anthropologiechristmas
Instagram post 2192932954456261636_483183181 New boobs - who dis? Pregnancy and now maternity have brought some *interesting* changes to my body. Boobs being the biggest variable. I don’t love them, but hey, they’re part of the gig for now. AD: I’ve been dying to try the @knixwear maternity bra because it’s billed as leakproof, and all my other maternity bras are meh. They sent me one to try, and here’s my review: I like how it shapes and supports them. I look the most “normal” wearing it. The clasp is easy to open and close. I don’t like how the little cups inside aren’t fixed and move around, so when I fold it under during a feeding, I find I have to re-adjust before closing it. All things considered though, it’s the best I’ve tried so far, and the leakproof is true! No leaks.
•
Have you tried it? What did you think?
Instagram post 2192206267112323470_483183181 Send eggnog! 🥚🍼🐔 Our Christmas party season starts this weekend! For the first year EVER we have to negotiate schedules and appearances based on babysitter availability. It’s like a board game based and negotiation and money. Fun eh? •
•
•
#christmaspartyideas #christmaspartydecor #eclecticdecor #eclectichome #myhomestyle #bhghowiholiday #smallspacesquad #sideboardstyling #sideboarddecor #christmasdecor #christmasdecorations #abmlifeisbeautiful #sillyseason #christmasgiftideas #maximalism #styledhome #bhgholiday #fleamarketdecor #spoonflowerwrappingpaper
Instagram post 2191484958258745569_483183181 Uncle Eddy made it! If you think I spent 2hrs during JB’s naptime creating a cake topper inspired by National Lampoon’s Christmas Vacation, then you’re 👏🏻absolutely👏🏻 right👏🏻 Check our the whole thing on the blog.
•
•
•
#nationallampoonschristmasvacation #christmasvacationmovie #christmasvacationquotes #whitechristmastree #whitechristmas #christmasdecorations #caketopper #kitschmas #shittersfull #iamcreative #clarkgriswold #retrochristmastree #retrochristmas #christmasmovies #christmasmoviemarathon #livingroomdecor #bhghowiholiday
Load More...

- THEME BY ECLAIR DESIGNS -

Cookies 🍪

This site uses cookies: Find out more.