A while back I found a group of similarly eclectic home decor and DIY bloggers and am head-over heels! The style, inspiration, and quality from that group is in-sa-ne. When I found out that every month a bunch of them do an “inspired by DIY” blog hop I jumped at the opportunity to participate. You can never have too many blog hops right?! This month’s Inspired by DIY – hosted by my friend Jess from Domicile 37 – has us all recreating our fav Pottery Barn items and I chose their Marbleized Serving Platter.
The platter is shown in blue. If you know me, you’ll know that there was no way I was going to do blue since I have a nice blue Countryside Whichwood Pattern, so whatever I made had to be complimentary to that, but not in the same colour. Hence the pink marbleized plates.
In case you haven’t noticed, I’m having a bit of a moment with pink these days. I don’t know what is is, but the colour and all its shades have a hold on me! I’m not using it in an infantile gamine way either, I’m throwing this bad boy into the deep-end with bigger and bolder colours to watch it swim!

Materials required
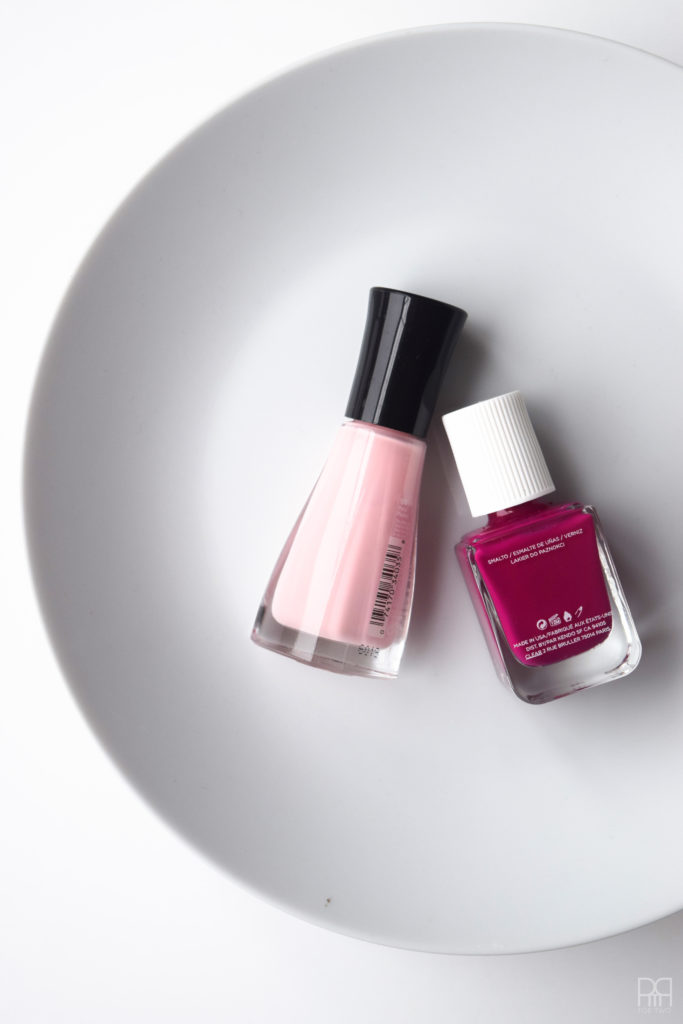
- Nail polish in as many colours and shades as you want *DO NOT GET FAST DRY NAIL POLISH… it dries too fast*
- Plastic container that you don’t mind getting stained and dirty
- Toothpick
- Clean and dry dish; I did plates but you could do a mug, a bowl, a tray, tile etc.
- Paper towel
- Dishwasher safe Mod Podge
- Paint Brush
Step 1: Make sure your plates are clean from dust, oil and smudges left by price stickers.
Step 2: Fill your plastic container half way with warm/hot water. The warmer it is – the faster it all dries.
Step 3: Drizzle your nail polish over the water. You’ll see that some of it clumps to the bottom while the majority of it will float on the surface.

To avoid it all clumping to the bottom, drizzle your nail polish in a circular motion. It helps the polish disperse as opposed to pooling on the bottom.
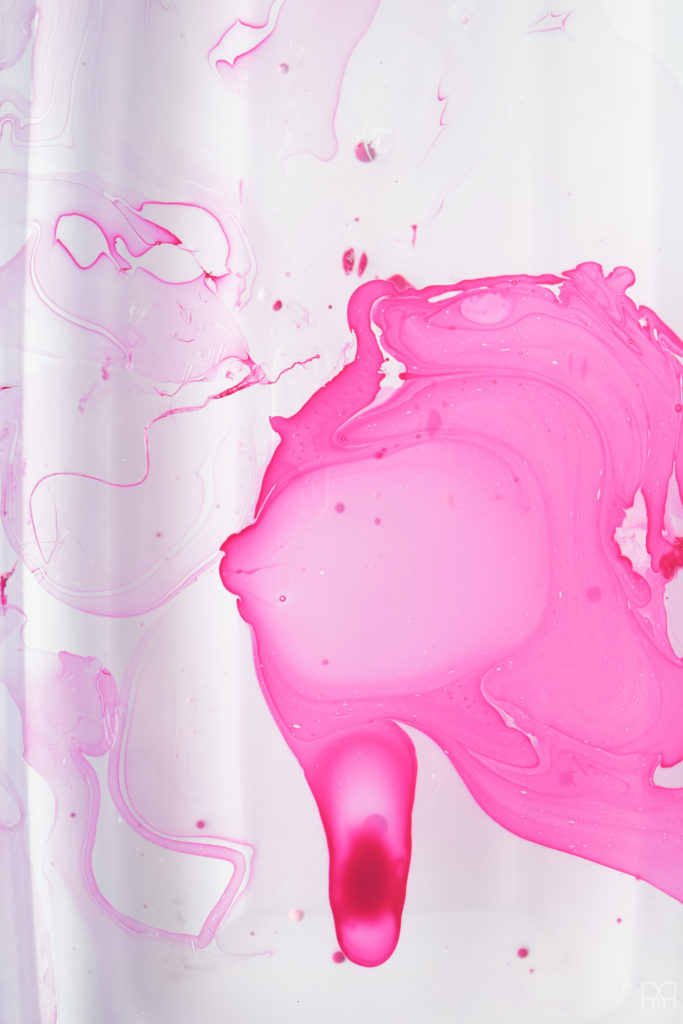
You can use a toothpick to swirl colours together if you’re using more than one.
Step 4: Dip your plate into the polish.
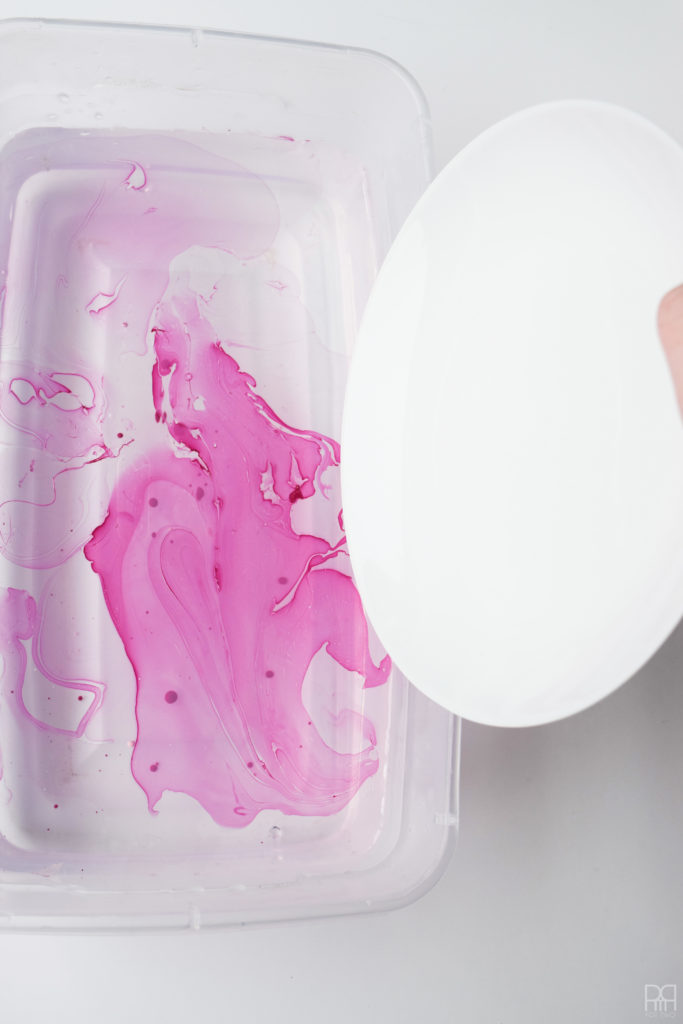
My container is too shallow for me to dip the entire plate in one go, so I quickly turned the plate as I went to ensure it got the most coverage.
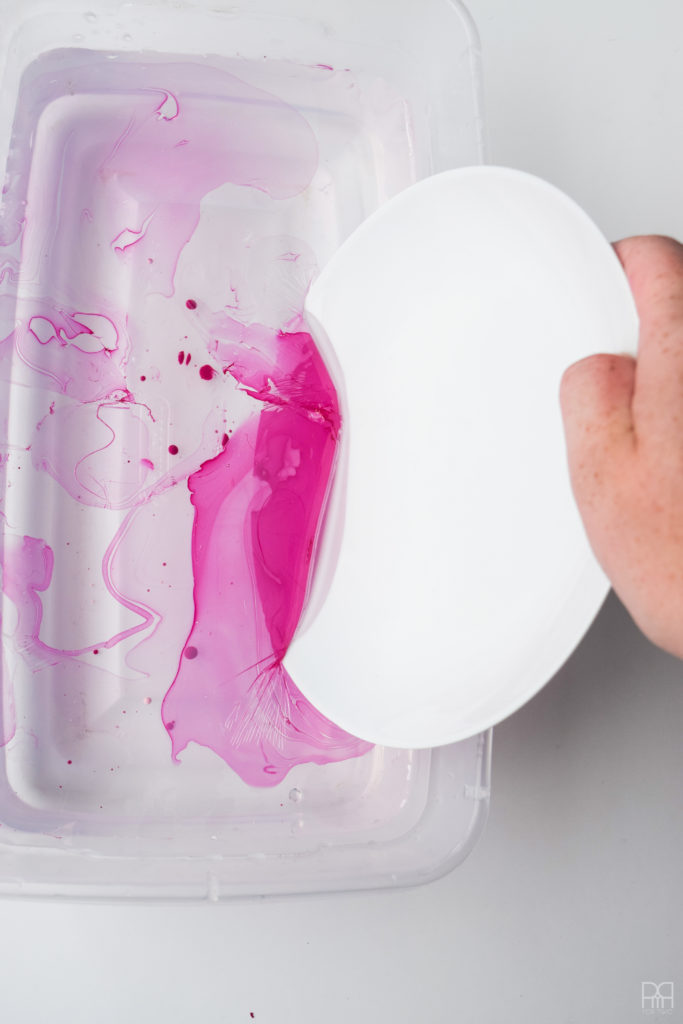
When you pull the plate out of the water the final polish will settle on the plate, but be sure to drain as much water as you can.
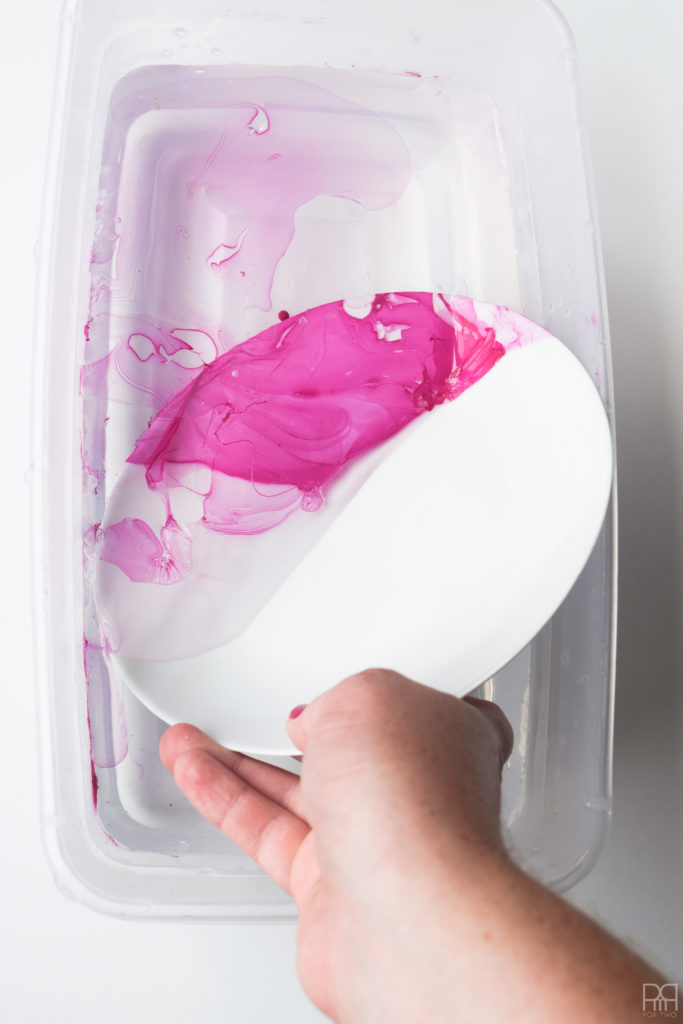
Step 5: Let the plate dry. I sat mine on some paper towel after it came out of the water and let most of the water dry.
20 minutes later I flipped the plate upside down to ensure there was no water left before sealing it.
Step 6: Using a paintbrush, apply your dishwasher safe mod podge to the marbleized plates’ surface.
If your marbleizing covers the whole plate – even the underside – and you want to keep that look, make sure you coat that area too.
Once it’s coated it’s food safe and can withstand the top rack of the dishwasher.
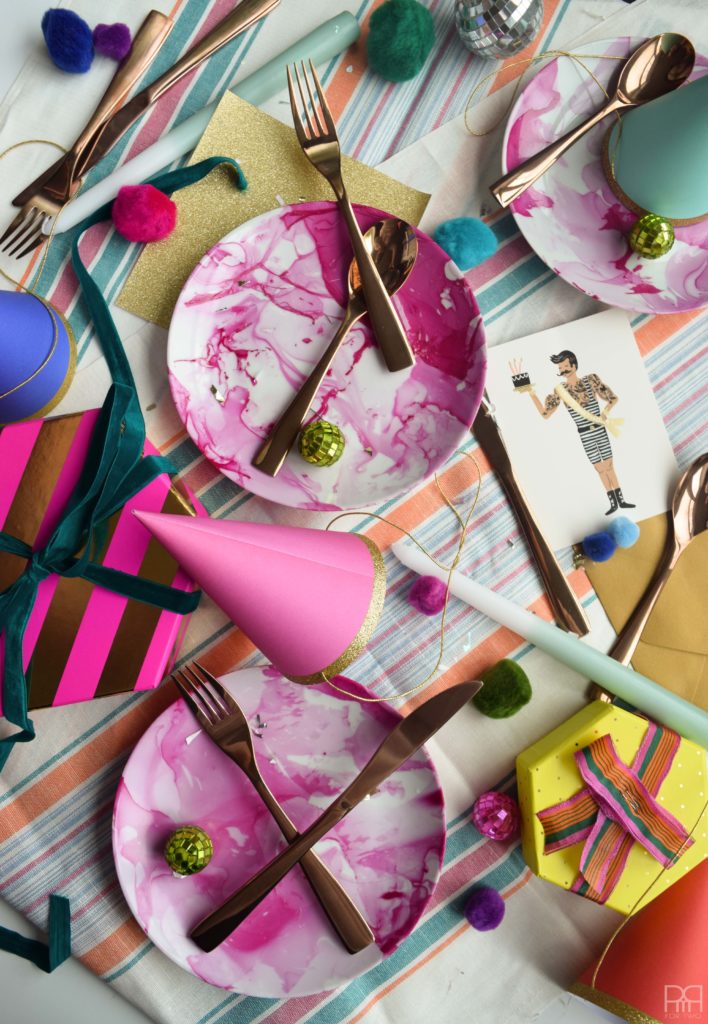
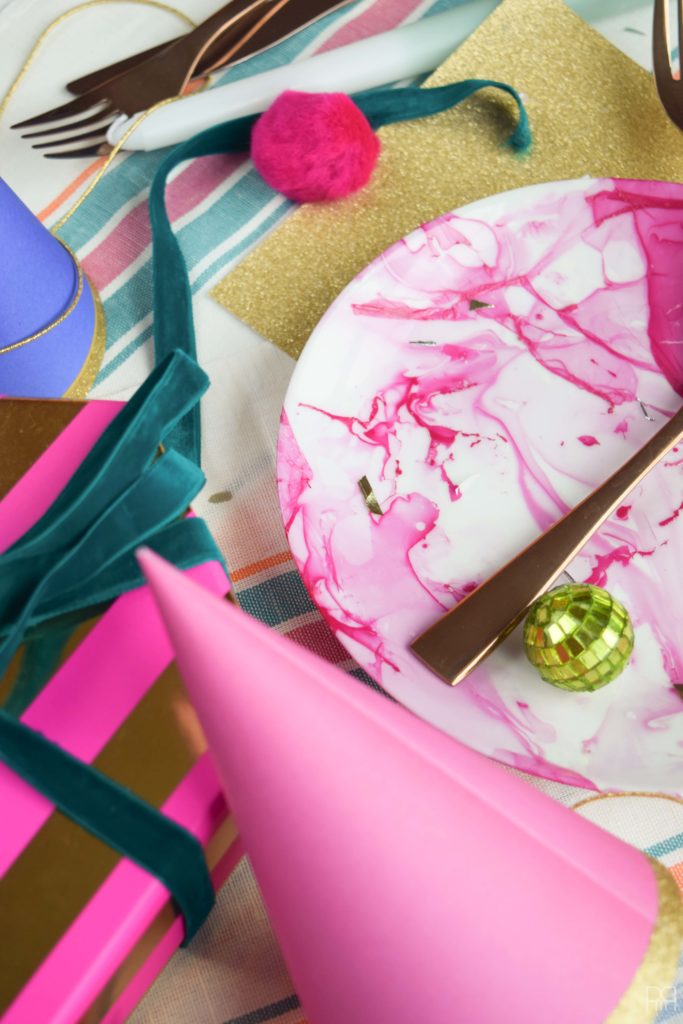
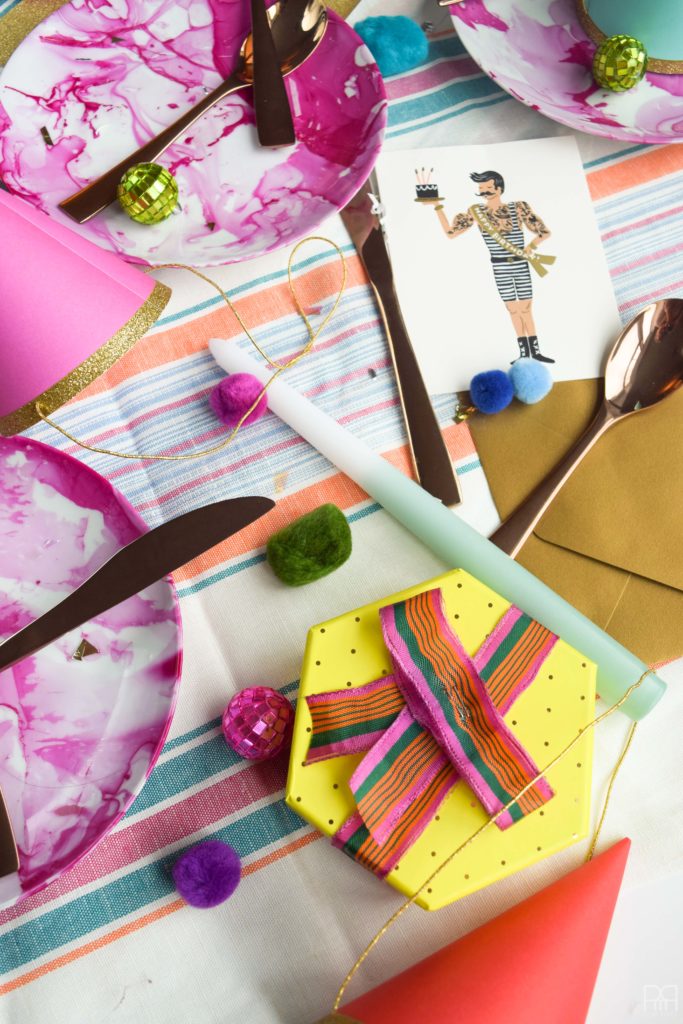
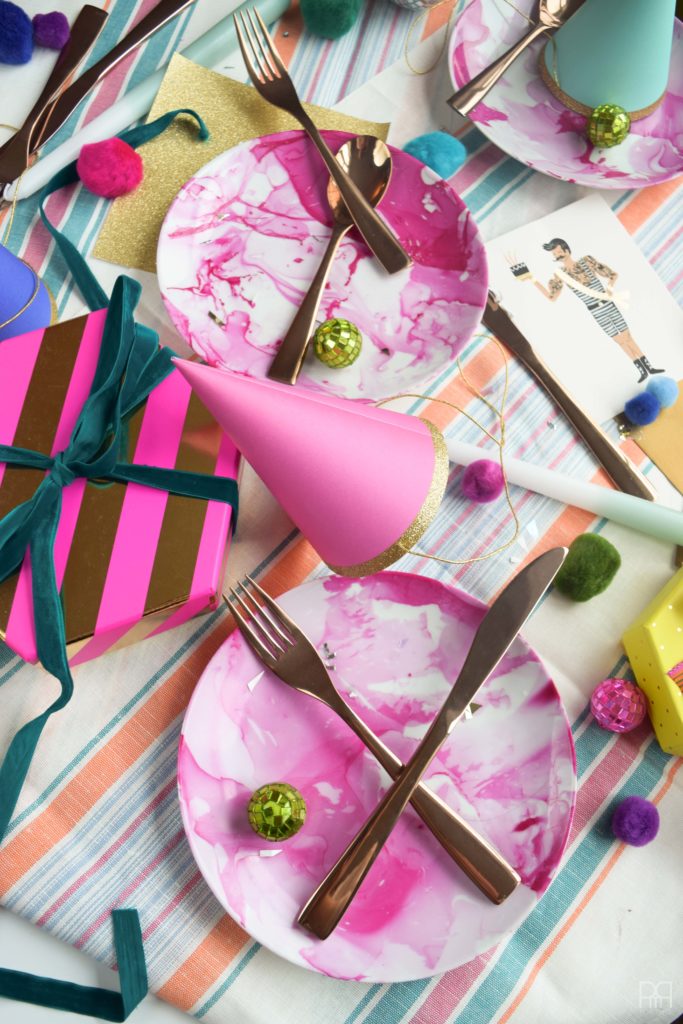
Step 7: Get the party going! I’m hosting a birthday party for no good reason, but hey! There’s confetti and birthday hats and funky marbleized plates for eating cake.

I love the look of these marbleized plates – and given how easy they are you can be sure I’ll be doing them thematically for other holidays. Can you picture spooky marbleized plates with black veins?!
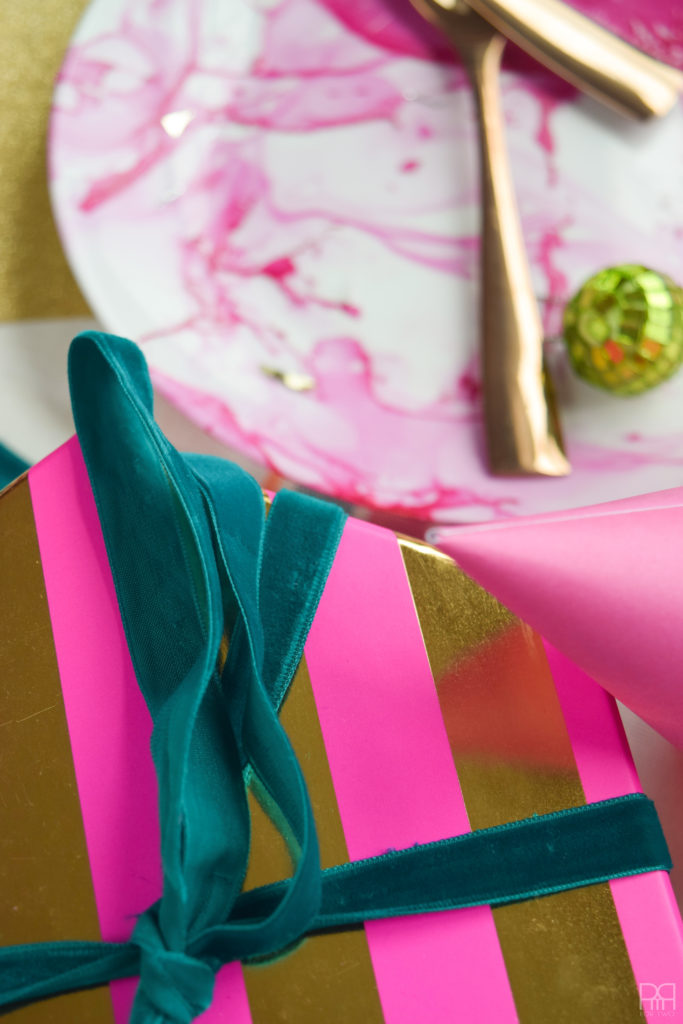
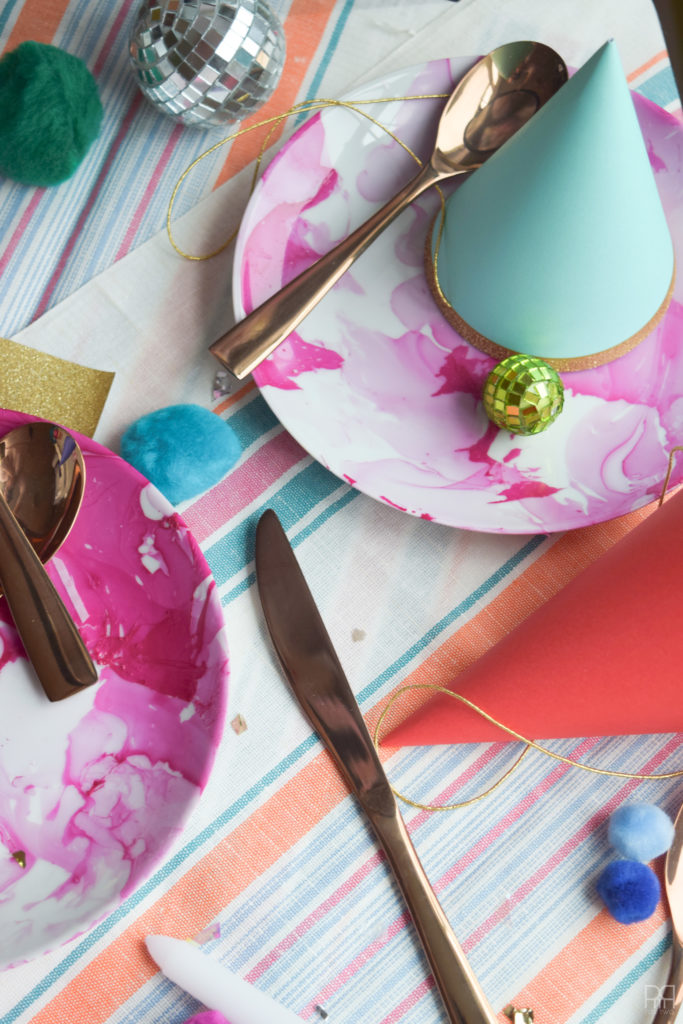
I found the paper hats at Old Navy a while back – random I know. They’re fun and pretty solid, so I’ll be sure to re-use them!
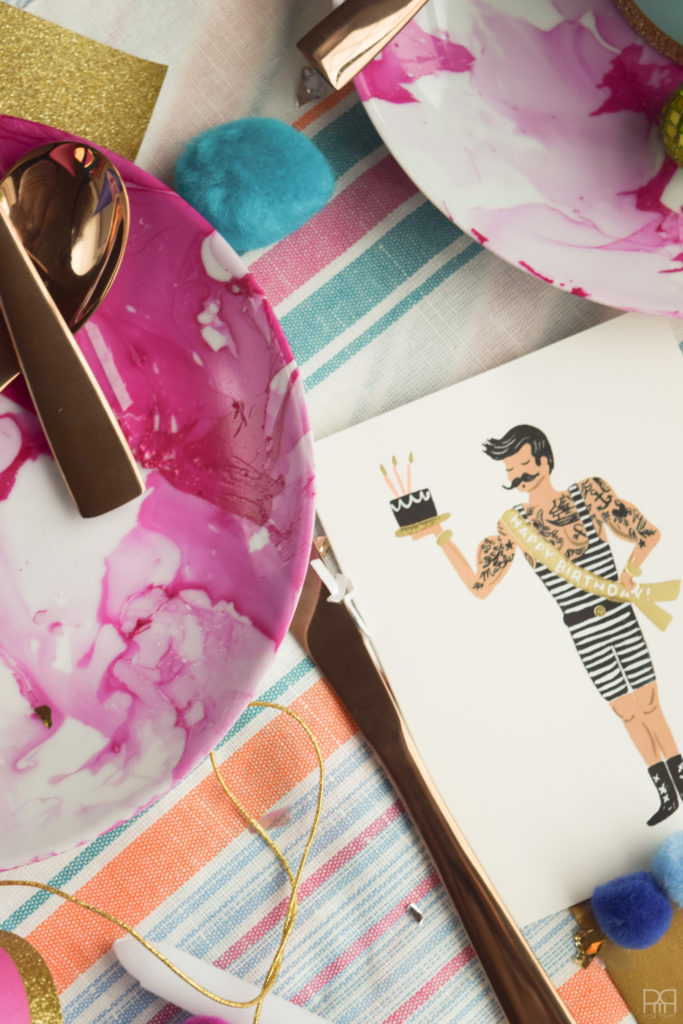
The birthday card was purchased in advance of DH’s birthday this fall. DH, if you’re reading… you didn’t read that.


Pretty Practical Home // PMQ for Two // Iris Nacole // Suburban B*tches // This is Our Bliss
Up To Date Interiors // Monica Wants It // Maggie Overby Studios

Love them and yes I can definitely see different colors and even multiple colors! So fun, love the layout too!
Thank you! I plan on doing something similar for
Halloween witj black and grey marbleing
Wow! The pink is gorgeous. I can’t wait to try out this tutorial. ????
Thank you gorgeous!
these are so flippin’ incredible! LOVE LOVE LOVE! and pinned!
thank you thank you!!!
So it seems I need new dishes! Love that they’re actually food safe.
it is a HUGE plus! Try ’em out
These are so cool! I’d love a set of mugs like this, or maybe even a really large platter. The pink was an excellent choice, and I adore your styling!
Thanks Sharon 🙂 I think House of Hipsters did a mug set actually!
Your plates turned out amazing, love them, and how you made them food safe with the mod podge. Great diy!
Thank you Dannyelle 🙂 Mod Podge for life!
O.M.FReak! You just made my life! I will be recreating this DIY once I move. Thanks love for participating and for your spin on the PB marbleized plates
Thank YOU! Send me a pic of what you do. Good luck with the move!
Ok, this is FAB! I would have never guessed you did this with nail polish. My head is spinning with ideas now. Love, love, love.
Right?! The nail polish is a super secret element and no one would have expected it. Can’t wait to see what you do.
I think you might have guessed from my reactions on Instagram that I’m crazy about these! Love them so much!
Just a smidge ???? Thanks fot the love! ????????????
They are just gorgeous! Beautiful work girl. 🙂
Thank you!!!! I do love my colourful projects 😉
Oh my gosh! I seriously can’t handle how GOOD your after shots look!! I am so ridiculously impressed with this project! Must go marbelize something ASAP! Oh and all of that pink and gold is perfection. Awesome job 😉
I know right?! I wasn’t digging the styling, and then I added a few elements and all of a sudden it’s a fiesta of colour! It’s perfect! Tooting my own horn over here. Glad you like it 😉
Absolutely gorgeous!!!
Thanks girl ????
Awesome stuff!!! Cannot wait to try this out!!!!
Send me a pick of your creation!!
Love, love, love this DIY.
I’m having an impossible time finding plates with the right colour/pattern for my new place, so I’ll be giving these a try!
What material where the plates you used?
Thanks!
Oh good!
They’re just regular ceramic plates purchased at Dollarama. I bet you could do this with a set from IKEA, you know, those boxes where it’s like 4 place settings “to go”
wHAT KIND OF PLATES DID YOU USE? aRE THEY BREAKABLE? i WONDER IF THIS WOULD WORK ON PLASTIC ONES FROM DOLLAR TREE?
Hi Katee!
I used just plain ceramic ones from the dollar store. You could totally try on plastic! Just make sure you seal them. Depending on what sealant you use they may not be food safe either, they’re definitely more decorative! i.e they’d make great chargers
I did these and they came out pretty cool, but i’m wondering are these microwave safe?
I’m not sure to be honest! I would say no and err on the side of caution!