PMQ for two

Bold, Bright and Colourful Home Decor & DIYs

  • Home
  • About me
    • Press
    • Policies
  • Download Colour & Pattern Mixing Guide
  • Project Gallery
  • What is a PMQ?
    • The duplex
    • The Row House Tour

DIY Malachite & Cheetah Decor

June 1, 2018~ Decor, DIY and craft projects

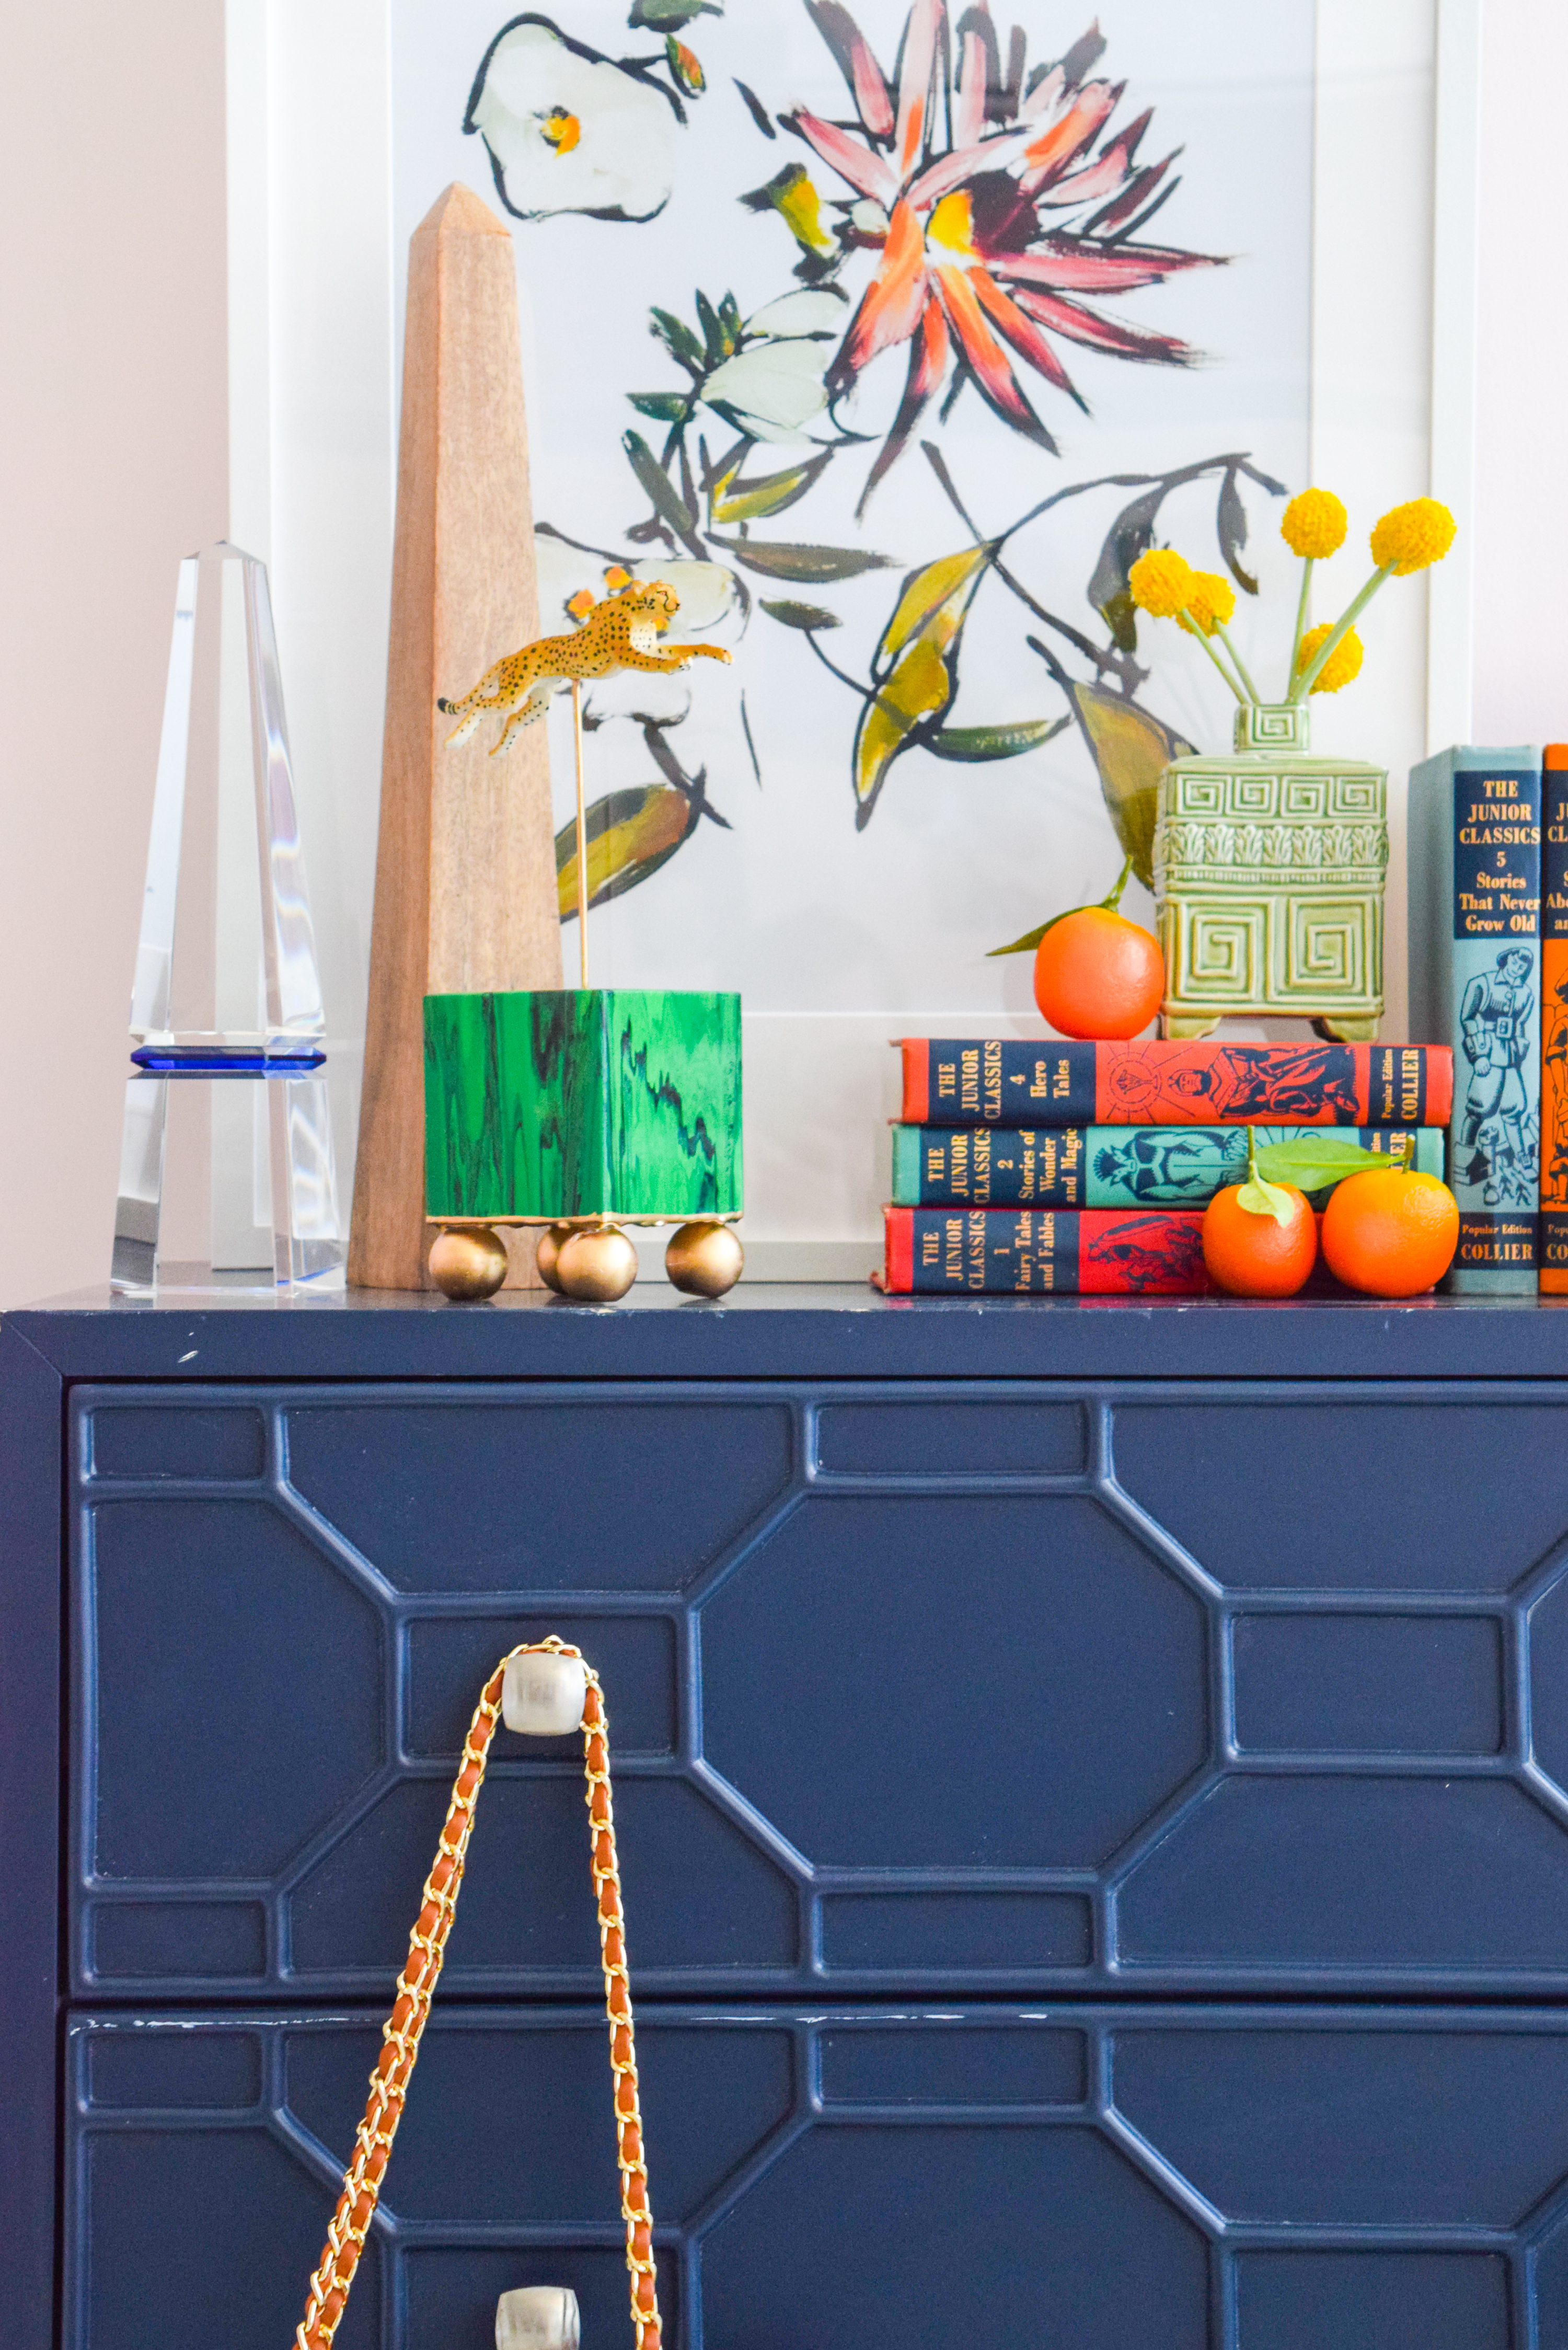
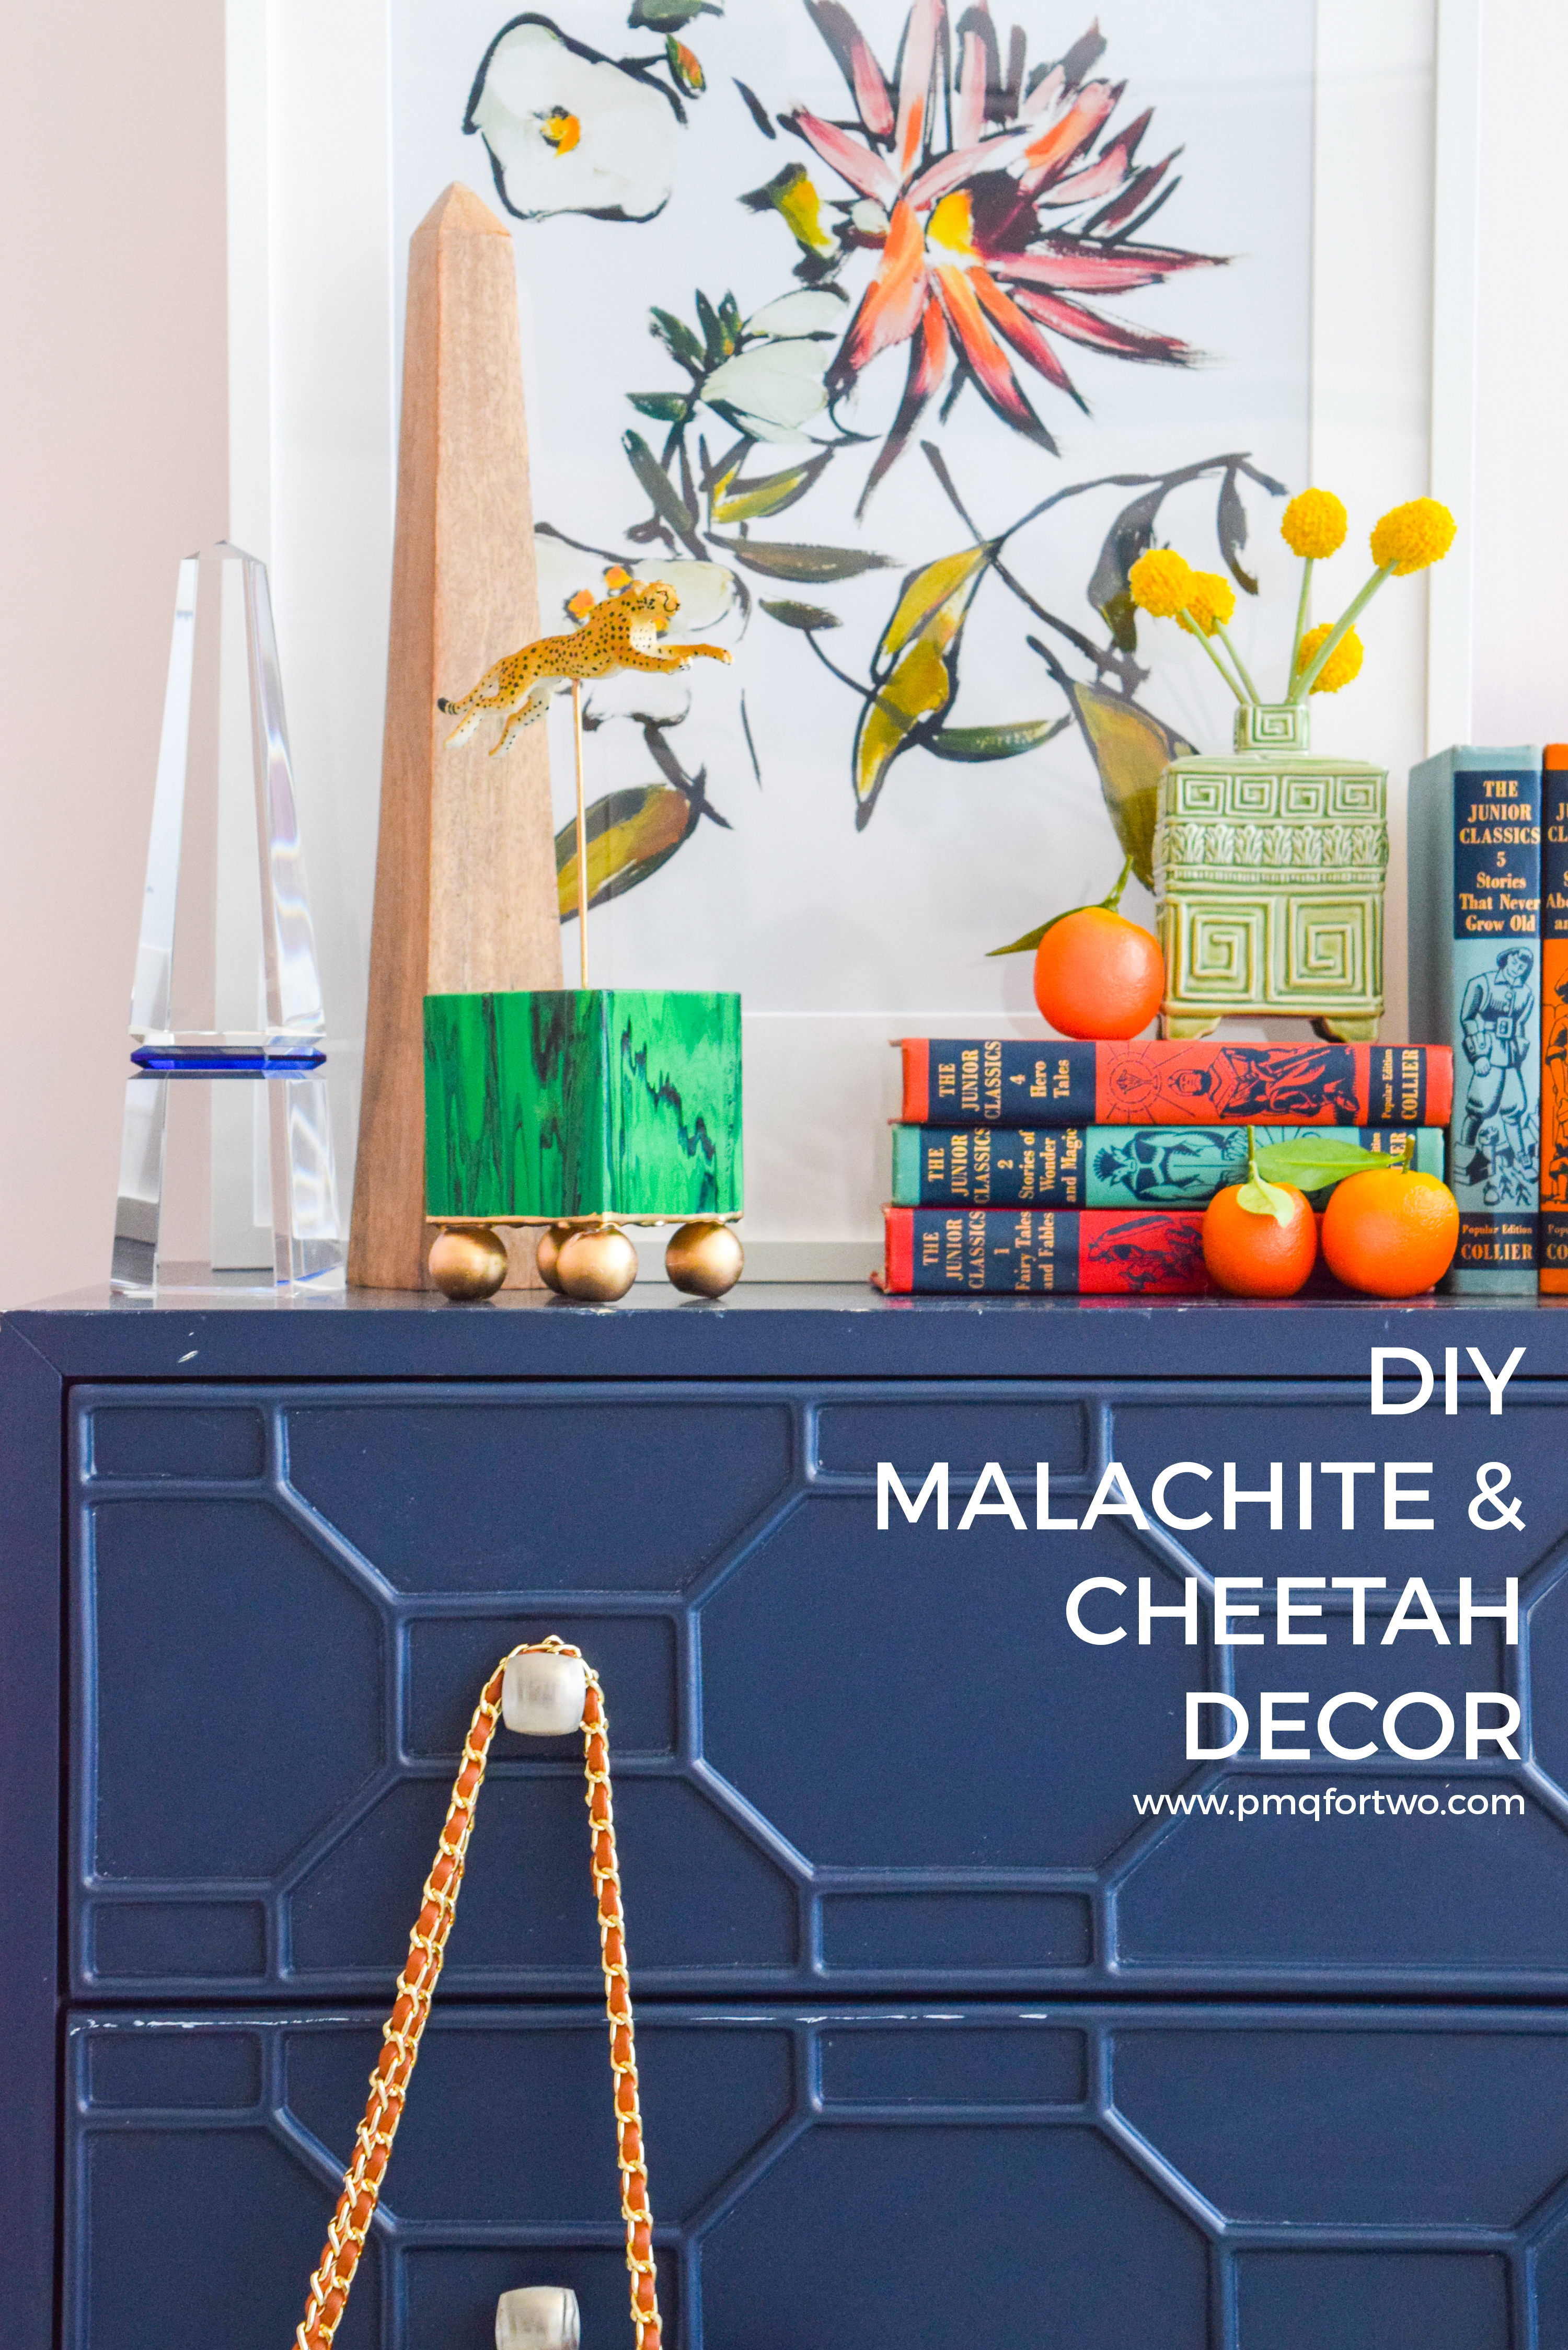
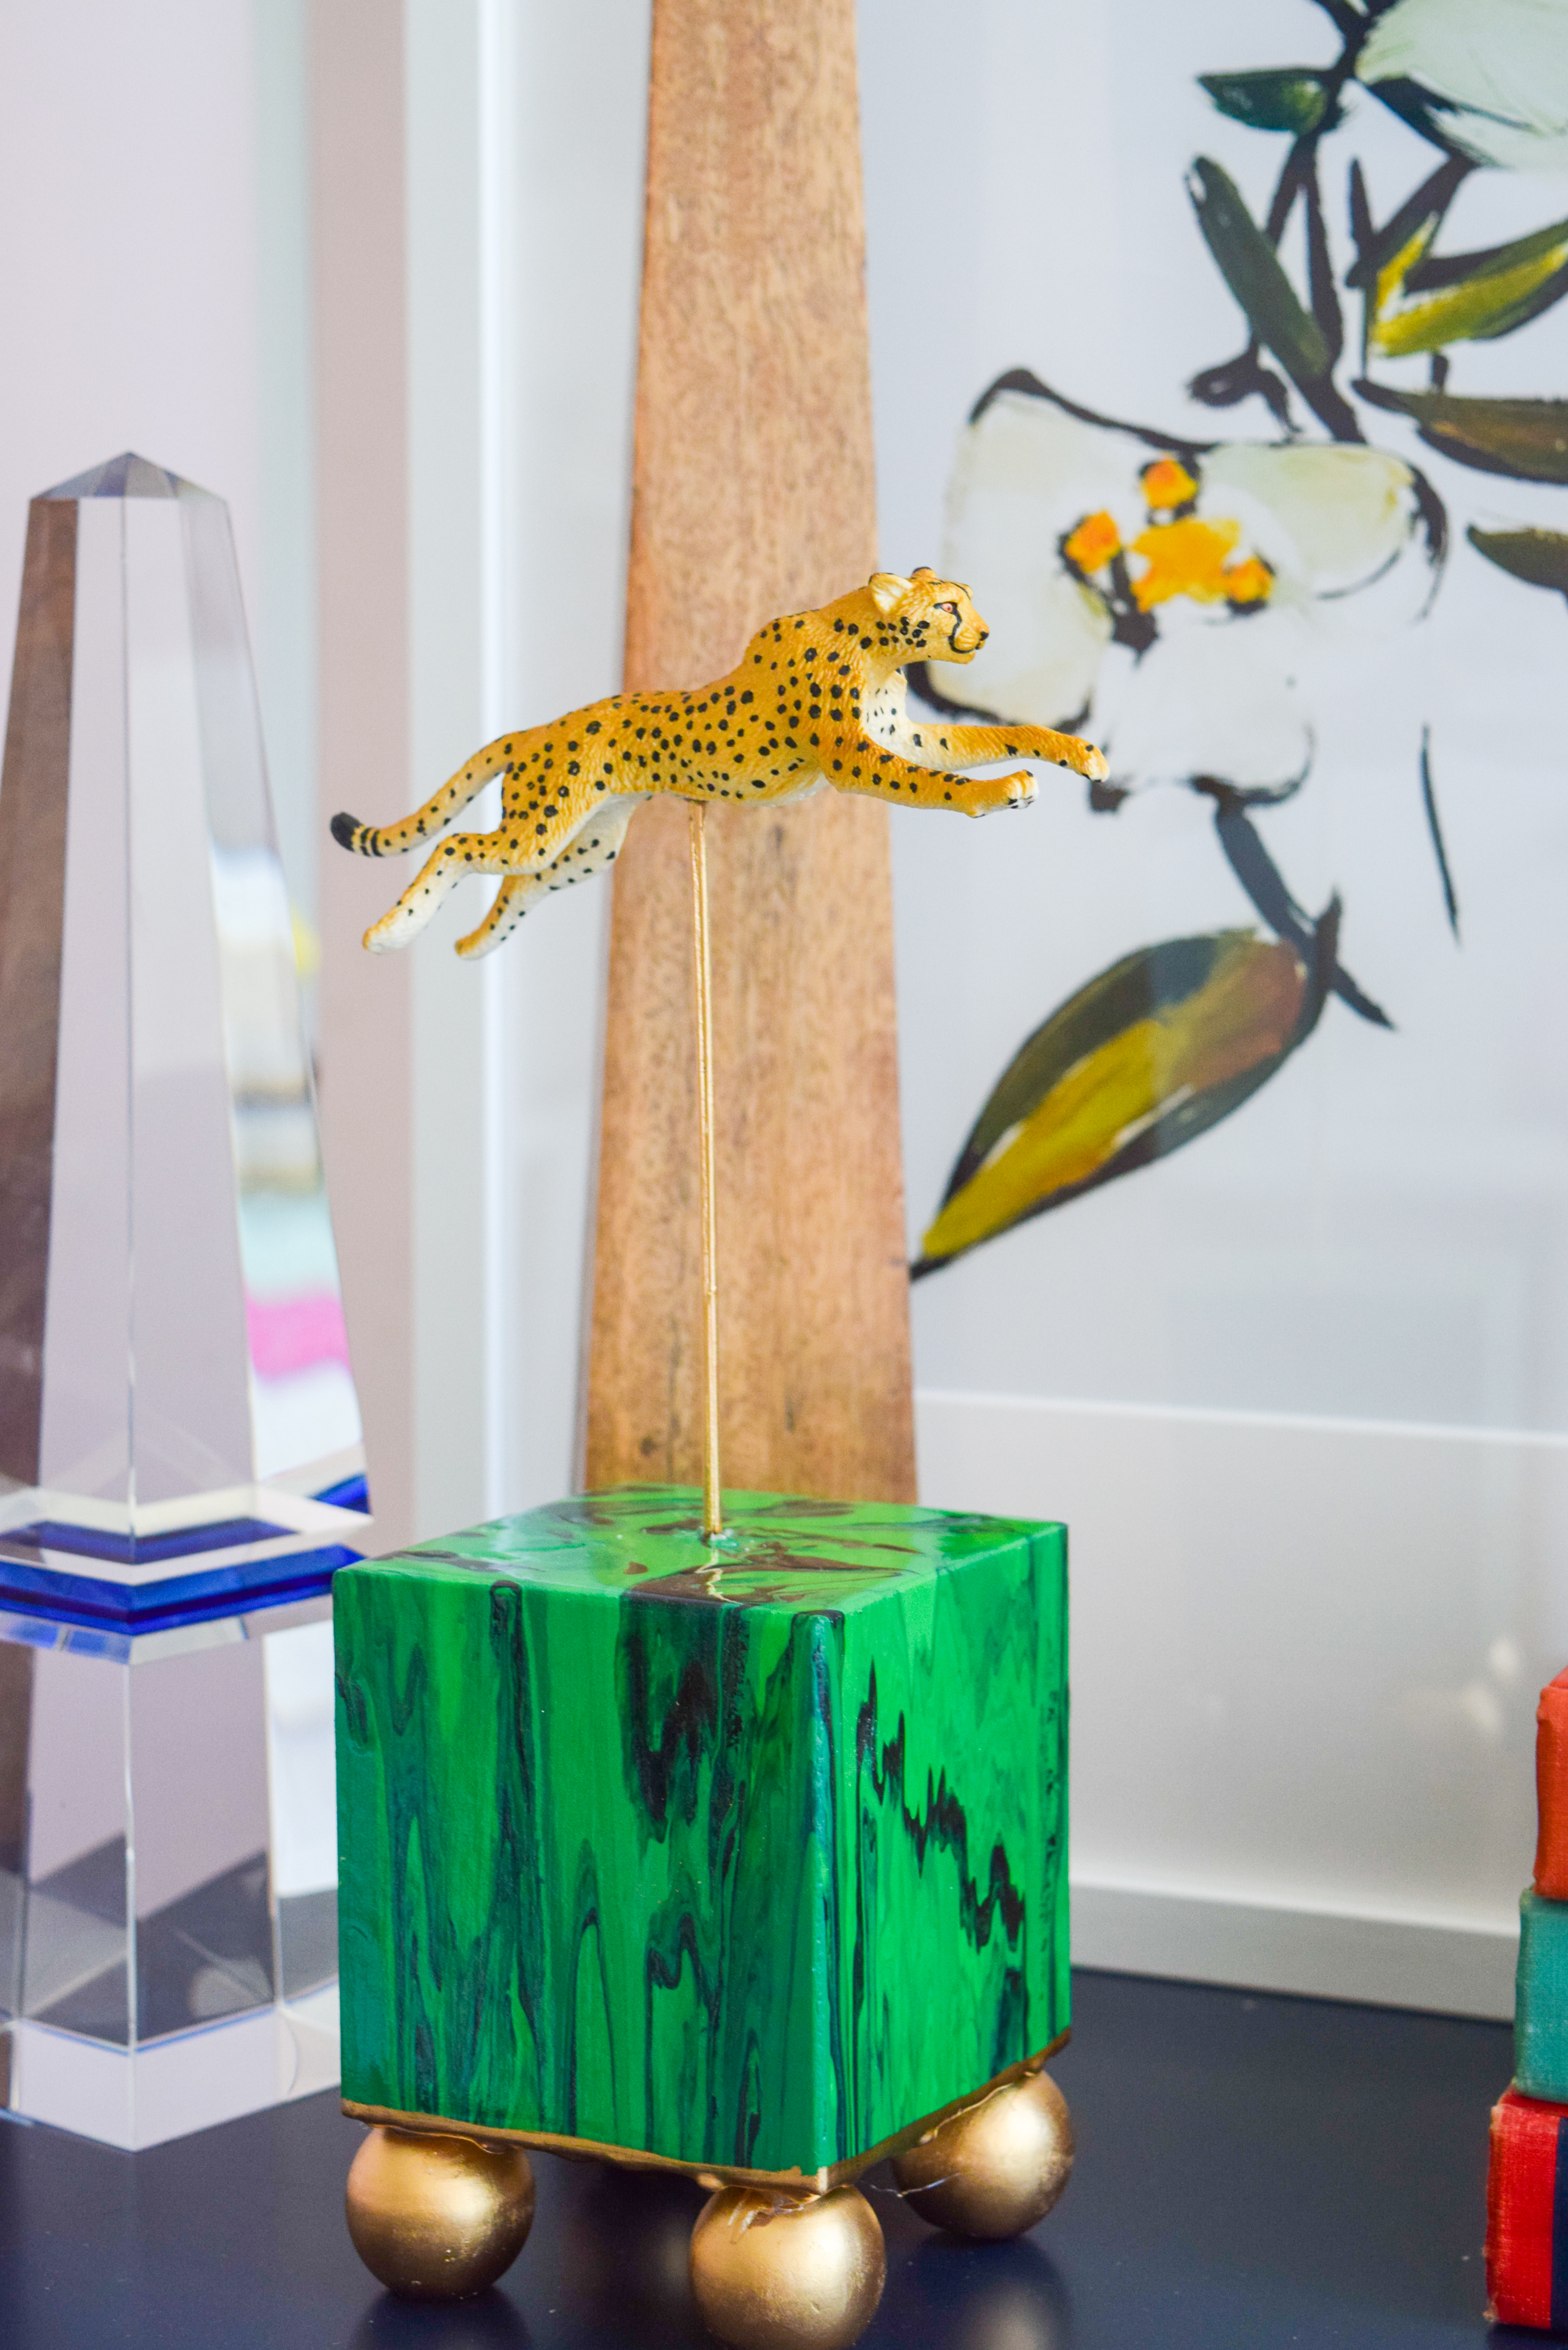
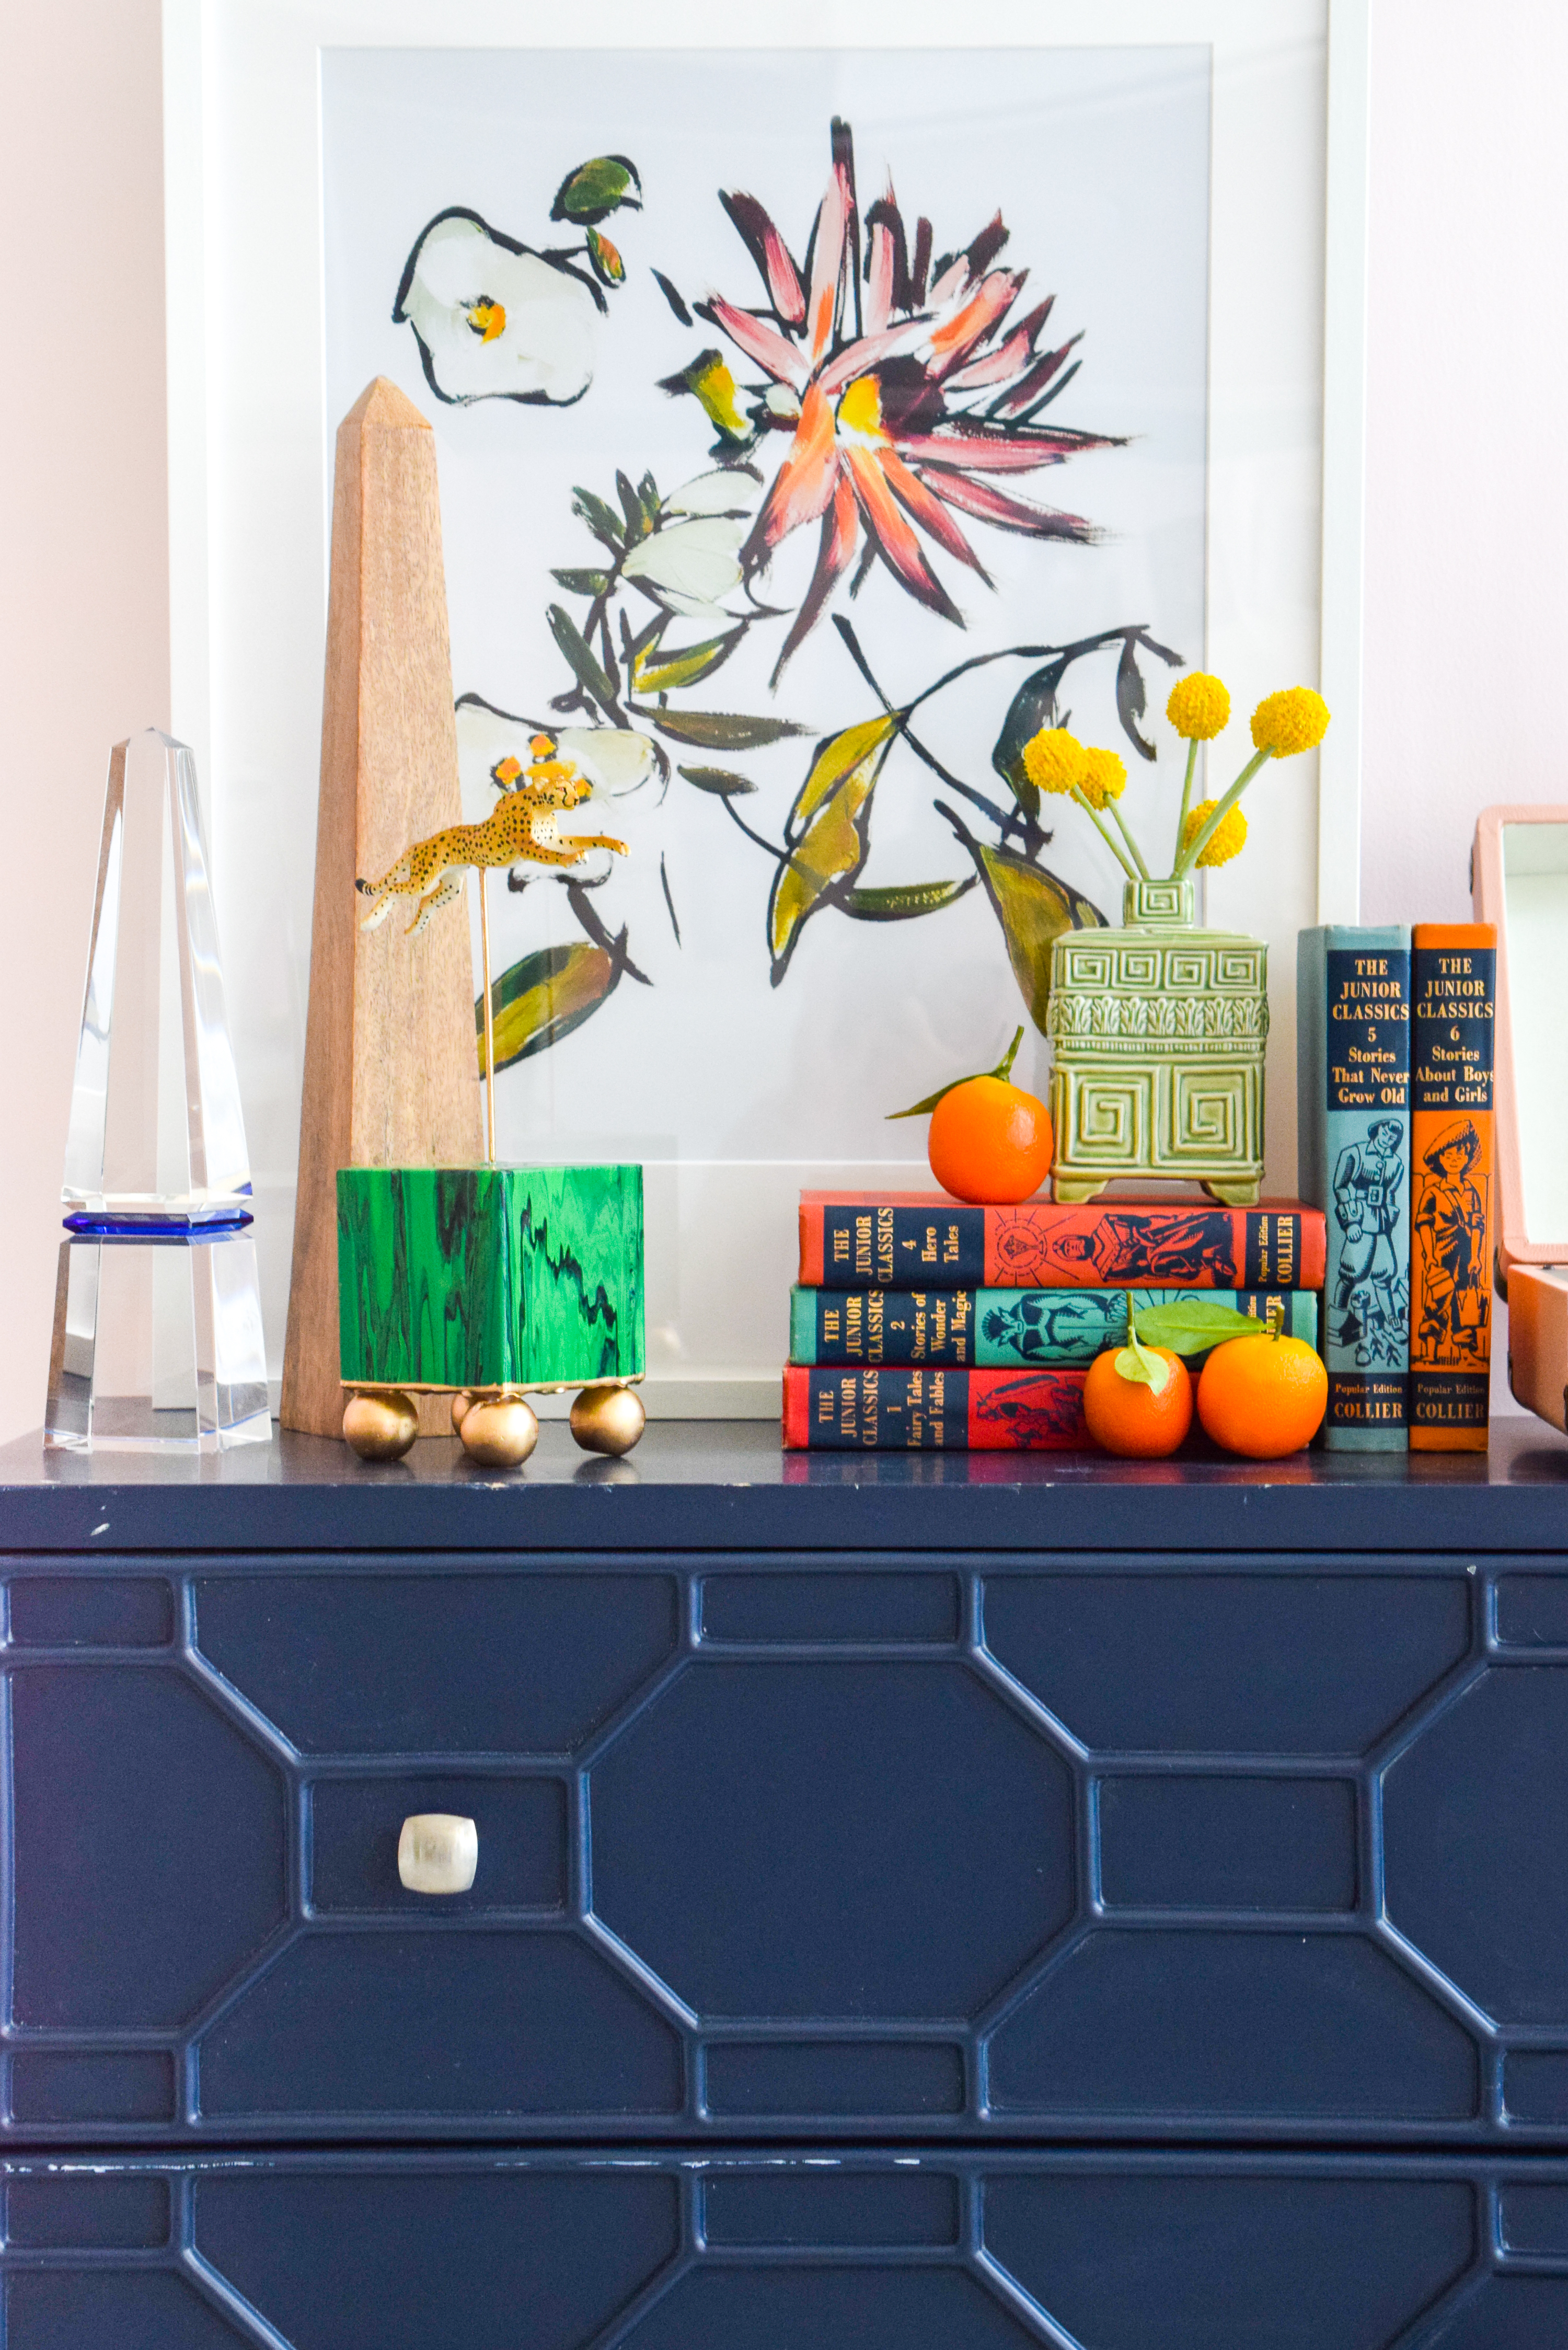
For my final project with DecoArt as part of their 2017-2018 blogger squad, I give to you one of my favourite projects to date — DIY Malachite & Cheetah Decor. I brought this little piece of eclectic decor to life in the space of a day (+dry times) and absolutely loved that it all came together in my mind, while standing in the narrow isles at Michaels. Gotta love that creative spark eh? This project involves — you guessed it— paint pouring, but it’s also got liquid gold and a cheetah, so I think we’re good.

*DecoArt sponsored this post, but all thoughts are my own.  Thank you for supporting the brands that make PMQ for two possible.

DIY Malachite & Cheetah Decor on a budget! Because who really has the coins for some malachite? Grab the secrets behind this paint pouring DIY.

Did you catch my last paint pourring project where I made marbled colanders, perfect for summer? // Catch that post here //

Given the chance to try my hand at paint pouring again, I chose to go off-canvas a second time. It’s not that I don’t love the canvas art, it’s just that I don’t have a place to put it, and since I apply that rule to my shopping, I figured it was high-time I apply it to my crafting (even though I sorta was already)

*The following product links contain affiliate links. Thank you for supporting the brands that make PMQ for two possible. For my full policies click // here //

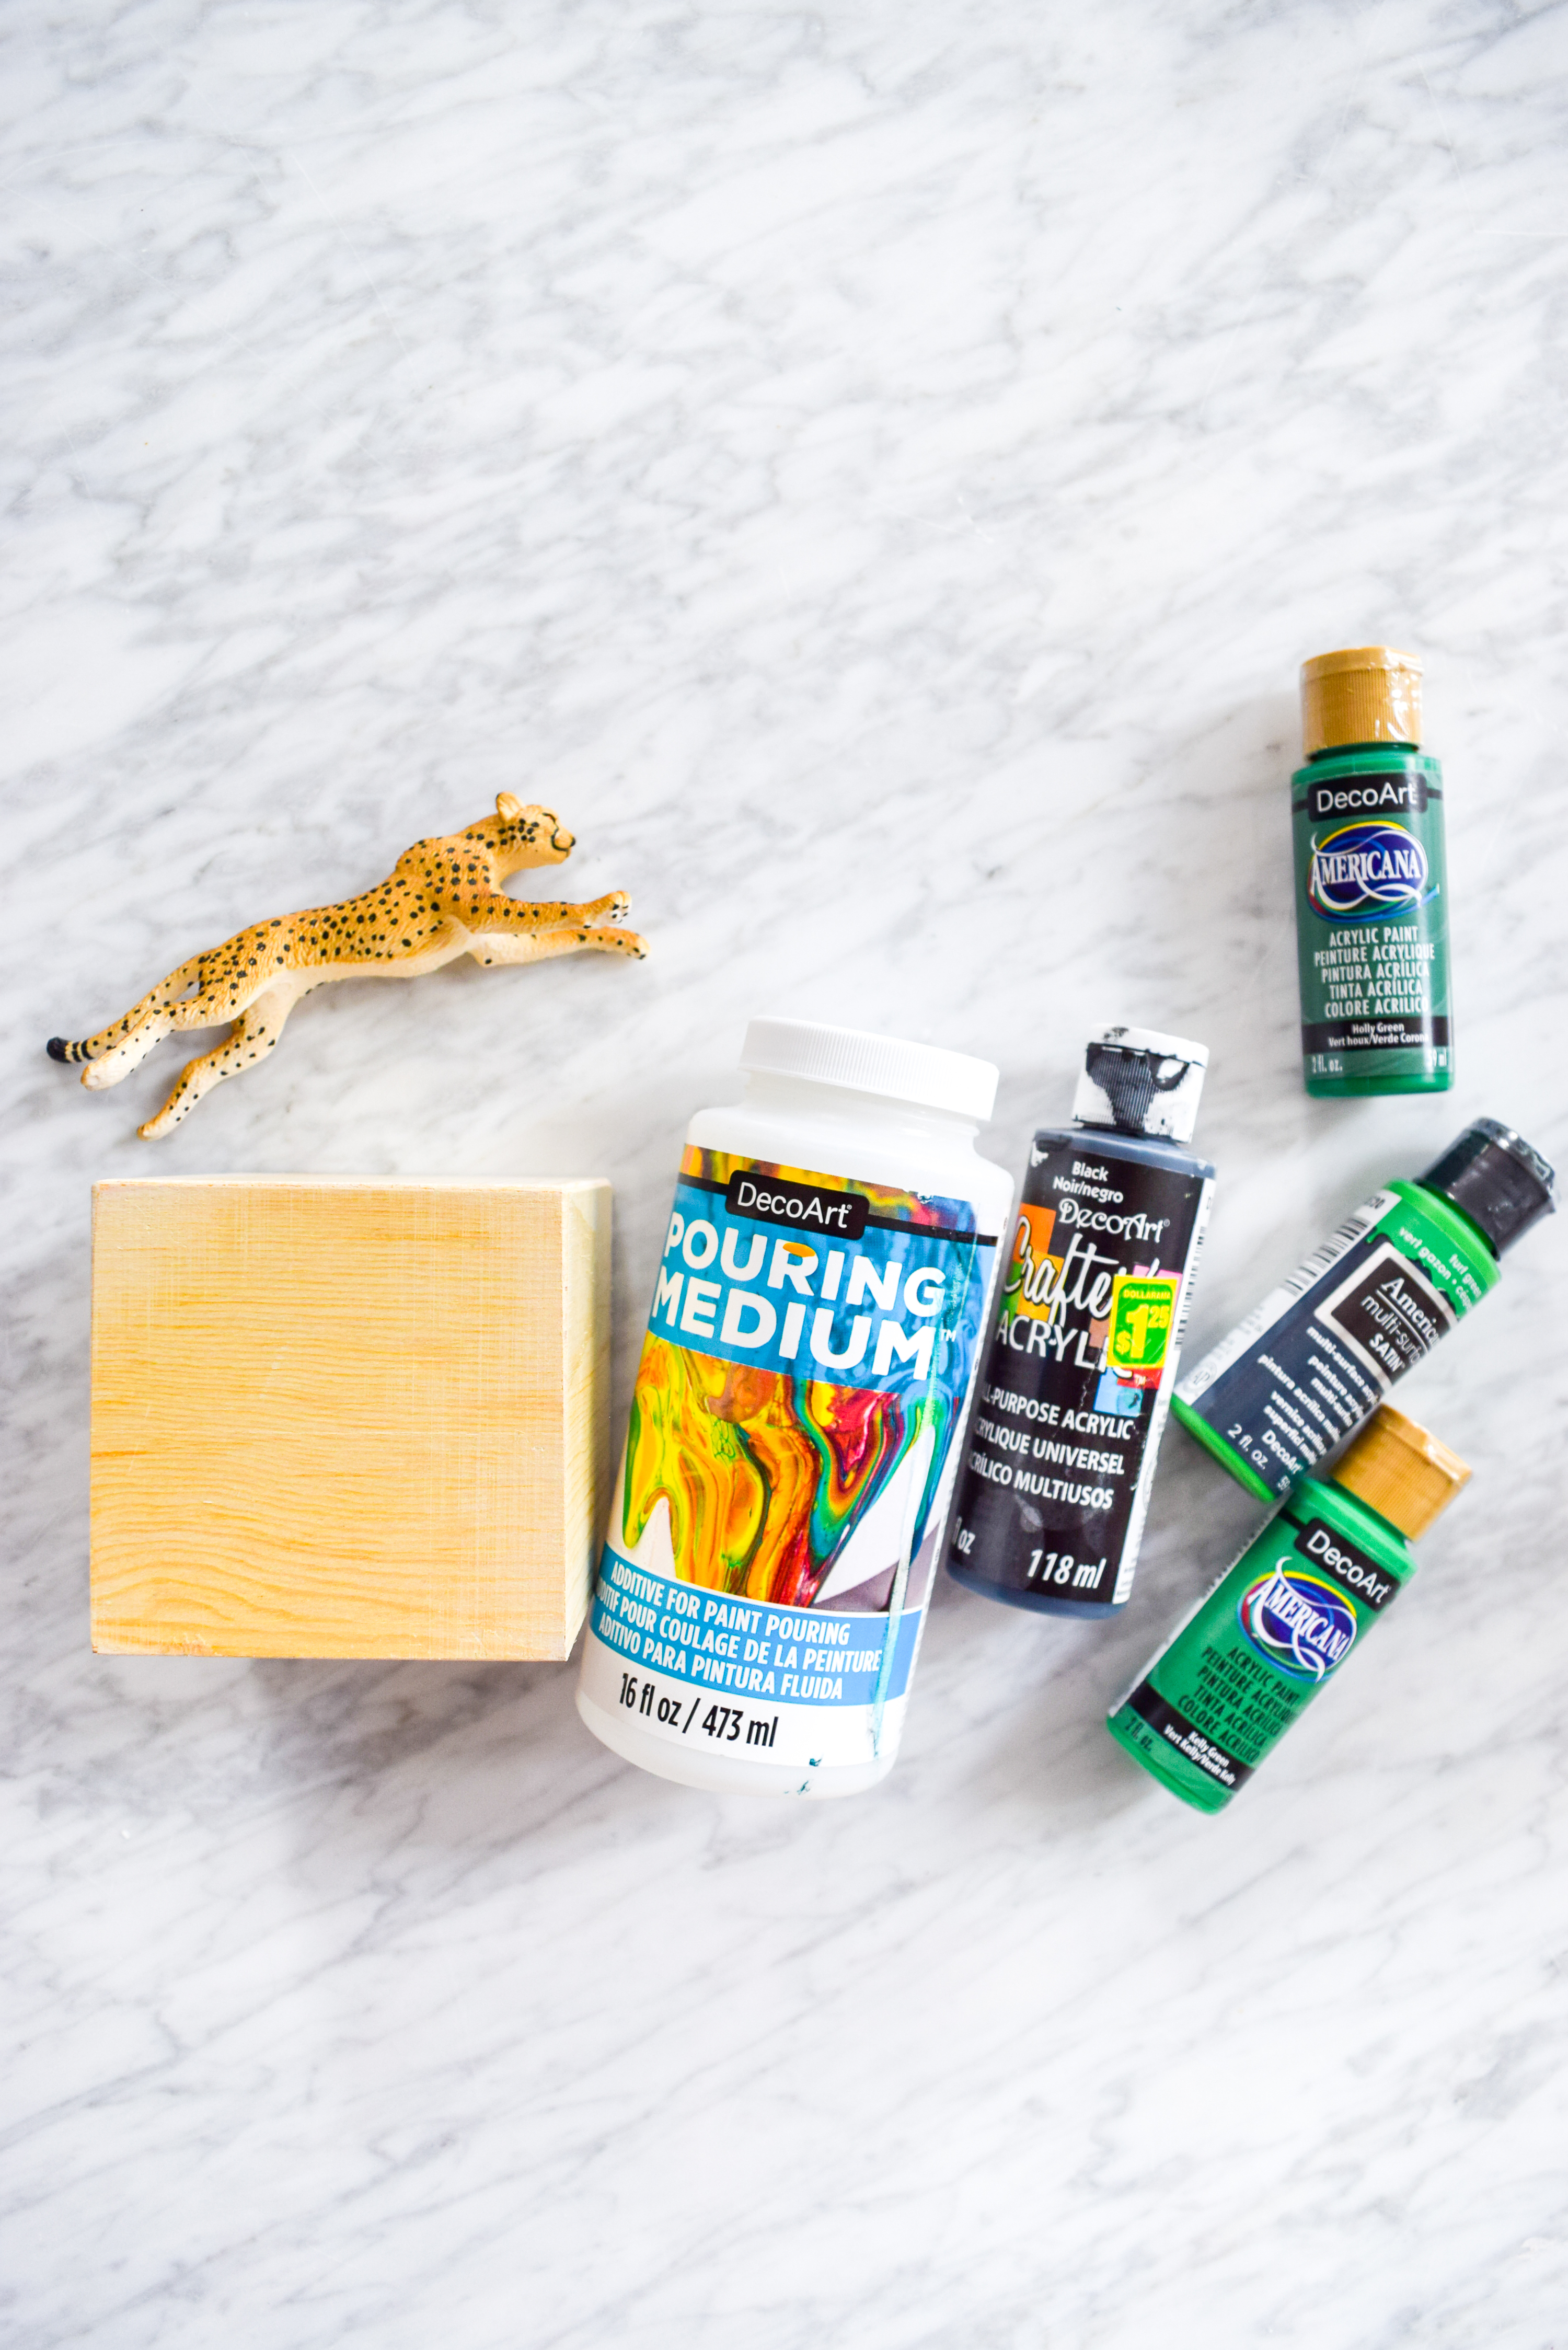
Materials for a DIY Malachite & Cheetah Decor

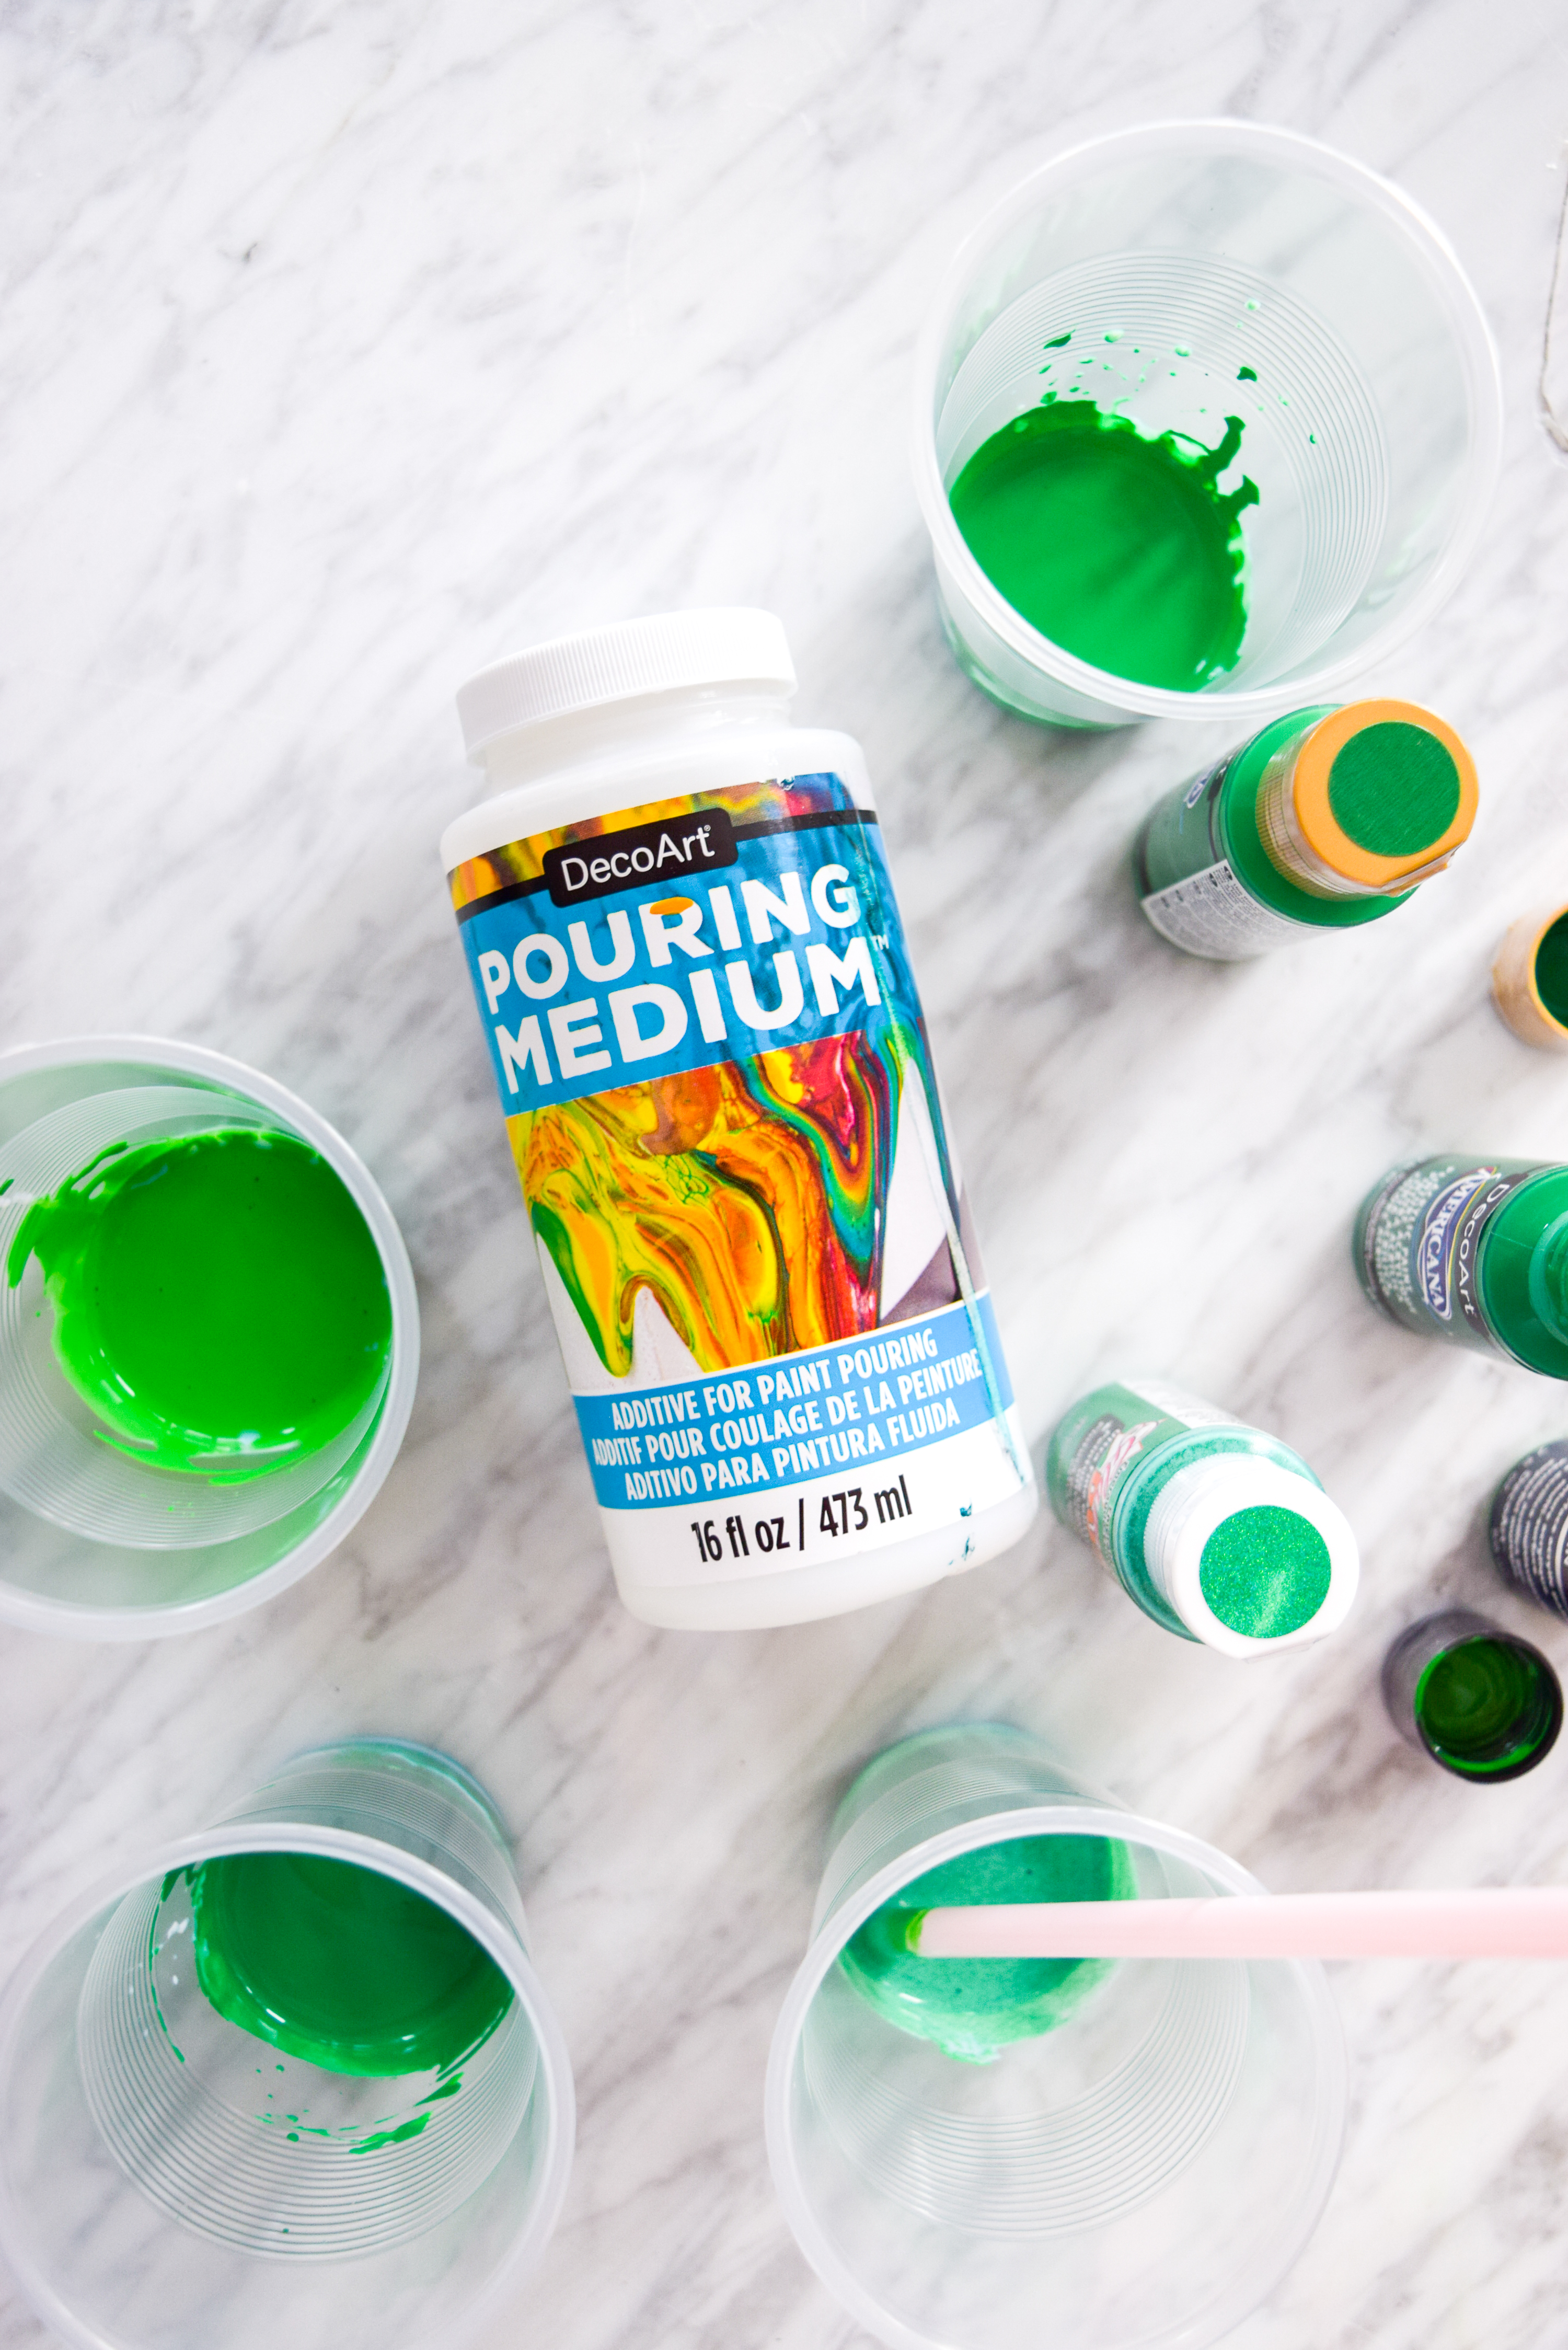
  • DecoArt’s Paint Pouring Medium
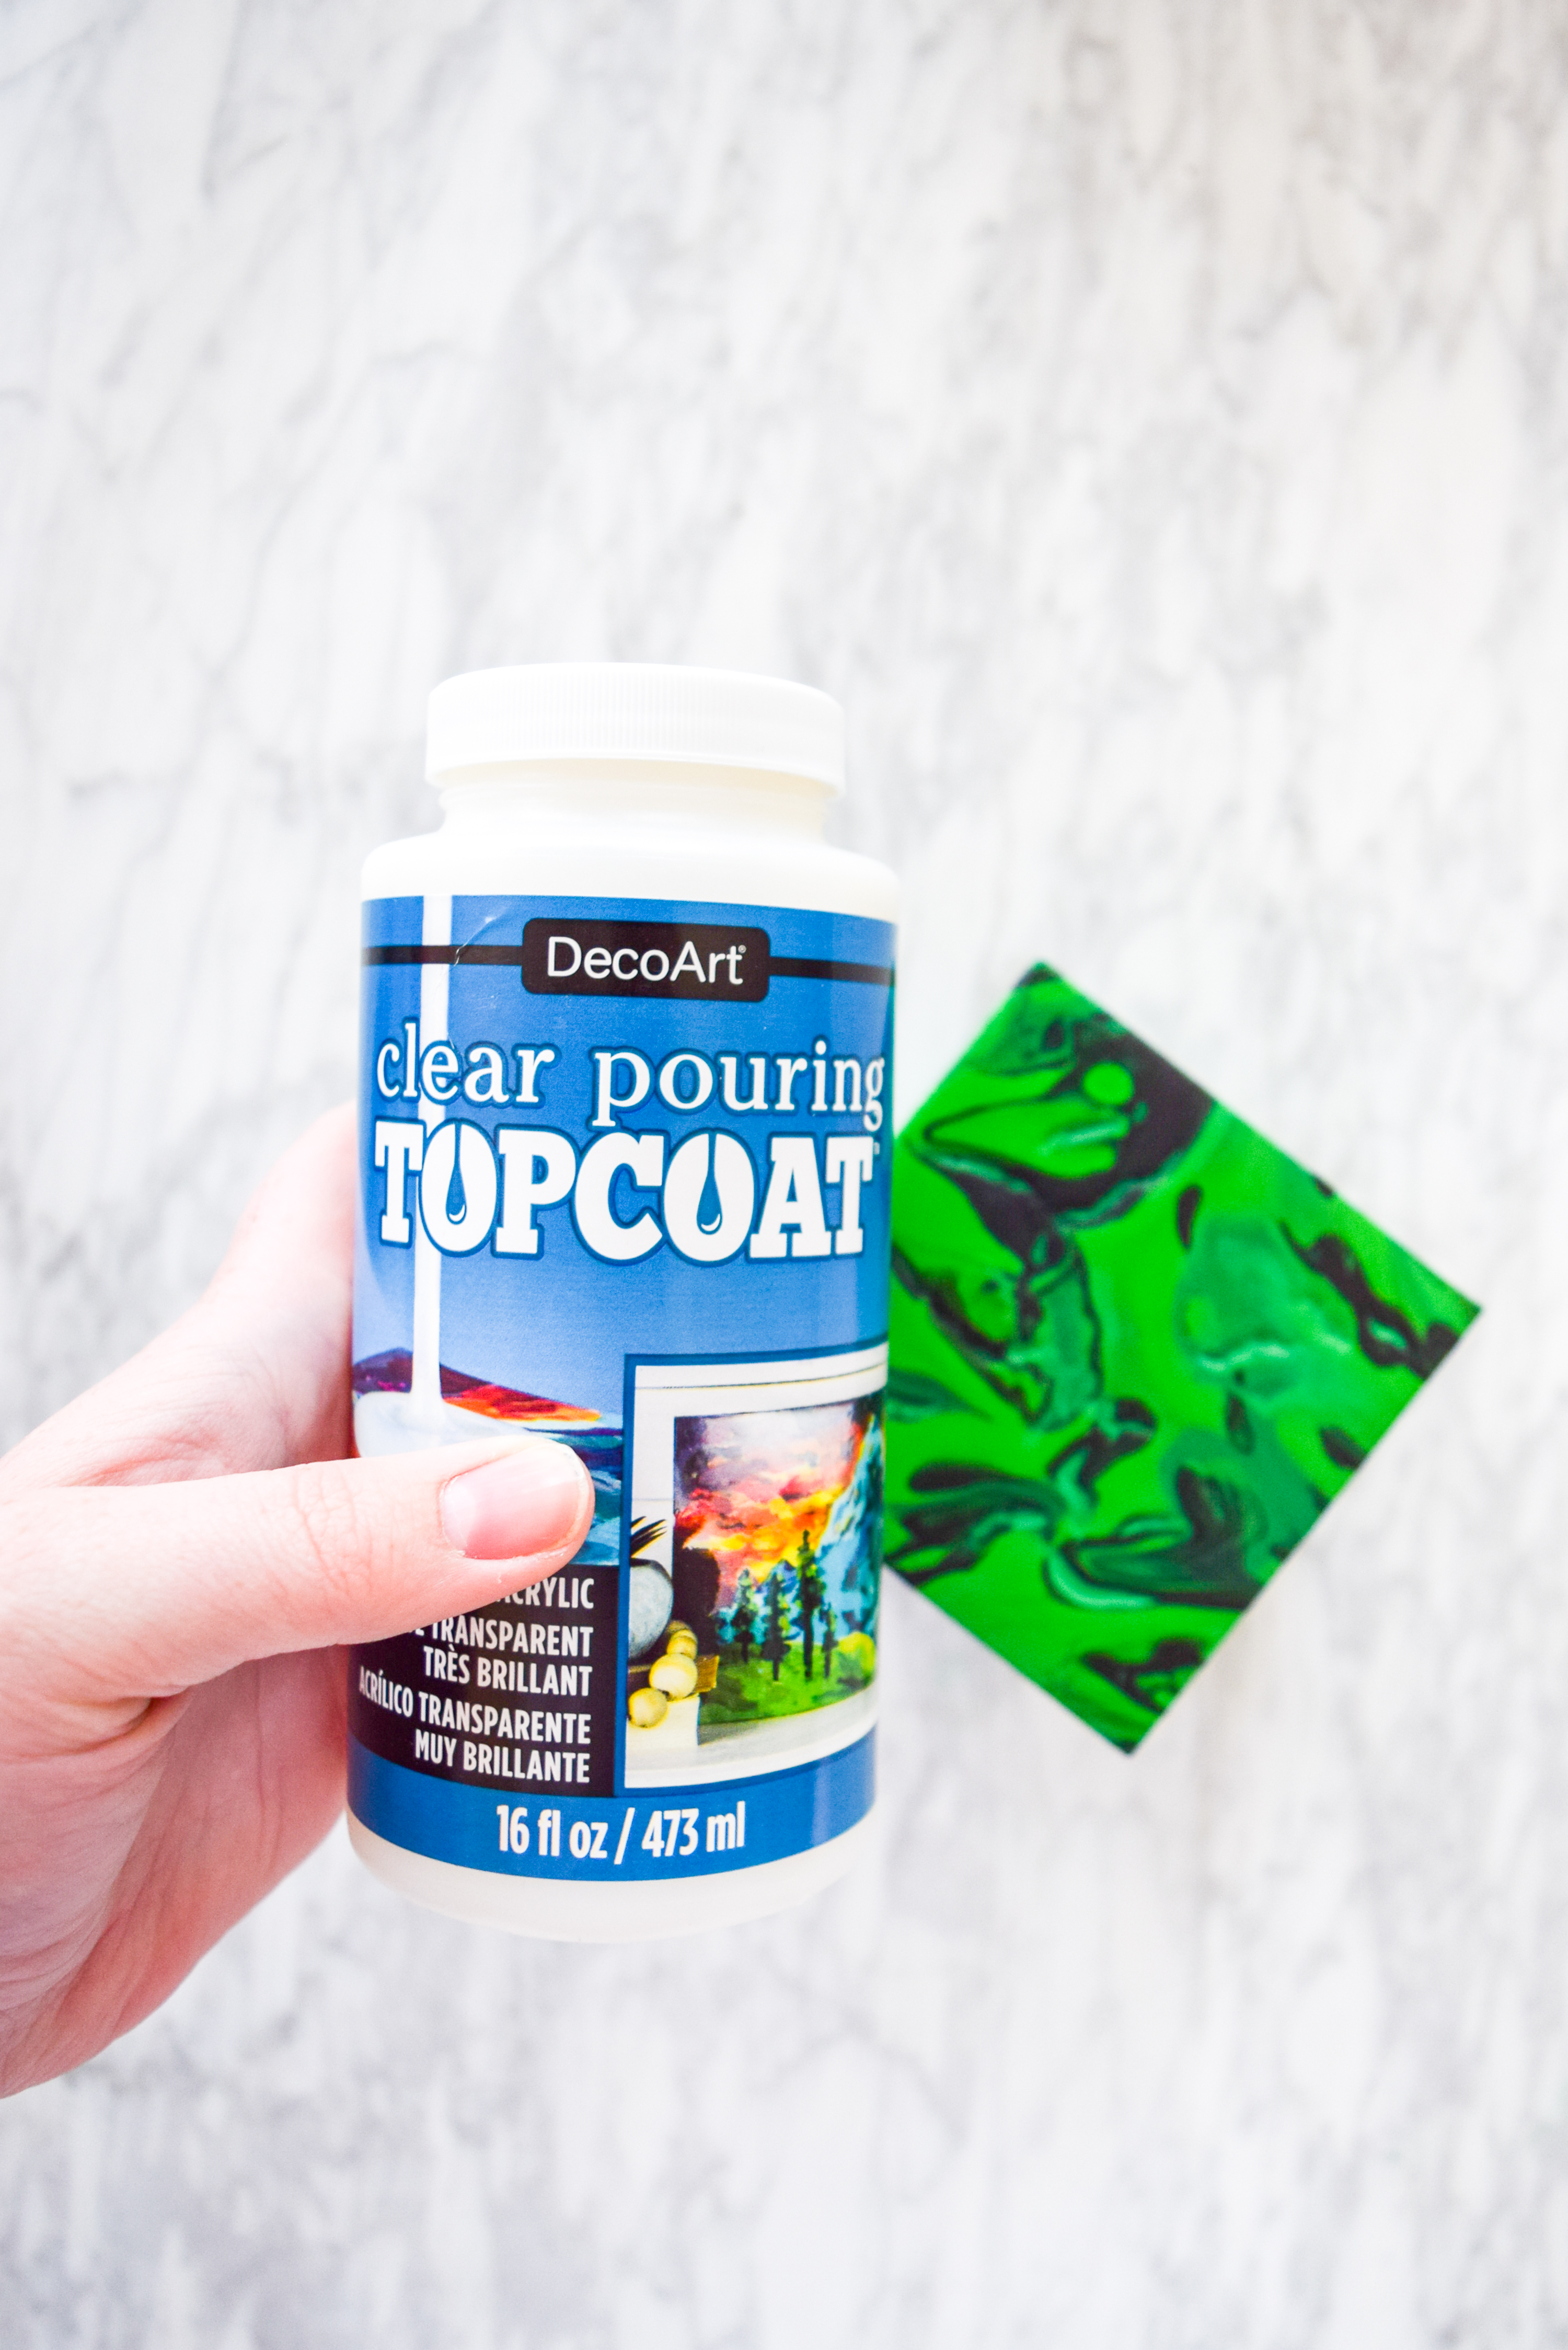
  • DecoArt’s Paint Pouring Top Coat
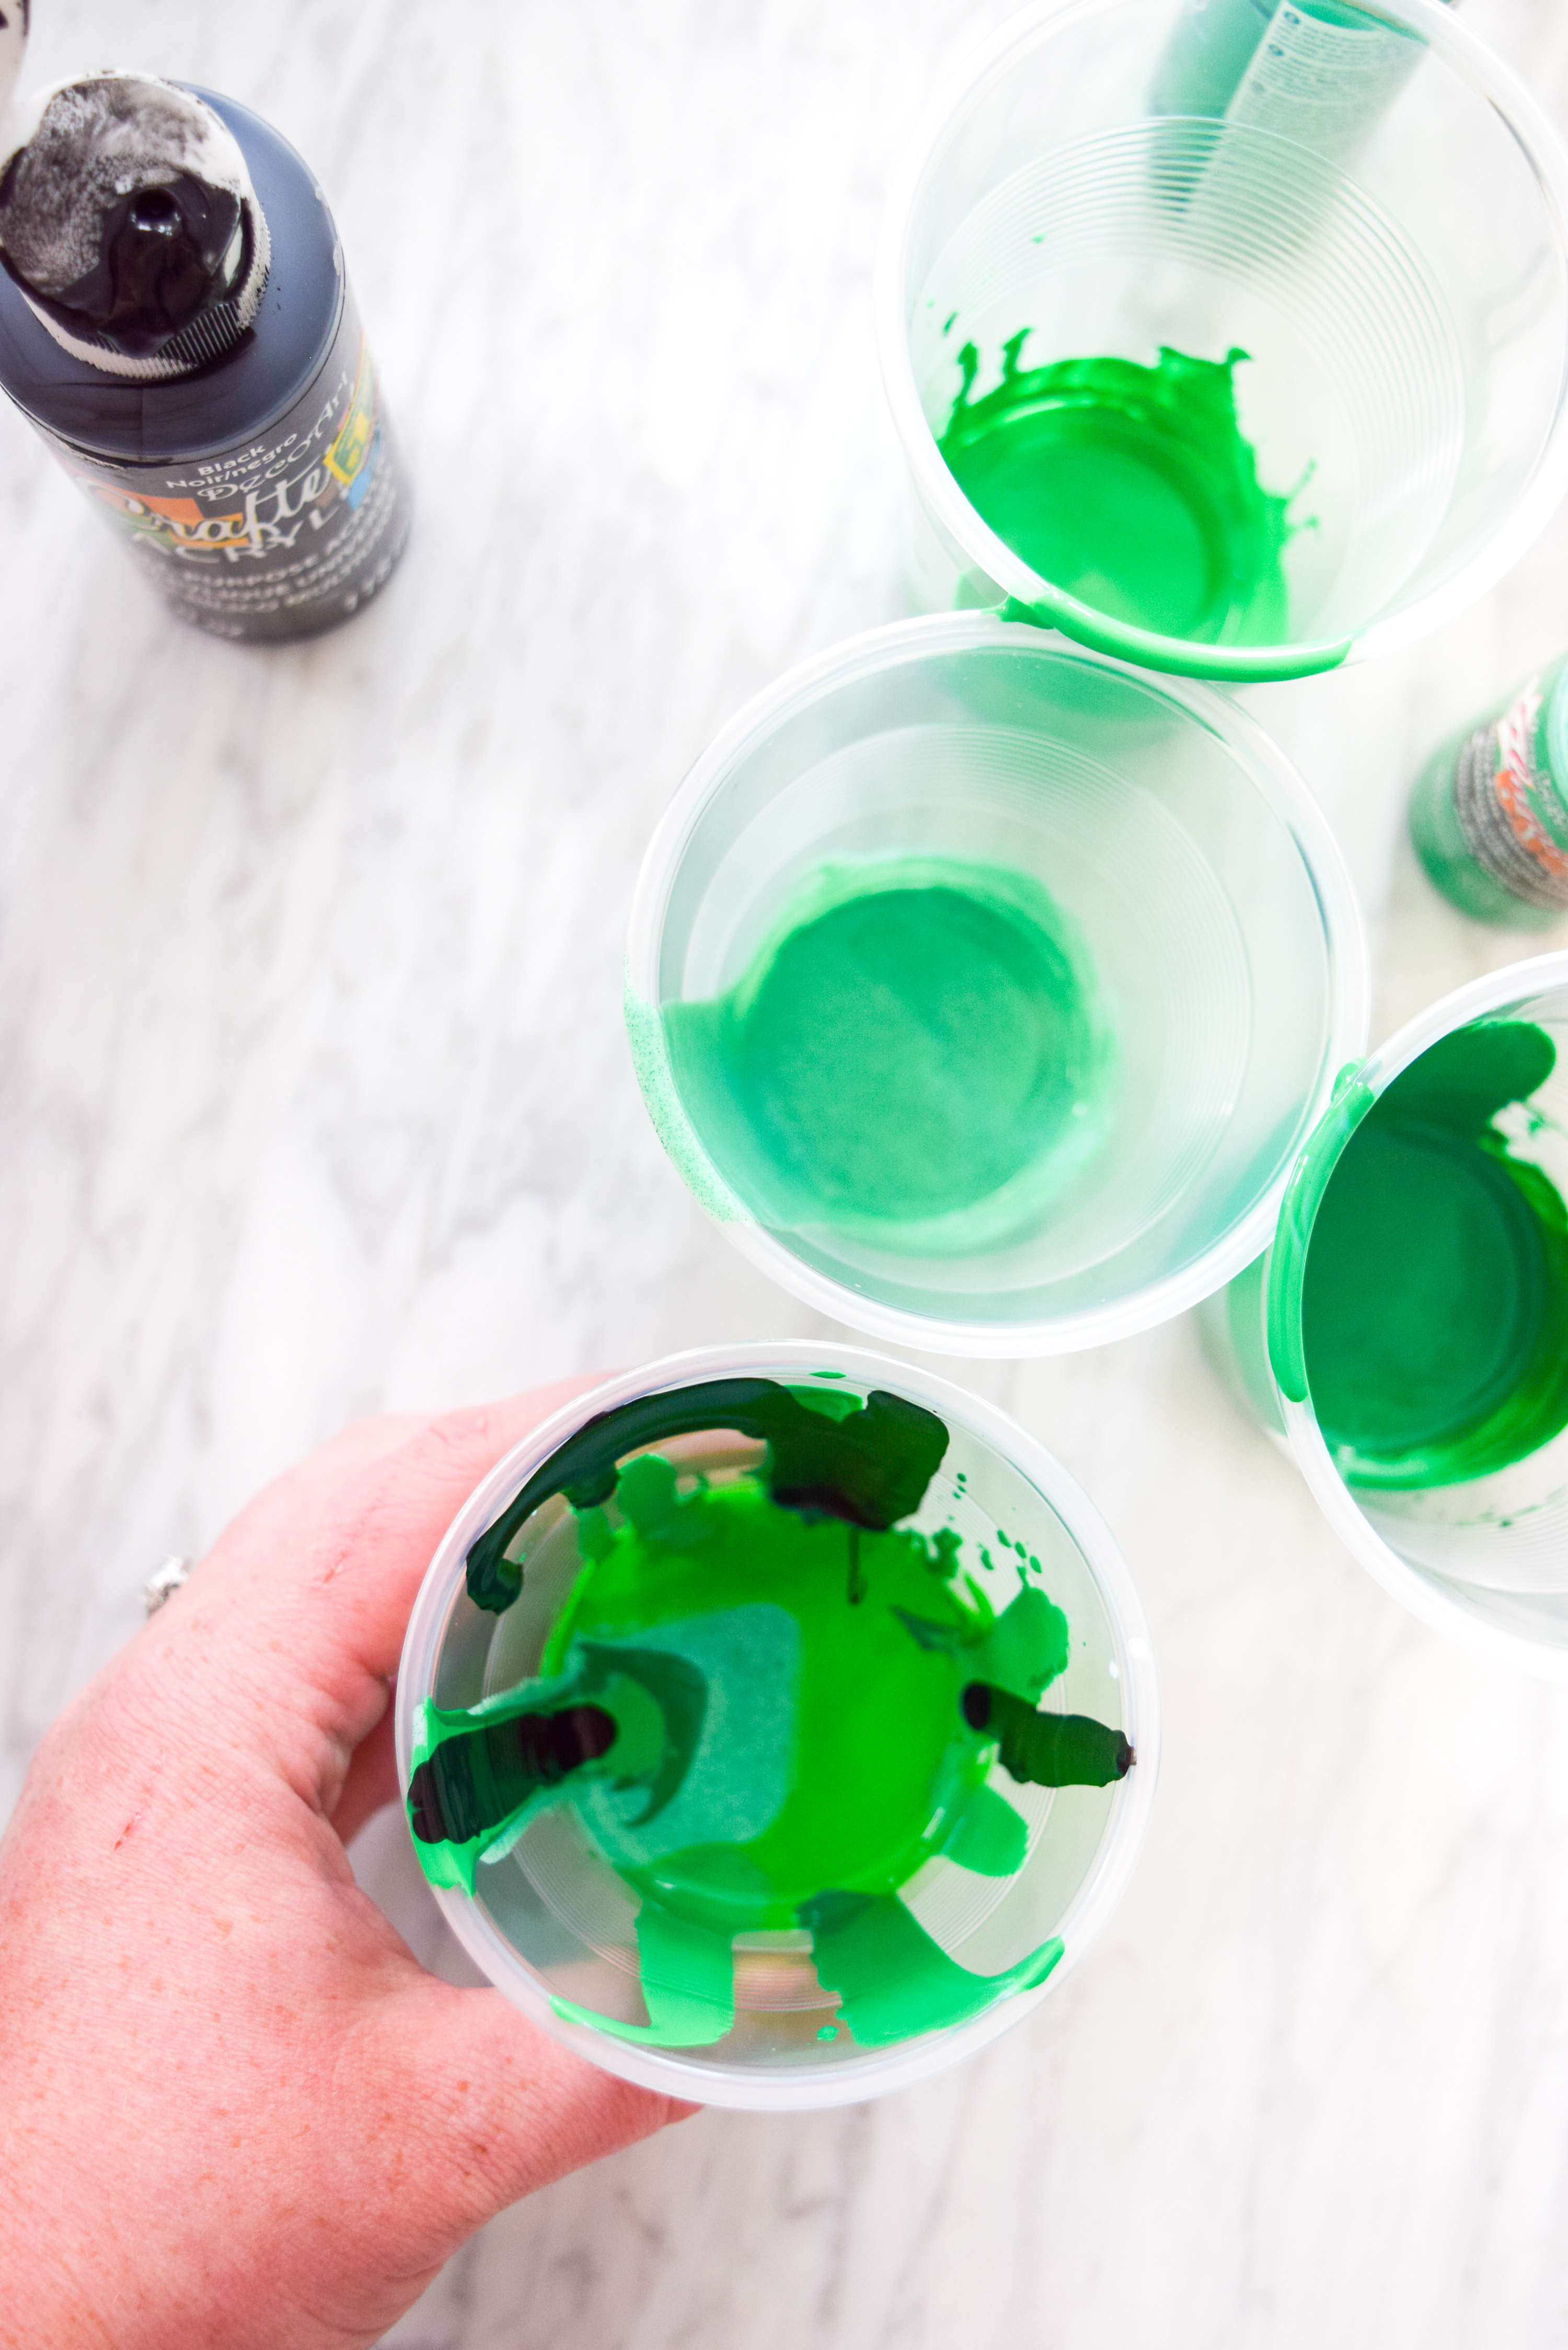
  • DecoArt Americana paints in: Black, Kelly Green, Holly Green, and Turf Green (from the Satin collection)
  • Plastic disposable cups for mixing
  • Enamel Gold
  • 1 Wood block
  • 4 wood beads (circular or square, up to you)
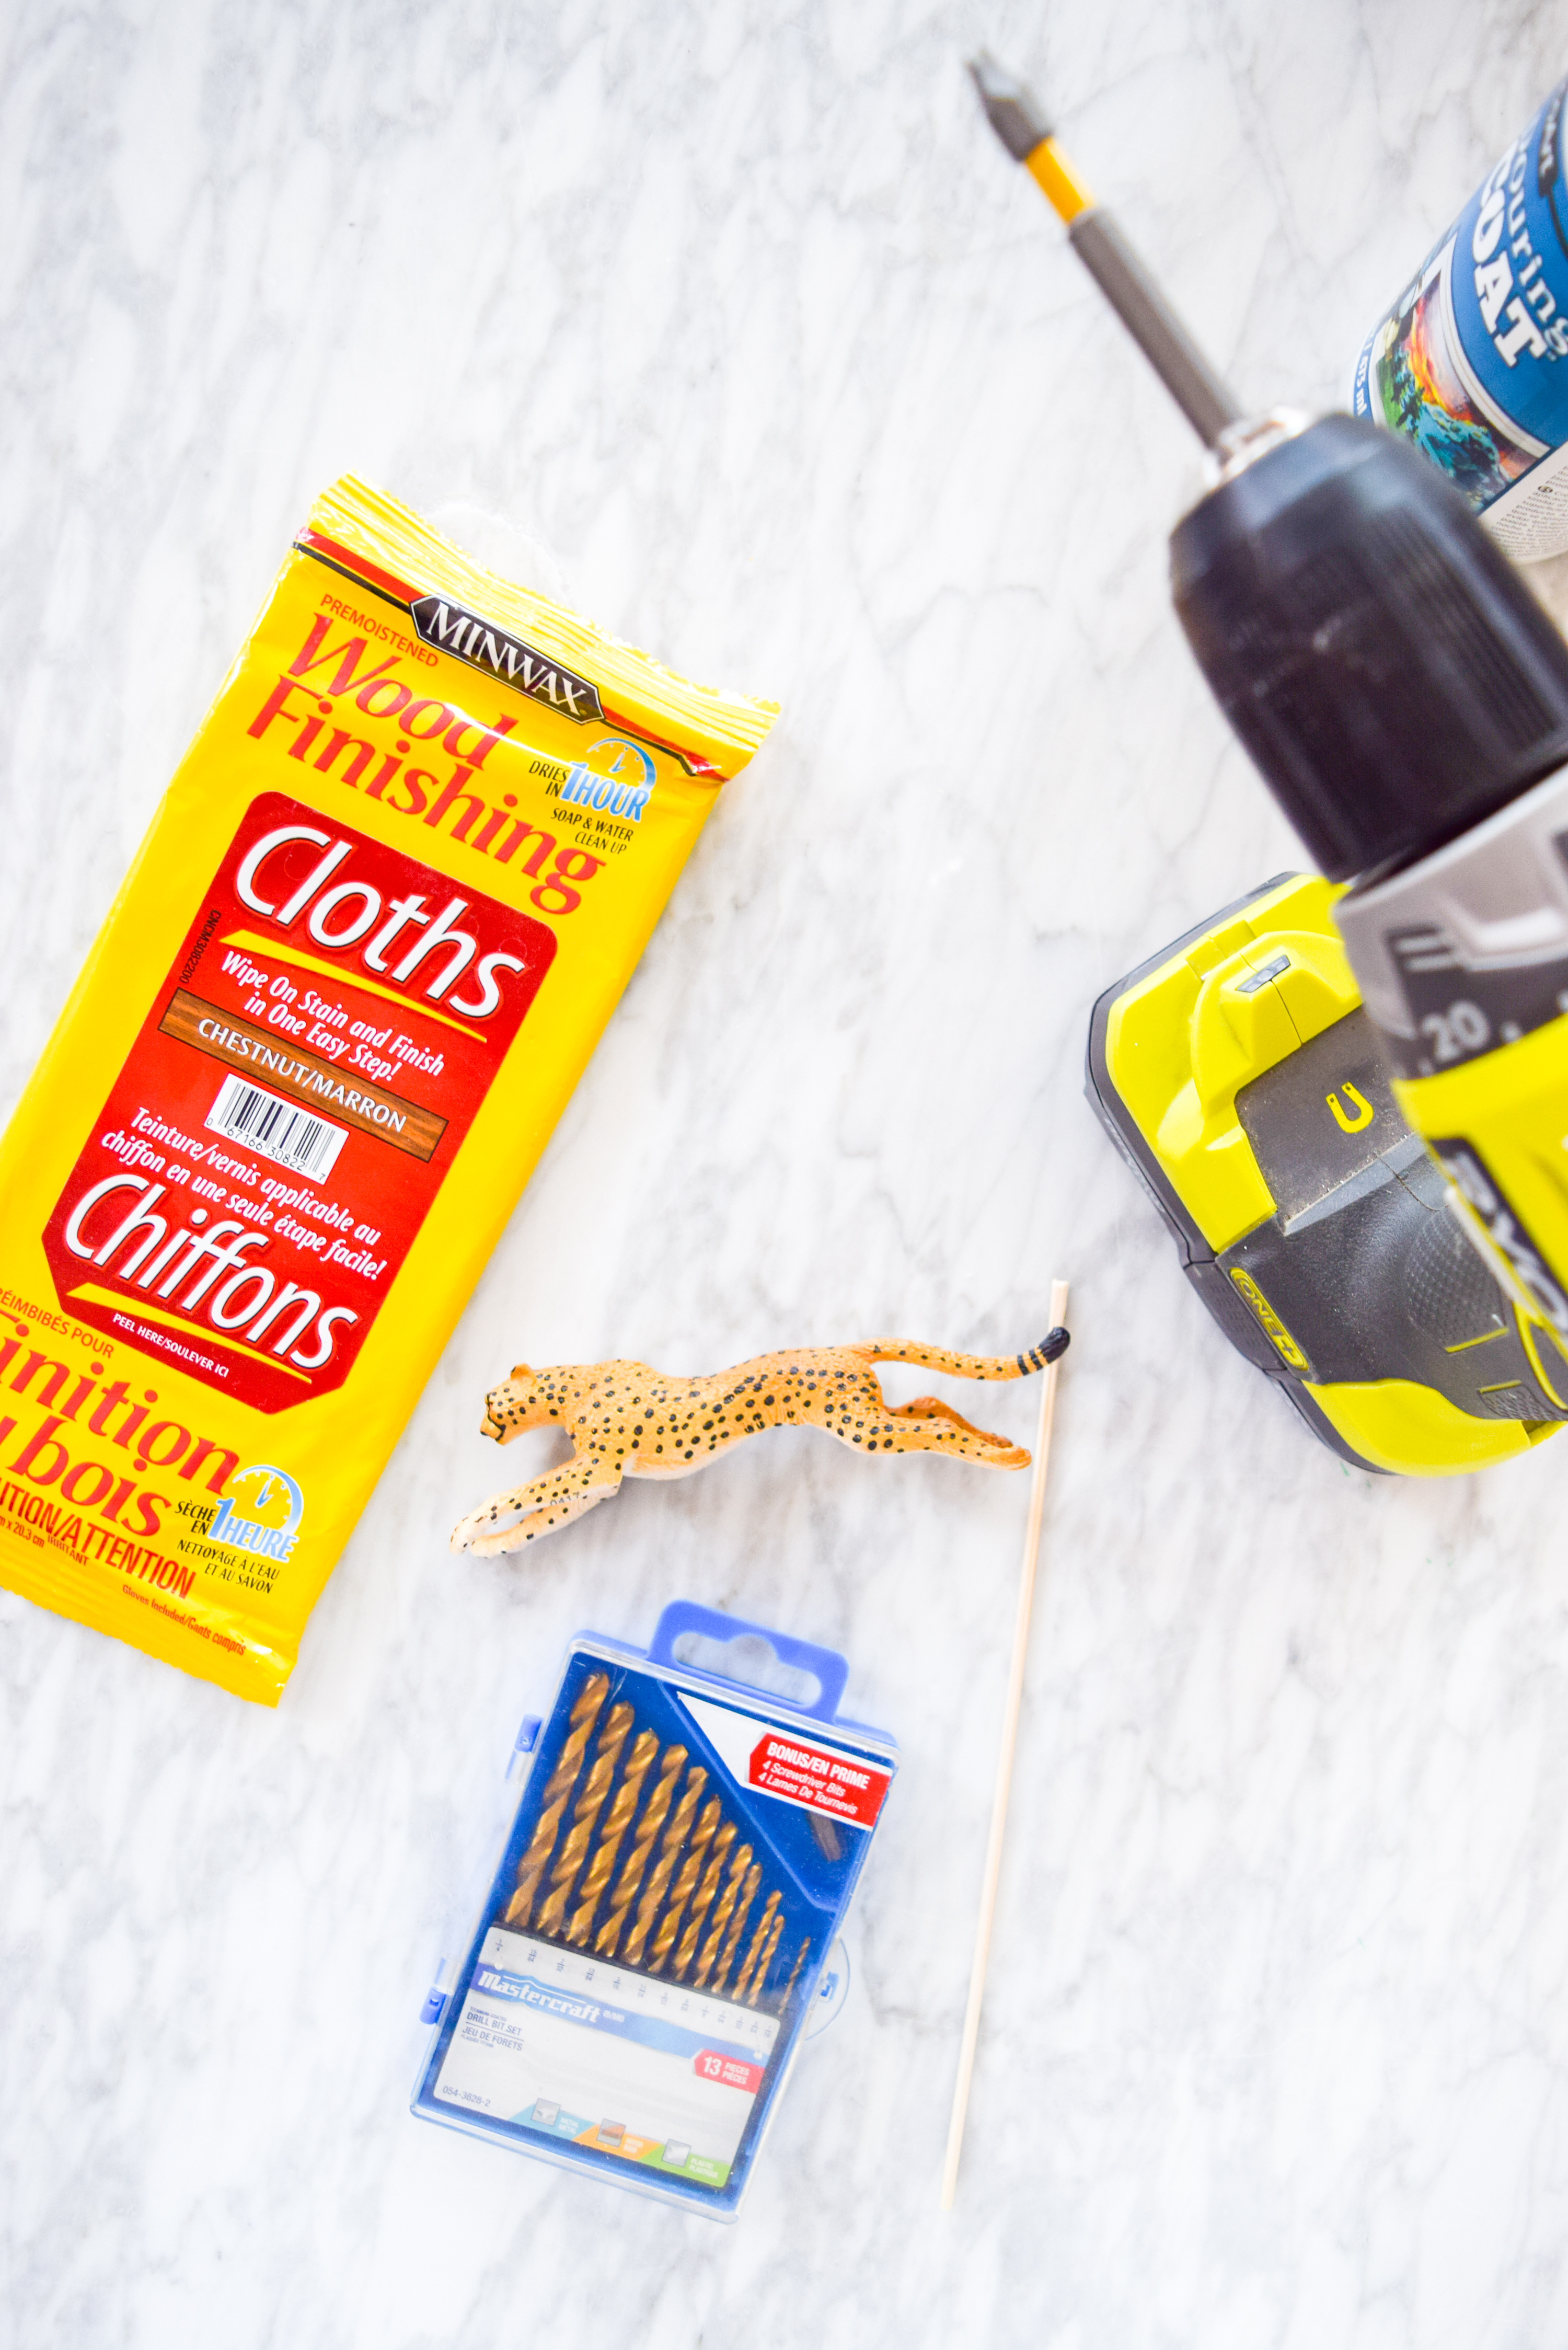
  • 1 plastic cheetah toy
  • 1 wooden dowel (I legit used a BBQ skewer)
  • MinWax Wood Finishing Cloths (pick a colour!)

DIY Malachite & Cheetah Decor on a budget! Because who really has the coins for some malachite? Grab the secrets behind this paint pouring DIY.

Step 1: Start by setting-up where you’ll be pouring. I used a paint tray and an old glass jar. I placed the wood block on the jar, so that it wouldn’t stick to the bottom of the tray, and so that the liquid could pool beneath it, and allow it to dry.

DIY Malachite & Cheetah Decor on a budget! Because who really has the coins for some malachite? Grab the secrets behind this paint pouring DIY.

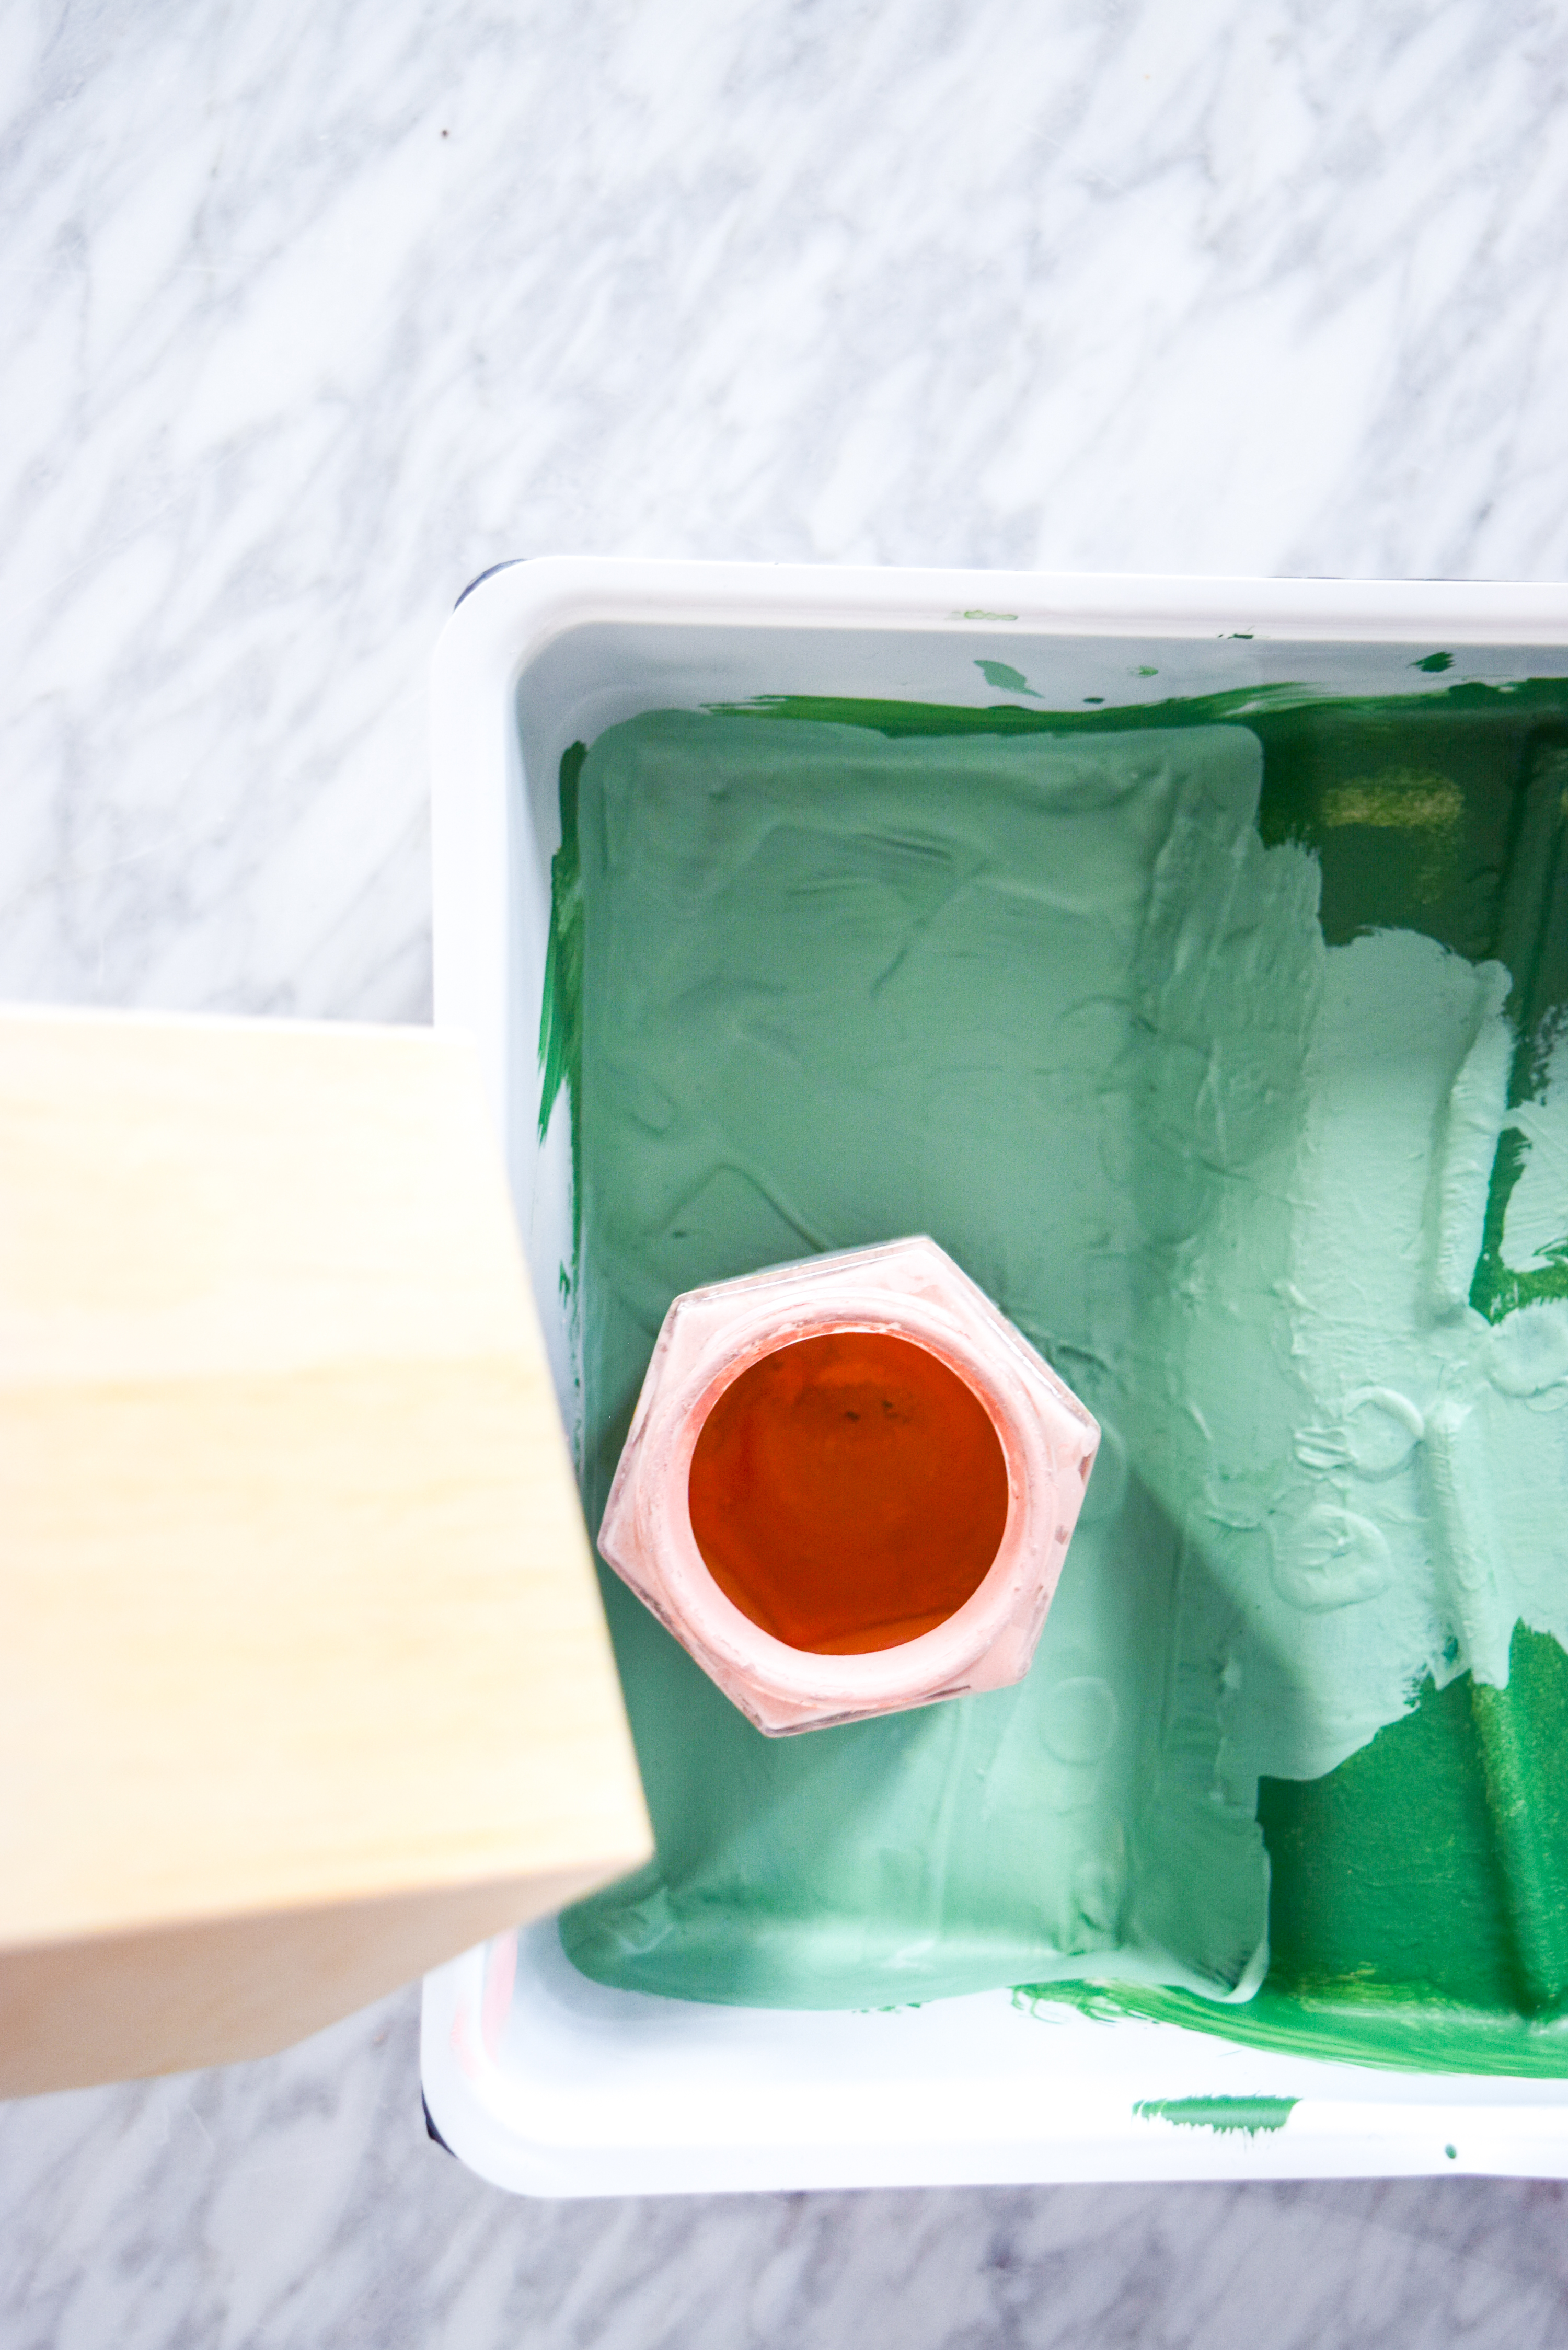
Step 2: I coated the block in a first mixture of Kelly Green and Pouring Medium (1 part of each). I wanted to make sure there was a good base before I started applying the faux malachite finish.

While I let it dry, I prepared the mix for the other colours.

DIY Malachite & Cheetah Decor on a budget! Because who really has the coins for some malachite? Grab the secrets behind this paint pouring DIY.

Step 3: Time to mix each other colour with paint pouring medium (1 part each). You can’t just mix them all in one big cup, because otherwise you’ll blend the colours instead of giving them the marbled look.

DIY Malachite & Cheetah Decor on a budget! Because who really has the coins for some malachite? Grab the secrets behind this paint pouring DIY.

Step 4: Once each mixture is ready, pour them one at a time, into the main cup. You do this by pouring them down the side of the cup so that they don’t mix, rather, just sit together.

DIY Malachite & Cheetah Decor on a budget! Because who really has the coins for some malachite? Grab the secrets behind this paint pouring DIY.

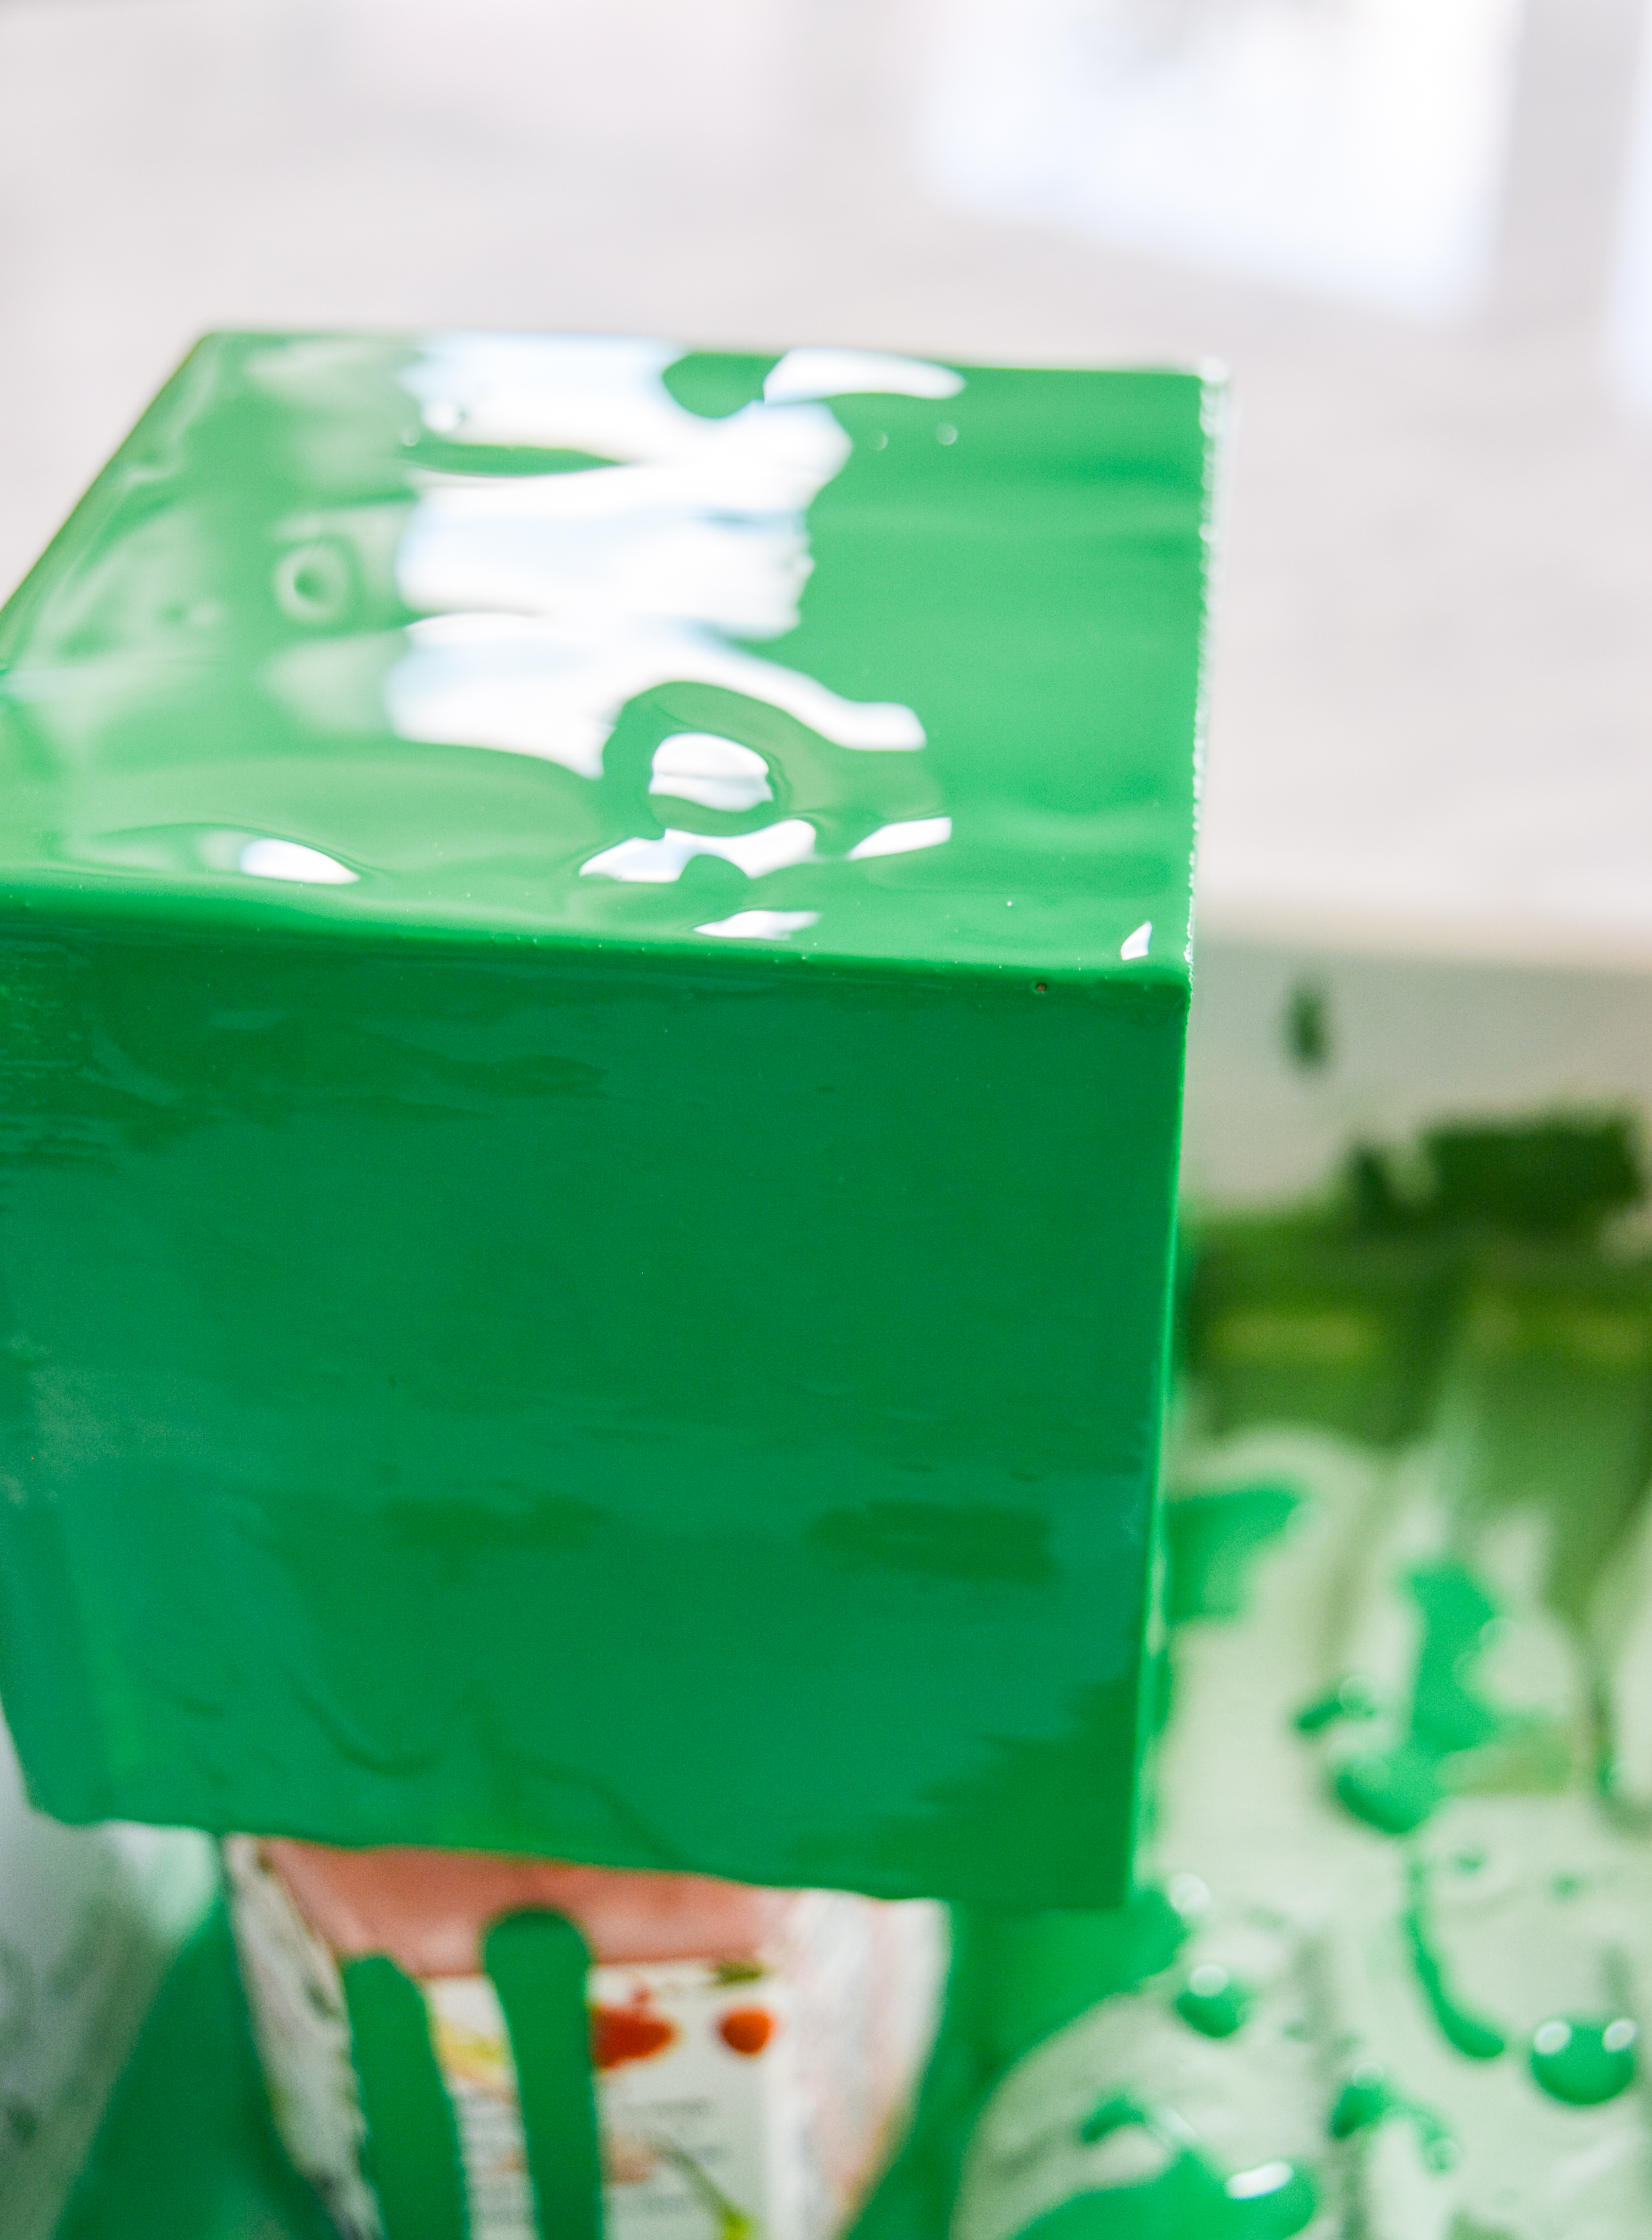
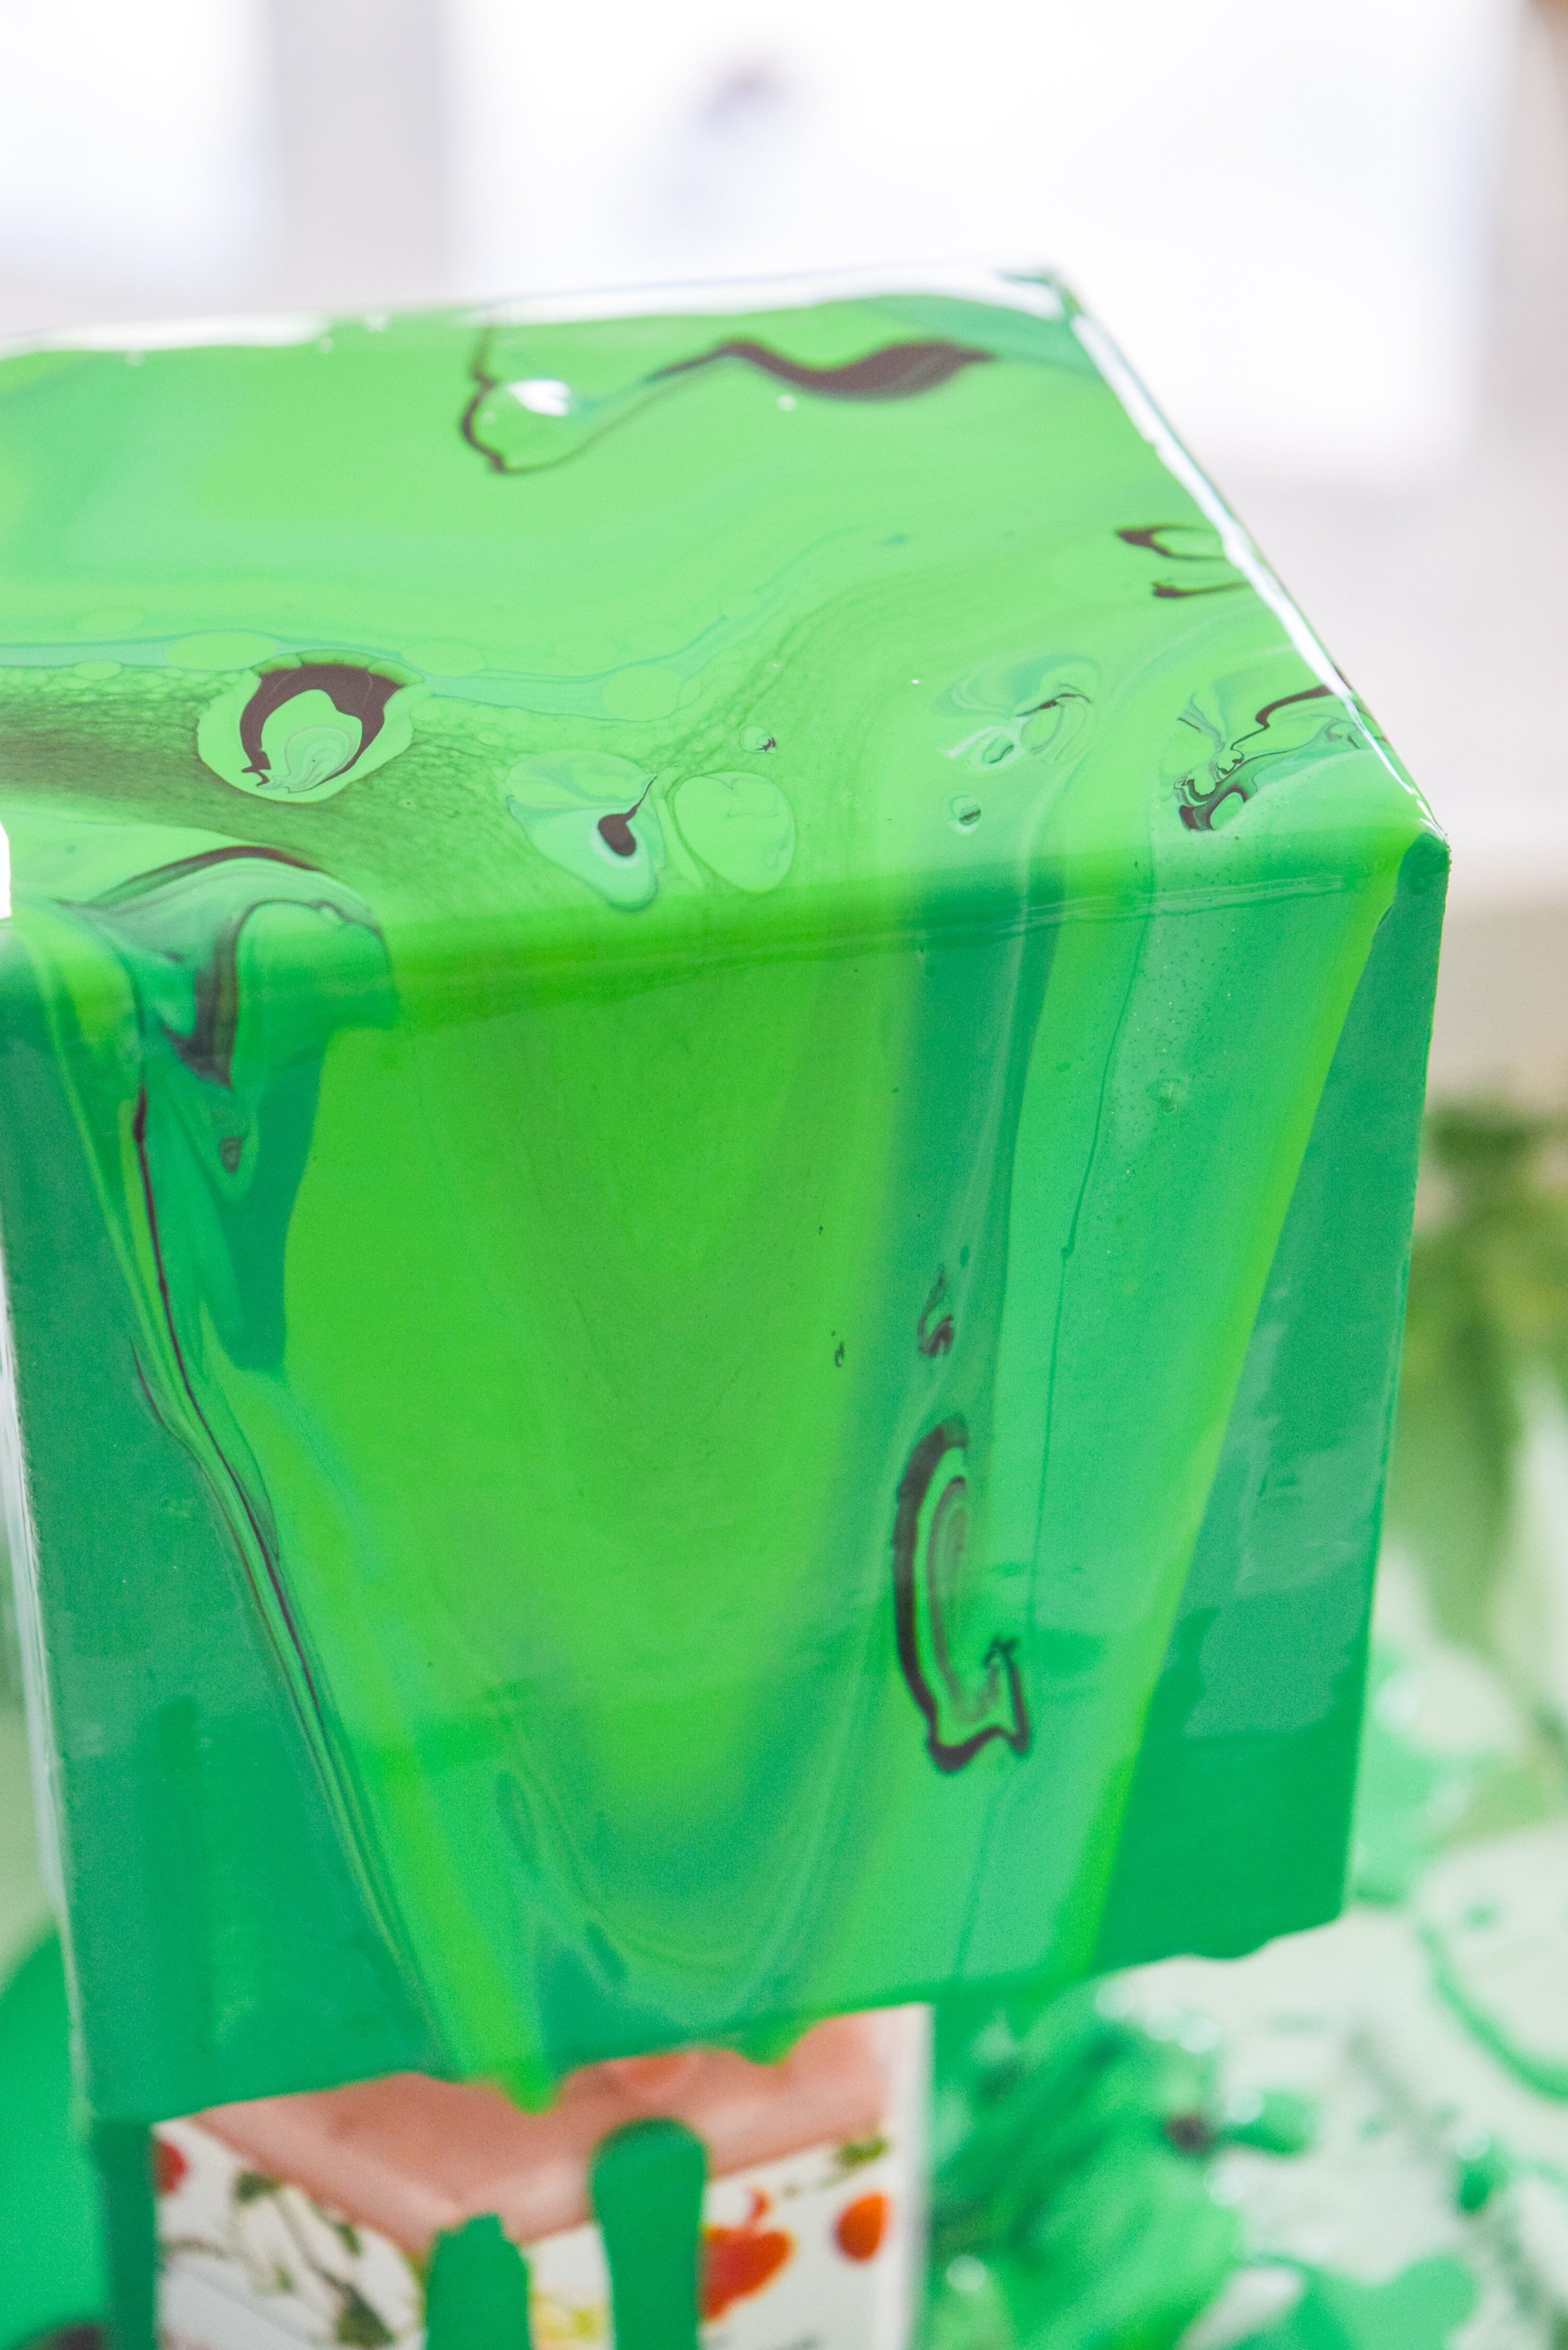
Step 5: Once you’re satisfied with the number of colours and tones, it’s time to pour or dump it on the block! I quickly flipped mine over onto the block, and then slowly lifted the cup, watching it all pool down the sides.

DIY Malachite & Cheetah Decor on a budget! Because who really has the coins for some malachite? Grab the secrets behind this paint pouring DIY.

I used a straw to gently brush any extra paint over bald spots, and to ensure some even coverage. Be very careful in doing this, since you don’t want to blend the paints. Conversely, you can gently blow through a straw to do that exact same thing.

While it dries, using a straw or a palette knife, slick away the beads of paint at the bottom, or be prepared to do that once it’s dry.


DIY Malachite & Cheetah Decor on a budget! Because who really has the coins for some malachite? Grab the secrets behind this paint pouring DIY.

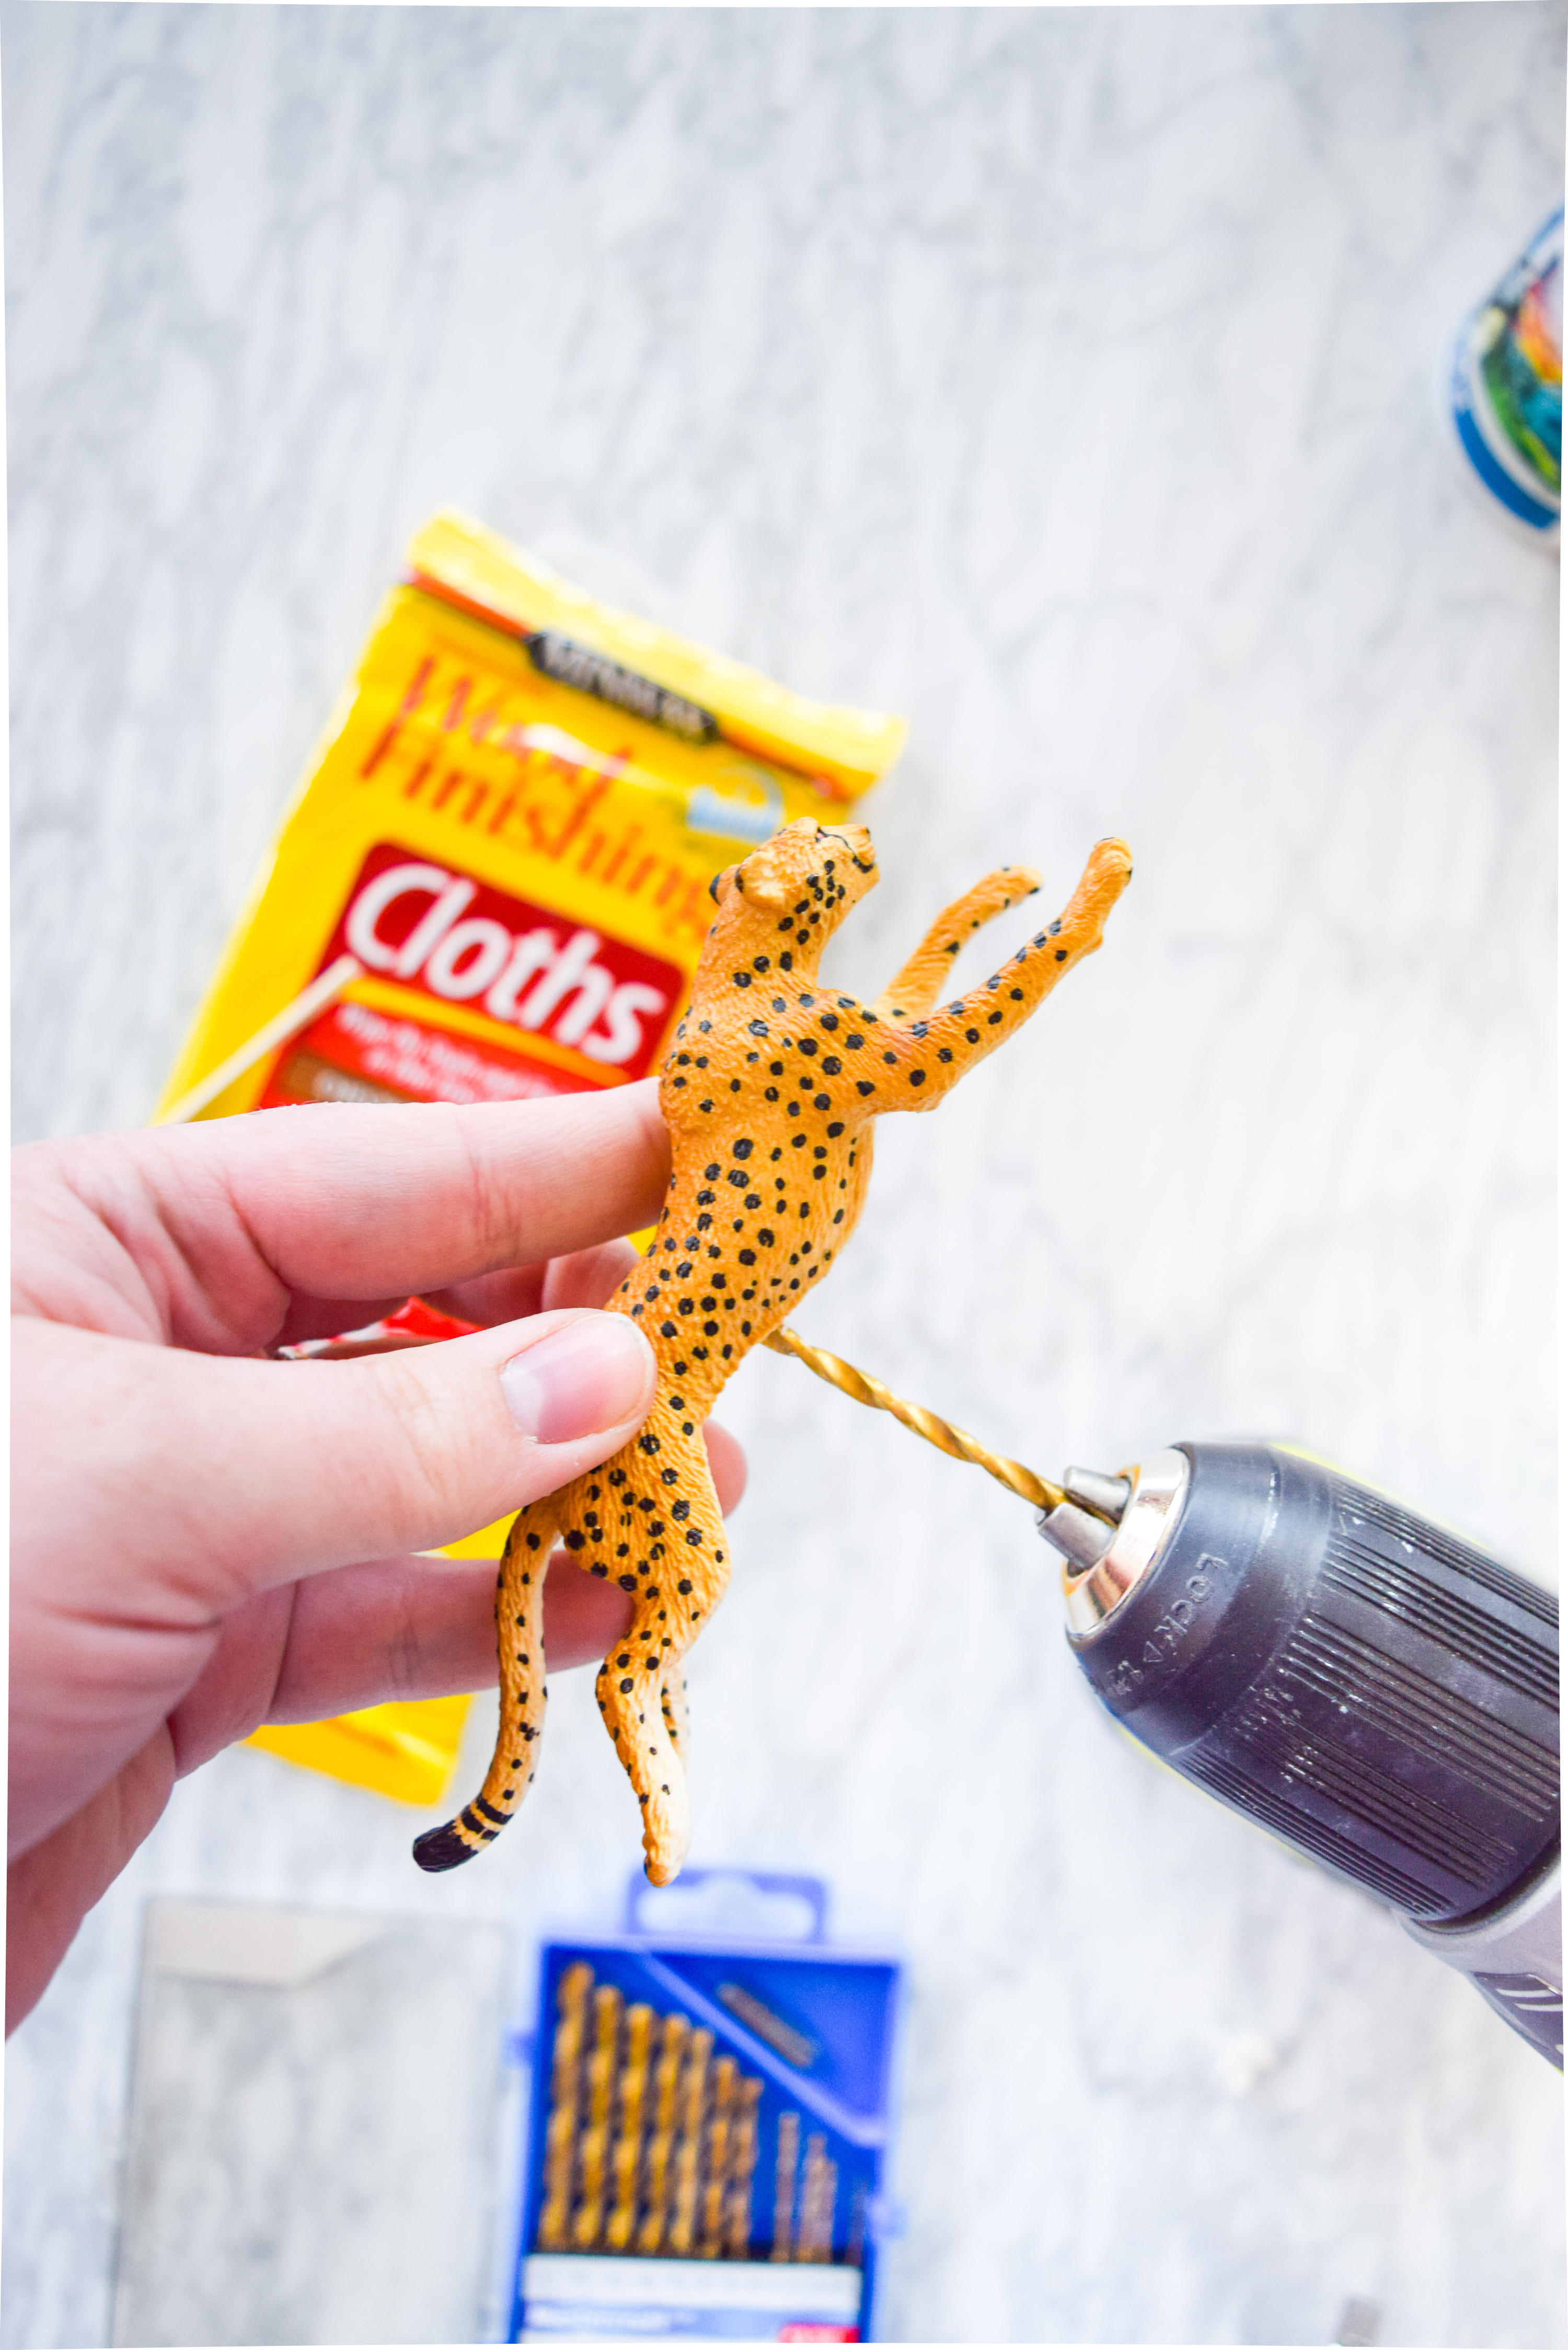
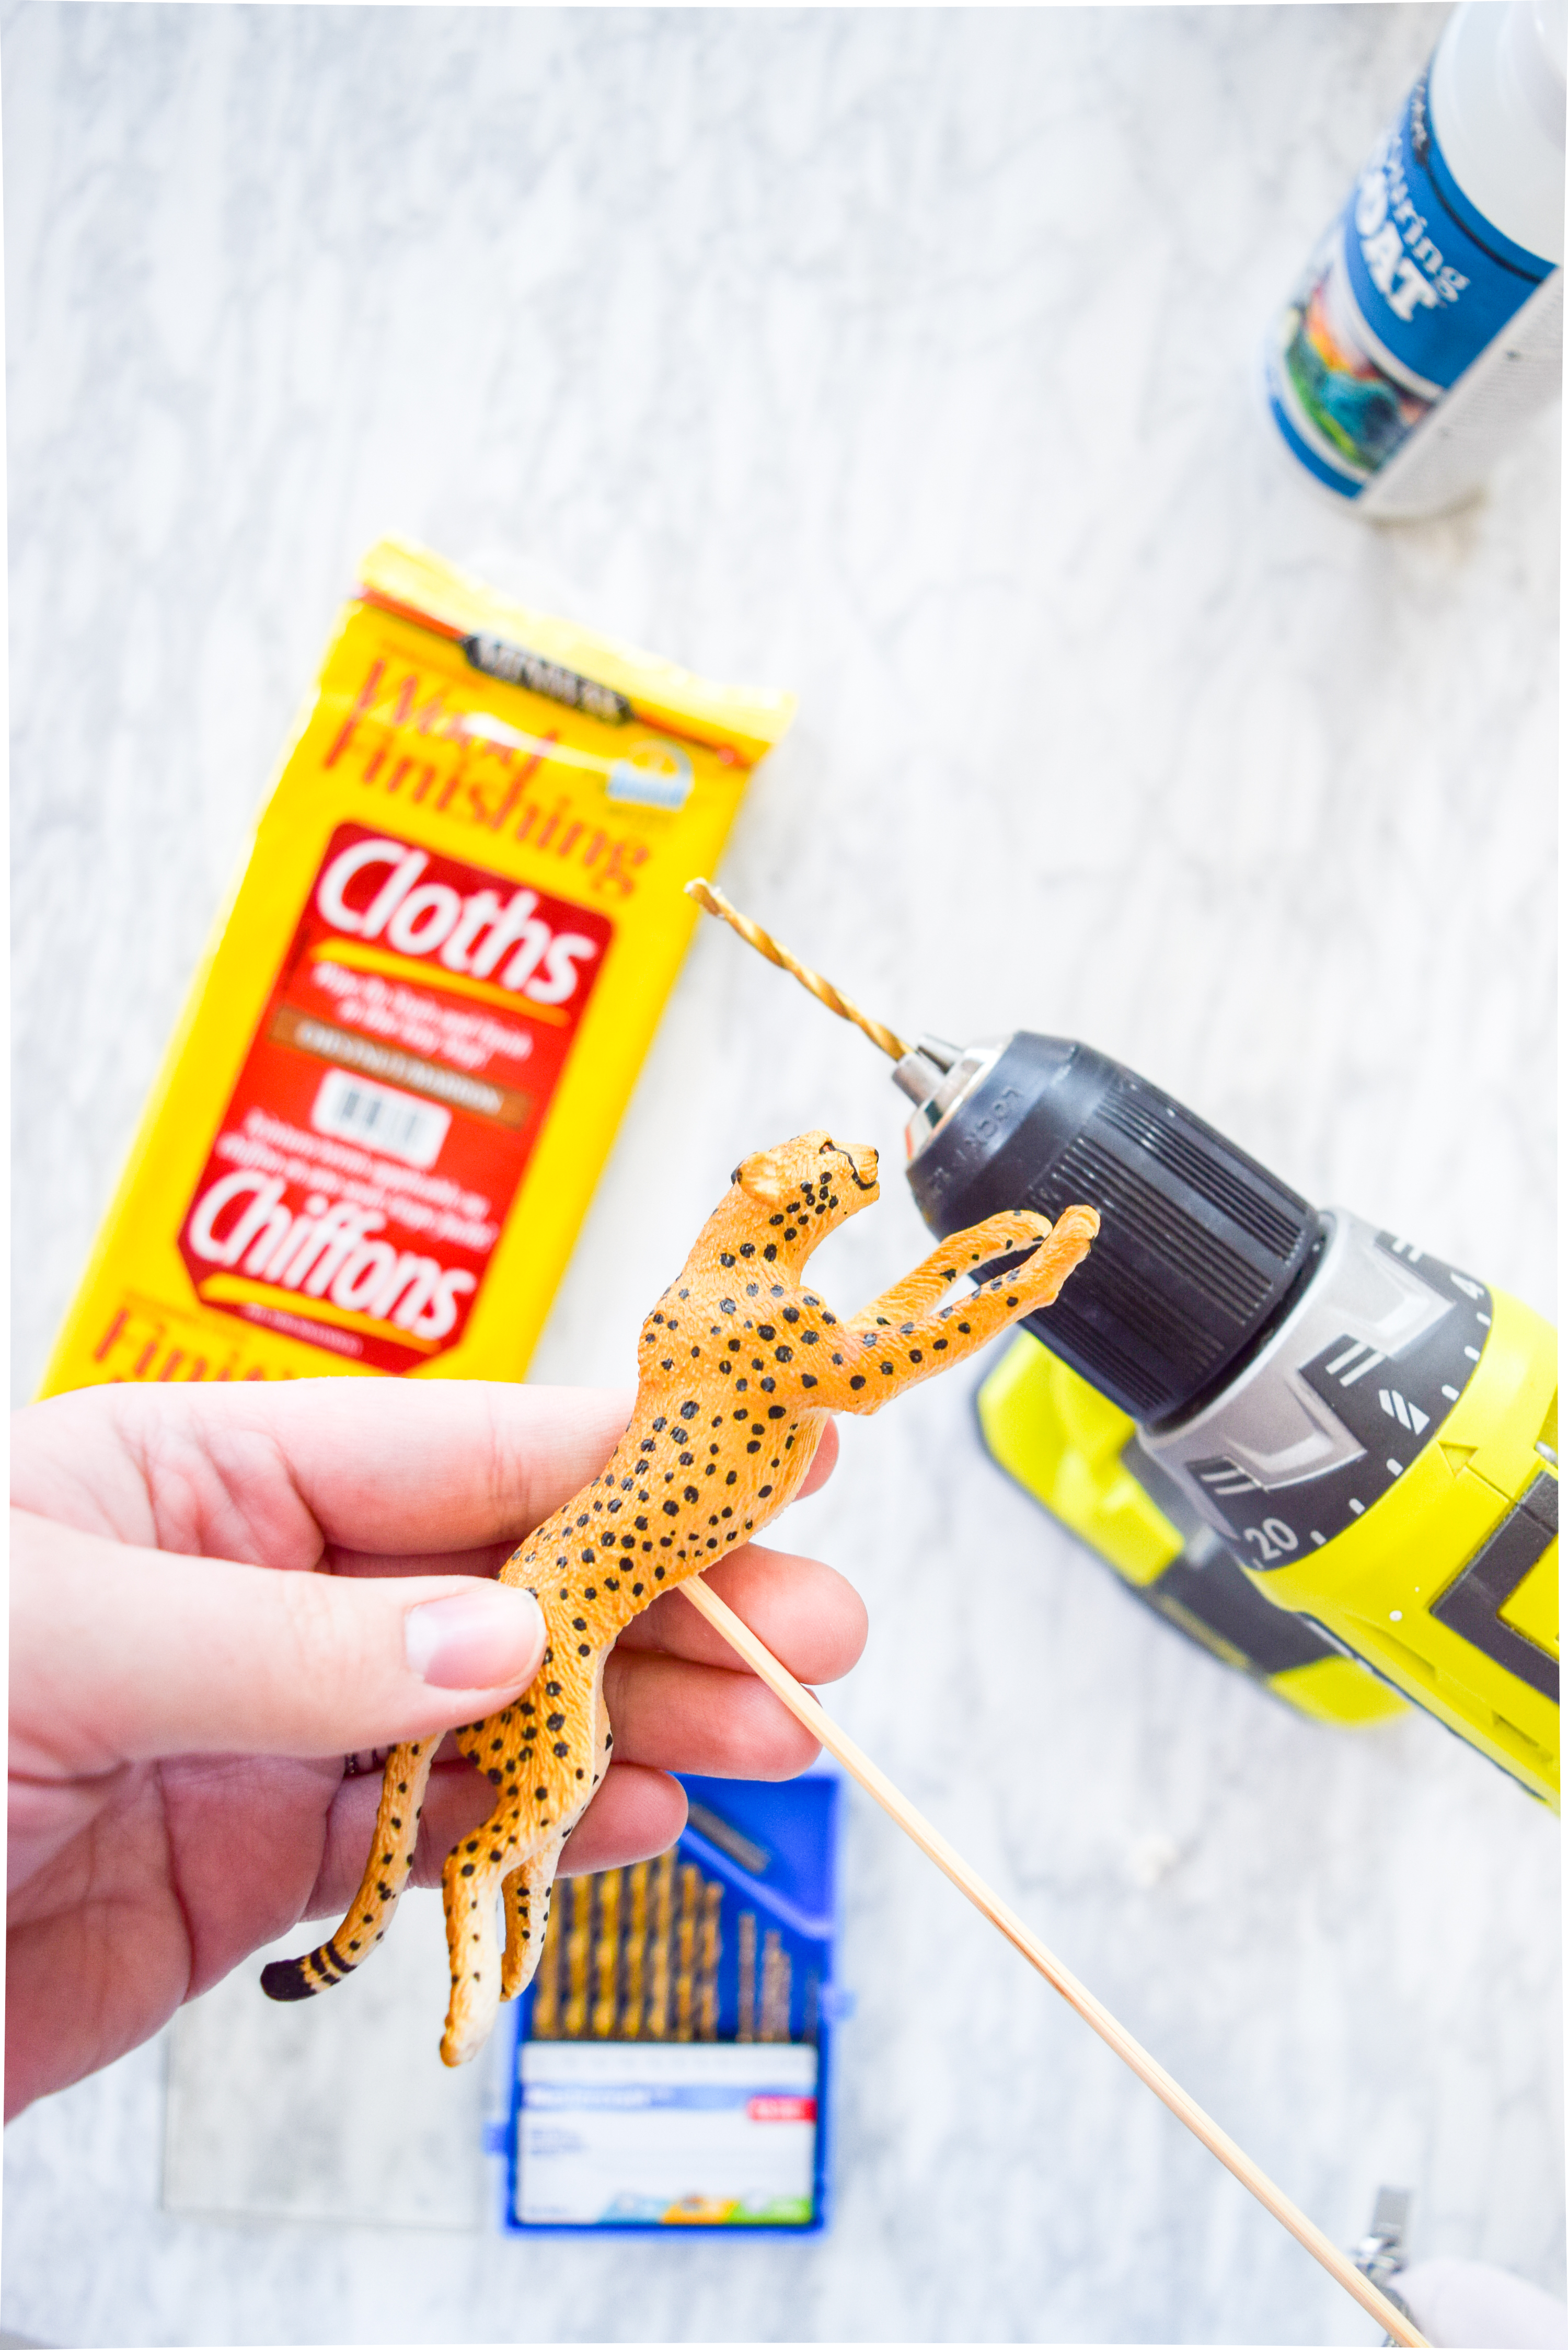
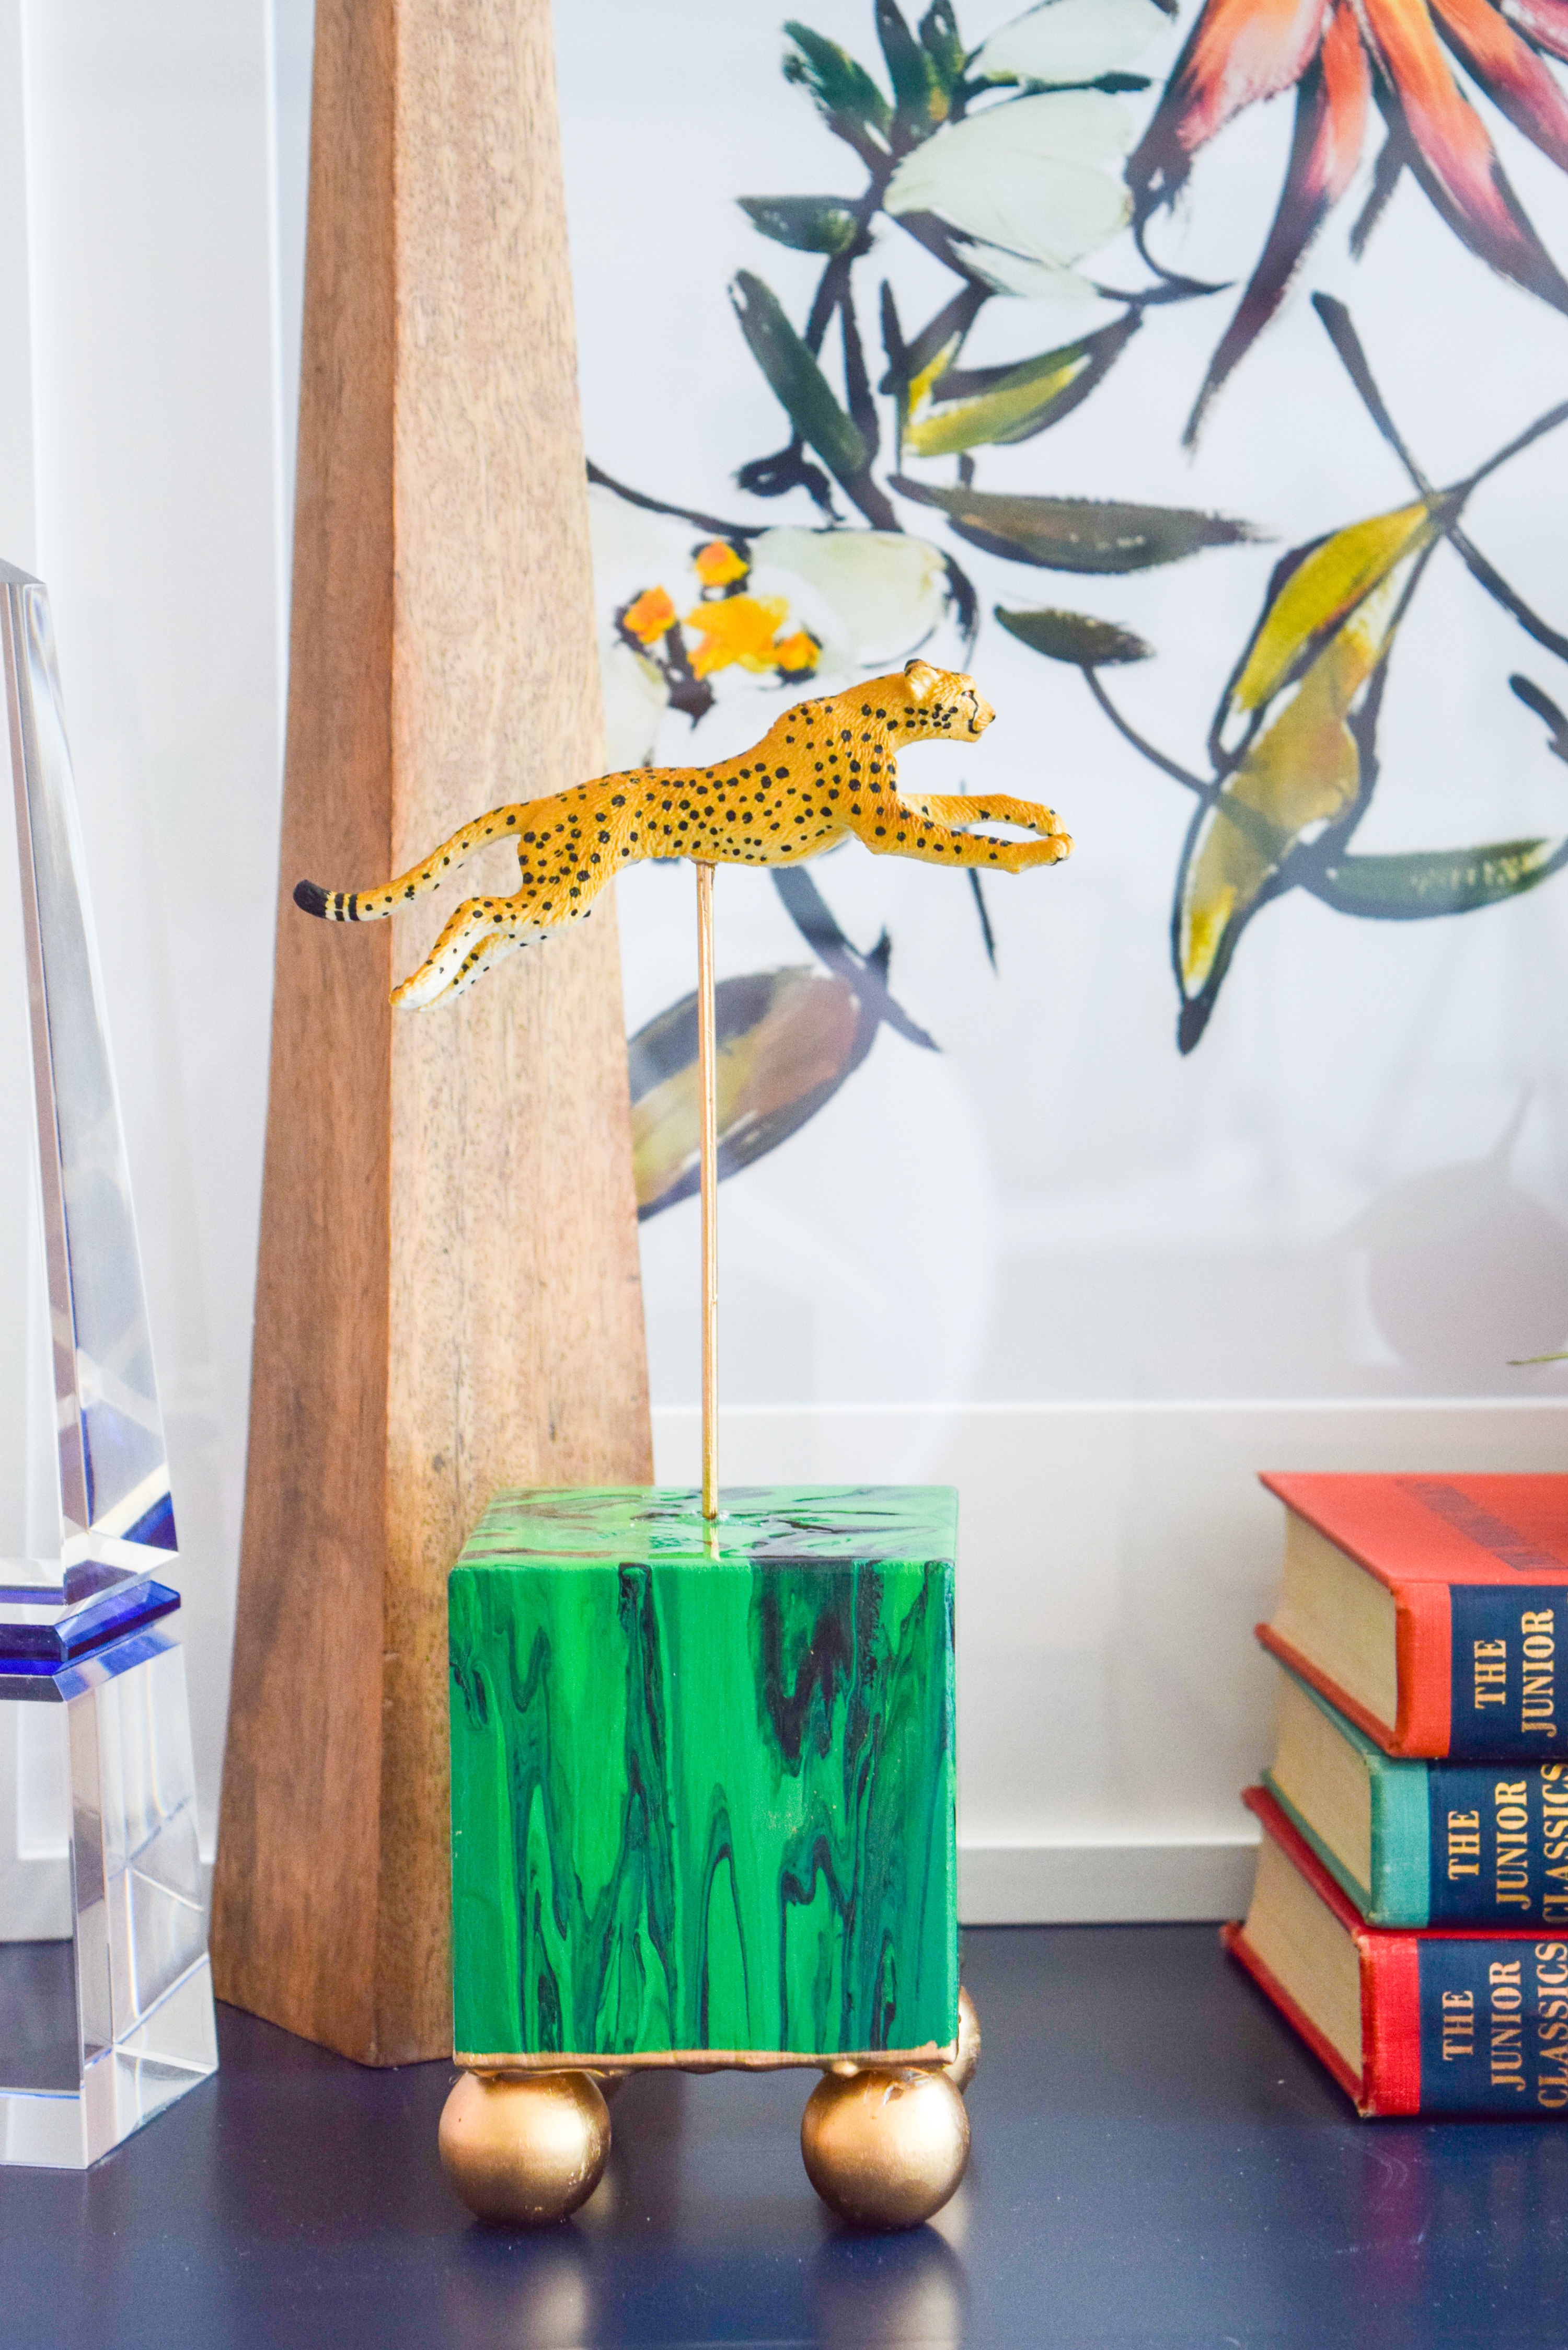
Step 6: While the block dries overnight, prepare your cheetah! I drilled a hole small enough for a dowel to fit into his belly. I also stained the dowel using a stain cloth, just so that it wasn’t un-treated.

DIY Malachite & Cheetah Decor on a budget! Because who really has the coins for some malachite? Grab the secrets behind this paint pouring DIY.

DIY Malachite & Cheetah Decor on a budget! Because who really has the coins for some malachite? Grab the secrets behind this paint pouring DIY.

Once the dowel is dry, using a hot glue gun, add a little dab of glue over the hole before inserting the dowel to dry.

DIY Malachite & Cheetah Decor on a budget! Because who really has the coins for some malachite? Grab the secrets behind this paint pouring DIY.

Step 7: Once the base of the block is dry, apply the topcoat. It will similarly need to dry overnight, but if you start it early in the morning, it should be dry enough to dry a hole through in the afternoon. Apply it by directly pouring it over the block, make sure it gets complete coverage and isn’t too thick of goopy. I used another straw to smooth it out and remove any excess.

DIY Malachite & Cheetah Decor on a budget! Because who really has the coins for some malachite? Grab the secrets behind this paint pouring DIY.

Step 8: Once it’s dry, drill a corresponding hole in the top of the block. Add a dab of hot glue and insert the dowel.

DIY Malachite & Cheetah Decor on a budget! Because who really has the coins for some malachite? Grab the secrets behind this paint pouring DIY.

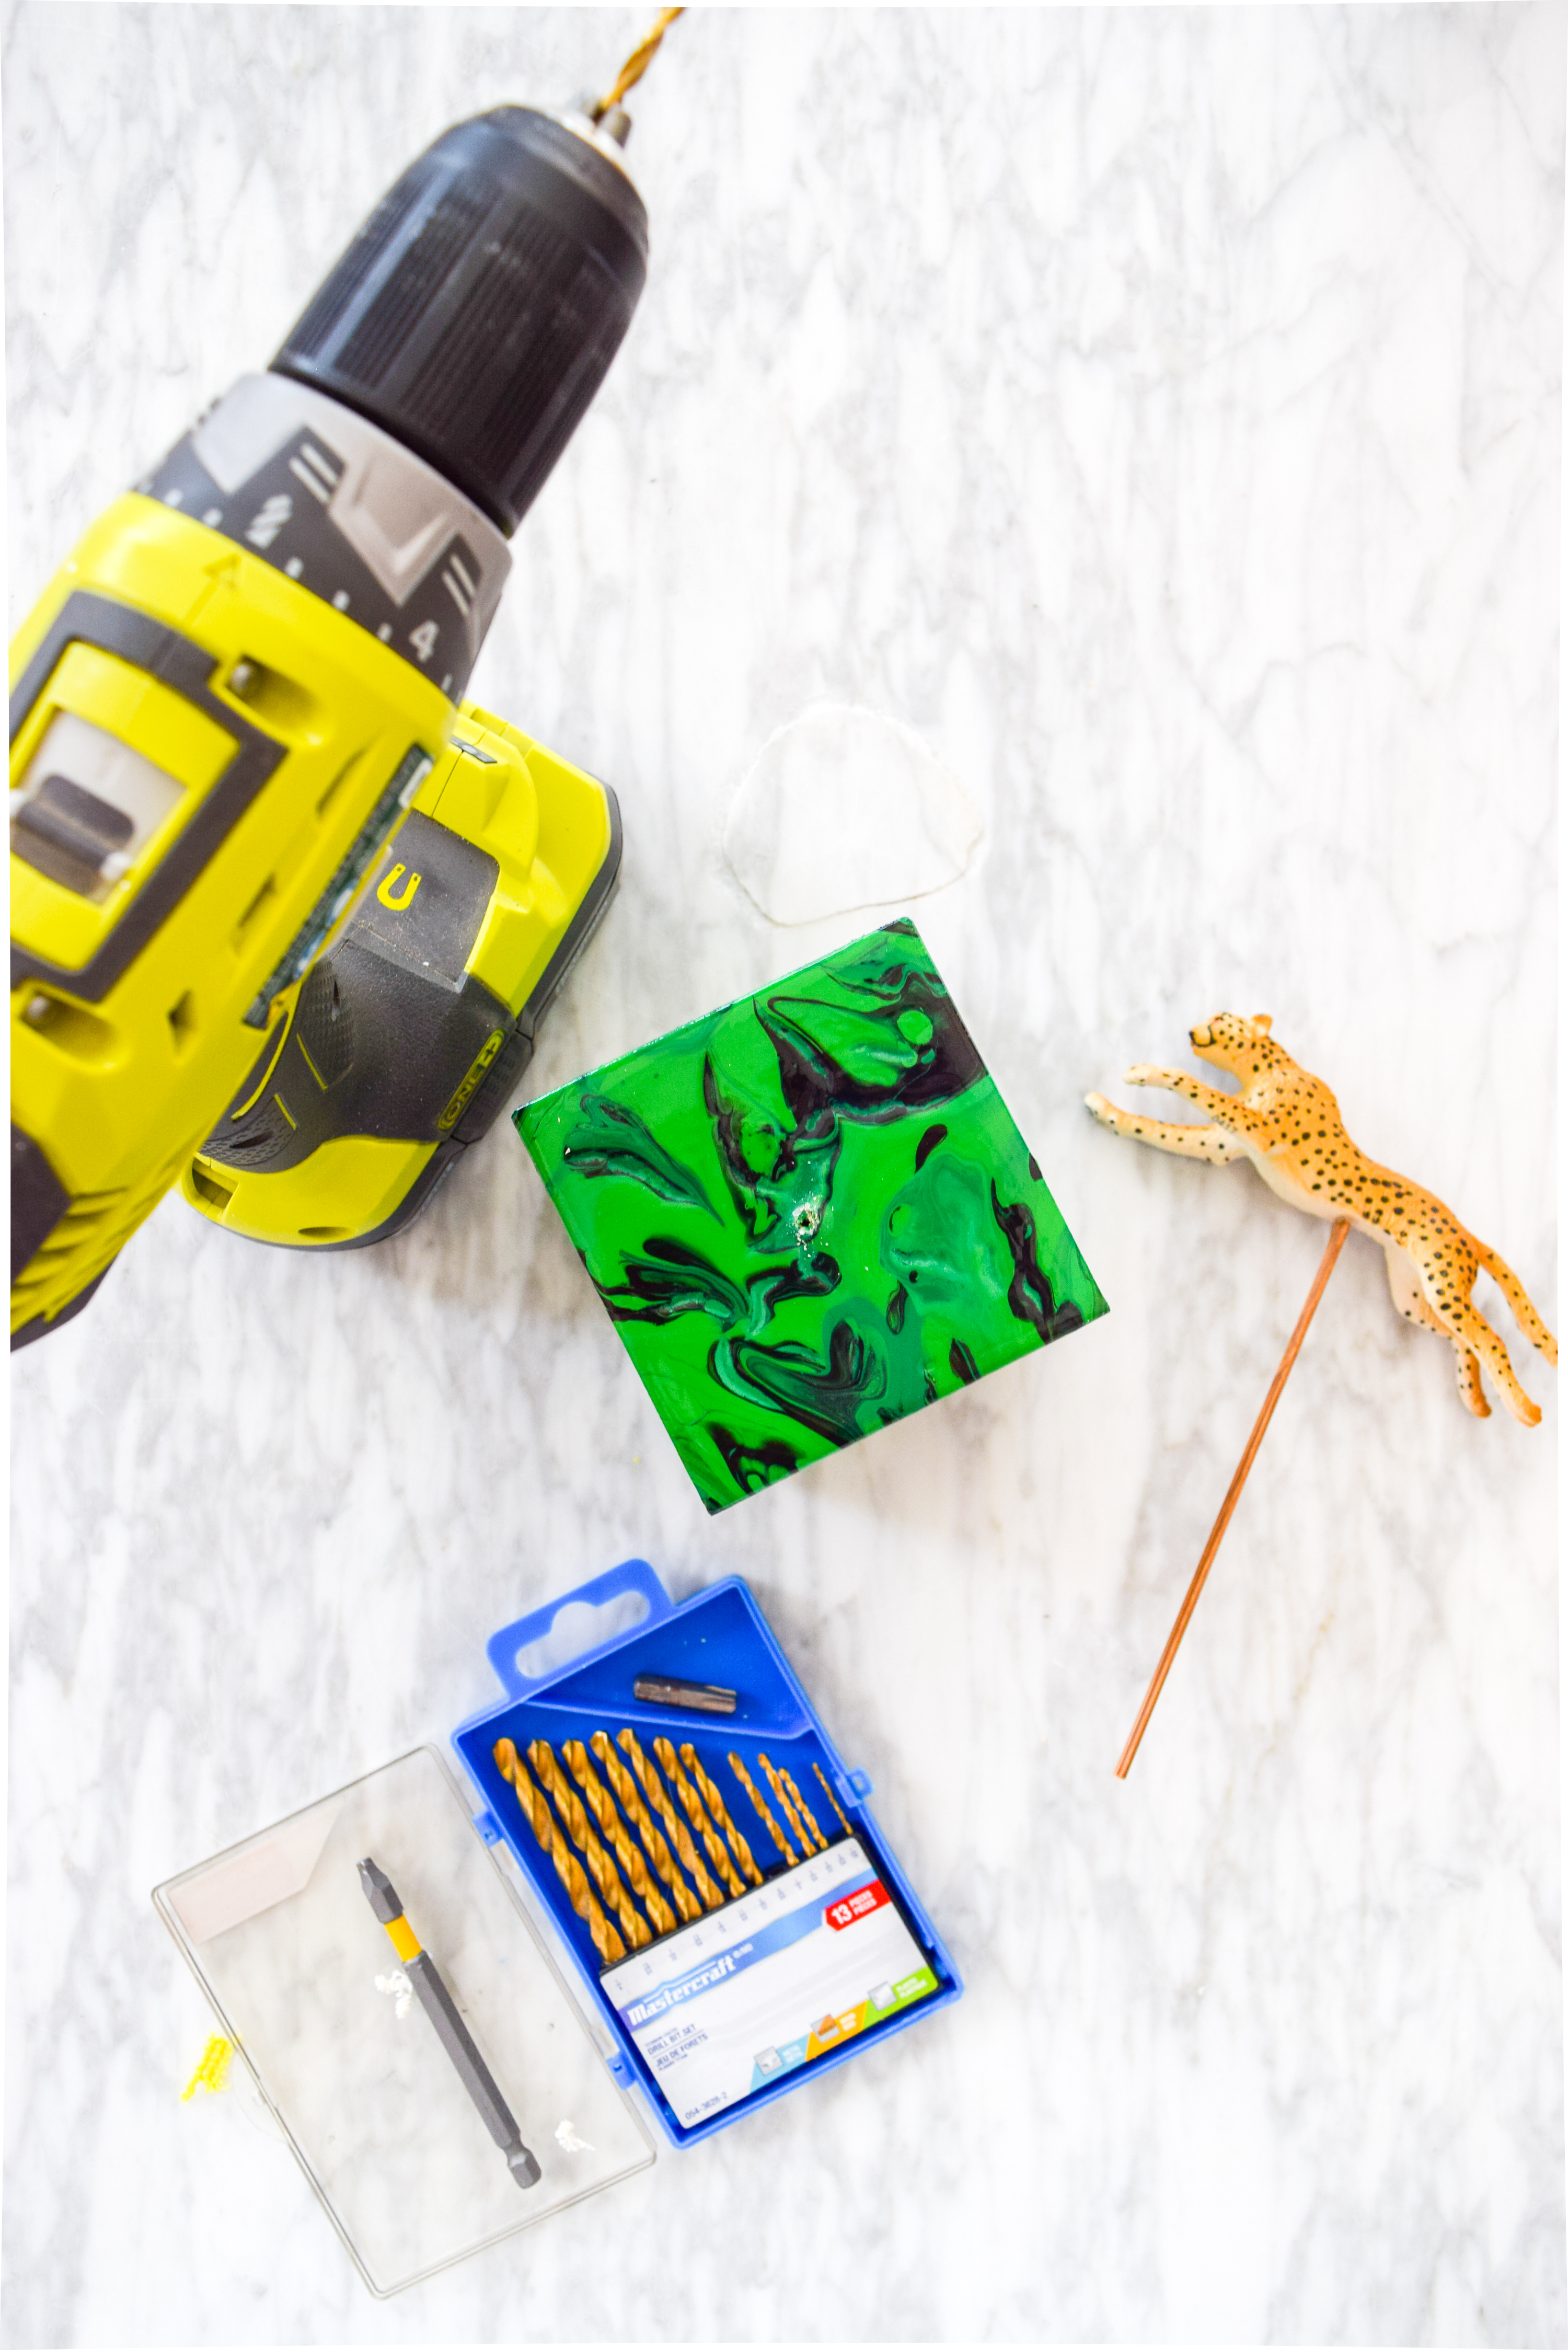
Step 9: In the meantime, using some liquid enamel gold (or gold paint), paint some feet for the block. You have the option of just skipping this part, but I think it’s adds a little oomph to the DIY Malachite & Cheetah Decor, so I did it. Gotta be #extra. I just hot glued them to the bottom of the block once they were dry, and BOOM!

DIY Malachite & Cheetah Decor on a budget! Because who really has the coins for some malachite? Grab the secrets behind this paint pouring DIY.

DIY Malachite & Cheetah Decor on a budget! Because who really has the coins for some malachite? Grab the secrets behind this paint pouring DIY.

DIY Malachite & Cheetah Decor on a budget! Because who really has the coins for some malachite? Grab the secrets behind this paint pouring DIY.

DIY Malachite & Cheetah Decor on a budget! Because who really has the coins for some malachite? Grab the secrets behind this paint pouring DIY.

DIY Malachite & Cheetah Decor on a budget! Because who really has the coins for some malachite? Grab the secrets behind this paint pouring DIY.

DIY Malachite & Cheetah Decor on a budget! Because who really has the coins for some malachite? Grab the secrets behind this paint pouring DIY.

DIY Malachite & Cheetah Decor on a budget! Because who really has the coins for some malachite? Grab the secrets behind this paint pouring DIY.

✨Are you signed-up for my new post updates? ✨

* indicates required
Email Format

2 Comments

Summer Cocktail Napkins »
« DIY Bike Picnic Crate

Comments

  1. Rosa Awad says

    June 1, 2018 at 9:57 am

    I’m obsessed with acrylic pouring and am looking to do a large living room wall piece! This looks like it was fun to do!

    Reply
    • Ariel says

      June 15, 2018 at 4:41 pm

      OOohhh you totally should! It’s not my personal fave, but I love how it turned out here. I’d do this again in a heart beat.

      Reply

Leave a Reply Cancel reply

Your email address will not be published. Required fields are marked *

woman in red dress on counter

Hi! My name is Ariel and I'm the voice behind PMQ for two. I'm an internet rubbernecker, creative soul, and mom

  • Bloglovin
  • Facebook
  • Instagram
  • Pinterest
  • Twitter

PMQ for three

Time For A Cocktail

pmqfortwo

Ariel - PMQ for two
Someone asked if Bruce and Boots were still around Someone asked if Bruce and Boots were still around - yes they are! They’re just getting old, they’re tired of my antics, and honestly spend a good chunk of time sleeping. To be honest, who isn’t 😅 
Happy Friday? 

#wallpaperwednesday #wallpaperdirect #irishsettersofinstagram #lapofluxury #bhgstylemaker #bhghome
Excuse me, have you seen these floors?! AD: The Ch Excuse me, have you seen these floors?! AD: The Champagne Oak flooring from @goldenselect is the one element (other than paint) that runs throughout our house! It’s a unifying element, and brings depth to each space, especially the ones built around neutrals. It’s waterproof, exceptionally durable (to pets and kids!) and easy to clean. It’s also the flooring we installed in our last home, so you know we love it! 

#vinylflooring #goldenselectflooring #costcofinds #kitchenflooring #bhgstylemaker #springflowers #sodomino #kitchendecor #kitchendesign
Would like to further immortalize Dan’s epic pre Would like to further immortalize Dan’s epic pre-baby beard and moustache combo on the grid 👨🏻‍🦰 and remind you that I have a healthy offering of cocktail recipes on the blog. This Lemon 🍋 & Gin Champagne cocktail is a delightful spring recipe! 

#mancrusheveryday #gingerbeard #bhgfood #cocktailoftheday #cocktailrecipes #champagnecocktail
Because you can’t do just do photos or just do a Because you can’t do just do photos or just do a reel, you gotta do both! Anything you’re curious about price wise? Happy to do a reel and explain costs for this space in the context of the build! Here are the details - AD - @villalagoontile Zellige tiles in Iceberg for the shower walls, @officialmetrie casing and architrave on window and door, and baseboard. And the entire space is ultra pure white from @behrpaint. ✨ We purchased the following: mirrors through @homesensecanada, lights from @wayfaircanada, faucets from @kraususa through @homedepotcanada, sinks/toilet/bathtub/shower doors through our plumbing supplier, vanity is a custom build, floor tiles were from a local supplier, and plumbing fixtures in matte black are @deltafaucetcan, and the bath mats are from @urbanoutfitters 

#architecturaldigest #bathroomdesign #bathroomdecor #bathroominspiration #modernbathroom #midcenturymoderndesign
Spring is on the horizon, I swear! Only 5 more sno Spring is on the horizon, I swear! Only 5 more snow storms to get through. AD: in the meantime, I’ve got @mrsmeyerscleandaycanada’s NEW Rain Water detergent to bridge the gap between snow storms and rain storms. 🧺 I use the liquid detergent to keep our clothes clean, smelling fresh, and in ship shape for all that life with a toddler throws our way. Head to my stories for more details! 

#mrsmeyerscleanday #laundryroommakeover #laundryroomdecor #laundryroomgoals #bhgstylemaker #hgtvmagazine #potterybarn
Today is a weird one. So here’s a fun throwback Today is a weird one. So here’s a fun throwback to my Nancy Drew cover fun back in spring 2020. Funny how two years has gone by eh? 

#nancydrew #closetorganization #closetgoals #walkincloset #eclectichomemix #eclectichome #bhgstylemaker #wallpaperwednesday
June met Rupert, and immediately wanted to read to June met Rupert, and immediately wanted to read to him. These two have got a friendship based in love, snuggles, reading, and causing absolute chaos - they’ll get along just fine. 🐅 

#kittensarelikethat #welcometothefamily #kidsroomdecor #kidsroominspiration #houseofcats #kidsplayroom #eclectichome #collectedhome
Follow on Instagram

- THEME BY ECLAIR DESIGNS -