I’ve been sitting on this project for a while now. It’s been in the back of mind mind for about a month as I’ve tried to figure out how to do it. You’d be surprised how hard it is to find metal that is thin enough that you can bend it by hand, but sturdier than embossing metal.
This DIY cookie cutter tutorial is super simple and will allow you to gift your favourite shapes to your family and friends this holiday season.
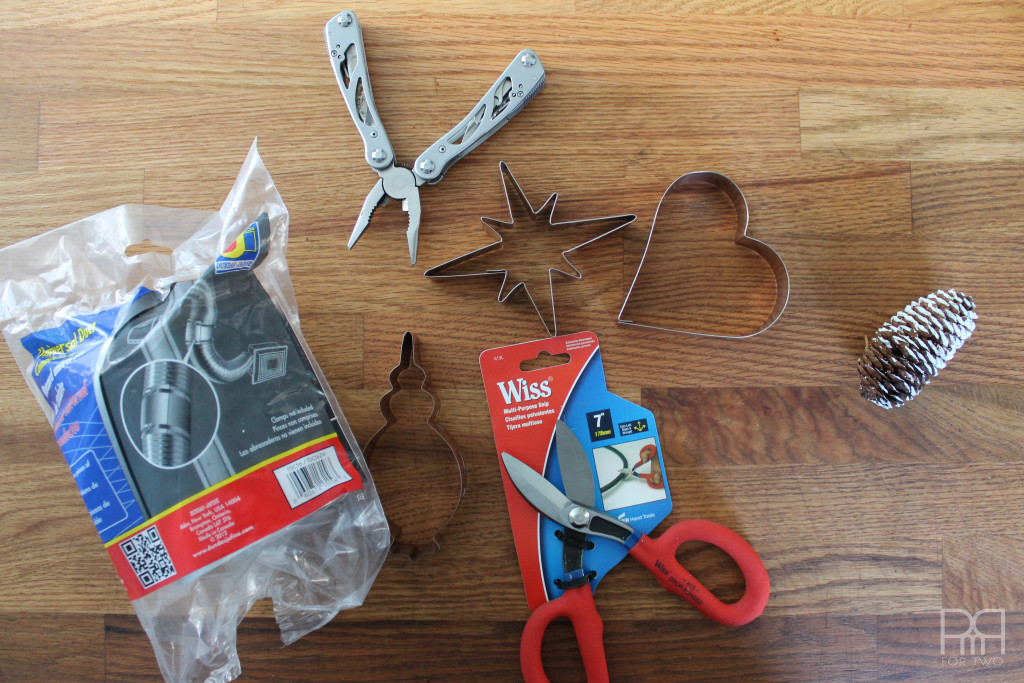
Materials needed
Connector Metal Duct sleeve
Metal sheerers
Hot glue gun
Needle nose pliers
Decorative ribbon
Sandpaper
Cookie cutter inspiration?
You can buy everything you need at your local Home Depot, as well as a surprising amount of Christmas items.
Instructions
Step 1: Start by flattening the metal coupling due, and then taping a straight line that you’ll use to guide your cuts.
Keep in mind that the width of the metal strip you’re laying-out will be the depth of your cookie cutter.
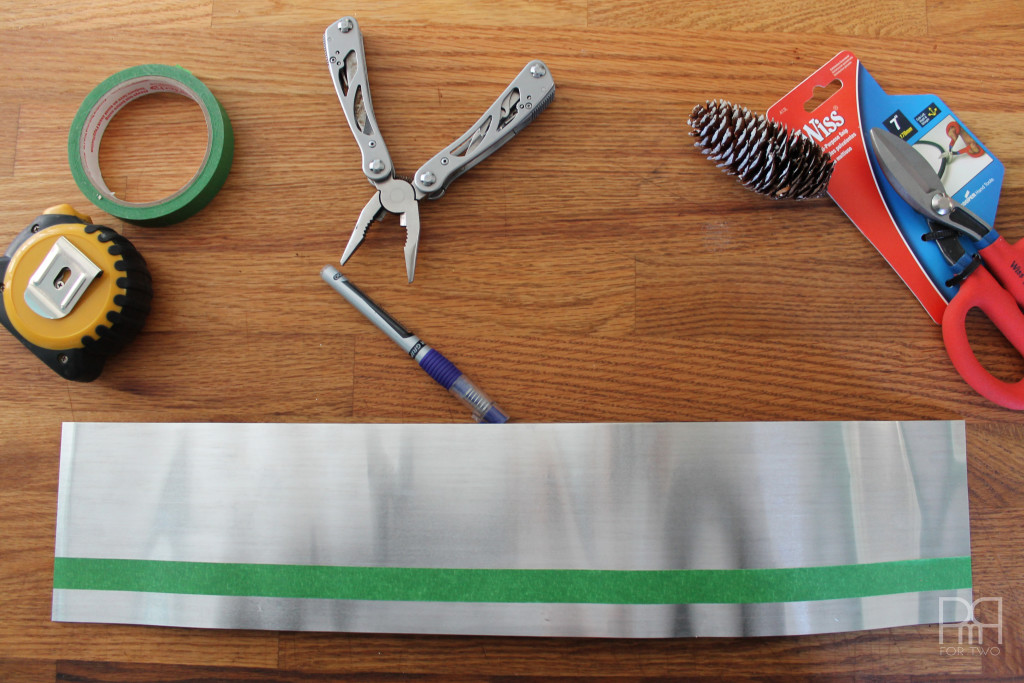
Step 2: Using the metal shearers cut a strip of aluminium.
Step 3: Sand down the edge you just cut to make sure there aren’t any metal slivers. It would suck to get a little sliver in your next cookie!
Step 4: Wash the alluminm! I can’t stress this enough! It’s coated for industrial use, so give it a good scrub or two with some soap and water.
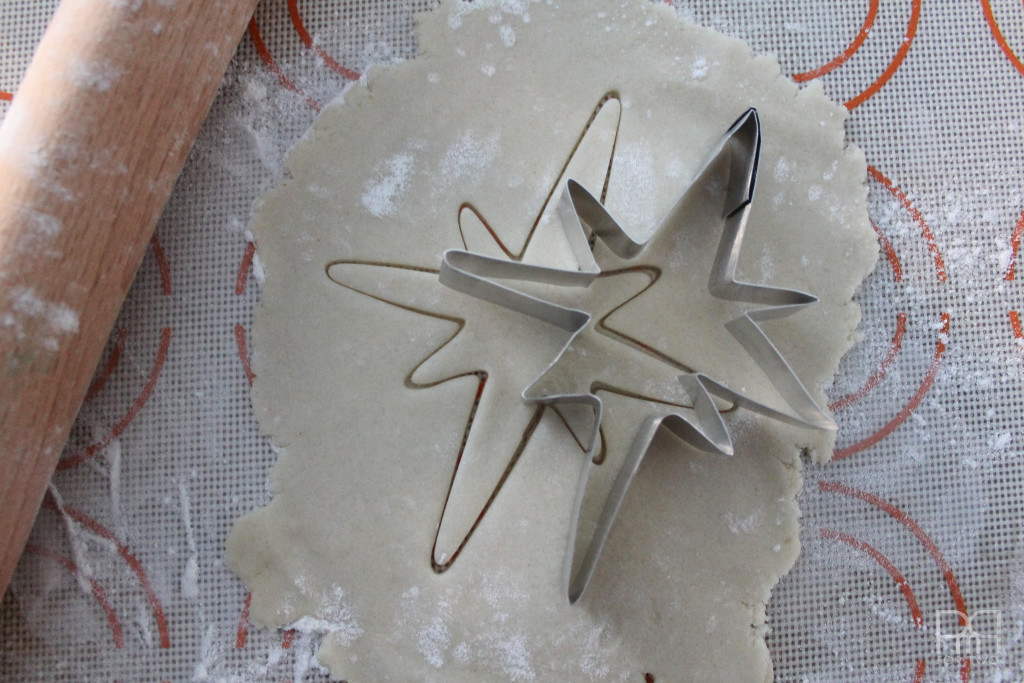
Step 5: Using the needle nose pliers, start bending the metal strip to make the shape of your desired cookie cutter.
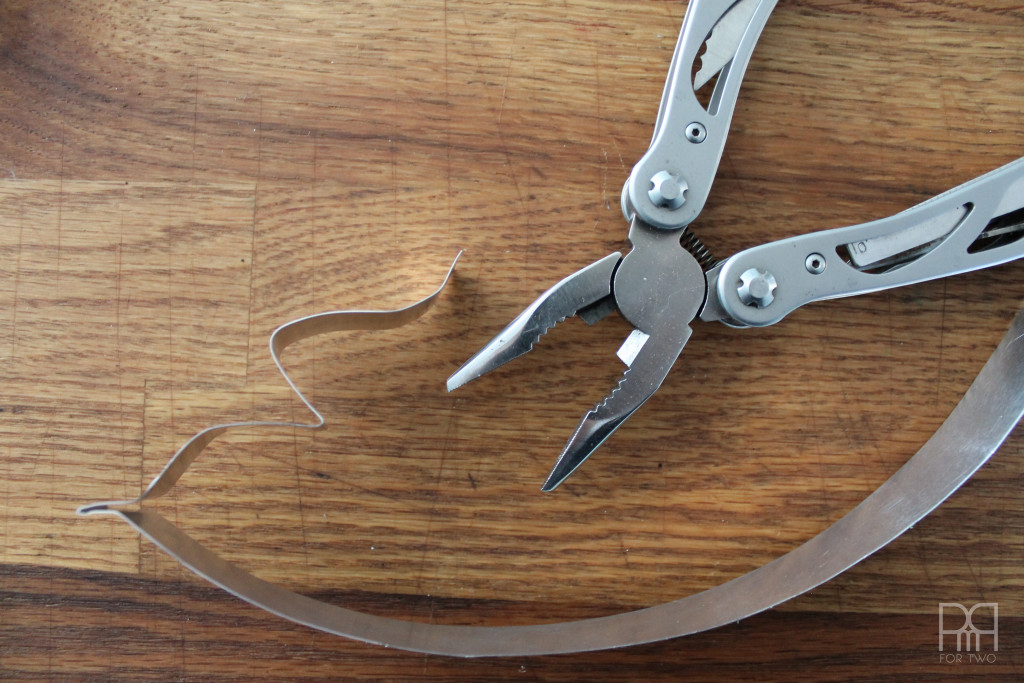
I made an atomic starburst and a dove. I based the dove off the image below, and the atomic star off my favourite cookie cutter shape.
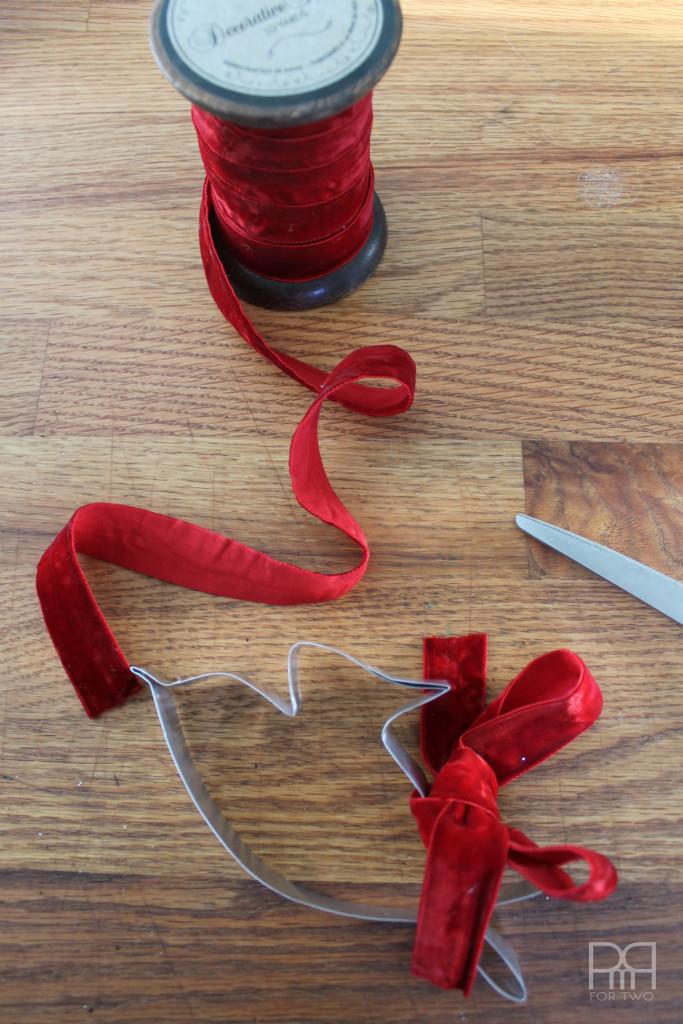
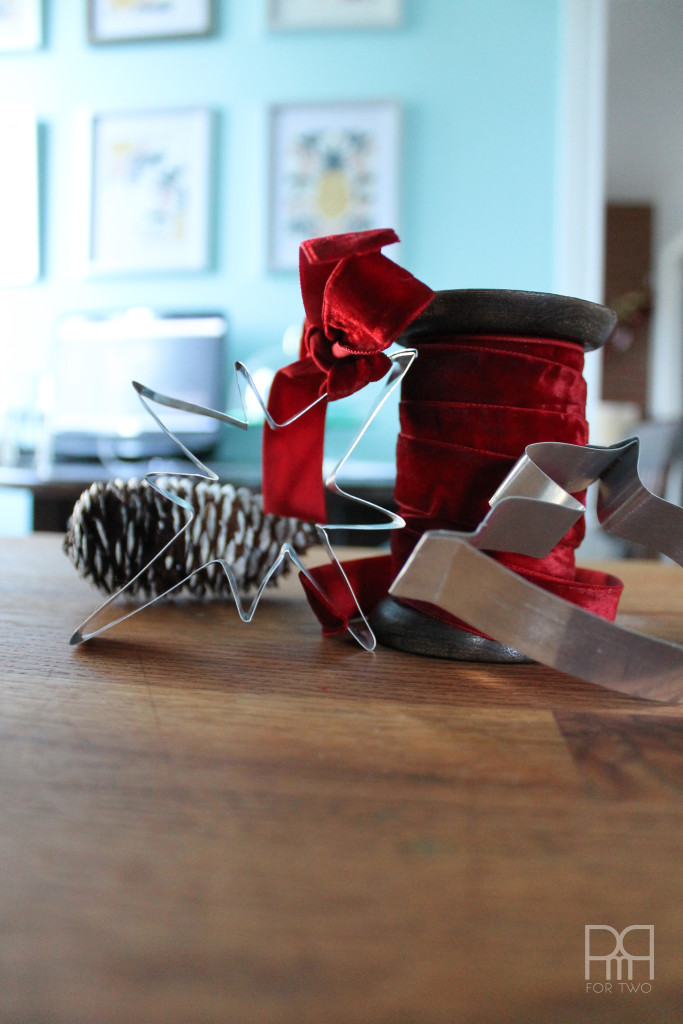
Step 6: Once you’ve achieved the desired shape hot glue the two ends of the metal strip together.
Be careful because the hot glue will heat the metal very quickly, so use the needle nose players to hold the two bits together while it dries.
Step 7: Add a huge bow and voila! Your very own christmas cookie cutter.
The final product cuts beautifully as long as the dough is thick enough.
Sadly,this was also the last week of the Canadian Home Decor and DIY bloggers’ hand made Christmas gift blog hop. Here’s what everyone else made this week:
DIY Maple Candle (A Roots Knockoff) from Vin’yet Etc.
Homemade Candied Citrus Peel from Personally Andrea
Hand Lettered Ornaments from Lemon Thistle
Christmas Breakfast Gift Basket from Craftberry Bush
Homemade Apple Cider Vinegar from Sustain My Craft Habit
Cashew Coconut Brittle from Life Is A Party
DIY Serving Tray for the Coffee Lover from DIY Passion
DIY Cookie Cutters from PMQ For Two
Christmas Cupcake in a Jar from The DIY Mommy
DIY Growler Carrier With Dry Erase Label from Hello Creative Family
DIY Wood Slice Ornaments from The Sweetest Digs
Galvanized Letter Tree from New House New Home
DIY Animal Bookends from Lifeovereasy
Industrial Watch Holder from Love Create Celebrate
DIY Gifts for the New Mom from Fresh Crush
Homemade Barbecue Spice Meat Rub Gift from Time With Thea

*PMQ for two received compensation in exchange for this post, however all views and opinions are my own. Thank you for supporting the brands that make PMQ for two possible.
Wow! This is a super creative gift! Love it! I could definitely see myself making these 🙂
You are so talented!!! These are gorgeous. But I think mine would look a bit wonky if I attempted this -lol
Thank you so much Heather! I think yours would probably turn out beautifully though ????????
These are so cute. Love this idea, thanks for sharing.
Thank you Dannyelle! thanks for sharing with your friends 🙂
So fun AND impressive! The cookie cutters turned out beautifully!
Thanks Sonja <3
I’m so impressed! I’m not sure I could make mine look so beautiful… and not crinkled 😉 These would be fun to make if you can’t find a specific shape (I’ve been known to run to every craft and baking store in town!)
You should definitely try making some! They’re a delightfully easy DIY, it will definitely save you some time next holiday season 😉 They also make great gifts.