


I don’t know about you, but I’m kind of amazed that I managed to pull off an easter tablescape in our living room, while the kitchen is under reno, and all the kitchen stuff is in the dining room. That required some serious dedication, let me tell you. That being said, all I needed to do was paint some basswood chargers to get me in the mood, and suddenly I have a bold & colourful easter tablescape fully formed.
Check out my Kate Spade Inspired Easter Tablescape, my Holi Tablescape, and my Bold & Graphic Spring Tablescape
*Walnut Hollow sponsored this post, but all thoughts are my own. Thank you for supporting the brands that make PMQ for two possible.
, and display all your chocolate too! I painted basswood chargers from Walnut Hollow with a bold colour blocked pattern, and love the result.")

When I was on the Walnut Hollow website earlier this year looking for jewelry boxes, I stumbled across their basswood round plates and knew I wanted to try something with them. So try, I did! I must admit, it took me a beat to figure out what exactly I wanted to do with them. I thought about painting giant gingham on them, but I’ve already done that. I thought about decoupaging them, but that didn’t feel very durable. And that’s when I settled on the idea of a great colour block.
Check out my Colour Blocked Jewelry Boxes & my Colour Blocked Kitchen Canisters
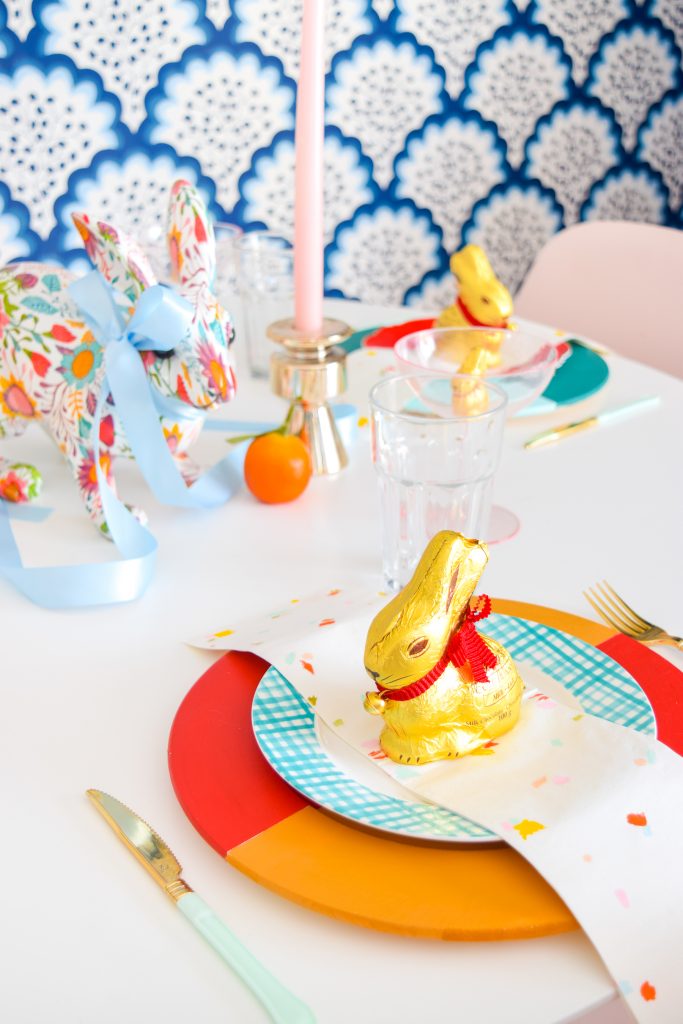
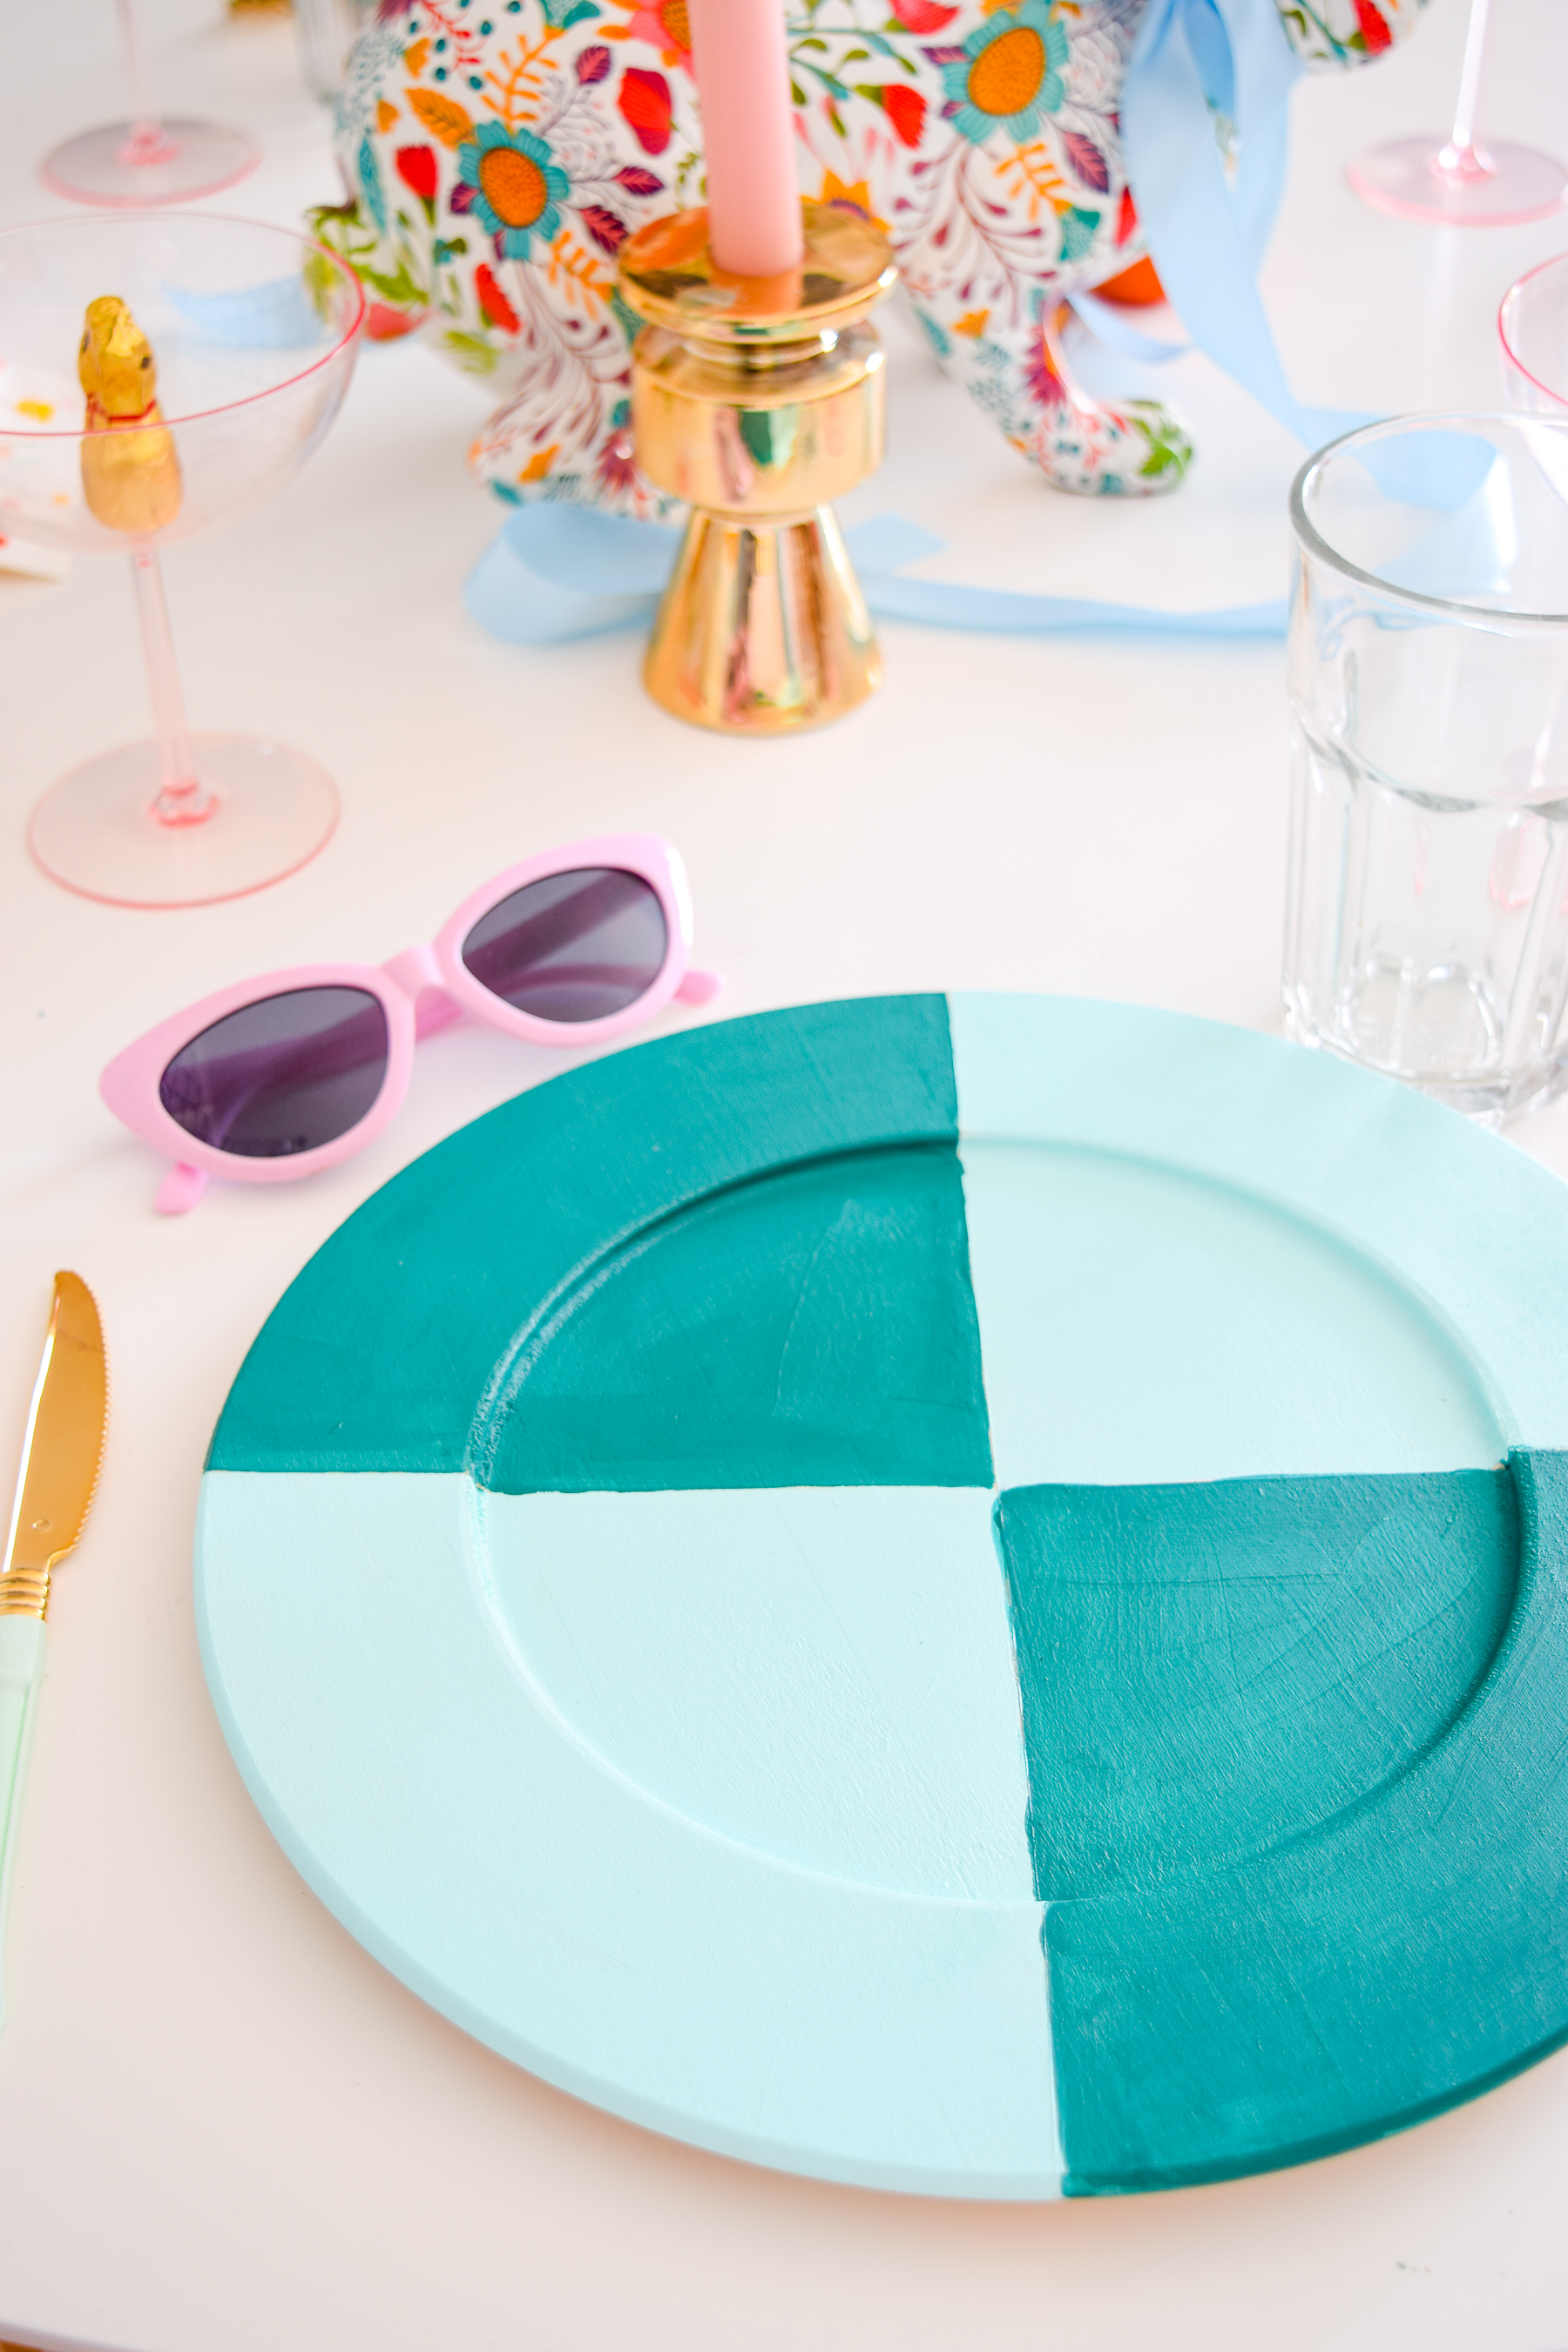
See, I’m super inspired by the elements around me, and our new kitchen floor tile has a distinct pattern, which I thought would lend itself perfectly to these basswood round plates, as chargers on a bold & colourful easter tablescape.
DIY Colour Block Chargers
Like with all good projects, this one will take very little time, and create quite the impact. I think the toughest part will be picking your colours. I definitely flipped flopped on the scheme a few times, before deciding to do 2 in each colour scheme. I opted to keep the same pattern for continuity though.
What you’ll need: 11.5″ round basswood plates, craft paint (I used Fusion’s line of paints), a few brushes, and some painter’s tape! I suppose a measuring tape would also come in handy too.
, and display all your chocolate too! I painted basswood chargers from Walnut Hollow with a bold colour blocked pattern, and love the result.")
Because I did a somewhat geometric aka colour blocked pattern, I wanted to bring a bit of precision to the game, so I used a measuring tape and some painters tape to create a good grid. After I painted the first quadrant, the rest was mostly freehand with a few tape adjustments.
You can be as precise as you want, and the final effect will be that much more outstanding if you do.
, and display all your chocolate too! I painted basswood chargers from Walnut Hollow with a bold colour blocked pattern, and love the result.")
, and display all your chocolate too! I painted basswood chargers from Walnut Hollow with a bold colour blocked pattern, and love the result.")
, and display all your chocolate too! I painted basswood chargers from Walnut Hollow with a bold colour blocked pattern, and love the result.")
Some pieces needed a little detail touching-up once the colours were on, but it was well worth it, because once they were sealed they looked perfect on my bold & colourful easter tablescape.
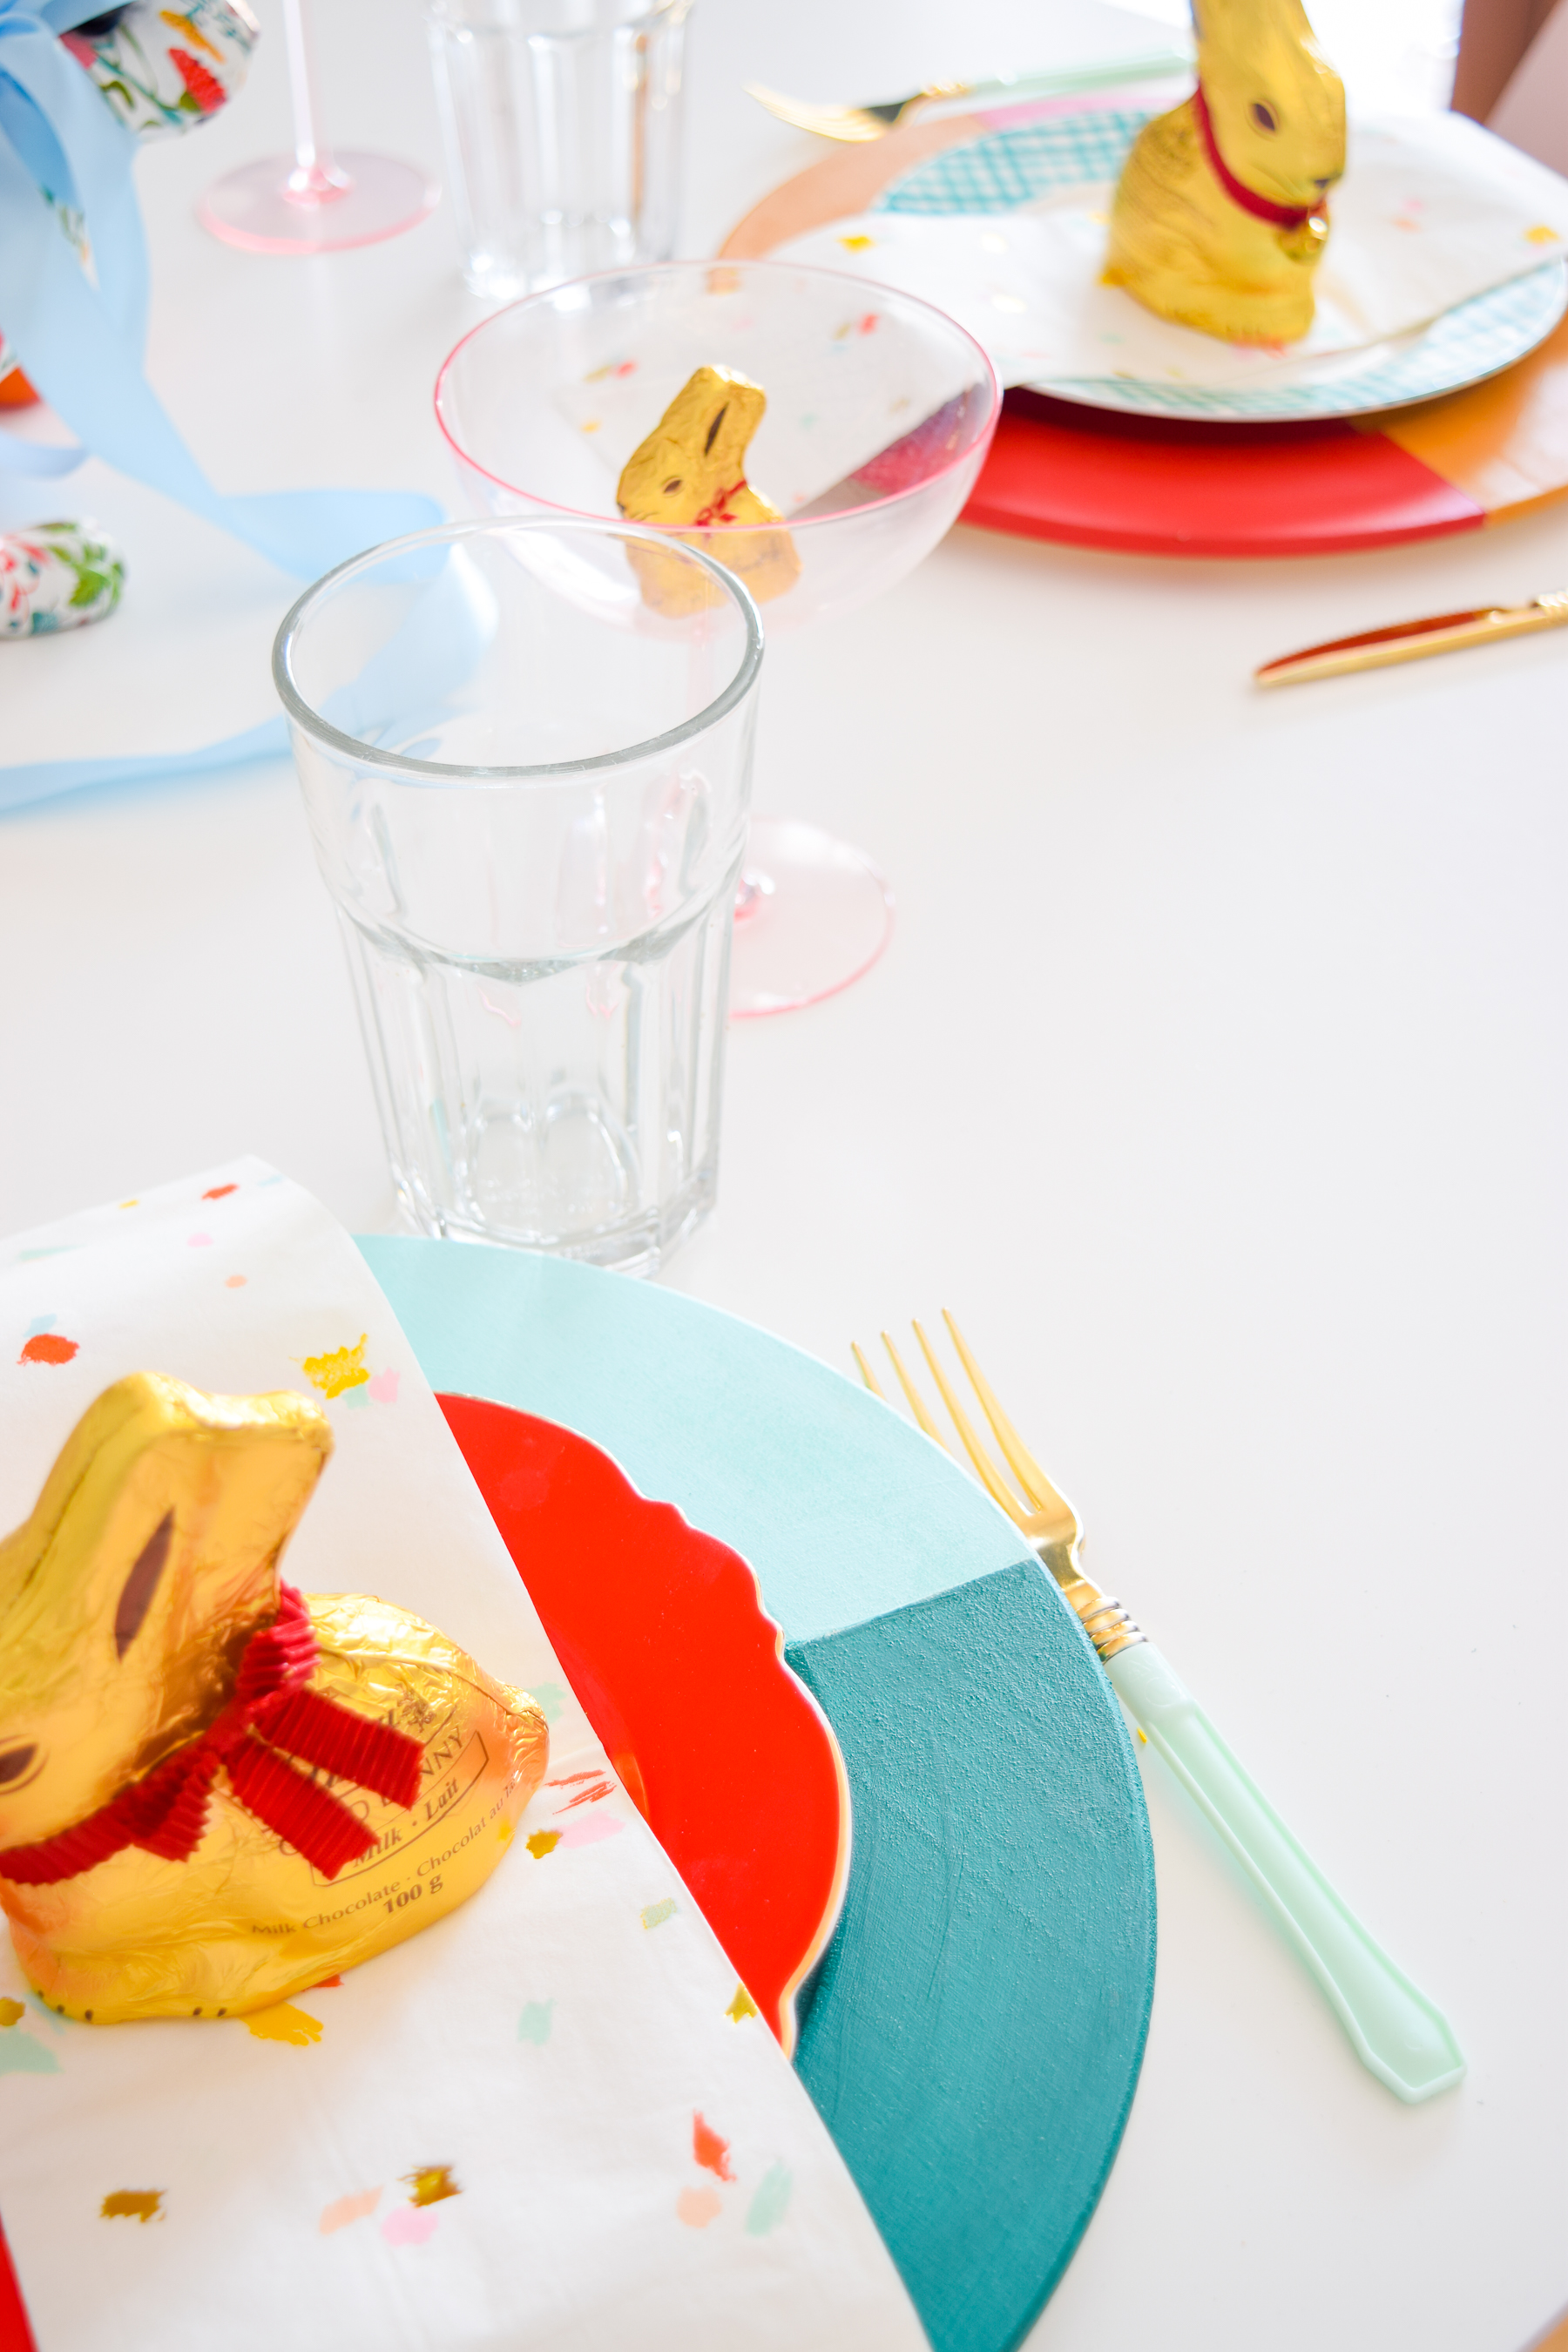
I ended-up finding the perfect napkins from Sugar & Cloth to match to the chargers, and it even looks like I pulled my whole colour scheme from them!
Creating a Bold & Colourful Easter Tablescape
So here comes the fun part! Actually setting the table. As I mentioned above, my entire house is kind of upside down at the moment, and without a studio this spring, I had to get creative to create the entertaining space we’ll use.
, and display all your chocolate too! I painted basswood chargers from Walnut Hollow with a bold colour blocked pattern, and love the result.")
I somehow got our kitchen table out from under a pile of stuff in the dining room, and then hauled it into the living room. Same with our wallpapered sideboard! I managed to create a little pocket of colourful sanity in this hamster house.
, and display all your chocolate too! I painted basswood chargers from Walnut Hollow with a bold colour blocked pattern, and love the result.")
, and display all your chocolate too! I painted basswood chargers from Walnut Hollow with a bold colour blocked pattern, and love the result.")
Make a chocolate bunny easter cocktail!

Creating the actual place setting was actually pretty easy once I had a colour palette so cleverly pulled from the napkins. It’s all about layering, creating depth, and then adding a little whimsy, kind of like the mini chocolate bunny sitting in the champagne coupe.
, and display all your chocolate too! I painted basswood chargers from Walnut Hollow with a bold colour blocked pattern, and love the result.")
, and display all your chocolate too! I painted basswood chargers from Walnut Hollow with a bold colour blocked pattern, and love the result.")
Don’t you just love the paint on my hands? I promise they’re clean, this is just paint I can’t get off my hands at the end of each day after the renos. I’ve never let it stop me before, and I sure as heck won’t now.
, and display all your chocolate too! I painted basswood chargers from Walnut Hollow with a bold colour blocked pattern, and love the result.")

, and display all your chocolate too! I painted basswood chargers from Walnut Hollow with a bold colour blocked pattern, and love the result.")
, and display all your chocolate too! I painted basswood chargers from Walnut Hollow with a bold colour blocked pattern, and love the result.")
p.s if you love this wallpapered sideboard IKEA hack as much as I do, you’ll want to check out the tutorial. It’s super easy to do yourself.
I think in this case, because this is not our dining room, keep the sideboard situation nice and light was the ideal solution. A few glittery gold bunnies, maybe a chocolate one, some butterflies and bold statement lighting. Now THAT’S how you dress a sideboard.
, and display all your chocolate too! I painted basswood chargers from Walnut Hollow with a bold colour blocked pattern, and love the result.")
, and display all your chocolate too! I painted basswood chargers from Walnut Hollow with a bold colour blocked pattern, and love the result.")
, and display all your chocolate too! I painted basswood chargers from Walnut Hollow with a bold colour blocked pattern, and love the result.")
, and display all your chocolate too! I painted basswood chargers from Walnut Hollow with a bold colour blocked pattern, and love the result.")

Shop the Colour Block Easter Tablescape


