PMQ for two

Bold, Bright and Colourful Home Decor & DIYs

  • HOME
  • ABOUT ME
    • POLICIES
  • BUSINESS BABES
  • PROJECT GALLERY
  • PRESS
  • WHAT IS A PMQ?
    • THE DUPLEX
    • The Row House Tour

DIY Paper Fans

May 19, 2017~ Cricut, DIY and craft projects, Summer

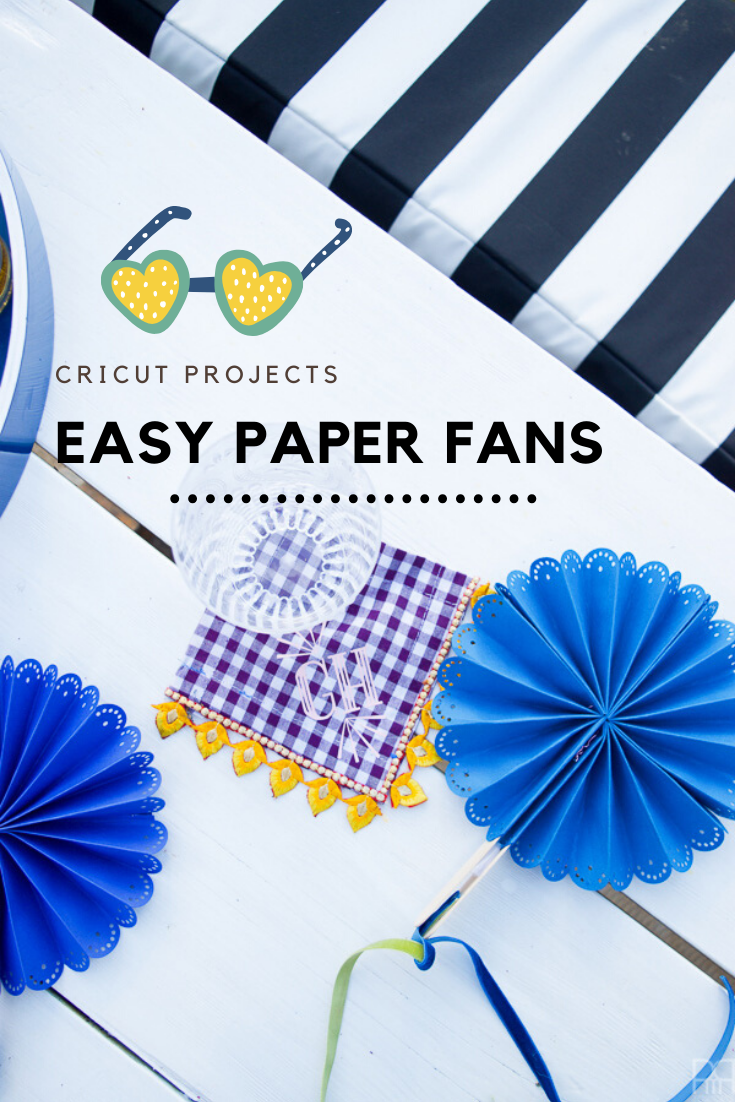
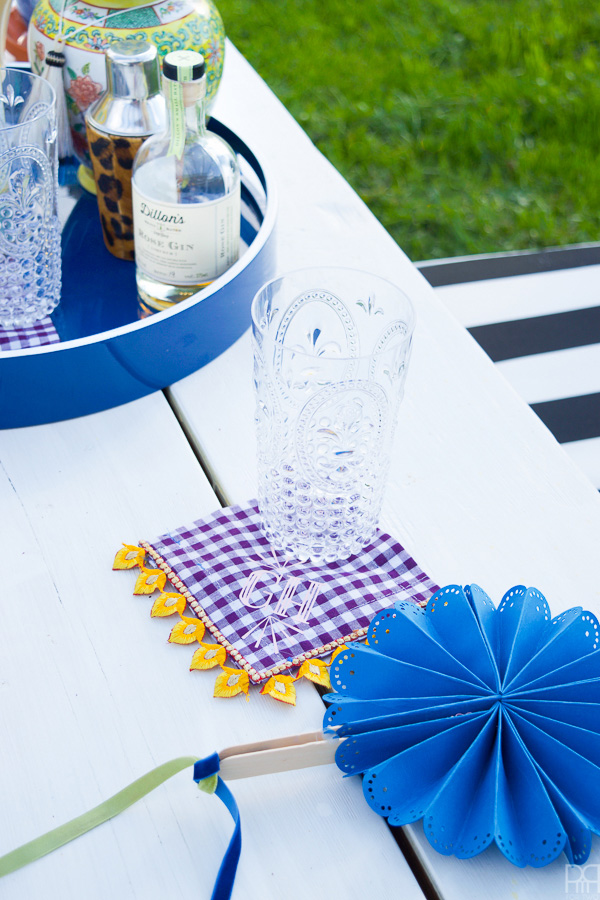
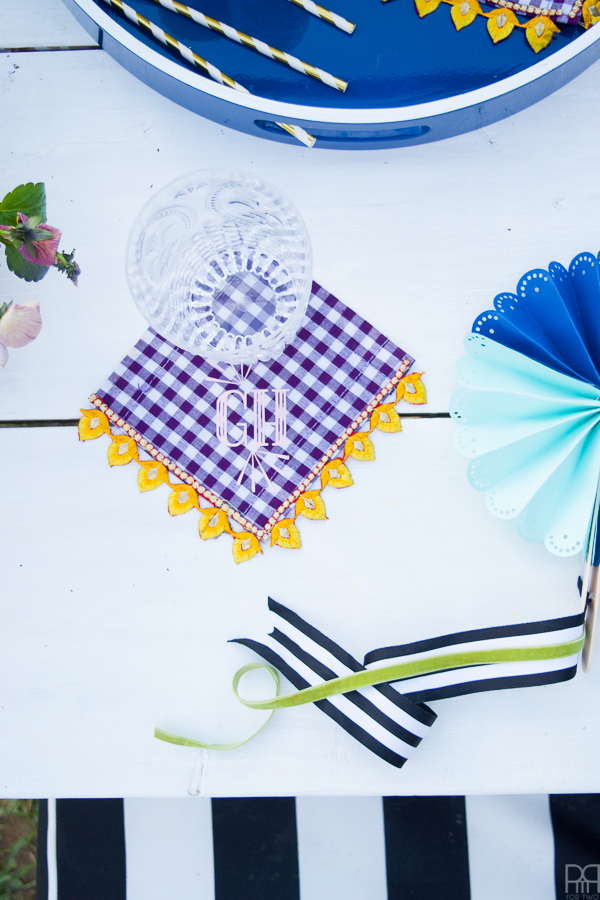
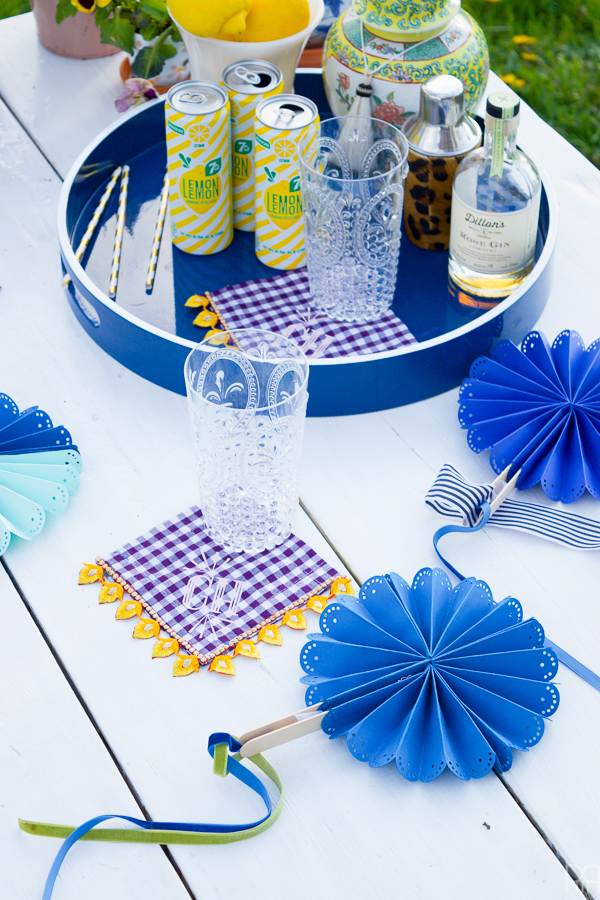
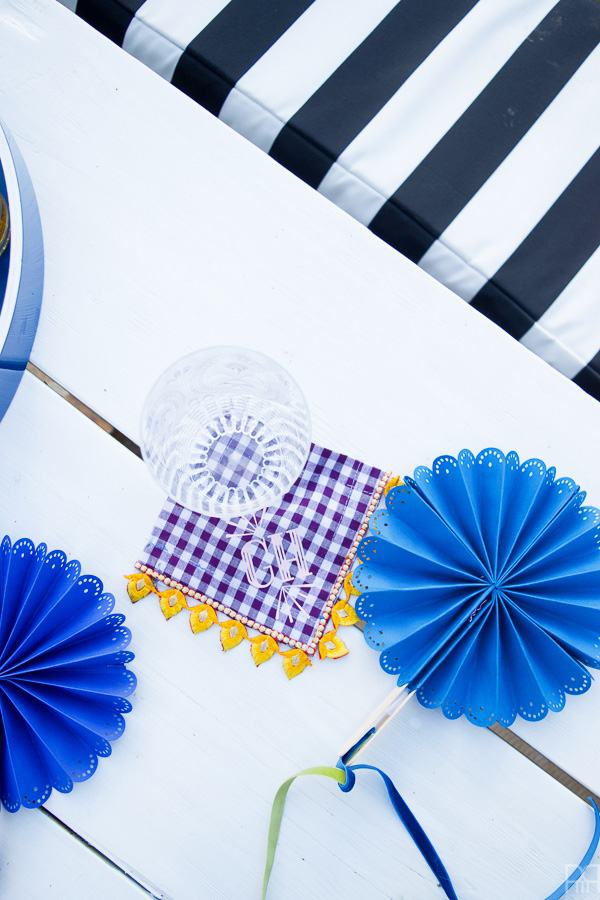
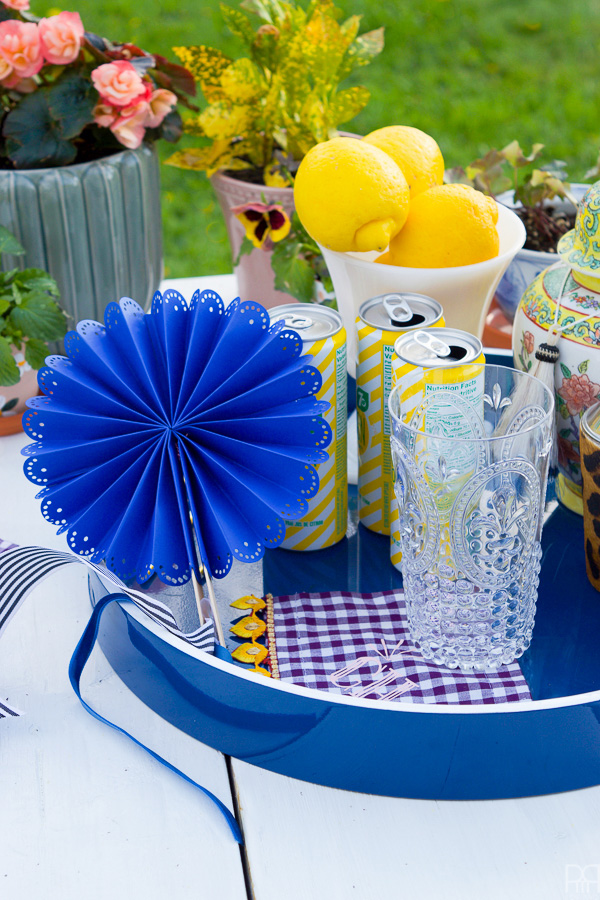
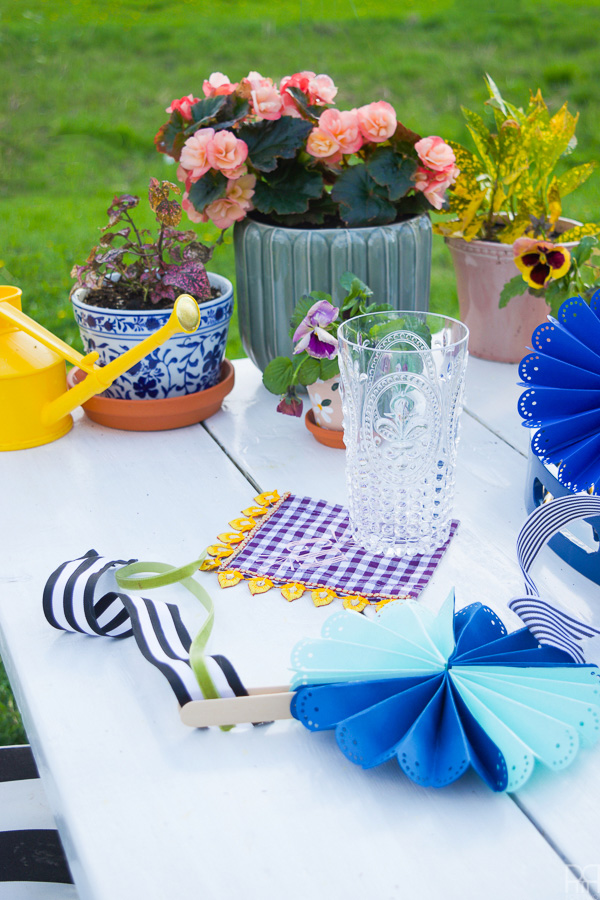
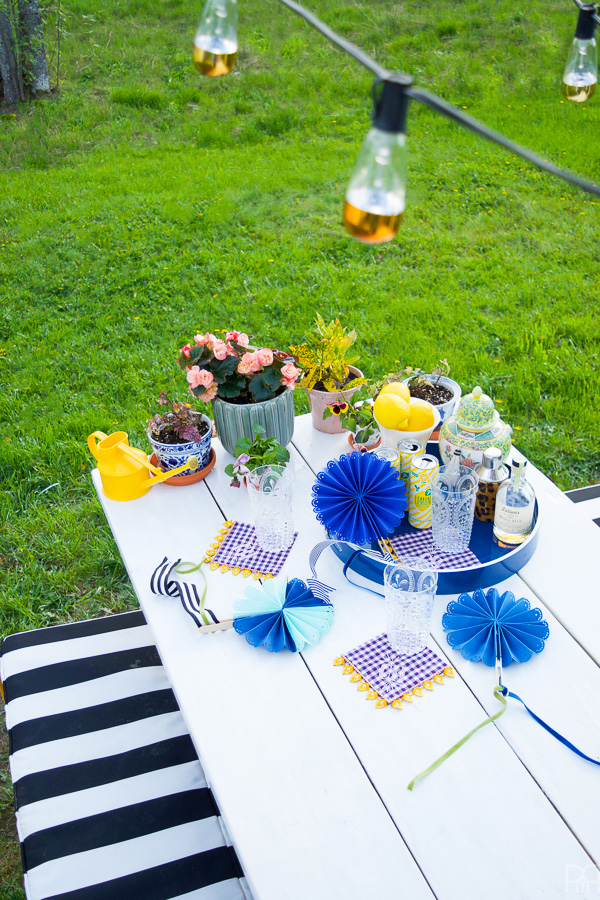
These beauties are sturdy, functional, and the perfect accessory for our summer bar cart.

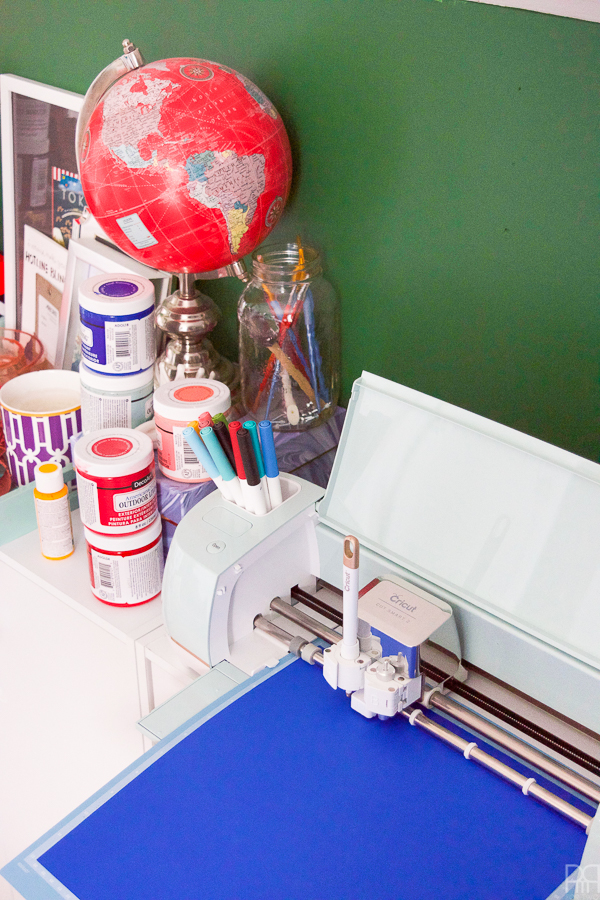
I made mine using my Cricut Explore Air 2 and a Make It Now project by Lia Griffith. The whole project took a bit longer than I had expected, but that was because I ended-up modifying a few things along the way. It’s all good though, because I can now tell you about those modifications and why they make for a slightly superior fan.

*Cricut sponsored this post, but all thoughts are my own.  Thank you for supporting the brands that make PMQ for two possible.

Using my Cricut Explore Air 2 and some colourful card stock and ribbons, I made beautifully paper fans for summer entertaining and outdoor living. Come see how you can make a set for yourself!

*The following product links contain affiliate links. Thank you for supporting the brands that make PMQ for two possible. For my full policies click // here //

What do you need to make a paper fan with your Cricut?

  • Cricut Explore Air™ 2 machine
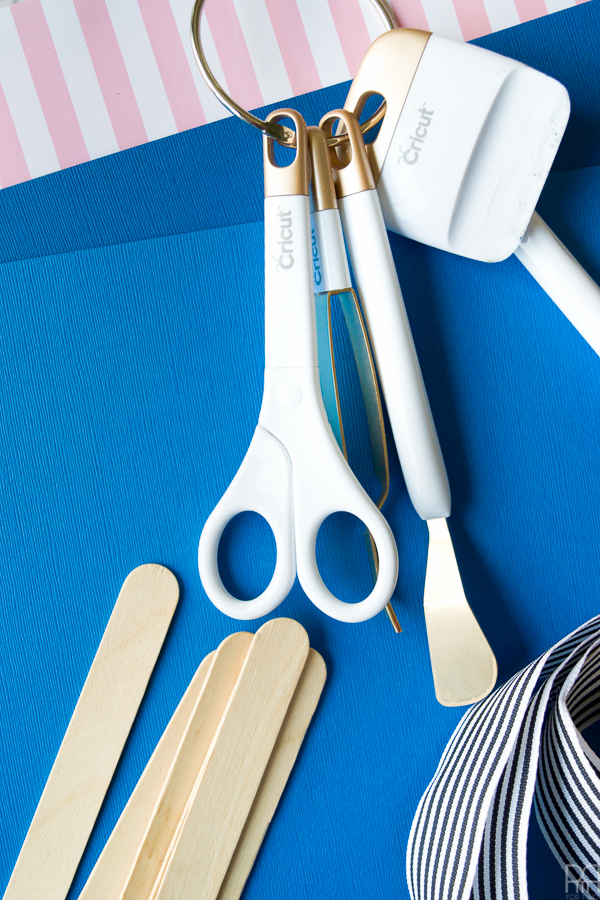
  • Cricut® Tools Basic Set
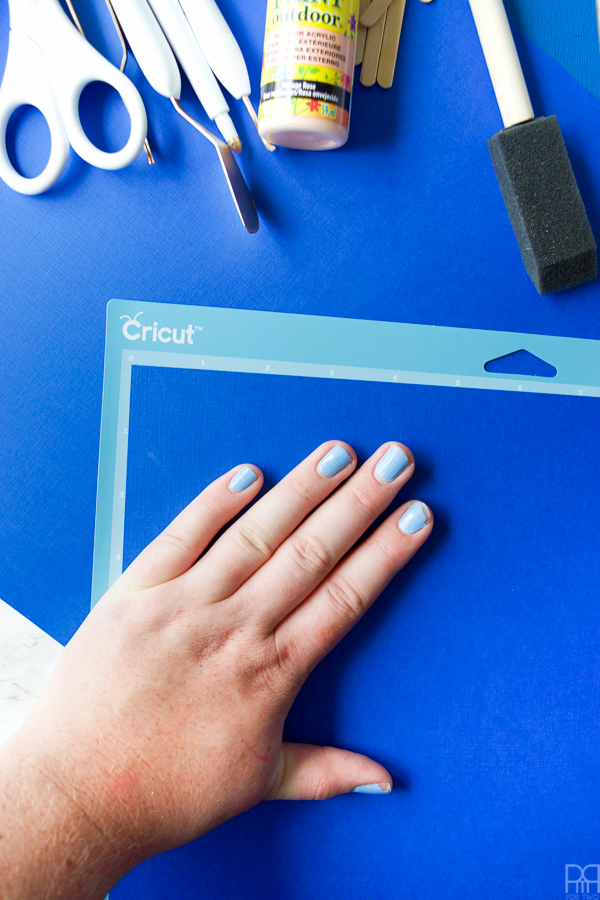
  • Cricut® 12″ x 24″ StandardGrip Adhesive Cutting Mat, 2-pack
  • Lia Griffith’s Paper Party Fans Medium (under the Make It Now – Parties and Events)
  • Wide popsicle sticks / tongue depressors
  • Ribbons of all shapes and sizes
  • 18 gage floral wire
  • Colourful cardstock x 2 sheets per fan

*NB: you will need 2 sheets of card stock per medium sized fan. You can do the same project in a bigger size, but you’ll need 3 sheets for that one.

How to make the Lia Griffith Paper Fans

Select the project from the Make It Now category for “Parties and events.” If you already have a payment profile set-up with your Cricut Design Space account, purchase the project and hit “go.”

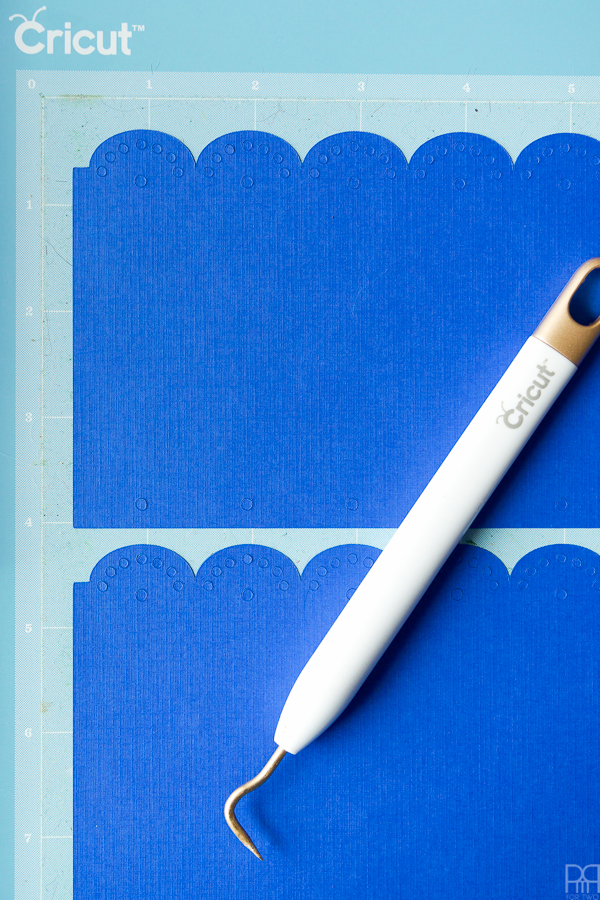
 Place the card stock on the cutting mat. Make sure there are no remnants from previous projects on the mat as they’ll create bumps that will be an issue with the amount of small detail cuts the machine needs to make.

I often sue my scrapping tool to clean the mat between cuts, and you’ll def need to do that with this project.

Using my Cricut Explore Air 2 and some colourful card stock and ribbons, I made beautifully paper fans for summer entertaining and outdoor living. Come see how you can make a set for yourself!

 This project will also require a scoring pen, so make sure you have one handy.

The lovely thing about the Make It Now projects is that once you pick one, all you have to do is click “make it now.” You don’t need to fiddle with sizing or anything, but you can if you want.

Using my Cricut Explore Air 2 and some colourful card stock and ribbons, I made beautifully paper fans for summer entertaining and outdoor living. Come see how you can make a set for yourself!

p.s if you’re curious about why I use a Cricut Explore Air 2 and not a Silhouette Cameo click // here //

 Like I mentioned above, you’ll need 2 sheets per fan, so if you need to make several fans it may take a while to get all the cuts done.

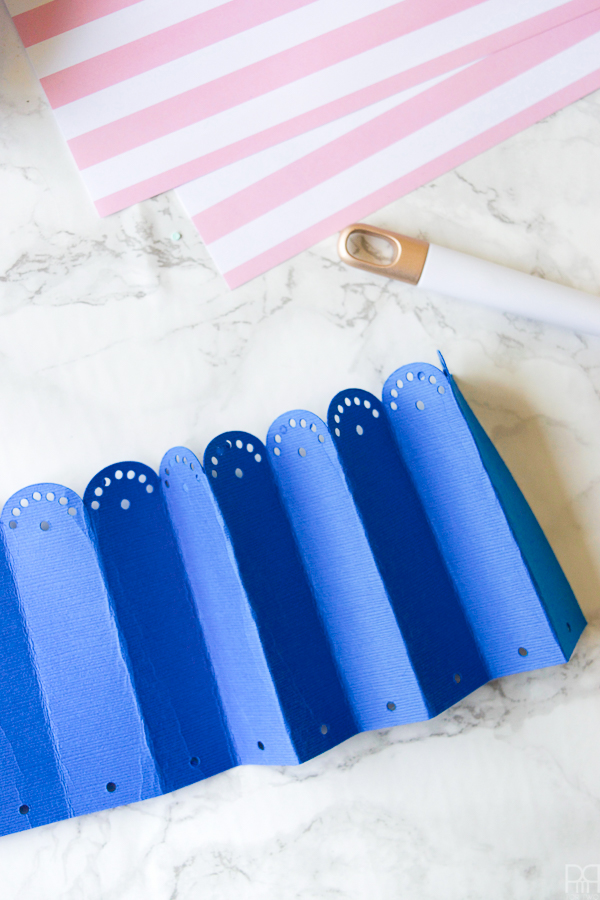
Once they’re cut and you’ve removed them from the cutting mat you’ll need to weed-out any remaining cuts that didn’t fall out immediately.

Using my Cricut Explore Air 2 and some colourful card stock and ribbons, I made beautifully paper fans for summer entertaining and outdoor living. Come see how you can make a set for yourself!

Once you’ve weeded the cuts, time to start folding the fan components. Each strip that is cut will make up part of the fan, so you’ll need to fold them like an accordion.

Using my Cricut Explore Air 2 and some colourful card stock and ribbons, I made beautifully paper fans for summer entertaining and outdoor living. Come see how you can make a set for yourself!

Tweaking the Lia Griffith Fan instructions

Lia Griffith recommends gluing all four pieces to each other (end to end) before starting the folds, to ensure that you don’t have to re-fold something because it’s folded on the wrong grooves.

On my first fan, I used hot glue spread really thin to attach the pieces, but that made them too bulky to fold at the seams. Each strip comes with a seem where you can attach the pieces, but I found all of that to to be hard to work with. My first fan didn’t really pan out how it should have, so I modified it going forward.

Instead: I cut-off the little tabs they provide for a seam and just glued the two extreme panels to each other. It was more sturdy, less cumbersome, and made for a seamless look.

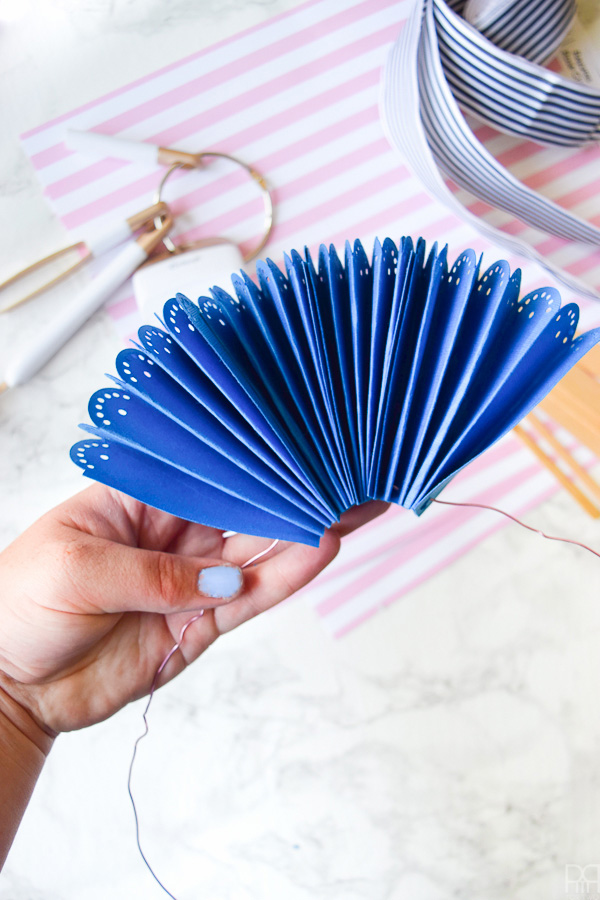
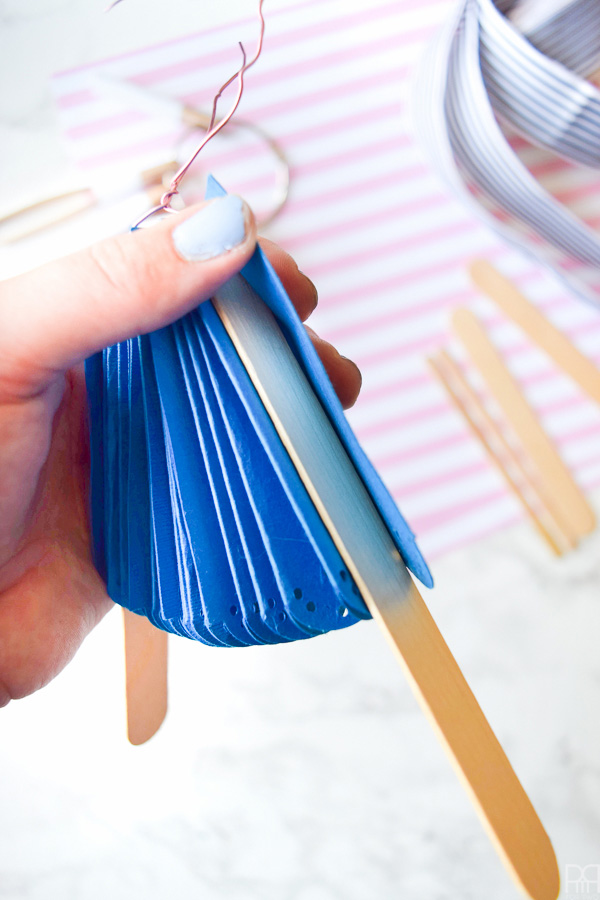
 Thread some twine through all the single eyelets at the bottom of your fan strips.

Instead: I used 18 gage floral wire. Not only did I find it easier, but I found it sturdier. One of the problems I had with my first fan, was that I couldn’t get the tension right with the twine, so my fan kept flopping over when I opened it. No bueno. Using the floral wire lets you adjust the tension, and makes for a sturdier hold. I highly recommend it!

Using my Cricut Explore Air 2 and some colourful card stock and ribbons, I made beautifully paper fans for summer entertaining and outdoor living. Come see how you can make a set for yourself!

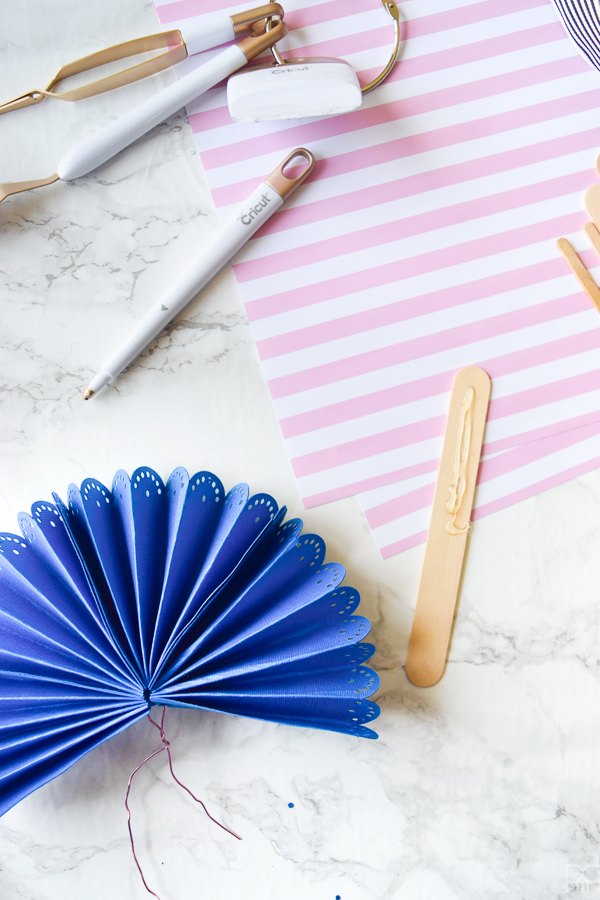
 Using your large popsicle sticks, apply some hot glue and then inset them between the last folds on each end. Those will your handles!

Using my Cricut Explore Air 2 and some colourful card stock and ribbons, I made beautifully paper fans for summer entertaining and outdoor living. Come see how you can make a set for yourself!

Here you can see how I figured-out the tension I needed. Open the fan half-way and then tie it off. That way when it’s open all the way there will be nice tension between the folds.

Make sure you glue both folds to the popsicle stick or your fans will look silly.

Using my Cricut Explore Air 2 and some colourful card stock and ribbons, I made beautifully paper fans for summer entertaining and outdoor living. Come see how you can make a set for yourself!


 If you want your fans to be open permanently you can then glue the sticks together and add fun centre medallions. I opted to have mine open and close for easy storage. You can add an elastic band on the ends of the sticks to make sure it stays closed, but I added ribbons for that instead.


Using my Cricut Explore Air 2 and some colourful card stock and ribbons, I made beautifully paper fans for summer entertaining and outdoor living. Come see how you can make a set for yourself!

Using my Cricut Explore Air 2 and some colourful card stock and ribbons, I made beautifully paper fans for summer entertaining and outdoor living. Come see how you can make a set for yourself!

Using my Cricut Explore Air 2 and some colourful card stock and ribbons, I made beautifully paper fans for summer entertaining and outdoor living. Come see how you can make a set for yourself!

Using my Cricut Explore Air 2 and some colourful card stock and ribbons, I made beautifully paper fans for summer entertaining and outdoor living. Come see how you can make a set for yourself!

Using my Cricut Explore Air 2 and some colourful card stock and ribbons, I made beautifully paper fans for summer entertaining and outdoor living. Come see how you can make a set for yourself!

Using my Cricut Explore Air 2 and some colourful card stock and ribbons, I made beautifully paper fans for summer entertaining and outdoor living. Come see how you can make a set for yourself!

Using my Cricut Explore Air 2 and some colourful card stock and ribbons, I made beautifully paper fans for summer entertaining and outdoor living. Come see how you can make a set for yourself!

Using my Cricut Explore Air 2 and some colourful card stock and ribbons, I made beautifully paper fans for summer entertaining and outdoor living. Come see how you can make a set for yourself!

Using my Cricut Explore Air 2 and some colourful card stock and ribbons, I made beautifully paper fans for summer entertaining and outdoor living. Come see how you can make a set for yourself!


This is a sponsored conversation written by me on behalf of Cricut. The opinions and text are all mine.


✨Are you signed-up for my new post updates? ✨

* indicates required

Email Format

8 Comments

My Colourful Home Style »
« Harvest Table Refresh with Minwax

Comments

  1. Lidia says

    May 20, 2017 at 6:56 am

    They are so darling Ariel!!!

    Reply
    • Ariel says

      May 23, 2017 at 12:55 pm

      thanks friend <3

      Reply
  2. Cindy Y. says

    May 20, 2017 at 9:30 am

    I’m going to make a couple of these today! They are just too cute..
    Thank you for taking the time to share with us.

    Reply
    • Ariel says

      May 23, 2017 at 12:55 pm

      oh good! Share a pic if you make ’em 🙂

      Reply
  3. Ainsley says

    May 20, 2017 at 11:58 am

    What a cute idea for an outdoor wedding!

    Reply
    • Ariel says

      May 23, 2017 at 12:54 pm

      it sure is! If only I knew of any summer weddings this summer!

      Reply
  4. Amy | Delineate Your Dwelling says

    May 24, 2017 at 1:57 pm

    Love those paper fans! circut machines are magical. ALSO! LOVE your site’s new header design/logo!!

    Reply
    • Ariel says

      June 4, 2017 at 10:16 pm

      Thanks girl 😉 It was a spur of the moment change and I love it. Super clean.
      Those cutting machines ARE pure magic. You’re a silhouette girl right?

      Reply

Leave a Reply Cancel reply

Your email address will not be published. Required fields are marked *

woman in red dress on counter

Hi! My name is Ariel and I'm the voice behind PMQ for two. I create bright, bold, colourful, and eclectic home decor, DIYs and lifestyle content.

  • Bloglovin
  • Facebook
  • Instagram
  • Pinterest
  • Twitter

PMQ for three

Time For A Cocktail

pmqfortwo

Ariel - PMQ for two (she/her)
This living room has been so many things to us sin This living room has been so many things to us since we moved in (including the distinction of being the first space we made over, and over). It’s also been a space that evolved with us as our needs changed. And now, while we plan what the next one will look like, I wonder if it’ll have a marble fireplace... probably not. 
•
•
•
#livingroomdecor #livingroominspo #atomicranch #bhgstylemaker #bhghome #midcentury #oneroomchallenge #behrpaint #eclectichome #eclectichomemix #eclectichomedecor #maximalism #maximalistinteriors #moreismoredecor
My boo @tmoorehome has been sharing and uplifting My boo @tmoorehome has been sharing and uplifting people around her for years. It’s one of the many reasons we’re real life friends. Her design is clean, bold, and evolves with each house they make a home. If you know exactly who you are and what you’re about, she is one very worthwhile follow. Her meme game is pretty strong too. 
•
•
•
#nashvilletennessee #nashvilleblogger #bhgstylemaker #bhghome #schoolhouseelectric
It’s not #nationalpetday unless everyone you fol It’s not #nationalpetday unless everyone you follow tells you about it #doingmypart I present to you the only photo shoot where I have all 3 critters in the same space. #smallspaceliving #smallspacesquad #diyhomedecor #behrpaint #rugsusa #irishsettersofinstagram #adoptedcats #adoptedcatsofinstagram #bhgstylemaker #bhghome #maximalistinteriors #moreismoredecor
Remember when this was our bedroom? This was our l Remember when this was our bedroom? This was our last PMQ bedroom, and I 100% do NOT miss how hot it was in there in summer. Tell me, which bedroom do you miss the least? 
•
•
•
#bedroomdecor #bedroominspo #smallspacesquad #smallspaceliving #smallspacedesign #eclectichomemix #eclecticdecor #maximalism #maximalistinteriors #eclecticinteriors #anthropologiehome #bhghome #southernliving
JB in her happy place✨ AD: JB LOVES her @wiwiurk JB in her happy place✨ AD: JB LOVES her @wiwiurka_toys triangle (in sunset) and ramp. From the moment we assembled it, she was all over it. We use it to make blanket forts, set obstacle courses, entertain Tina 🐓 , and just hang out on it. It’s kinda the perfect toddler toy. 
•
•
•
#piklertriangle #wiwiurka #pikler #montessoriathome #montessoritoddler #montessoriactivity #montessoritoys #montessoriplayroom #toddlermomlife #toddlersofinstagram #toddlerplay #bhghome #spoonflowerfabric #chickensofinstagram #maximalistinteriors #familyroomdecor #familyroomdesign
You know what I’ll miss?! Going pee with this vi You know what I’ll miss?! Going pee with this view. The next house better have amazing pee views. 
•
•
•
#bathroomrenovation #bathroomdecor #wallpaperdecor #wallpaperwednesday #maximalistinteriors #maximalist #maximalistdecor #powderroomdesign  #powderroom #bathroominspo #bhgstylemaker #bhghome #southernliving #anthropologiehome
I know you all love colour as much as I do, so whe I know you all love colour as much as I do, so when I asked @itscarlabethany if I could share a few frames of her home with you guys, I knew it would be a perfect fit. We’ve both got a few of the same pieces, and we both love bold textiles and wallpaper. She’s got her own spin on them, and the cutest sidekick in town - Maybeline (swipe to see). Do yourself a favour and go give her a follow! 
•
•
•
#abmlifeiscolorful #colorfulhome #colorismyjam #maximalism #maximalistinteriors #maximalistdecor #rainbowdecor #bhgstylemaker #bhgcolor
Load More... Follow on Instagram

- THEME BY ECLAIR DESIGNS -

Cookies ????

This site uses cookies: Find out more.