Summer is now officially here, which means I can start on all our summer road trip and vacation plans. We’ve got a big one planned for August and that’s all I’m saying about it for now, but in the meantime I’ve got a few smaller overnighters planned throughout the maritimes. This of course means I need to dig-out our luggage and start making kennel arrangements for the pets. Because I’m a creative and immediately start thinking of what I can make or style for the smallest occasion, my mind drifted to the beautiful monogramed luggage that Louis Vuitton makes. Although I won’t be getting my hands on any of that for a while, I can absolutely make my own, so I did! Monogramed & Numbered Luggage is the coolest travel related DIY you didn’t even know you needed.
Don’t forget about my TGIF cocktail series! See the first edition // here //

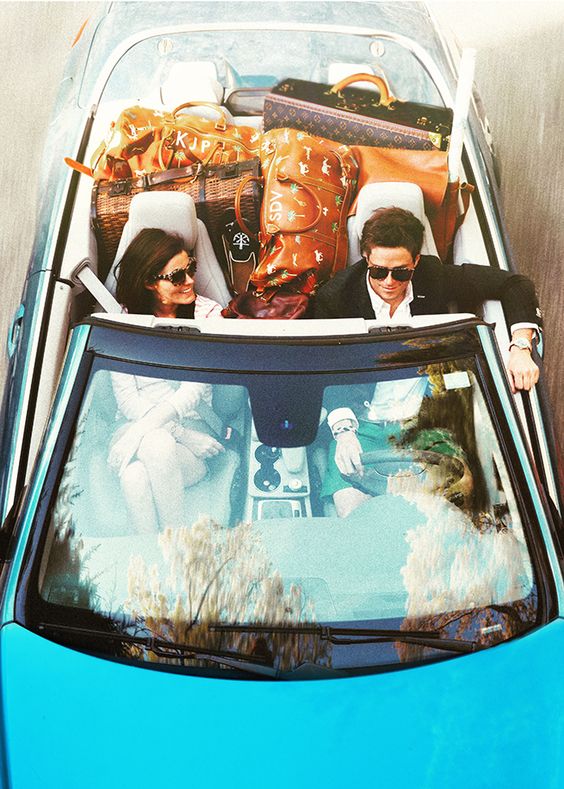
image from townandcountrymag.com
Can you spot the animal pattern on the warm leather luggage in the back seat? I was taken with this pattern when I first saw it in Wes Andesron’s A Darjeeling Limited and have been pining for a bag ever since. However, it’s a bit out of my budget. And if LV is out of my budget, would it be comical to suggest that a matching set of leather weekend bags for Dan and I, is also out of budget? Sadly it is. Saving for a house is real y’all! it’s real!
In thinking about the luggage I thought about the parts of it that I loved: the bold monogram, the numbering of the bags, and the fun nature of it. Those are all things that I can do and that are in within my budget. While I’d love to say that painting a repeating motif of woodland or safari creatures is within the realm of my talents, I don’t think I could pull off a pattern like that just yet.
I dug through our existing bags and luggage to see what I could pull and where it would take me.

*The following product links contain affiliate links. Thank you for supporting the brands that make PMQ for two possible. For my full policies click // here //
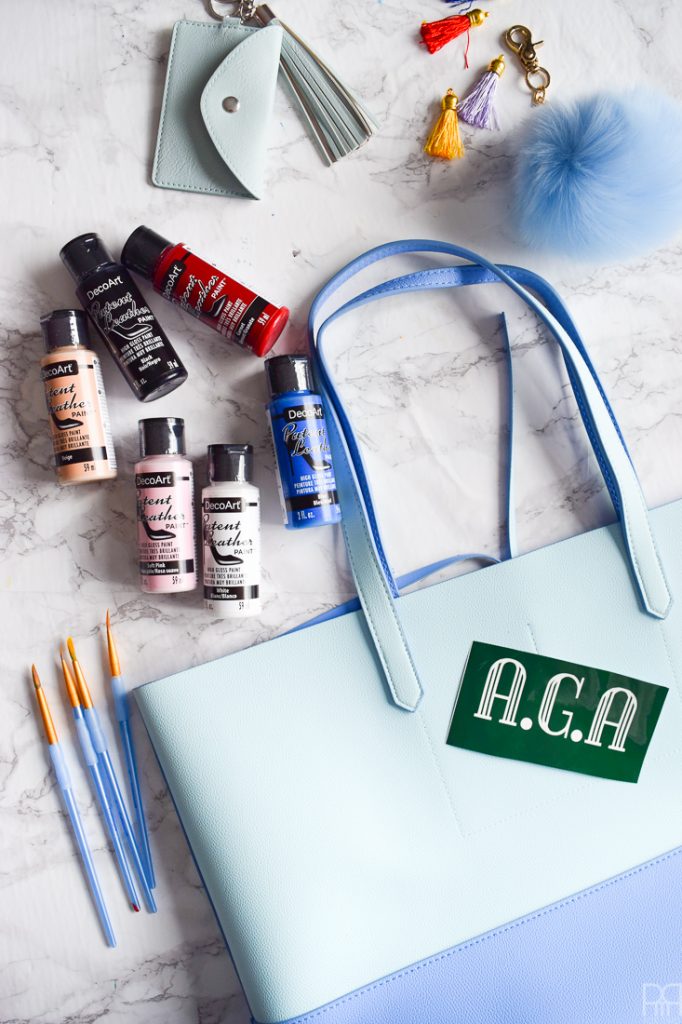
Materials
- DecoArt Patent Leather Paint in white * I’ve pictured a few different colours because I think I may add some other painted details down the road.
- Cricut Faux Leather (in any colour, but I went with blue)
- Cricut Explore Air

- Cricut Pink tool set
- Scrap of vinyl (for the stencil)
- Key chain loops and rings
- Leather bags or luggage (I like this // one // and this // one // )

There are 2 DIYs within this one DIY, so I’ll break ’em down accordingly
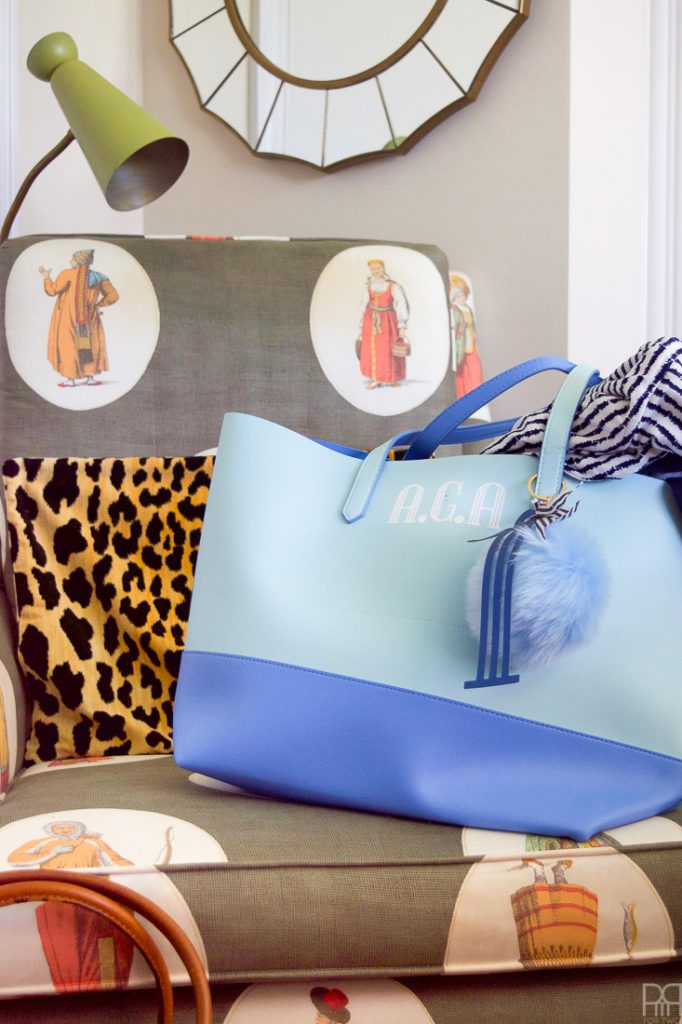
The painted monogram
View my guide to all things Cricut Explore Air 2 // here //
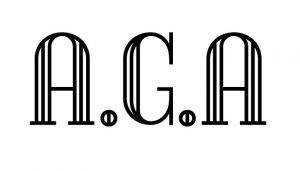
Step 1: You’ll need a monogram to start this off. I explain how I made my own (and how you can make yours!) in my post about monogram napkins // here //
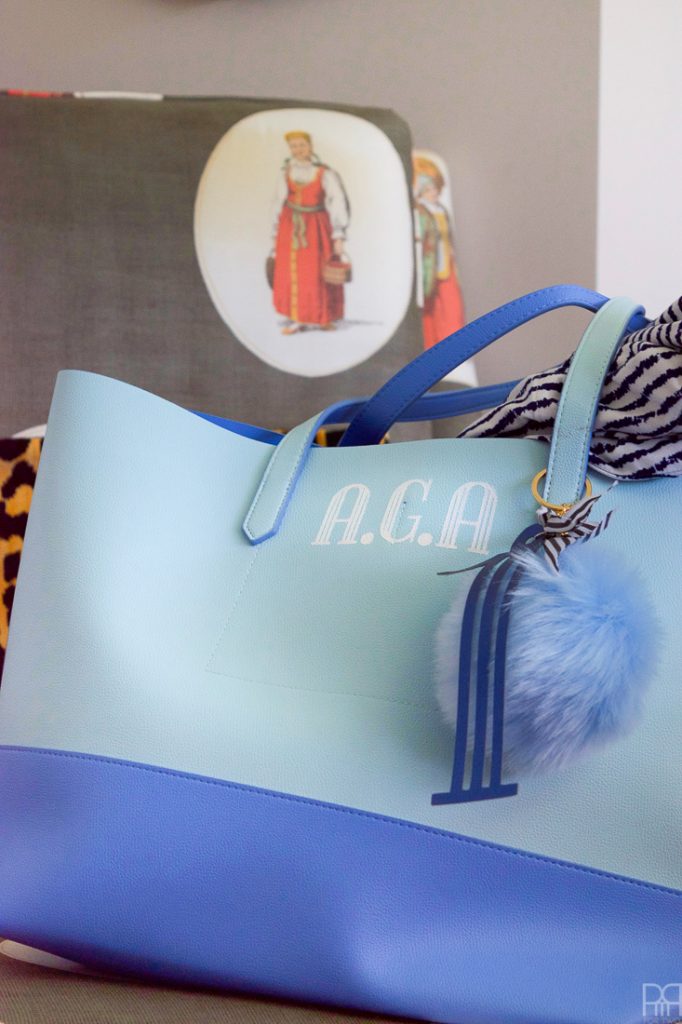
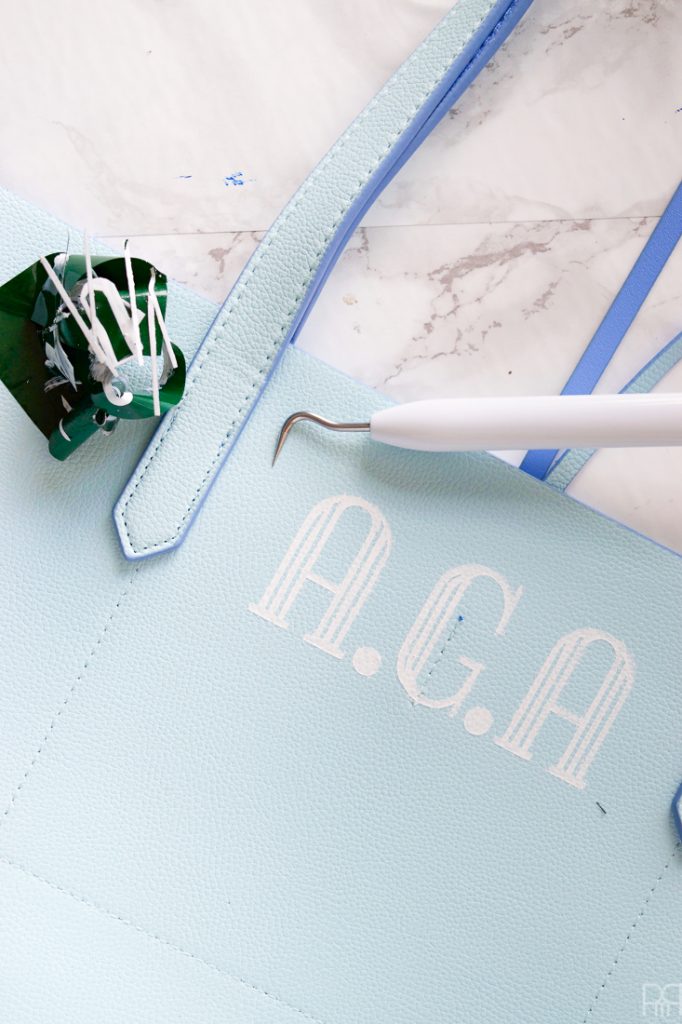
Step 2: I used the same font as in my napkin monogram, and in photoshop created a new one for personal use with my own initials A.G.A.
If you’re curious about monogram etiquette and how to use the letters read // here //

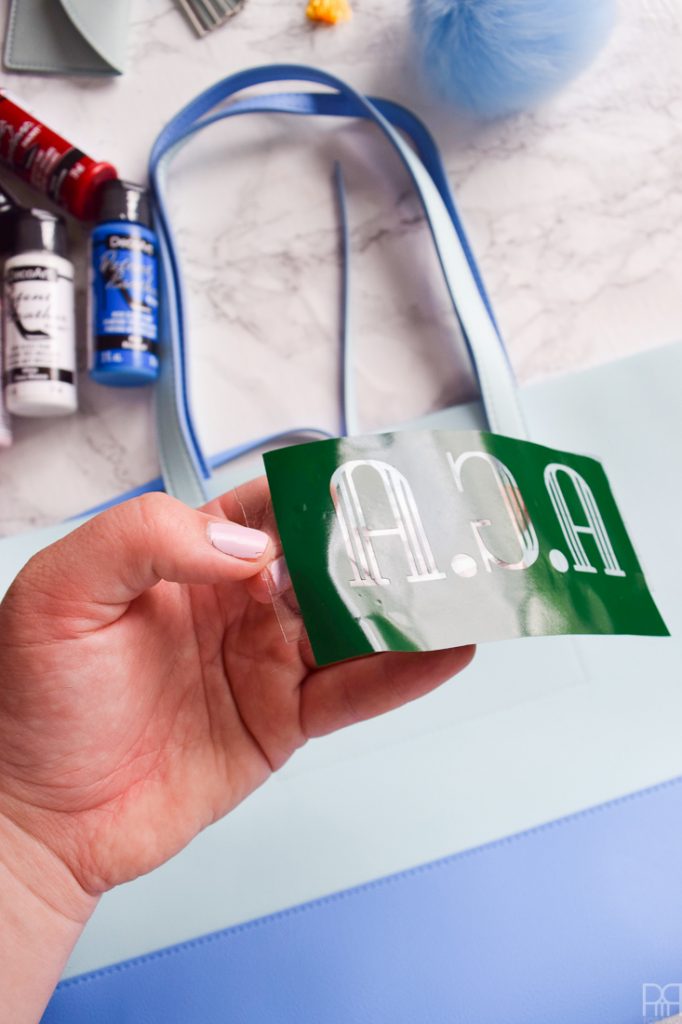
Step 3: I loaded my image into the Cricut Design Space and created a cut file from it. You can view my tutorial on that // here //.
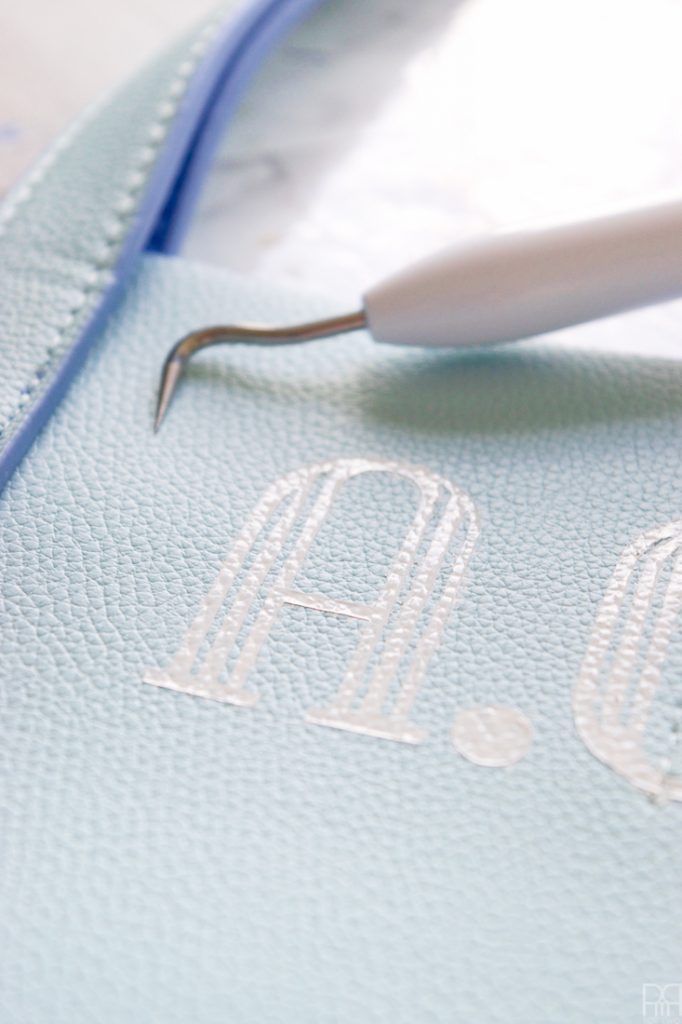
Step 4: Using a scrap of vinyl I cut the monogram and weeded-out the lettering. Remember, you need the negative space and the small details for the stencil, so don’t weed those!
Step 5: Using transfer tape I then moved the monogram to my bag and placed it where I wanted it.
Step 6: After removing the transfer tape I then added my first coat of DecoArt’s Patent Leather paint.

Step 7: I needed about 3 coats to get a nice thick coverage. I waited about 10 mins in between each coat for it to dry.
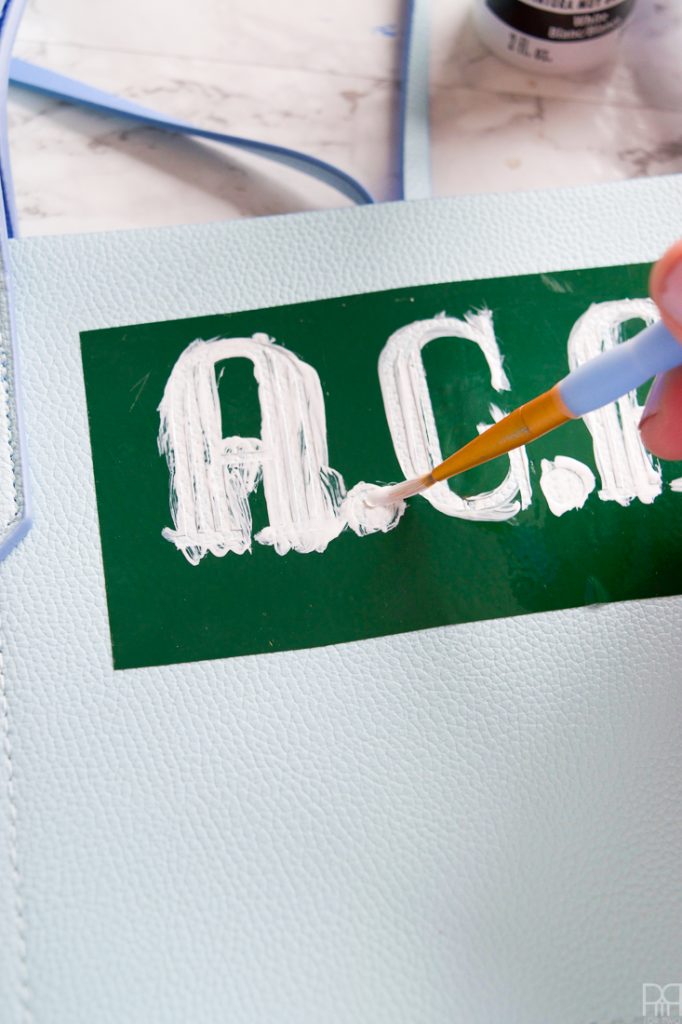
Step 8: Remove carefully once dry.
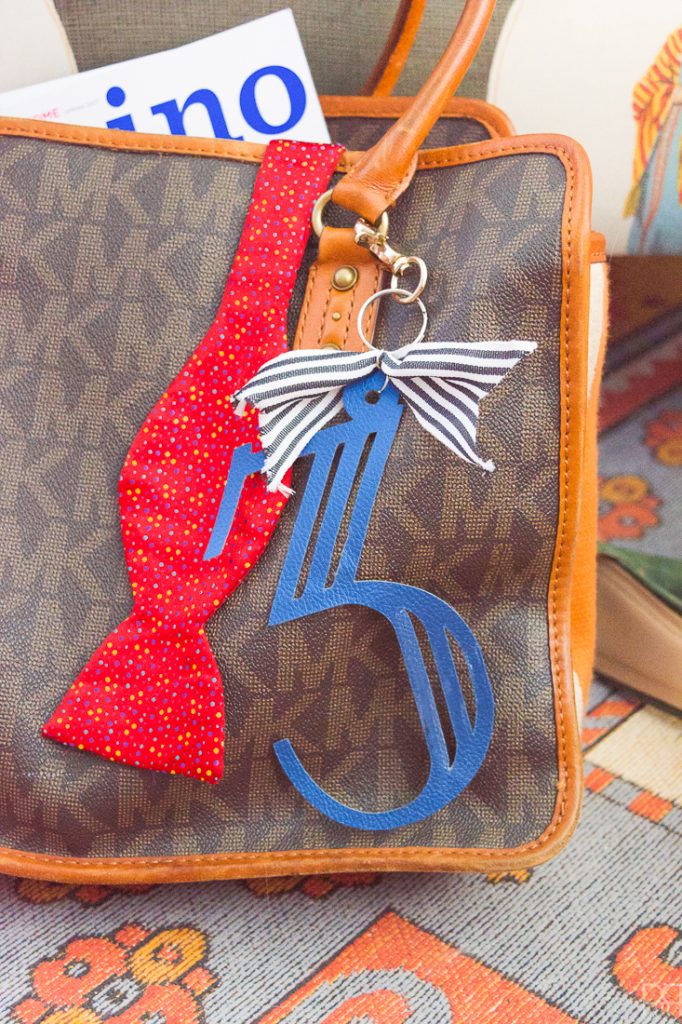
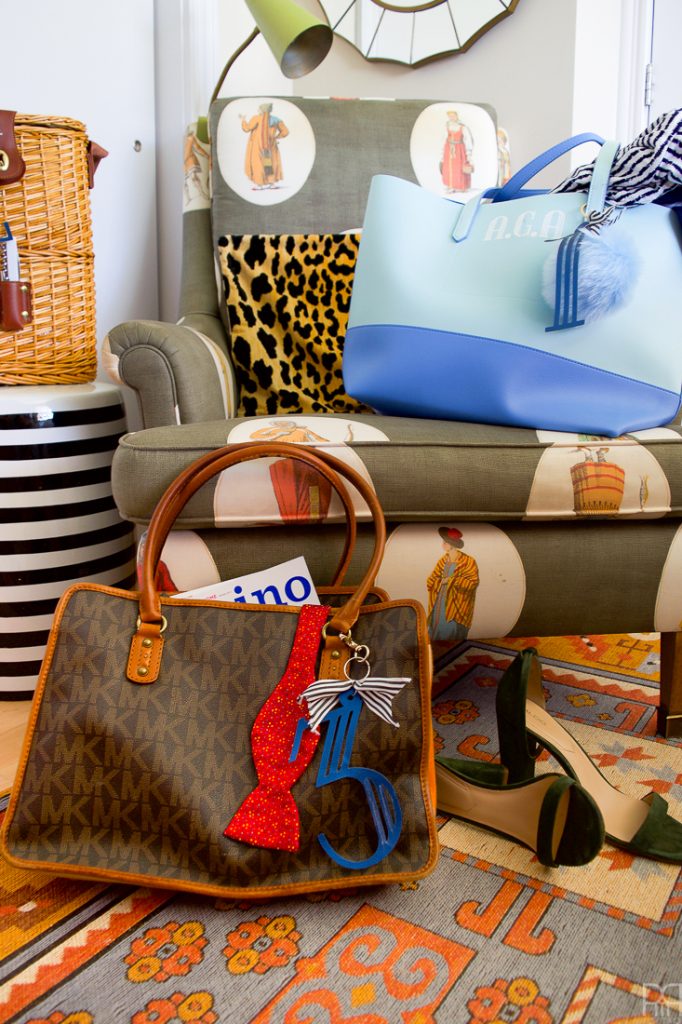
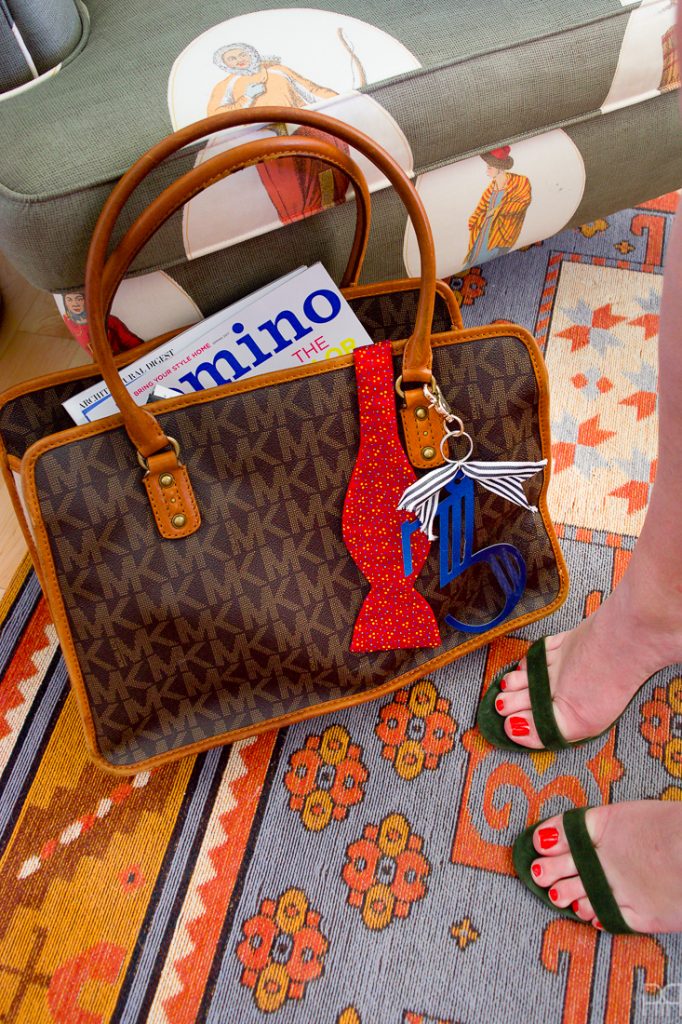
The luggage number tags
Step 1: Much like with the monogram you’ll need access to the font you use for the monogram and a way to create files.
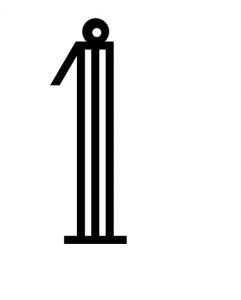
Step 2: In photoshop I created files using the same font for each number. Atop each number I added an extra circle and then punched-out the middle –> this is where the keychain with loop through, so don’t forget to do it!
You can see an example below,

Step 3: I loaded my image into the Cricut Design Space and created a cut file from it. You can view my tutorial on that // here //.
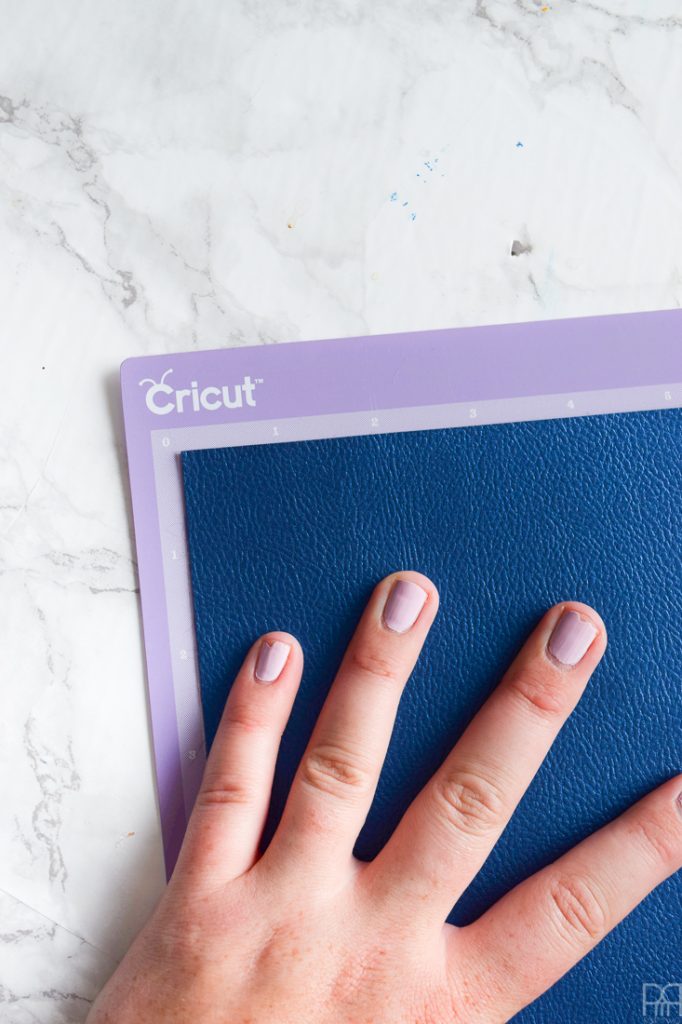
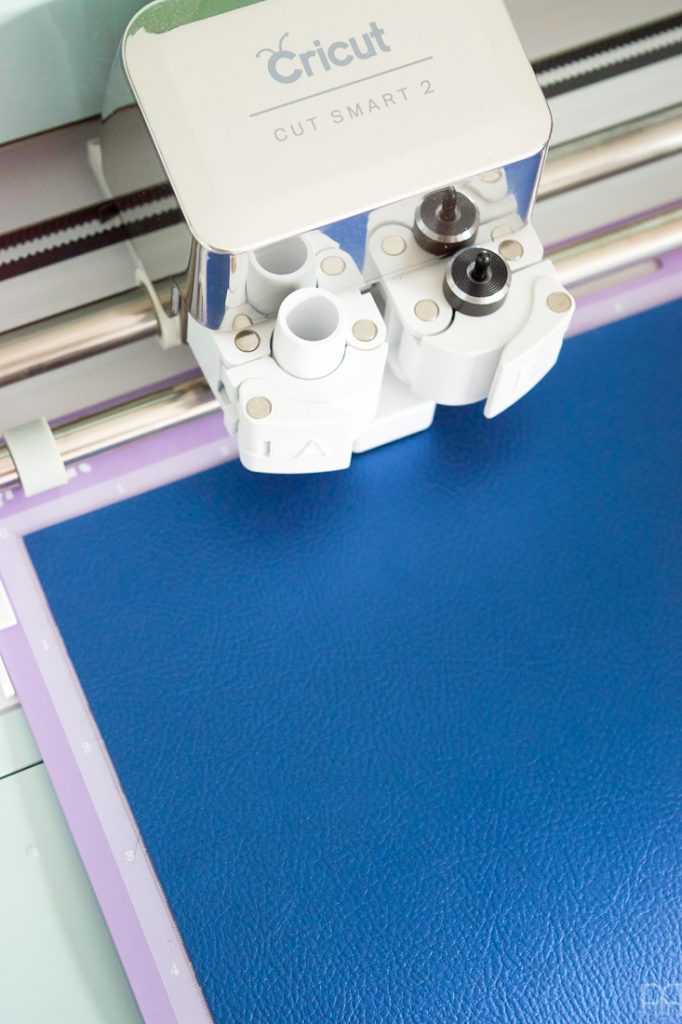
Step 4: Attach your sheet of faux leather to your strong grip cutting mat, and swap the normal blade in housing B for a deep cut blade. Don’t forget to set the dial setting to “custom” and then select “faux leather” from the drop down menu.
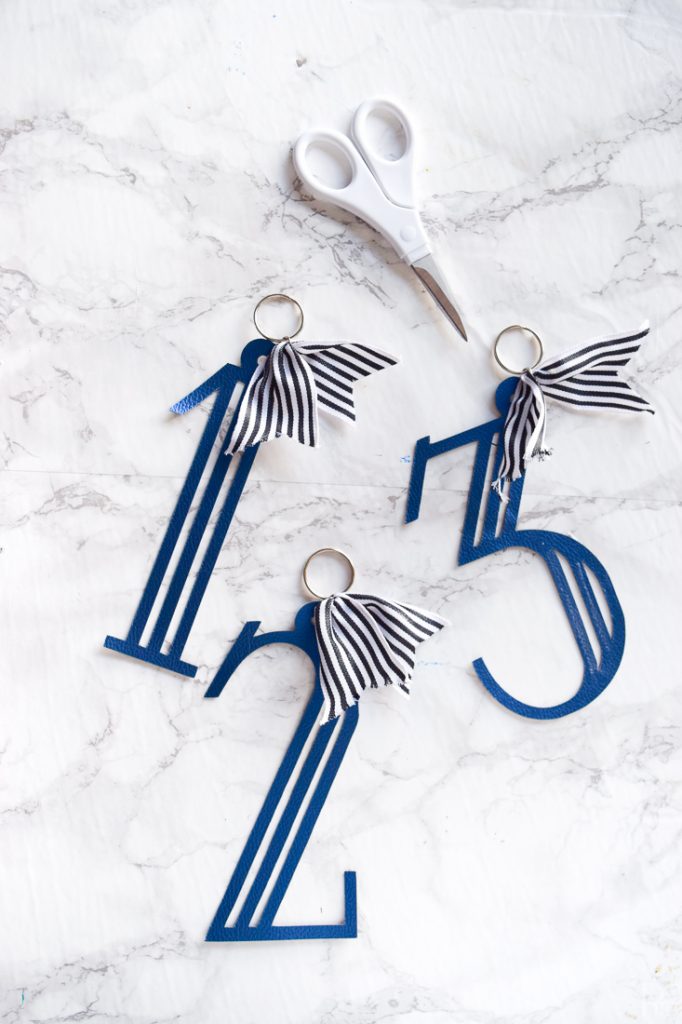
Step 5: Once the Cricut has cut the number tags, using a set of pliers you’ll want to loop the rings and loops through the appropriate holes and then close it all up.
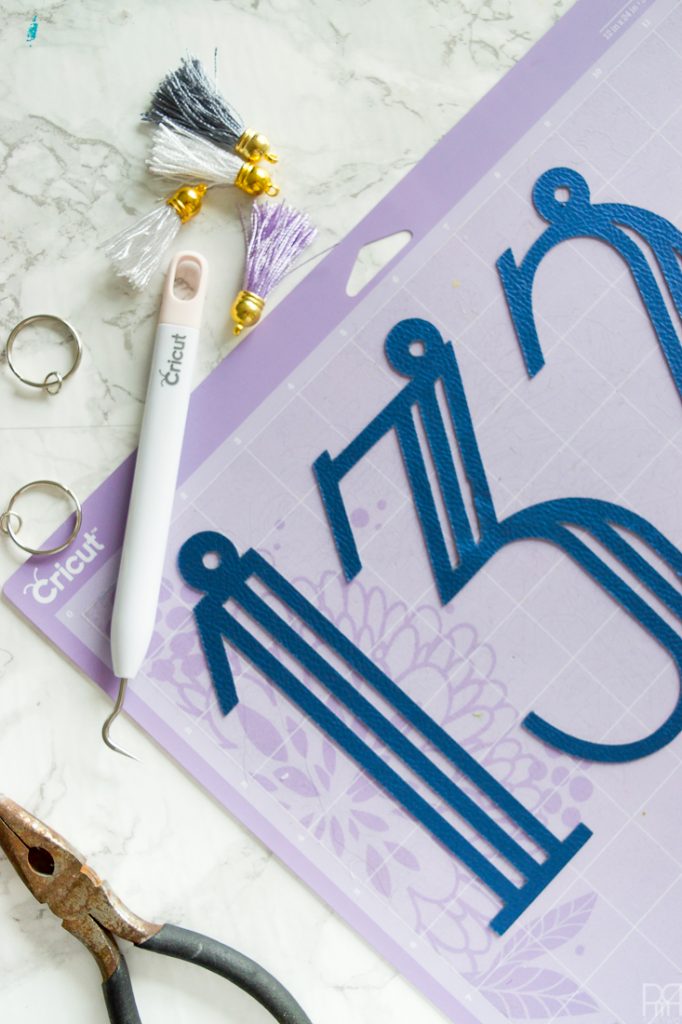
Step 6: I added a little bit of ribbon for flair, but you could just as easily not do that.
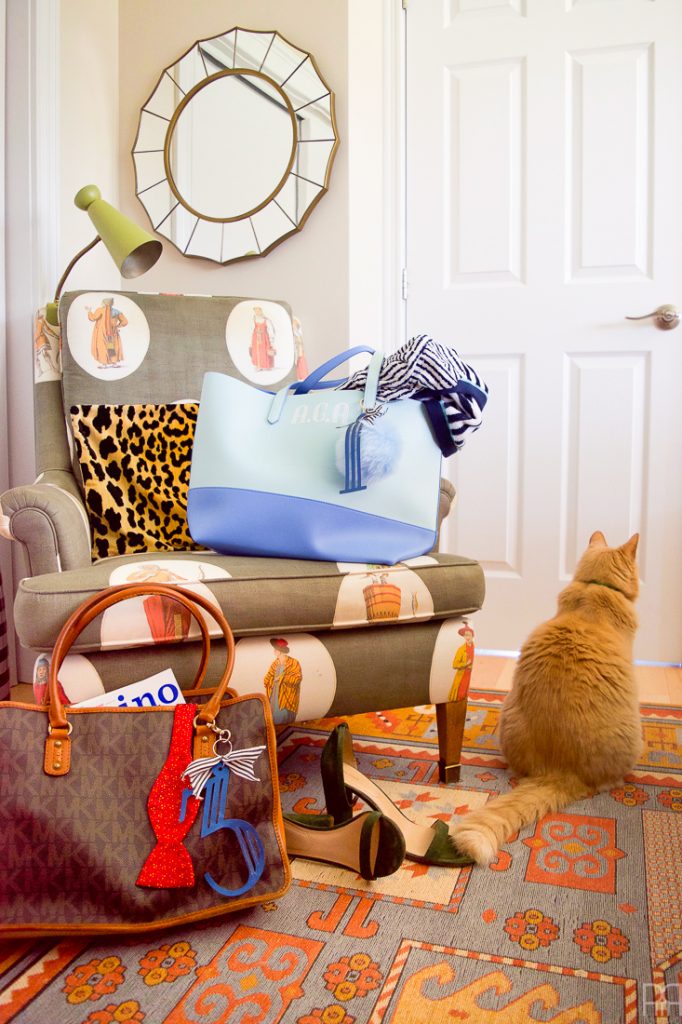
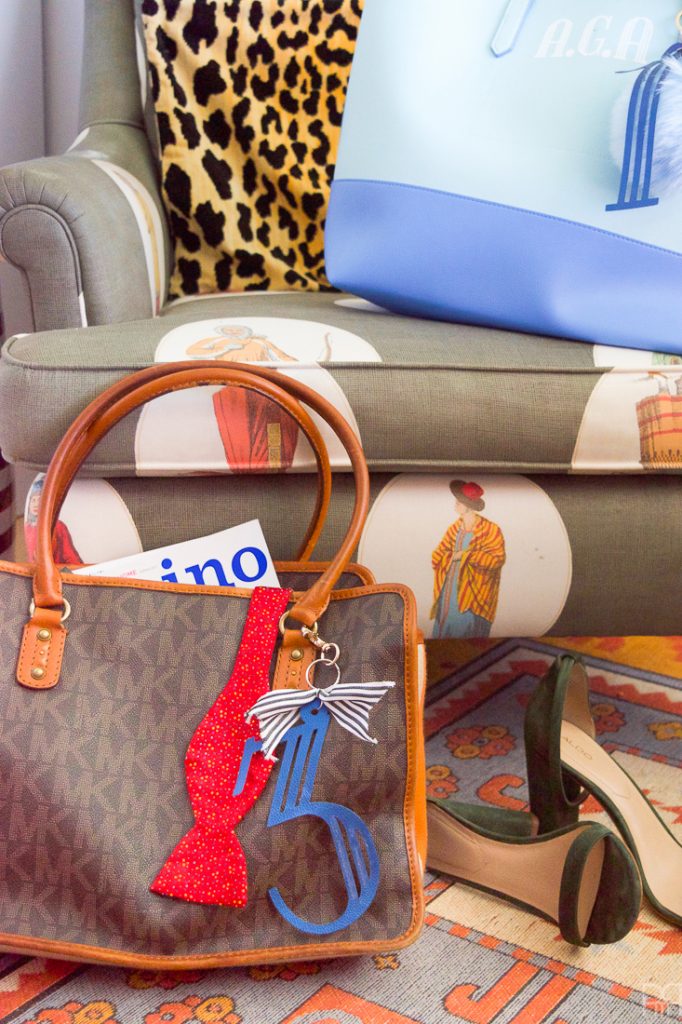
So far while we’re working on the master bedroom refresh // here // I’ve created a beautiful chinoiserie style lamp // here //, but other than that I’ve just got plans in the works, nothing concrete. I can however show you a corner of the room and – I think – the most anticipated chair reveal in the history of Instagram?! After you guys saw the matching footstool in my Eclectic Summer Home Tour // here // y’all kinda lost it, so I figured I’d show off a bit of the chair in the reveal for the Monogramed & Numbered Luggage DIY.
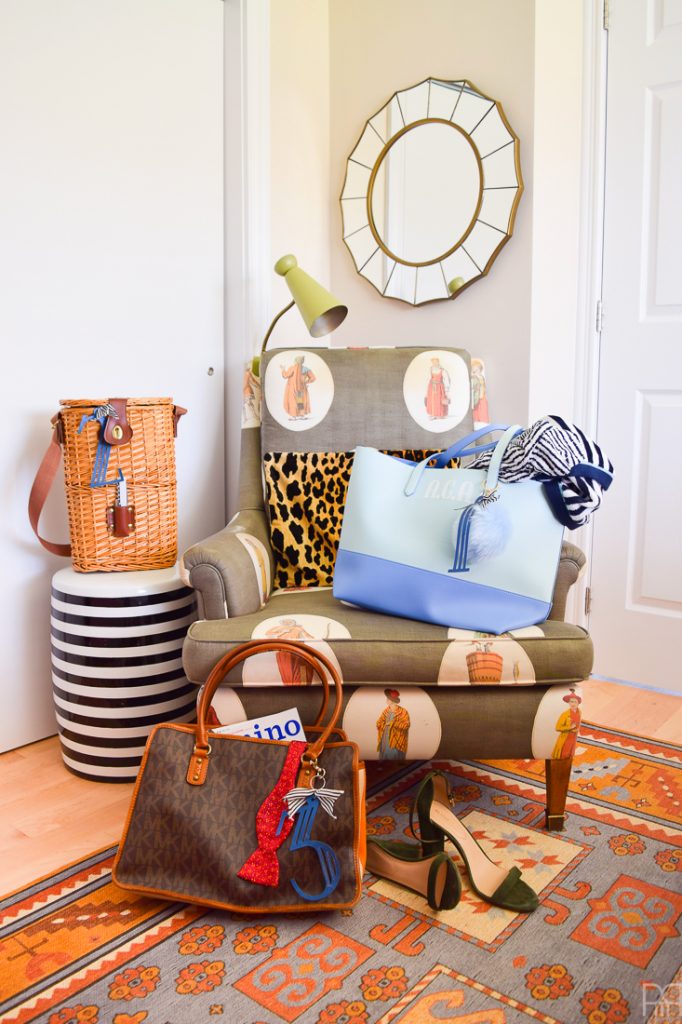
Don’t ya just love the green lamp on the back of the chair? I snagged it online with kijiji.ca because a local woman is slowly selling off her trove of MCM finds. This lamp was a steal of a deal and still works too!

Boots wandered into the room while I was shooting and got a good sniff of all the bags. He probably wondered what was up and where we were all going, because he eventually got in one of the bags but wouldn’t sit still long enough to let me photograph him.
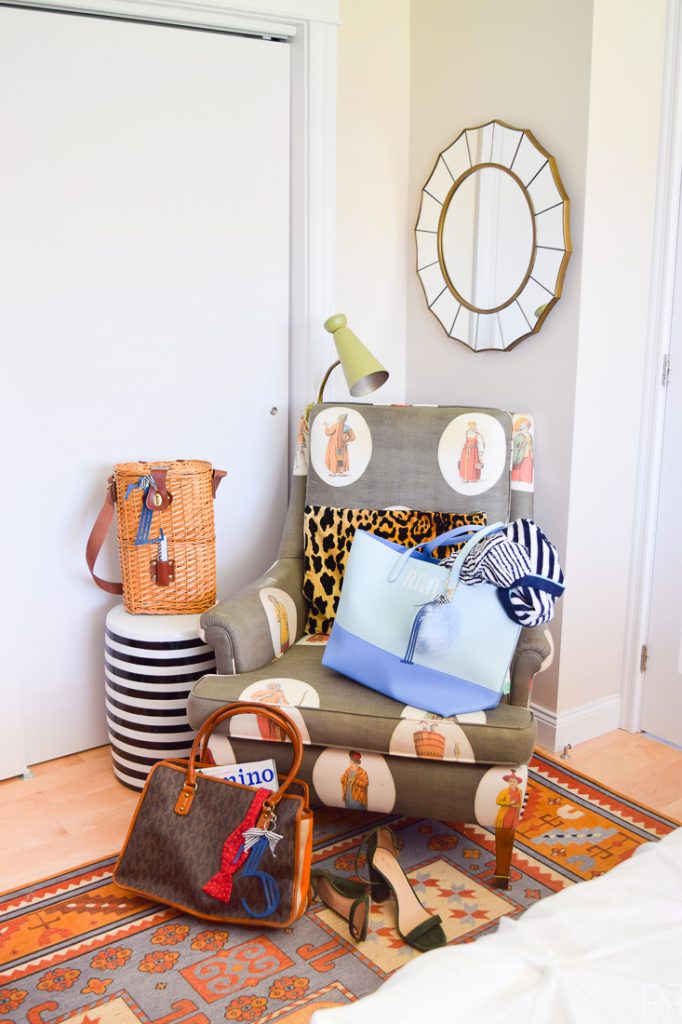
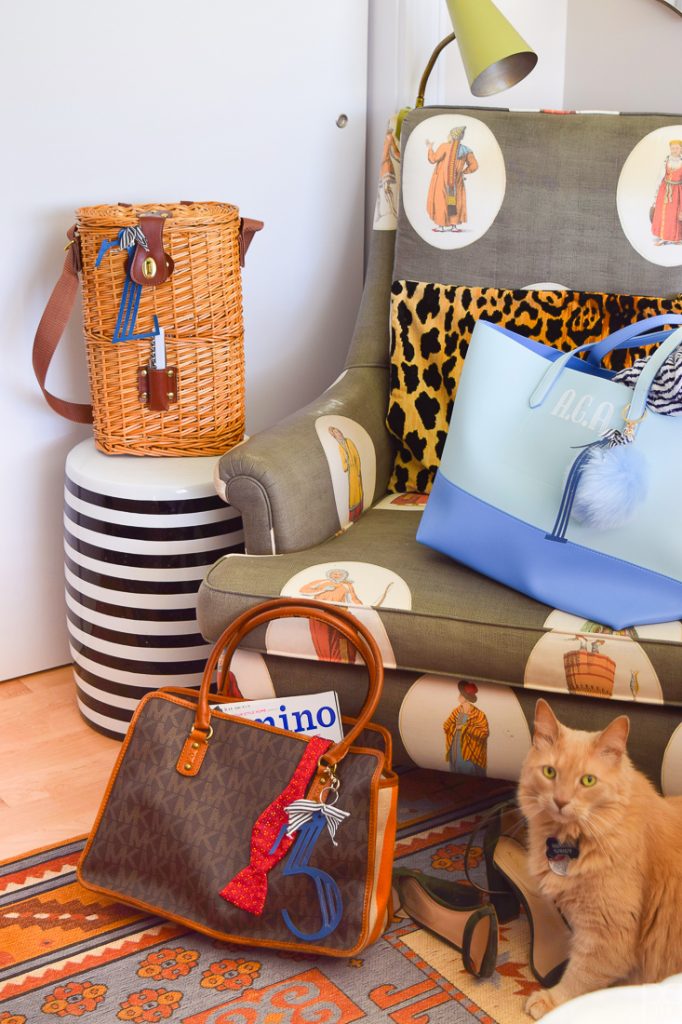
I can’t be the only one who gets weak knees looking at the fabric on the chair. My gran had stupendous taste when it came to many things, and you could safely say it extended to home furnishings as well. If you know where I can find more of this pattern let me know!!!