PMQ for two

Bold, Bright and Colourful Home Decor & DIYs

  • HOME
  • ABOUT ME
    • POLICIES
  • BUSINESS BABES
  • PROJECT GALLERY
  • PRESS
  • WHAT IS A PMQ?
    • THE DUPLEX
    • The Row House Tour

Making an ornament wreath – the PMQ for two way!

November 30, 2014~ Christmas, DIY and craft projects, wreath

For my first ever hosting of Pinnie’s Piggies we made ornament wreaths. Tried and tested, these are and say first craft of the season if you’re looking to up your wreath game. My DIY Starburst wreath is a tad more complicated, but also fun.ornament wreath

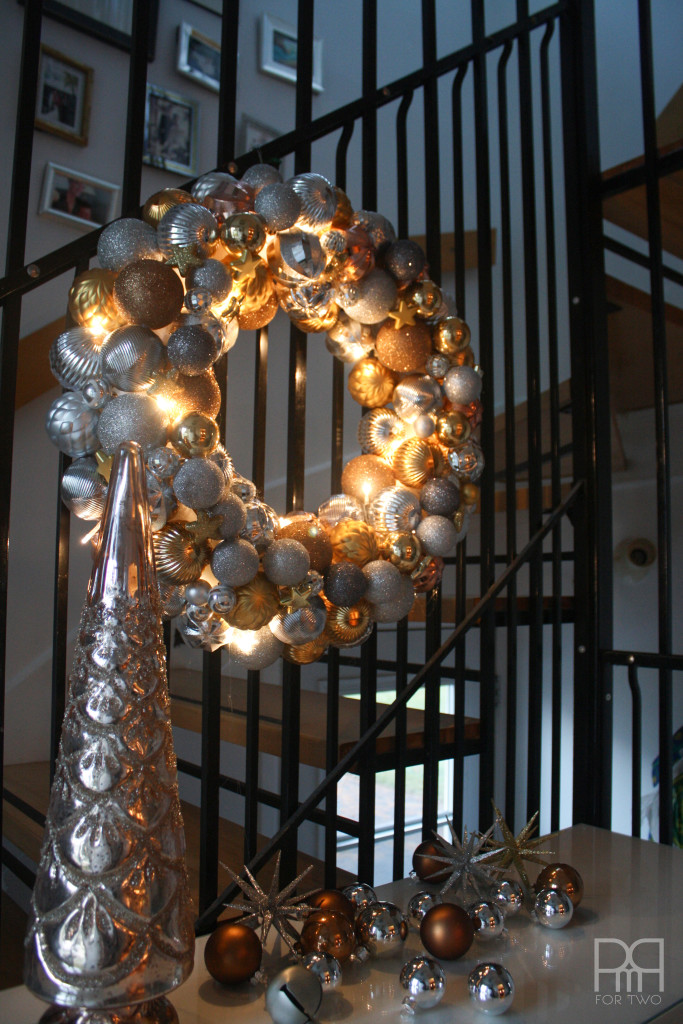
We had about 8 people over for the affair, glue guns and all! I don’t think I can host many more events like that on our tinny but mighty dining room table. NB – If you’re up to it, consider making a harvest table like we did for our backyard.

Back to the craft-  We made ornament wreaths, something everyone wants, many people attempt, and few master. From my many attempts and hours spent perusing Pinterest, I have compiled some tidbits that may be useful in your attempt at crafting the ultimate ornament wreath.

ornament wreath close up

Many people do a traditional two or three colour palette, some opt for one while other strive for the rainbow. They all look great, and colour choice (like almost everything in decorating) depends on what you already have. Last year I made gargantuan red one, with traces of gold. I also made a smaller one for the kitchen with ice blues, greens, whites and silver. They were both bitchin’ first attempts at wreaths, and this year I made a gold/copper/silver one. If you’re ever looking for inspiration, stop by my Ornament Wreath board on Pinterest.

Material list /budget

May I suggest the following materials for your wreath?

Extruded Foam Floral Wreath http://www.michaels.com/extruded-foam-flora…/M10103227.html… –> Get the size you want, keep in mind it will get about 6 inches wider once we add ornaments. You can pick these up at Michaels or any certified craft store.  Walmart and Omer De Serres sometimes have them, so if you live in a remote area I think you may be better off ordering one online.. They can be square or in any shape you’d like your wreath to be in.

Hot Glue gun (with LOTS of glue) http://www.michaels.com/imaginisce-ibond-cor…/10268205.html…
–> you can get these almost anywhere, and the glue sticks are usually available at Dollarama (sizes varie though)

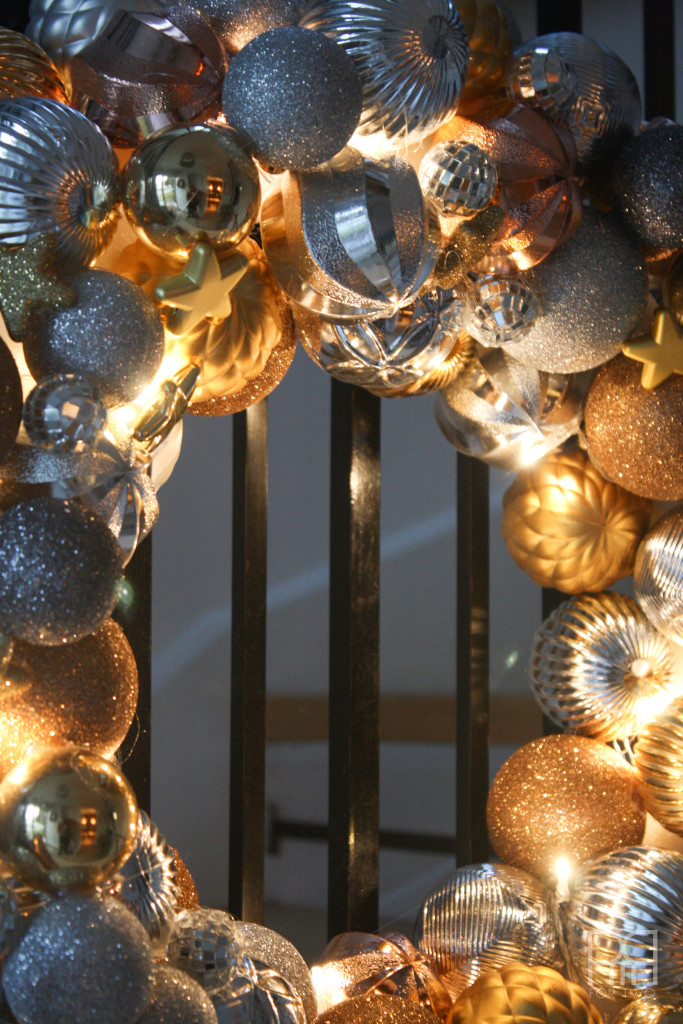
60-90 ornaments, of all shapes and sizes. I recommend some L, M, S and XS ones. You’ll need them to build a base, add details and then fill holes.

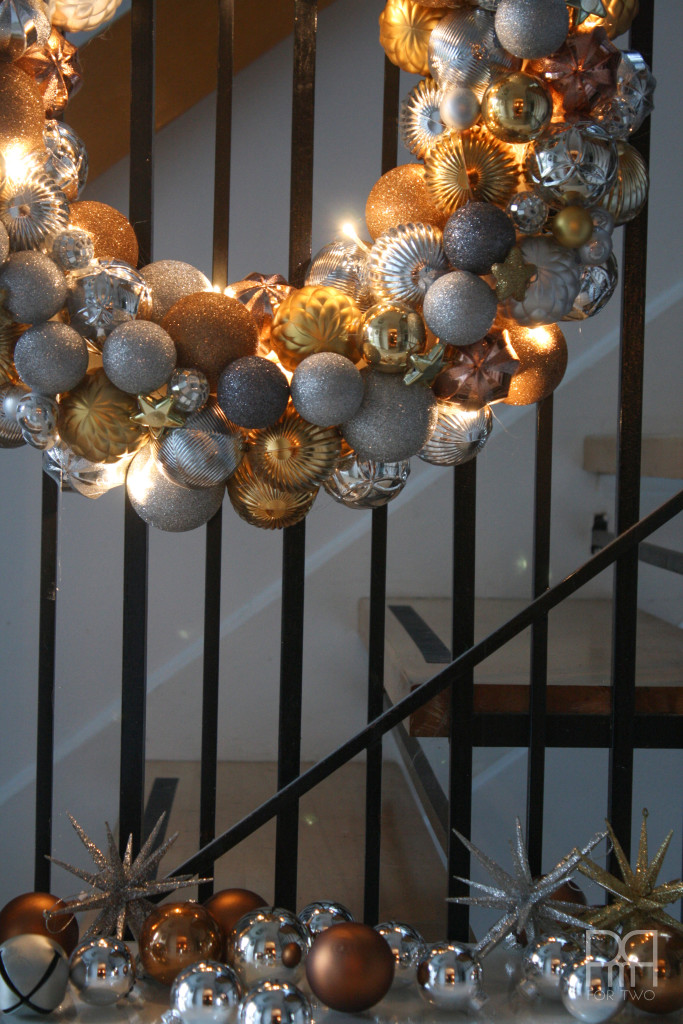
Any other bits and bobs you’d like to add such as jingle bells, figures, brids, cranberrie sprigs, spruce sprigs etc. Search Pinterest and get excited! I’ve seen some really nice ones made with ornaments from the 50s and 60s. I made mine with battery powered LED lights set into them (usefull when you’re not near a plug). Now all I do is flip the switch and BAM! We have light.

I also recommend you figure out how your hoping to hang the wreath: ribbon, wire, a hook for your door etc, so that when you make it you can account for a hook or a ribbon in the placement of your ornaments. If you put balls all over,you may have to weave wire through the spaces in between in order to hang it! I may or may not have done that last year, and it made me sweat at the last minute. I suggest you avoid that.

Directions

You’ll need quite a bit of space, so I suggest you clear off a table. Make sure you don’t have nine hot glue guns plugged into one power bar (which may spark and crap-out…), and put down a drop-cloth to catch any glitter or hot glue gobs.

Step 1: Take off all the little metal/plastic caps on the ornaments. They can be akward, and will scratch your window/door when hanging in place. If some of your chosen ornaments need to be viewed from a certain direction, taking off the caps may help with placement.

Step 2: Lay your wreath down, and glue balls to the outer and inner perimeter of the wreath. I suggest you place them all with their necks/stubby bits that you just took the caps off from, facing the same direction. It will determine which way is the front vs. back of the wreath. BE CONSISTENT: if you have them all facing down along the outer perimeter, make sure it’s the same on the inner perimeter.

I suggest you lay the biggest ones along the outside, and medium ones along the inner circle. Make sure you have enough to do so before you start gluing.

Visually, it will help set a base, and allow you fill a lot of space later.

Step 3: Wait 5 minutes until they’re dry enough that you can flip the wreath over (so that you’re looking at what will be the front). If their not dried in place, they will go flying when you flip it over.

Step 4: Layer in a methodical way so that the core itself is covered in ornaments. It will look like you have three different circles of ornaments (outer, inner, and “on” the top of the death).

Step 5: fill in the rest of the space with varying sizes of ornaments.

Make sure that you’re not wasting any and all of your XS small ornaments filling gaps no one will see. Don’t forget, people will only see your wreath from head-on, so anything on the top or bottom is less important.

Step 5.5: layer in the lights you want to use. I have a little 20 LED light string that’s powered by batteries. It’ll be weaving it through the main layers before adding the smaller and/or prettier ones.

Step 6: adorn with details like beads, beaded rope, ribbons, little birds, letters, numbers, lights, bells etc. The world of crafting is your oyster! so get creative and make something that speaks to you.

Step 7: let it dry overnight before hanging to ensure everything is set.

ornament wreath finished

I hope you get as much joy out of making your wreath as we did yesterday. It can be a great solo activity, or something to do with others. If you want to see more Christmas Decor, stop by the Christmas Home Tour.

arielsignature-1

✨Are you signed-up for my new post updates? ✨

* indicates required

Email Format

3 Comments

Make or Buy: How to tackle seasonal decor the smart way »
« Home is where the army sends us – christmas ornaments edition

Trackbacks

  1. Curb appeal isn’t just for houses | A PMQ for two (and three pets) says:
    March 12, 2015 at 1:26 pm

    […] you with flowers. if you’ve read my blog before, you know I’ve had many types of wreaths on the front […]

    Reply
  2. Curb appeal isn’t just for privately owned homes | A PMQ for two (and three pets) says:
    March 12, 2015 at 1:30 pm

    […] you with flowers. if you’ve read my blog before, you know I’ve had many types of wreaths on the front […]

    Reply
  3. Putting together a Christmas Card Mailer • PMQ for two says:
    March 4, 2018 at 9:49 pm

    […] a blanket (in black and white buffalo check plaid of course), my wreath from two years ago // here // and Bruce! You want items that won’t be heavy if you have to cart them around a bit, and […]

    Reply

Leave a Reply Cancel reply

Your email address will not be published. Required fields are marked *

woman in red dress on counter

Hi! My name is Ariel and I'm the voice behind PMQ for two. I create bright, bold, colourful, and eclectic home decor, DIYs and lifestyle content.

  • Bloglovin
  • Facebook
  • Instagram
  • Pinterest
  • Twitter

PMQ for three

Time For A Cocktail

pmqfortwo

Ariel - PMQ for two
Literally a year later 📆 these two are still cu Literally a year later 📆 these two are still cute as heck. Time has been a fickle beast this past year, but at least we’re all still together and in good health. It’s the little things ❤️
•
•
•
#livingroomdecor #babyplayideas #babyplay #eclectichome #eclectichomemix #tummytime #spoonflower #spoonflowerfabric #bhgstylemaker #bhghome #abmlifeissweet #toddlermomlife #toddlermom #colorfulhome
Raise your hand if you’ve been following me sinc Raise your hand if you’ve been following me since our last PMQ 🙋🏼‍♀️ okay now raise both hands if you’ve been following me our first PMQ 🙆🏼‍♀️ even better, tell me when you started following me! I’m diving back into my project archives and want to share some good old ones, but I’m not sure who remembers what! 
•
•
•
#livingroomdecor #livingroomdesign #livingroomstyle #smallspaces #smallspaceliving #smallspacesquad #ikeahack #behrpaint #eclectichome #eclectichomedecor #southernlivingmag #anthropologiehome #thriftedhomedecor #retrohomedecor
Today I have the immense please of sharing a few o Today I have the immense please of sharing a few of Seana’s squares. You likely know her as @bellybaila the Glamohemian ✨ I first met her this summer during @albieknows ‘s initiative called #sharethemic and have been IG friends since. I’m compelled by the rich colours, layered spaces and her smart design. It packs a punch and is filled with beautiful pieces by Black artists. What I wouldn’t give to poke around a room of hers and explore everything that we don’t see in photos. Give her a follow for the colours, but stay for her captions ❤️
•
•
•
#eclectichome #bohemiandecor #curatedhome #collectedhome #bohoglam #bohoglamdecor #colorismyjam #bhgstylemaker #apartmenttherapy
It’s been a Monday y’all. I’m ready for spri It’s been a Monday y’all. I’m ready for spring and my floral wallpaper is as close as I’ll get for now, and Boots is sitting on the heating pad even though that’s where I’d rather be. Tell me, how are you surviving the mondayest or mondays.
•
•
•
#kitchendesign #retrokitchen #brevillebambino #oneroomchallenge #bhgstylemaker #wallpaperdecor #wallpaperwednesday #bluekitchen #behrpaint #retroaesthetic #hgtvcanada #southernlivingmag #kitschycute #moreismoredecor #maximalistinteriors
I keep thinking about the entryway console I made. I keep thinking about the entryway console I made. I was inspired by a Mendl’s box from The Grand Budapest Hotel, and tried to make the furniture equivalent. I think I did it! 
What’s the oddest thing you’ve ever been inspired by? Pretty sure this is mine. 
•
•
•
#wesandersonplanet #wesandersonstyle #wesanderson #upcycledfurniture #entrywaydecor #entrywaytable #behrpaint #countryliving #betterhomesandgardens #apartmenttherapy #prettypegs #eclecticdecor #eclectichomemix #kitschycute
Design only works if it works for you ✨ Looking Design only works if it works for you ✨ Looking back, this setup was optimal for conversation, and assumed that Dan and I would only casually watch TV. That *was* the case until June arrived, and suddenly I was pinned to the couch for many hours a day while pumping and/or breastfeeding, and suddenly it felt off. Add to that, a rolling and crawling toddler, and suddenly there were too many obstacles. Thinking about how our spaces have changed with our needs, really shows how much design has to work for you. 
•
•
•
#oneroomchallenge #bhghome #bhgstylemaker #behrpaint #midcenturymodern #midcenturyhome #midcenturyfurniture #gallerywallhashtag #gallerywalldecor #livingroominspo #livingroomstyle #eclectichome #eclecticdecor #collectedhome #mycollecteddecor
I’ve been planning June’s big girl room in the I’ve been planning June’s big girl room in the next house, since the day we sold this one 🏡While we’re still a few months away, I am already pinning and planning away. Like her nursery, it may take me a few tries to get it right (first try, pictured here) but now that June’s personality is shining through, it’ll be a good reflection of her. 
•
•
•
#behrpaint #nurserydecor #nurserydesign #nurseryideas #nurseryroom #kidsroominspo #builtinshelves #shelfiedecor #maximalism #maximalistinteriors #moreismoredecor #eclectichomemix
Load More... Follow on Instagram

- THEME BY ECLAIR DESIGNS -

Cookies ????

This site uses cookies: Find out more.