We’re wrapping up some major renovations on our first floor, and all within the first year of home ownership – we’ve come so far! I wanted to take the time to walk y’all through how to plan a powder room renovation, because in our case it involved quite a few steps and re-working our floor plan in the space off the kitchen.
Check out last year’s Primp & Pamper Bathroom reveal – my Kate Spade Inspired Powder Room – and how to remodel a bathroom on a budget (incase you’ve already got a powder room and it just needs some updating).
*Hygge & West, Build.com & Signature Hardware sponsored this post, but all thoughts are my own. Thank you for supporting the brands that make PMQ for two possible.


How to Plan A Powder Room Renovation
Easy! You need to set a budget, determine a visual direction, evaluate your floor plan, and then chose the right finishes for the space.
In out case, we had quite a bit of leg work to do before we got to the fun part, but taking into consideration those factors allowed us to make smart decisions about timing, placement, and costs that saved us from having to go back and fix things later.
We’re ultimately renovating our house to sell when we get posted next, which means making smart decisions about upgrades that suit others, not just us. And adding a series of functional spaces where before there was a mishmash, is a great way to do that.
What is a Powder Room?
Simple! It’s also known as a half bath, or a guest bathroom. It’s usually just a toilet and a sink, and it’s often found in a communal or more public part of your house – thus making it easier for guests to use.
The term “powder room” comes from the idea that you guests might use it to powder their noses while visiting. It’s basically a chance to go wild with wallpaper and other finishes in a largely ornament space in your home.
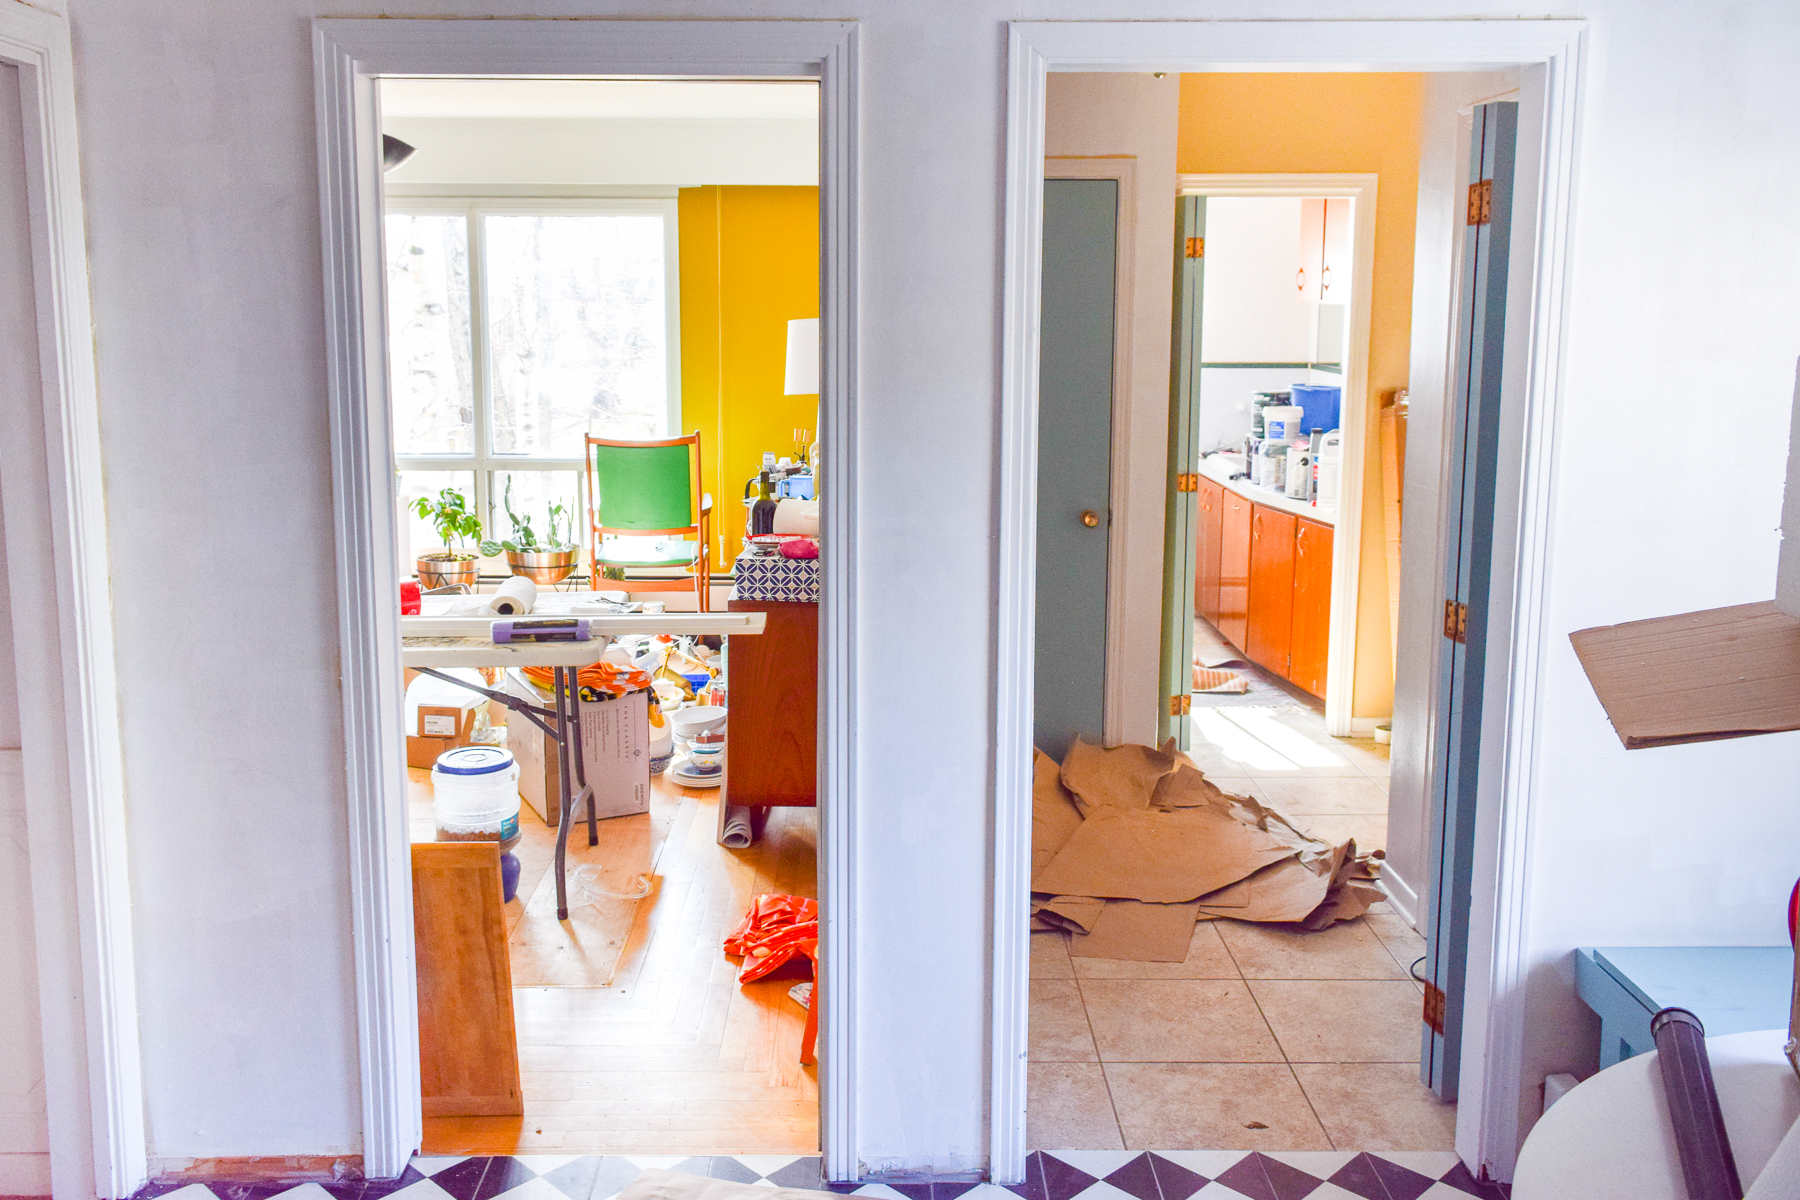
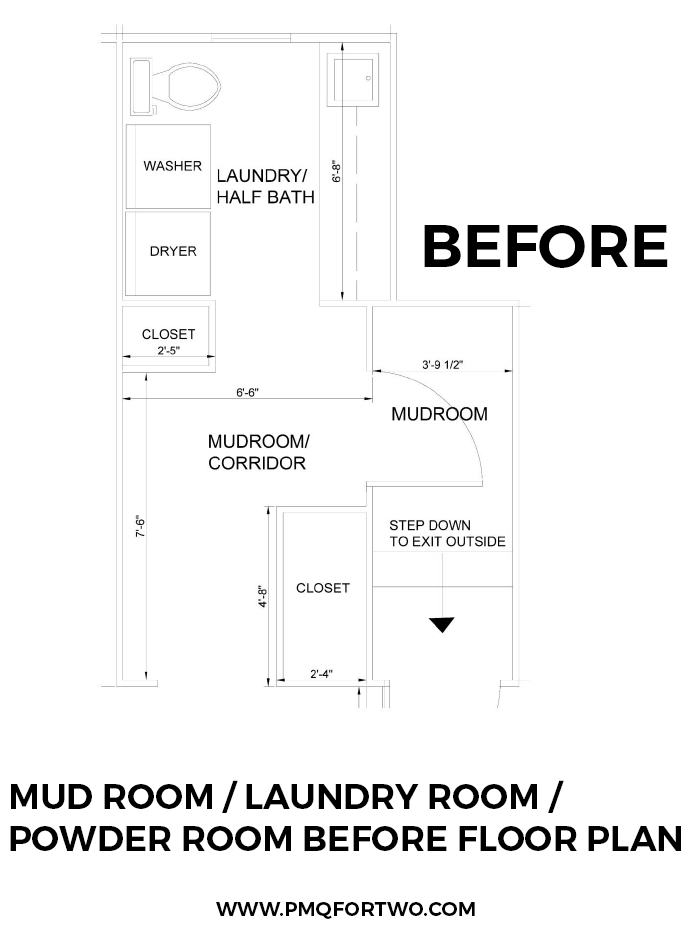
In our case, our powder room was situated in the same space as the laundry machines and some cabinets off a hallway that came from the Kitchen and heads towards the garage. It was an awkward lay-out, not very functional for us, and was definitely not #goals. So before we could even begin, we had to rework the floor plan.

How To Re-work a Floor Plan
As you can see below (in the original floor plan), we weren’t working with a very useful, logical, or private flow for the spaces. We needed to re-work the floor plan to optimize the flow.
Check out our Retro Glam Kitchen Renovation
Evaluate your needs & the spatial problems
We found out that the previous homeowner used this entrance as the main entrance to the house (not the front door we use). How and why is beyond me, guests got funnelled past the laundry room and didn’t have a very functional mud room (where would people sit to take shoes on and off?). Not only that, but there was no laundry sink – you know a place to empty the mop water, soak dirty clothes, and rinse paint brushes.
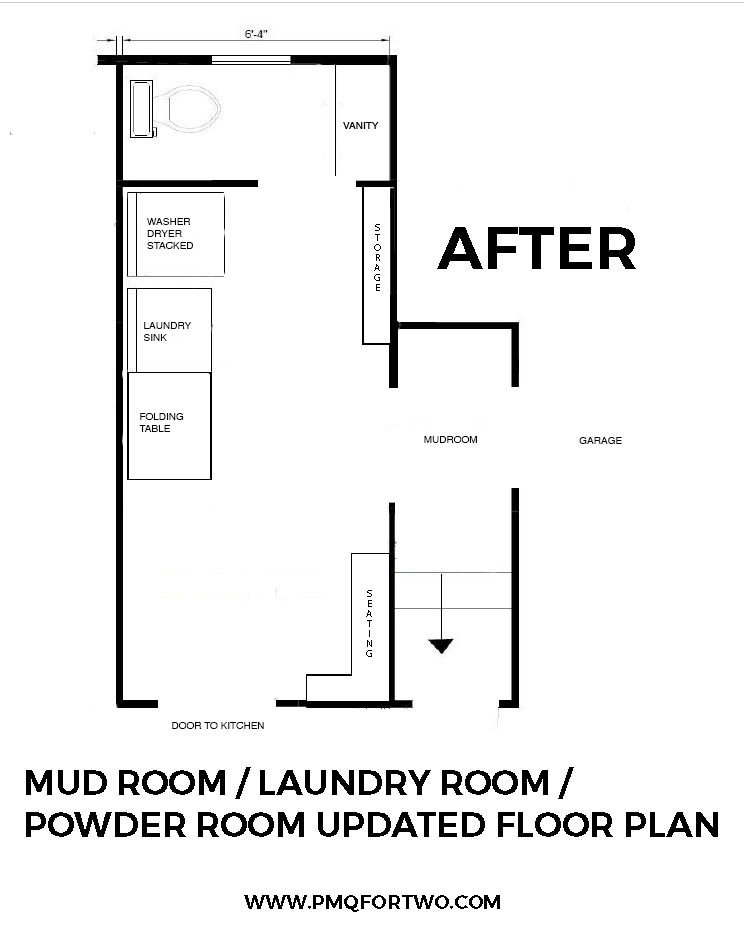
Creating Two Separate Spaces with Distinct Purposes
So while the Primp & Pamper bathroom challenge will cover our journey with the powder room, I’ll be covering the laundry room & mud room transformation this fall as part of the One Room Challenge.
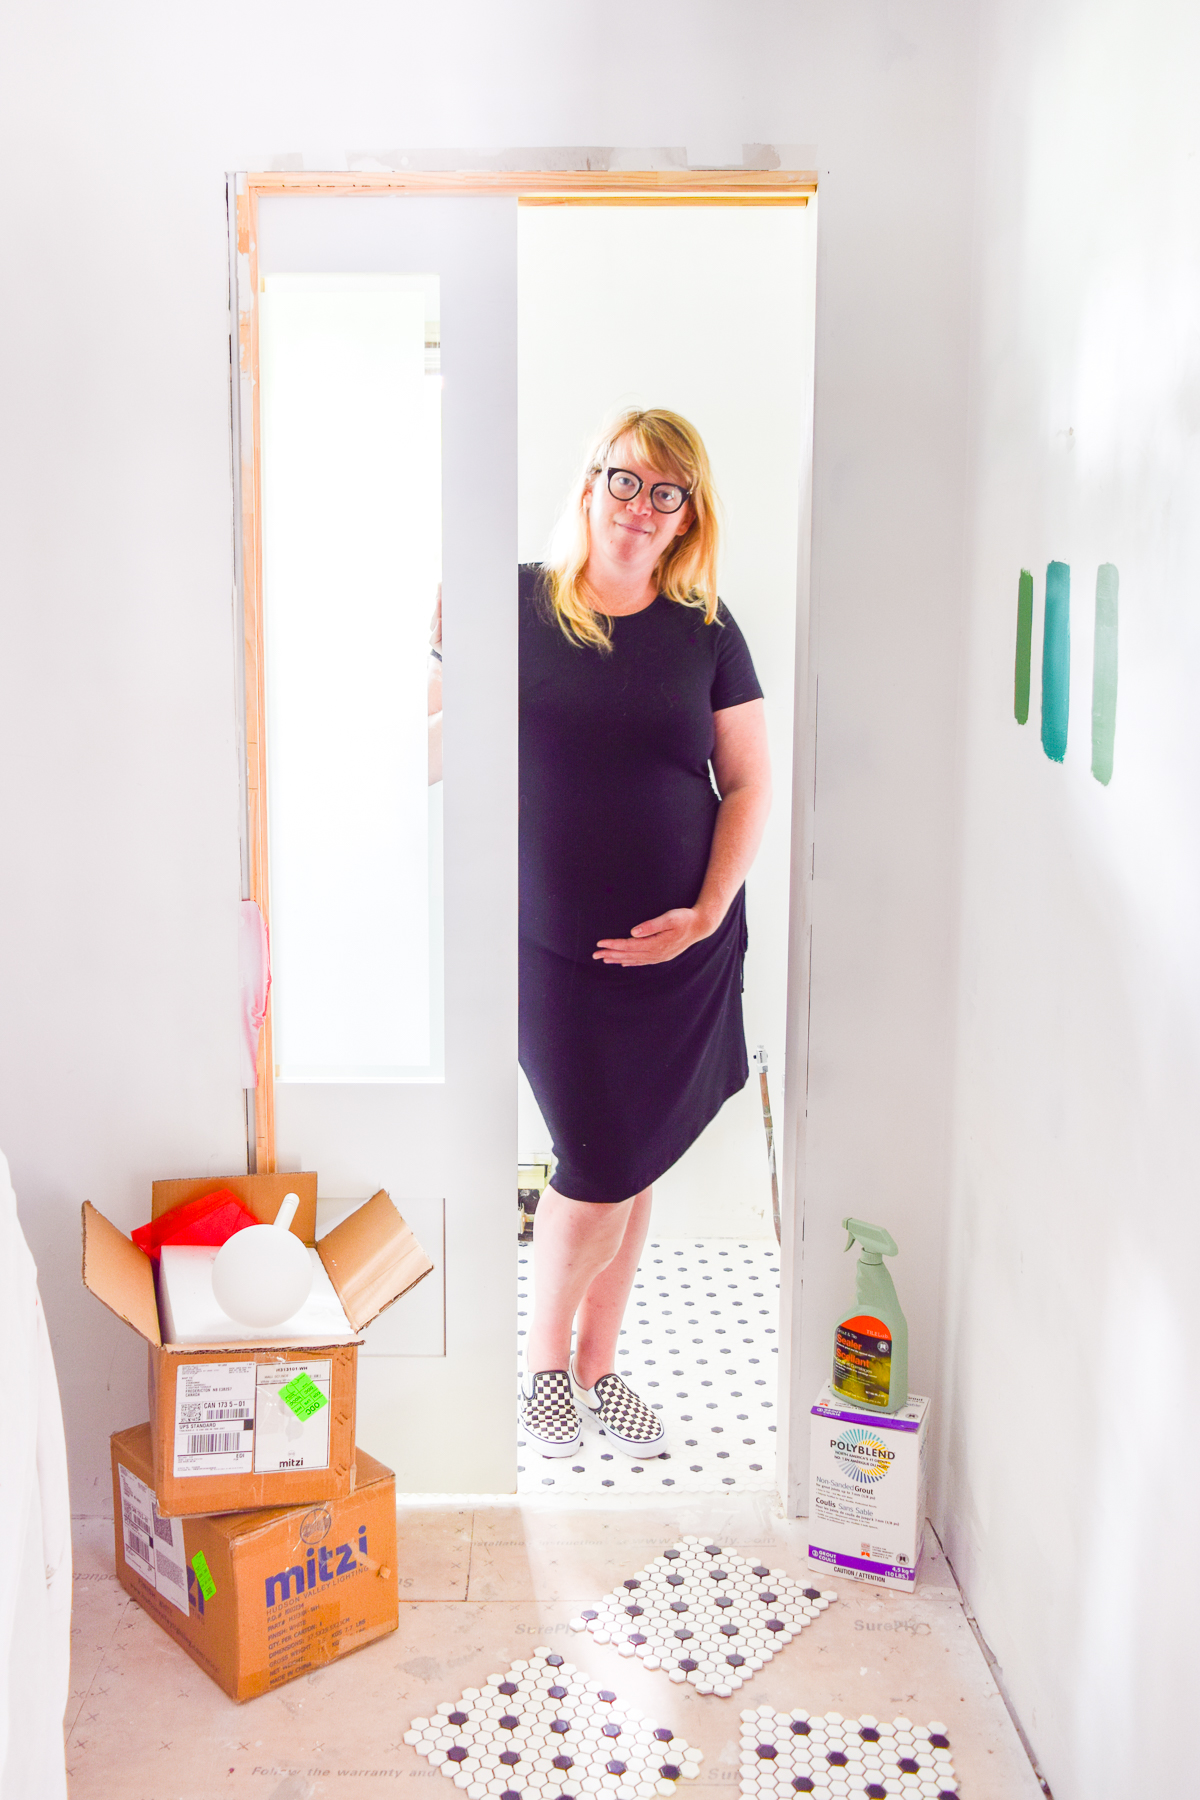
To get the distinct spaces, we removed the closets, and took down the wall that had previously enclosed the washing machines + toilet. We then re-built a wall to create a powder room, and put the washing machines in the mud room area. We’re not professional contractors, so I’ve spared you all the process photos for that, but I did share a lot of it over on my Instagram account’s stories while they were happening.

In order to maximize the floor plan for a 21st century family we needed a separate powder room, and then seating + coat hanging options, storage for our brooms, vacuum, and cleaning supplies, a stacked washer and dryer to minimize their foot print, and a proper laundry sink.

Building A Powder Room From Scratch
If you’re creating a room from scratch, you know that you have to work around the utility of the space. Here are some things to consider before you even frame a wall:
- Where are the water hook-ups? are there existing pipes you can use?
- Where will your electrical go? Do you need to have an electrician safely remove and add electrical boxes?
- Will the toilet fit? In our case, we bought a new one since the old one had a leak. We had to measure to make sure it would all fit first though.
- What kind of door will you use to enter the space? If it’s a swing door, which way will it swing? We used a pocket door and saved ourselves the hassle of having to incorporate swinging doors into our tight floor plan.
You’ll see in the above floor plan that we squeezed the bare essentials into the powder room (toilet + vanity) because everything else is a decorative touch i.e flooring, wallpaper, hardware & lighting. So once we knew how both spaces needed to interact, we built our wall and got to work.

Tiling A Powder Room
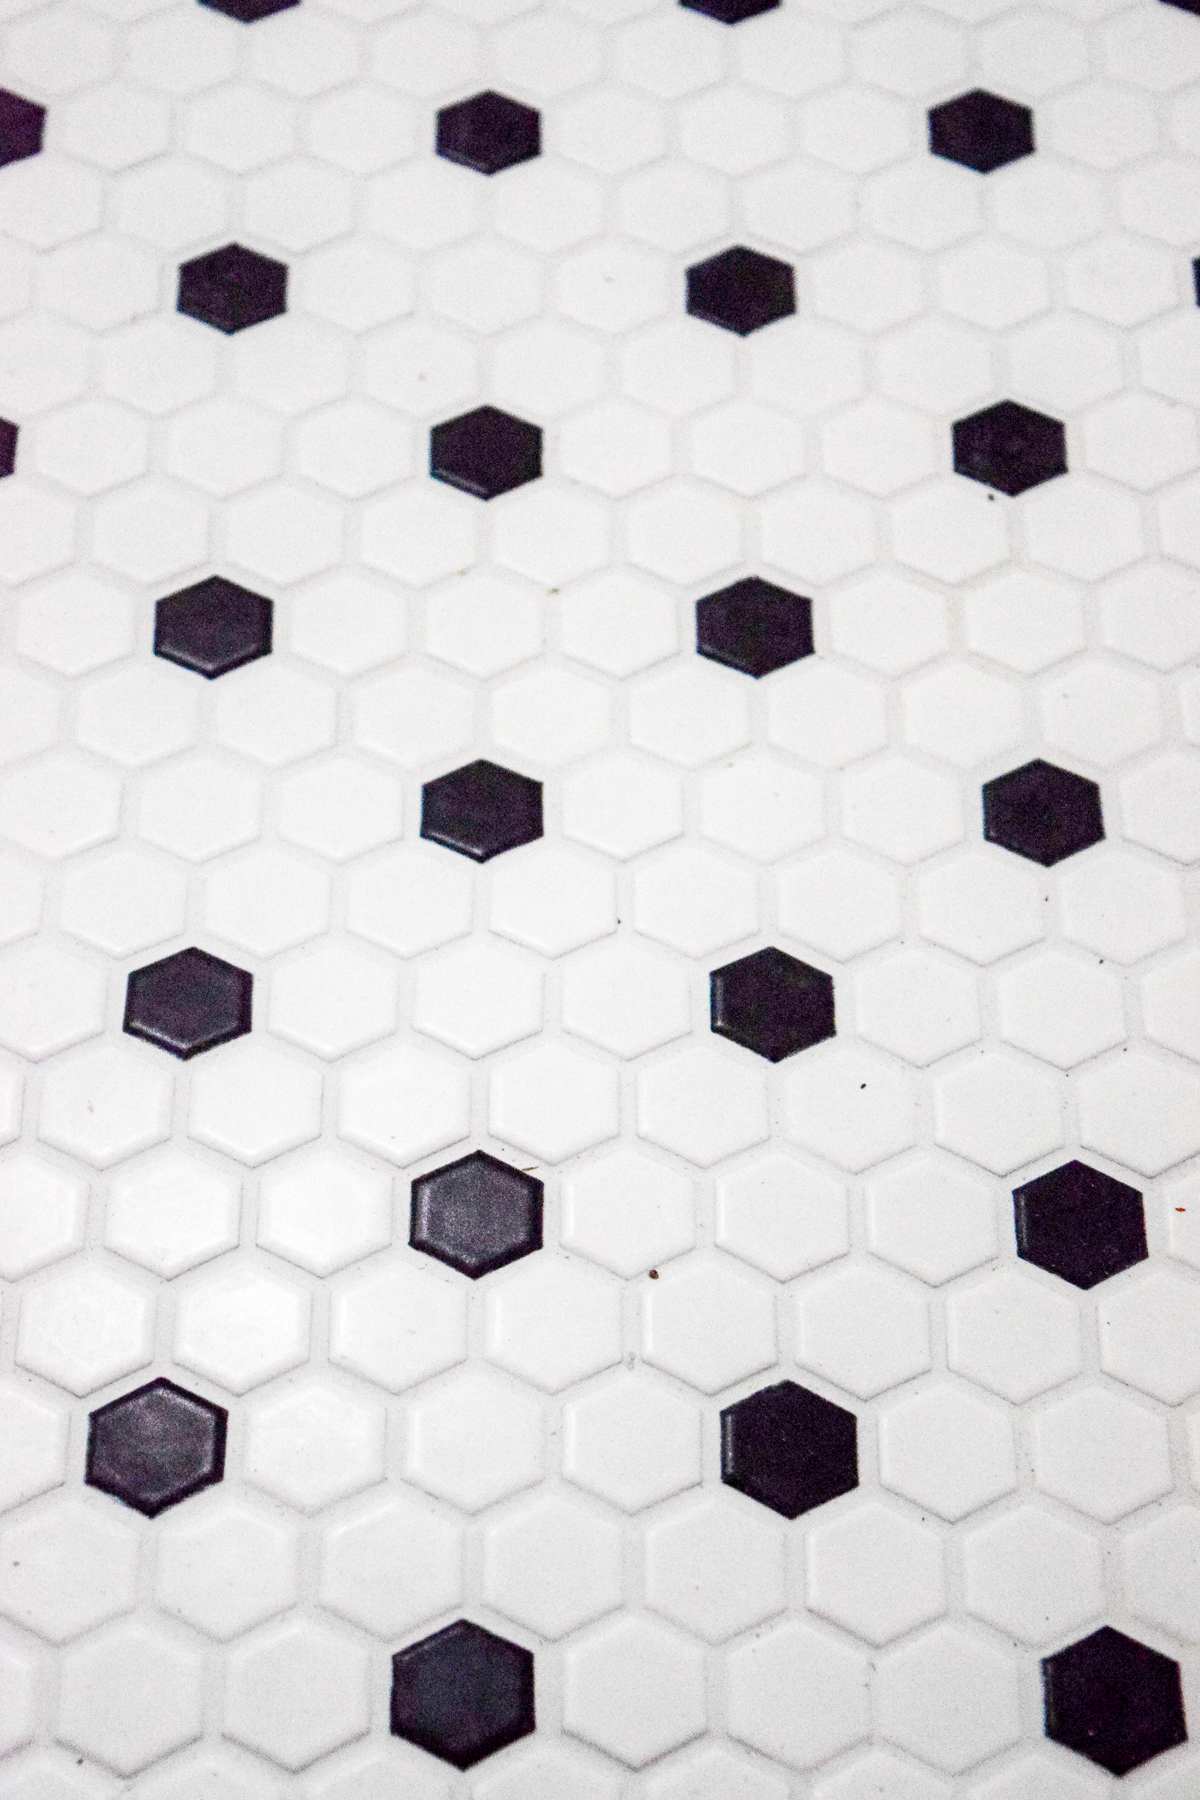
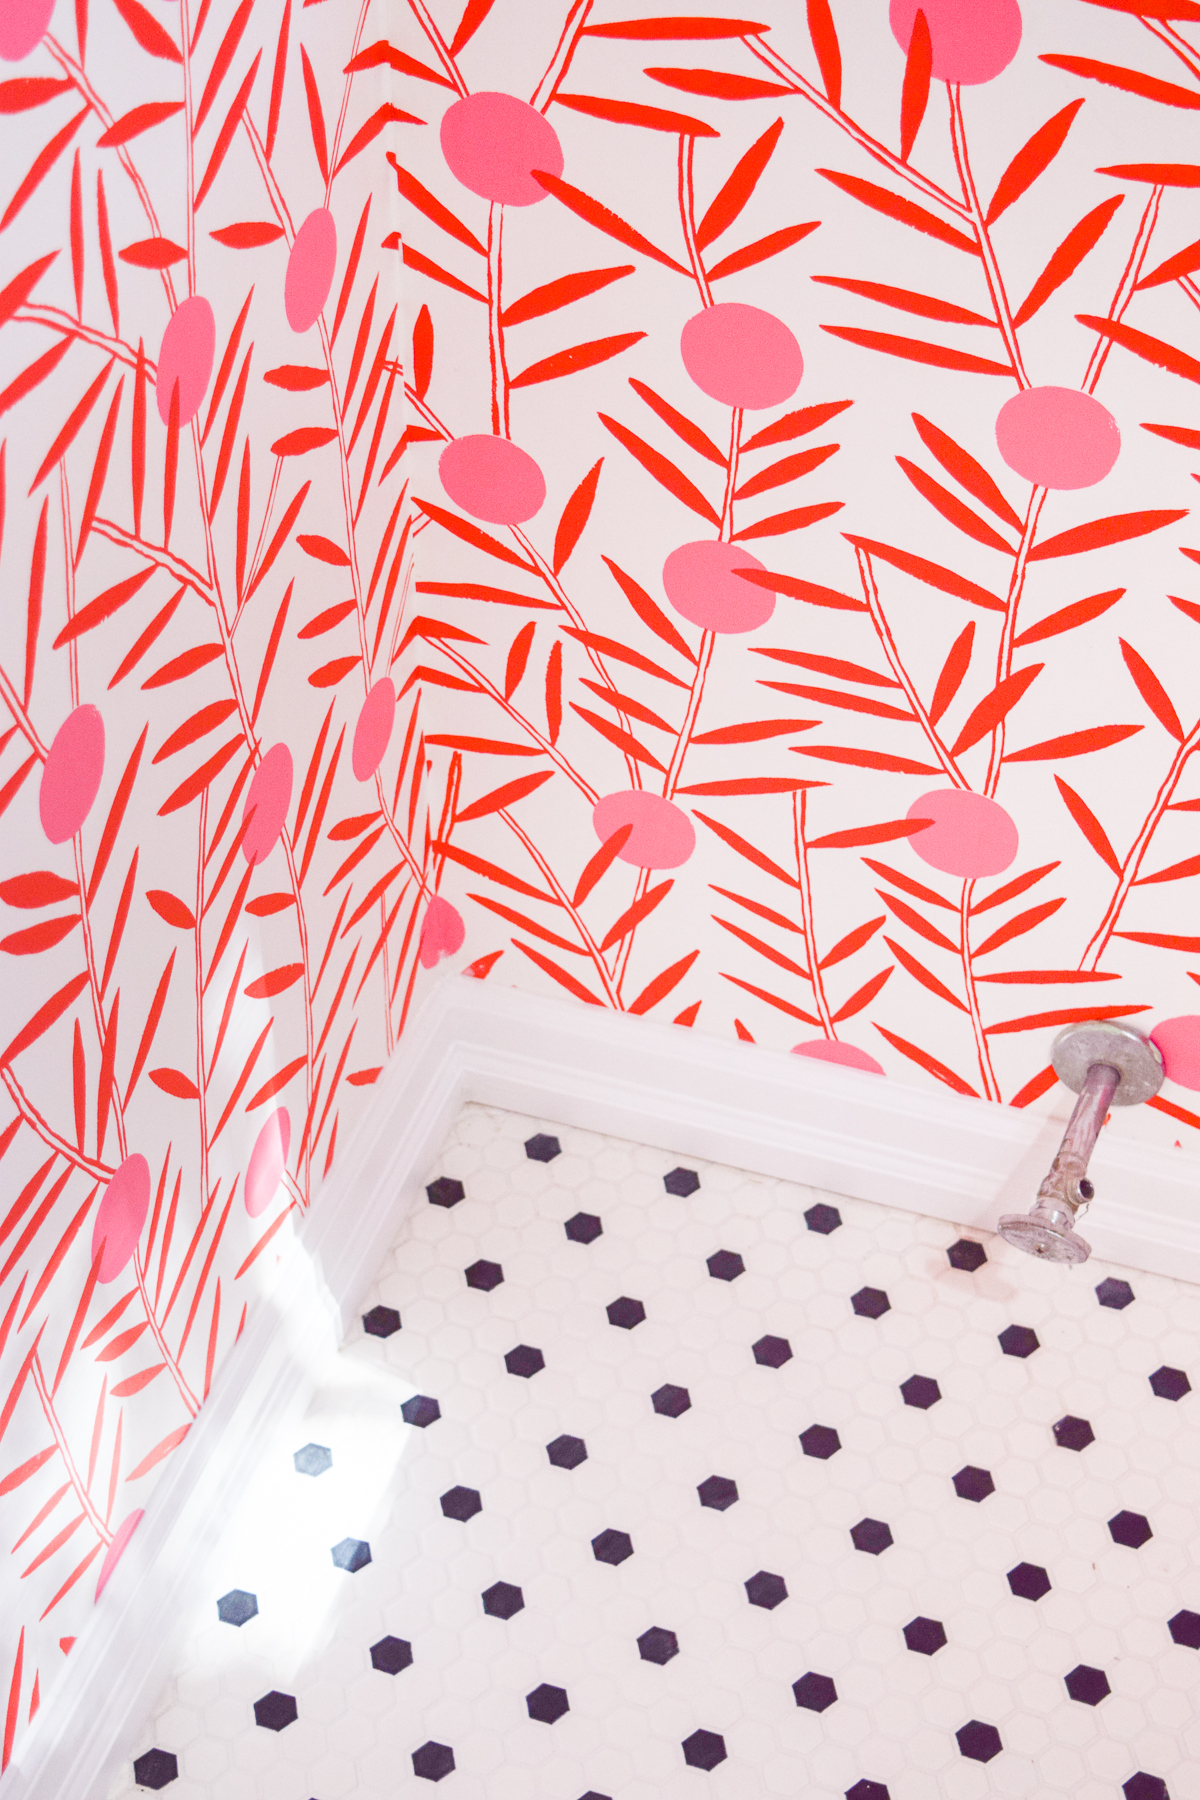
While the laundry room / mud room will have different flooring, I went for something funky in the powder room. Wanting to cary the black and white motif from the kitchen through to all the tiled spaces in our home, I chose these black and white hex tile sheets.
The Daltile Keystones – 1″ x 1″ Hexagon Mosaic Wall Tile (available on Build.com) were a perfect choice for us for our first time tiling project for a few reasons:
- our powder room has a small foot print
- the hex tile sheets are easy to cut and fit around pipes and wall edges
- the pattern is simple and easy to match-up from sheet to sheet
- tile sheets are easier to lay and grout than larger tiles
Check out how to chose a retro floor tile for our kitchen renovation
Speaking of which, I went with a white grout in the bathroom because of how small the bathroom is. I didn’t want an unnecessary black that might visually clutter an already busy space.
Wallpapering the Powder Room
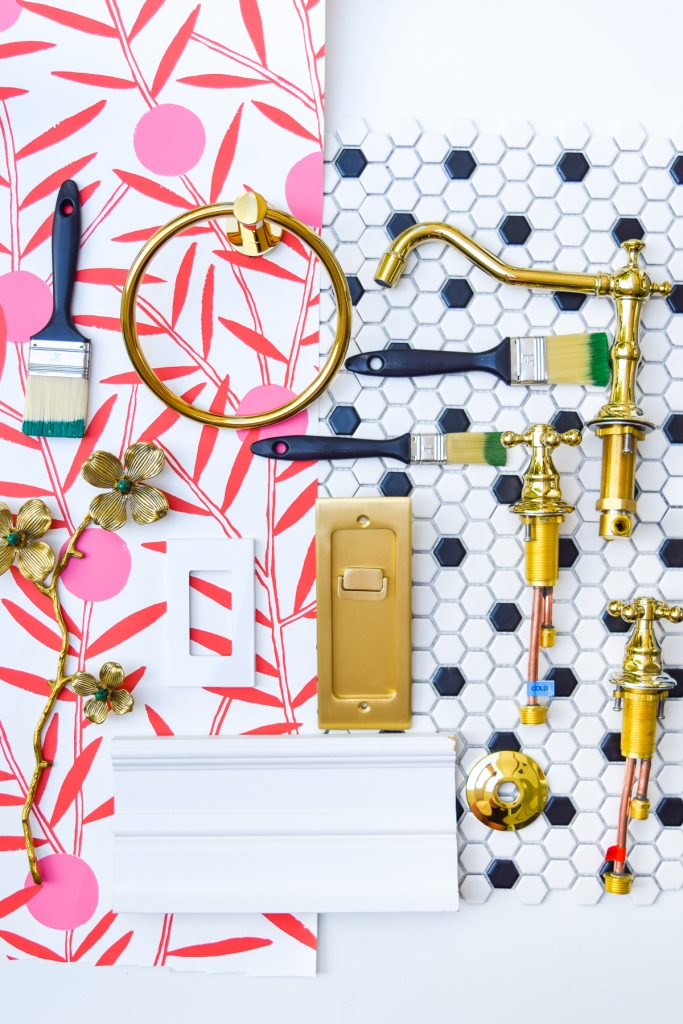
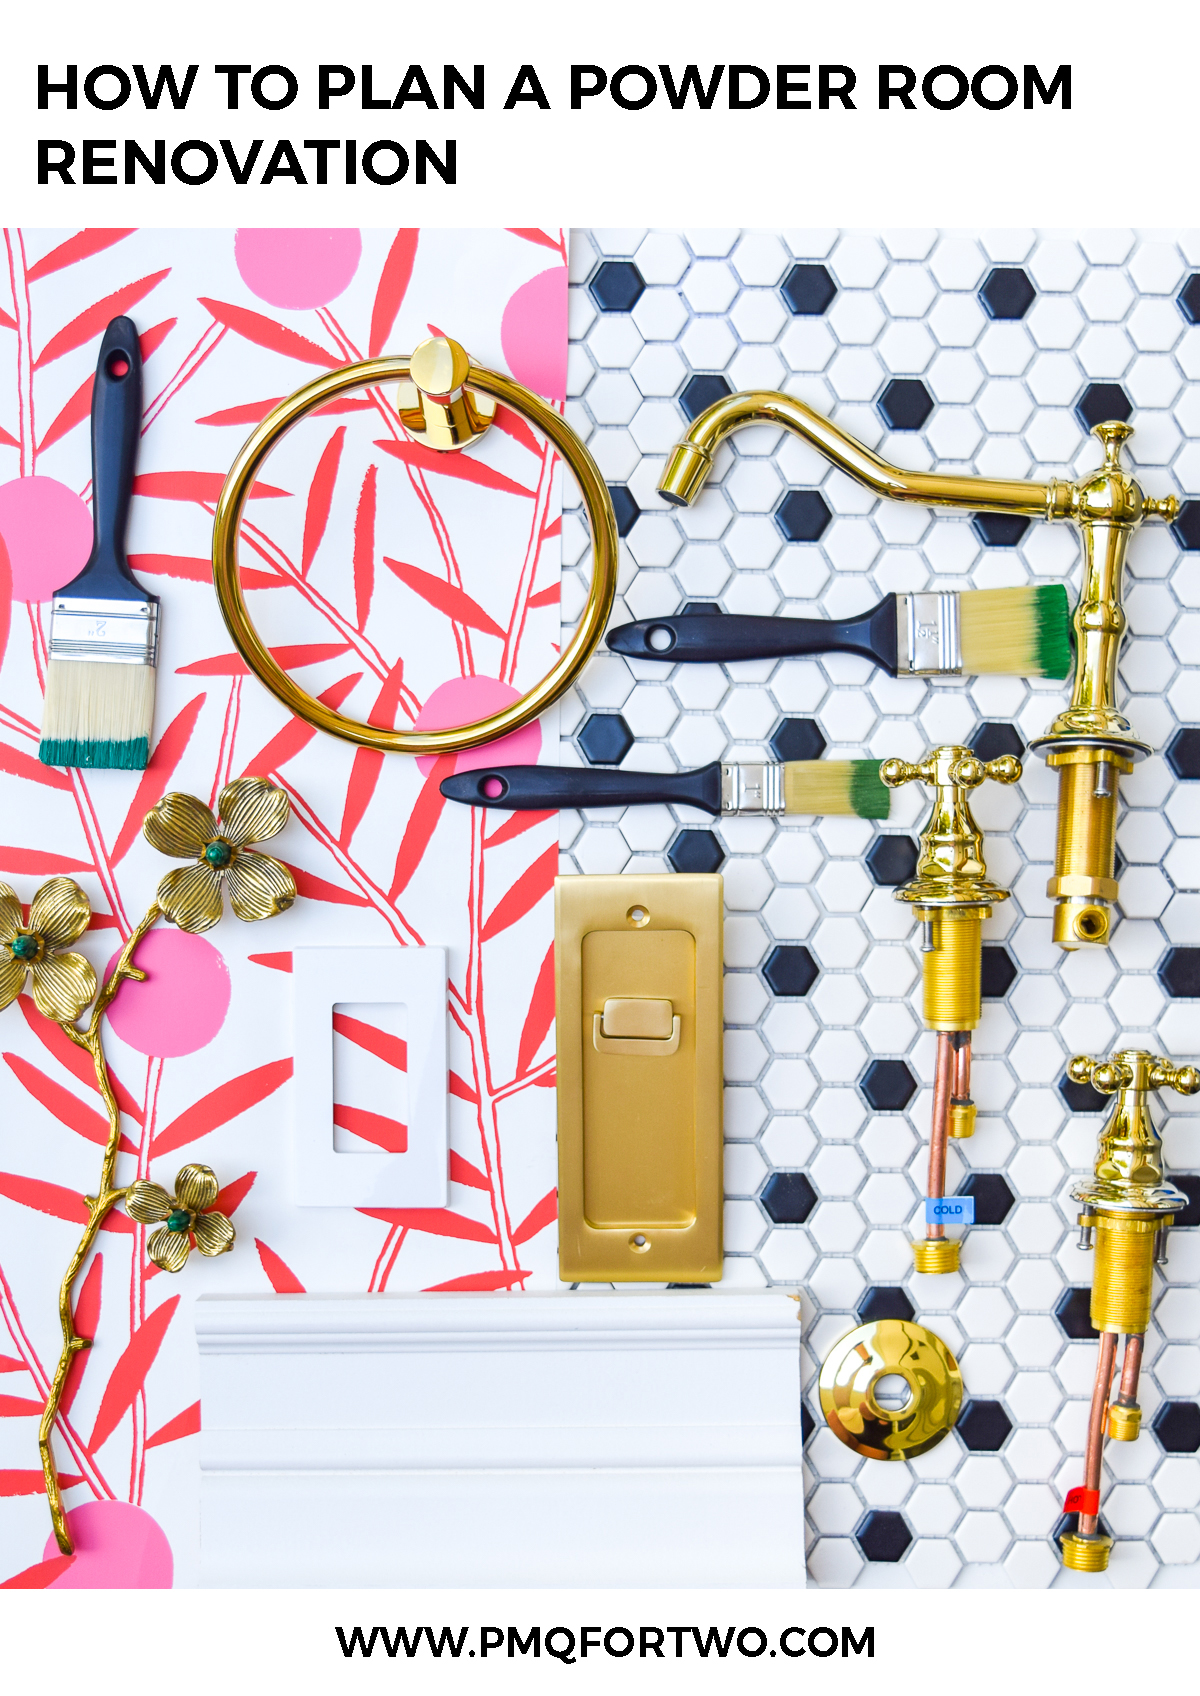
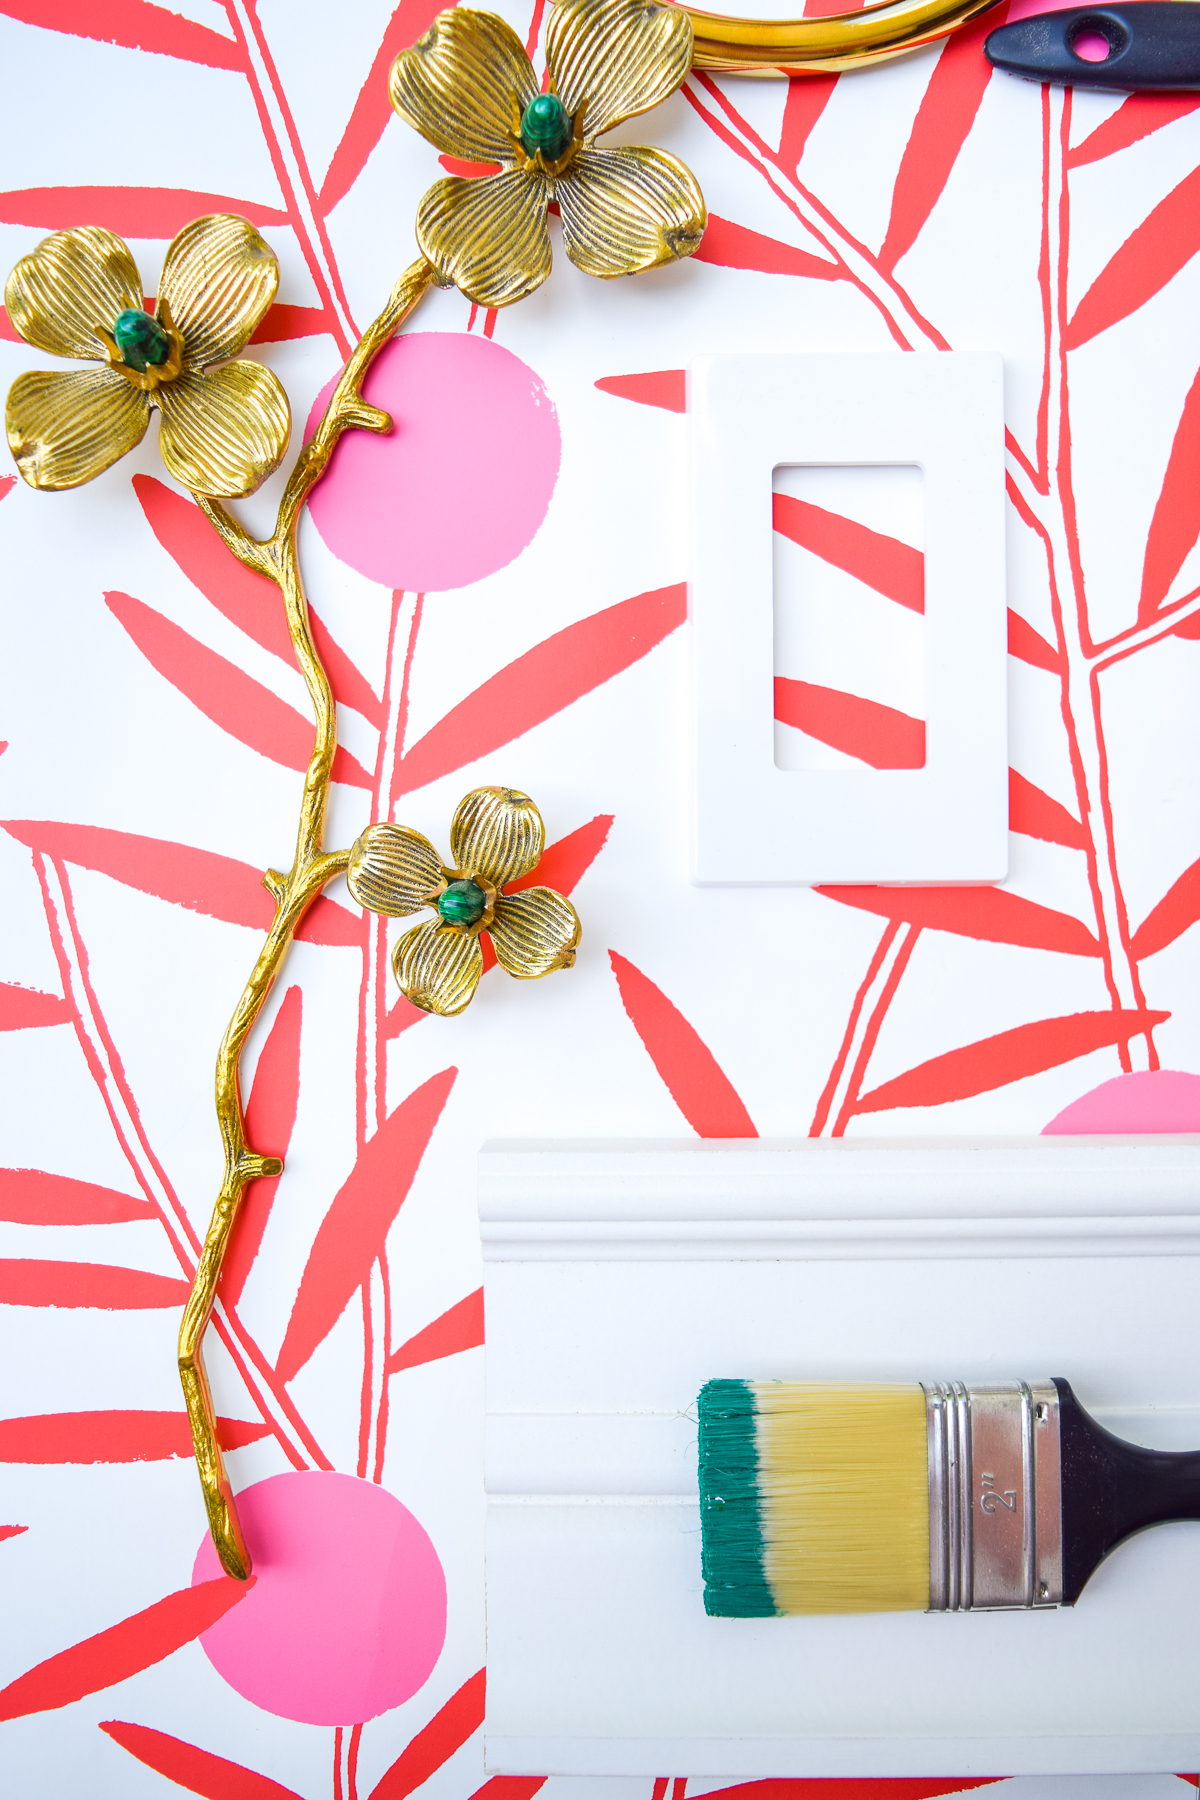
Dan seems to think I can’t sneak bold pattern and color into every room in the house, band boy is he wrong! I went buck wild in the powder room with the Bloom print (in Poppy) from the Emily Isabella x. Hygge & West Collaboration. As you can see, it goes perfectly with all the brass accents we’re bringing into the space (more on those later), as well as the crisp whites of our millwork finishes, and the green we chose for the laundry room.
With the sleek baseboards and the tile in place, these two patterns come together nicely in such a small space. It’s hard to show it off without giving away the rest of the look, so I’ll say this – you’ll get to see much more of it as the weeks go on!
Check out my other wallpapered spaces: our Floral Glam Master Closet, our Mid Modern Living Room, and our Retro Glam Kitchen
Why We Chose a Console Sink Instead of a Vanity
Surprise! We’re actually going with a console sink from Signature Hardware. I won’t tell you which one until next week, but I know a few of you have already spotted it on my Instagram stories and are crushing HARD on it.
Here’s a sneak peek in the meantime – and yes, those are lucite legs with brass caps.
Check out my low budget painted vanity bathroom update

While I’ll have more details about the sink next week, I wanted to quickly explain why we chose a console sink instead of a vanity for our powder room. It’s quite simple and comes down to a few design principles for such a small space:
- We wanted to reduce the footprint of everything going into the space. A big vanity would appear cumbersome and hide part of the floor.
- All we really needed for the space was a sink, so why not make it extra fancy! By choosing brass and lucite, we upped the glam factor, which allows us to bring in some really fun finishes elsewhere and still have it all tie together.
- Because of the pocket door placement (because of the washing machines in the laundry room), part of the doorway will be obstructed by the sink, but with a console sink it won’t appear blocked.
Choosing Finishes for a Powder Room Renovation
To me, this is by far the best part of any renovation, and it’s one I took on with glee! I’ve got plans to unveil them to you in more detail in the coming weeks, but you can get a good idea of what we’re up to from the flat lay.
If I could sum it up with one rule, it would be: keep it simple.
Now it’s time to check in with the other Primp & Pamper participants! I know they’ve all got exciting plans and projects under way for their spaces, so go check them out.
Jeweled Interiors | PMQ for Two | House Homemade | Rain on a Tin Roof | Effortless Style Blog | Haneen’s Haven | Kaleidoscope Living