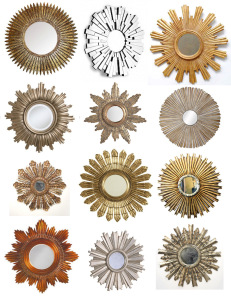
Sunburst mirrors are pretty much everywhere this season, and I was dying to get my hands on one. I saw a how-to on Danielle Oakey’s blog a while back, but could only find the circular mirrors, and not the doweling I wanted. The project was put on hold until I could find what I wanted for the right price. Fast forward to three weeks ago when we were in a hobby store in Kingston, ON. JACKPOT! I found flat strips of balsa wood in the width I was looking for.
Flash forward to me, sitting in our dinning room with a mini miter box, a cutting board, about 60 dowels, many shades of paint, and a frazzled look on my face. Damn. In the mirror pack I bought at dollarama there were 3 mirrors, so I ended-up making two of them. One with circular dowels and one with flat balsa wood.
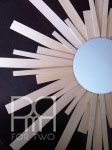
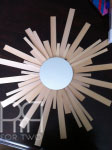
The flat dowel mirror took the longest to make as I had to use clamps to hold the pieces together while the wood glue dried. Unfortunately I didn’t take how-to photos as I went along because it just didn’t occur to me (I know right?!) but I do have these photos showing the different stages of readiness.
The circular dowel mirror is my favourite, but could have been spaced a bit better.
After carefully picking the many colours I would use (gold and silver on the circular dowel/ blue, gold, silver for the balsa wood) I painted all the strips before I glued them down. When using wood glue make sure you let it dry! It needs a good hour or two to firm up, and then a full 24 hours to totally dry. Once it’s dry though, that stuff is rock hard.
It’s never too early to think about how you’re going to hang them. This was something that hit me while I was making my holiday ornament wreaths. They were perfect and done, and I couldn’t figure out how to hang them without breaking them, it was a major problem. SO, this time around, I made sure I could hang them before gluing everything down.
The multi-coloured mirror was hung by our back door in an area that would allow it to amplify the light in entrance way perfectly.

The classic sunburst mirror hangs in our staircase, completing the top of the gallery wall. I LOVE IT, but I can see all the little imperfections every time I walk by :S


[…] also got the blue, gold, and silver sunburst mirror hanging by the back door. This was a cost-effective and TIME CONSUMING addition to our tiny space. […]