PMQ for two

Bold, Bright and Colourful Home Decor & DIYs

  • HOME
  • ABOUT ME
    • POLICIES
  • BUSINESS BABES
  • PROJECT GALLERY
  • PRESS
  • WHAT IS A PMQ?
    • THE DUPLEX
    • The Row House Tour

DIY Painted Wrapping Paper

November 16, 2016~ DIY and craft projects, gifting, painting

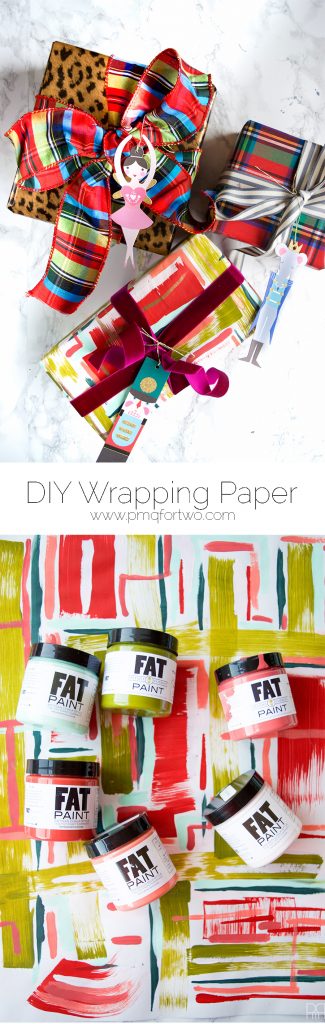
Okay so who hasn’t made their own wrapping paper yet? If you had asked me this on monday I would have said “ME!” but here we are on a wednesday, and I have now made my own wrapping paper. Well, I didn’t technically make the paper from the pulp up, but I did paint it and then gild it, so that’s gotta count for something right? For this month’s penultimate edition of the 12 Months of DIY series we’re doing stuff with paper! So I DIYed Painted Wrapping Paper using the beautiful and bold colours of The FAT Paint Company, and let me tell you – WOW~

Using thick and luxurious paints I created my own festive holiday wrapping paper.

So you’re probably thinking “what? she didn’t do something with her Cricut? or paint wrapping paper in a Rifle Paper inspired motif?” Nope – not this time, although both of those would be awesome projects. For this paper theme I wanted to deconstruct a plaid pattern. I’ve been toying with the idea of deconstruction plaids in some way, shape or form ever since we upholstered that chair for the One Room Challenge // here //, but I was finally able to actually do it with this project.

When I say “deconstruct” I don’t mean that I took some scissors to a pattern and then taped it all back together in a new pattern. I mean that I broke open the lines and pattern, I forced some new colours and negative space in between existing structures to create a new, more abstract pattern. Not only is this pattern fresh and colourful and bold – much like myself – but it’s also super easy, and you can probably do it with items lying around your house.

Using thick and luxurious paints I created my own festive holiday wrapping paper

*The following product links contain affiliate links. Thank you for supporting the brands that make PMQ for two possible. For my full policies click // here //

*FAT Paint sponsored this post, but all thoughts are my own.  Thank you for supporting the brands that make PMQ for two possible.

Materials

  • Easel Paper Roll (Set of 2)
  • Paint Brush Set & 1″ Foam Brushes
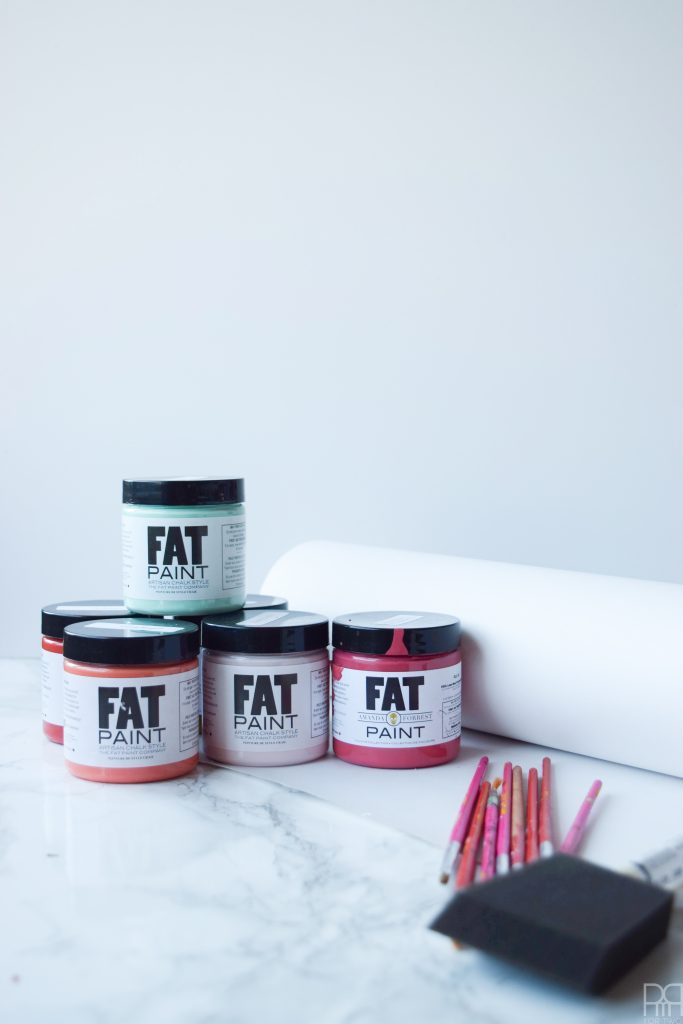
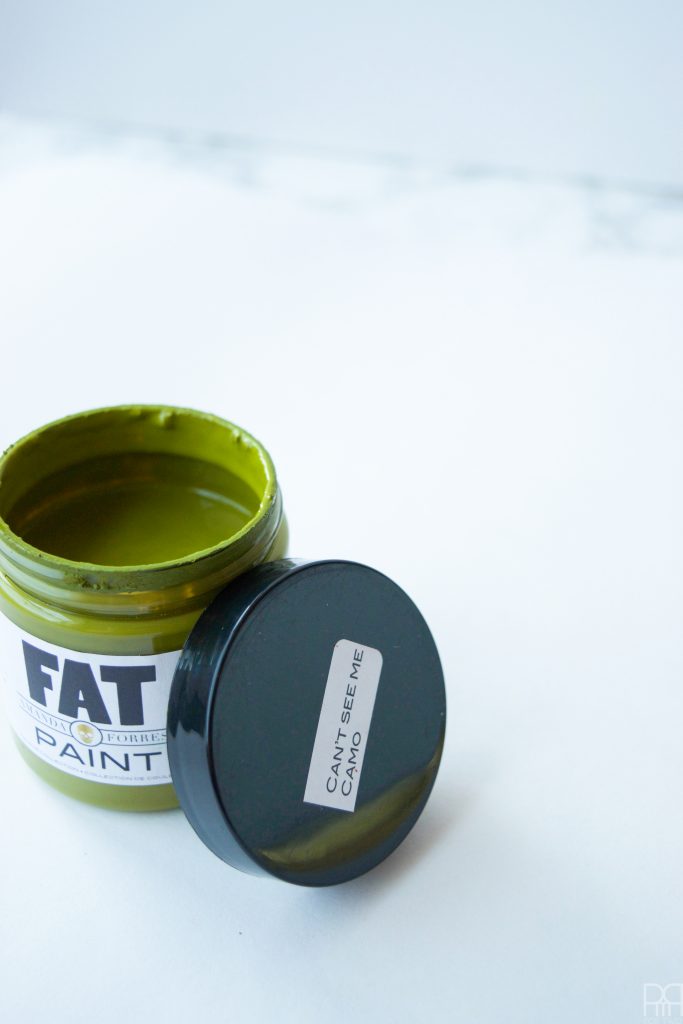
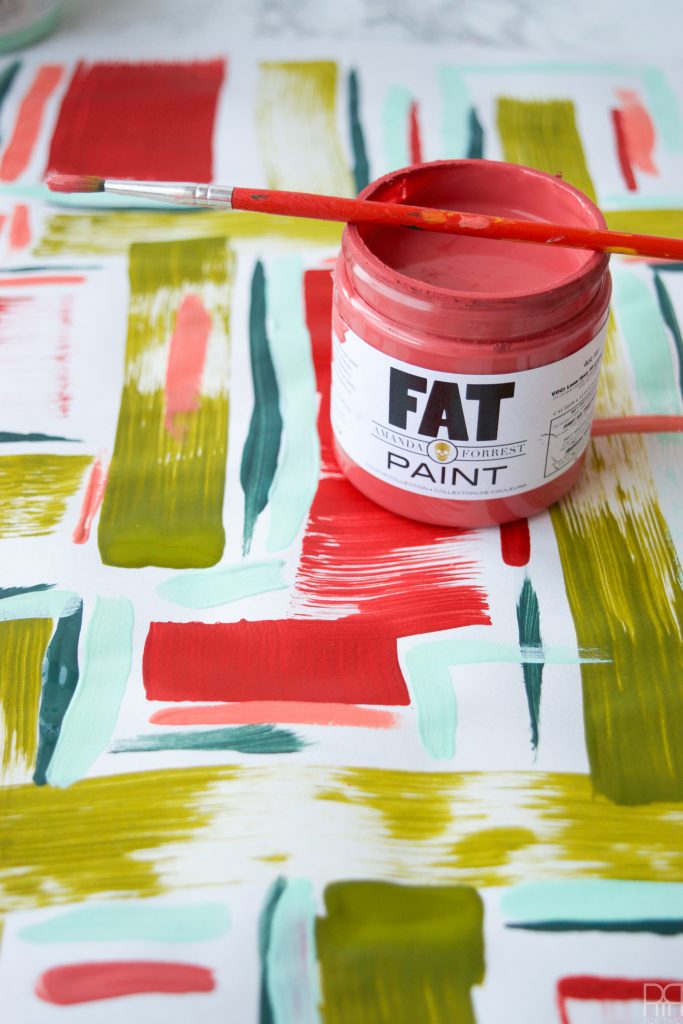
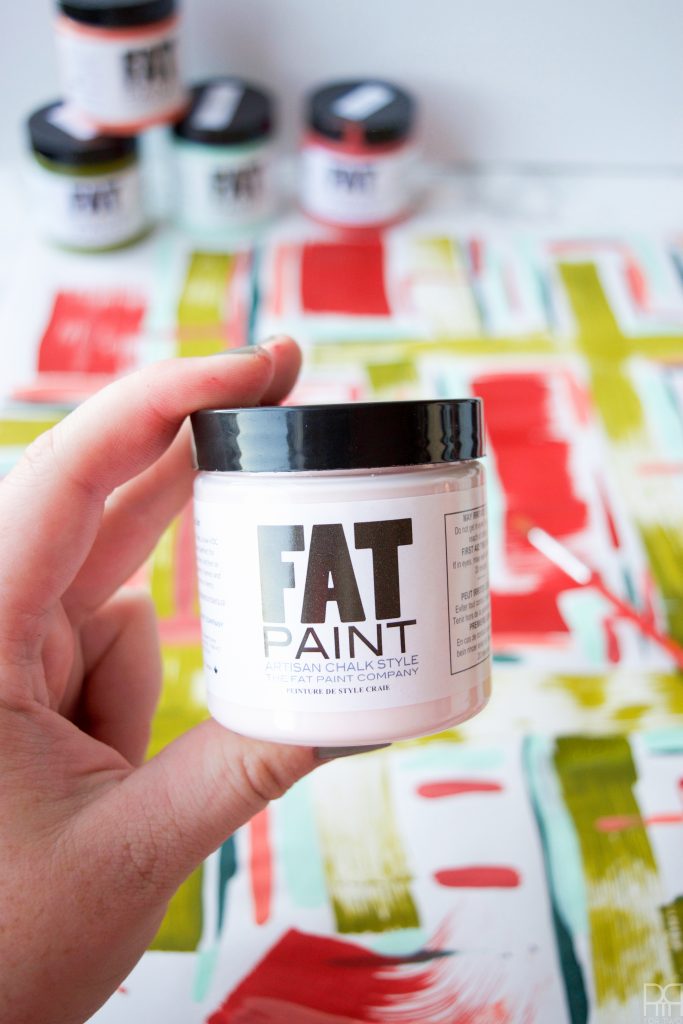
  • FAT Paint in sample size for the following colours: Can’t See Me Camo, Pistachio, Blushing Bombshell, Coral Reef, and Pink Cashmere, Red Barchetta, Navy State of Mind or Peacock * You can also see the rest of their colours // here //
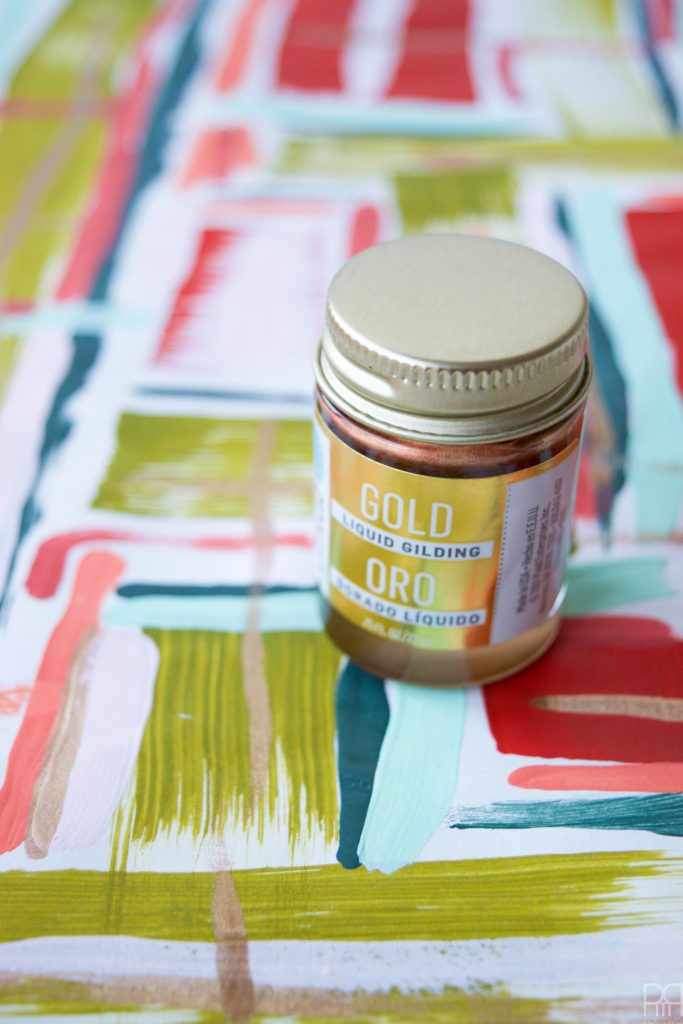
  • Martha Stewart’s Liquid Gilding
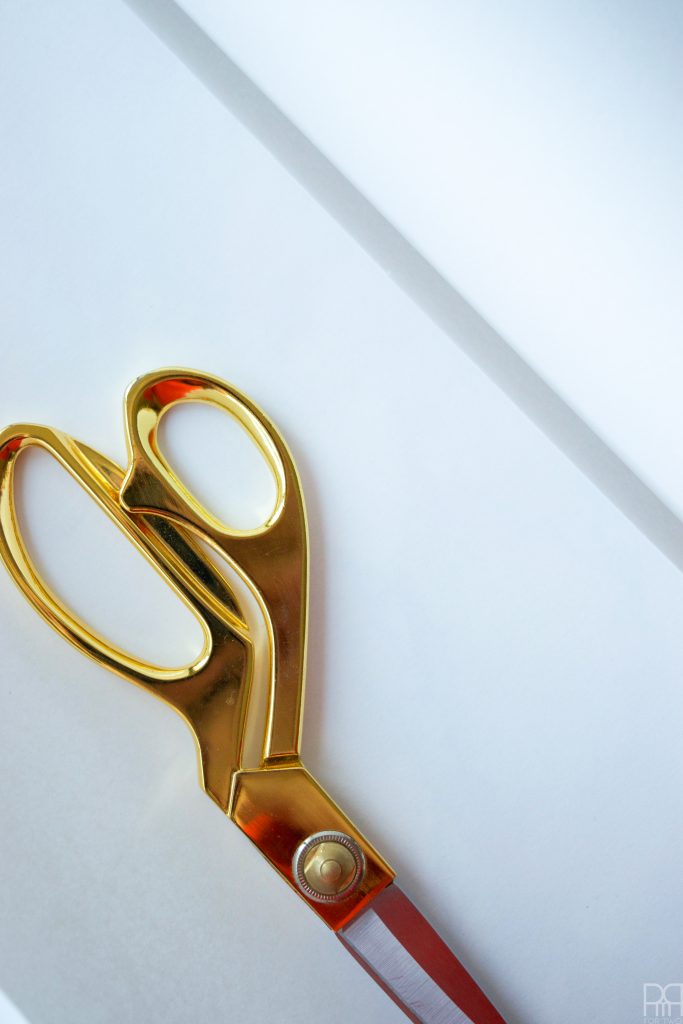
  • Gold 8″ Scissors
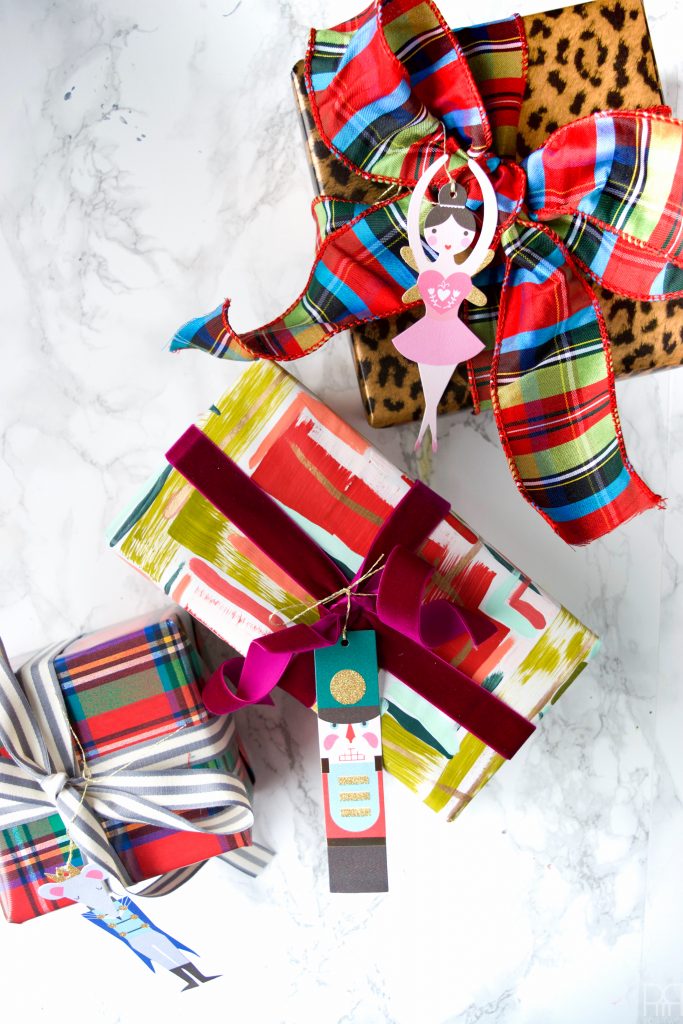
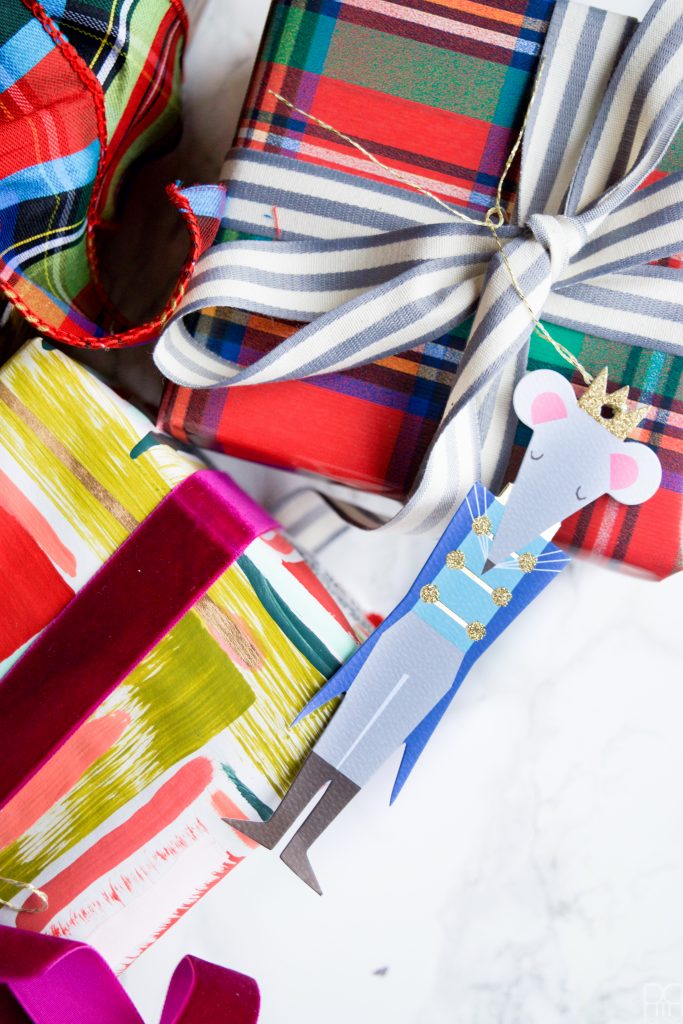
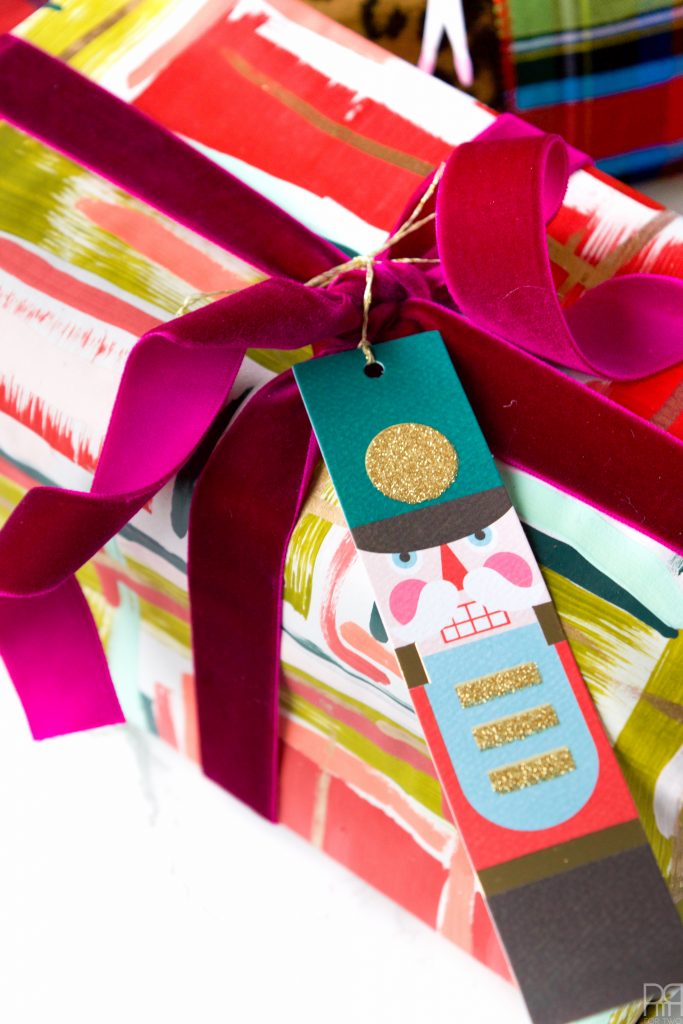
  • Meri Meri gift tags: Tartan Joy Peace Noel Tags, Merry and Bright Gift Tags , Tis the Season Gift Tags

Step 1: Figure-out how big a sheet of paper you want to work with, and cut it from the roll. I recommend weighing it down for a few minutes before painting, to avoid it curling in on itself while you’re laying-down some colour.

Using luxurious paints I created my own festive holiday wrapping paper

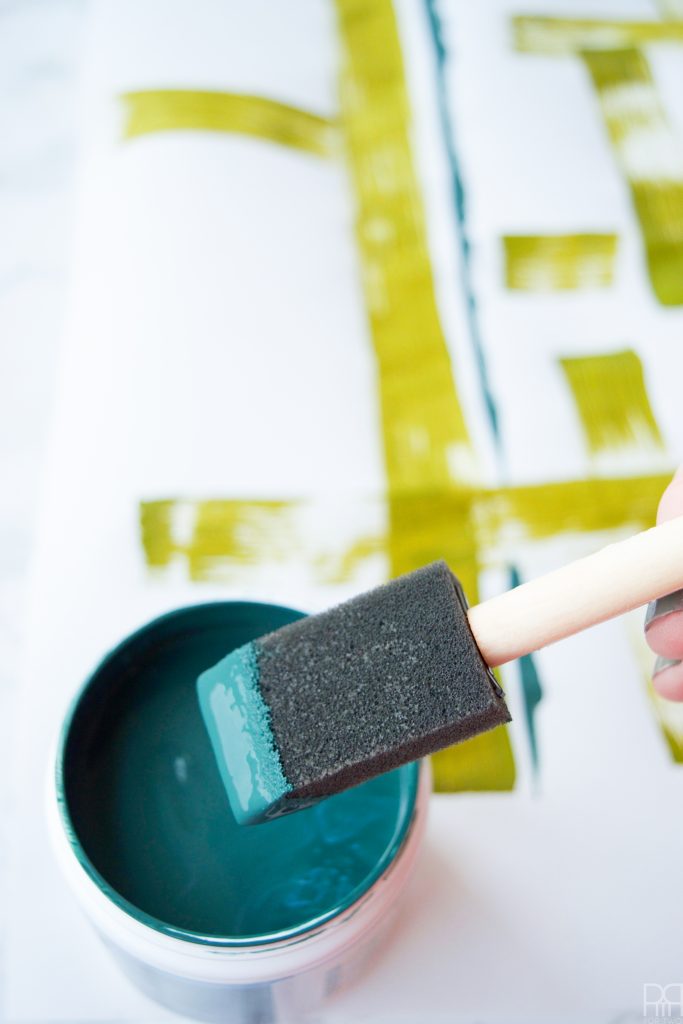
Step 2: Start with your colour base. I picked two bold colours on opposite ends of the wheel, and one complimentary shade to form the initial pattern.

Using thick and luxurious paints from fat paint I created my own festive holiday wrapping paper.

Using thick and luxurious fat paint I created my own festive holiday wrapping paper.

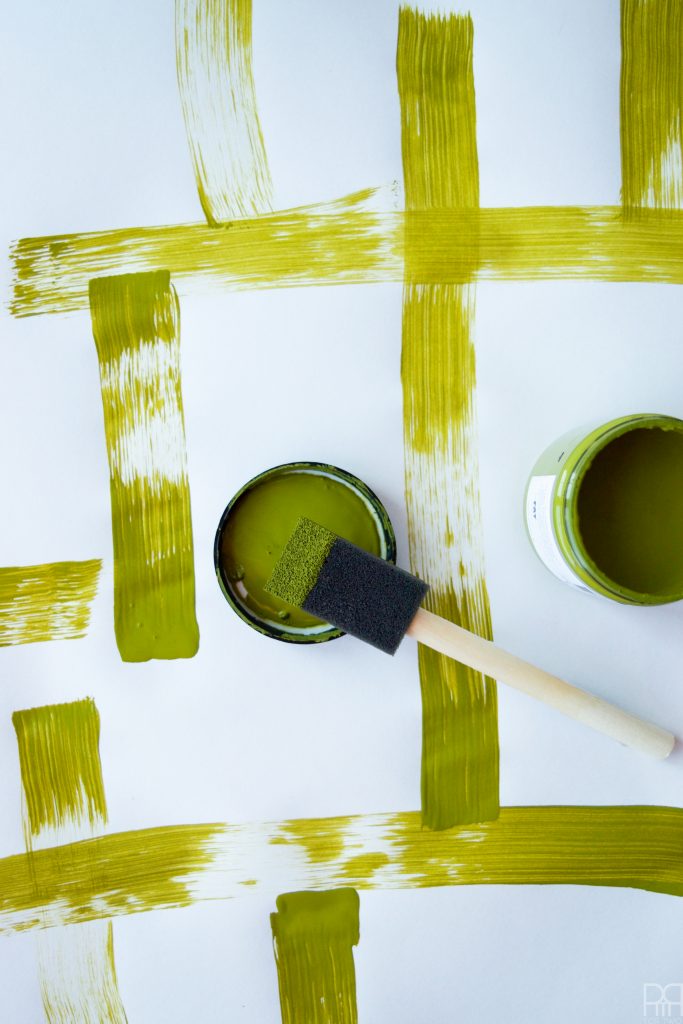
Remember how I said this was a deconstructed plaid? That’s where this comes into play. Sure, you could focus on an exact pattern and repeat it, or you could have fun and paint a bunch of different lines that flow organically. What you make probably won’t look like this, and that’s OK.

The important thing is that you start with solid colours.

Step 3: Now that you’ve got your guiding grid down, take your complimentary colour and loosely shadow the first grid.

Using thick and luxurious paints I created my own holiday wrapping paper.

Step 4: Take your third base colour and fill-in some of the negative space using large brushstrokes. This will help define space for contrast and allow you to work in other colours and hues, as well as movement.

Using thick and luxurious paints I created my own festive holiday wrapping paper.

Step 5: Give the base colours a few minutes to dry. With the similar hued colours, you’ll be going over the grids, so you don’t want colours to run.

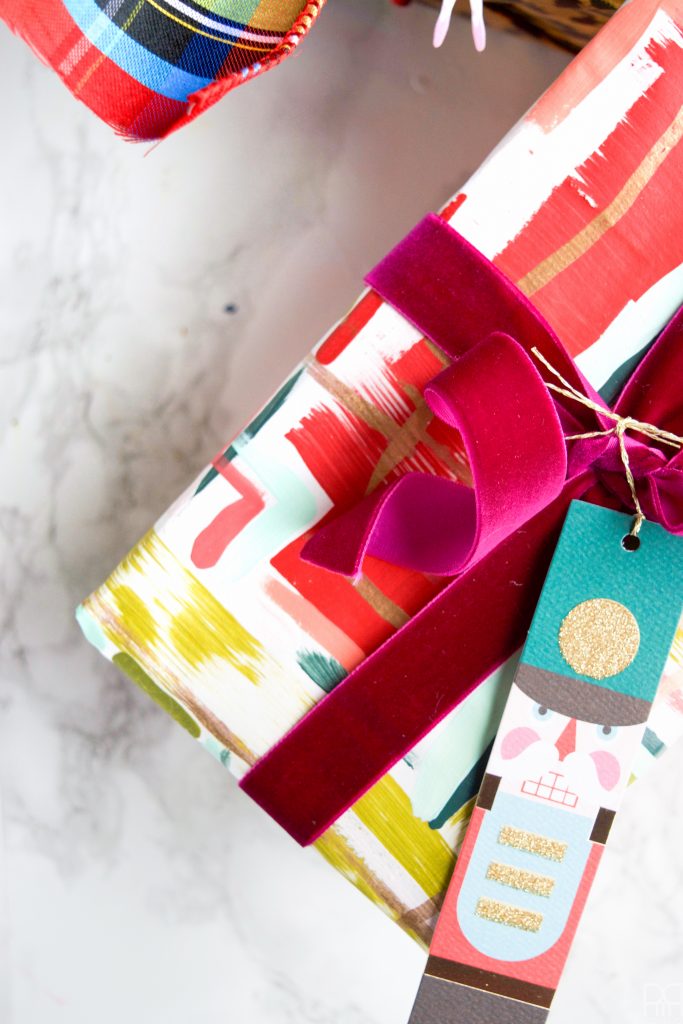
Step 6: Using the remaining colours, paint contrasting and complimentary strokes into the pattern. I used the Pink Cashmere to make the Red Barchetta stand-out, and then feathered the Blushing Bombshell and Coral Reef into the pattern with alternating strokes and placement.

Using thick and luxurious paints I created my own festive holiday wrapping paper.

Using thick and luxurious paints I created my own festive holiday wrapping paper.

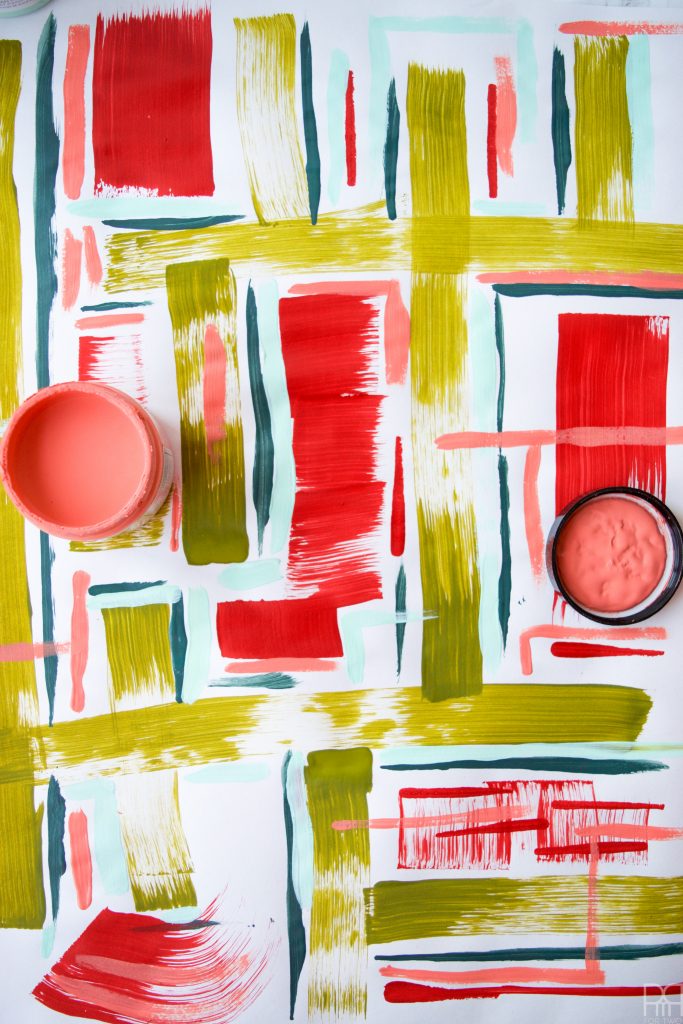
The point is to fill up the paper’s surface, but to also leave some space between lines.

Don’t be afraid to cut across, make corners and more corners, add a swoosh or two, and to create grids on top of other grids. Because this is deconstructed, you can really have a lot of fun with it all.

Using thick and luxurious paints I created my own festive holiday wrapping paper.

Step 7: Let all the paint dry thoroughly, and dab away any pools or large wet blotches. That’s the thing about FAT Paint, it has such fabulous coverage and goes on thick, but when working on paper like this it may be a touch too thick if you’re not careful.

Step 8:  Using the Martha Stewart liquid gold, apply a few strokes to emphasize and contrast the pattern. P.s this stuff smells super strong.

Using thick and luxurious paints I created my own festive holiday wrapping paper.

Step 9: Let dry once again.

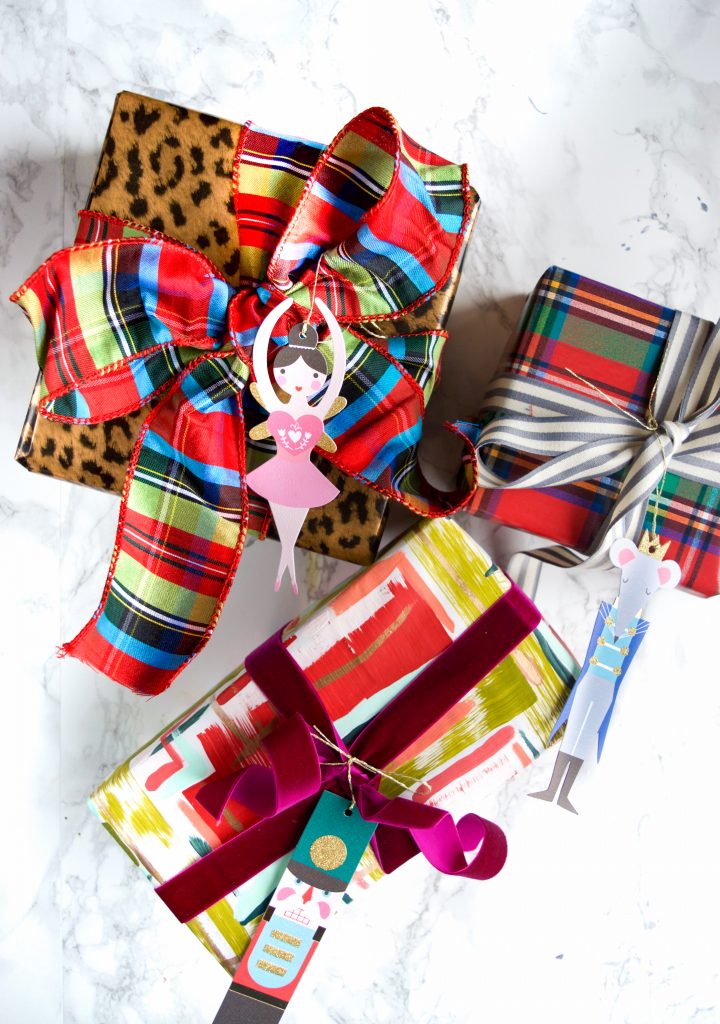
Step 10: Wrap your gifts and enjoy!

Using thick and luxurious paints I created my own festive holiday wrapping paper.

Using thick and luxurious paints I created my own festive holiday wrapping paper.

Using thick and luxurious paints I created my own festive holiday wrapping paper.

Using thick and luxurious paints I created my own festive holiday wrapping paper.

Using thick and luxurious paints I created my own festive holiday wrapping paper.

Using thick and luxurious paints I created my own festive holiday wrapping paper.


Using thick and luxurious paints I created my own festive holiday wrapping paper.
Now it’s time to see the rest of the DIY PAPER project ideas from my Canadian blogging friends.

Holiday Christmas paper craft ideas

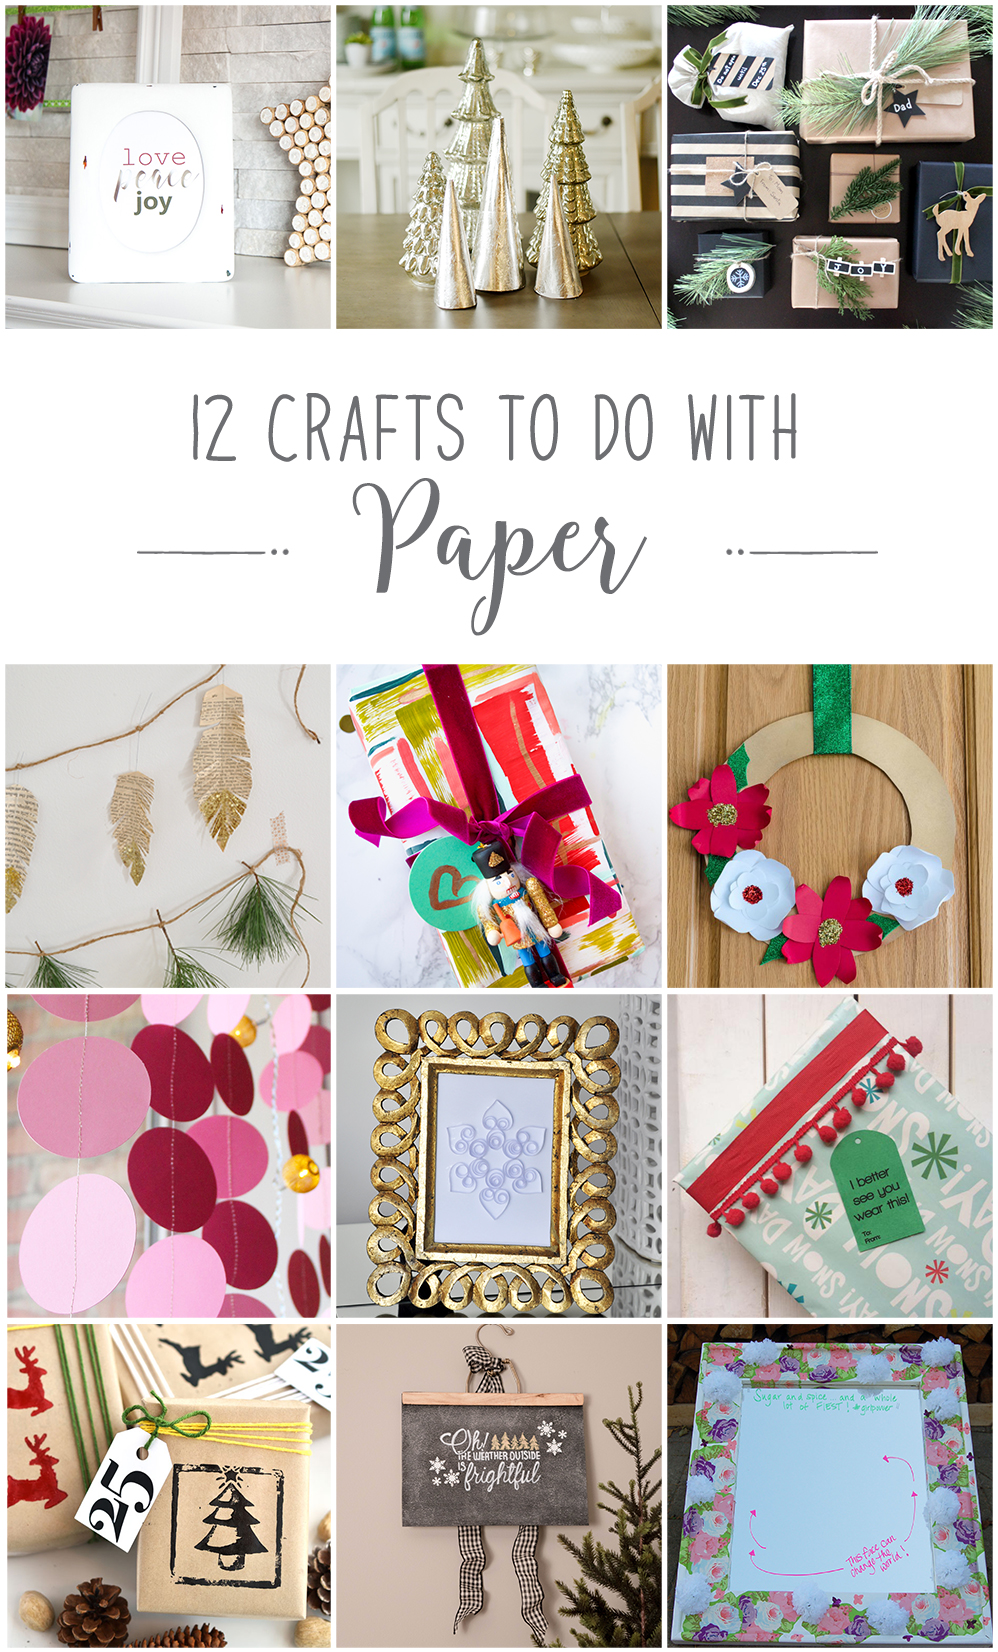
From the top left, they are:

Free Love Peace Joy Christmas Printable from Sustain My Craft Habit

Silver Leaf Paper Trees for Christmas Tabletop Decor from The DIY Mommy

Rustic Gift Wrap Ideas from Love Create Celebrate

Book Page Feather Garland from Life Is A Party

Deconstructed Plaid Wrapping Paper from PMQ for Two

Make 3D Paper Flower Christmas Wreaths from Time With Thea

How to Make a Paper Garland from Fresh Crush

Quilled Paper Snowflake from Lifeovereasy

Funny Printable Gift Tags from Brooklyn Berry Designs

DIY Linocut Print Kraft Paper Christmas Gift Wrap from Woman In Real Life

DIY Chalkboard Paper Christmas Art from Vin’yet Etc.

DIY Floral & Paper Decoupage Girl Power Mirror from Heather in Heels


✨Are you signed-up for my new post updates? ✨

* indicates required

Email Format

24 Comments

An MCM Christmas Tour with Collected Home »
« Renter Friendly Built-ins with Metrie

Comments

  1. Laurie @ Vin'yet Etc. says

    November 16, 2016 at 6:45 am

    Oh that colour and pattern… it’s gorgeous! Seriously you should send this off to Spoonflower to have it printed and sold in your shop! What beautifully wrapped gifts for under a Christmas tree! Or on FABRIC! The possibilities!

    Reply
  2. Amanda says

    November 16, 2016 at 9:38 am

    That looks so cool! What a great idea!

    Reply
  3. Brynne | The Gathered Home says

    November 16, 2016 at 9:45 am

    Oh lady! This is absolutely stunning! I think you’re right – I need some of this in my life this Christmas!

    Reply
  4. Emy says

    November 16, 2016 at 10:01 am

    This is a super fun project! It reminds me of fabric from the 1950’s. Love it!!

    Reply
  5. Joann @ Woman In Real Life says

    November 16, 2016 at 10:28 am

    I adore your idea of deconstructing plaid! This wrapping paper is gorgeous! The paint colours are so lovely and your technique is beautiful!

    Reply
  6. Heather says

    November 16, 2016 at 11:00 am

    I love this so very much. the colours, the gold, everything.

    Reply
  7. Thea says

    November 16, 2016 at 11:04 pm

    I always look forward to seeing your projects because they are always so creative, unique and artistic. This deconstructed wrapping paper did not disappoint. What fun to make, use as wrapping and give as a gift. Gosh you are so talented!

    Reply
    • Ariel says

      November 21, 2016 at 10:50 am

      and you Thea! So darn talented! I wish there was an appetite locally for my style. I’m trying to get myself organized for an etsy shop in the new year.

      Reply
  8. Jessica says

    November 17, 2016 at 12:32 am

    You are too legit to quit!! You are talented beyond the moon.

    Reply
    • Ariel says

      November 21, 2016 at 10:49 am

      YOU my friend, are too nice. I don’t know what I’d do without my blogging cheerleaders

      Reply
  9. Dannyelle @ www.lifeisaparty.ca says

    November 17, 2016 at 8:02 pm

    It’s so pretty, love all your bright colours, you make me want to be a little more colourful. 😉 Perfect for Christmas wrapping.

    Reply
    • Ariel says

      November 21, 2016 at 10:38 am

      Hey, if I can get one colour snuck into your scandi-chic decor, I’ll call it a victory 😉

      Reply
  10. Amy @ My Life From Home says

    November 21, 2016 at 8:29 am

    Absolutely adorable! Shared.

    Reply
  11. Kati says

    November 21, 2016 at 10:41 pm

    I love this idea! I want to DIY all kinds of beautiful wrapping paper now 🙂

    Reply
    • Ariel says

      November 24, 2016 at 11:42 am

      you absolutely should!

      Reply
  12. Sarah says

    November 22, 2016 at 7:46 am

    Deconstructing plaid is the perfect description! Probably the best DIY wrapping paper I’ve seen. It’s so fun and colorful. Love the mix of colors you used!

    Reply
    • Ariel says

      November 24, 2016 at 11:40 am

      I’m so glad you liked it! I had a blast with it, and will definitely be making more to wrap our gifts this season

      Reply
  13. Sonja says

    November 25, 2016 at 7:58 pm

    This is a really great idea, Ariel. You could do this technique for any occasion that calls for gift wrap and even get the kids to personalize their friend’s birthday presents throughout the year!

    Reply
    • Ariel says

      November 28, 2016 at 10:00 pm

      Totally! You guys are always quick with the kid friendly tip! I love it!

      Reply

Trackbacks

  1. Putting together a Christmas Card Mailer • A PMQ for two (and three pets) says:
    November 18, 2016 at 12:38 pm

    […] post about card selection // here // and the DIY Tutorial for that awesome gift wrap // here […]

    Reply
  2. DIY Advent Calendar using your Cricut • A PMQ for two (and three pets) says:
    November 23, 2016 at 6:01 am

    […] you love the wrapping paper on that box? Well you can check-out the tutorial // here […]

    Reply
  3. DIY FAT Paint Holiday Wrapping Paper - Fat Paint says:
    December 5, 2016 at 7:39 pm

    […] we’re always on the look out for fun, new projects or ideas. Last week, we shared an amazing DIY FAT Painted Wrapping Paper tutorial on our social media channels. Can we say ‘Wow!?’ The end result is nothing short of […]

    Reply
  4. DIY Chinoiserie Christmas House - A Blissful Nest says:
    December 14, 2016 at 7:00 am

    […] if you like my painted project, you’ll like these! // here // and // here // and // here […]

    Reply
  5. DIY Christmas Wine Bottle Bags • PMQ for two says:
    November 22, 2018 at 5:55 am

    […] out my other gift wrapping ideas: How to Throw a Gift Wrap party, DIY Painted Gift Wrap, and don’t forget to check out my series on […]

    Reply

Leave a Reply Cancel reply

Your email address will not be published. Required fields are marked *

woman in red dress on counter

Hi! My name is Ariel and I'm the voice behind PMQ for two. I create bright, bold, colourful, and eclectic home decor, DIYs and lifestyle content.

  • Bloglovin
  • Facebook
  • Instagram
  • Pinterest
  • Twitter

PMQ for three

Time For A Cocktail

pmqfortwo

Ariel - PMQ for two
Door handles are one of those things that blend se Door handles are one of those things that blend seamlessly into your home - if done right. AD: We “did it right” with the Myles from @emtek_products . We’ve got them throughout the house, and I’ve shared my thoughts on door hardware on the blog. Trust me, worth a read! Hint: 🦖🦖🦖
•
•
•
#houseandhome #abmlifeisbeautiful #kitchenrenovation #kitcheninspo #toddlermomlife #homerenovationideas #hgtvcanada #hgtvhome #bhgstylemaker #masonite #emtek #retrokitchen #glamhomedecor
Anyone else sit in bed and send memes to your frie Anyone else sit in bed and send memes to your friends for like 30mins before falling asleep? No? Just me? 🤷🏼‍♀️
•
•
•
#bedsidetable #bedside #bedtime #bedroomdecor #bedroominspiration #bedroomideas #bedroomstyling #gallerywalldecor #gallerywallhashtag #ikeahack #brighthome #mymitzi #abmlifeisbeautiful #ikeacanada
I made some felt hand puppets for June, and they’re totes adorbs, and a great way to include more skin tones in your child’s play. Head to the blog to see how I made ours ❤️
•
•
•
#handpuppet #felting #feltcrafts #montessoriathome #montessoritoddler #montessoriactivity #montessoriinspired #montessoriactivity #toddleractivity #toddleractivitiesathome #modfashion #bhgstylemaker #inclusiveplay #michaelsmakers
I am this week’s feature on the @littleyellowcou I am this week’s feature on the @littleyellowcouch podcast and I gotta say - FAN 👏🏻 GIRL 👏🏻 MOMENT. I had been listening since there were 2 hosts, and really got into it when I went full time with the blog during our first year posted to Gagetown. I found my colourful voice, and started making things like this beautiful glossy blue sideboard. 
There wasn’t really anyone else doing “colour” my way in the decor space at that time (everything was white farmhouse). And while there are definitely many more who do it now (and who do it better!), I’ll never forget the freedom I felt when no one was watching what I did. It has been so incredibly bittersweet watching new accounts lap me in a matter of months (and oh so humbling), but I like to think I’m exactly where I need to be. 
My growth has been slow by today’s standards, and I’m ok with it. I still get to do what I love. 
So, if you’ve been following me since then, the very beginning, or last week - stick around! Let’s see what the next stage is like. 
•
•
•
#eclecticdecor #eclectichome #eclectichomedecor #eclectichomemix #sodomino #hgtvcanada #hgtvmagazine #apartmenttherapy #behrpaint #upcycledfurniture #thriftedhome
Y’all Après Ski is a mood,and it is the spirit Y’all Après Ski is a mood,and it is the spirit with which I decorate for winter. Cozy furry things? ✅ Champagne ✅  Oversized sunglasses? ✅ hot cocoa with homemade marshmallows? ✅ a roaring fire? ✅  what’s on your chilly winter must list?
•
•
•
#apreski #apresski #winterwonderland #winterdecor #winterdecorating #winterdecoration #glamdecor #vintageski #skichalet #bhghowiholiday #vintageholiday #vintageaesthetic #eclecticdecor #eclectichome #cozyvibes #cozyhome
JB’s Montessori playroom is looking pretty good, JB’s Montessori playroom is looking pretty good, especially now that all the Christmas decor is gone. Bear in mind, this is what it looks like before a child has actually had a chance to play in it 😂 
•
•
•
#montessoriathome #montessoritoddler #montessoriinspired #montessoribaby #montessoriplayroom #playroomdecor #playroominspo #playroomideas #bhghome #society6 
#eclectichome #lorenacanals #thrifteddecor
It’s winter. It’s snowing here, and it’s col It’s winter. It’s snowing here, and it’s cold. Time for snowflake shaped tea cup cookie rims, and @jacksonmorgancream in your afternoon tea. ✌🏻🫖🍫
•
•
•
#hyggehome #hyggelife #hyggelifestyle #whiskeygram #teatime☕️ #teatime #afternoonteatime #cocktailsofinstagram #cocktailrecipes #bhgstylemaker #bhgfood #anthropologiehome
Load More... Follow on Instagram

- THEME BY ECLAIR DESIGNS -

Cookies ????

This site uses cookies: Find out more.