

I greatly enjoy creating seasonal decor. Halloween & Christmas lend themselves best to my making, and these Haunted House Silhouettes are the latest example. Using my Heavy-duty Easy Change Detail Knife Set (with 11 blades) I hand cut 4 haunted house silhouettes for some spooky candlelit decor.
*Fiskars sponsored this post, but all thoughts are my own. Thank you for supporting the brands that make PMQ for two possible.
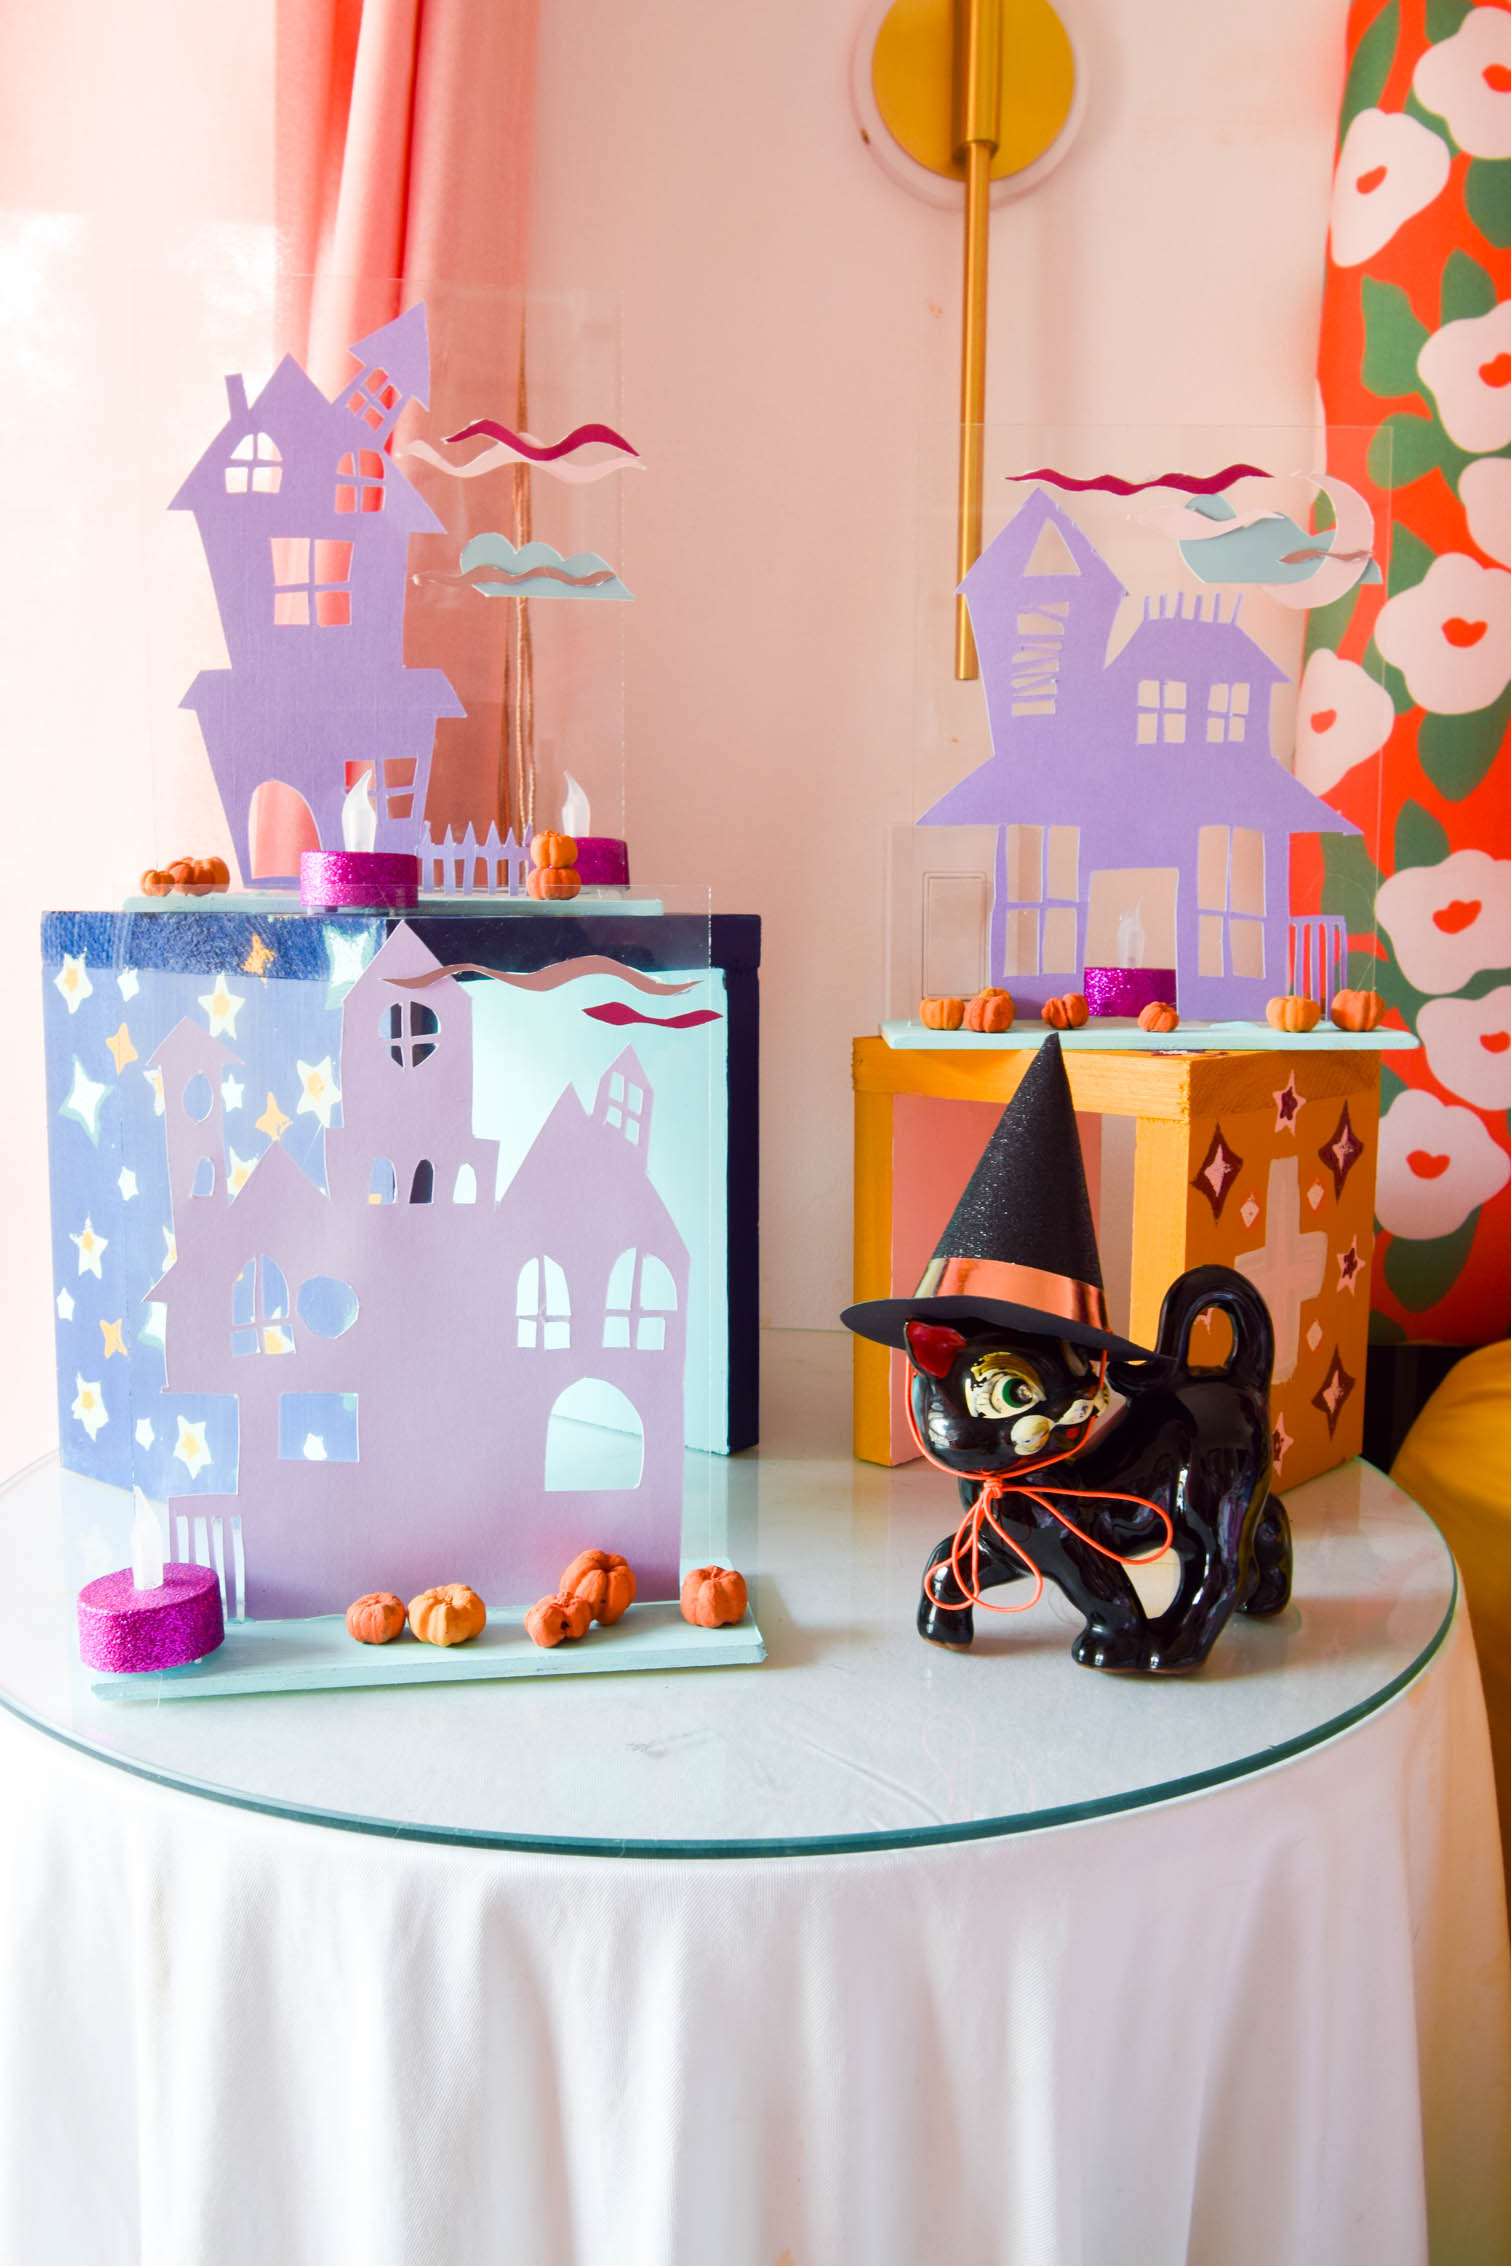

Haunted House Silhouettes
I’m sure you know, but silhouettes make for great haunted decor vibes. Flickering light, dancing shadows and so on. Because I didn’t want . to cut great big ones for our windows, I thought I’d cut smaller ones for more moveable decor.
I’ve done witch silhouettes & masked portrait silhouettes, and now we can add haunted houses to the list.
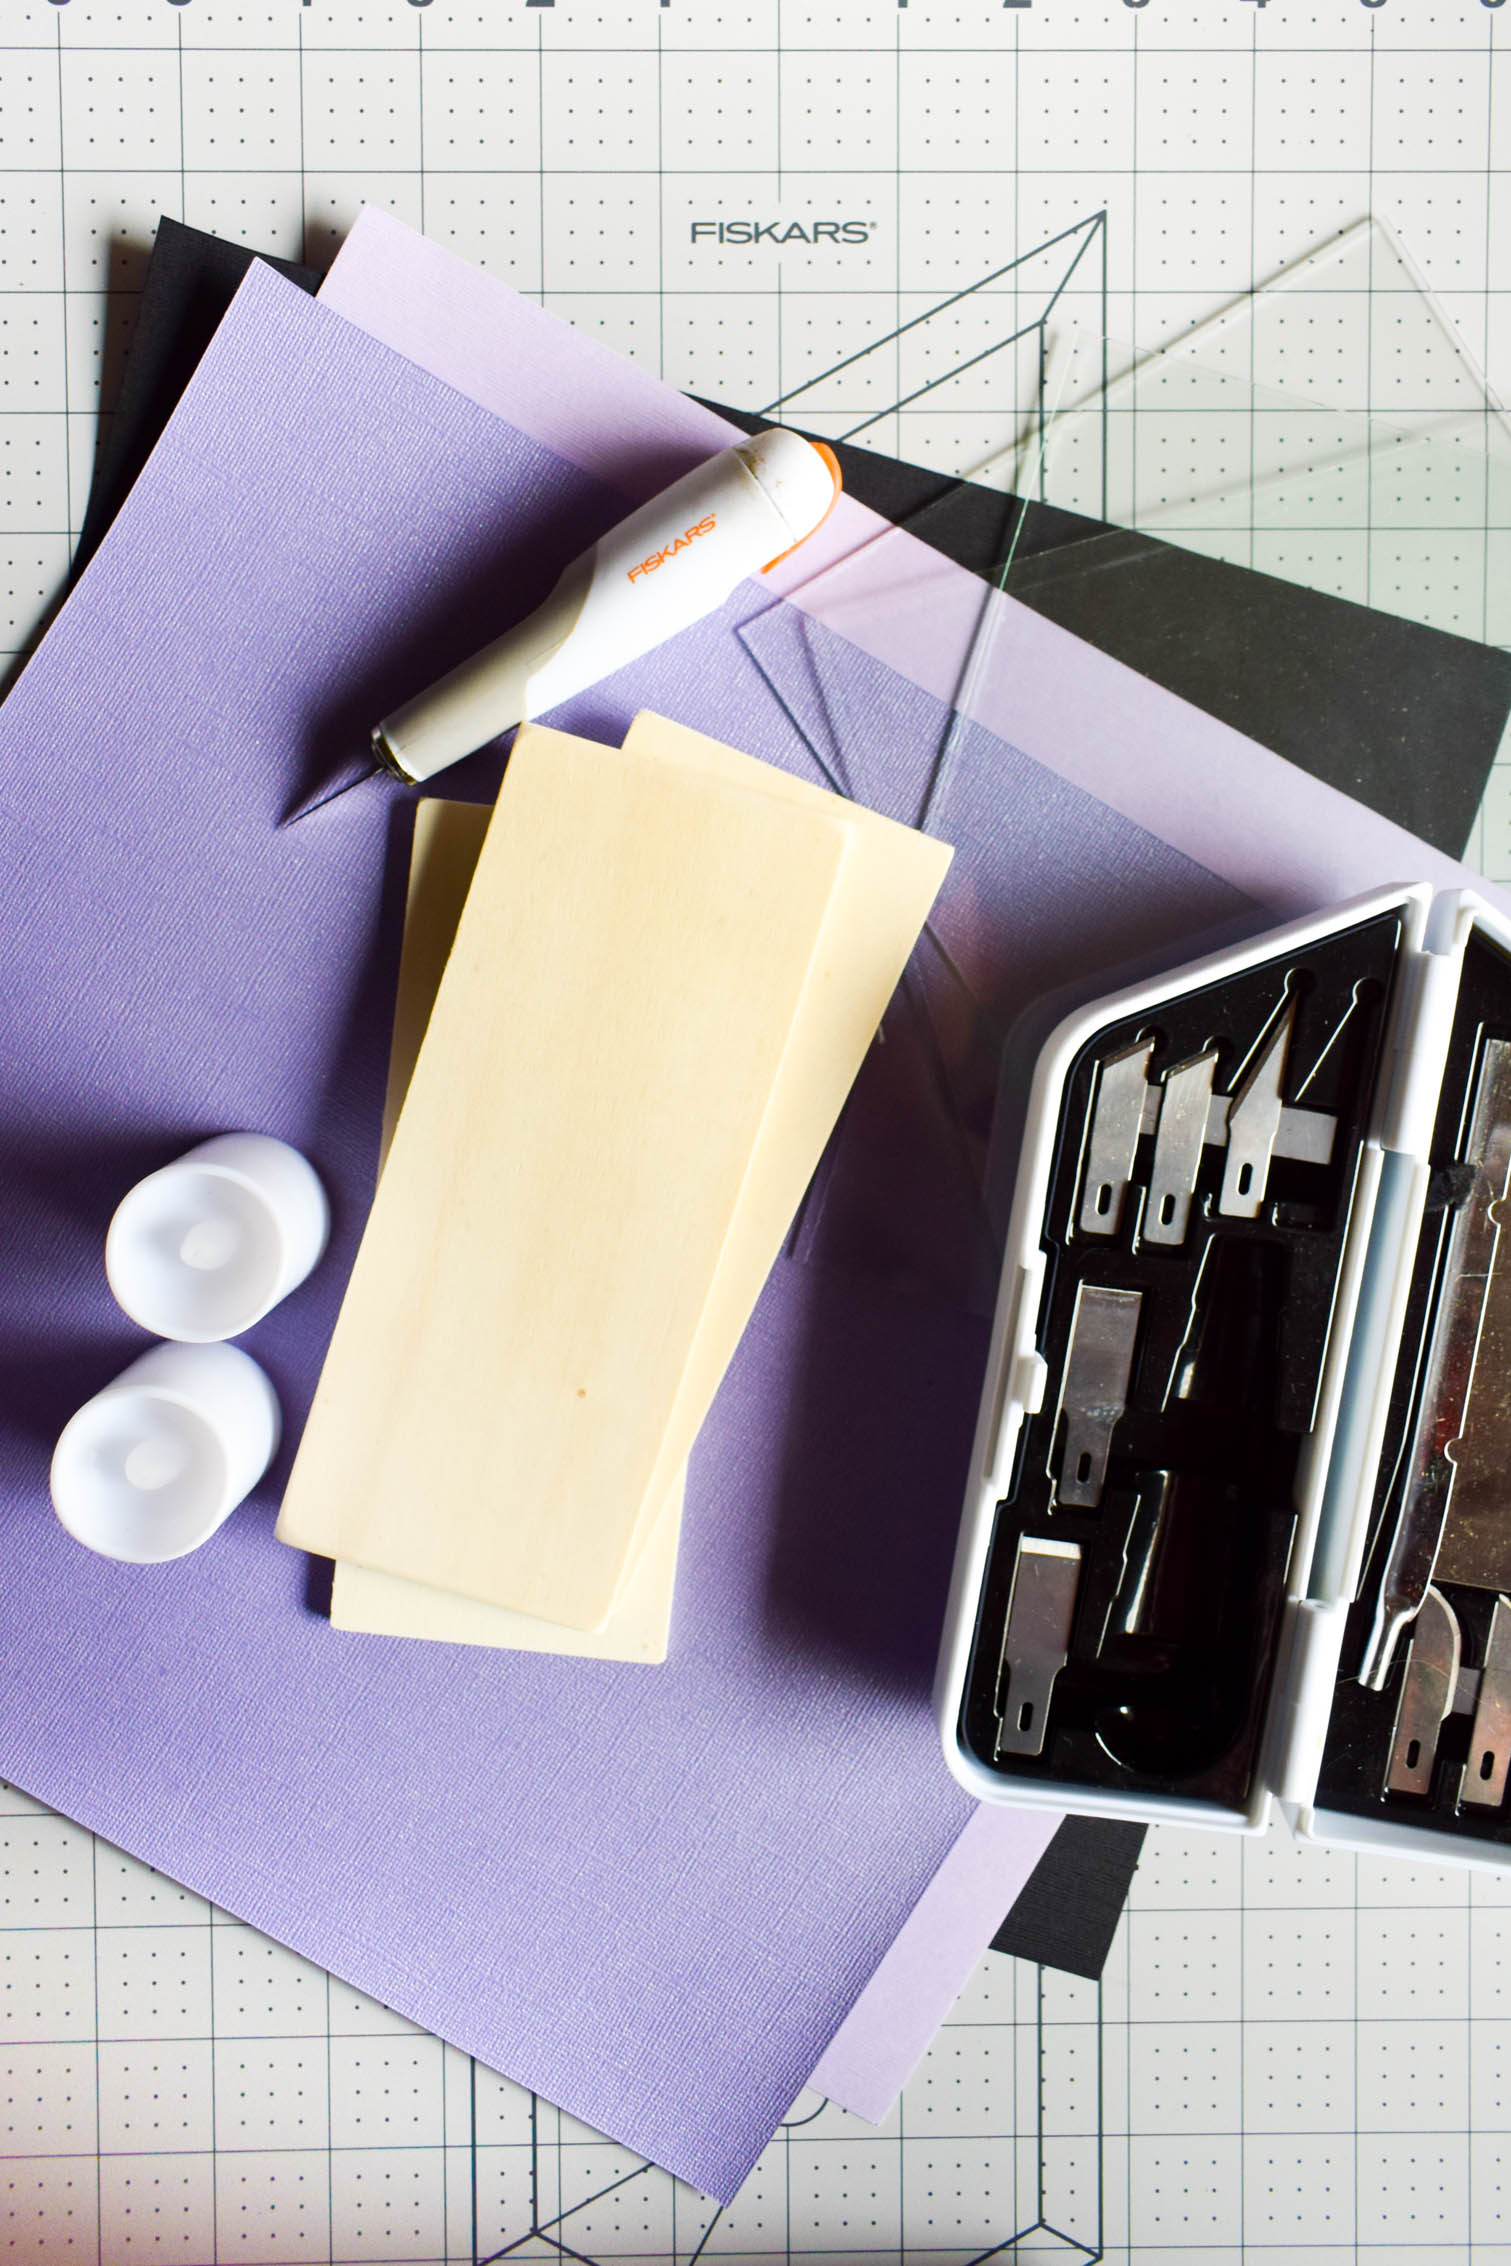
What you need to make haunted house silhouettes
To make these, I used cardstock, the glass from picture frames (I got these at the dollar store), wood bases, hot glue, a cutting mat (I used this one), and Fiskars’ Heavy-duty Easy Change Detail Knife Set (with 11 blades). I also used some LED battery tea lights for the candles, but I think the silhouettes are beautiful enough on their own that they don’t need the flicker. Up to you though!
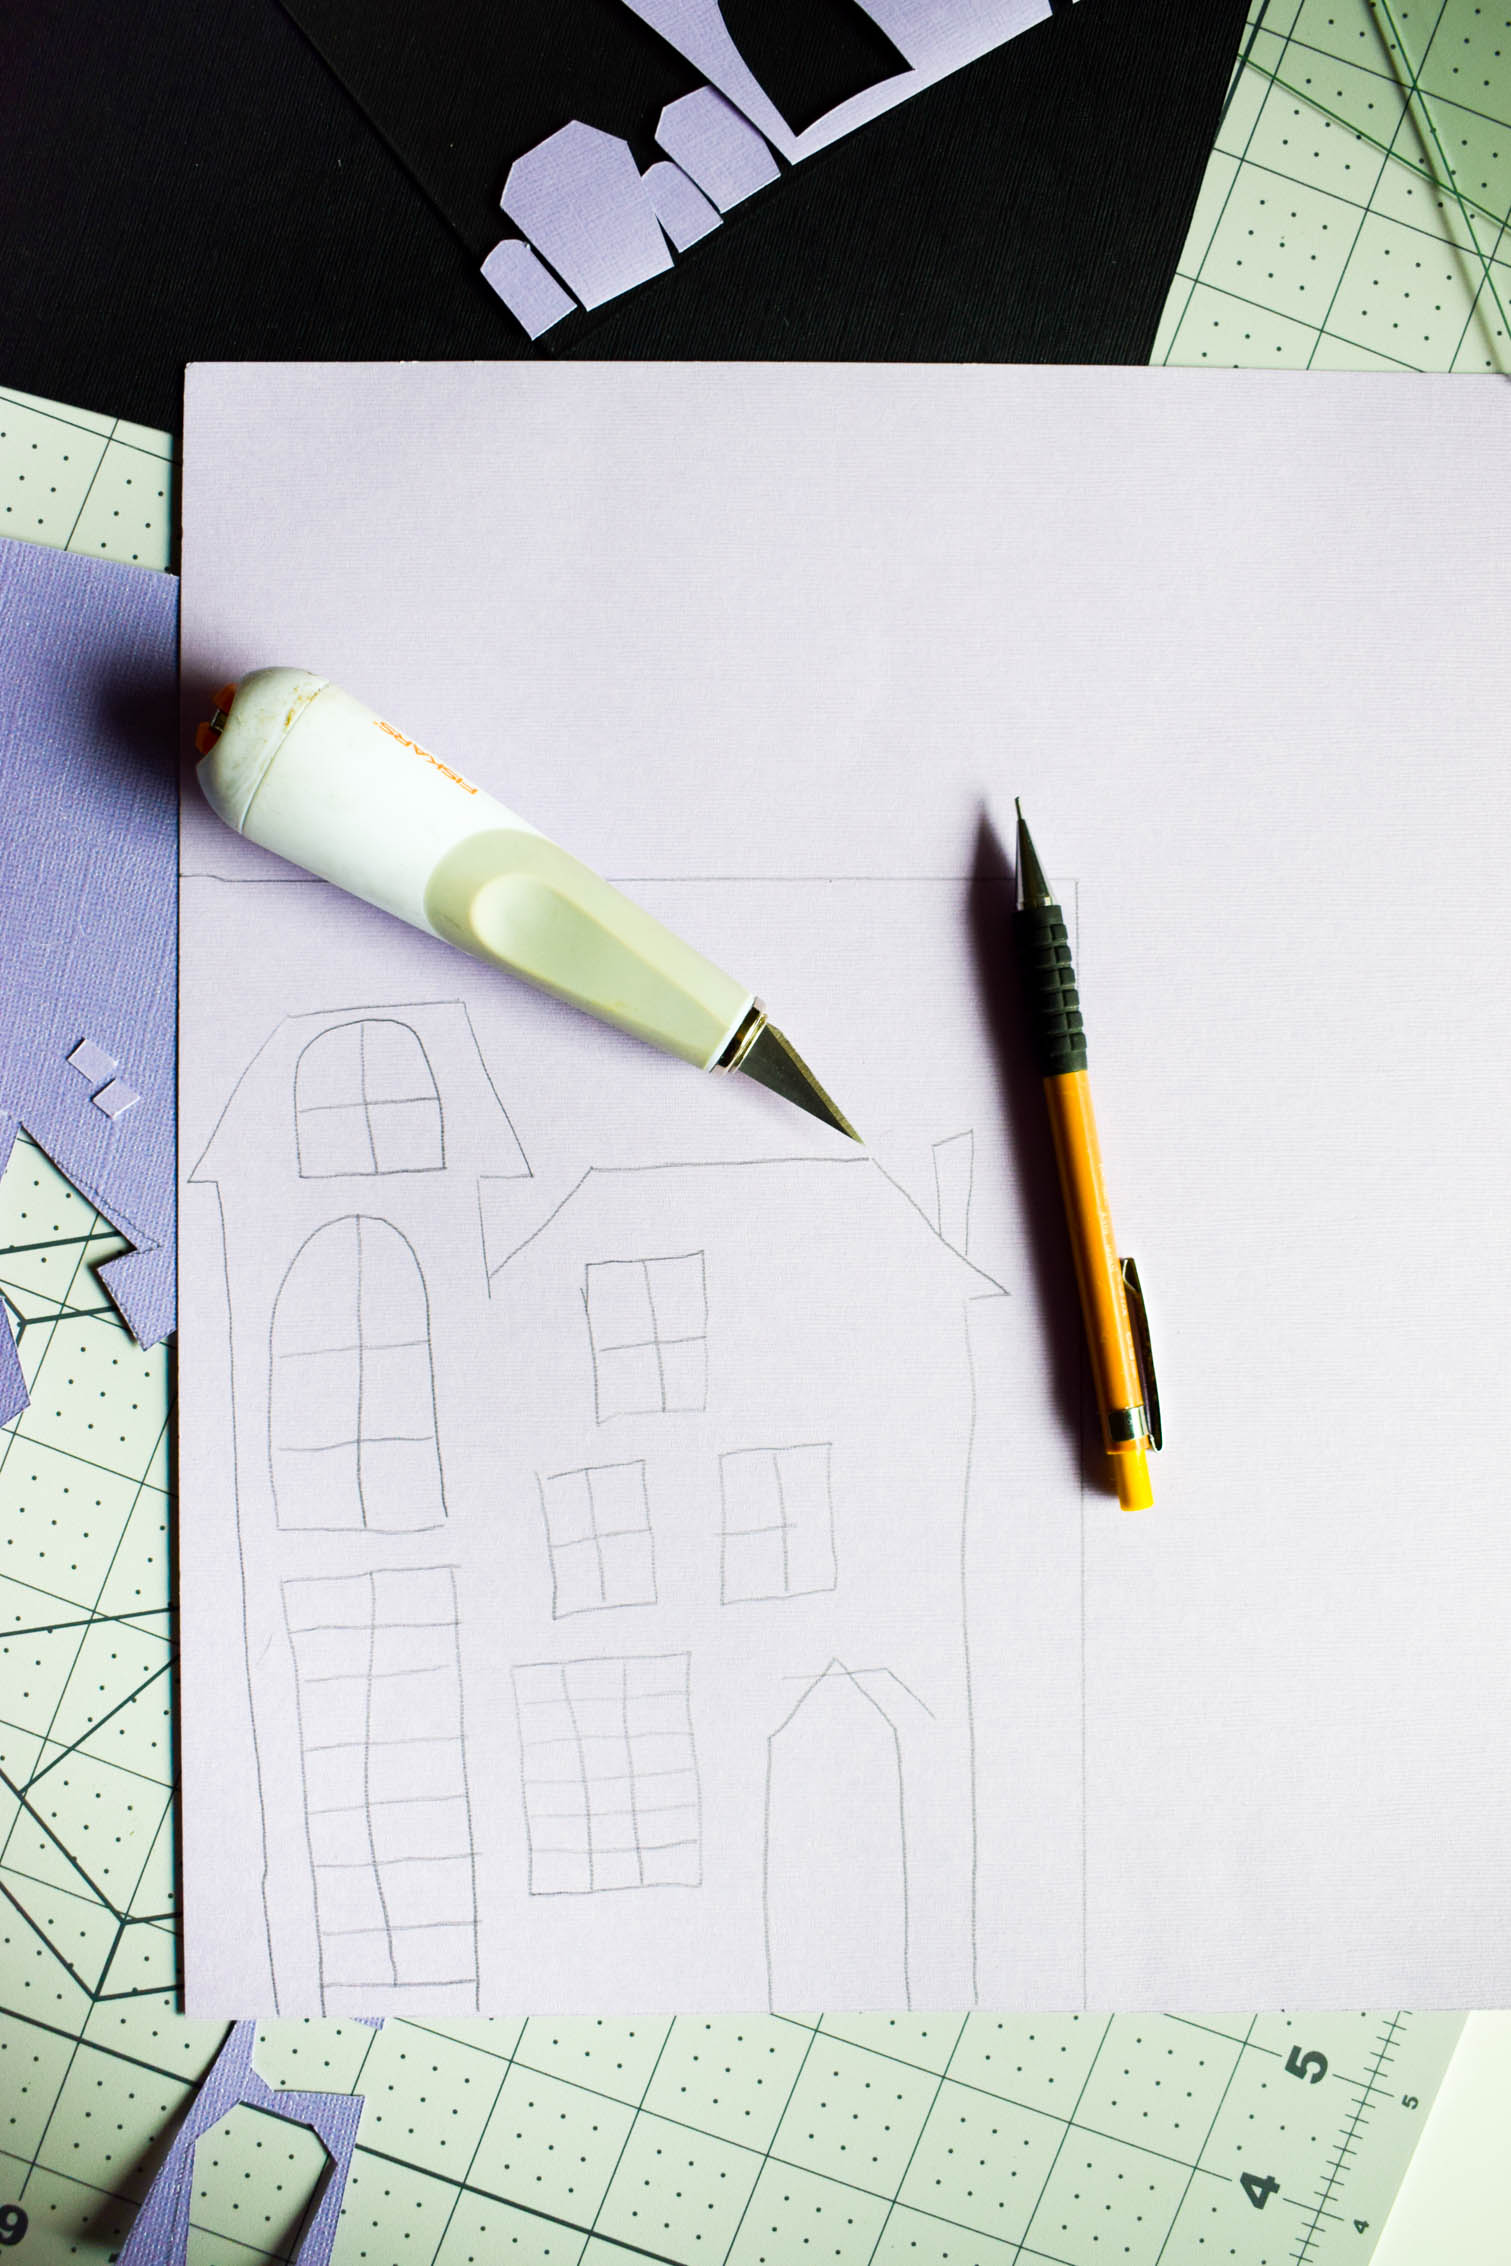
Cutting Haunted House Silhouettes
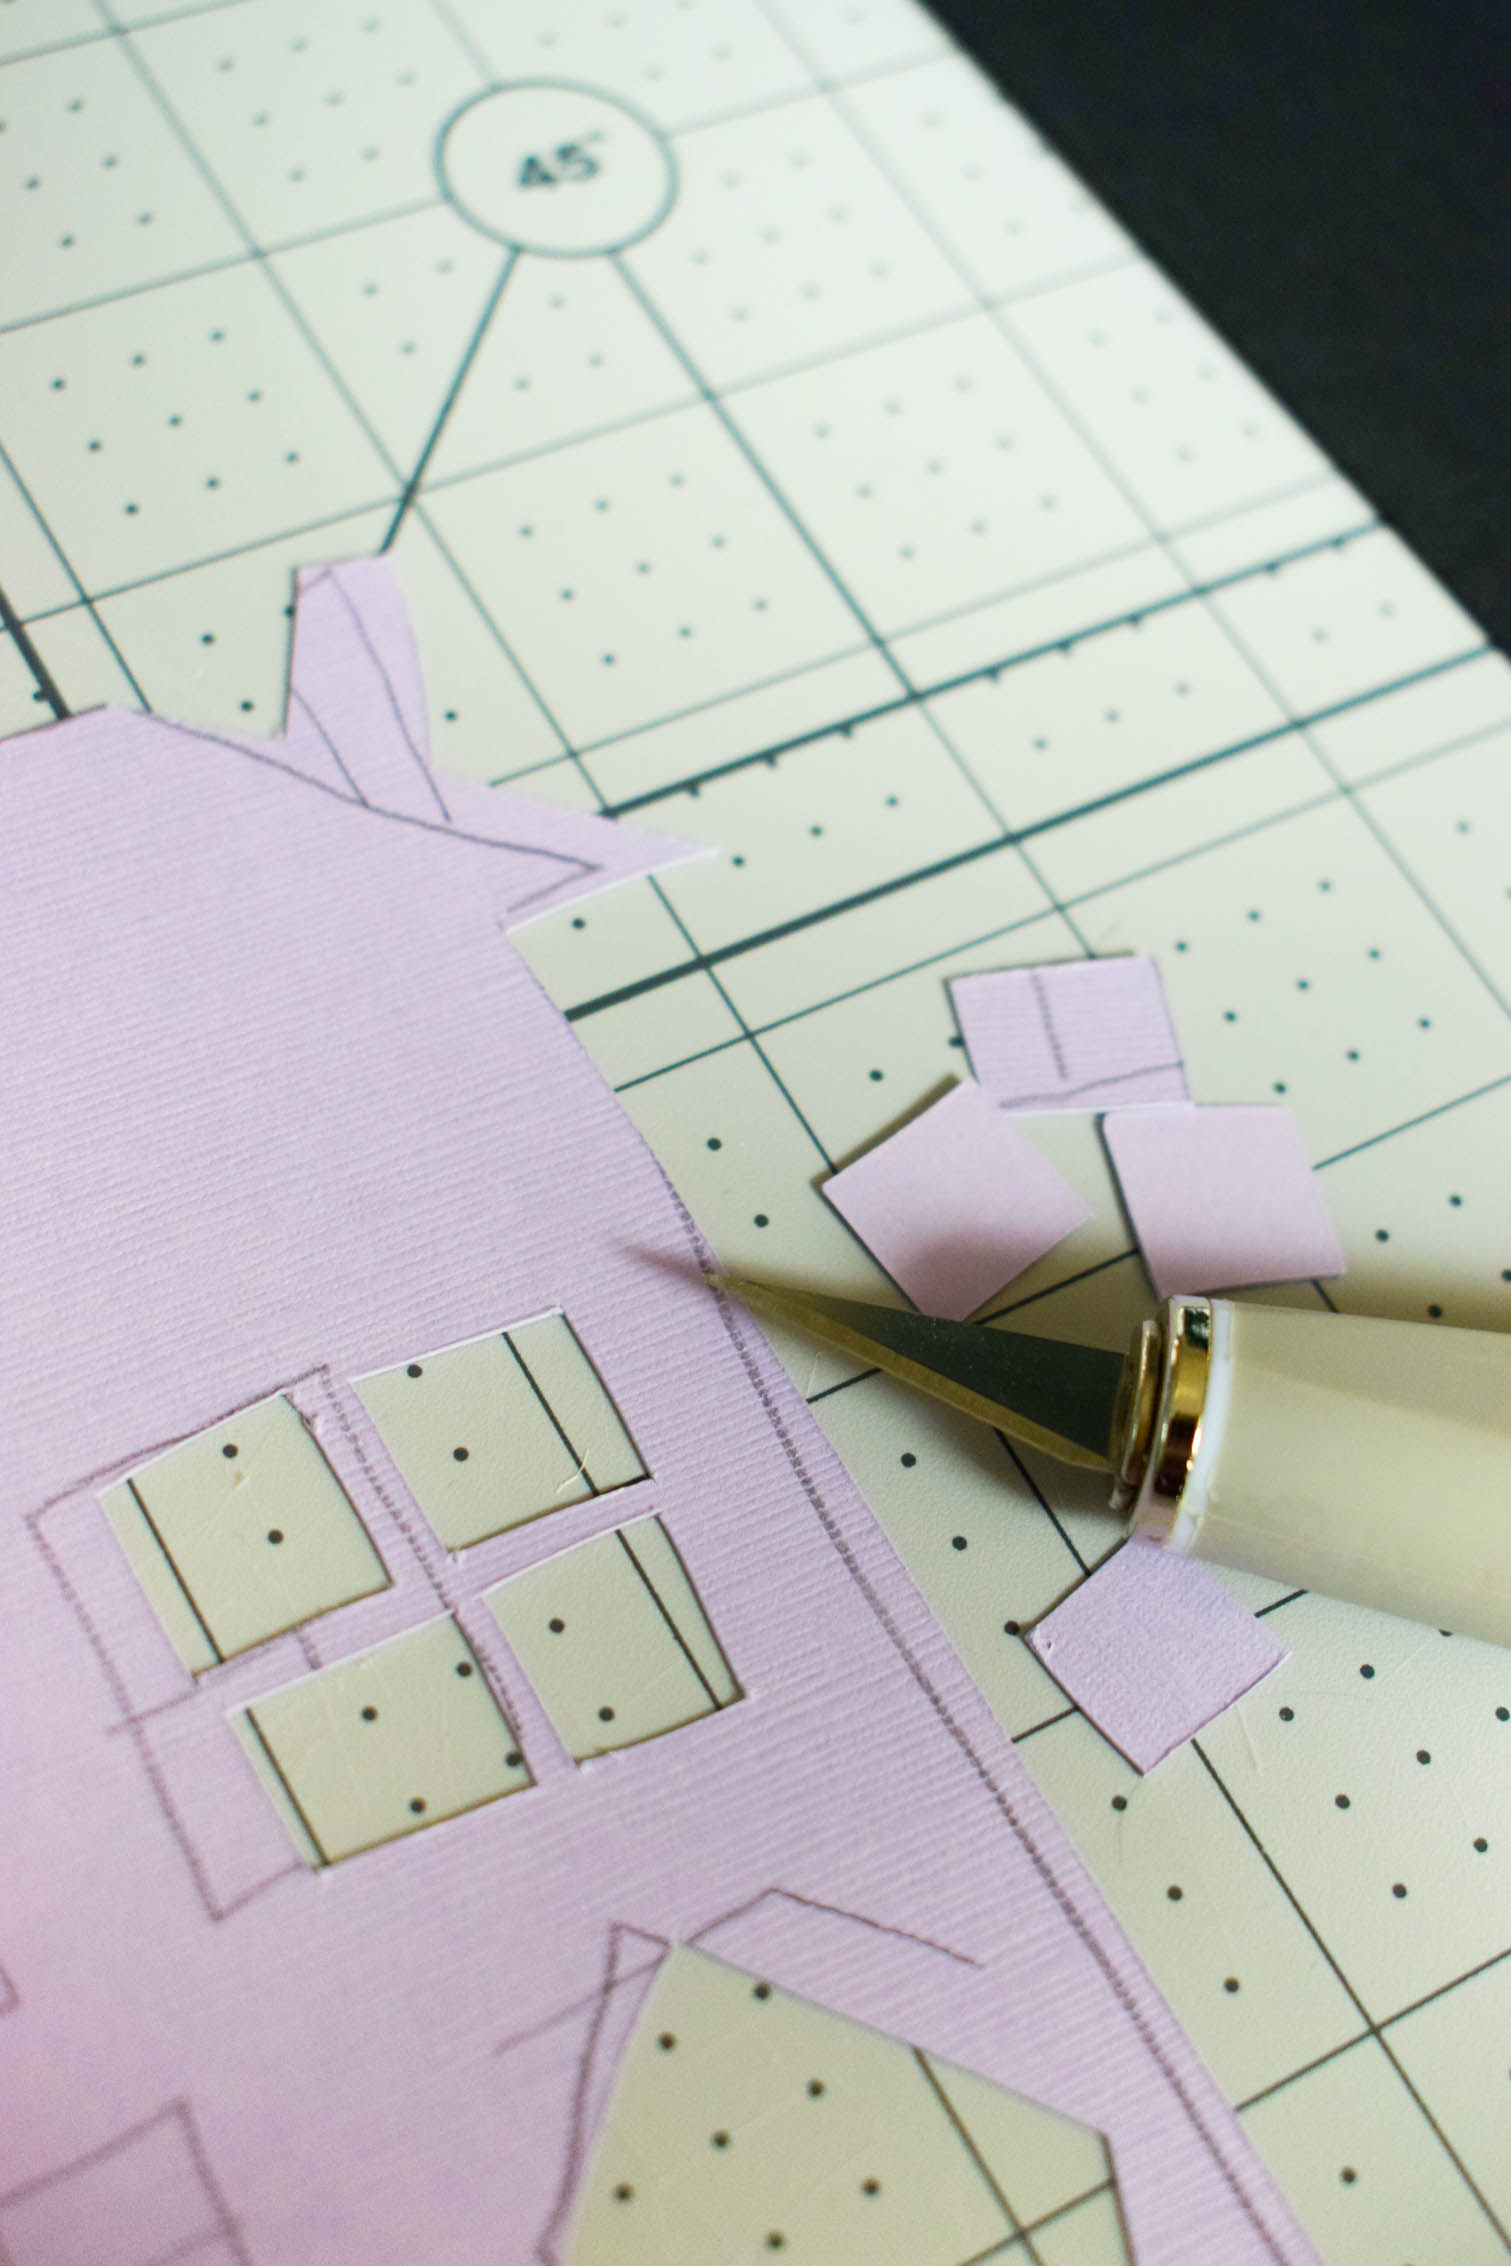
To start, I recommend tracing or sketching your house design. I did it on the back of the cardstock so that the right side wouldn’t be marked-up with pencil.
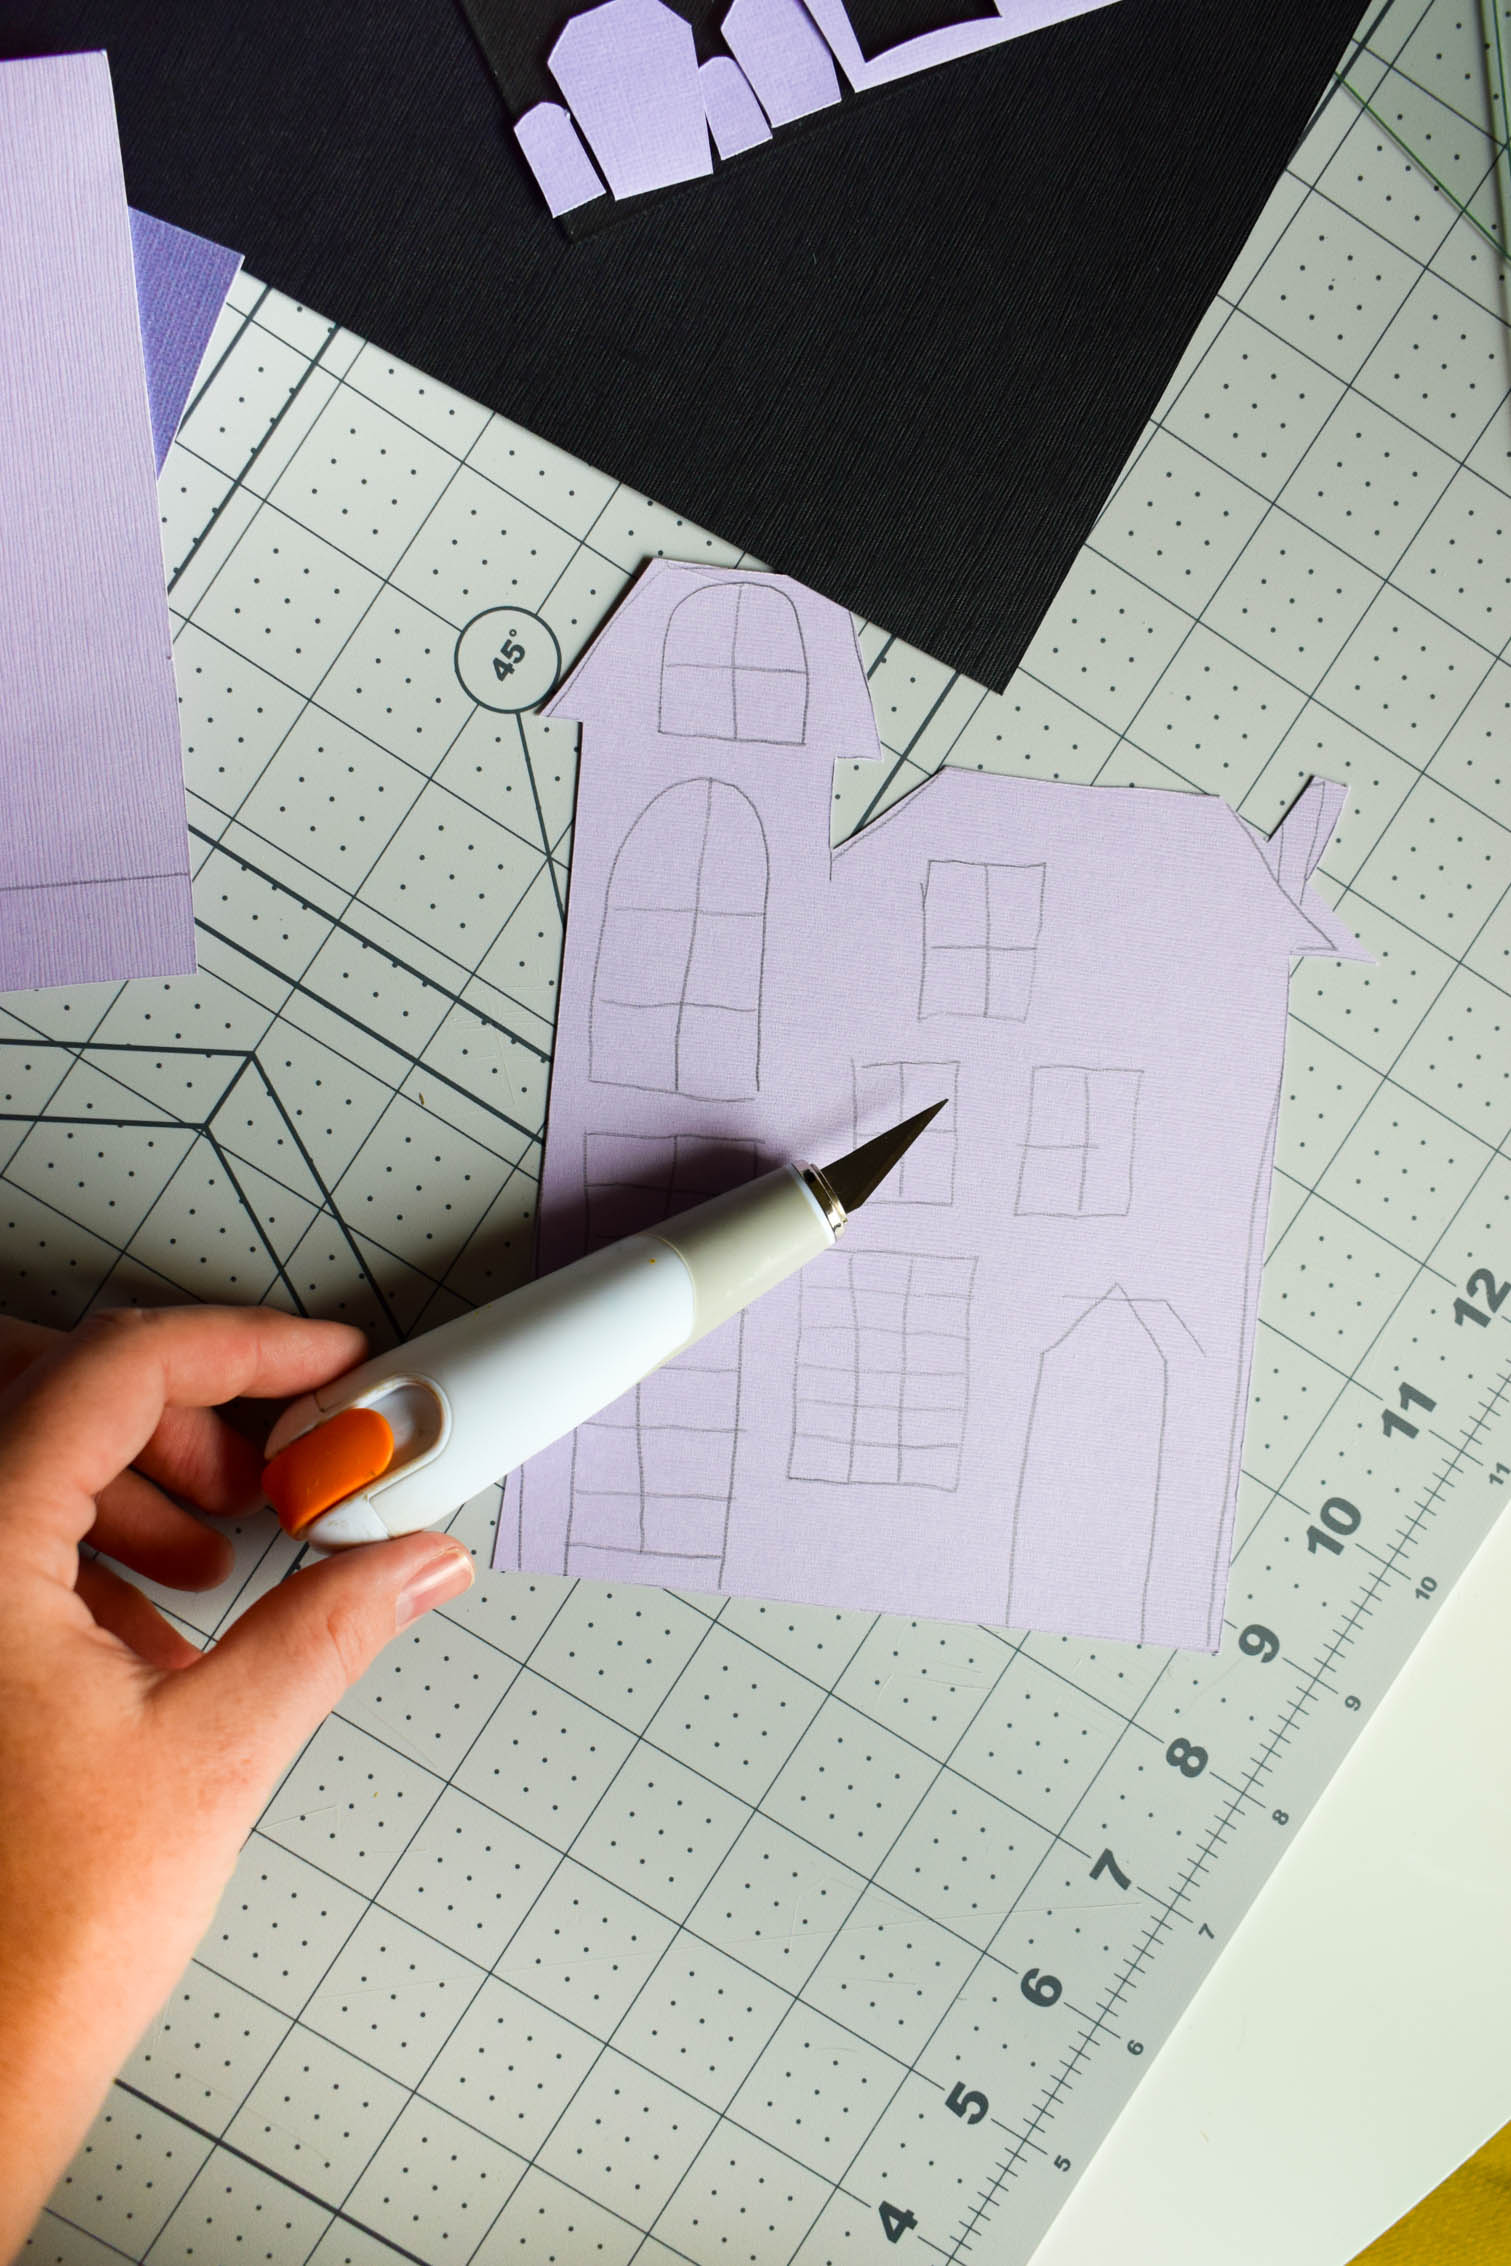
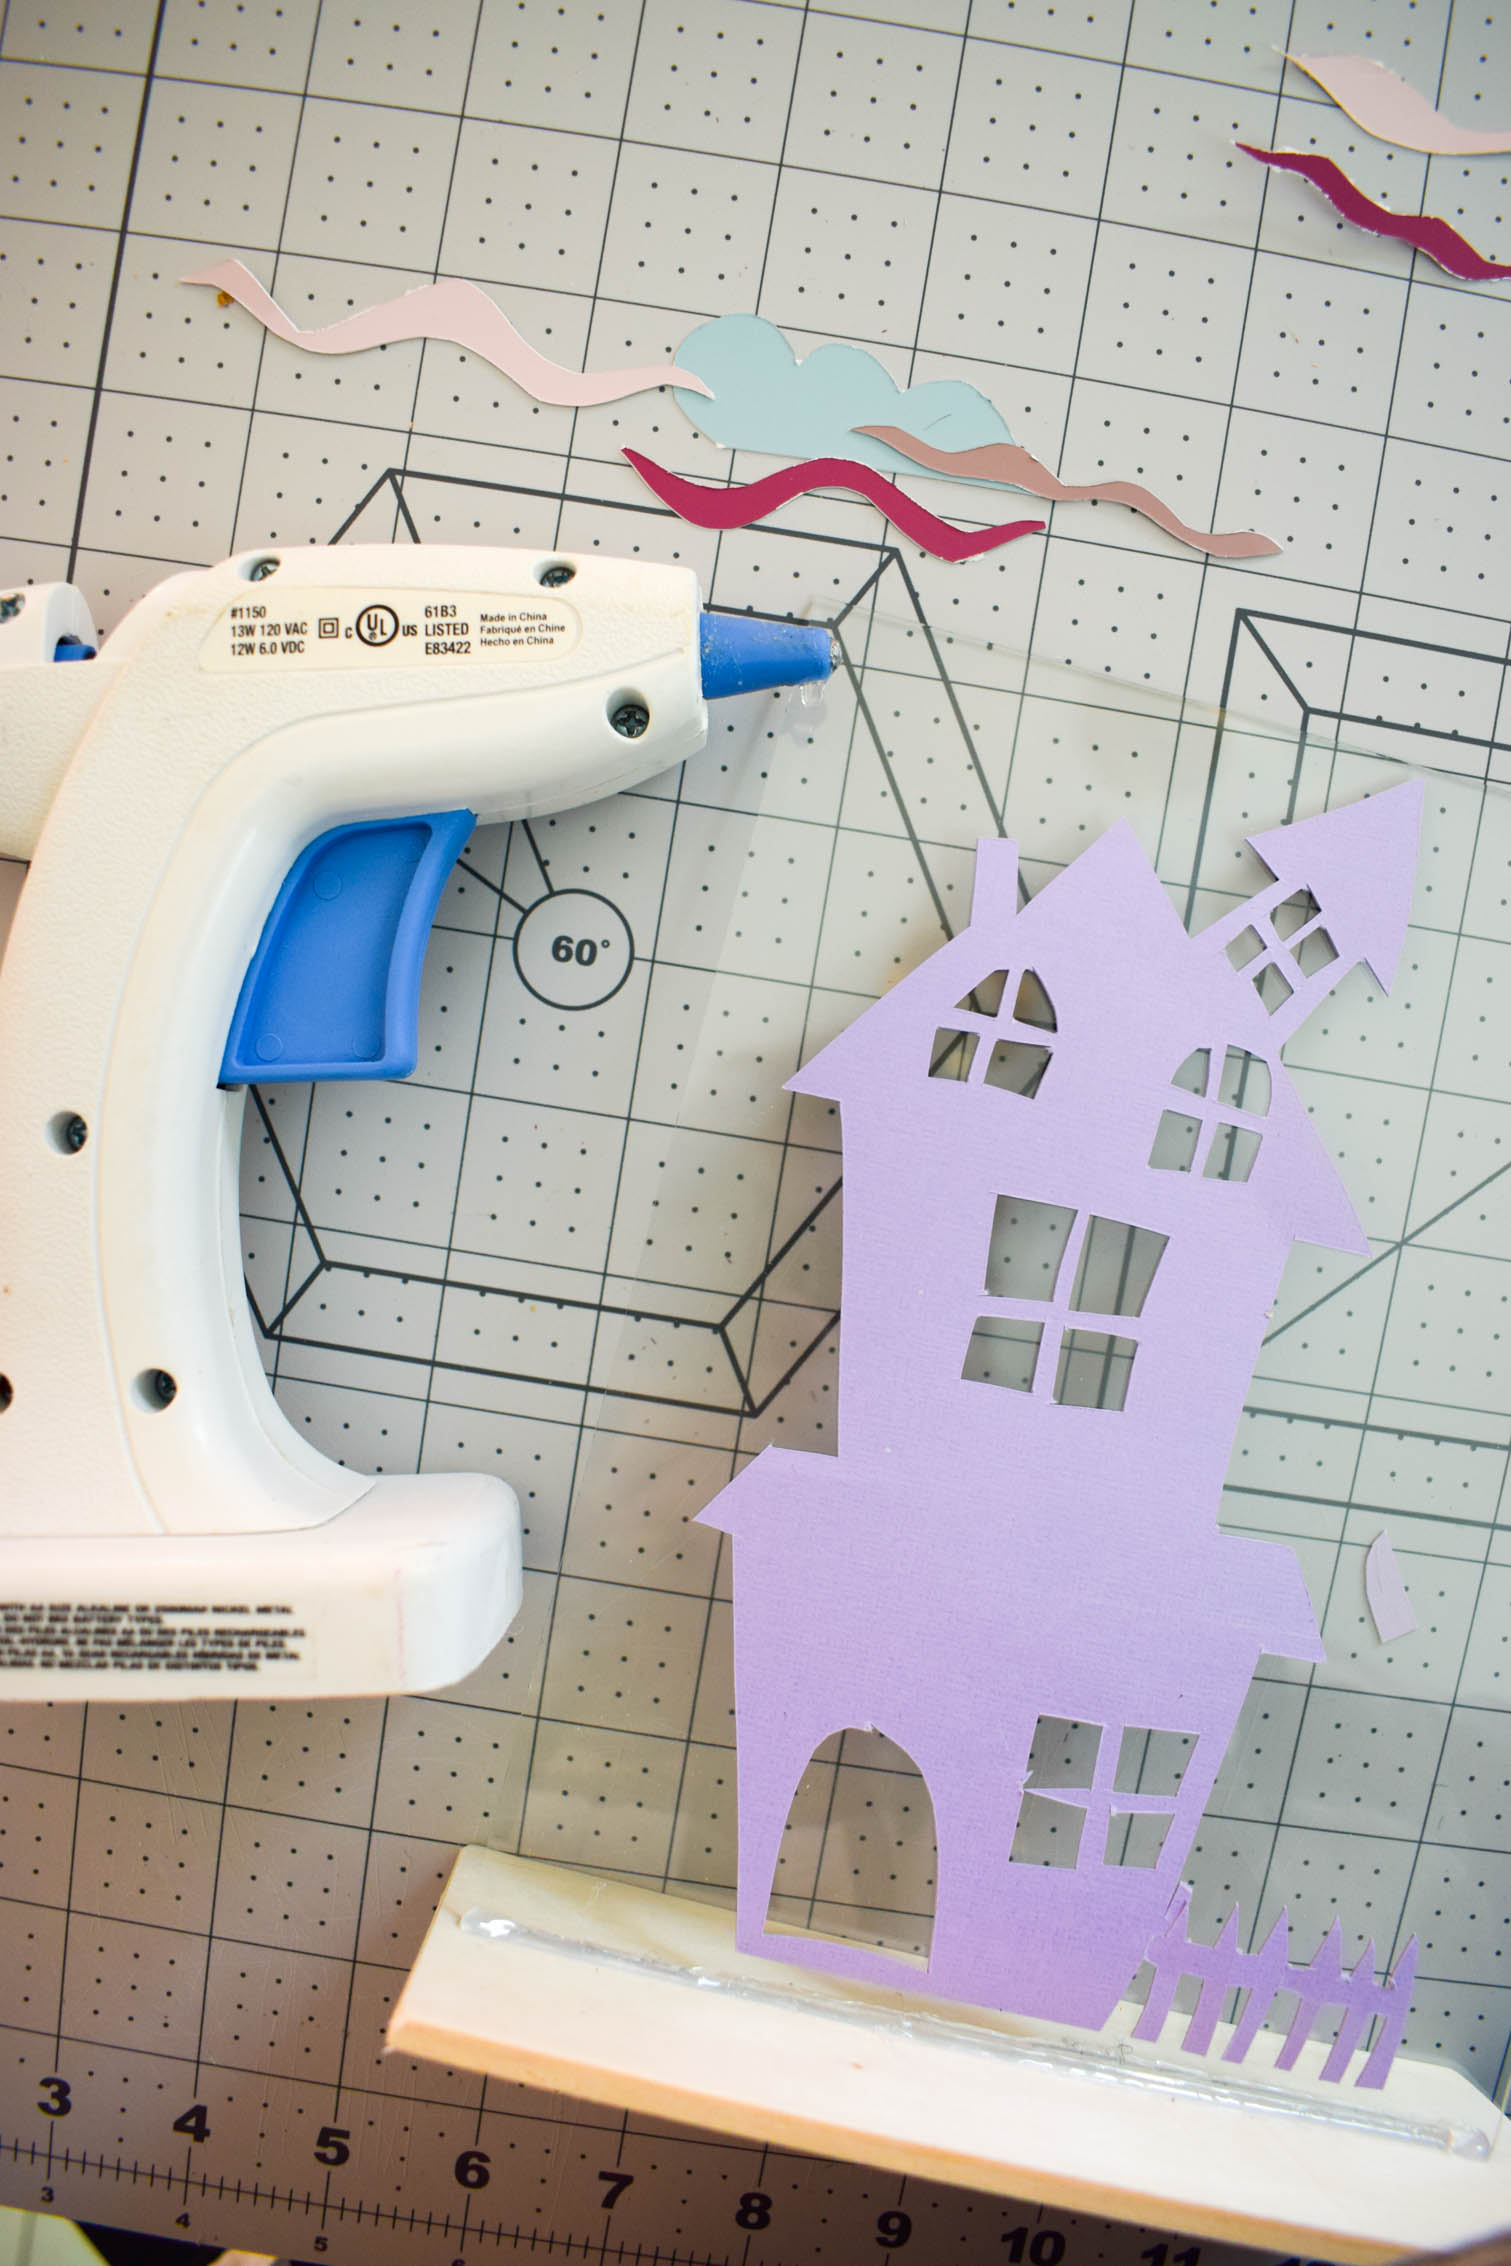
Then, using your Heavy-duty Easy Change Detail Knife Set (with 11 blades), on the cutting mat, trace the design your sketched out. I didn’t have to use much force to cut the details through the card stock, and the knife maneuvered with ease.
I had been concerned that the knife would be hard to make curves with, but it wasn’t a problem. I also didn’t have any issues cutting the small window panes. Hooray! Gotta love when a DIY tool works to perfection!
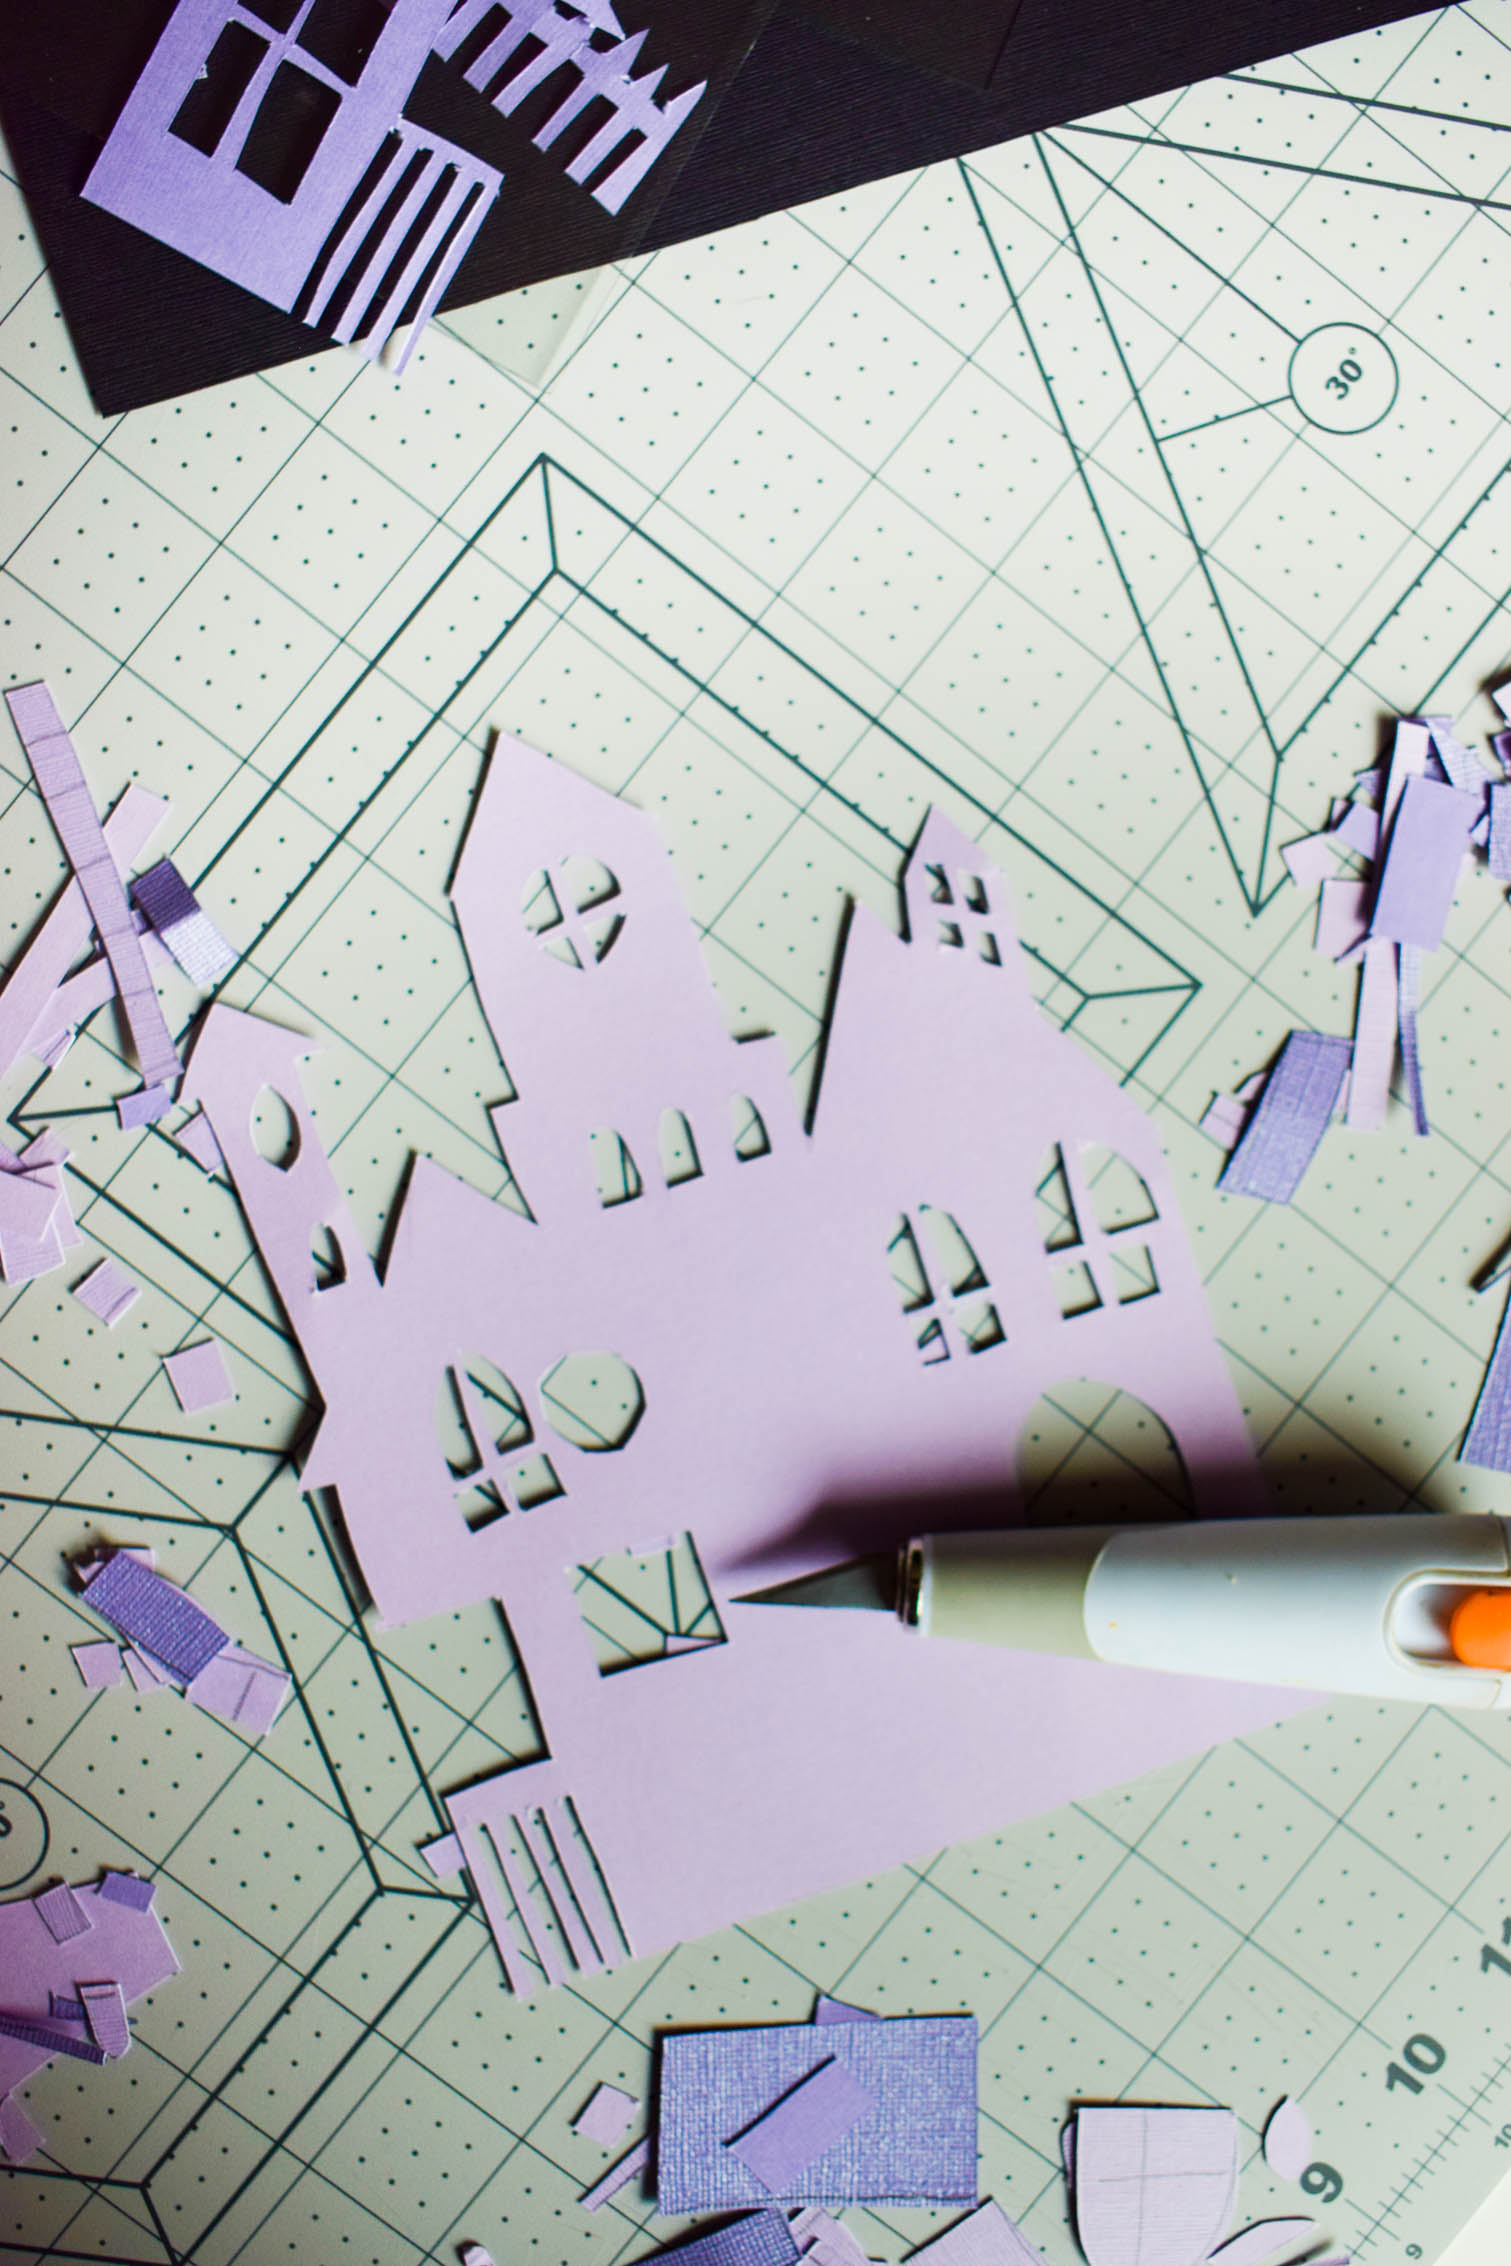
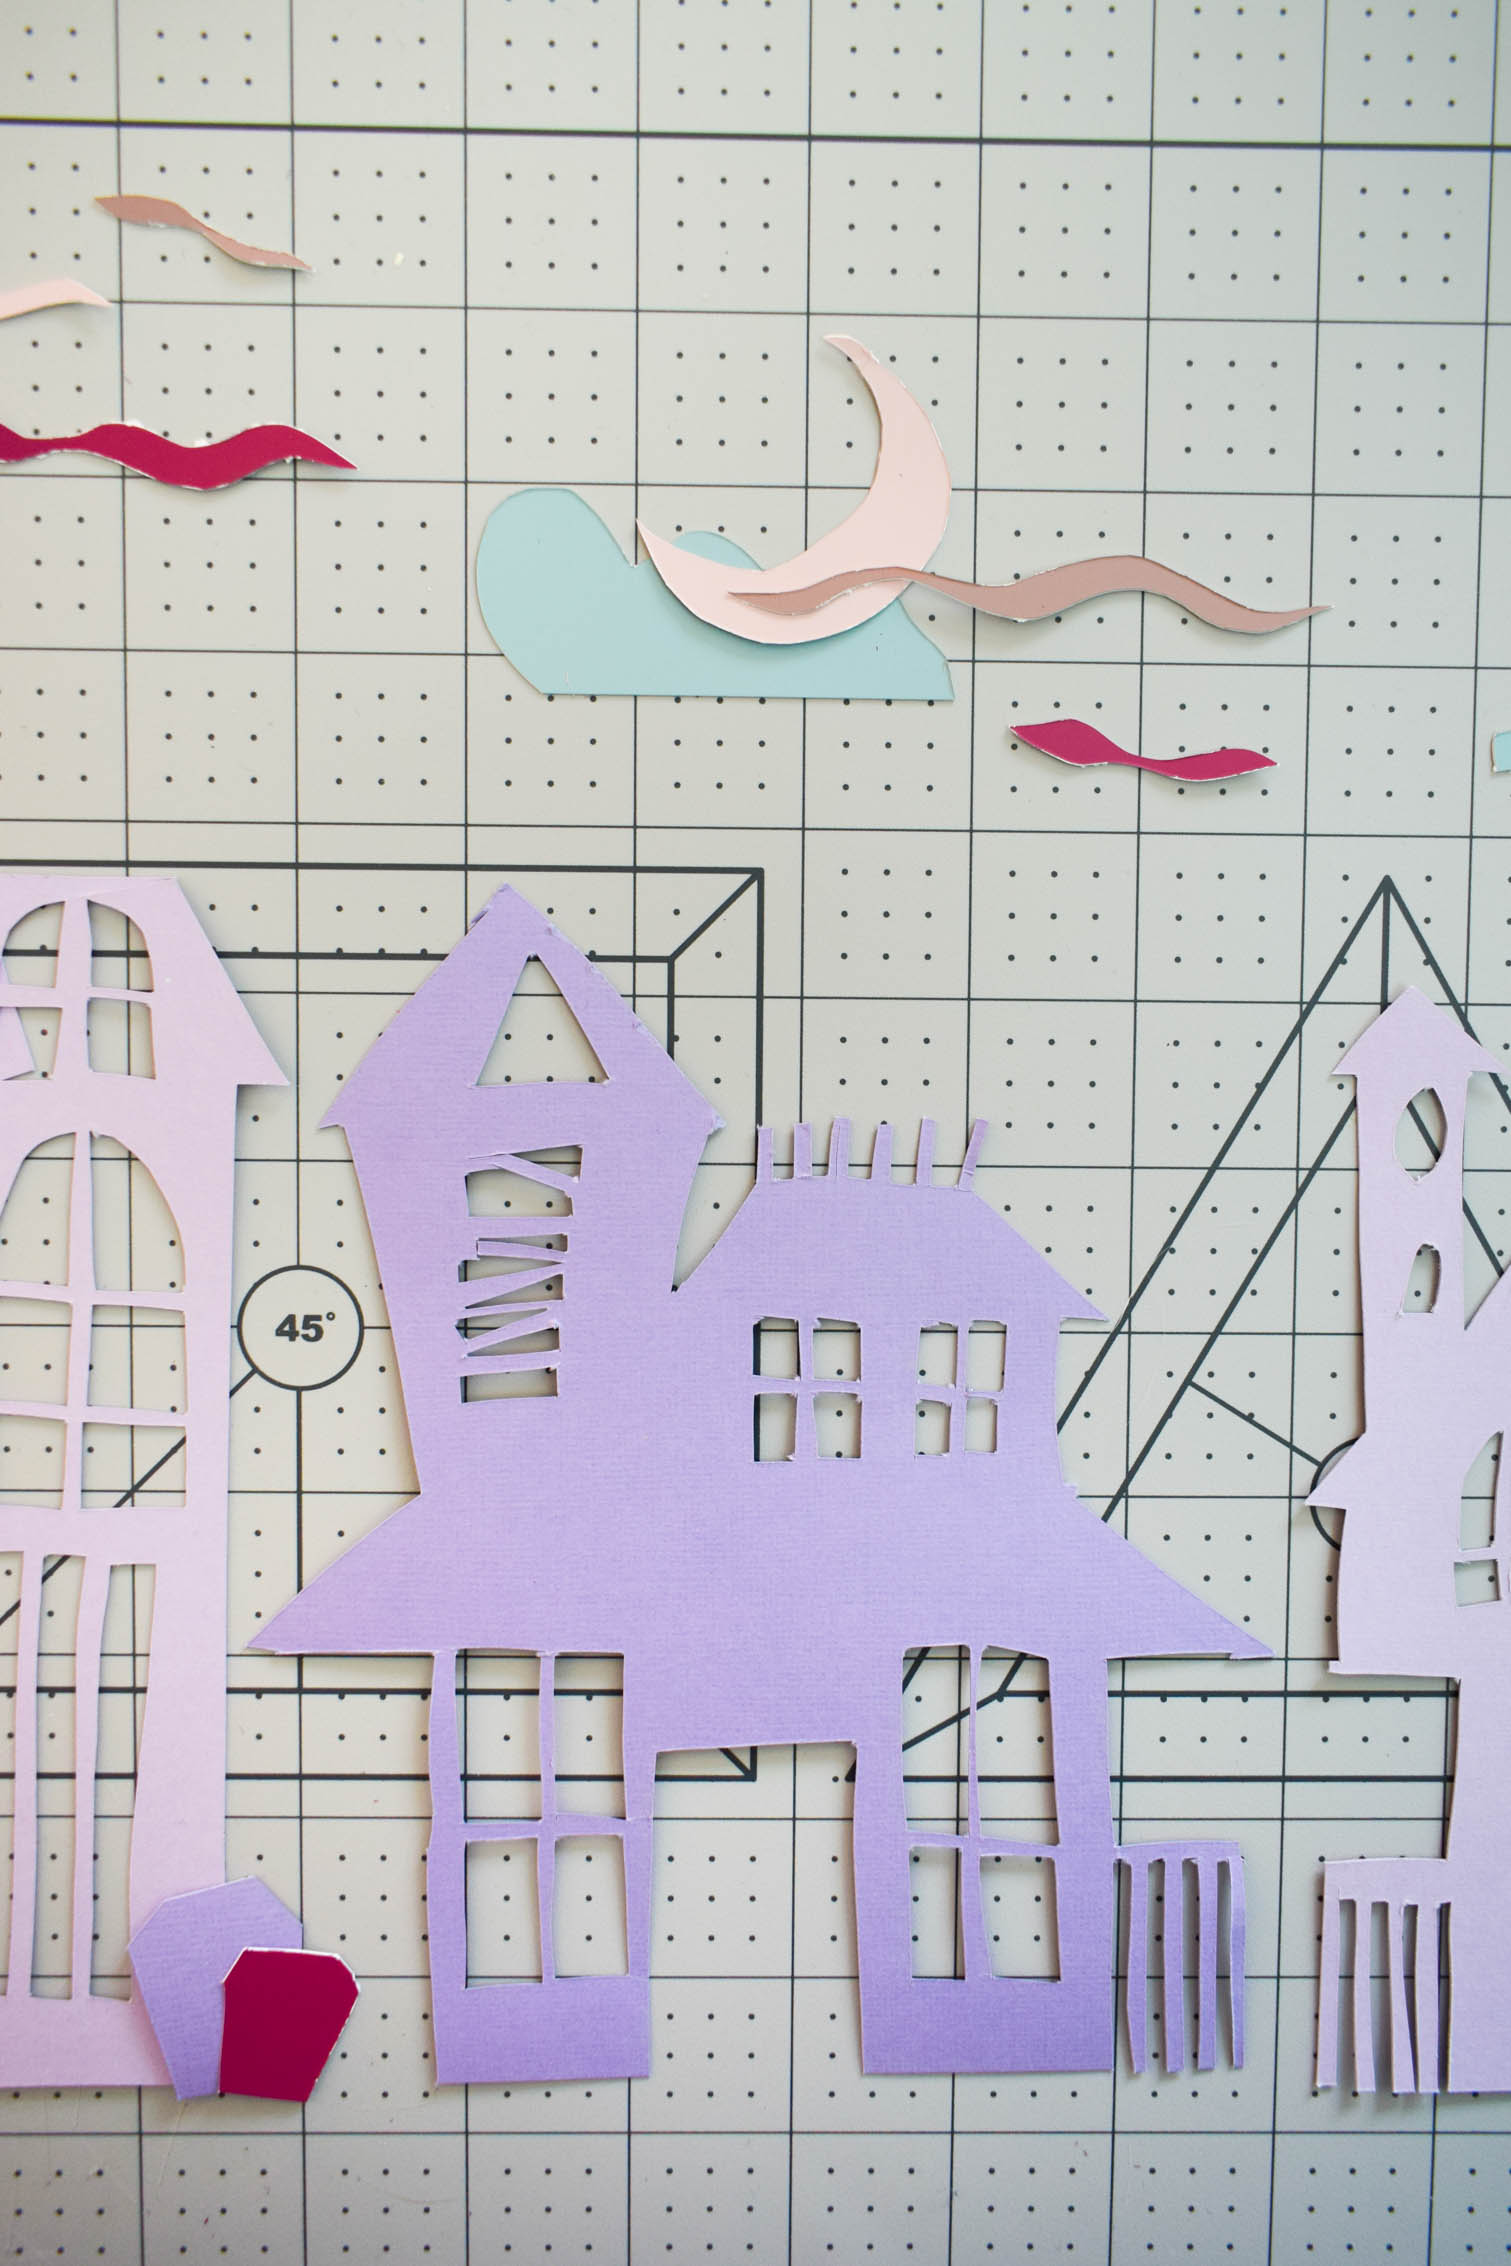
Using your Heavy-duty Easy Change Detail Knife Set , cut as many silhouettes as you want, with as many details as you want. I felt like 4 was a good number, so I went with that, and even cut out little mist wiggles and a crescent moon.
Building your silhouettes
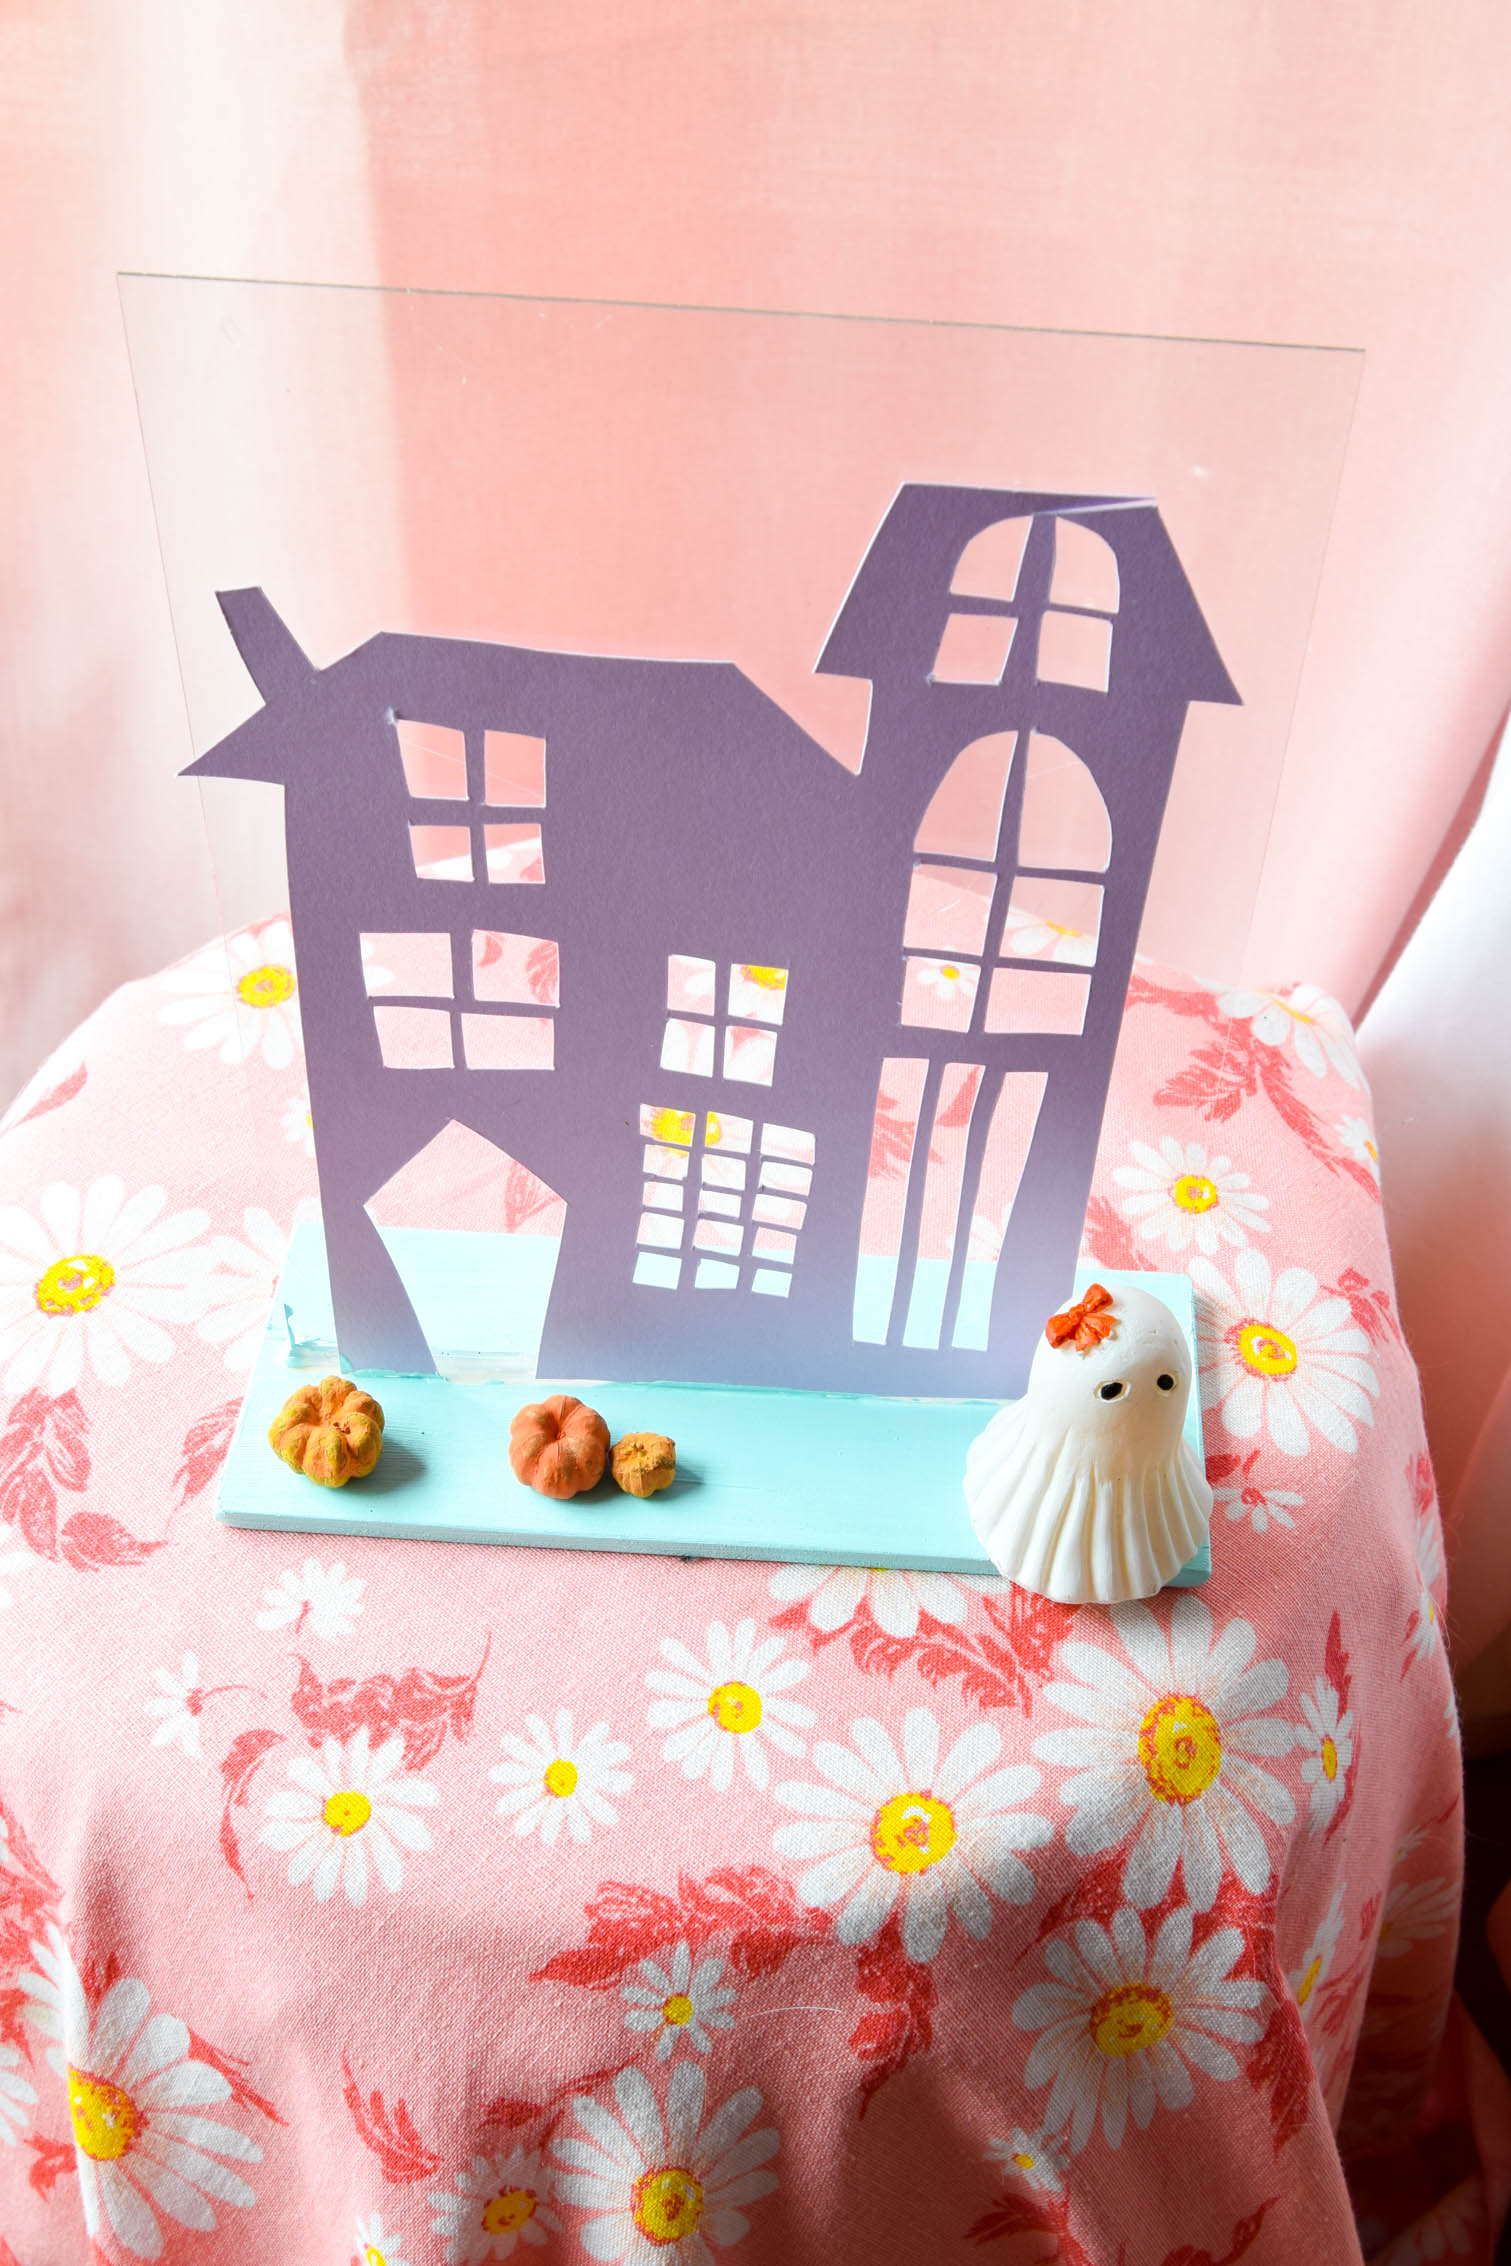
Once all my haunted houses were cut, I glued a wood base and a piece of glass together at a perpendicular angle using a hot glue gun.

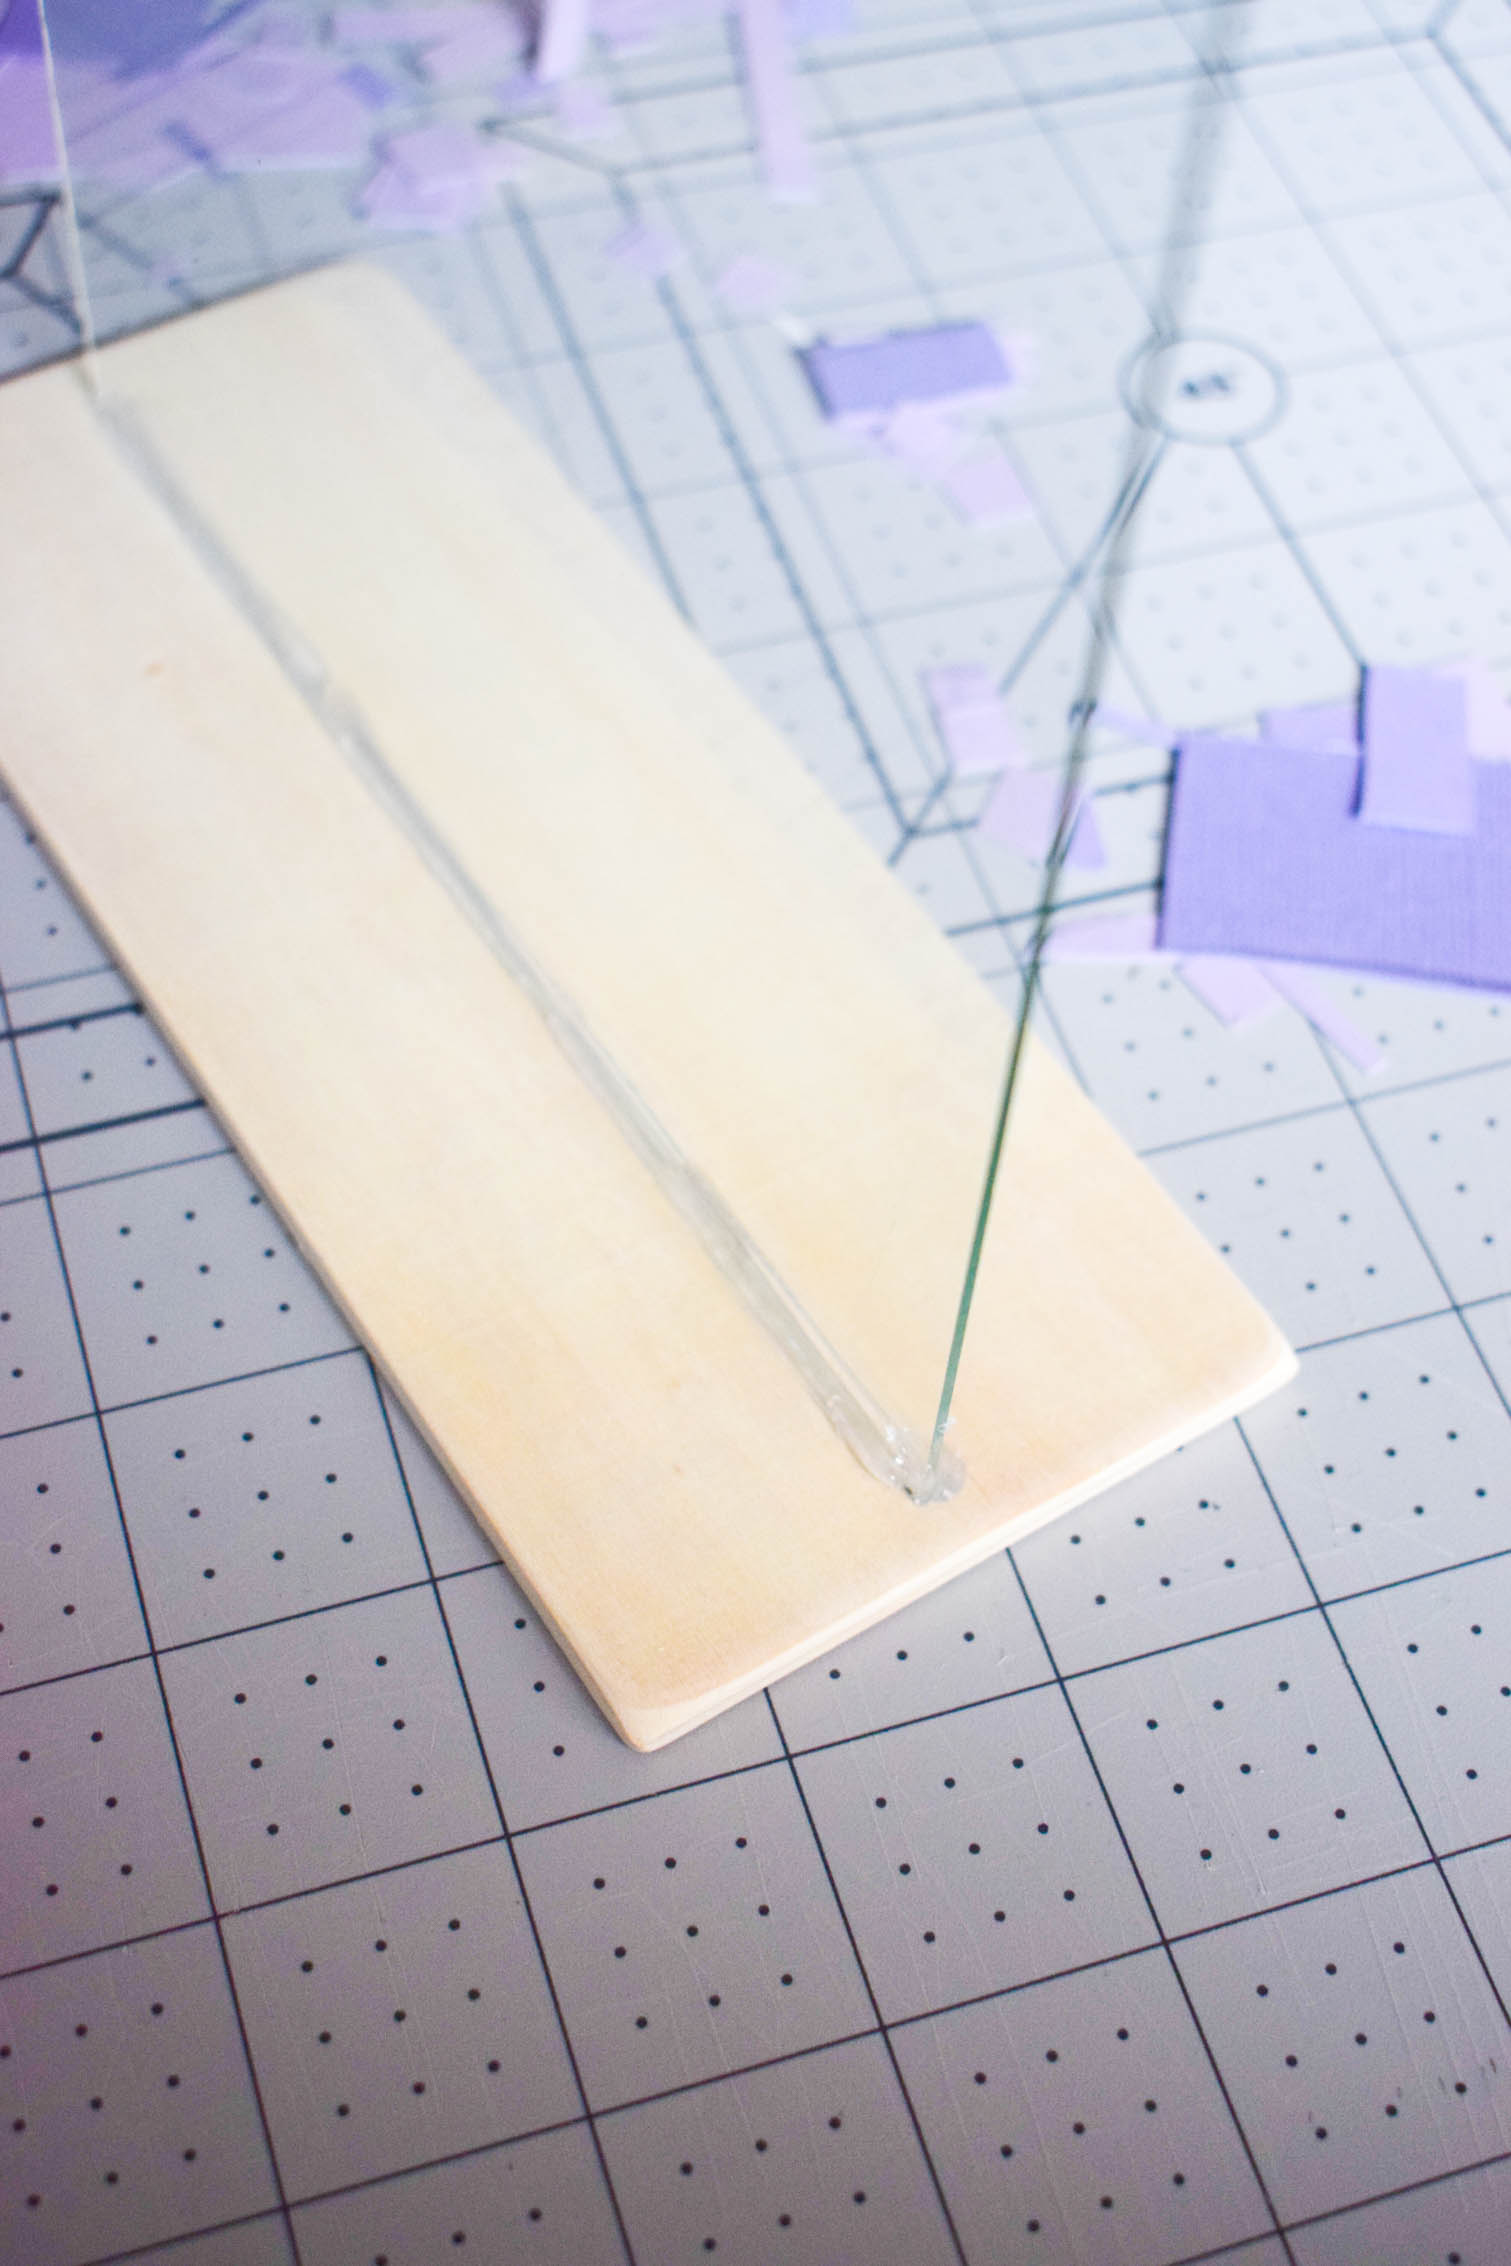
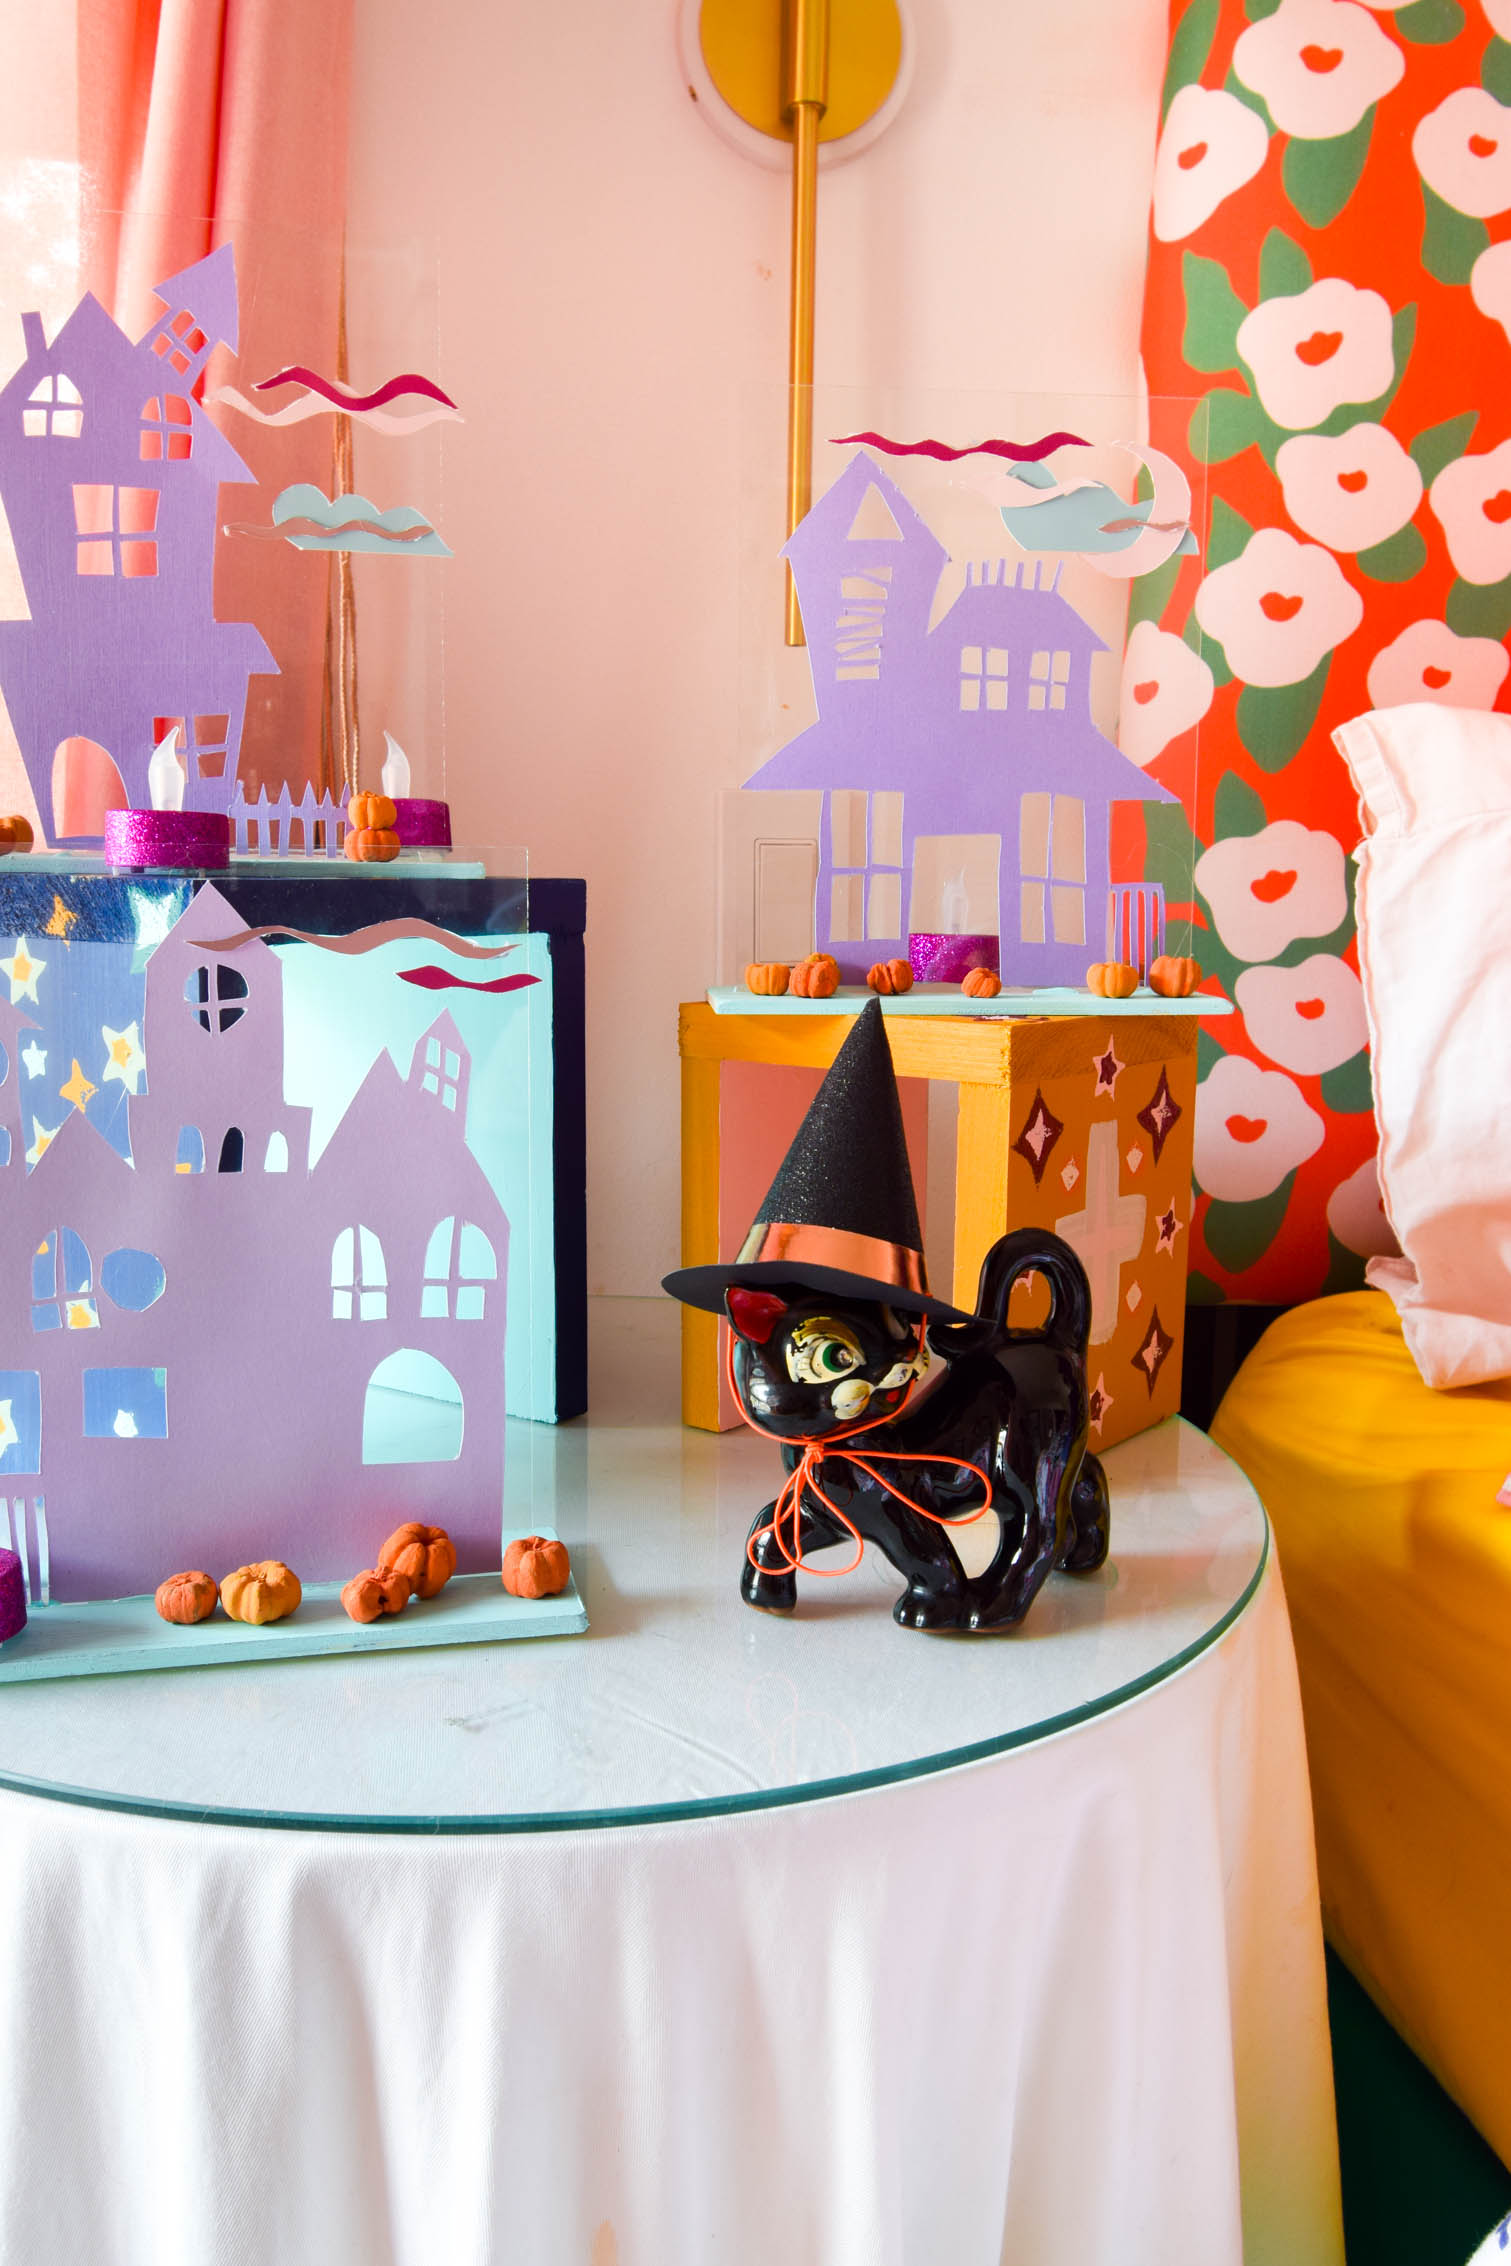
Once the base is dry, I glued the paper cut-outs to one side of the glass, and then embellished with the finishing touches.
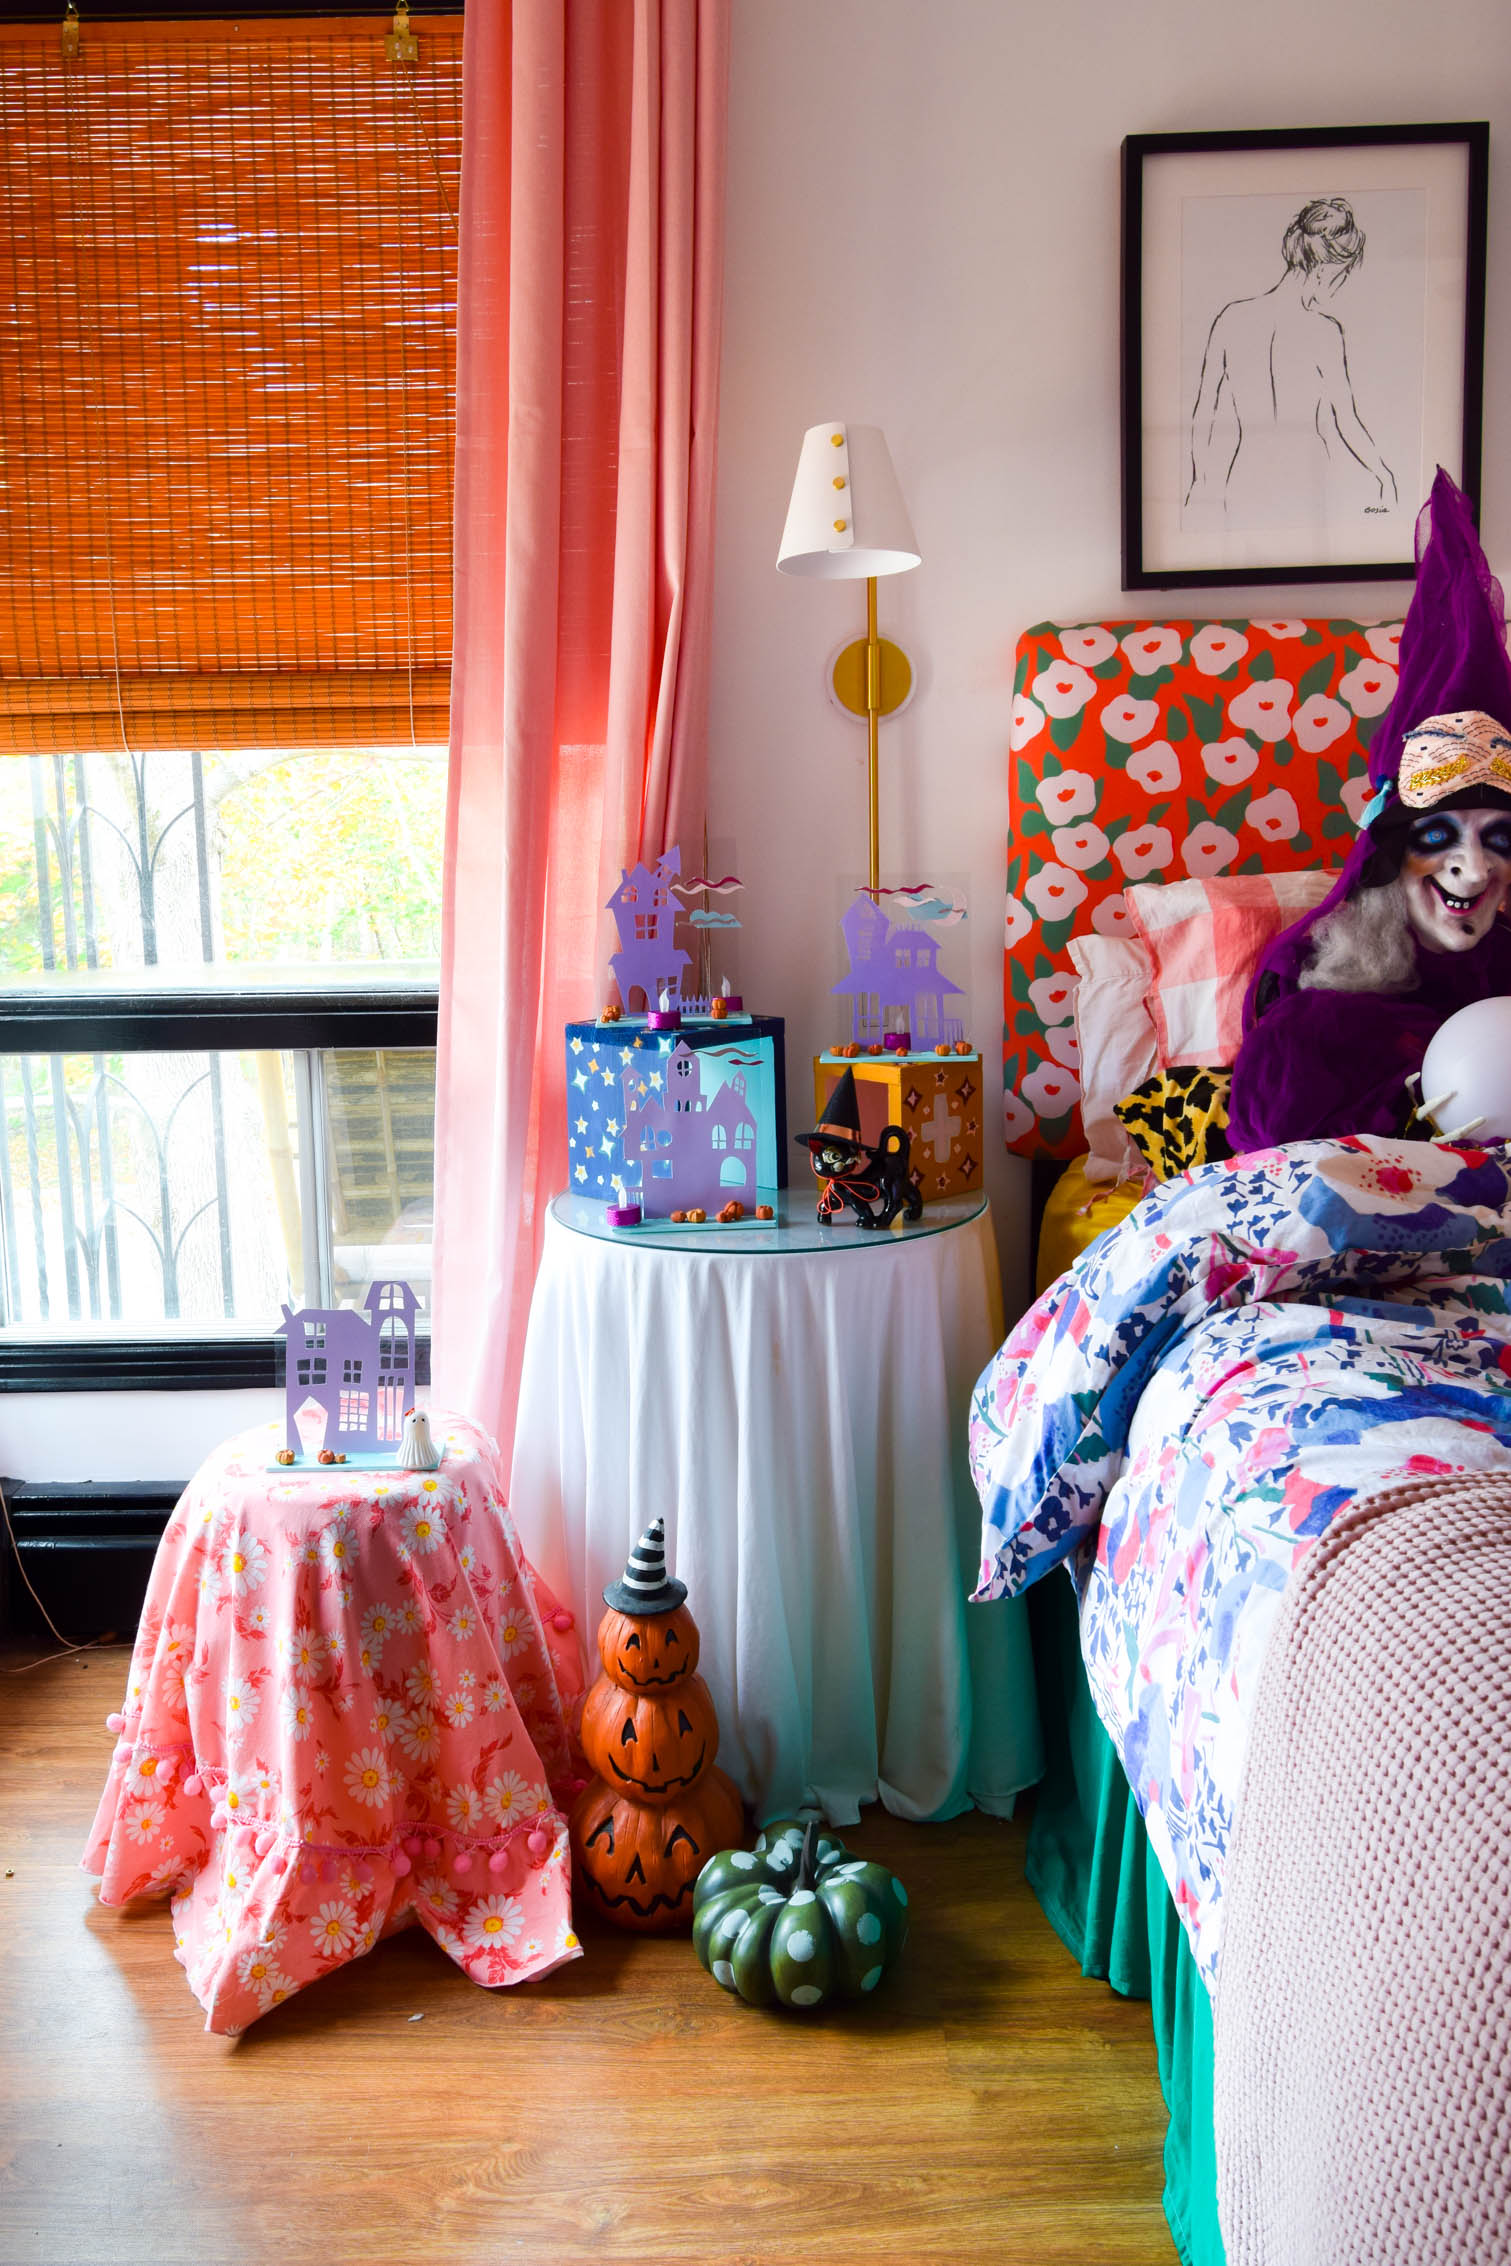
Once all 4 were assembled, I painted the base (which I should have done earlier) and then styled them.
DIY Haunted House Silhouette Decor
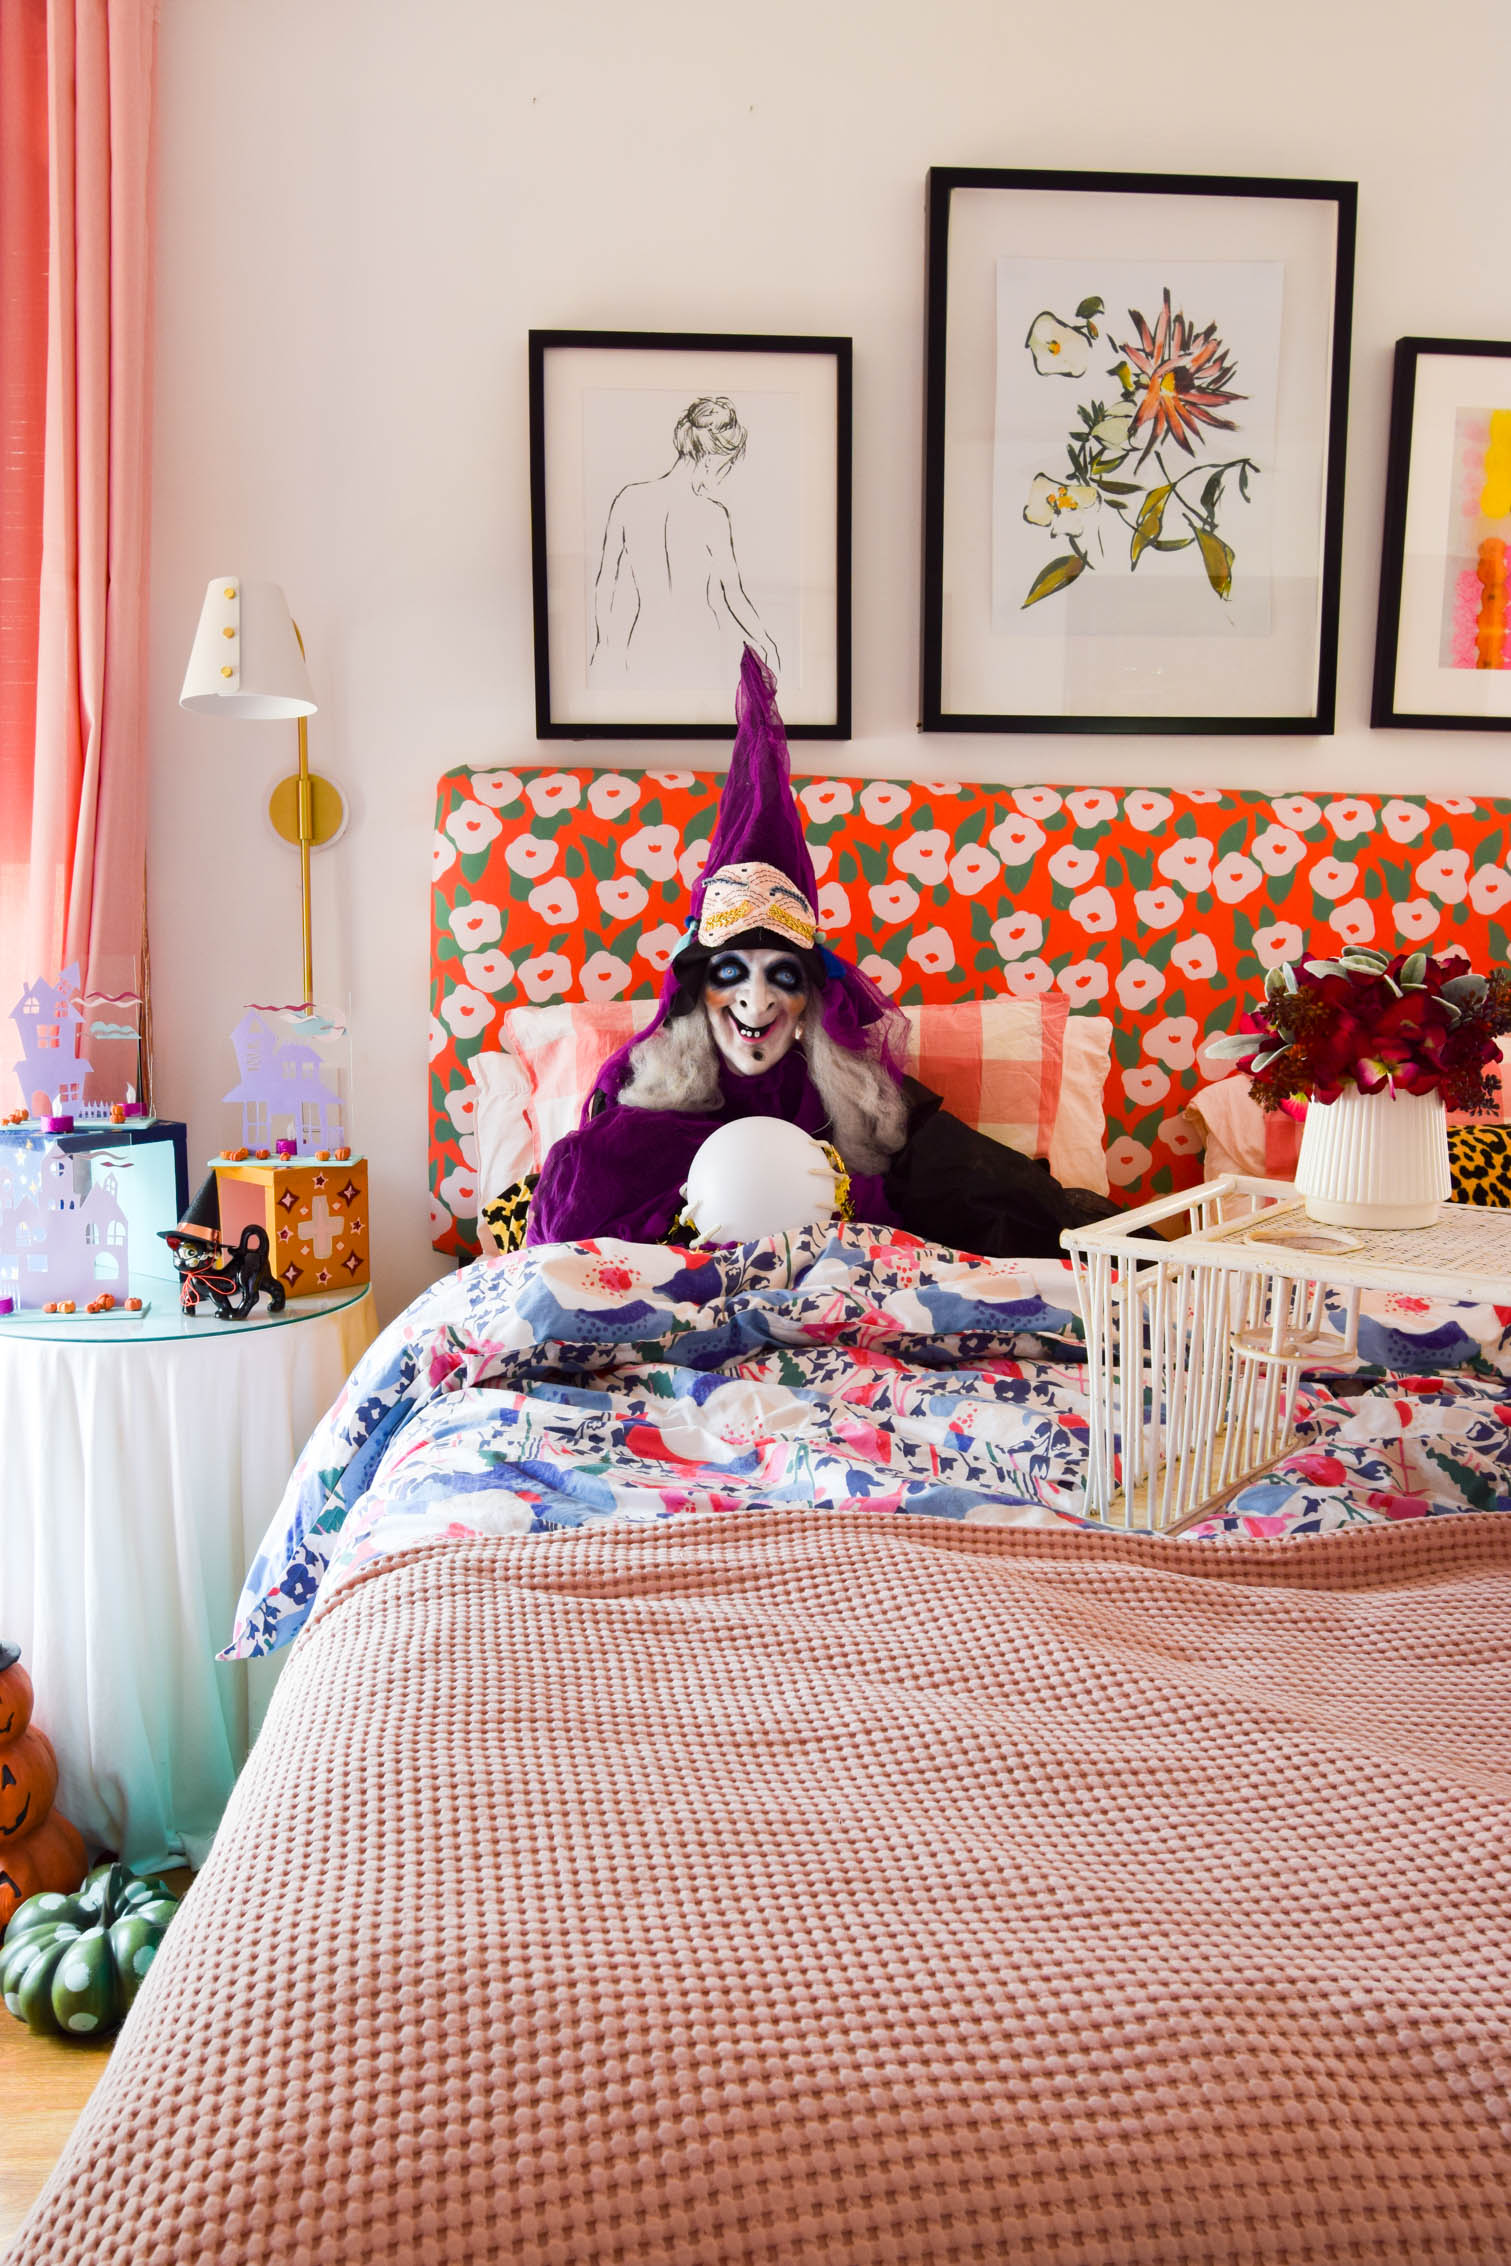
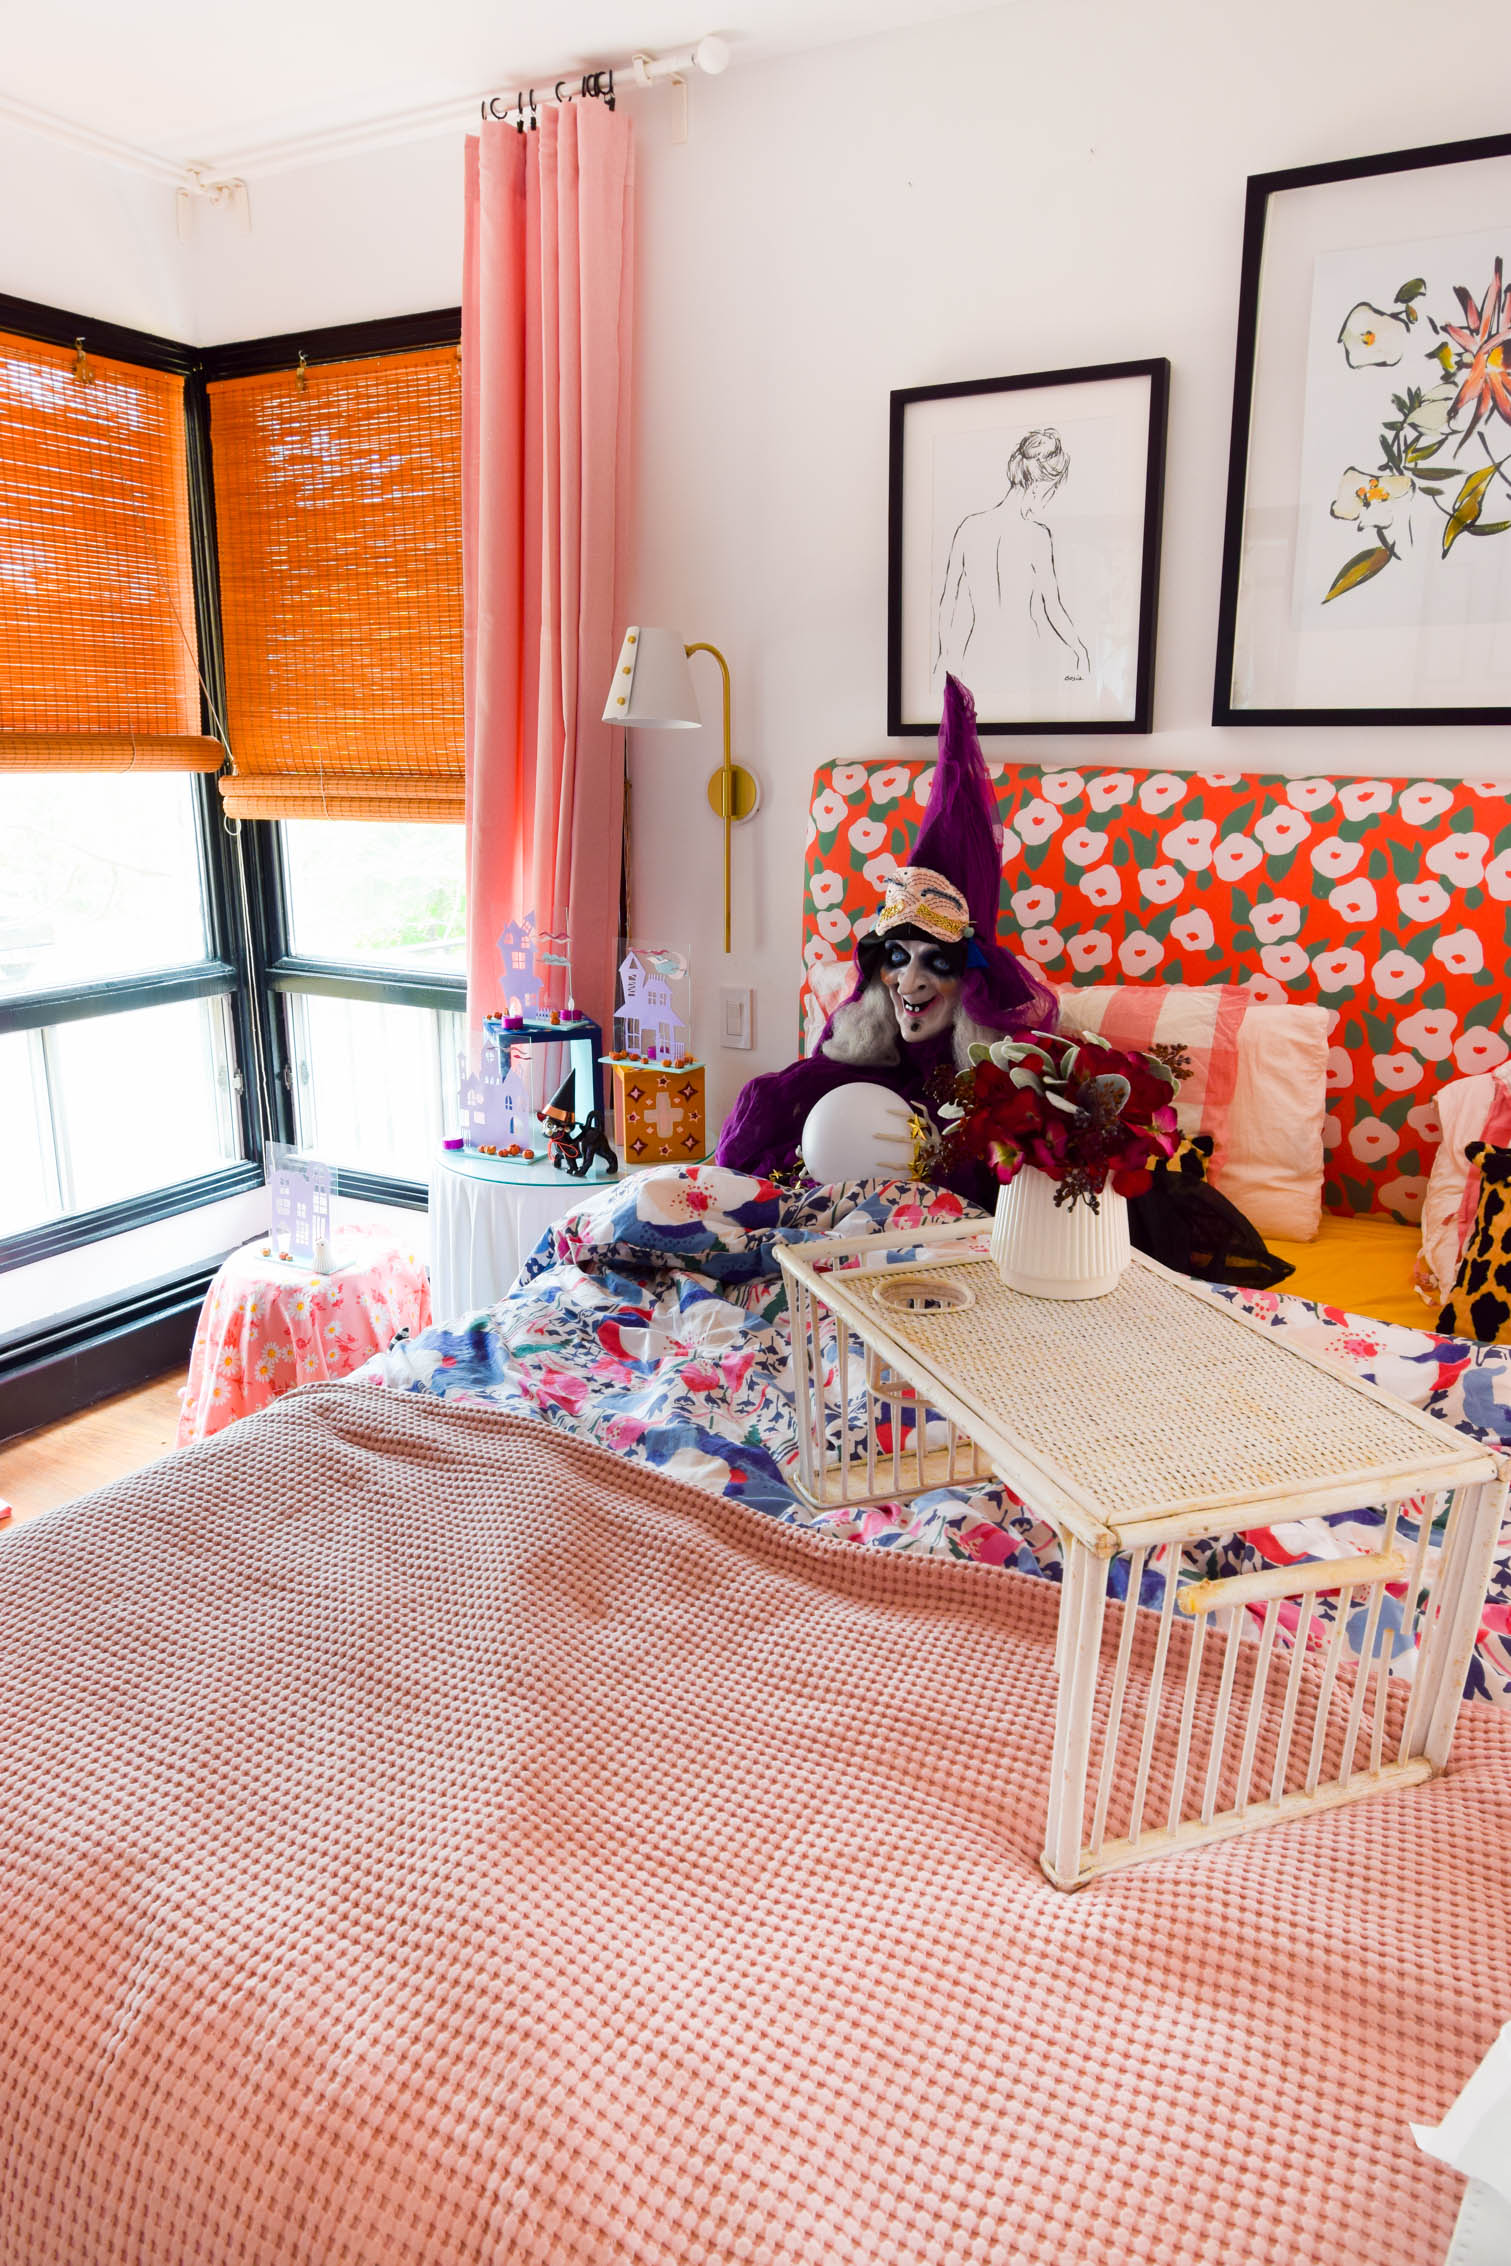
I initially had them on my mantel piece in the living room, but they actually worked better in the bedroom as decor for my dear aunt who was visiting.
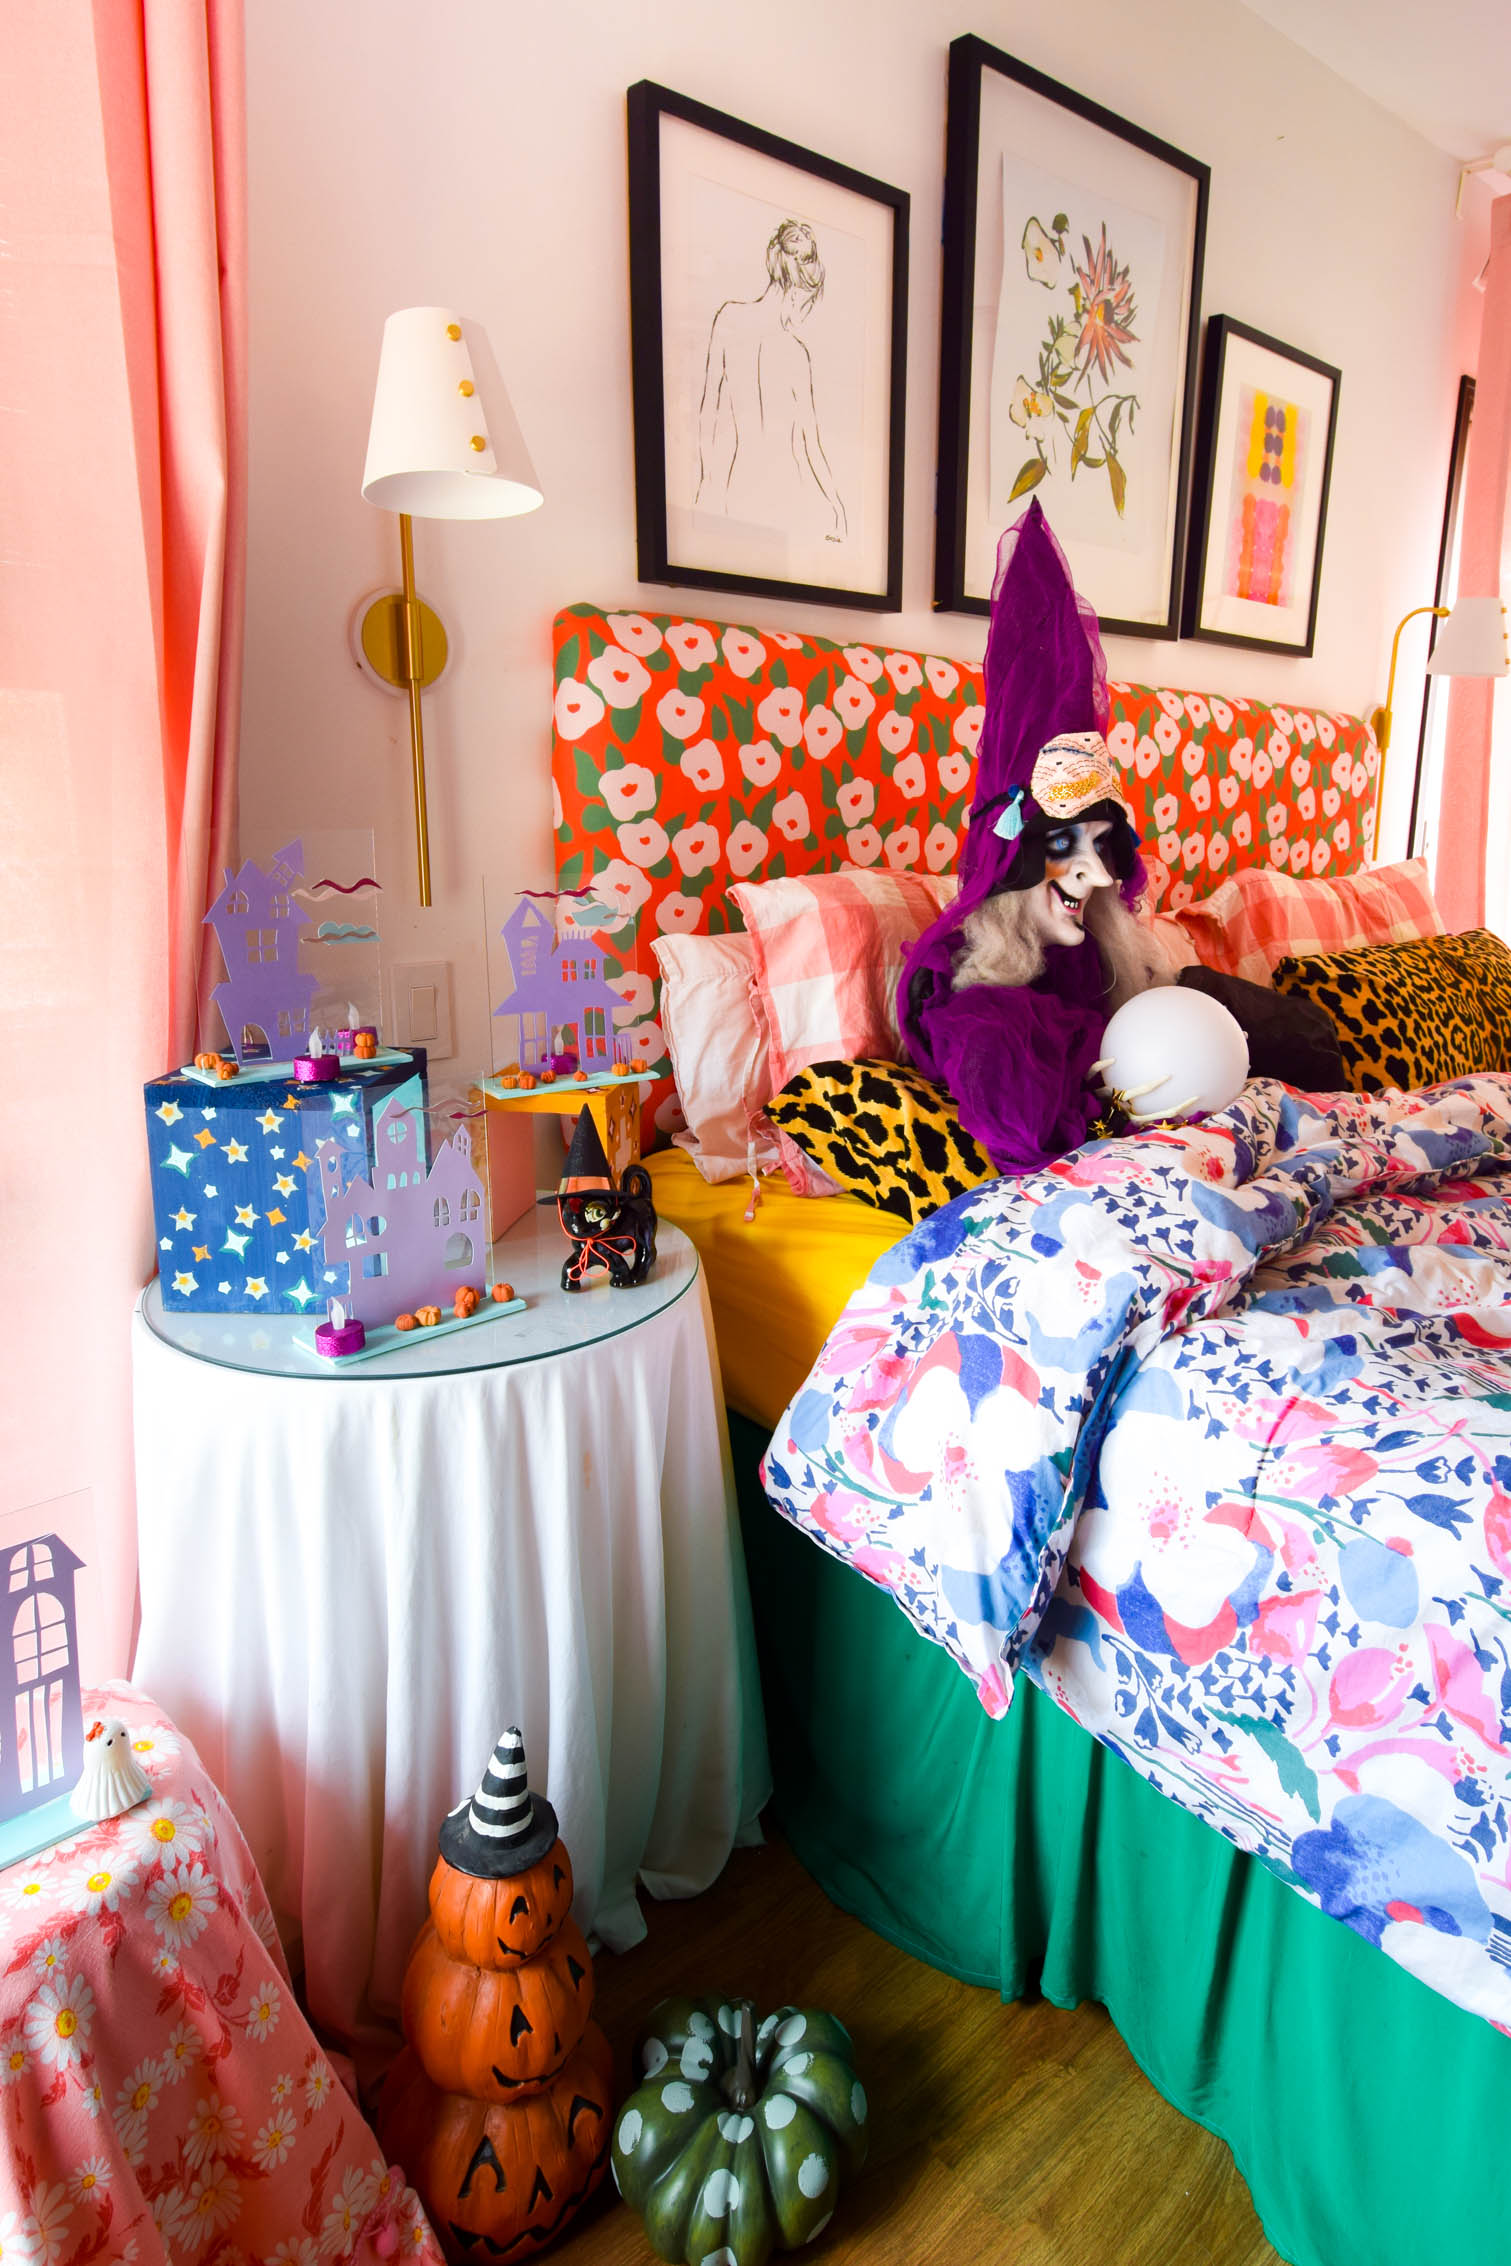
This witch brought her globe to bed with her, and insists on sleeping surrounded by pumpkins and spooky things. What a lady!

Haunted House Silhouette Decor

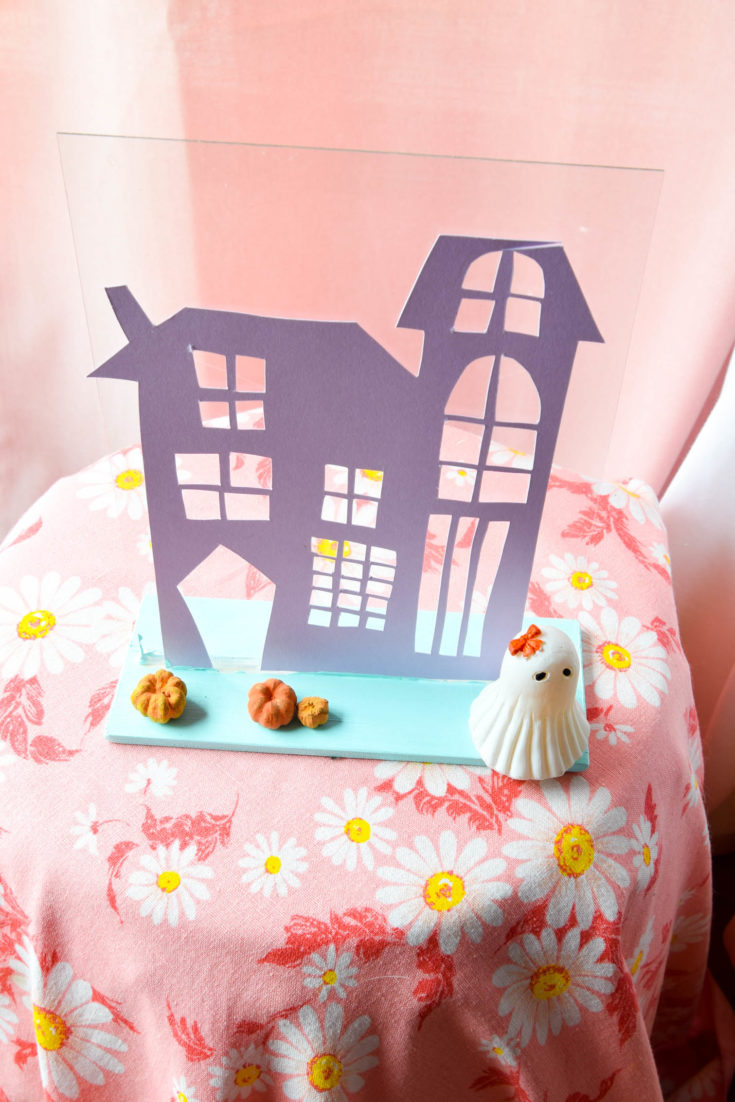
Make a festive haunted house silhouette for some spooky candlelit decor. It's easy and inexpensive too!
Materials
- Cardstock
- Glass from picture frames
- Wood bases
- Cutting mat
- LED battery tea lights
Tools
- Fiskars Detail Knife Set
- Hot Glue Gun
Instructions
- Trace or sketch your house design.
- Using your Heavy-duty Easy Change Detail Knife Set, on the cutting mat, trace the design you sketched out.
- Using your Knife Set, cut as many silhouettes as you want, with as many details as you want.
- Once the haunted houses are cut, glue a wood base and a piece of glass together using a hot glue gun.
- Once the base is dry, glue the paper cut-outs to one side of the glass.
- Embellish with any finishing touches.
- Paint the base.

