

It’s that time of year! The one where we all ask ourselves if we want a real tree, a fake tree, or a retro tree. Sure, there are so many more questions, but why don’t we put those aside for a second and ask ourselves “how to DIY a tinsel Christmas tree.”
No need to ask much longer because I have solved that one with this tutorial. See, it’s modeled after the actual retro tree I have – which you can see in my retro tinsel christmas tree post from last year, or when it’s decorated for June’s nursery – and it’s made using items from the craft store.
Before we get there, welcome if you’re joining me from Iris Nacole, Stacies Spaces, Rebecca Propes and Liz Morrow Studios. No matter where you are in the blog hop, I hope you’ll take time to go check out the other participants.
Check out my other Christmas Tree decor


How to DIY a Tinsel Christmas Tree
It’s a very simple concept, but can get tricky in the execution. I made it as small as you’d want to go (aka don’t make a smaller one), but this project would execute really well on a bigger scale.
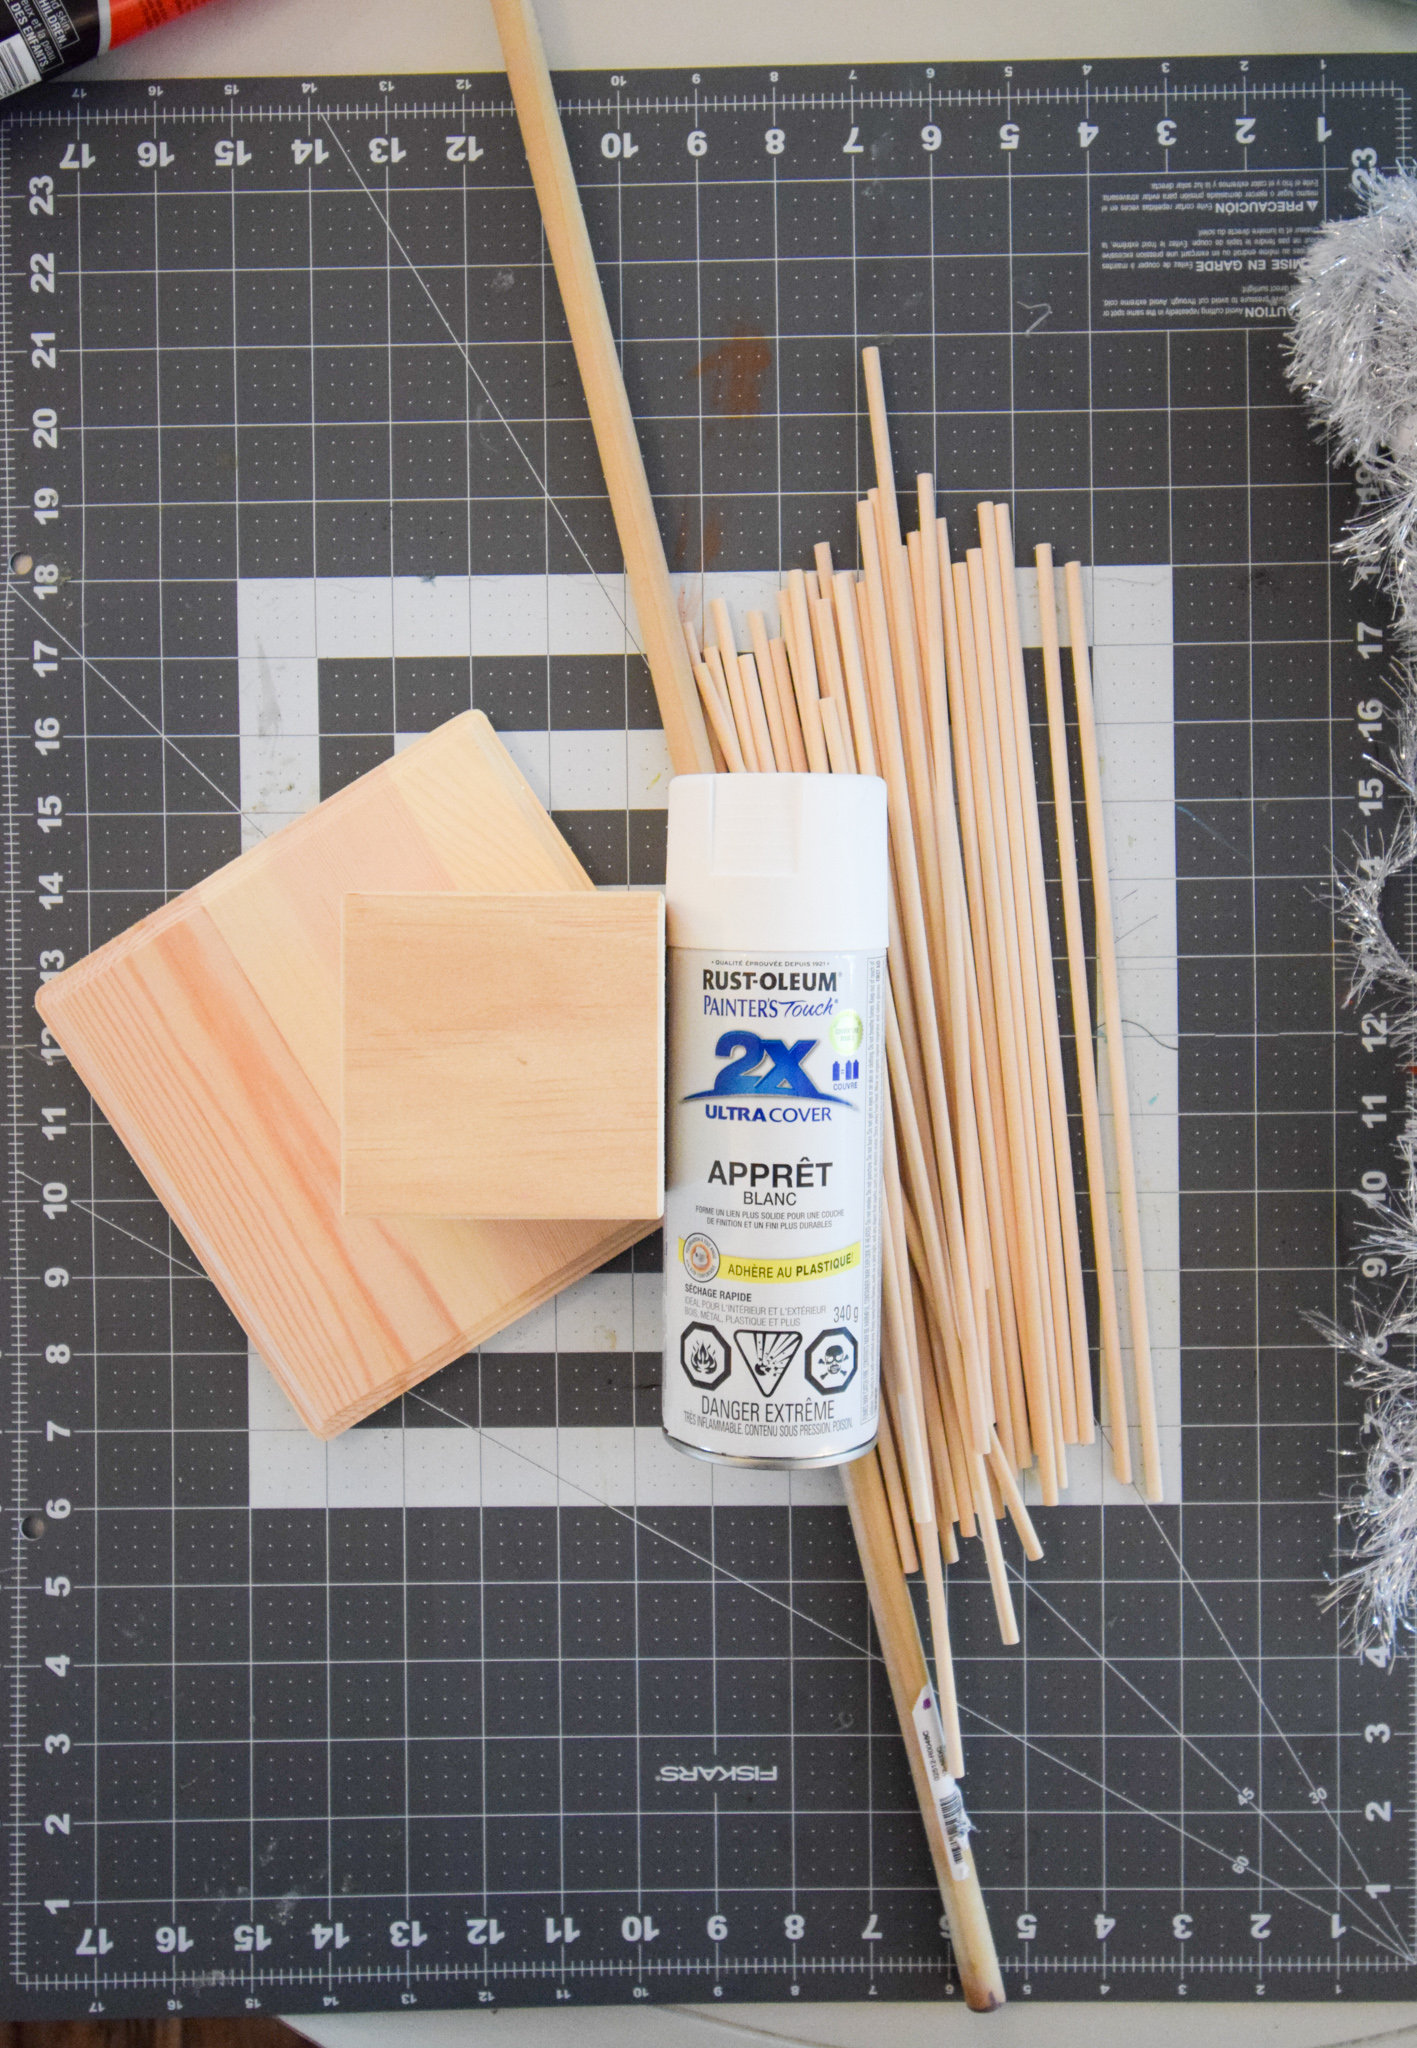
Here’s what you’ll need to make your own tinsel christmas tree
I got all these items at the local craft store, but you may have some lying around.
- 0.775″ dowel rod
- 0.25″ dowel rods (these came in packs of 15, so I bought 2)
- wood glue
- wood block – this one is 5×5
- wood plaque – this one feels like 8×8
- drill with bits that correspond to the size of the smaller dowels
- paint or spray paint in your colour of choice
- tinsel string or garlands
- saw + cutting mat
- hot glue


How a tinsel tree is assembled
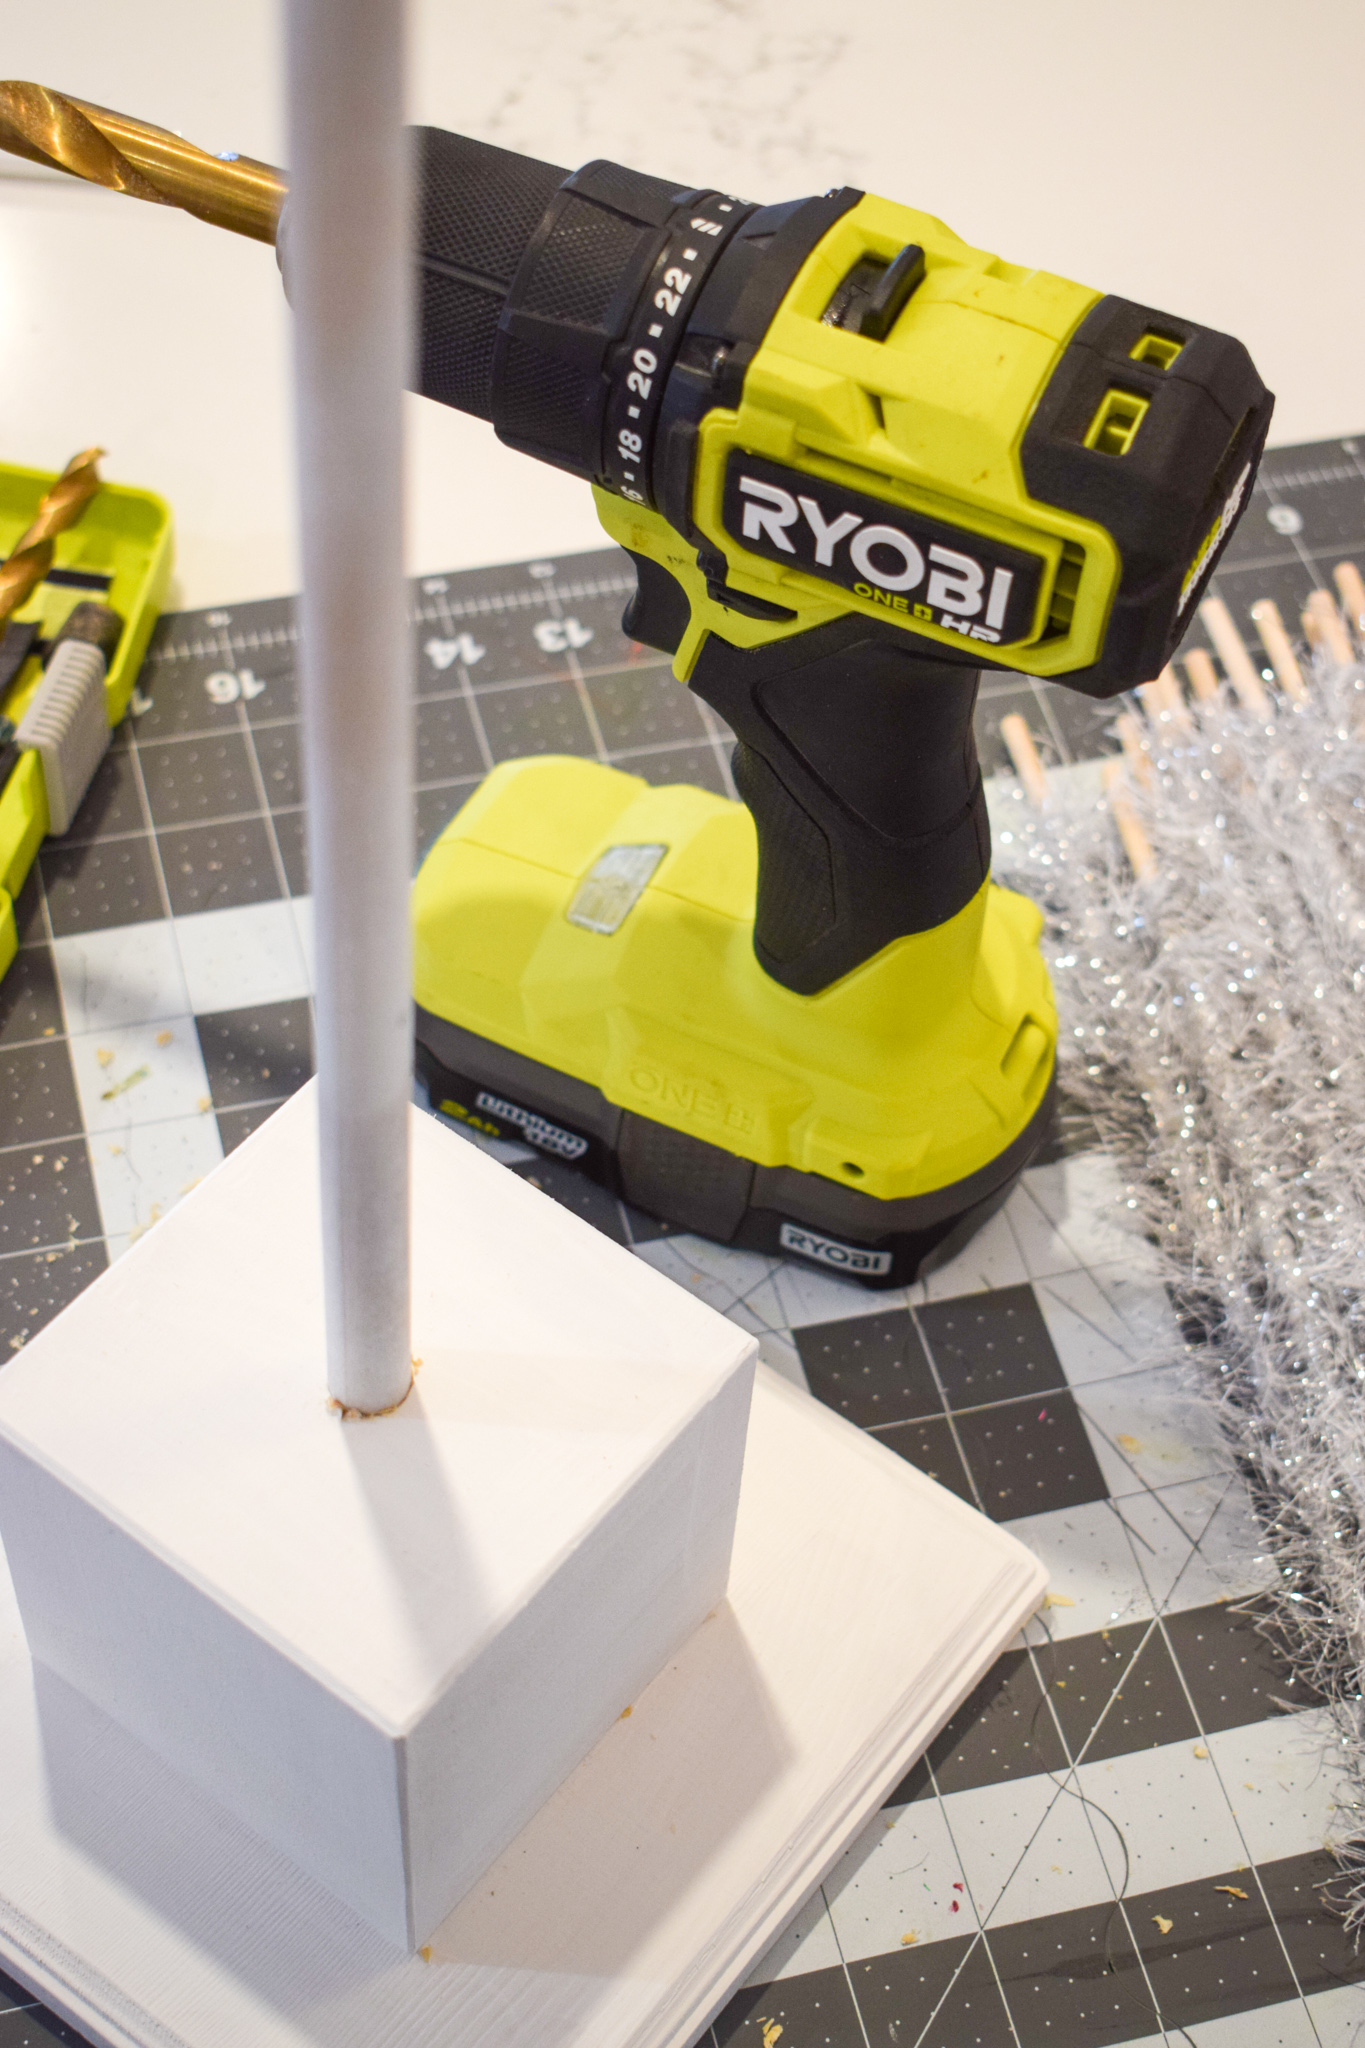
It’s quite simple – smaller dowels are inserted into a central core dowel, at various angles and heights. So how do you make the tree? Using your drill, make as many holes as there are dowels (in this case 30), in the bigger dowel. 


Once they’re dry, using a dab of hot glue at the end of the dowel, secure the tinsel string. Wind it around the dowel until you get to the other end. I suggest leaving a bit of space at the end so that it can easily fit into the core dowel. This part may take a while, so I suggest settling in for a movie.

Next up, gluing your dowels into the central dowel. Sure, you can place and remove them each year like a real tinsel tree, but those branches are drilled in at angles and are made of metal. This wood on wood set-up will be much stronger with wood glue.

Don’t forget to drill into the big block, and securing the core dowel in there with more wood glue.
Before adding any ornaments, make sure you do some small paint touch-ups!
DIY Tinsel Christmas Tree
Here’s how mine came out. I’m quite pleased with it, and will definitely try it again next year on a bigger scale (just to see).


Make sure you check out all the other participants in this edition!


Monday
Casa Watkins Living // Up To Date Interiors // Mocha Girl Place // Kate Decorates // House of Hipsters // Monica Wants It
Tuesday
The Happy Housie // SKG Designs // Delineate Your Dwelling // Cuckoo 4 Design // Room Bloom Design // My Sweet Savannah
Wednesday
Iris Nacole // PMQ For Two // Stacies Spaces // Rebecca Propes // Liz Morrow Studios
Thursday
Au Petite Salon // Taryn Whiteaker Designs // The Honeycomb Home // Daly Digs // T Moore Home // Love Your Abode
Friday
Haneens Haven // Our Fifth House // Seeking Lavender Lane // Two Twenty One // Amber Oliver // Zig and Company
>