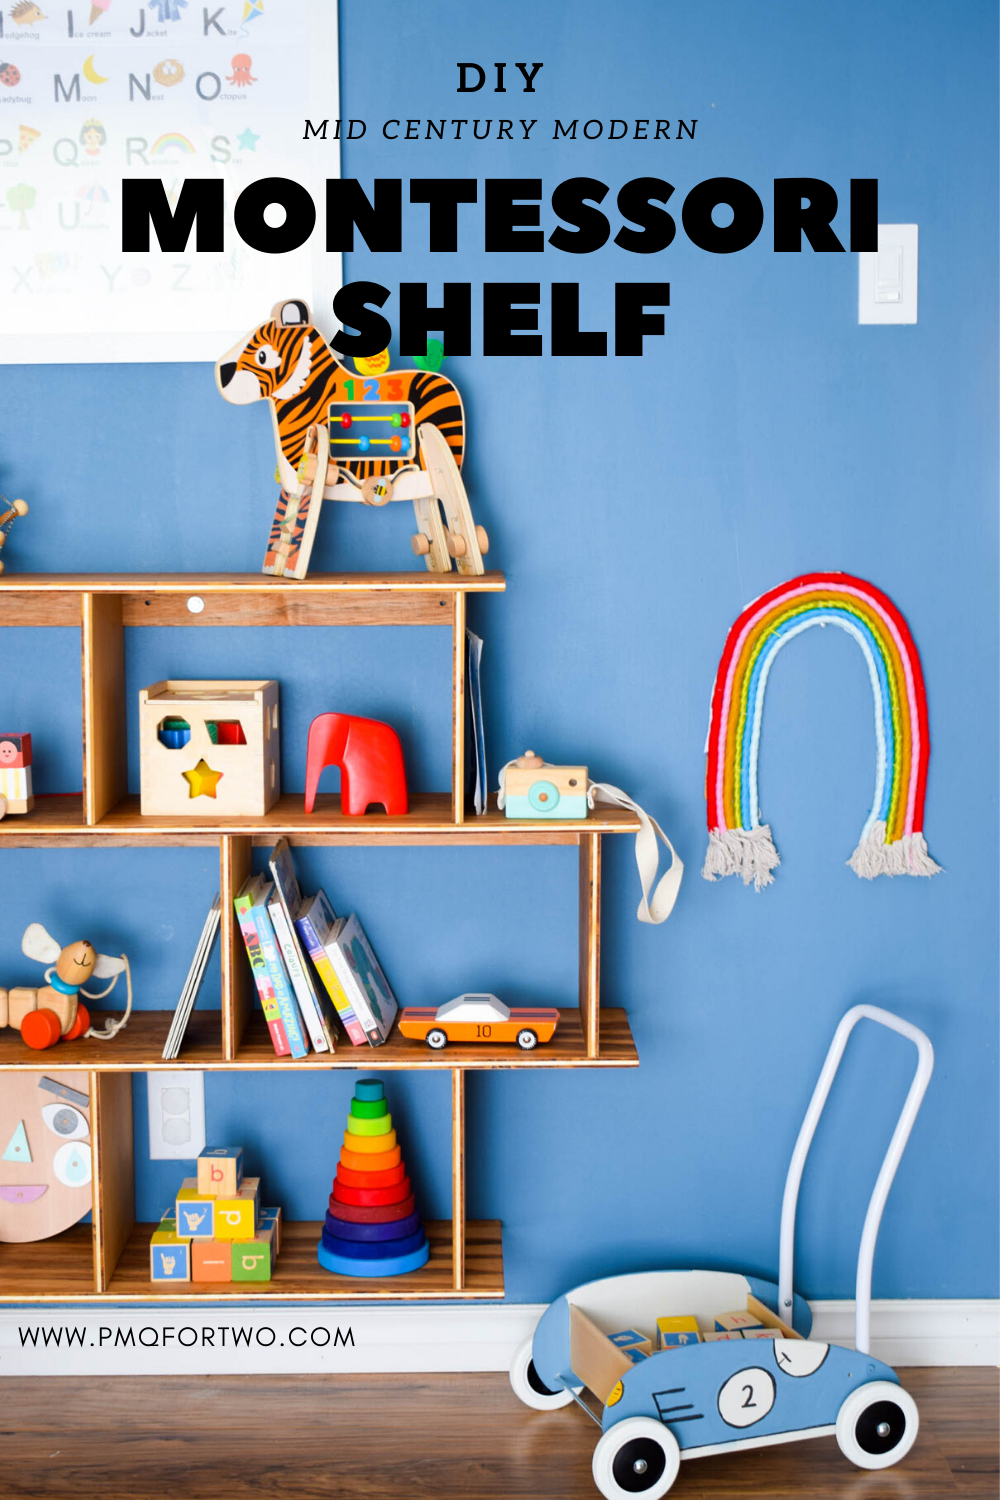
In our living room refresh, we made a dedicated play area for June. We’v been reading-up on various child development ideas, and we really like the ideas in the Montessori system, so Dan built her a DIY Mid Century Modern Toy Shelf using one sheet of 1/2″ Maple plywood.
*The Whimsy Shop sponsored this post, but all thoughts are my own. Thank you for supporting the brands that make PMQ for two possible.

Our living room is a slow burn renovation. We started with new flooring from Golden Select, and then re-arranged all the furniture, and that freed-up space for a toy area on the wall next to the fireplace.
What is a Montessori Toy Shelf?
A Montessori approach allows the child to select their activity based on their interest, and enables them to complete the activity from start to finish on their own. This means displaying activities at eye level, in an easy to access way. The traditional set-up only has two shelves, but June is going to be tall, so we took a gamble and made 3!
The run-on from that, is that it also means providing toys that create open-ended play. That is to say, the toys and activities have no pre-determined limitations and no fixed answer – children simply follow their imagination.
Check out my Colourful Baby Registry Ideas
As the site Montikids highlights “Low shelves are a fundamental element of the Montessori method, enabling children to practice independence as they select the materials they wish to explore.”
In a nutshell: a low shelf with simple toys that isn’t too cluttered.
The Montessori Emphasis on Beautiful Things
The Montessori approach places a premium on a beautiful learning environment. One that is calm, serene, and colourful.
Most importantly, it’s also full of natural elements like wood, fibres etc. They’re nicer to play with, last longer, and are usually associated with open ended play.
Check out my post about how to style Children’s Bookshelves
This is where The Whimsy Shop comes into play (see what I did there). They stock beautifully made, wood or ceramic, minimalist decorative objects.
We’ve been building a delightful collection of natural element toys for June to play with, so when The Whimsy Shop offered to send us a few items for consideration, we jumped at the chance to include such beautiful toys in our collection.
We chose the Orange Racer and the White Beast for June, and the red Beachwood Olifant for ourselves (less a play toy for now, more decor!)
June can play with any of these, but we can also use them as decor since they don’t look out of place in our sleek mid century modern inspired aesthetic.
Mid Century Modern Montessori Toy Shelf Build Plans
Materials needed
- 1 sheet of 4 x 8′ x 0.5″ Maple Ply
- Wood screws #6 x 1″ – 100 count
- 1 bottle of wood glue
- 150 & 220 grit sandpaper
- Hempseed Finishing Oil
Tools needed
- table saw
- mitre saw
- 2 x 90* clamps
- 2 x 12″ clamps
- cordless driver
- cordless hand drill
- Robertson Bit #1
- countersink Bit #1
- Stud Finder + Level
*When we bought the sheet of Maple ply, we had it cut in store to accommodate the tools we had at home.
Cut List for the 4 x 8′ maple sheet
- 3 x 10″ rip cuts (i.e 10″ x 8′)
- 2 x 2″ rip cutes (i.e 2″ x 8′)
These next cuts are made on those 5 pieces that you just ripped
- 10″ x 42″ x 2
- 10″ x 36″ x 2
- 10″ x 10″ x 9 – you’ll want to do these with a cross-cut sled on a table saw
- 2″ x 32.5″ x 3
How to assemble the MCM Montessori shelf
Now that you’ve cut all the pieces from the sheet of ply, give everything a quick sand before assembling. You’re assembling the shelf from the bottom-up.
The wood shelf is assembled using wood glue, clamps, and screws. Total assembly time is dictated by the number of clamps you have.
Create the bottom shelf using a 42″ and 36″ piece, as well as three of 10 x 10″ pieces.
In the next step, you’re using the other 42″ piece, and another three 10 x 10″ pieces. Make sure you’re respecting the 2″ off-sett to create the zig and zag in the shelf.
The top shelf uses the last 36″ piece, and the final three 10 x 10″ pieces. Once again, watch for the off-sets.
Because this shelf is free-floating and attached to the wall, you’re adding the three 32.5″ pieces to the back of the shelving. You’ll be drilling into the studs through these.
Your final product should look like this:
DIY Mid Century Modern Montessori Toy Shelf
With our beautiful floors, and a re-arranged living room, the bookshelf fits right in. Dan applied Hempseed Oil to the maple shelf once complete, and it brought out the beautiful colour of the wood.
Check out our other build projects
