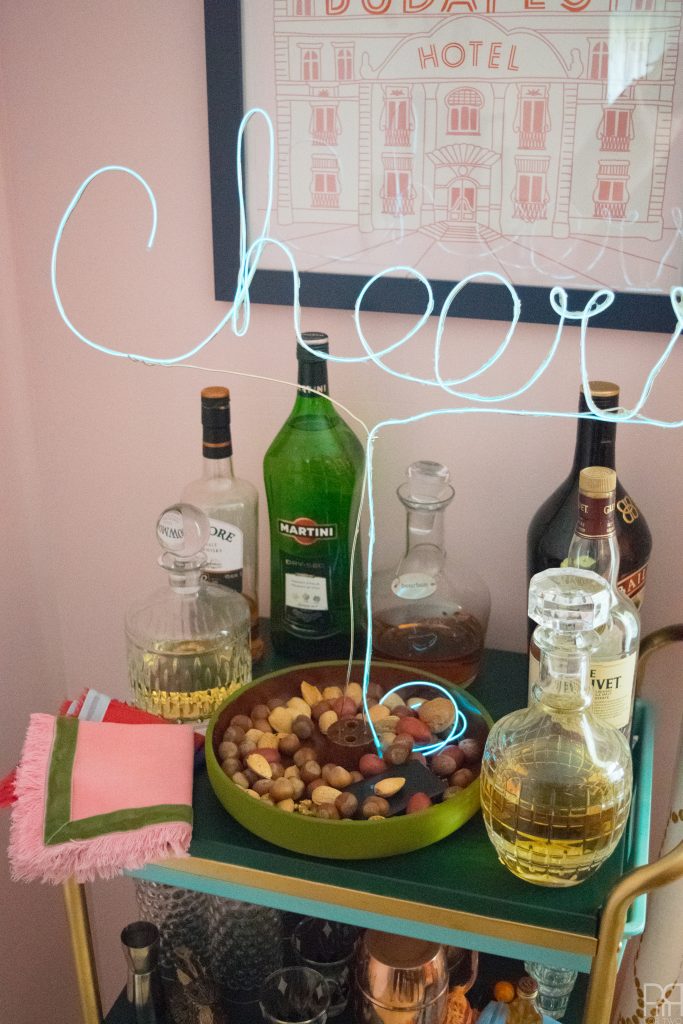
Another day, another dollar, another cool thing I made. But seriously, this time I made the coolest bar accessory ever – a DIY EL Wire Neon Sign in a nut bowl. Swap It Like It’s Hot is a DIY challenge that Charlotte from At Charlotte’s House hosts a couple of times a year. Bloggers send each other an item or collection of items from a thrift store (the uglier the better) and then we all have to make them over into something cool! I’m probably violating the rules of this challenge by using what I got for its intended purpose, but once you see it you’ll understand why.

If you’re joining me from Maggie Overby Studios, ConfettiStyle, Confessions of a Serial Do-It-Yourselfer, Addicted to DIY, Restoration Redoux, I Am A Homemaker, or Reinvented – welcome
Now, you guys know that I normally have stellar images, so if any of these seem kind of grainy to you, please bear with me. The Purolator guy only delivered the crucial component to my DIY at 4pm yesterday, which didn’t leave me with a whole lot of time left to complete, style, and photograph my project. I’m usually more organized too!
DIY EL Wire Neon Light
What did I receive? I received a beautiful redwood nutcracker bowl from Rex’s Redwood Gifts – a now defunct (?) store in Eureka, California. My friend Maggie from Maggie Overby studios stumbled across it in her thrifting journeys. I had originally intended to make this bowl into a Juju hat, but after staring at it for a few days I realized that I loved the grain of the wood too much! I just couldn’t completely cover it. This is where the idea of an EL Wire Neon Light comes into play.
Instead, I opted to give it a bit of lipstick and add something to it. Although in its new form it is not completely unrecognizable, it is still tons of fun, and just different enough to make it feel like mine.
What do you need to make an EL Wire Neon Sign
*The following product links contain affiliate links. Thank you for supporting the brands that make PMQ for two possible.
- Wood nut bowl – with holes for the picks and cracker
- Paint – I used Fat Paint
- 12 gage wire
- EL Wire Kit –> Zitrades EL Wire Portable Electroluminescent wire 4 modes 15ft El Wire Blue Driver With Battery Pack Controller For Cosplay Dress
- Super Glue – I used Gorilla Glue
- Tin snips
- Large sheet of paper
- Marker or pencil
- A willingness to glue your fingers together or to your desk
Make sure your bowl is clean and dry. I gave mine a good wipe down with a moist cloth to clean any dust or smudges.
Step 2: Paint the outside of the bowl using the paint colour of your choice I used “Can’t see me camo” by The Fat Paint company, from the Amanda Forest line. Guys, this paint covers like no other, and comes in some great shades.
How to Make a DIY Neon Sign
On a sheet of paper, write out the word or draw the shape you’ll be using for your sign. Because I wanted to place the nut bowl on our bar, I thought “Cheers” would be appropriate, so I traced-it out on a large piece of paper I had kicking around.
If you’re writing a word, don’t forget to write it in cursive, because it won’t work with block letters.
Open your wire, and start shaping it into the word or design. Because I was working with a word, I started by laying out the C in Cheers, and then moved on to the h from there.
Don’t forget to account for a “tail” of sorts, to that will allow your word to stand in the bowl and run the end of the EL wire down to the converter.
Once you’re happy with how the word is laid-out, start gluing the EL wire to the word, the same way you laid-it out.
I used super glue to avoid the gunky look of hot glue, but about halfway through after having glued my fingers to my keyboard twice, I switched the hot glue. I would still recommend super glue if you have the time and patience.
Glue your word into the *now dry* bowl. This only really works with this bowl because there are a series of little wholes in the middle, where all I had to do was fill them with glue and insert the word.
If I didn’t have that option I would have drilled a few holes through the bowl and brought the wire for the word through the bowl and then glued it on the underside.
Assuming the bowl is dry and the word is solid and in place, you’re good to go! Fill the sucker up with nuts and let the party start!
P.S. if you’re looking for a good post on styling your home bar you can read mine // here //
Remember when I gave my IKEA bar cart some life this summer with a fresh coat of paint? Well let me tell you how good it all looks together. Better yet, you can see for yourself. Adding the dark green shelves, the blue drawer and refreshing the gold was just what this old girl needed.
As you can see, the nuts sit very well in the bowl, and the converter isn’t hurting anything either.
