

You may have spotted these DIY colour blocked jewelry boxes on my dresser in the first pregnancy update, or in the floral glam master bedroom + closet, but I’m finally here to unveil them! I painted and quickly customized some basswood boxes from Walnut Hollow, and you can too.
Check out my Floral Glam Master Closet, and our floral glam master bedroom
*Walnut Hollow sponsored this post, but all thoughts are my own. Thank you for supporting the brands that make PMQ for two possible.


So I’ve actually wanted to do something like this for a while. I have tons of jewelry: prop, costume, vintage, high-end and more. And I can’t possible afford to buy matching jewelry boxes, and I really dislike the ginormous ones people buy at Costco. Not my scene!
I do however have space for chicly appointed boxes to hold all my treasures, and I’m sure you do too.
Check out my colour blocked Kitchen canisters & my colour blocked dinner chargers
Painting Basswood Boxes from Walnut Hollow
So, you can find all kinds of little wood boxes if you look hard enough, but I really like the classic basswood boxes from Walnut Hollow for a few reasons. They’re lightweight, durable, easy to paint, and the wood grain is lovely.
You know when you go to paint some wood and suddenly the grain comes through, and it looks messy? Ya, none of that going on here. The way the basswood is cut means that there’s very little unfinished edges, and if you happen upon them, give them a quick sand before proceeding.


To paint them, I wanted to do some colour blocking so that I could always find a way to tie them into my spaces. Between the blues, yellows, pinks and reds I figured I had my bases covered. I used shades from Fusion’s line of paints, and found that because of how porous the basswood boxes are, that I needed 2-3 coats to get a SOLID coverage, but it was well worth it.
It’s a relatively quick project when you think about it, the only thing slowing you down is dry time.


Dividing your jewelry boxes
Ok, so you could totally just paint the outside and call it a day, but you’d be losing out on all the functionality of the box itself! Using thick popsicle sticks (available at your local craft store), you can create little compartments within the boxes. This is great if you need to keep earrings separate, or want a way to store all your rings without putting them in one big pile.
*The following product links contain affiliate links. Thank you for supporting the brands that make PMQ for two possible. For my full policies click // here //
I used popsicle sticks, my Fiskars PowerCut snips, and a hot glue gun to secure them. Measure, cut, glue – you got this.


I could have added more little compartments (and I may yet still), but for now this division suits my needs. Once I was happy with how it looked, I chose a darker shade to paint the interior. Easy peasy!
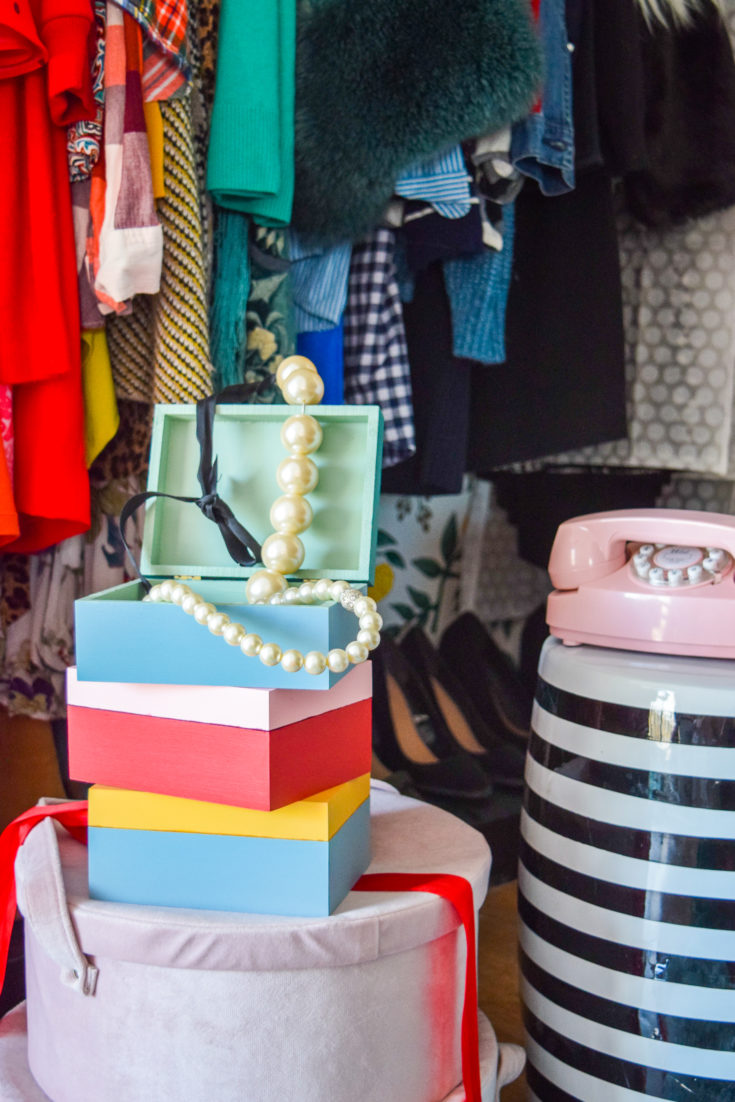
DIY Colour Blocked Jewelry Boxes
Because you’ve seen these beautifully painted basswood boxes all over the bedroom recently, I figured I’d ham it up for the final shoot. I’m all about making the floral glam master bedroom an oasis, and using my walk-in closet as a boudoir, so I’m all over any extra touches that I can add to make it feel special.
And that includes dressing in my new caftan, sipping on water in a champagne coupe, and pretending to be talking to Tom Hardy on my pink princess phone.


“oh yes? I’m available for a romantic meet-up Tom Hardy! Meet you on the helipad” – moi


DIY Colour Blocked Jewelry Boxes

Make your own DIY colour blocked jewelry boxes with just a few supplies. They can be used to hold so many different things, but are the perfect size for jewelry.
Materials
- Classic basswood boxes
- Paint in various colors
- Popsicle sticks
Tools
- Paint brushes
- Fiskars PowerCut Snips
- Hot Glue Gun

