

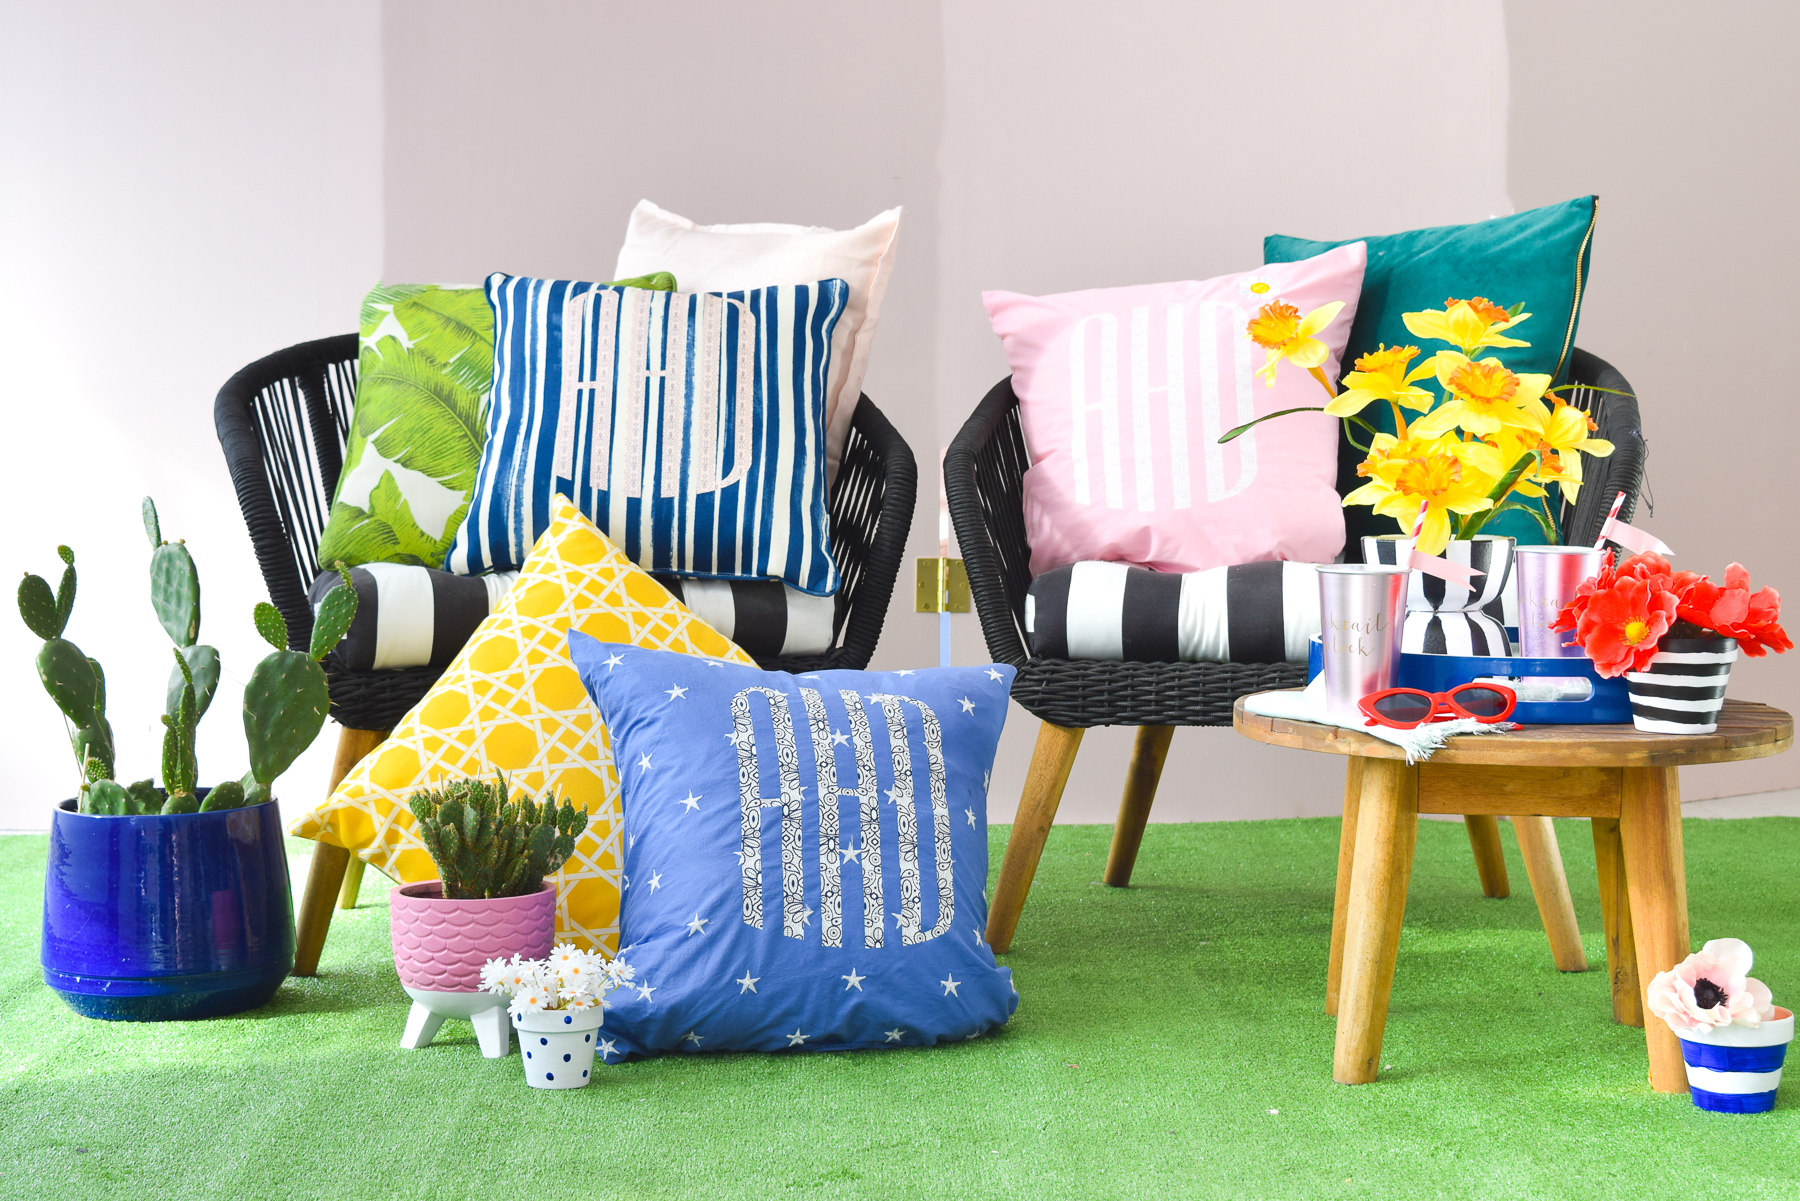
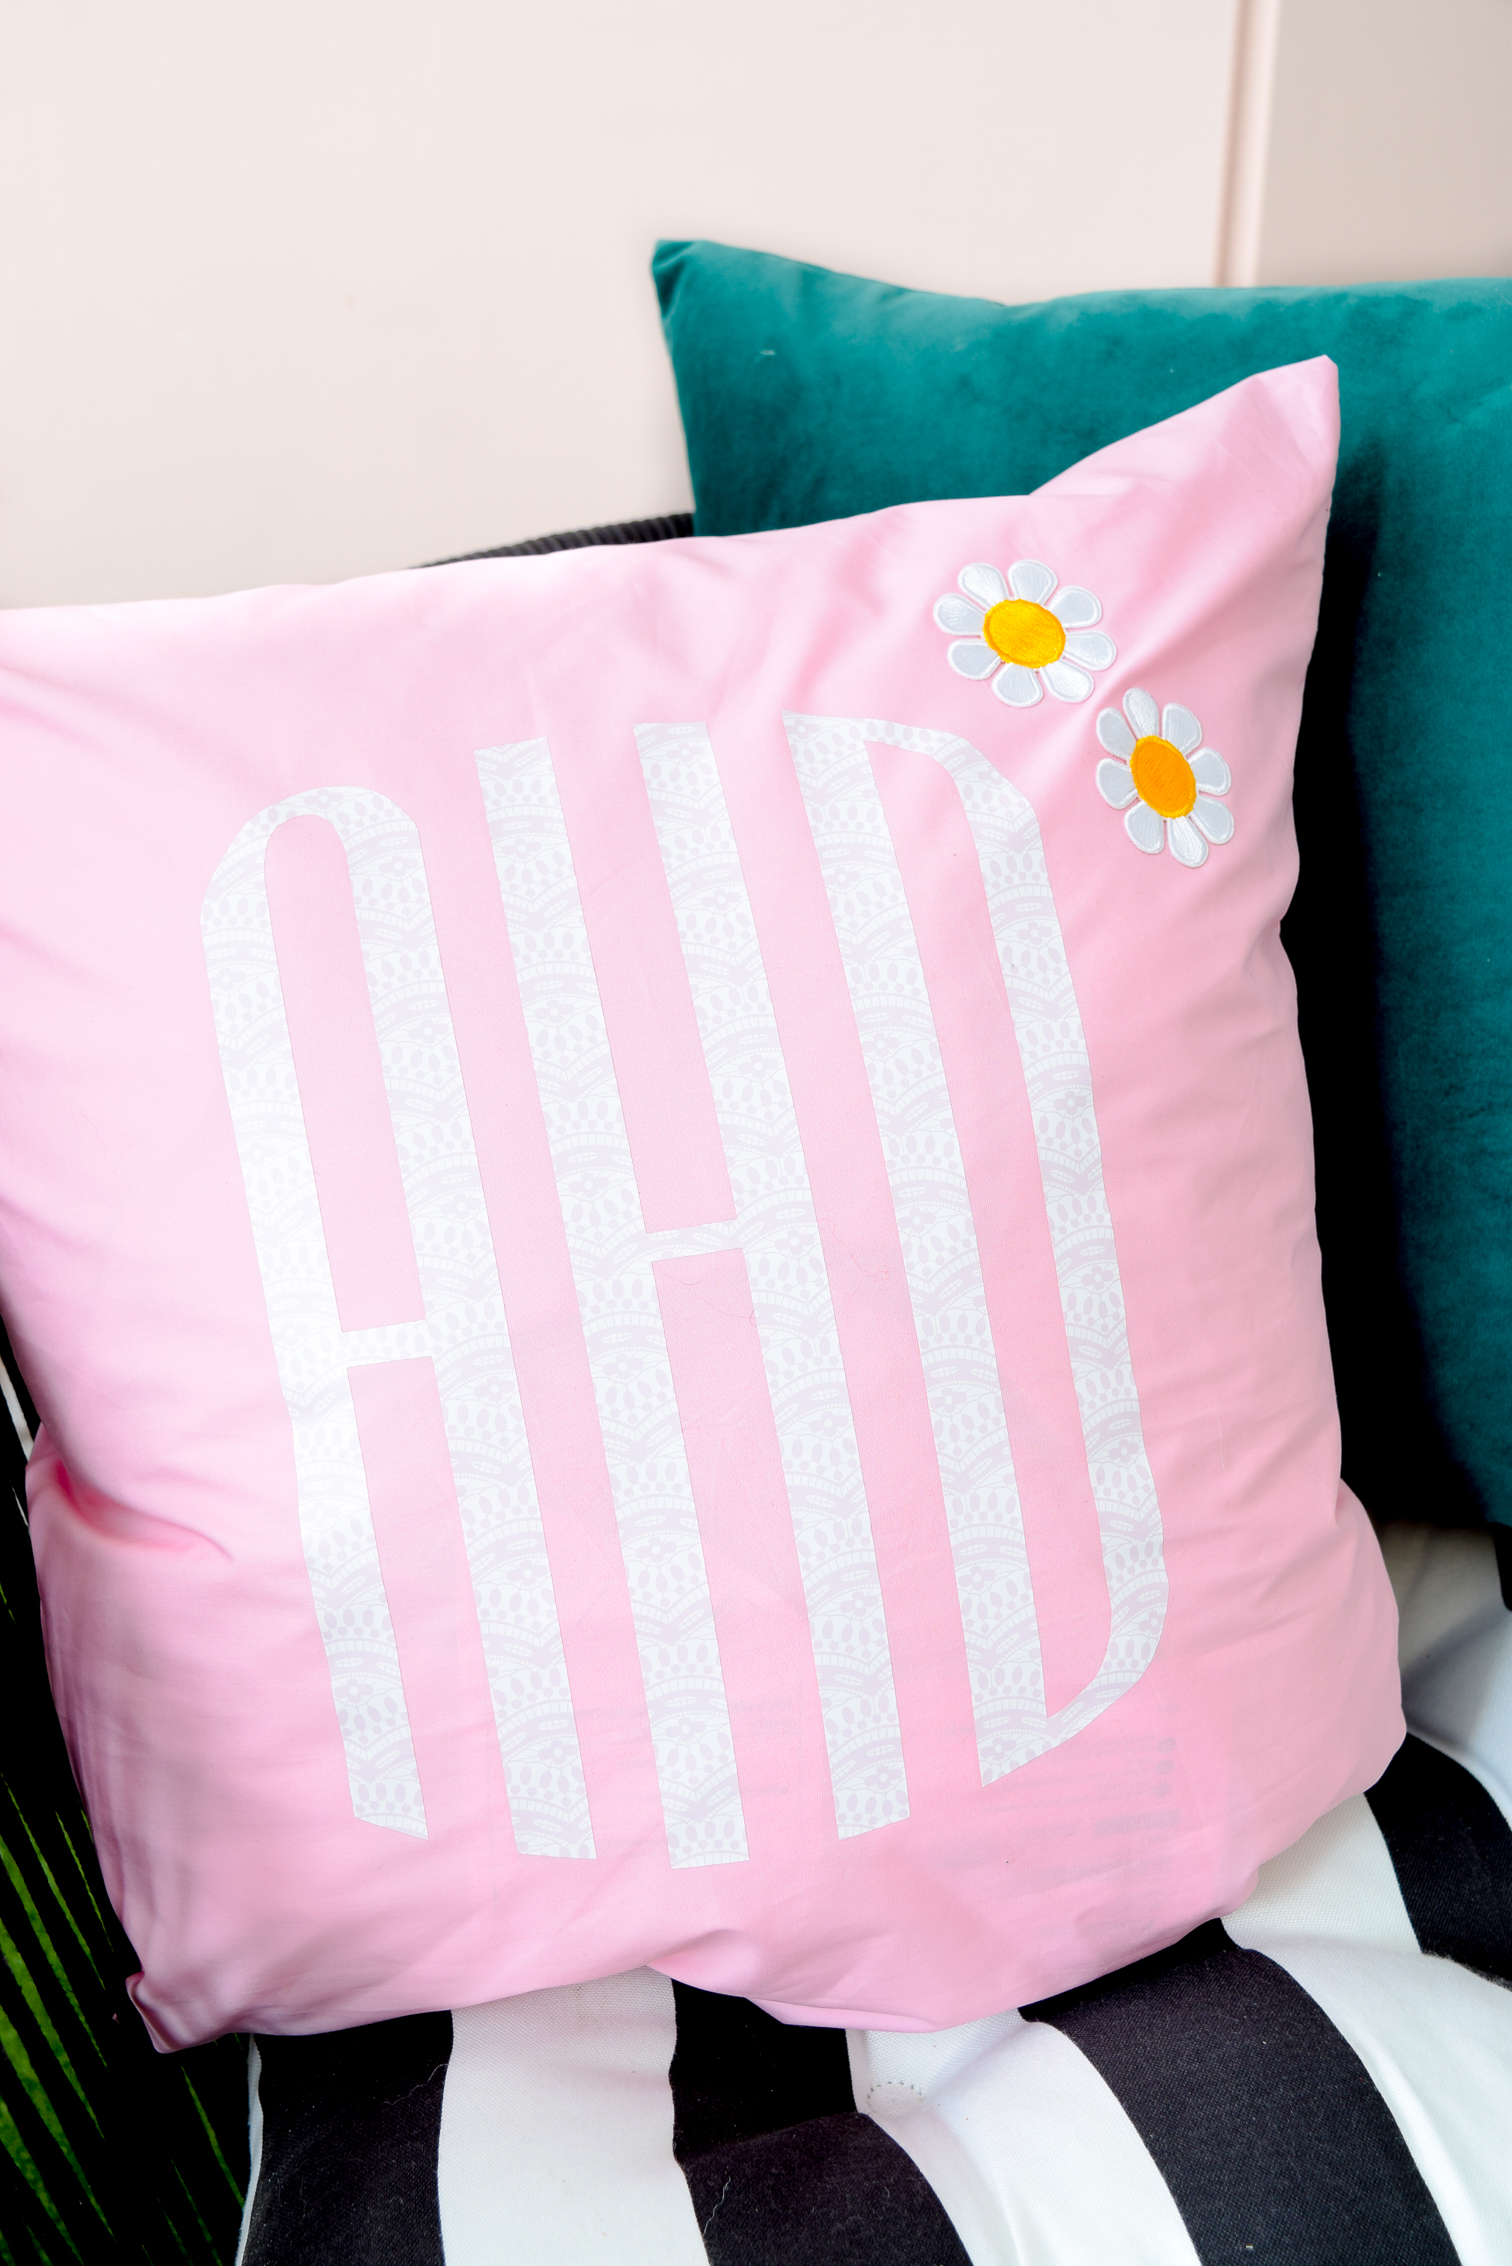
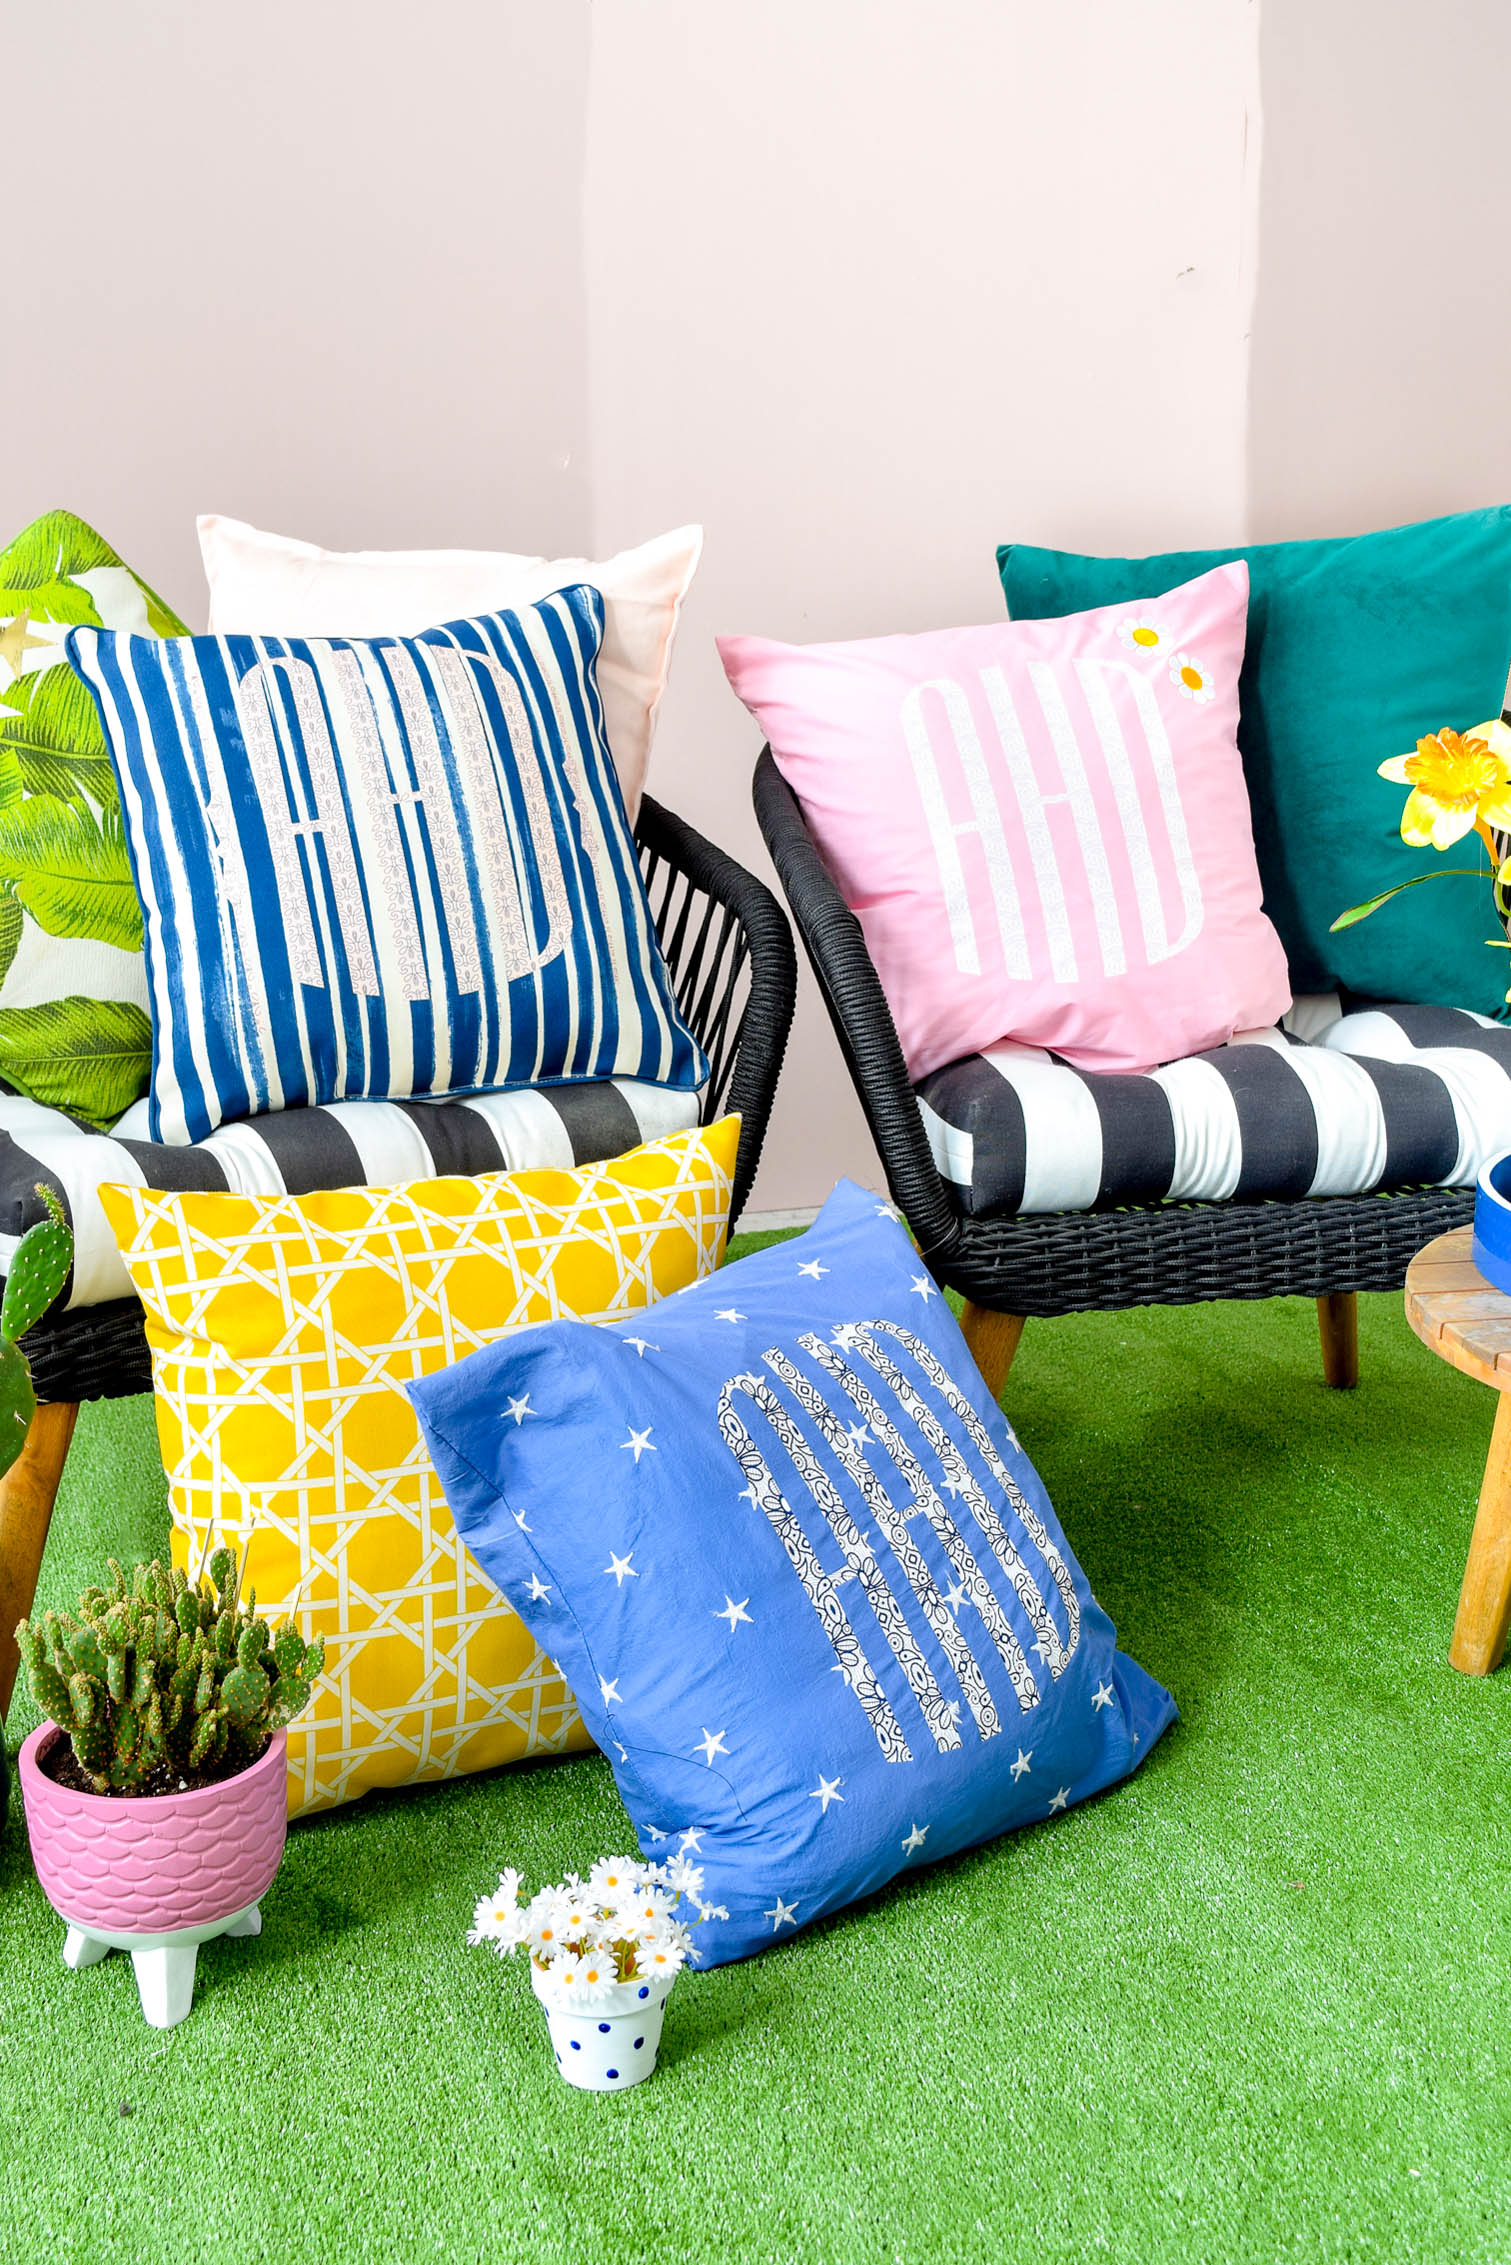
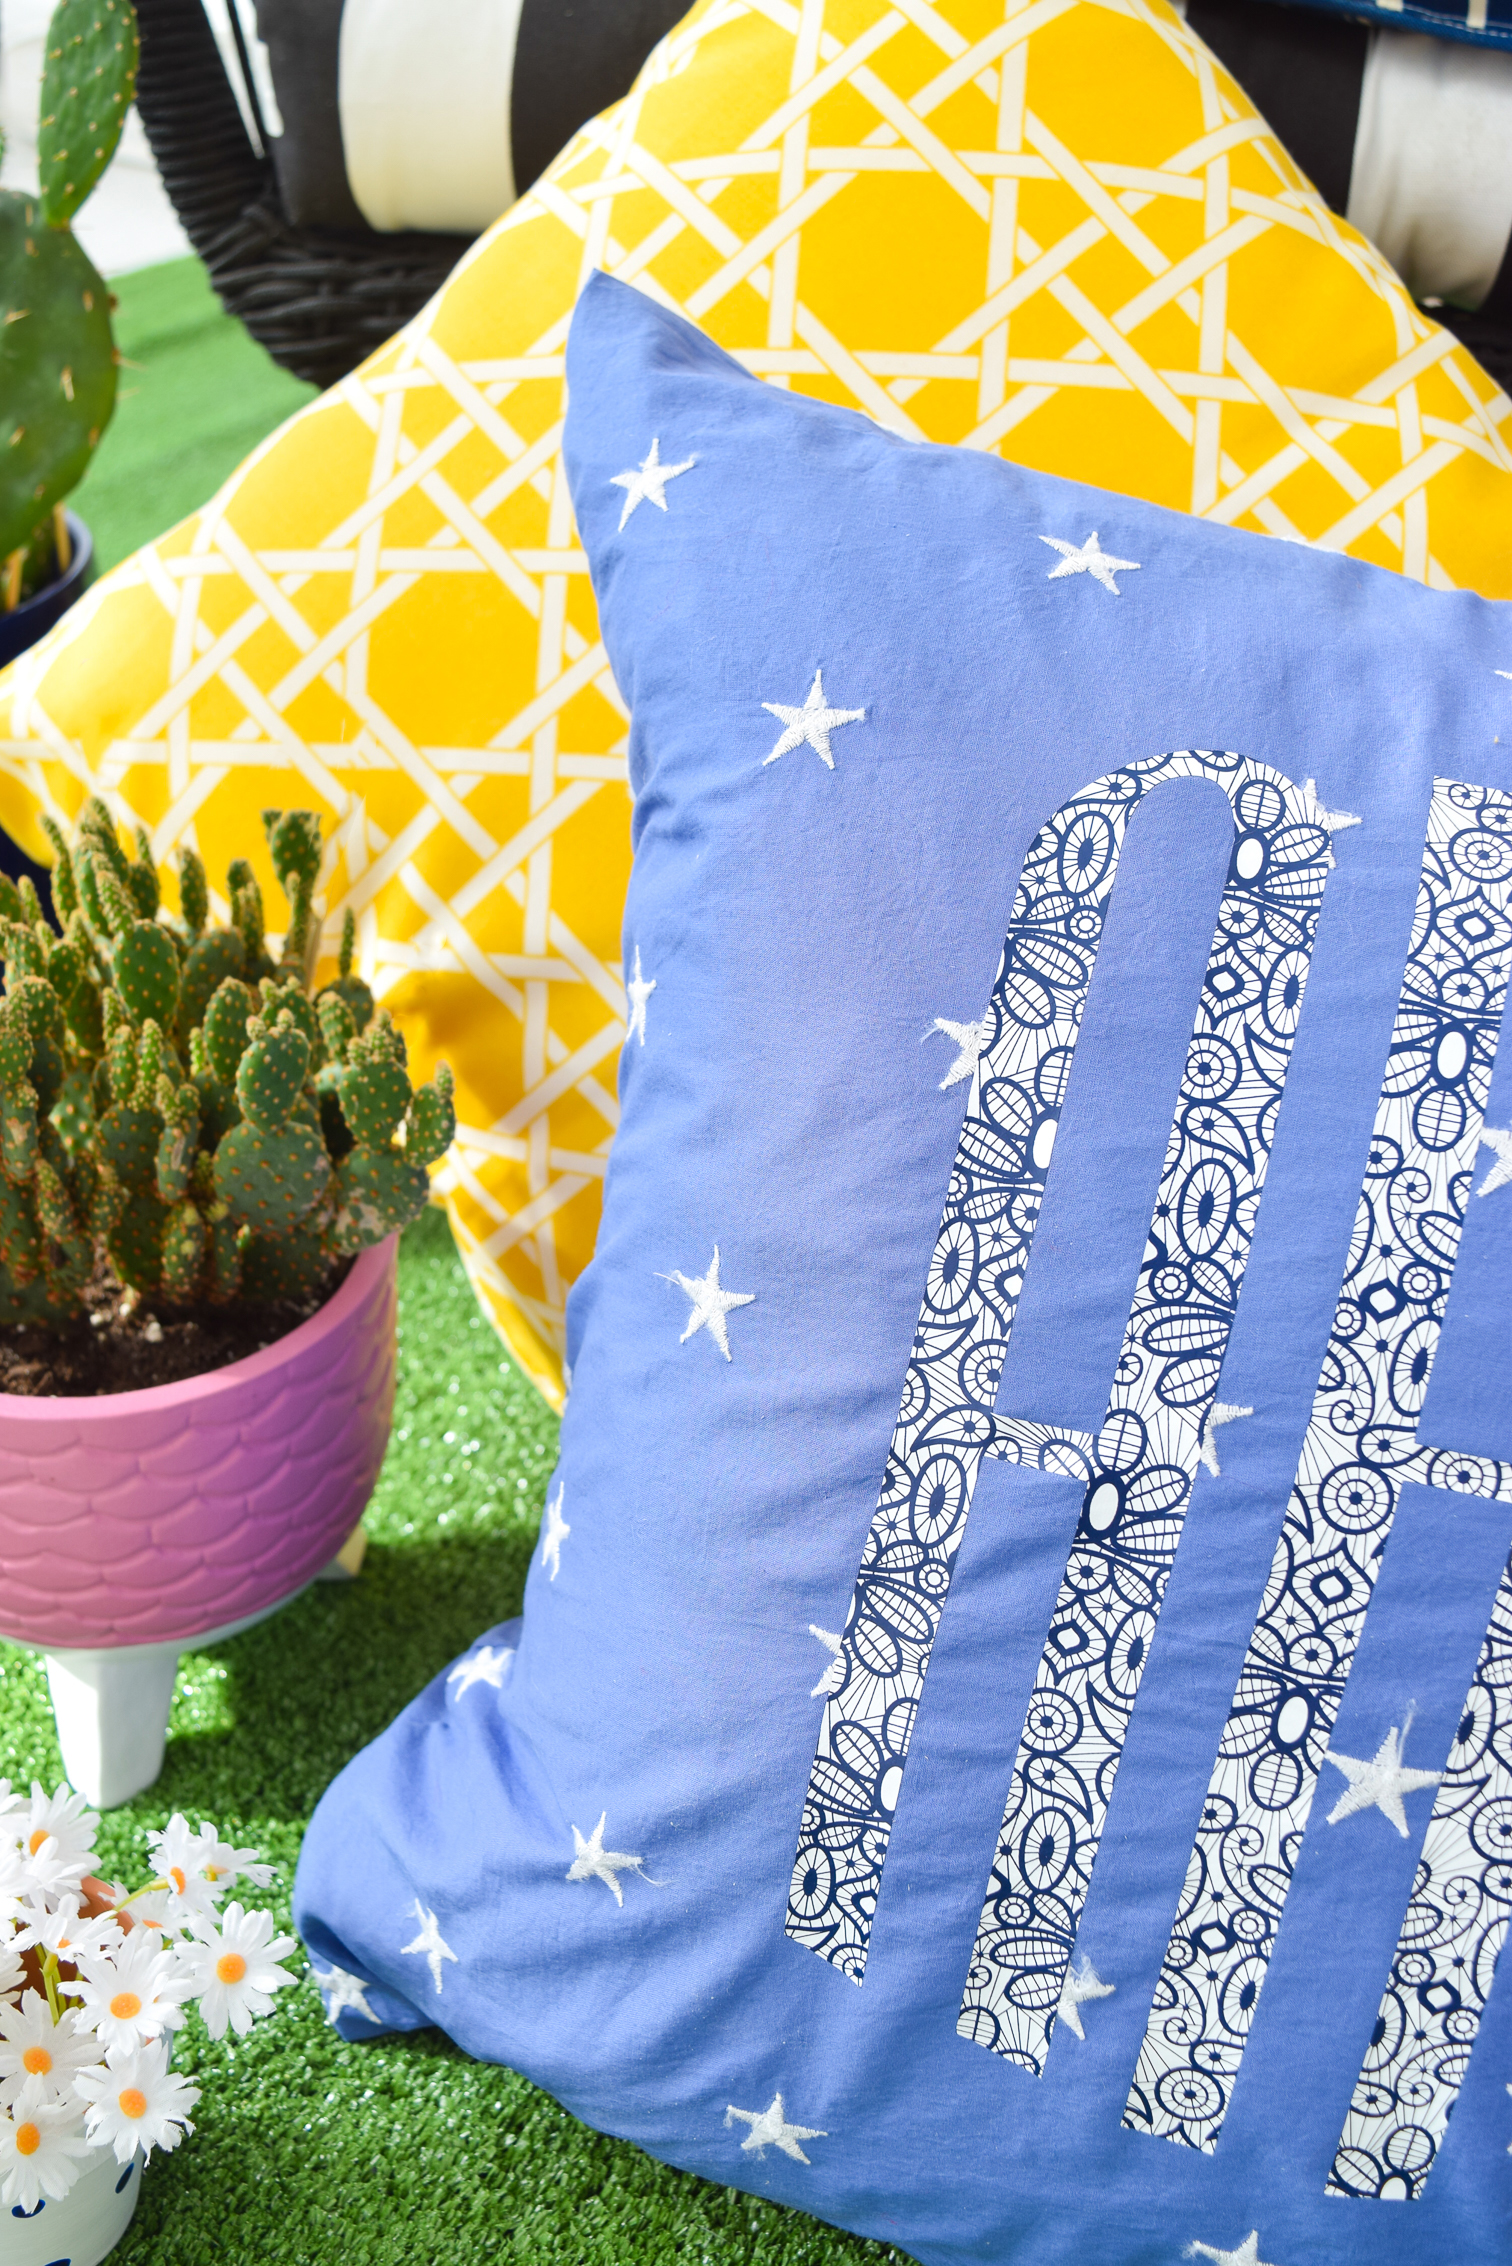
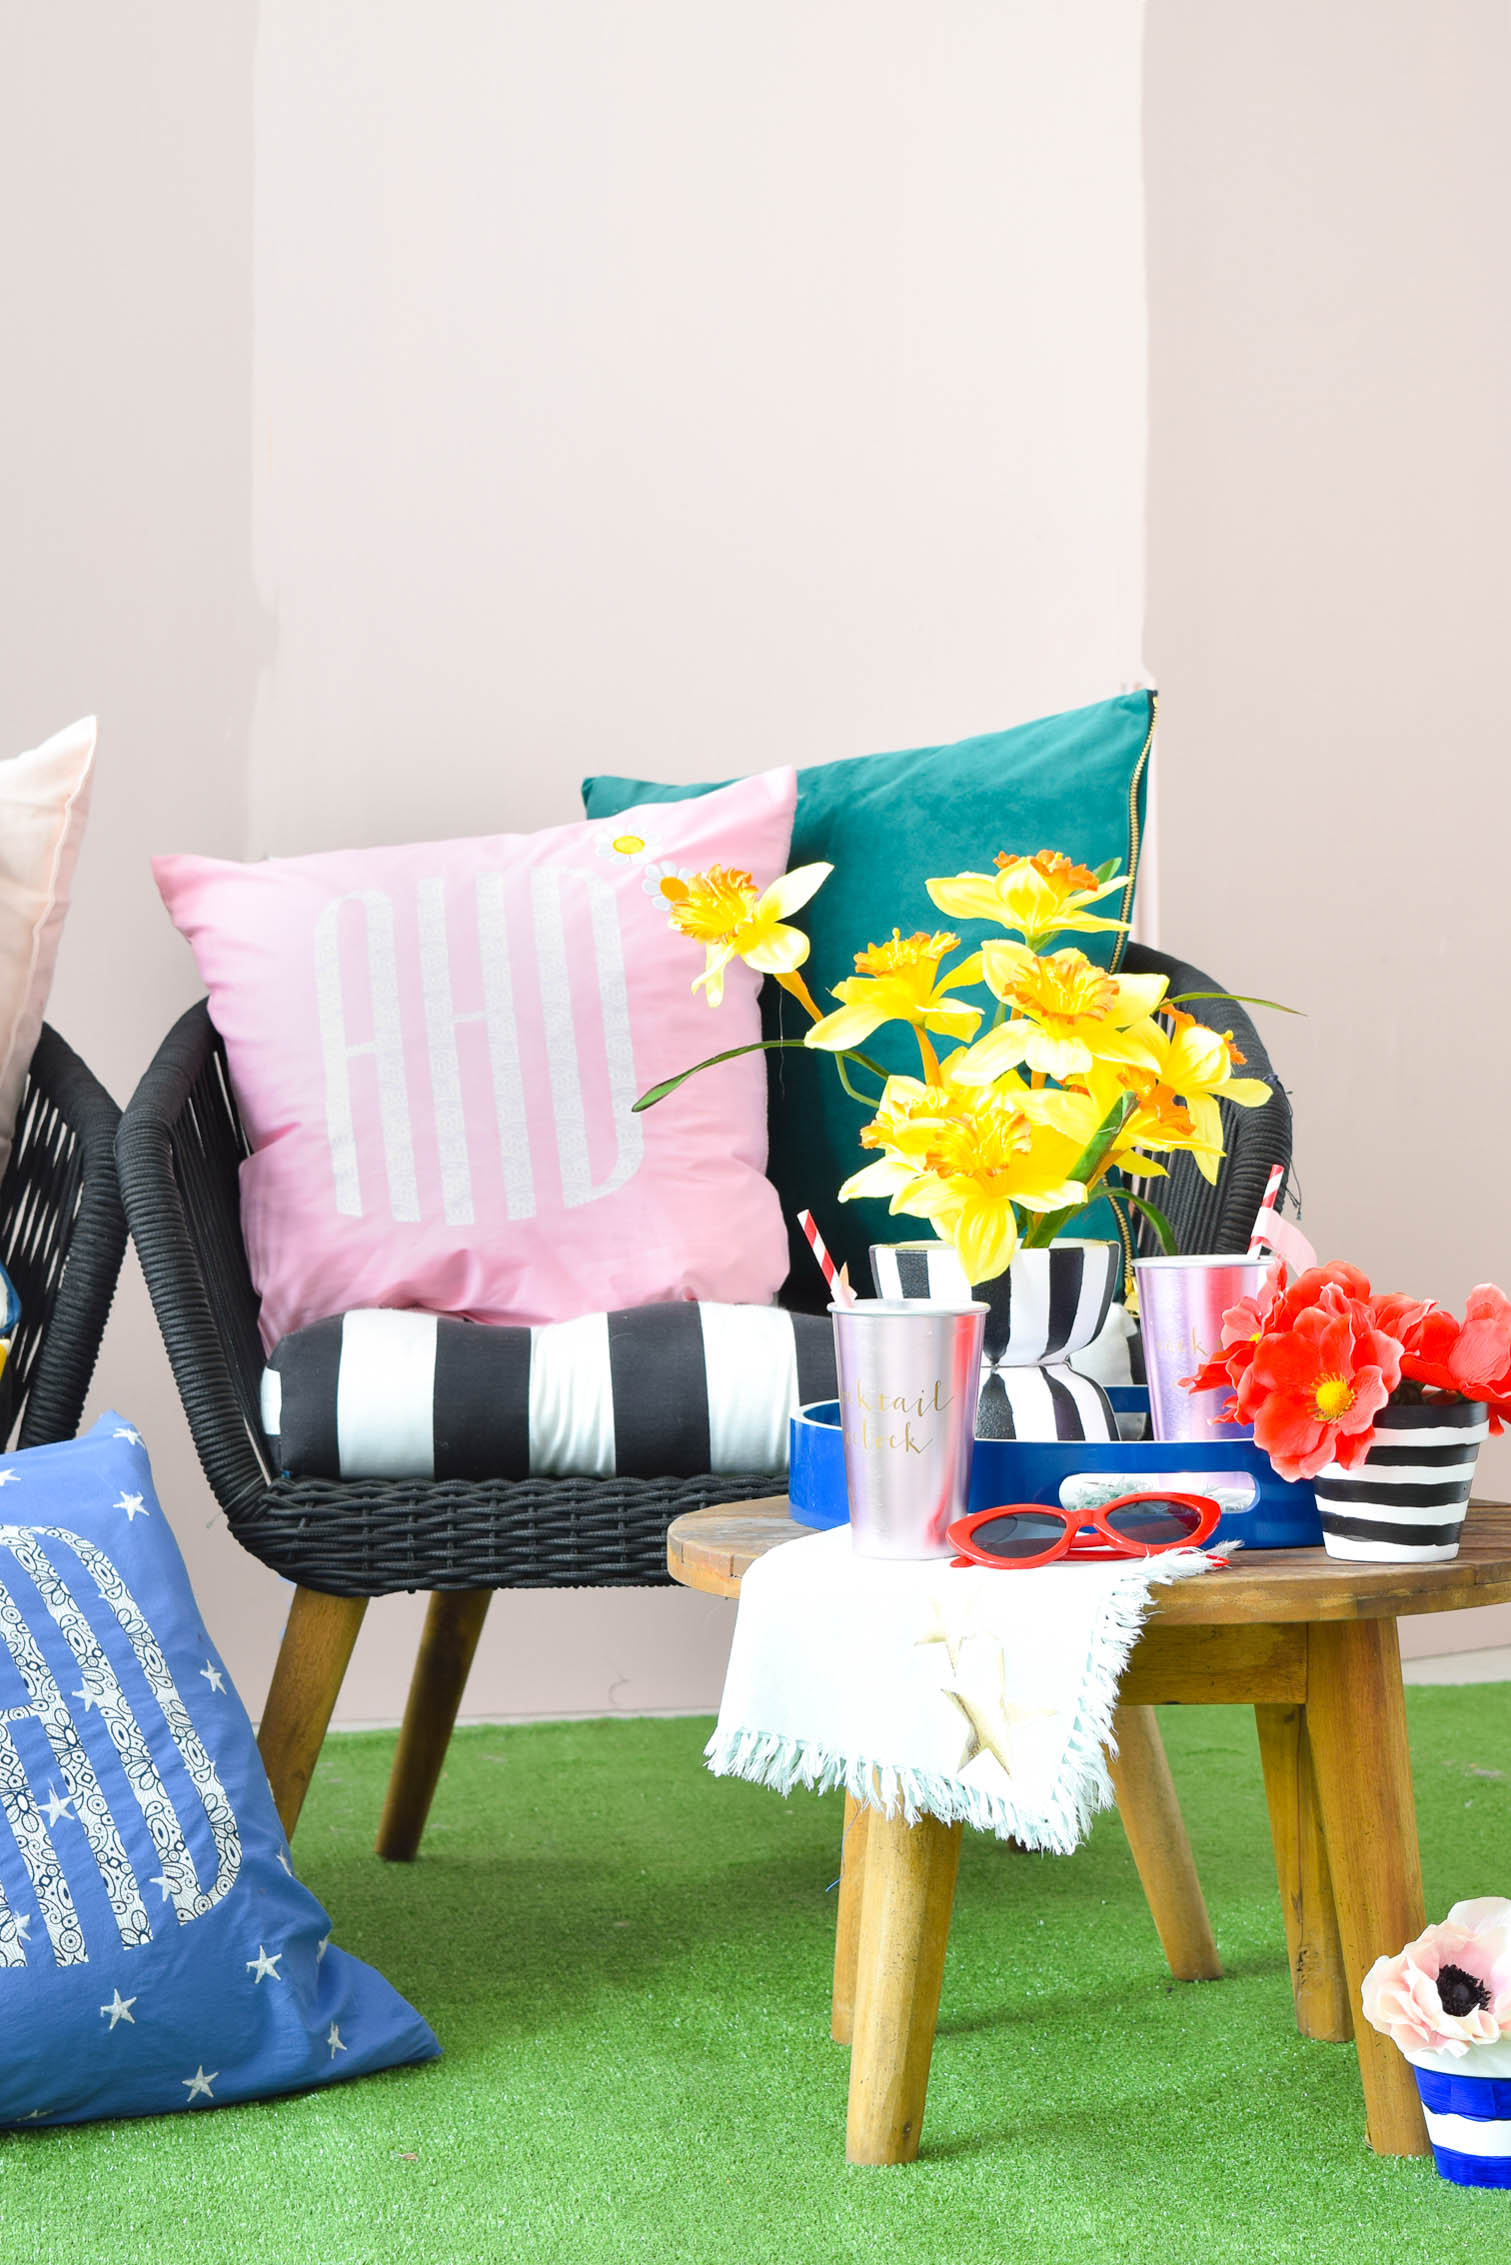
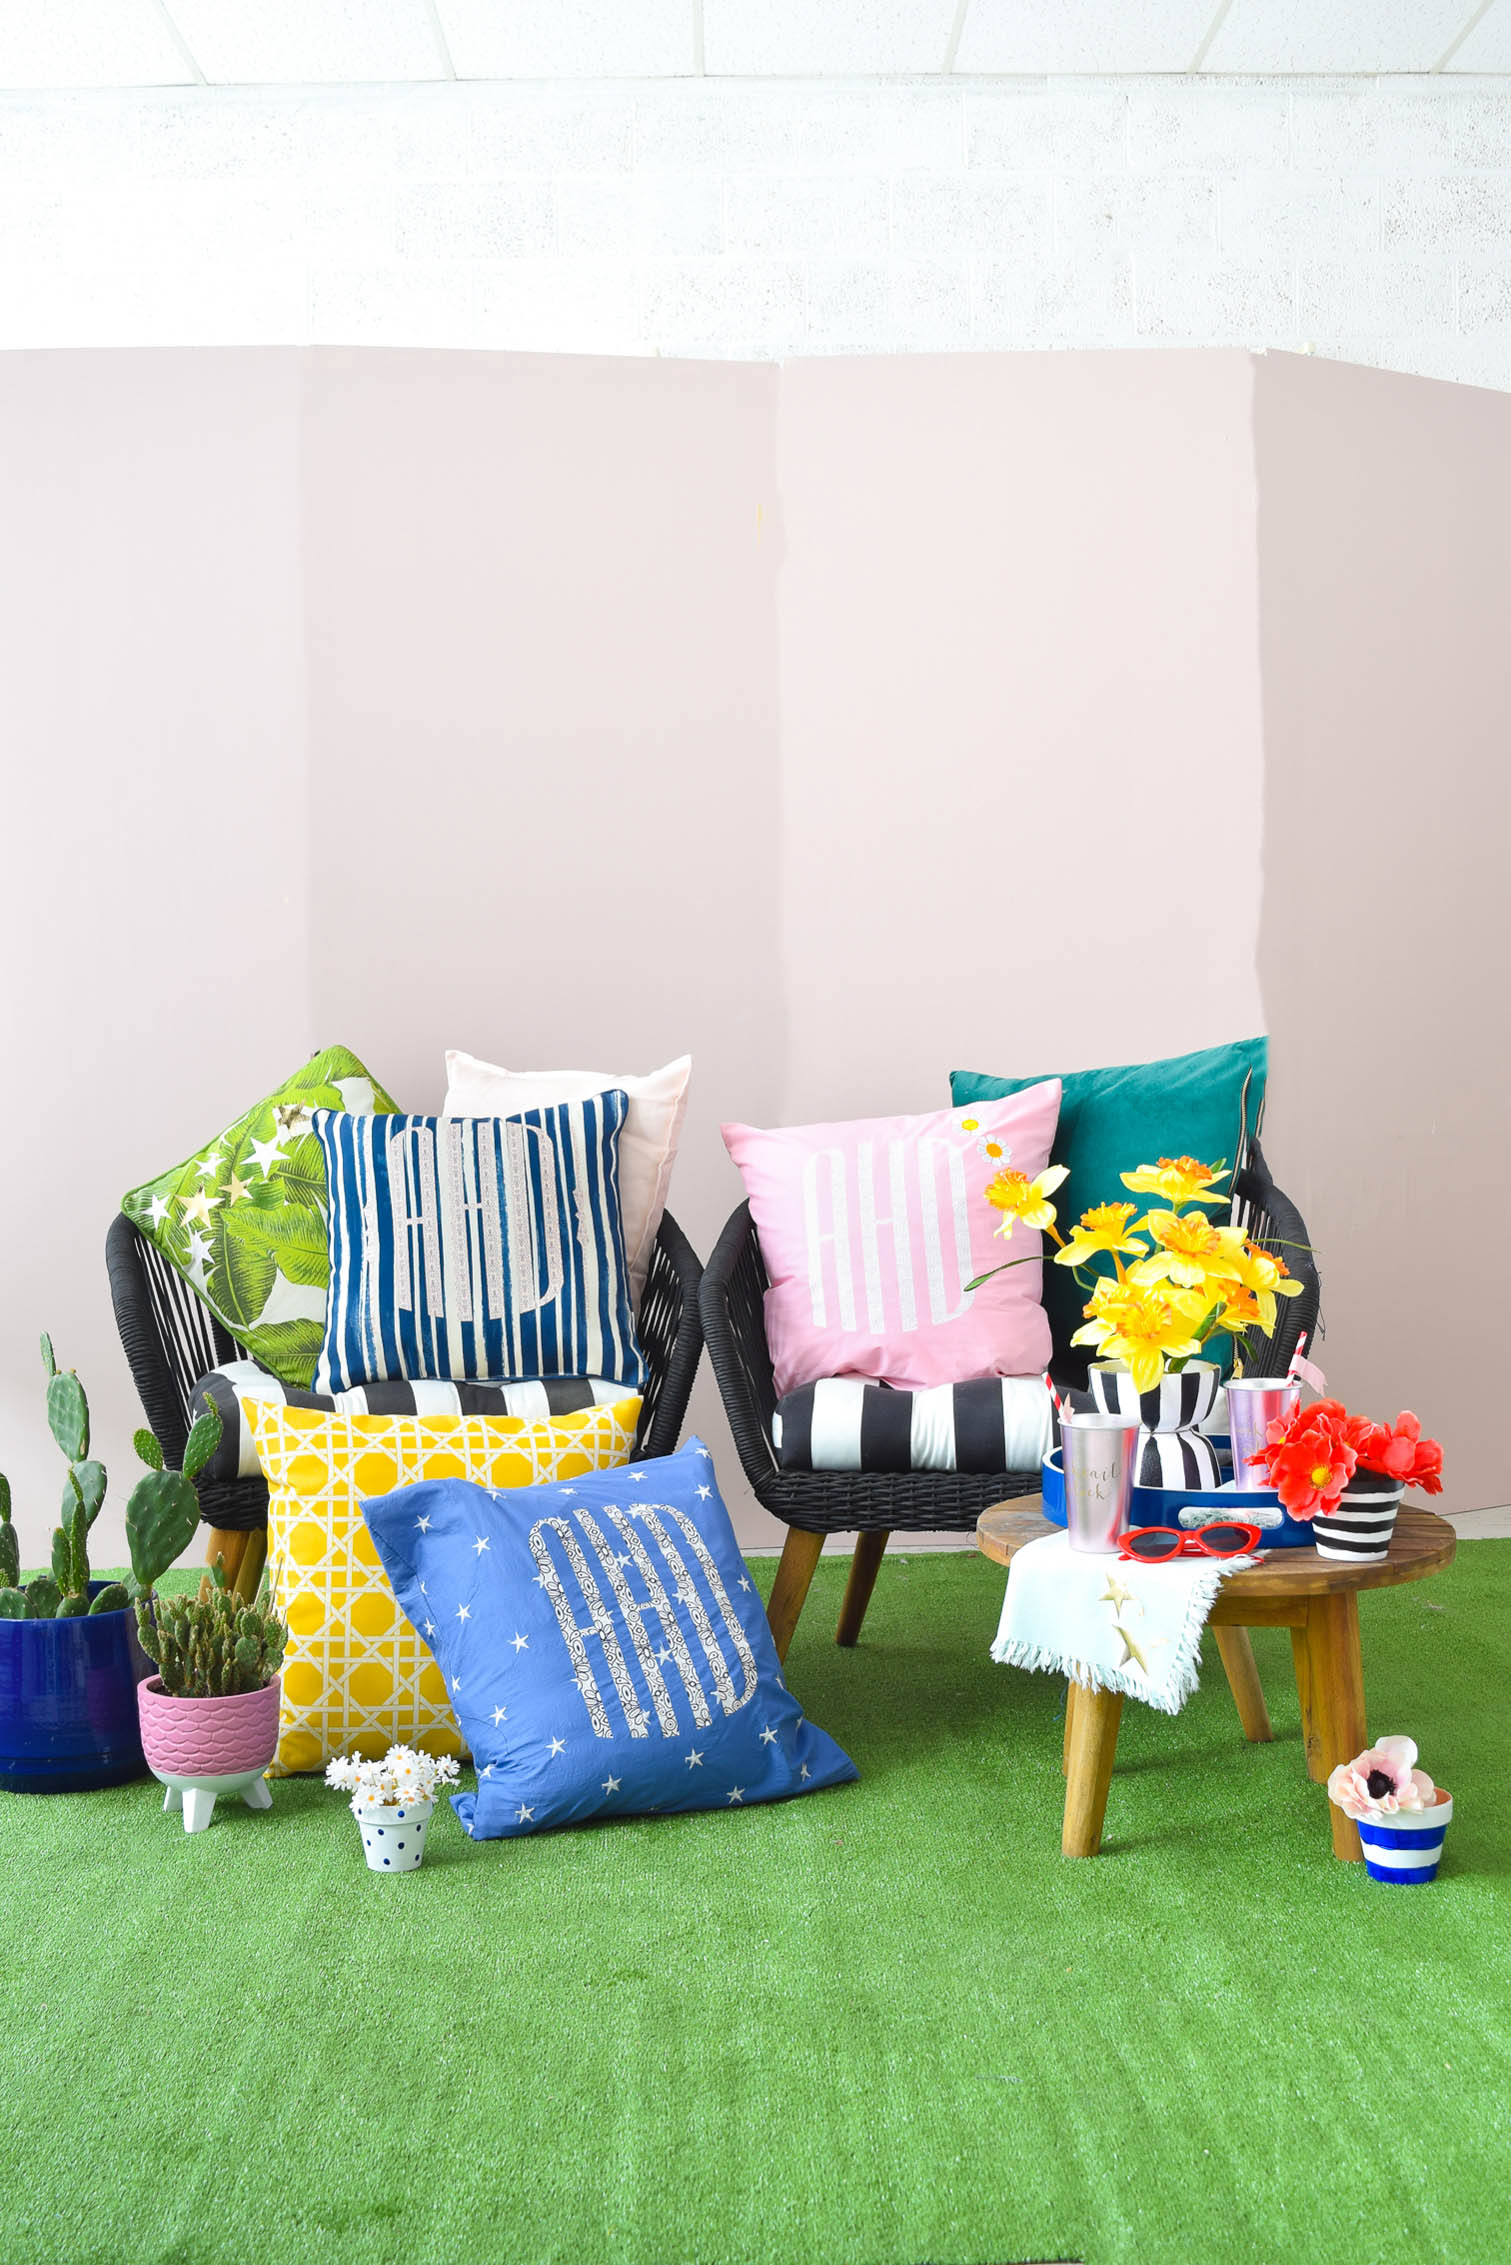
You may be sensing a theme here – I’m getting ready for the great outdoors! With yesterday’s potting bench // here // and now my Patterned Iron On Monogram Pillows, our outdoor space is really starting to shape up. We’re building on our ORC space reveal from last summer // here //, and one thing I wish I had done more of last year, was customize our decor. Now that Cricut has launched their game changing patterned iron on, I can bring all kinds of colours and patterns to my projects. They’ve got 9 different sampler packs, but the one I chose spoke to me because of it’s simplicity an retro vibes.
*Cricut sponsored this post, but all thoughts are my own. Thank you for supporting the brands that make PMQ for two possible.

Before we dive right into it I thought I’d share my guide to the Cricut Explore Air 2, just in case you were new to the machine and needed some help. You can read all about how to upload files, how the machine works, the kinds of projects you can make – and more!
// GUIDE TO THE CRICUT EXPLORE AIR 2 //

Patterned Iron On is perfect for all my spring projects because the 3 different designs in each pack give me a chance to play around with complimentary patterns without having to buy all three rolls. Gotta love a sampler pack, right?! Although I’ve done pillows, you could easily decorate t-shirts, hoodies, baby bodysuits, tote bags and more.
*The following product links contain affiliate links. Thank you for supporting the brands that make PMQ for two possible. For my full policies click // here //
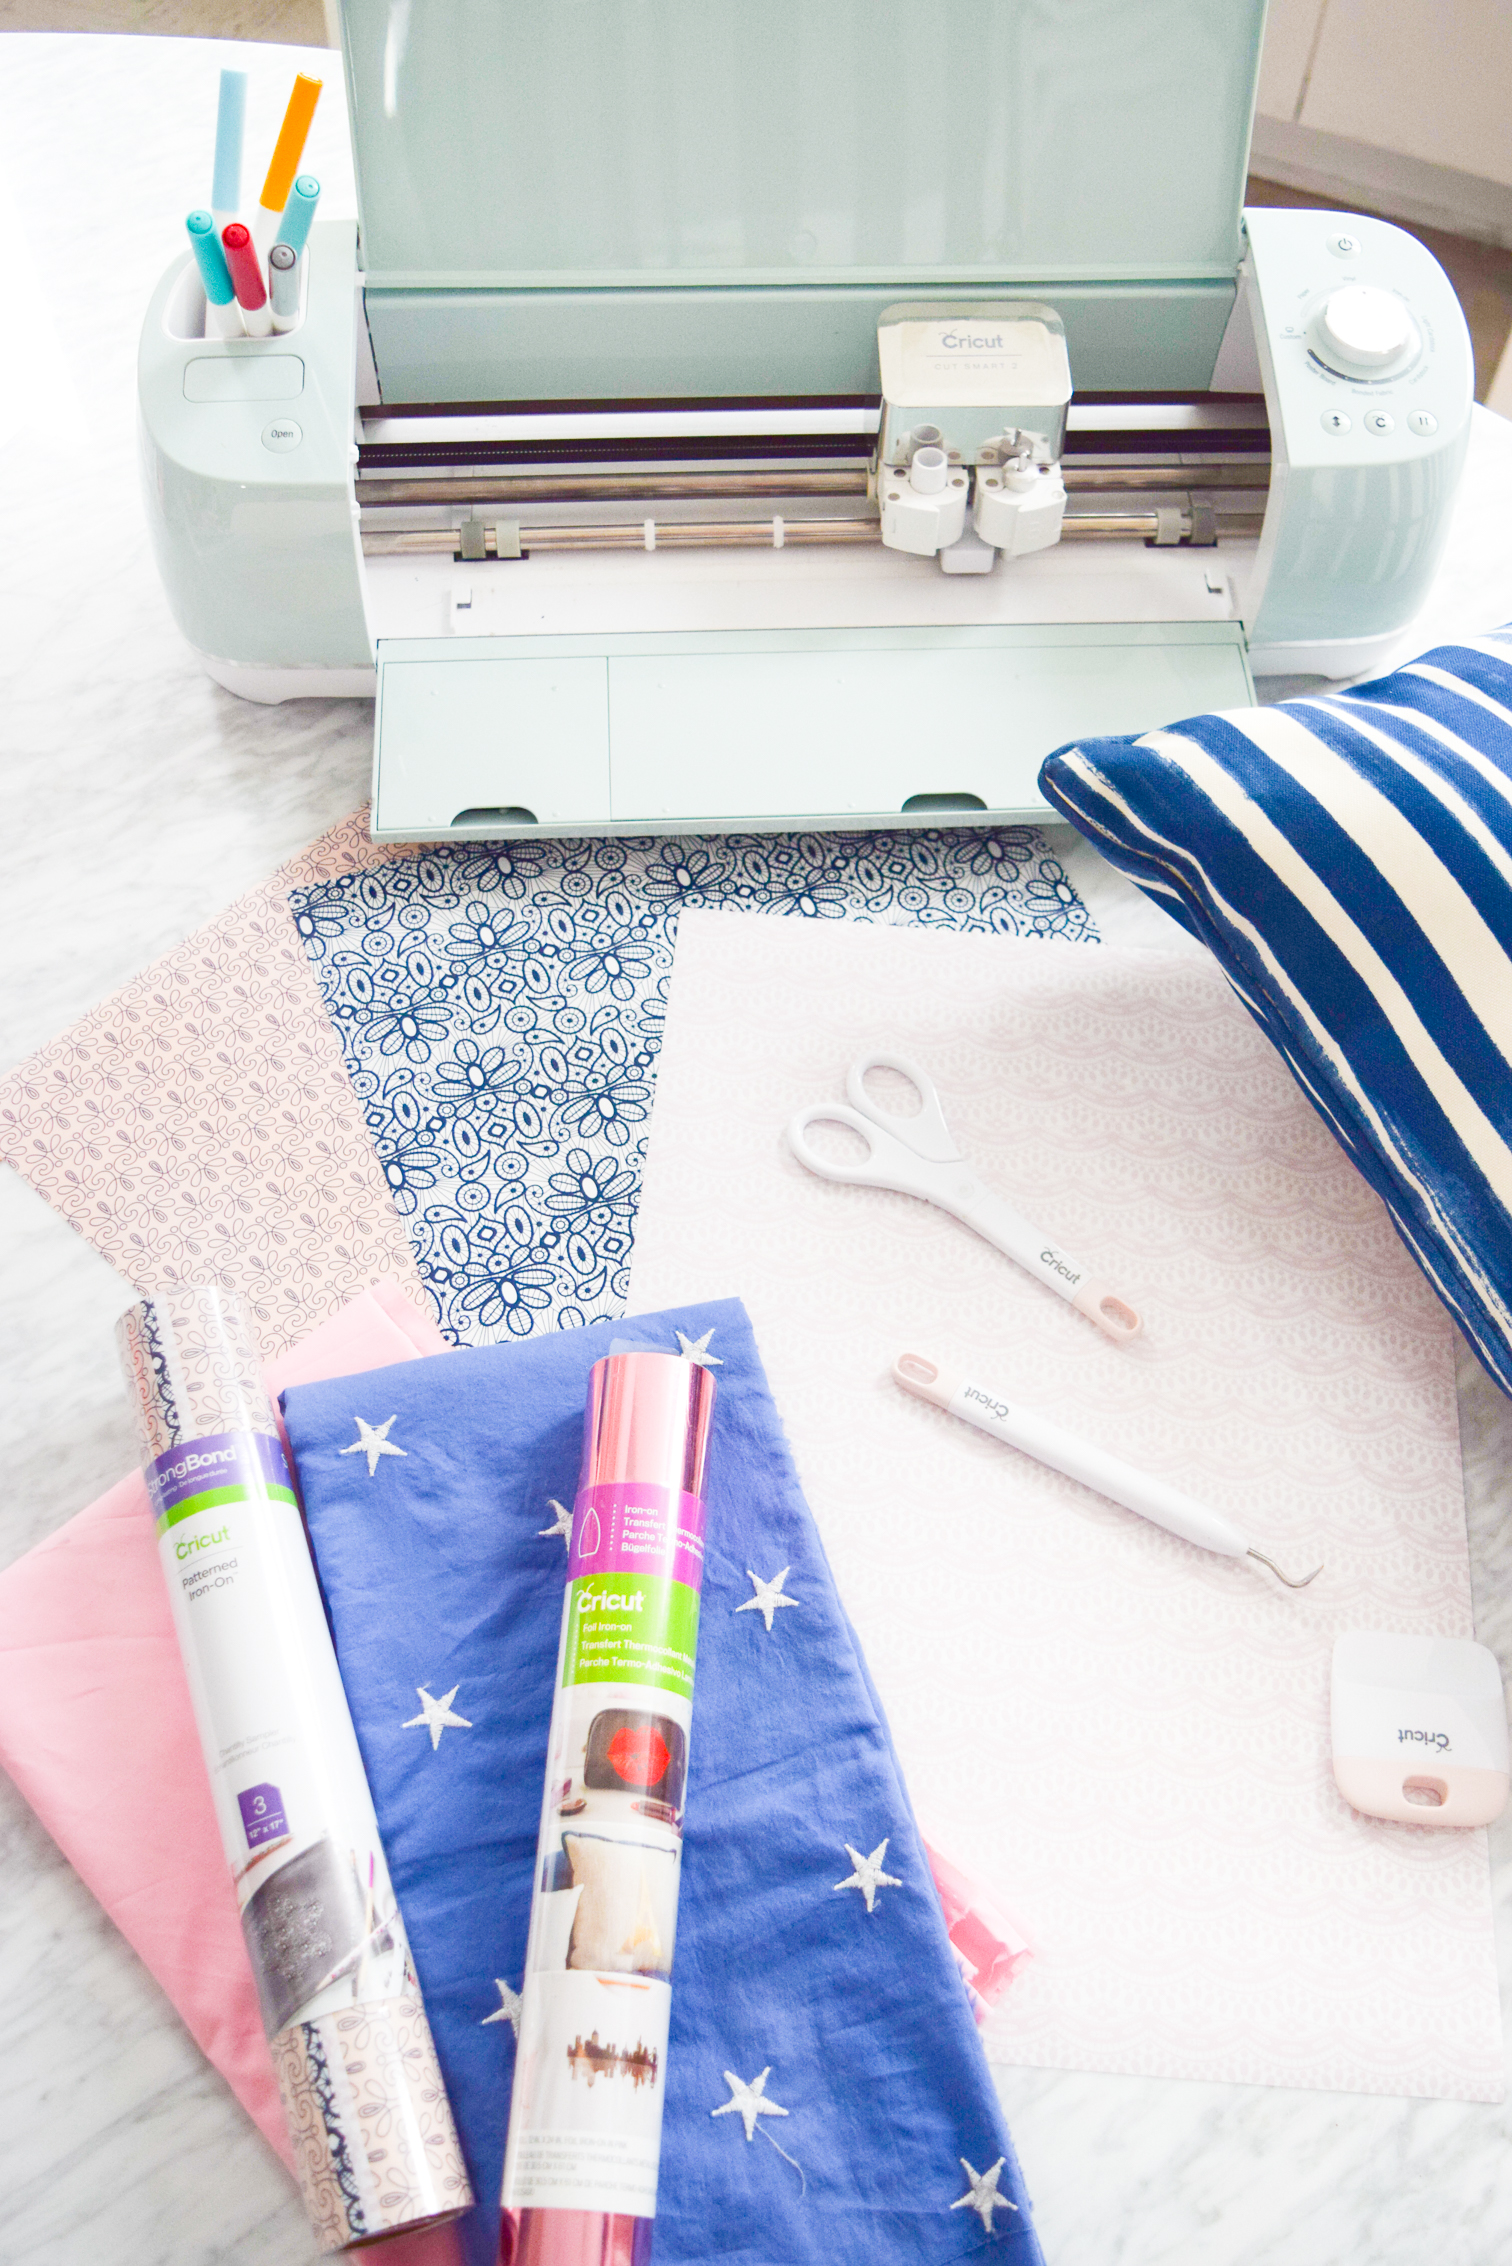
Materials required for the Patterned Iron On Monogram Pillows
- Cricut Chantilly Patterned Iron On Sampler – 3 sheets with one pattern on each
- Cricut Explore Air 2
- Outdoor Pillows – water resistant material – or you’ll get moldy pillows before the summer is out!
- Cricut Cutting Mat
- Cricut Tools
- Cricut EasyPress
- Cricut EasyPress Mat

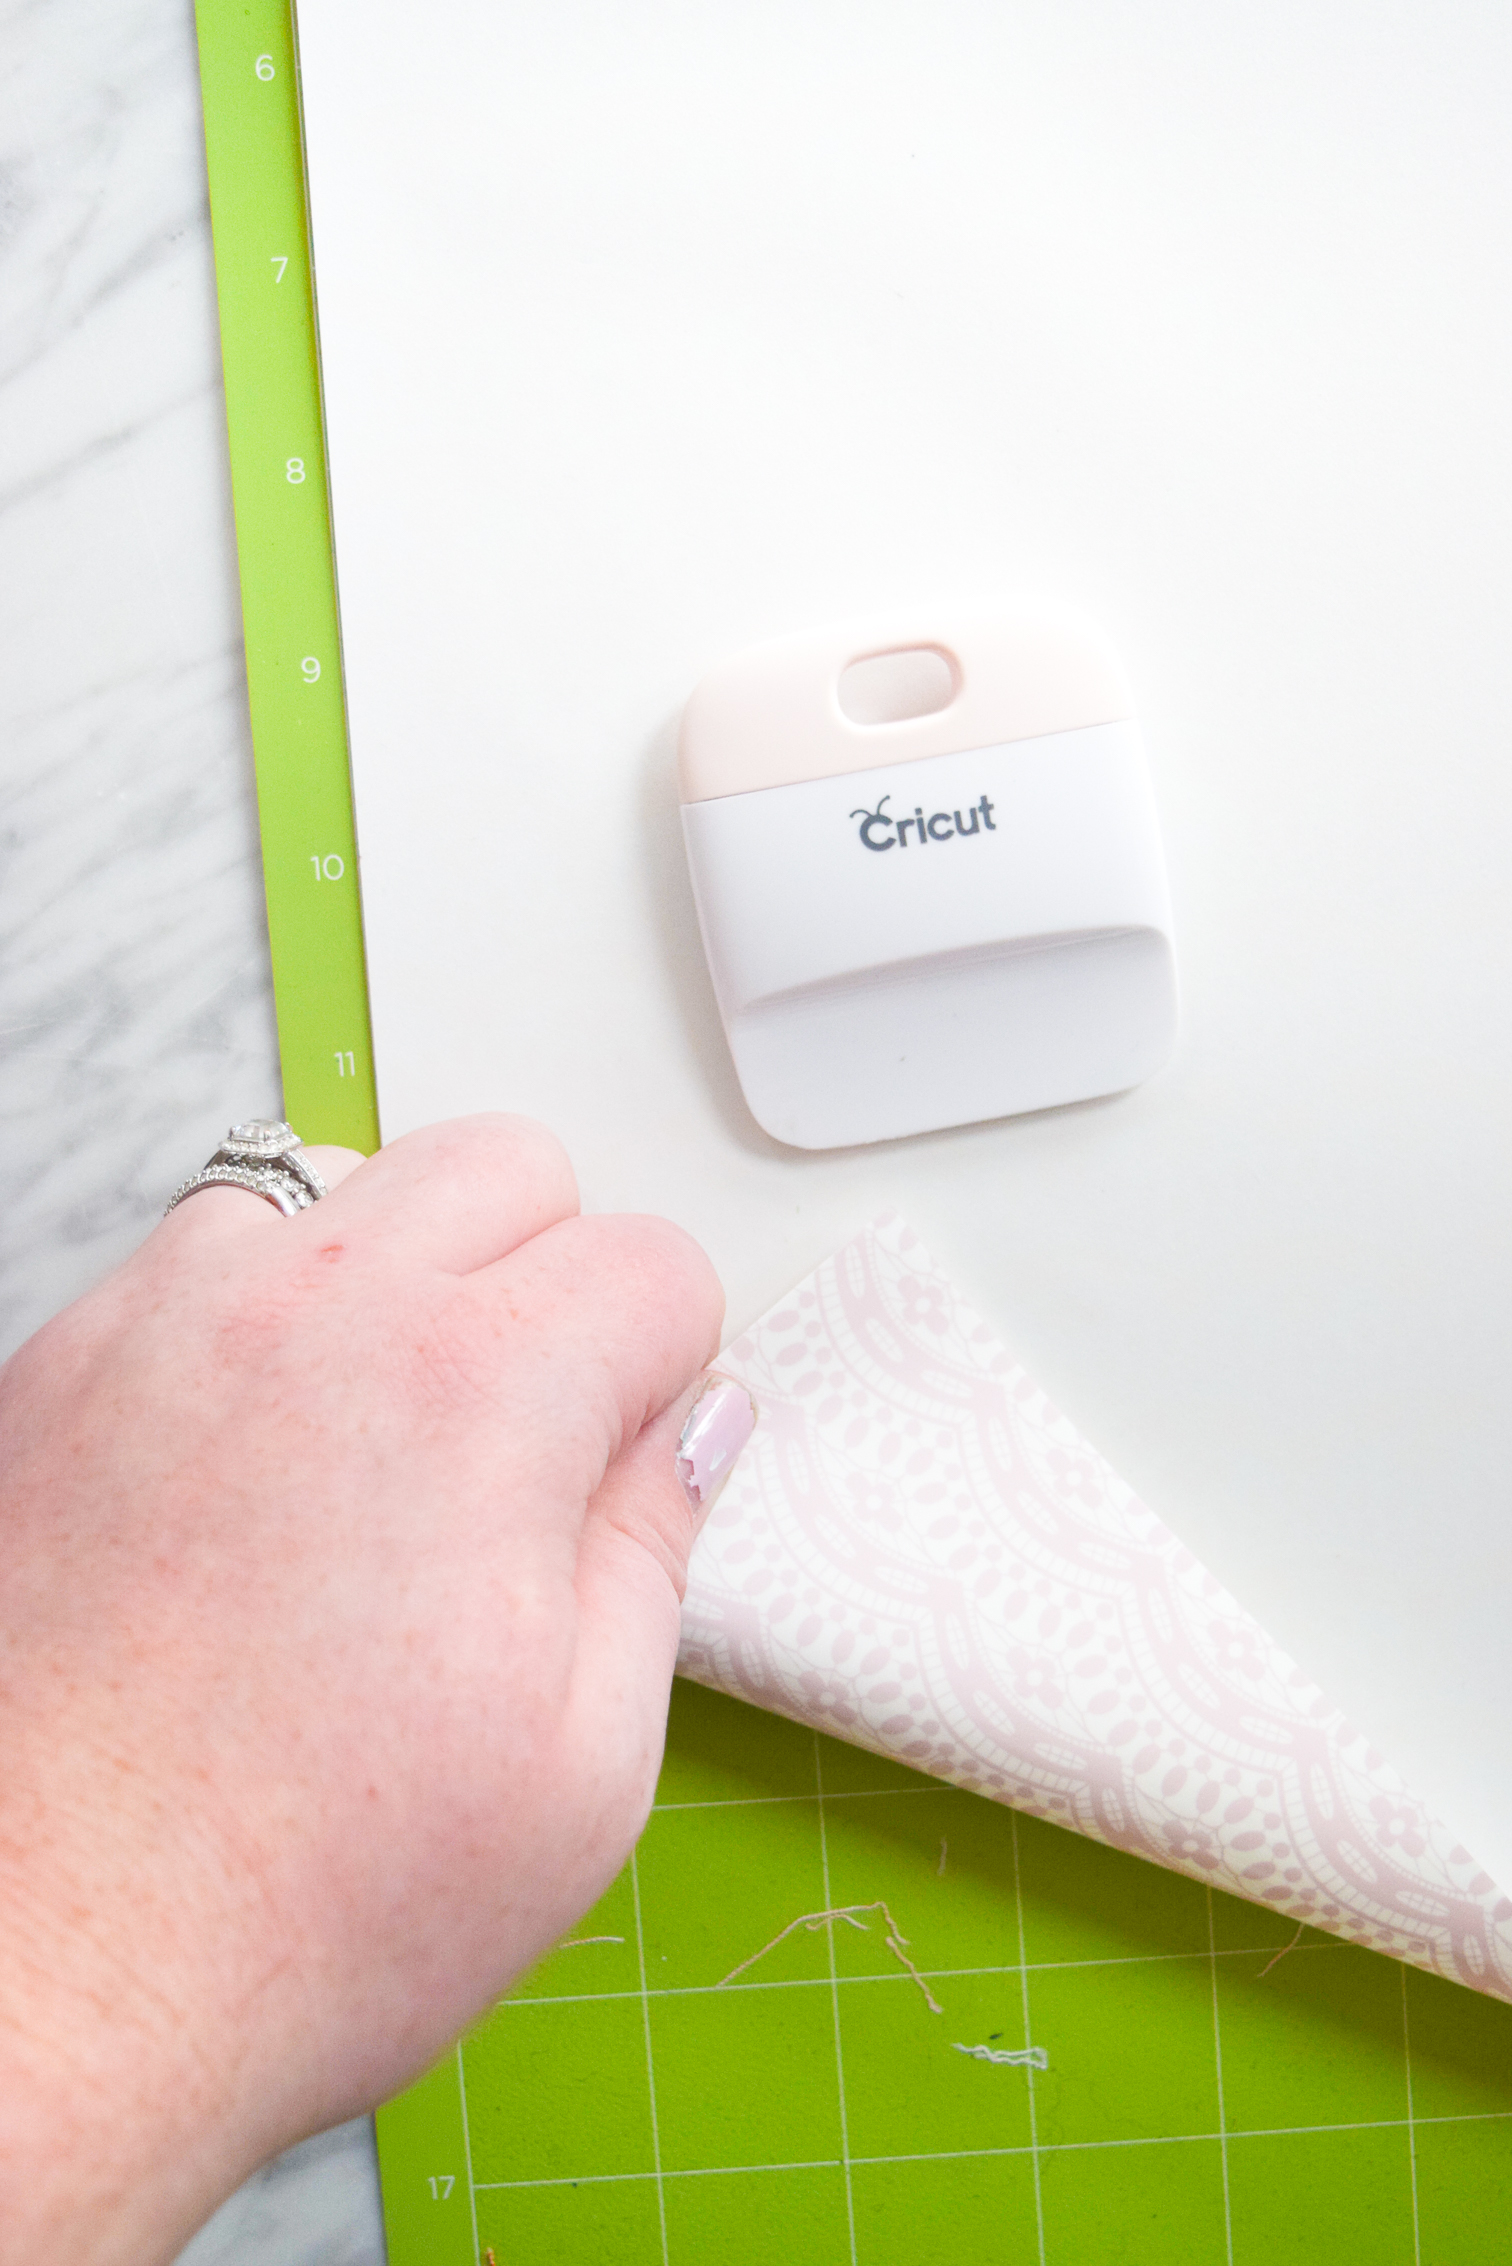
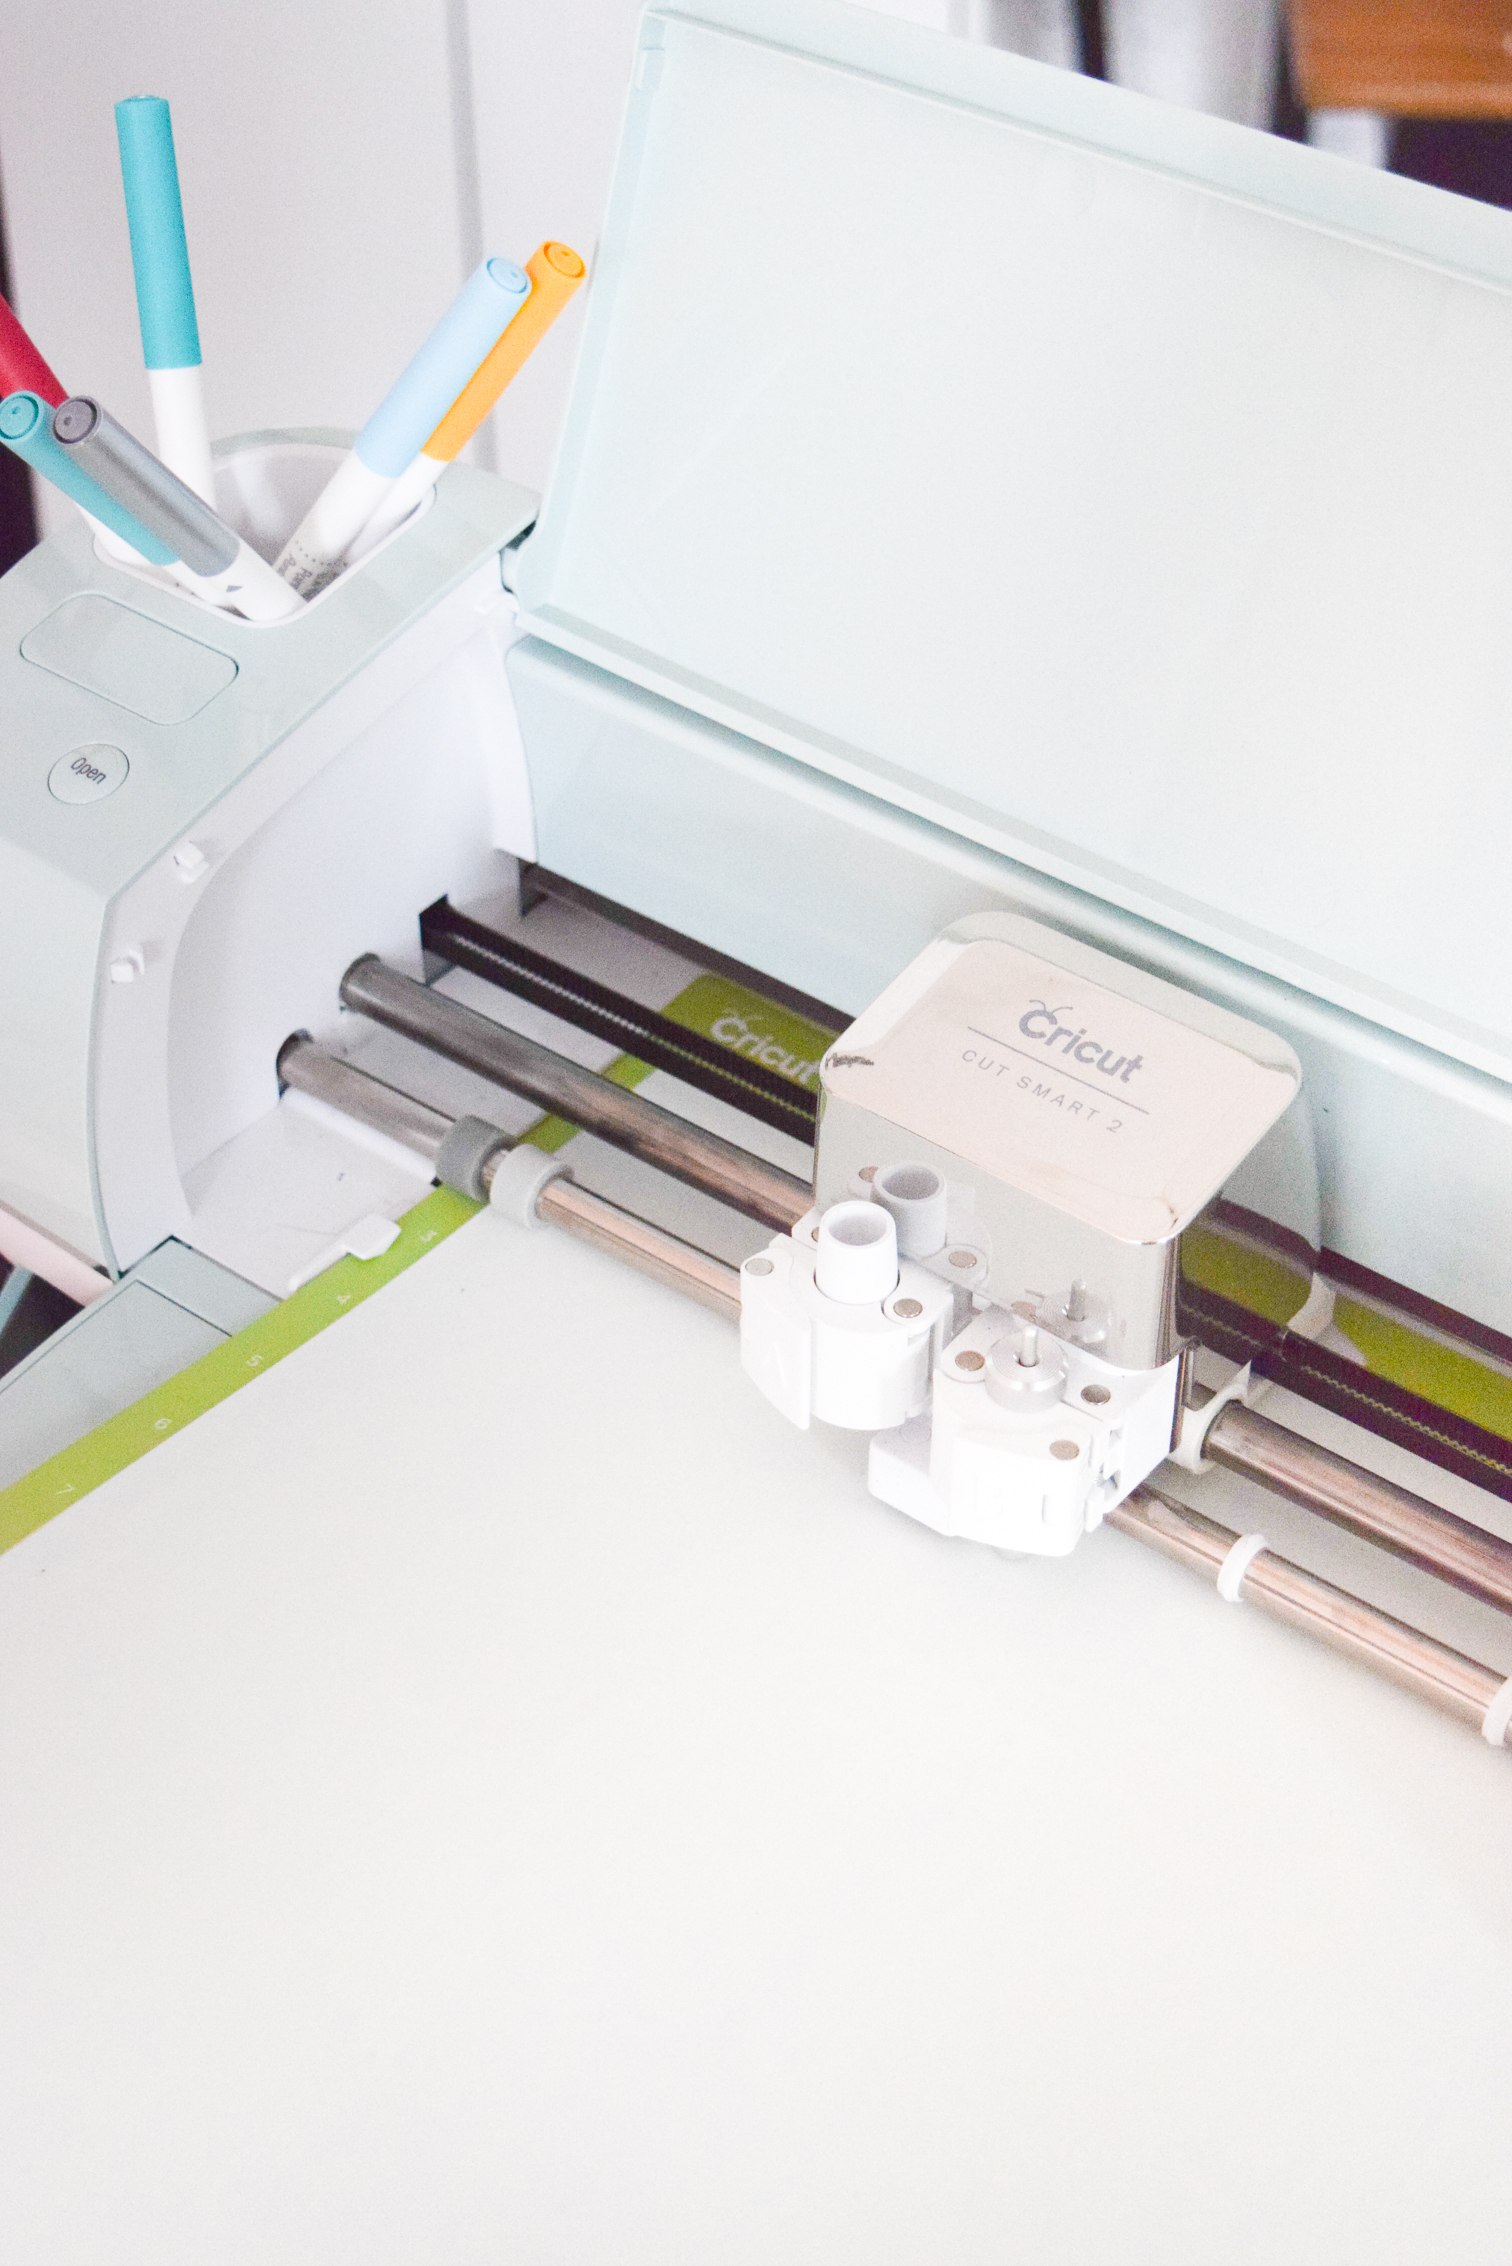
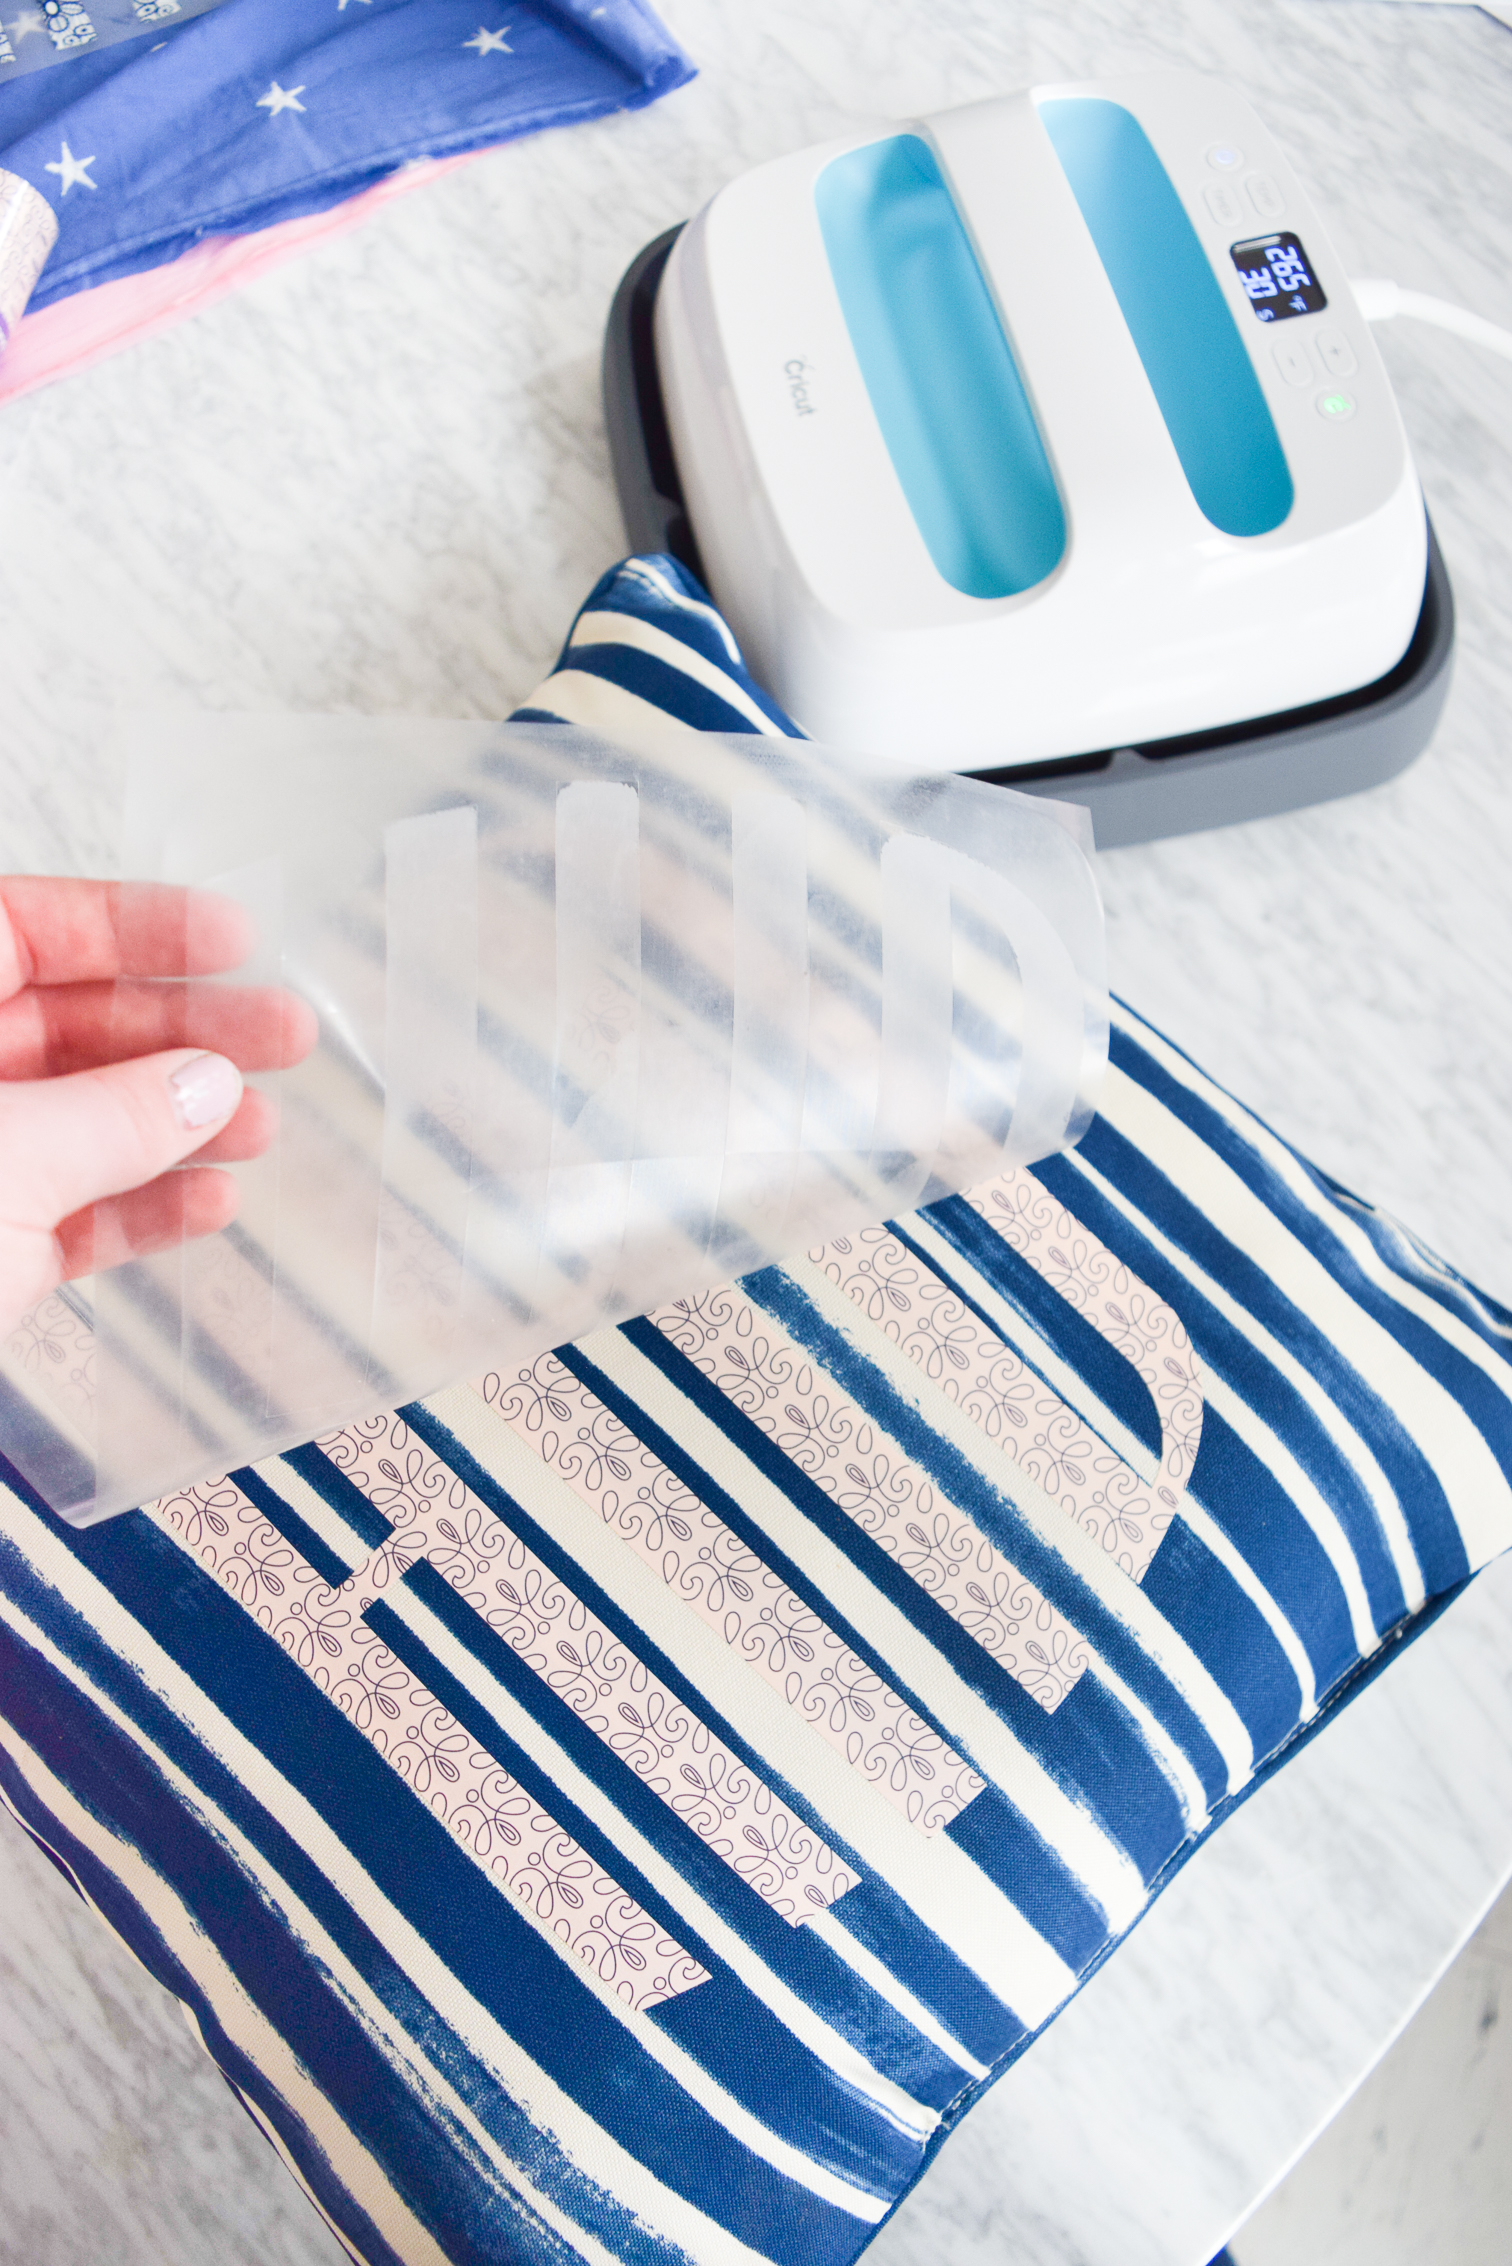
Step1 : Start by applying the patterned iron on to your cutting mat. I always use the applicator tool, because the bubbles will wreak havoc with your machine when you’re trying to cut. Like with all iron on vinyl, lay it pattern side down (like in the picture).
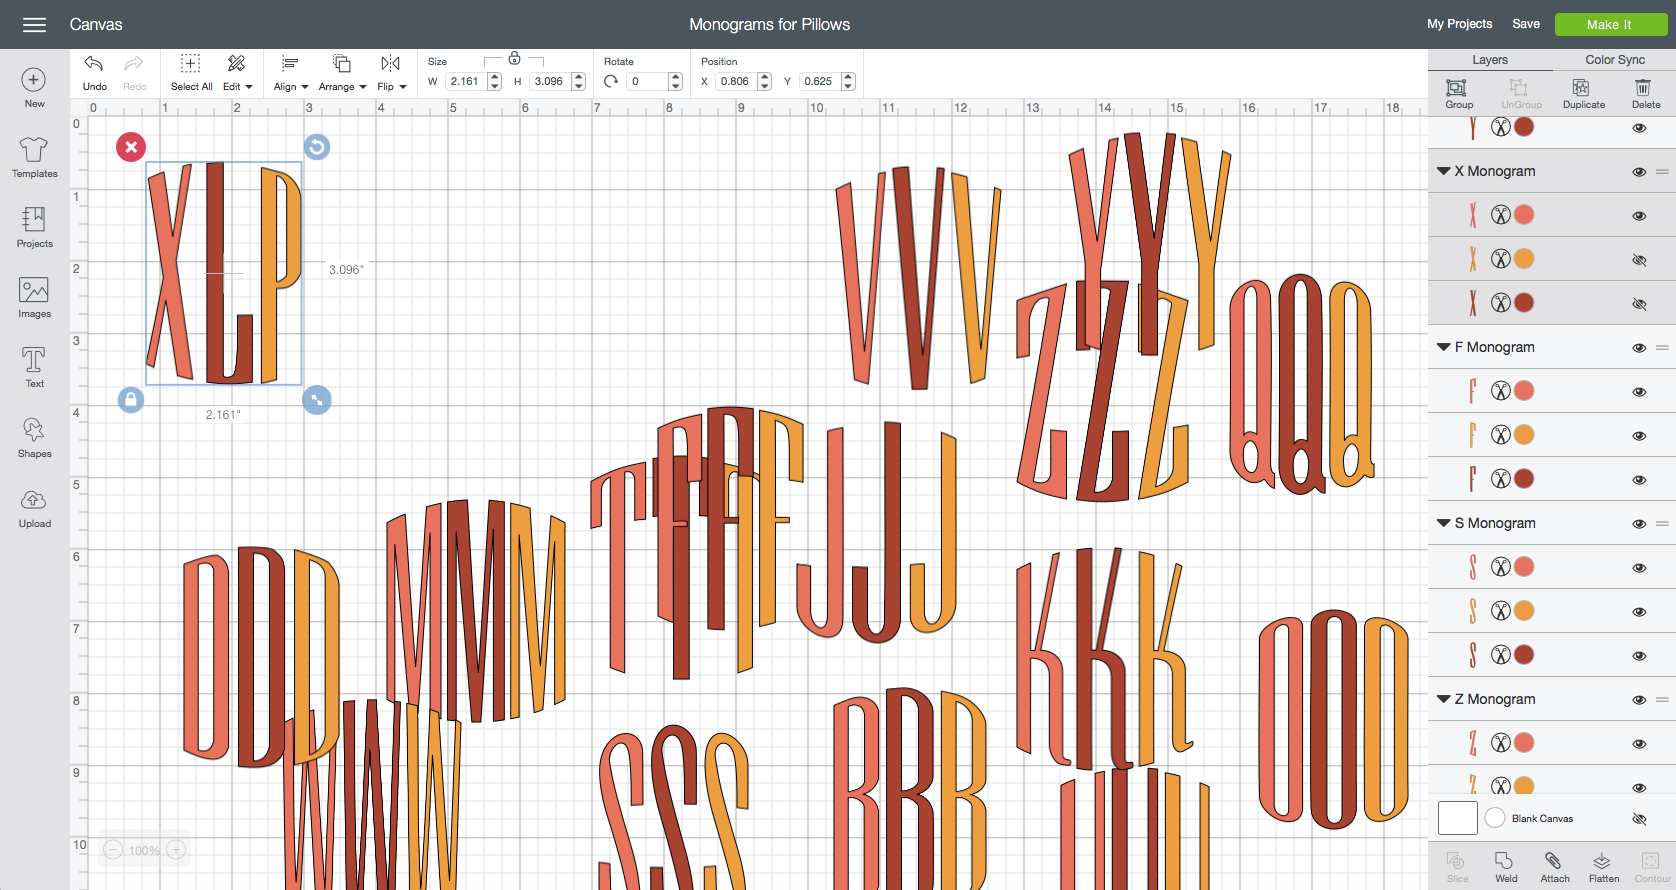
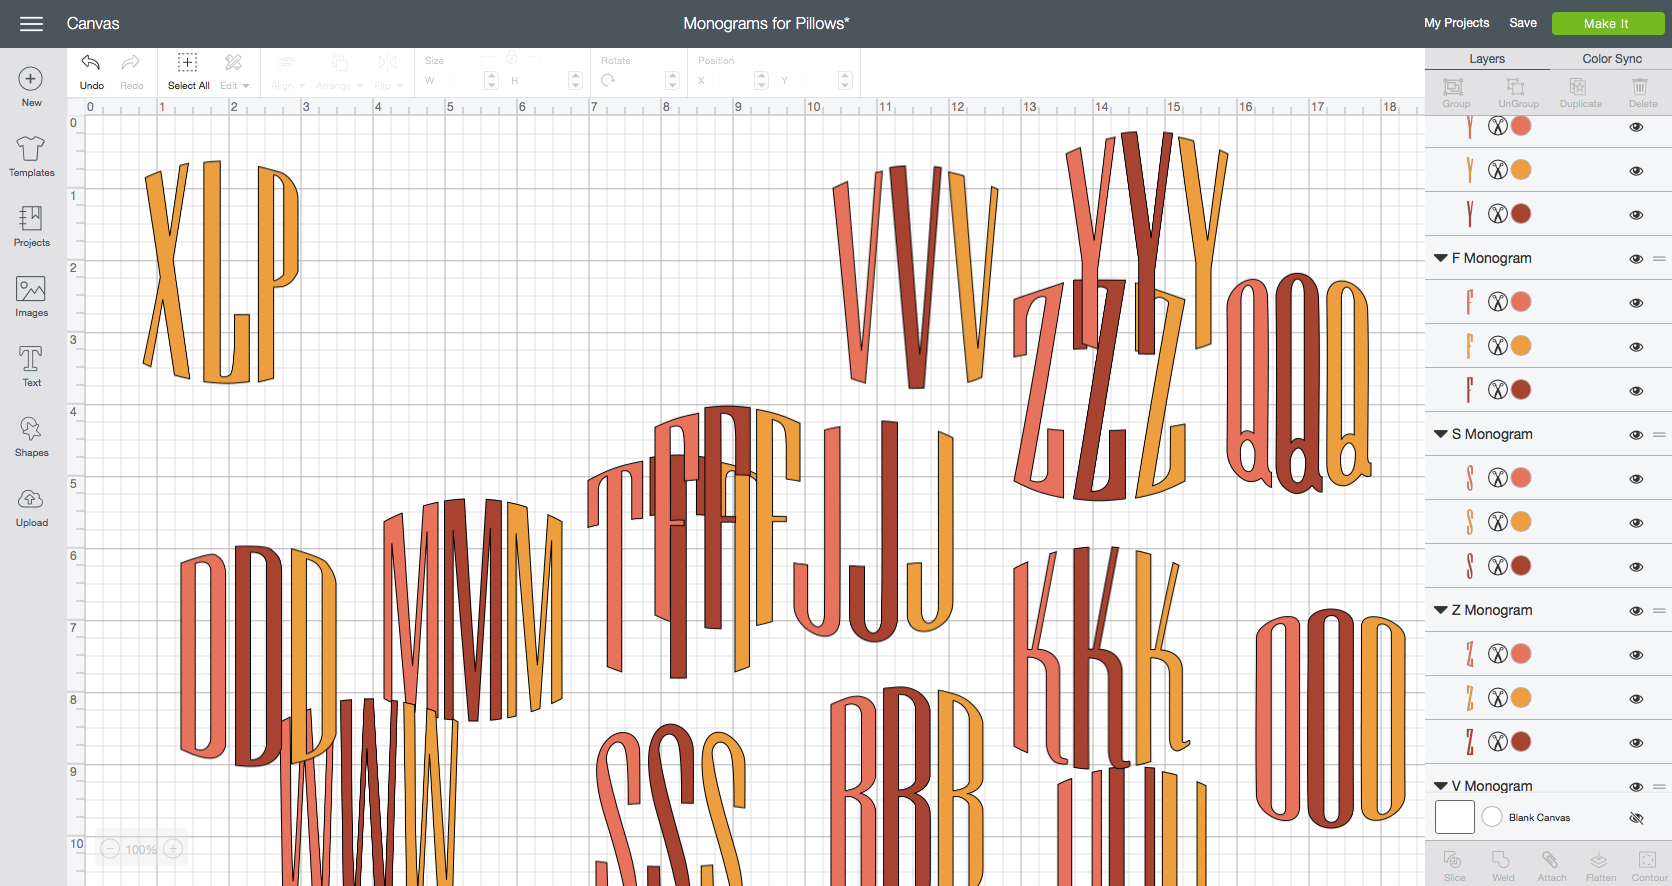
Step 2: In the Cricut Design Space open up this project // here //. I’ve included almost all the letter sets, so if you don’t see yours it’s not too hard to go find them.
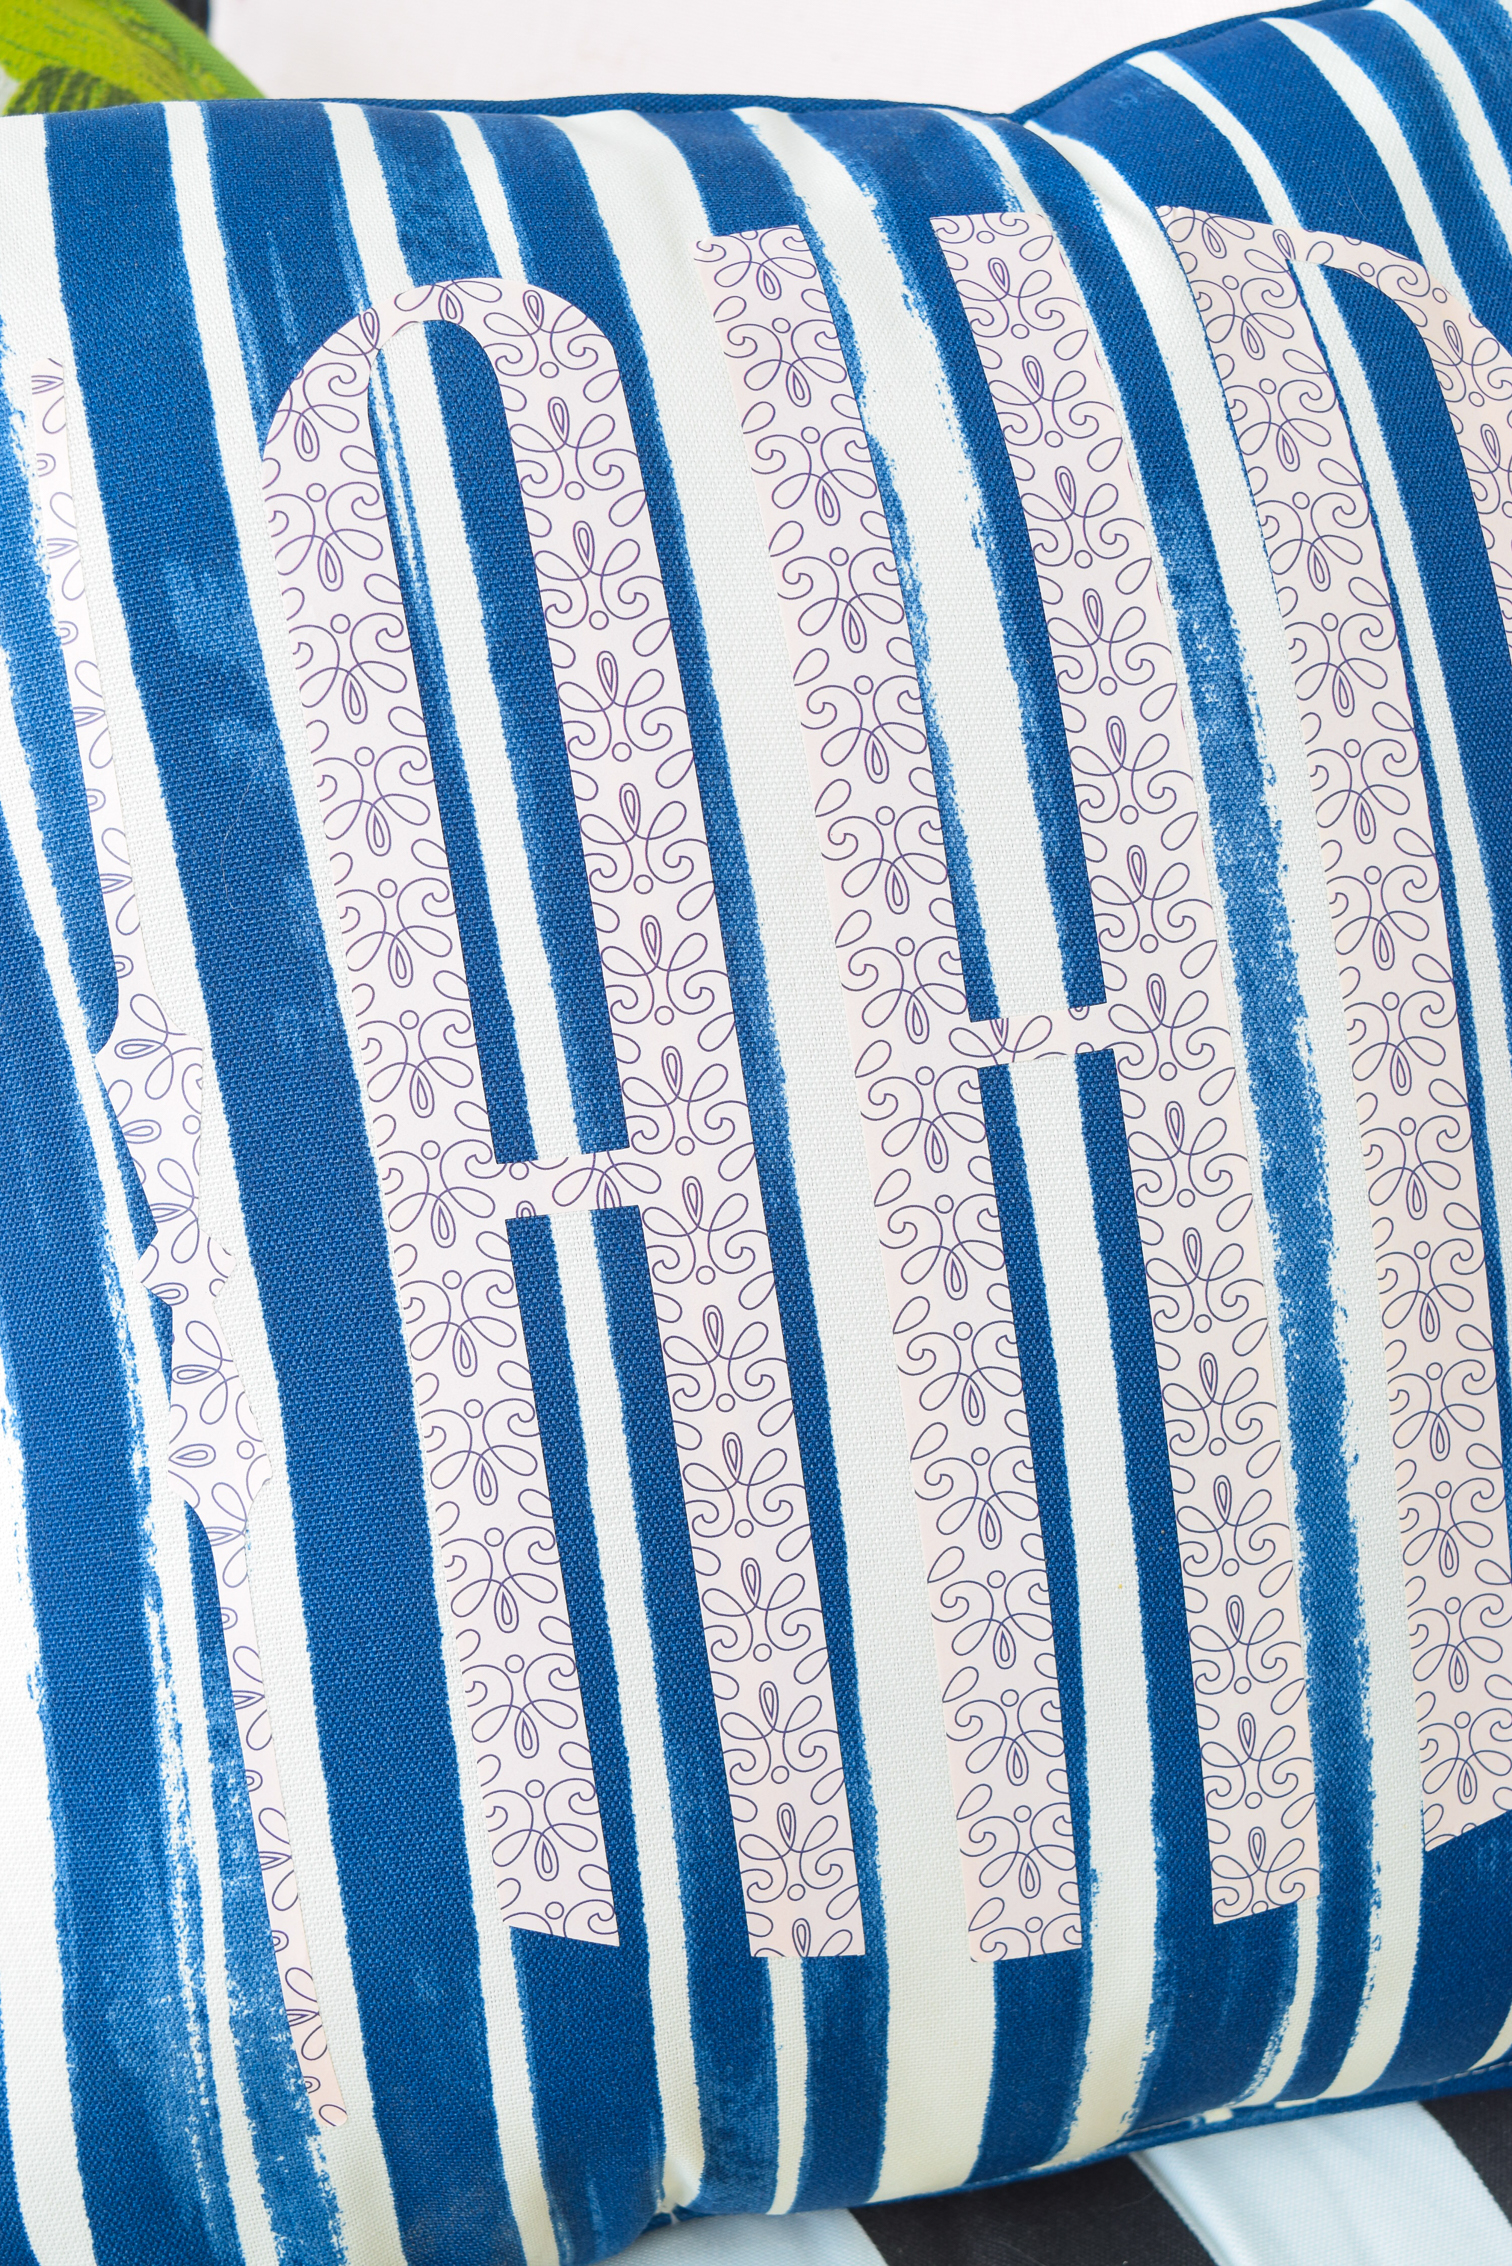
To make a monogram your need to select the correct letters from the letter sets. In the design space, you’ll see that I created one using “XLP”, so make sure you look at the image layers to see how I went about selecting them. Basically though, each of the 3 letters has a different colour, and it’s about aligning them and hiding the others.


Step 3: Once you’ve got your monogram set, select it by clicking and dragging around the letters. You’ll then hit “weld” in the bottom right hand corner. It will create the one file to cut, so that it doesn’t cut 3 letters in random order.


Step 4: Now it’s time to “make it”! Don’t forget to select the mirrored cut option, and adjust the dial on your machine before cutting.
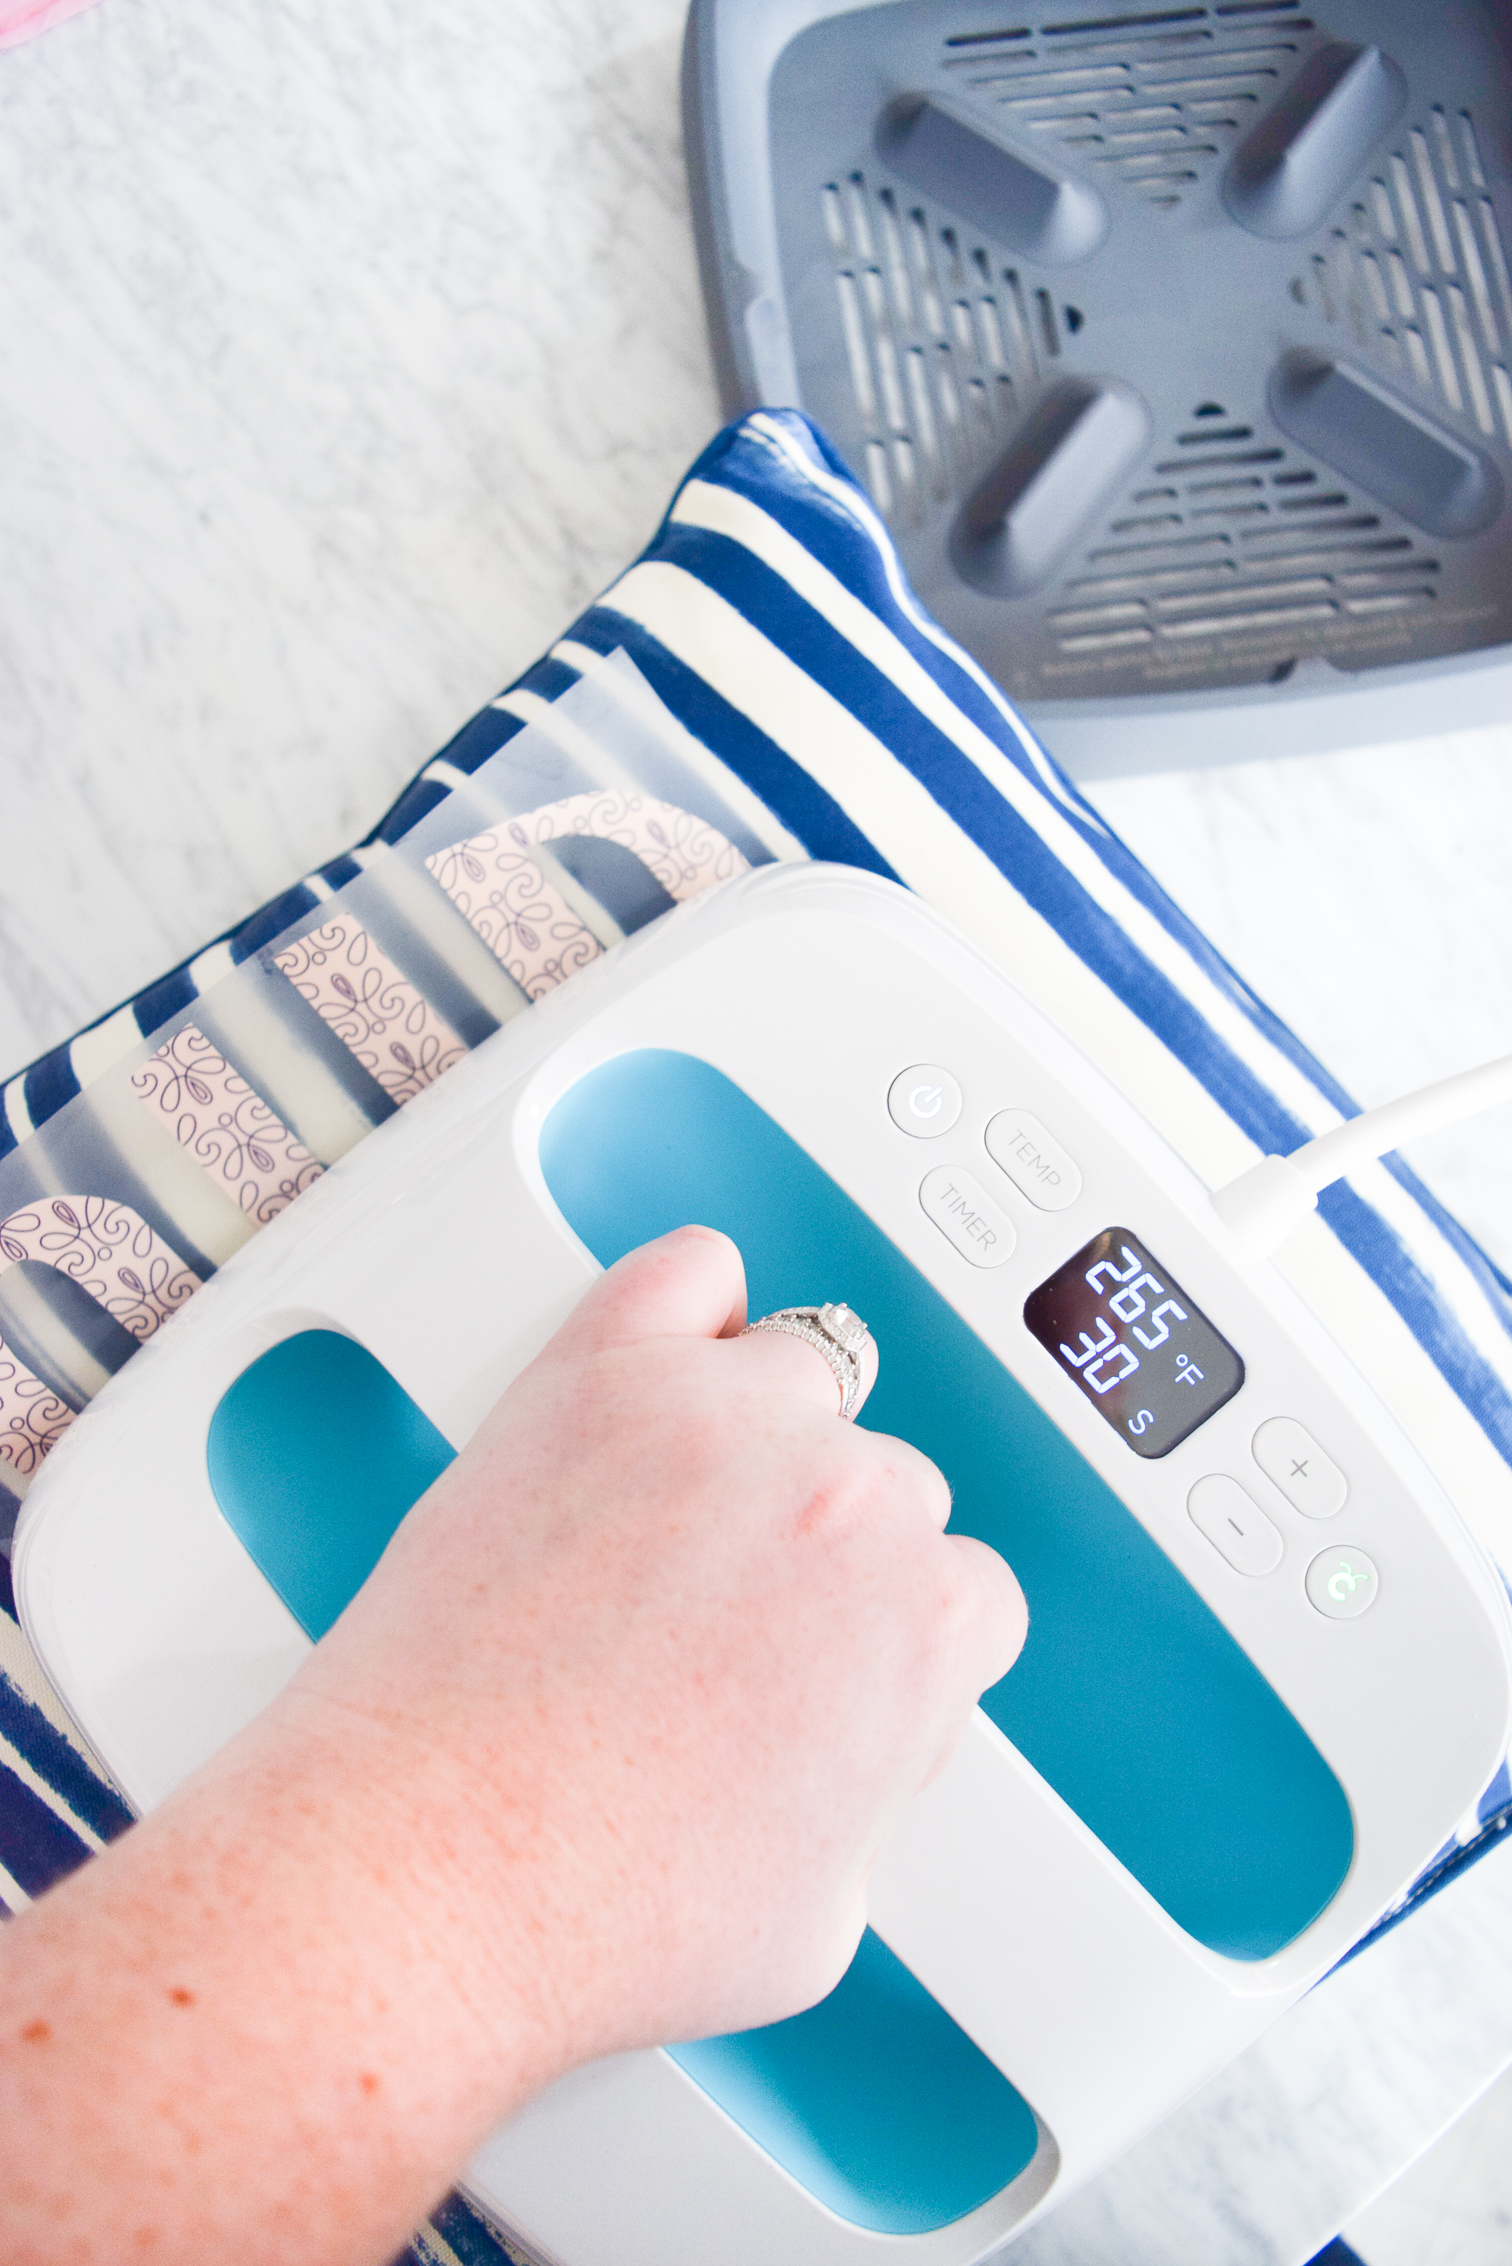
Step 5: Weed your designs and then get ready to apply them to your pillows using the EasyPress. I used a mix of pre-made pillows, and ones that I made for this purpose. The great thing about the EasyPress is that I can easily adjust the heat setting based on the type of material and vinyl I’m using, so it wasn’t hard for me to adjust between the various polyesters and cottons.
There’s a little guide that comes with the instructions, so make sure you keep that part handy. For the Patterned Iron On you should be using the machine at 340 for 50 seconds to get maximum adhesion.

Make sure you snag the EasyPress mat as well, since that’s how you ensure that you won’t burn a hole through table, or whatever work surface you’re using. I placed mine under the pillows when applicable, or inside the pillow cases when possible.
Like with all iron on products, preheat the surface for 5-10 secs before applying the vinyl (with the plastic sheet side facing up). You’ll then hold the EasyPress over the decal for 30-50 secs, before removing it and placing it back in the EasyPress craddle.
Step 6: WAIT UNTIL IT’S COLD TO PEEL the clear top off. You do not want to mess with all that freshly applied vinyl, now do you?!
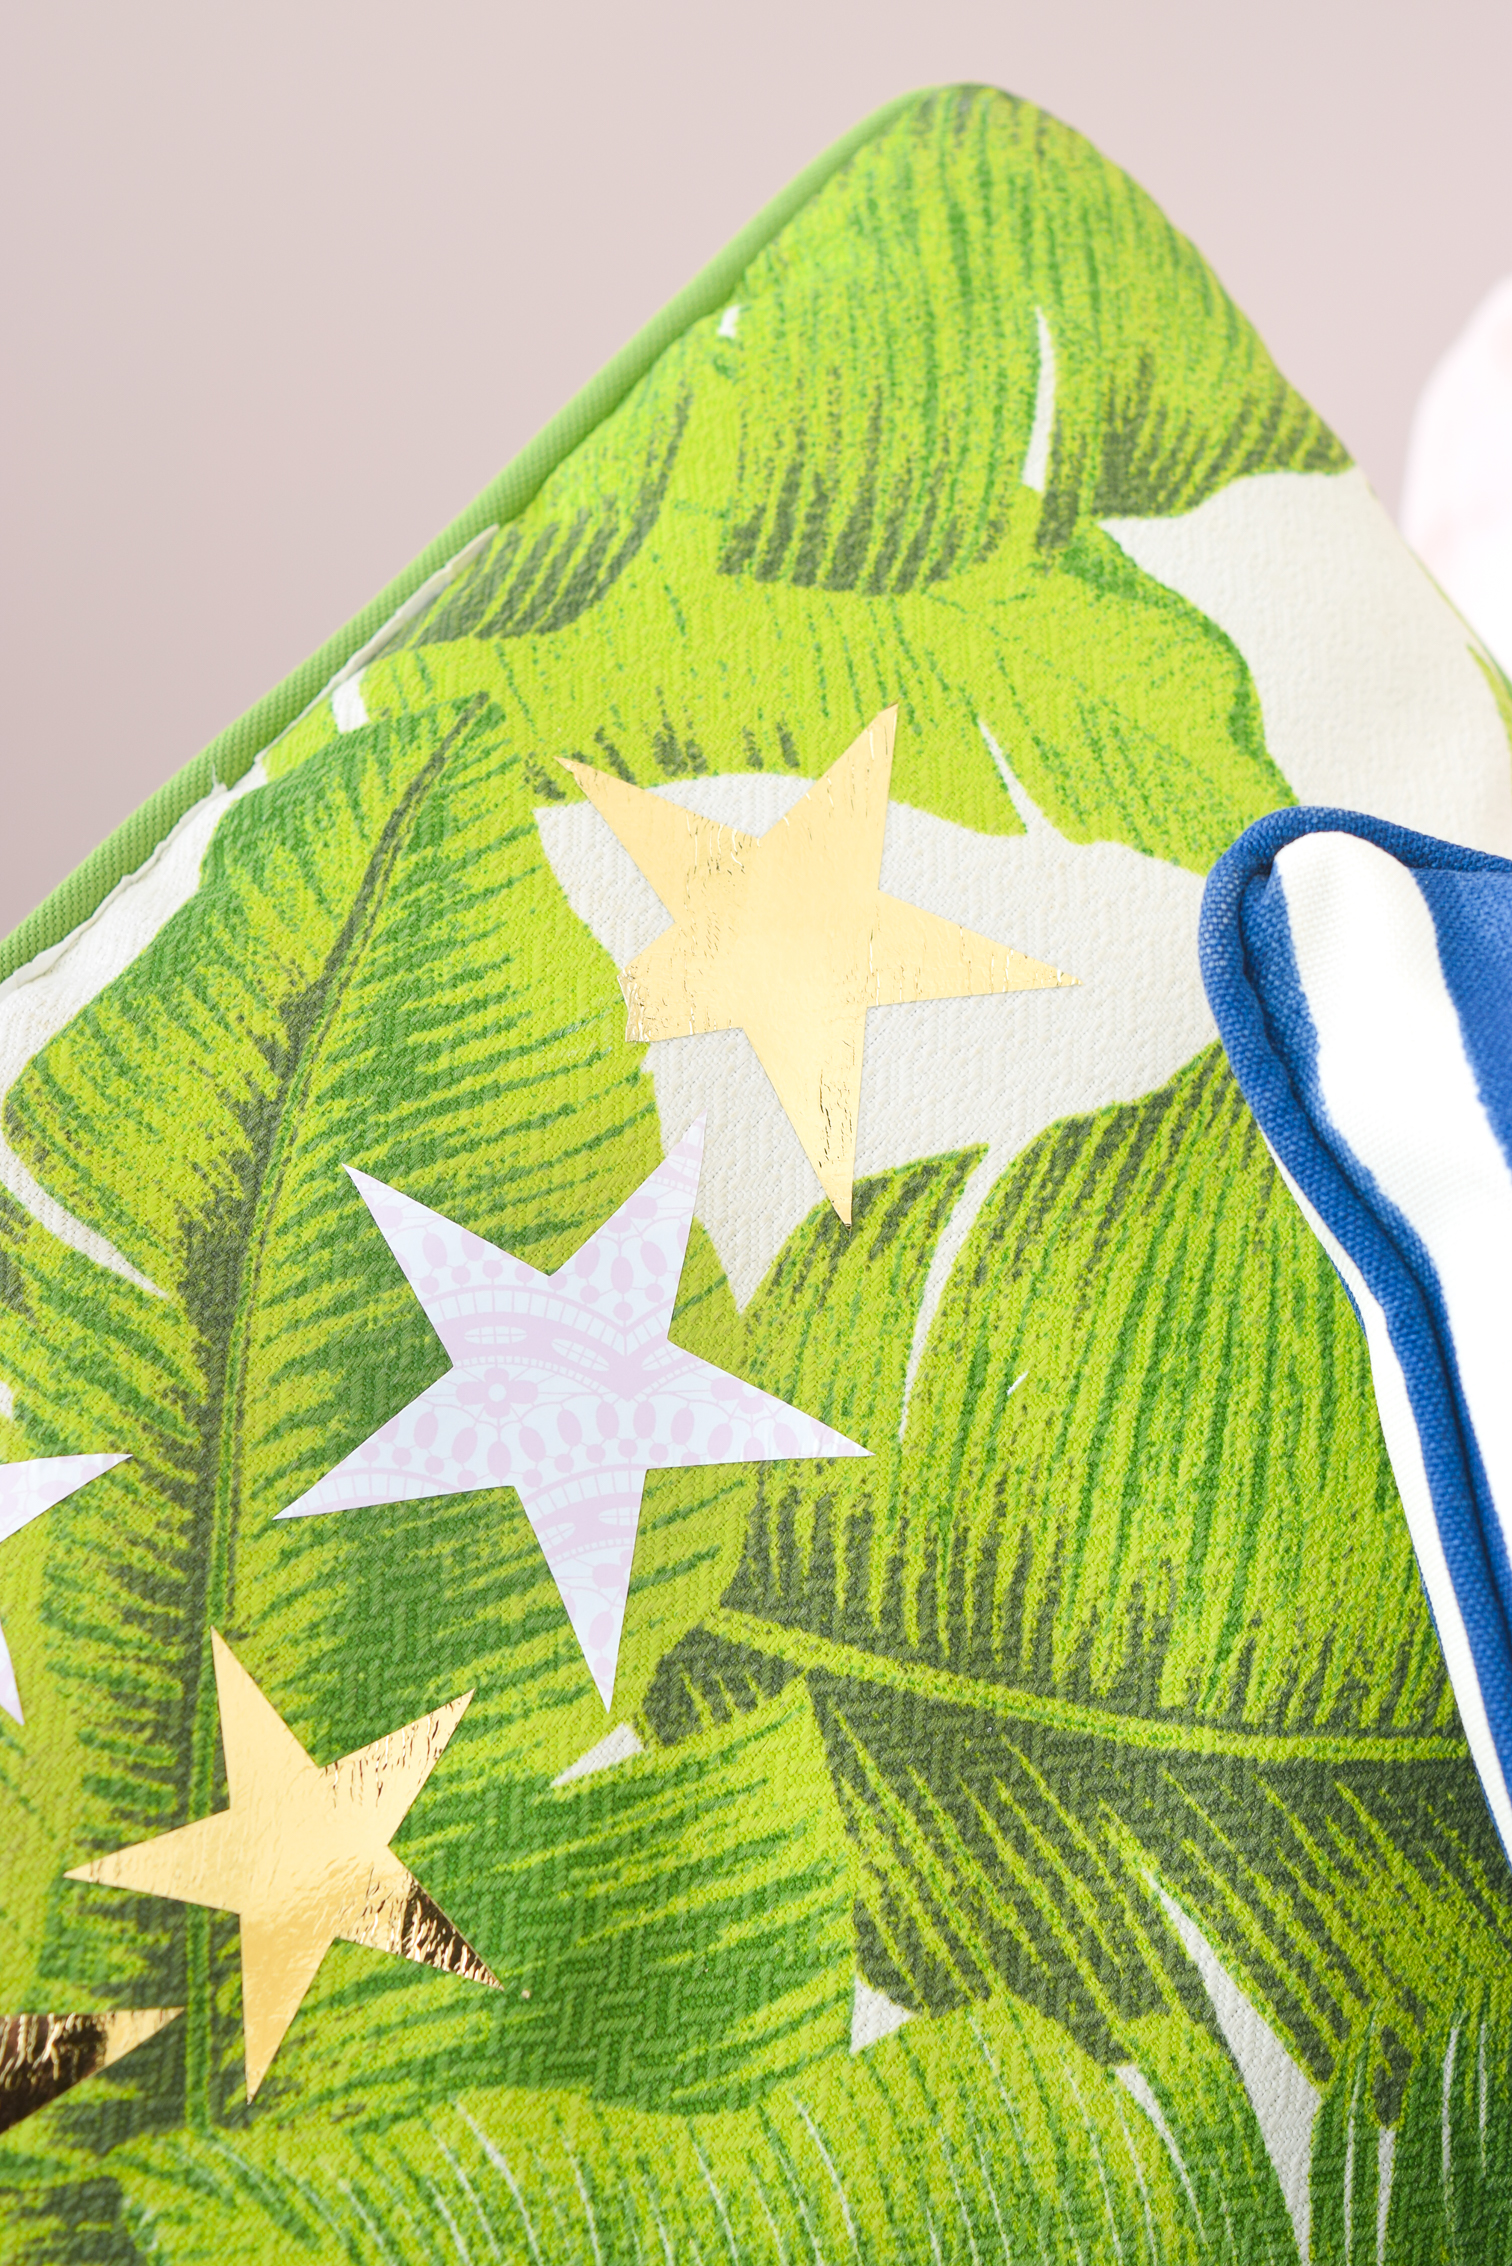
Step 7: Embellish with any other flourishes or designs as you please. While the patterned iron on monogram pillows are the star of the show, I cut out some stars using gold foil and patterned iron on scraps, to embellish my banana leaf pillow.
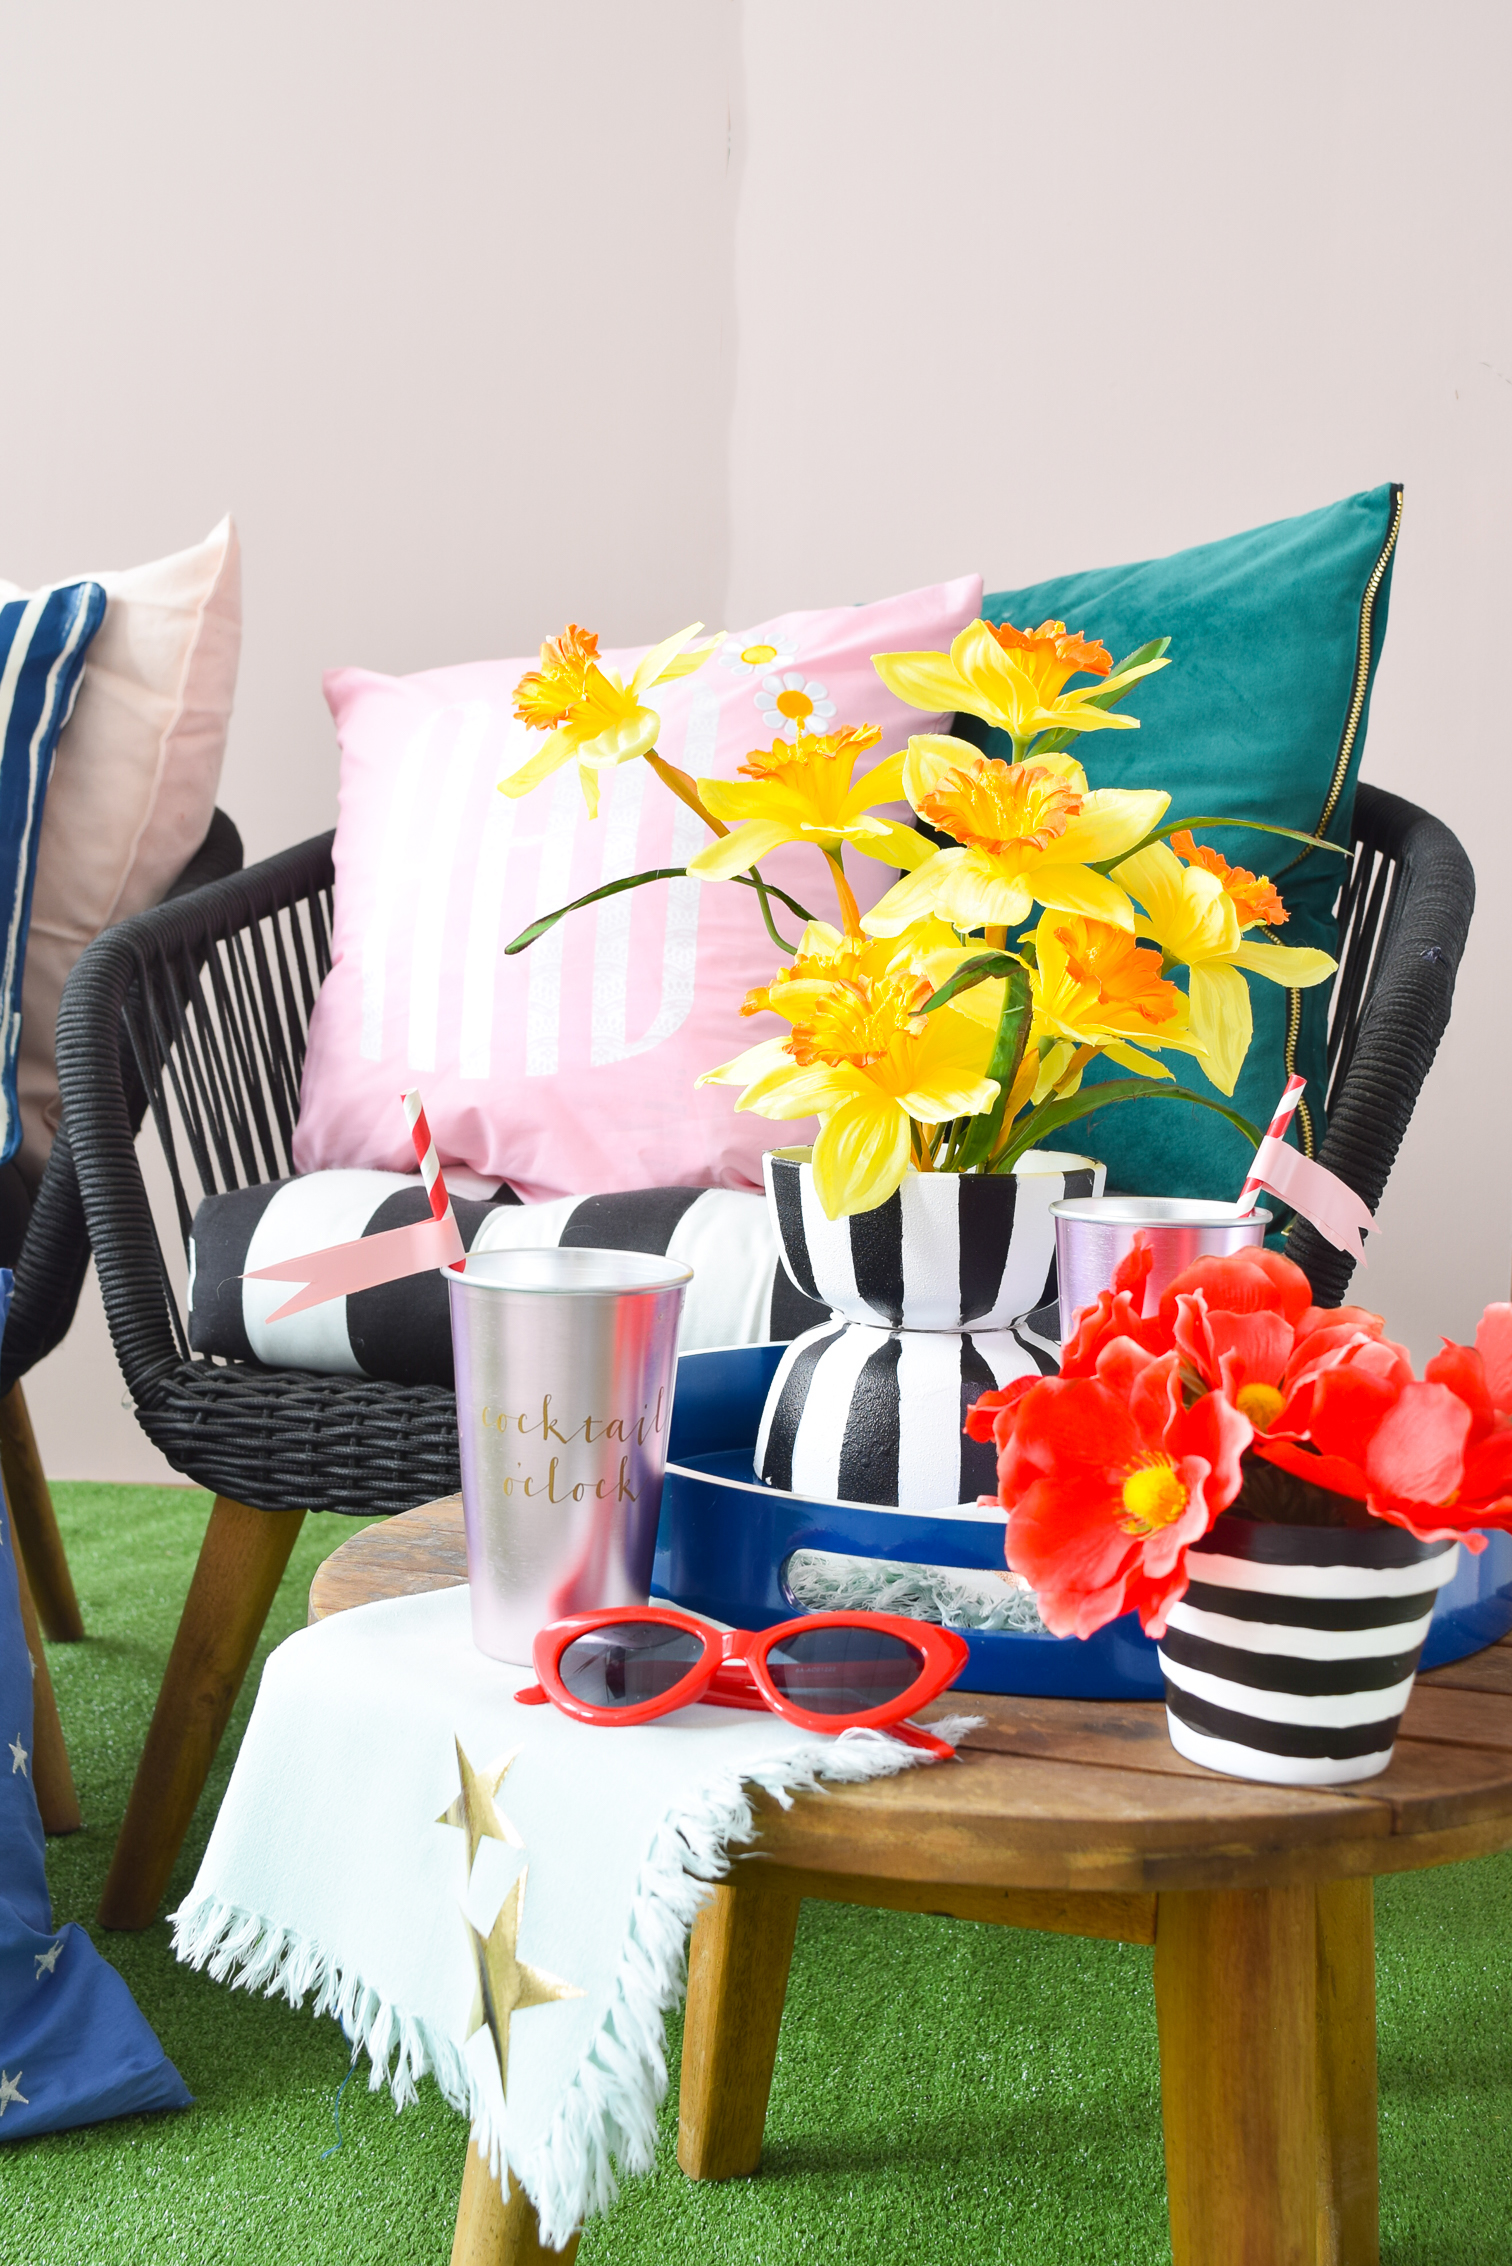
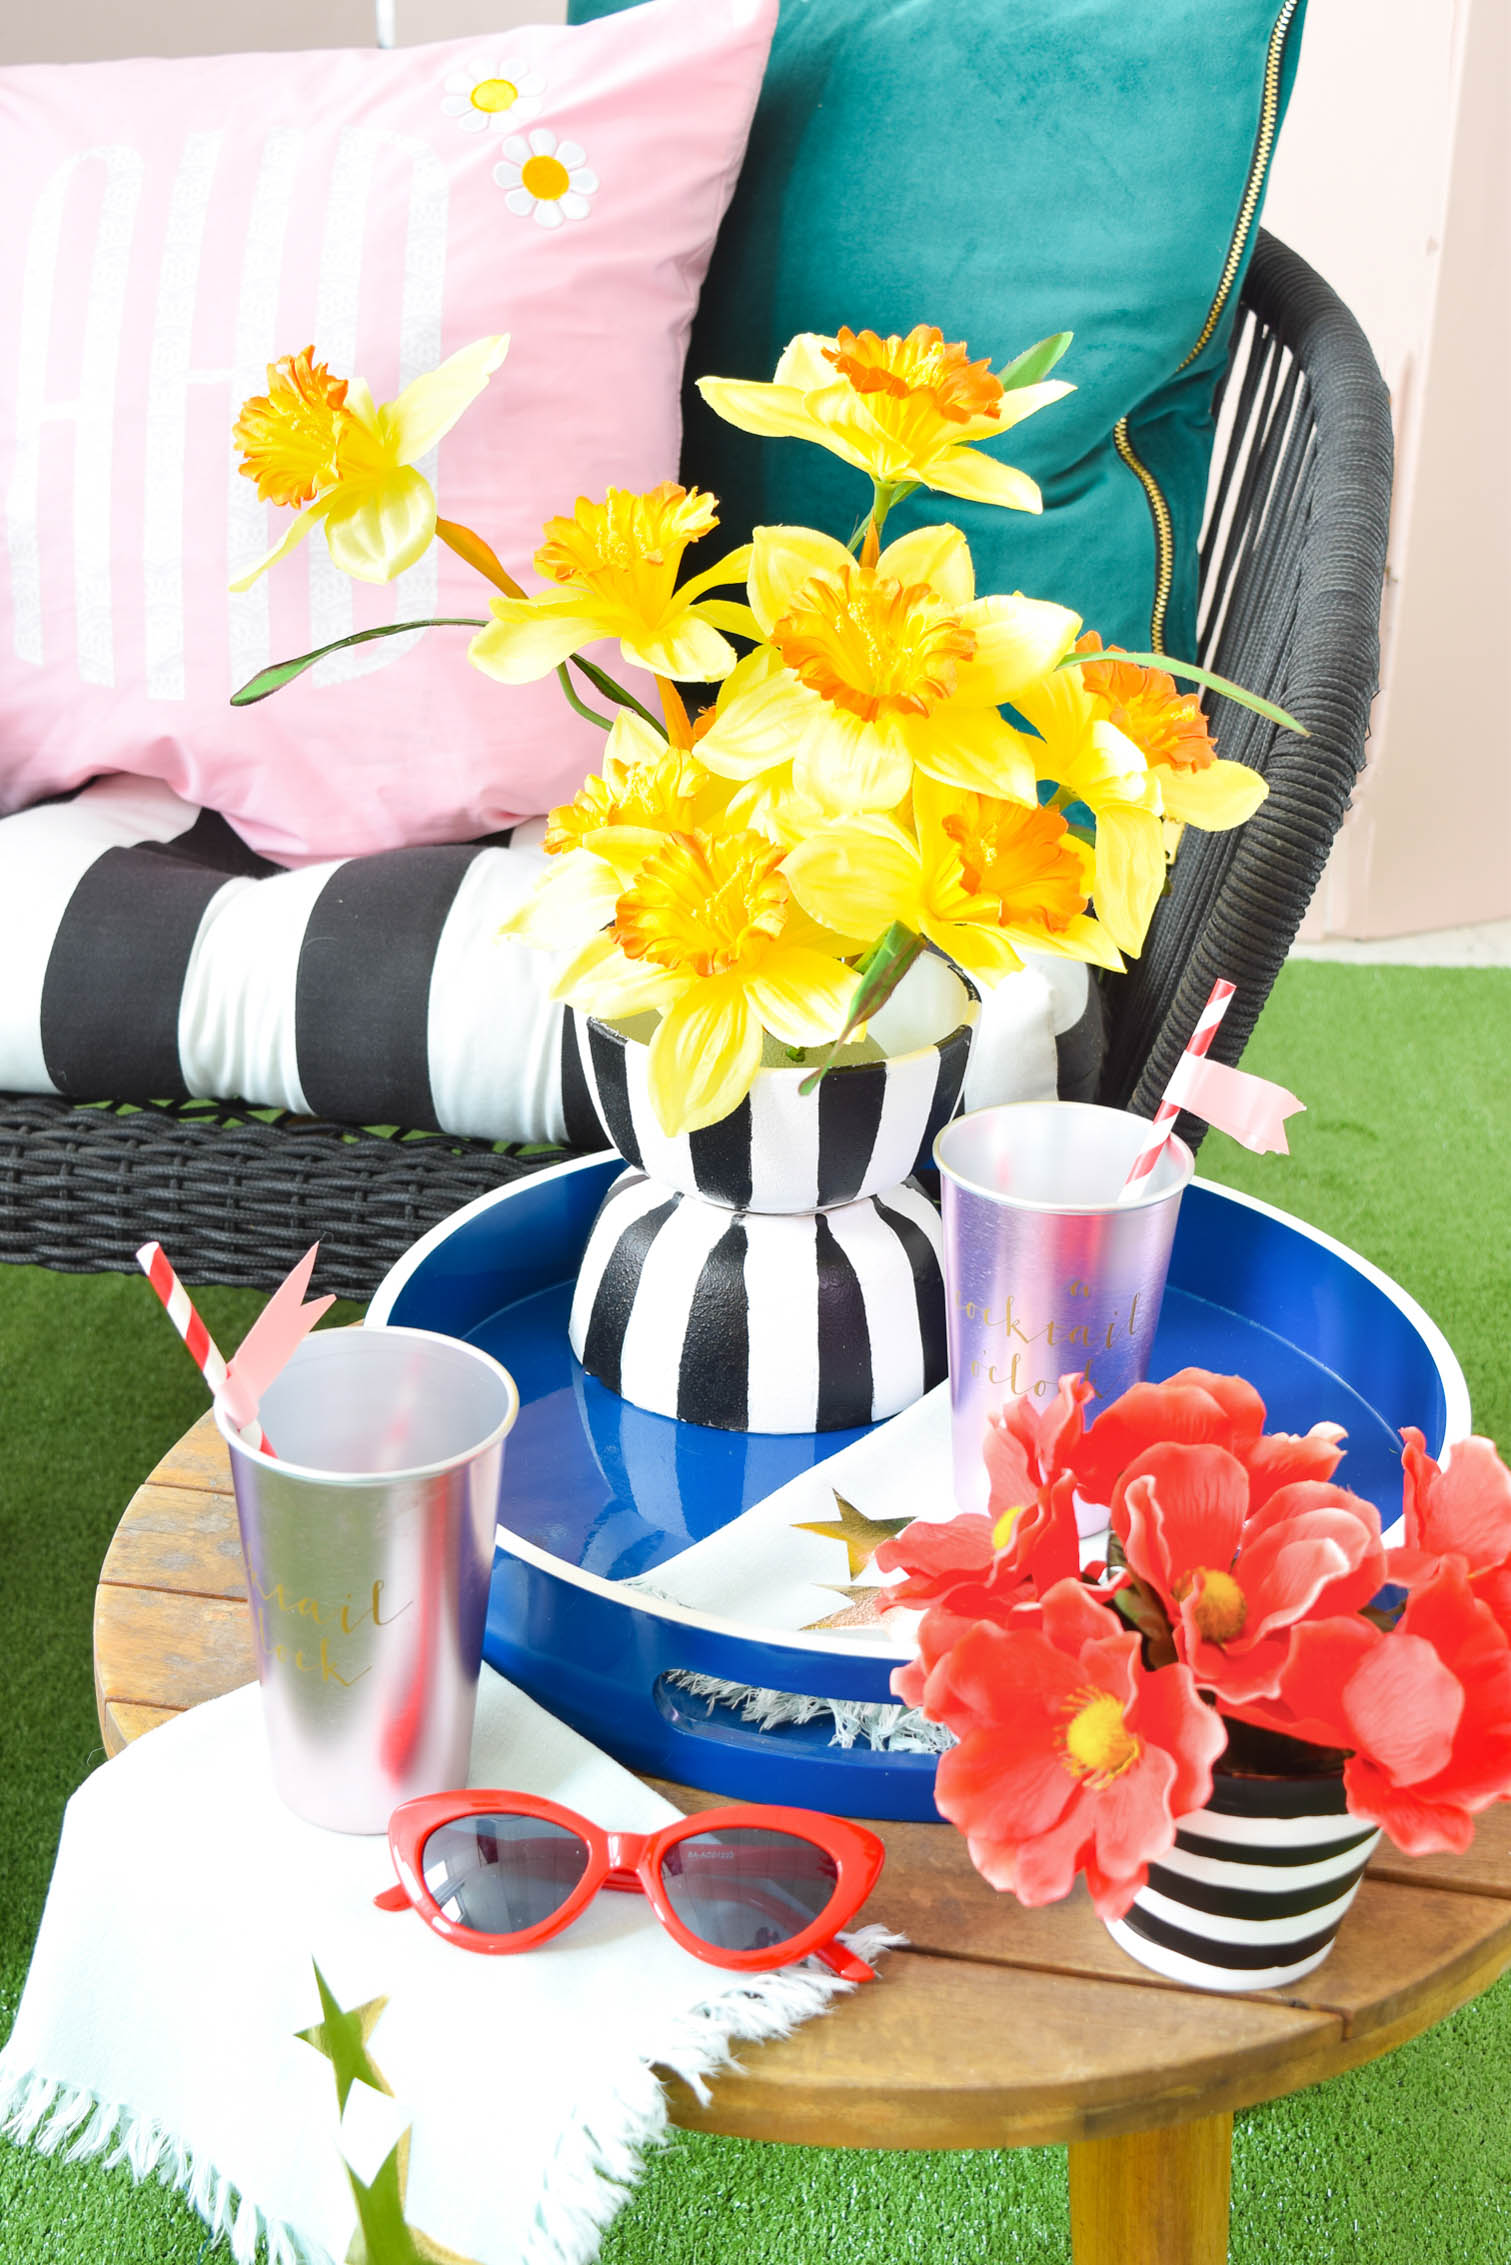
I also did up some cocktail napkins, because you know, it’s me.


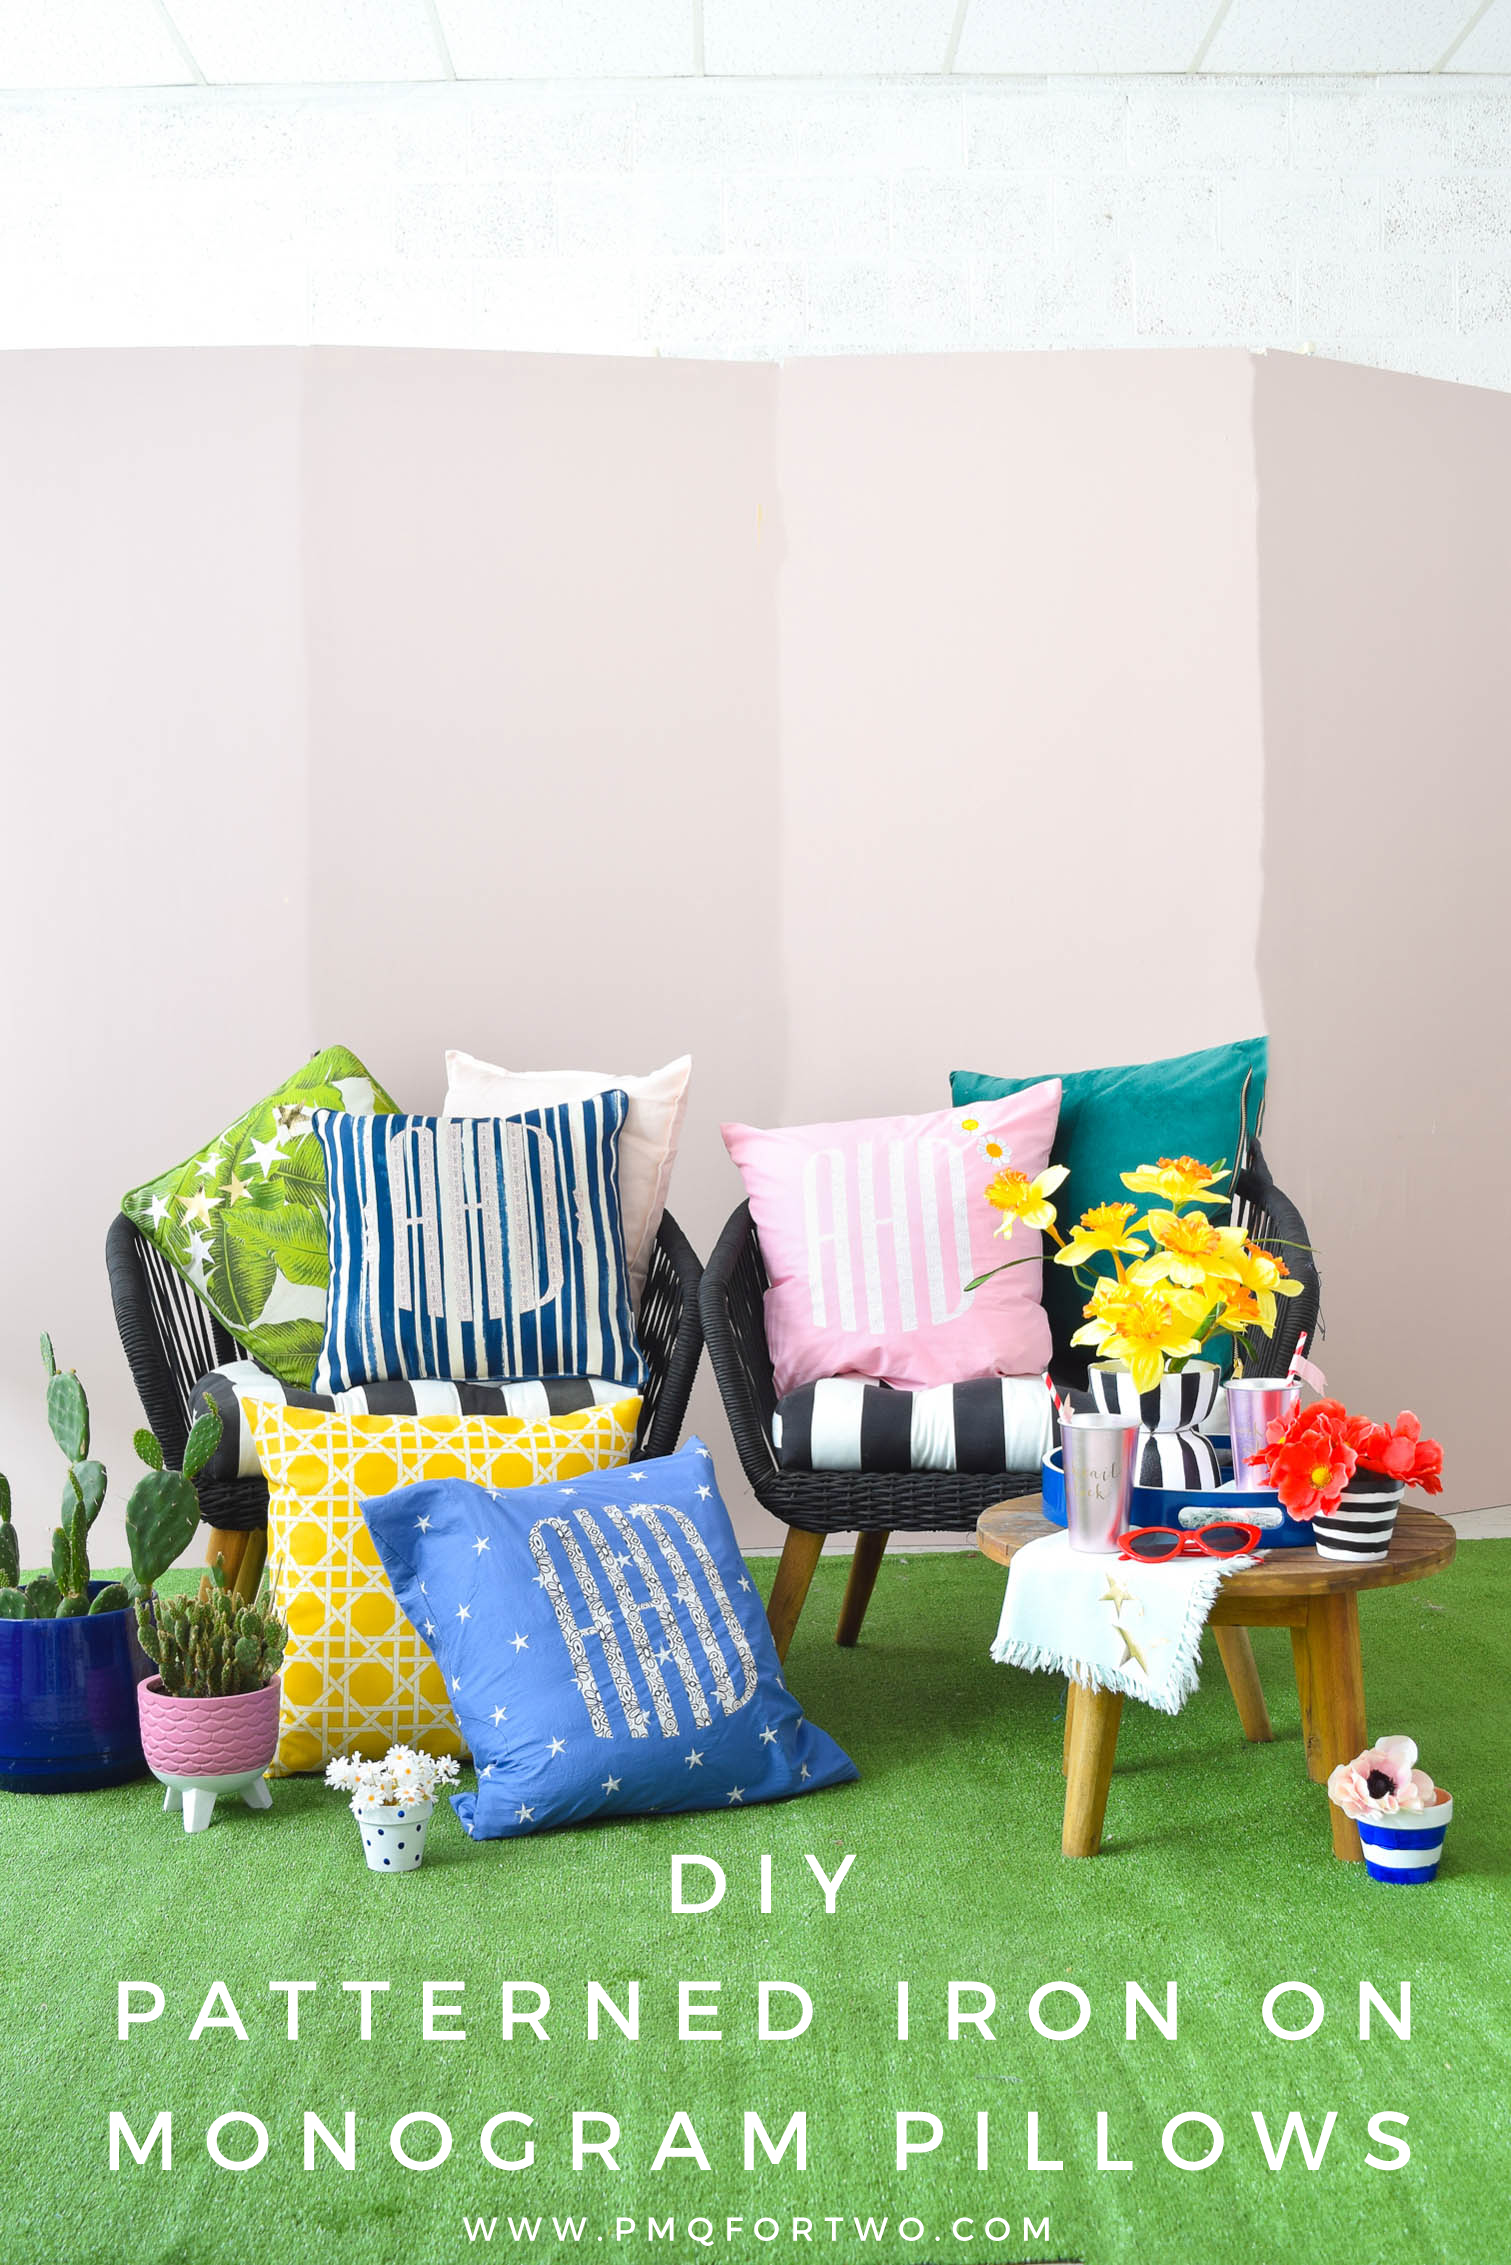

I mean, how slick do these colour combos look together?! So good eh?! It’s like sunshine and happiness just exploded into the studio, and I couldn’t be happier! Even though it’s supposed to be snowing tonight. Ugh #SpringInCanada


This is a sponsored conversation written by me on behalf of Cricut. The opinions and text are all mine.