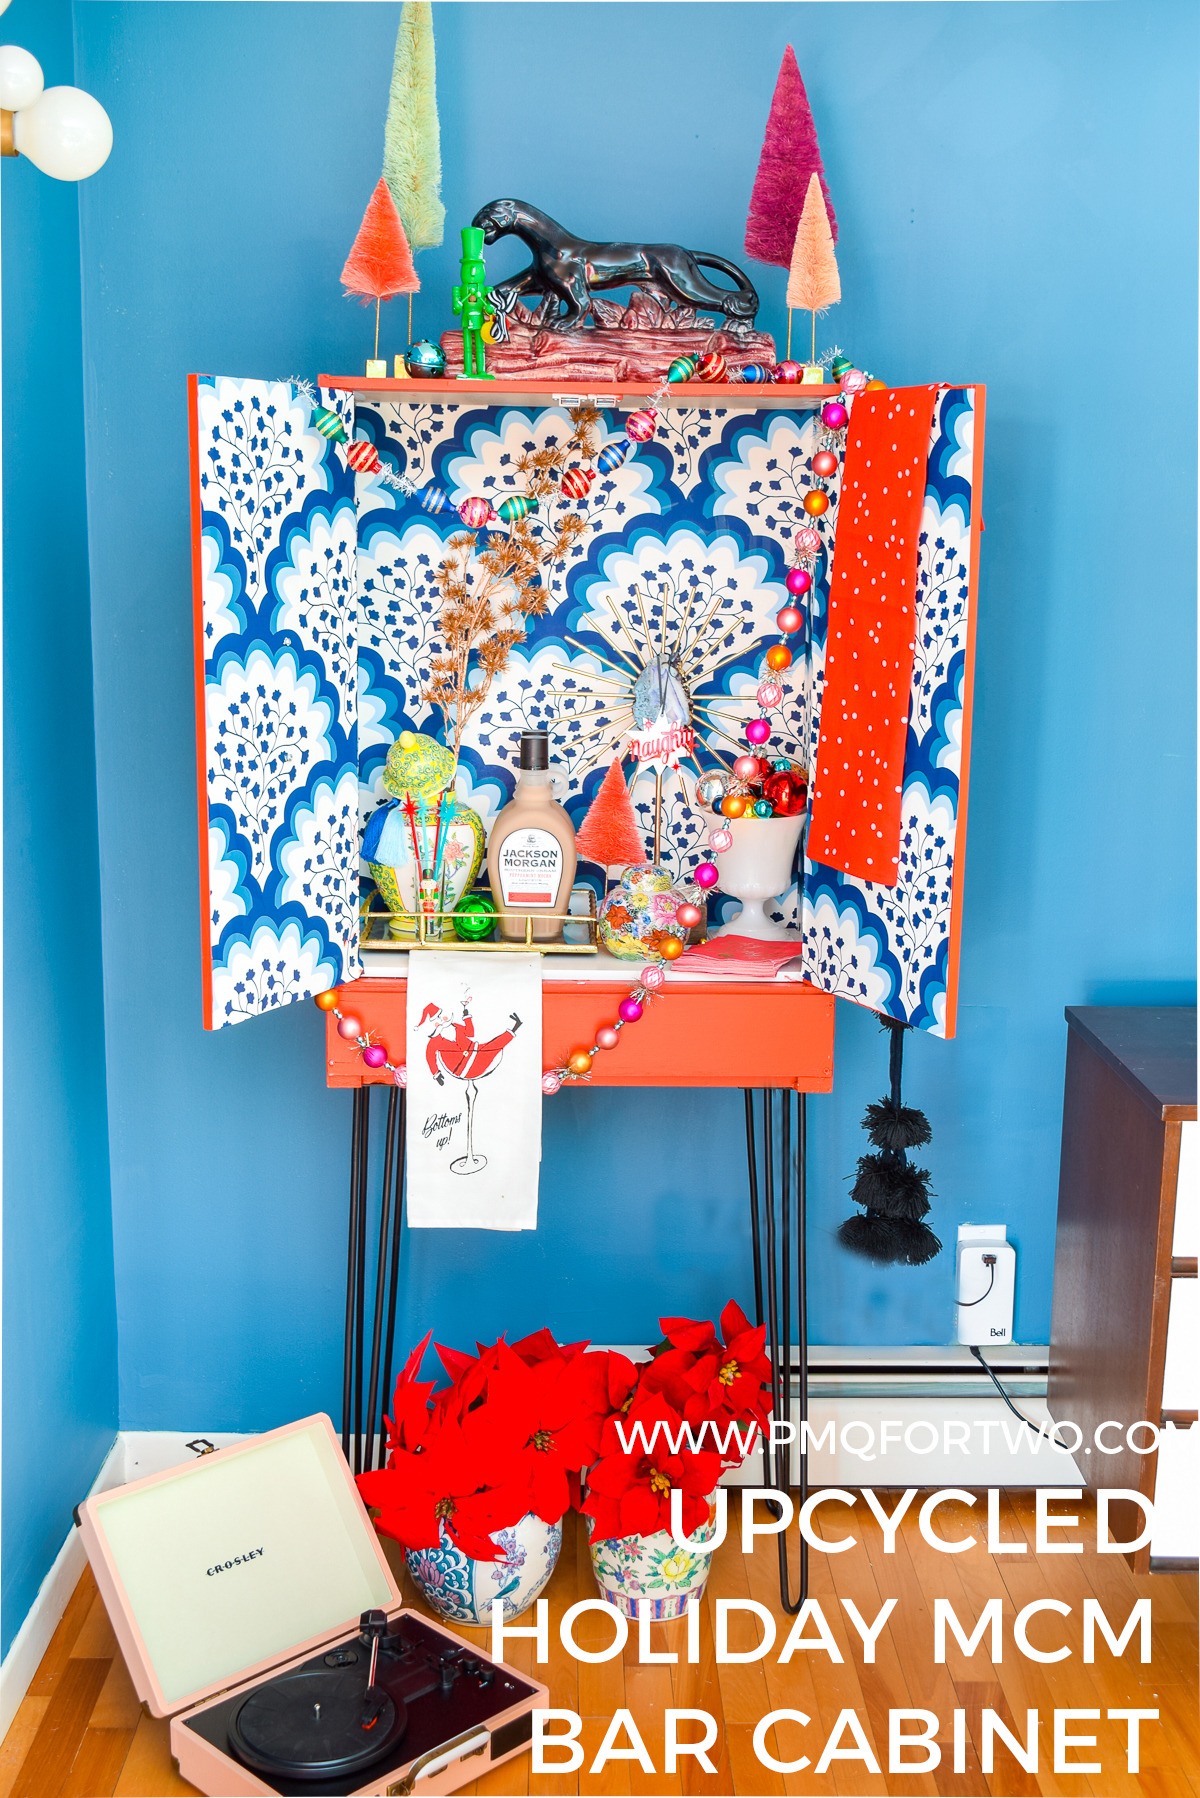
I’ve got the long awaited tutorial for the Upcycled DIY MCM Bar Cabinet that appeared in last week’s fall One Room Challenge reveal of our Mid Mod Eclectic Living Room. This was something I’ve had in the works for a few months now, and I’ve know exactly where it was going to go since I ordered the hairpin legs from Crates & Pallet.
*Crates & Pallet sponsored this post, but all thoughts are my own. Thank you for supporting the brands that make PMQ for two possible.

DIY MCM Bar Cabinet
I love the look of the hairpin legs. When most people think MCM they think of hairpin legs, so the fact that Crates & Pallet makes them in 3 sizes means you can build just about anything with them – including a mini bar!
What are Hairpin Legs?
Hairpin legs are a distinctive type of metal furniture legs from the Mid Century Modern era of design – which I love – and earn their name because they look like bobby pins inverted and attached for all kinds of things like chairs, tables, mini bars and more.
I originally pitched this as a Holiday Bar Cabinet, and I’m glad I did. This thing is BUILT for the holidays (any and all of them!). It’s high off the ground, so no kids can grab things. It’s got doors, which means I can easily hide a mess, and best of fall, it holds several adorable little Christmas vignettes, so it’s essentially the most perfect piece of furniture ever built.
How to Upcycle a Cabinet into a Mini Bar
So this is really simple, you need these 28″ Hairpin legs from Crates & Pallet, you need a cabinet or cupboard, some paint, and maybe some wallpaper! I happened to have wallpaper left over so I used it here. You could easily leave it blank or paint a pattern though.
As you can see, I used one of the cupboards from my Wes Anderson Inspired Entryway Console. This one didn’t hold up so well, so I stripped it back to its base.
Just look at those legs! So sturdy! So sexy! So fun! What I like about the 28″ set, is that it puts the cabinet up high. Most cabinets are lower, but because this one has height it feels more imposing and dramatic.
Painting A Bar Cabinet
I knew it had to be a bold pop of colour to offset the blue in the space. There was already a green dresser at play, so I opted to use Torch Red (by BEHR) for the cabinet. We started by sanding the existing paint off, and then priming it with the Zinser brand primer.
It took quite a few coats of paint, because the melamine surface — despite being primed — did not want to be painted. While those dried, we applied the wallpaper to the back panel and the doors. Once the cabinet was dry, we applied the final pieces inside the cabinet, and then sealed everything with a clear top coat.
After everything dried, I flipped the cabinet upside down (onto a blanket mind you), and then drilled the screws into the 4 hairpin legs. I wish I had taken a process shot, but honestly, it was as simple as drilling the screws. Not much explanation required.
I swapped the handles with some lucite ones I had left over from my IKEA Hacked Sideboard.
Stocking a DIY Bar Cabinet
You can see what the bar cabinet looks like dressed up for any ole’ day in the Mid Mod Eclectic Living Room reveal, but since we’re officially in the holiday season, I wanted to show you how it will look until the New Year.
I snagged the garlands at Michaels, and strung them around the cabinet for some extra season flair. How fun are they?! Their saturated hues and retro vibes are exactly what I’m about this time of year.
The leftover Hygge & West wallpaper truly pops inside the red frame, and really looks great against all my seasonal hues. p.s how cute is the retro robot?
The other touches in the cabinet, like my bowl of colourful ornaments, the Kate Spade Santa tea towel, and the Jackson Morgan Peppermint Mocha Cream are the kind of finishing touches everyone should have!
