

I have wanted a set of aluminum reflectors for a garland of Christmas lights for.like.ever. The problem is, they’re super hard to come by, and often not in a big enough set, or in good shape. This year I’ve decided to change that, and made my own set using little wooden stars and Krylon’s metallics, as well as the other colours from their Tiffany Pratt Collection.
See my Fall Cornucopia, my Kate Spade inspired nautical summer tablescape, and my striped spring planters.
*Krylon sponsored this post, but all thoughts are my own. Thank you for supporting the brands that make PMQ for two possible.

What are Retro Christmas Light Reflectors?
They’re little stamped aluminum discs that went around the base of a bulb, on a string of lights. They come in all kinds of shapes, sizes, colours and patterns, but the key thing is that they add a tint to the light by virtue of reflecting the colours on the discs.
As I acquire more and more vintage and kitschy cute Christmas decor, I find myself drawn to the more unique pieces that aren’t replicated by larger chains.
What do you need to make your own Retro Spray Paint light Reflectors
Well, no one has time to waste on eBay bids, or to wait on the postal services. With a quick trip to the craft store for some crafting balsa star diecuts, you can whip out your Krylon Spray Paint in gold (or copper), Cherry Red, Ballet Slipper, & Surf. You can find them all // here //

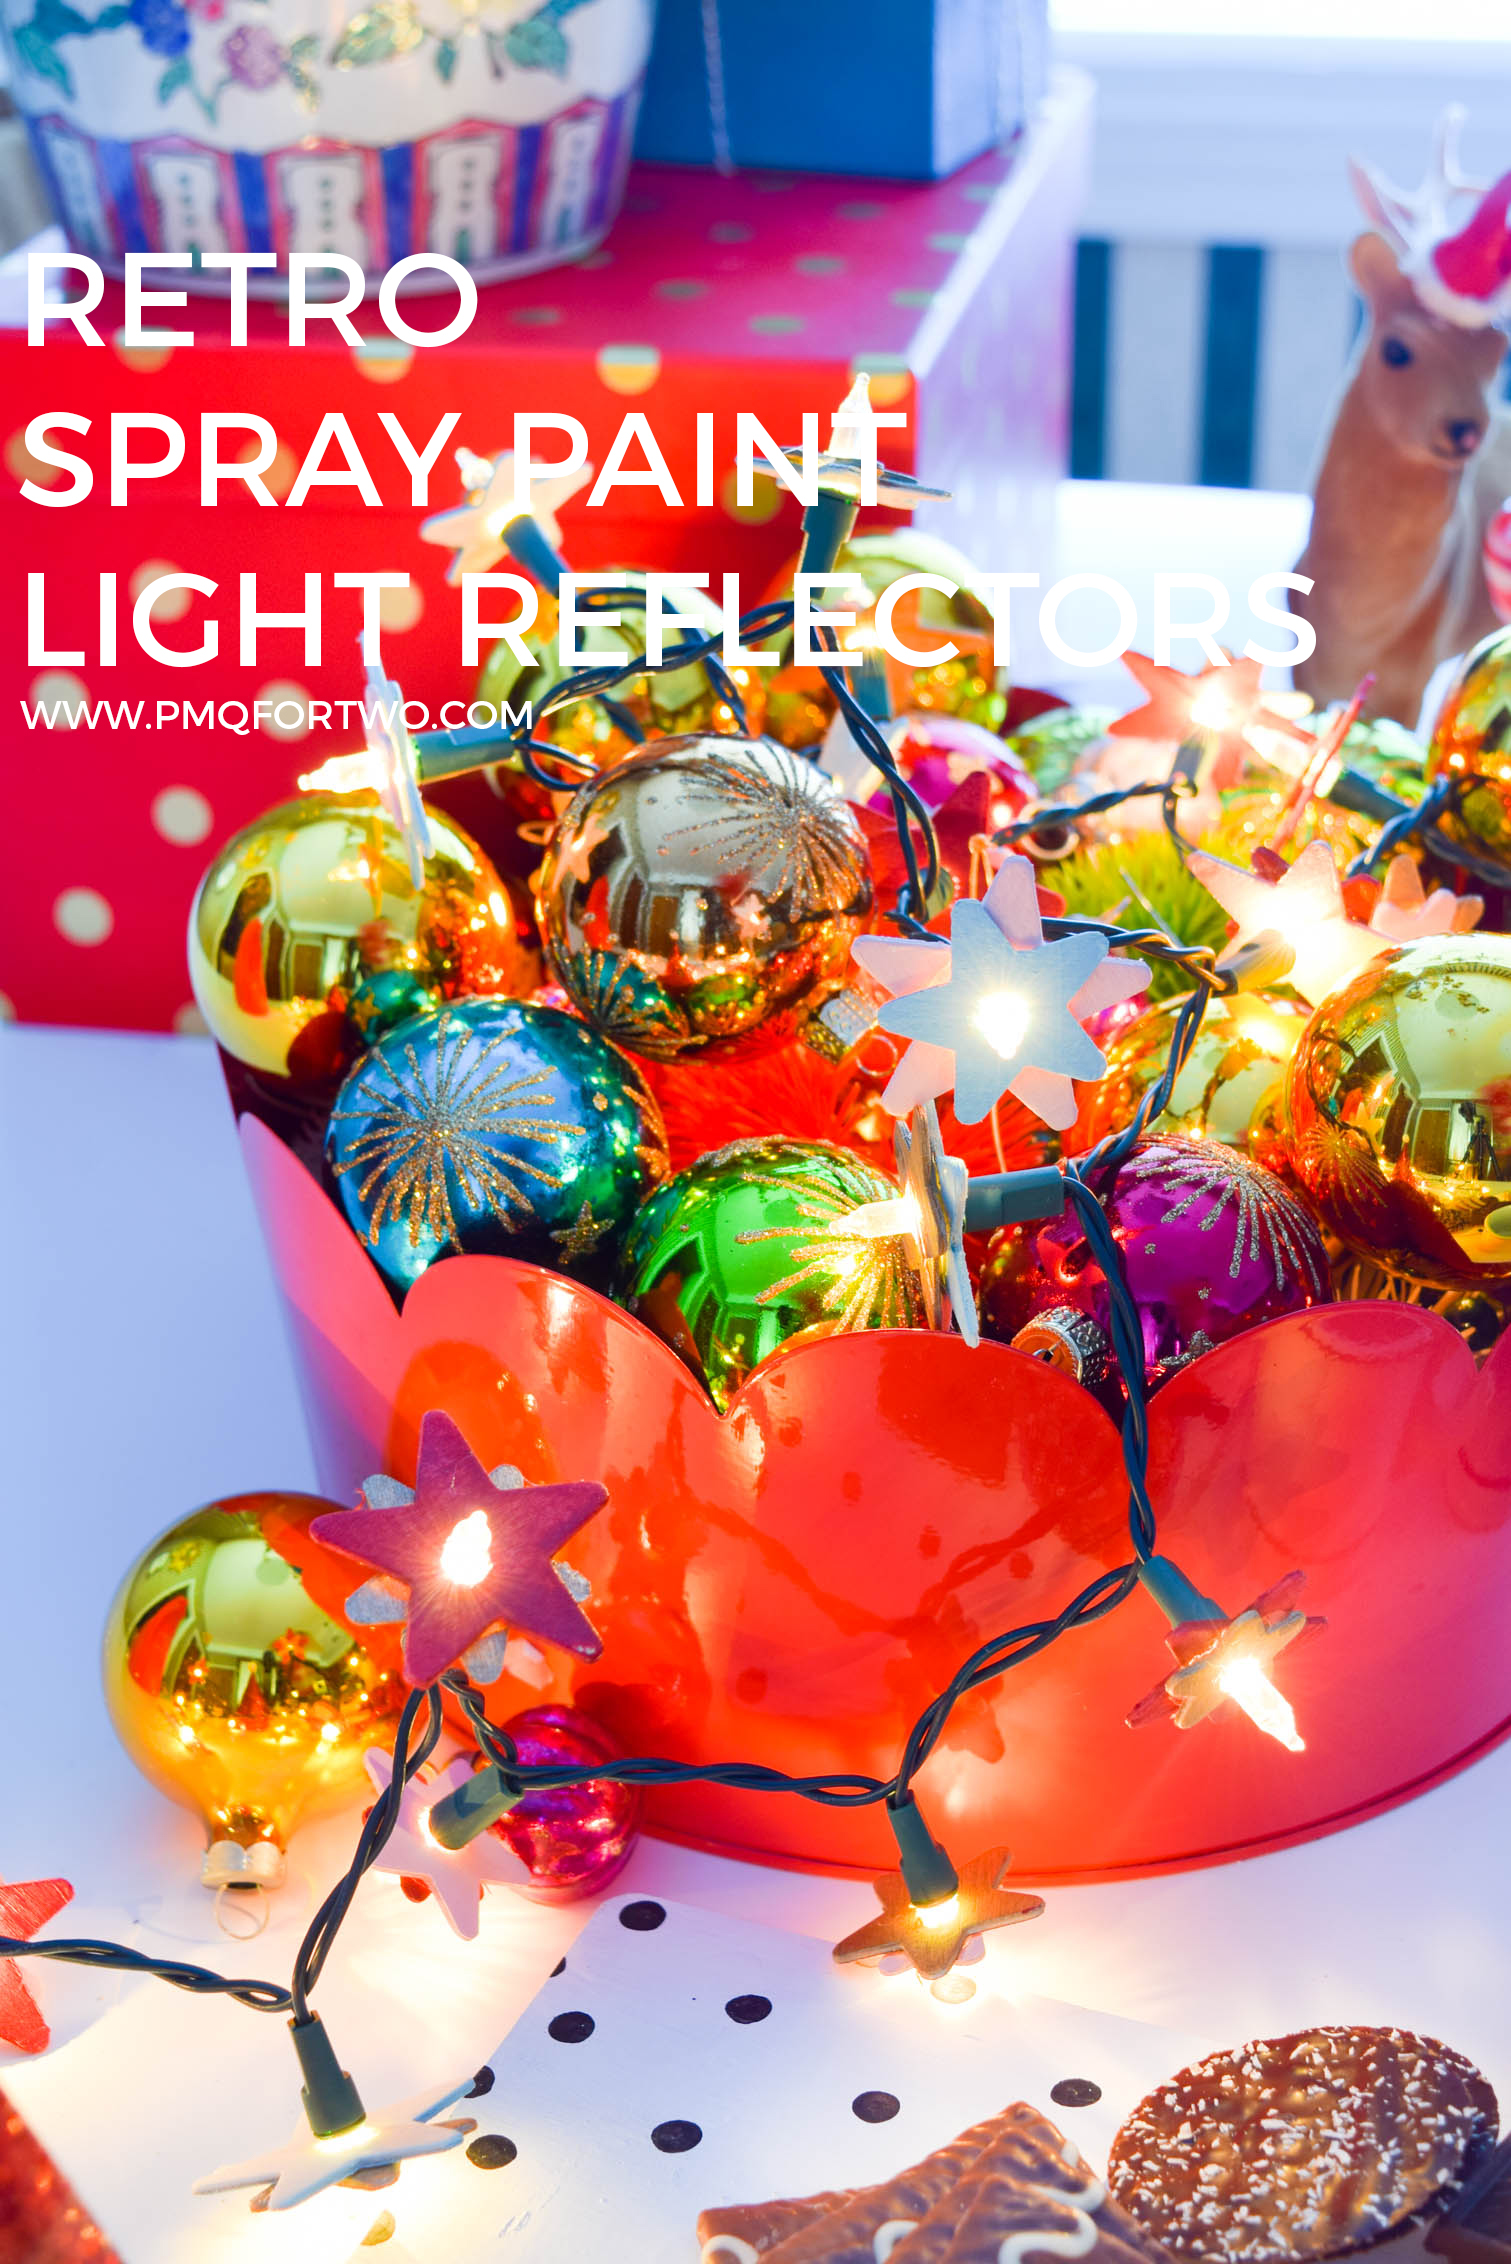
To start, match up two stars of different sizes per bulb on the garland you’re outfitting. With a 50 light strand, you need 100 stars to make 50 reflectors.
Next, check the drill bit you need to cut a whole big enough for the bulbs to pass through. Each strand of lights is slightly different, so make sure you check. Then, drill holes in the center of each star.


Spray Painting your diy reto reflectors
I highly suggest you use a pop-up spray shelter to spray these indoors (with proper ventillation) since spray paint dry times differ wildly depending on how cold and humid it is.
I split the stars evenly between the colours I wanted to use, and sprayed them accordingly.

Next, using a hot glue gun, glue two stars together, alternating points, so that they form a starburst. Slide them onto the bulbs as you go, that way the glue has time to dry around the base of the bulbs.

Decorating with your Retro Spray Paint light Reflectors
I shared our Retro Inspired Christmas House Tour on the blog yesterday, but I left one space out – the kitchen! It hasn’t really been touched since we moved in, and I can’t wait to make ALL the changes to it, but in the meantime it looks OK with a big bowl of ornaments and some Christmas cheer.


As you can see, they look adorable just sitting there, but the real magic happens when you turn them on!
Since this bowl of ornaments will likely sit there until January, I figured it could use some lighting to create a mood in the evening.


p.s getting photos of Bruce where he’s not in motion can be tricky. Amiright?!


And there you have it! An easy peasy way to use Krylon’s gold spray paint to create DIY Retro Spray Paint light Reflectors! And in case it wasn’t already painfully obvious, while I could paint them one at a time, spray paint is the absolute easiest way to get the job done.

