

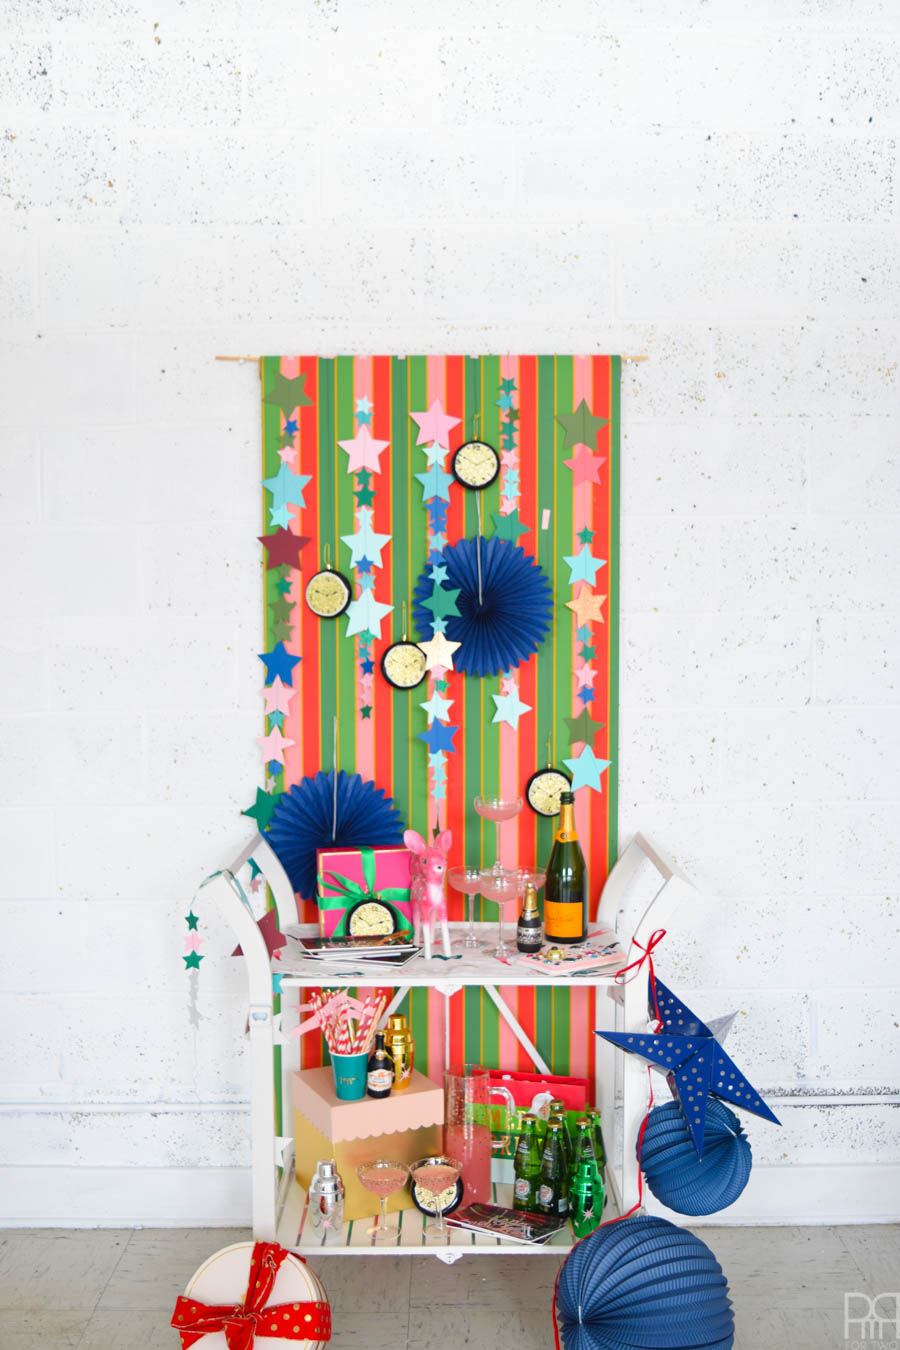
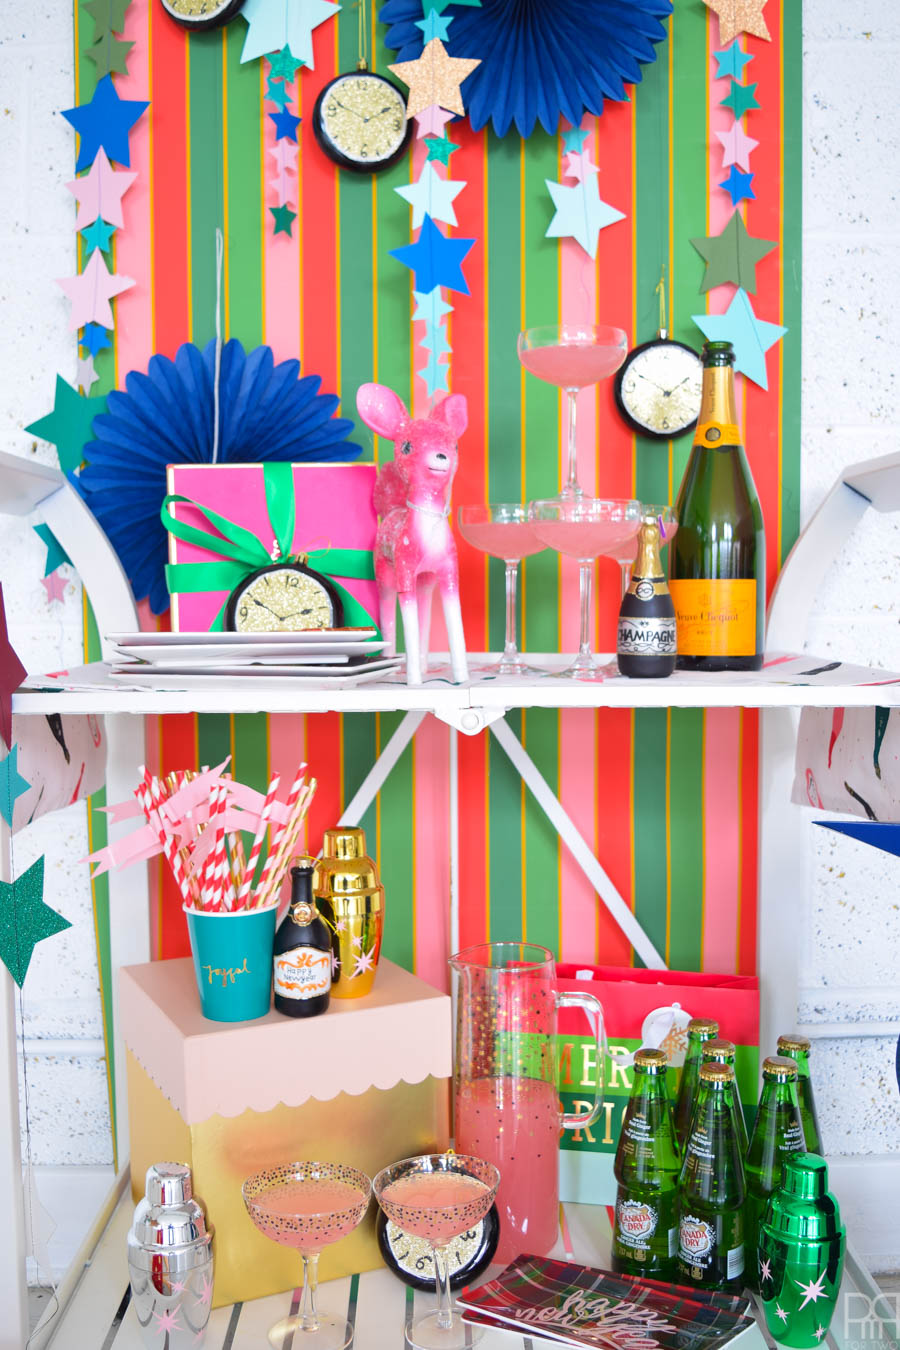
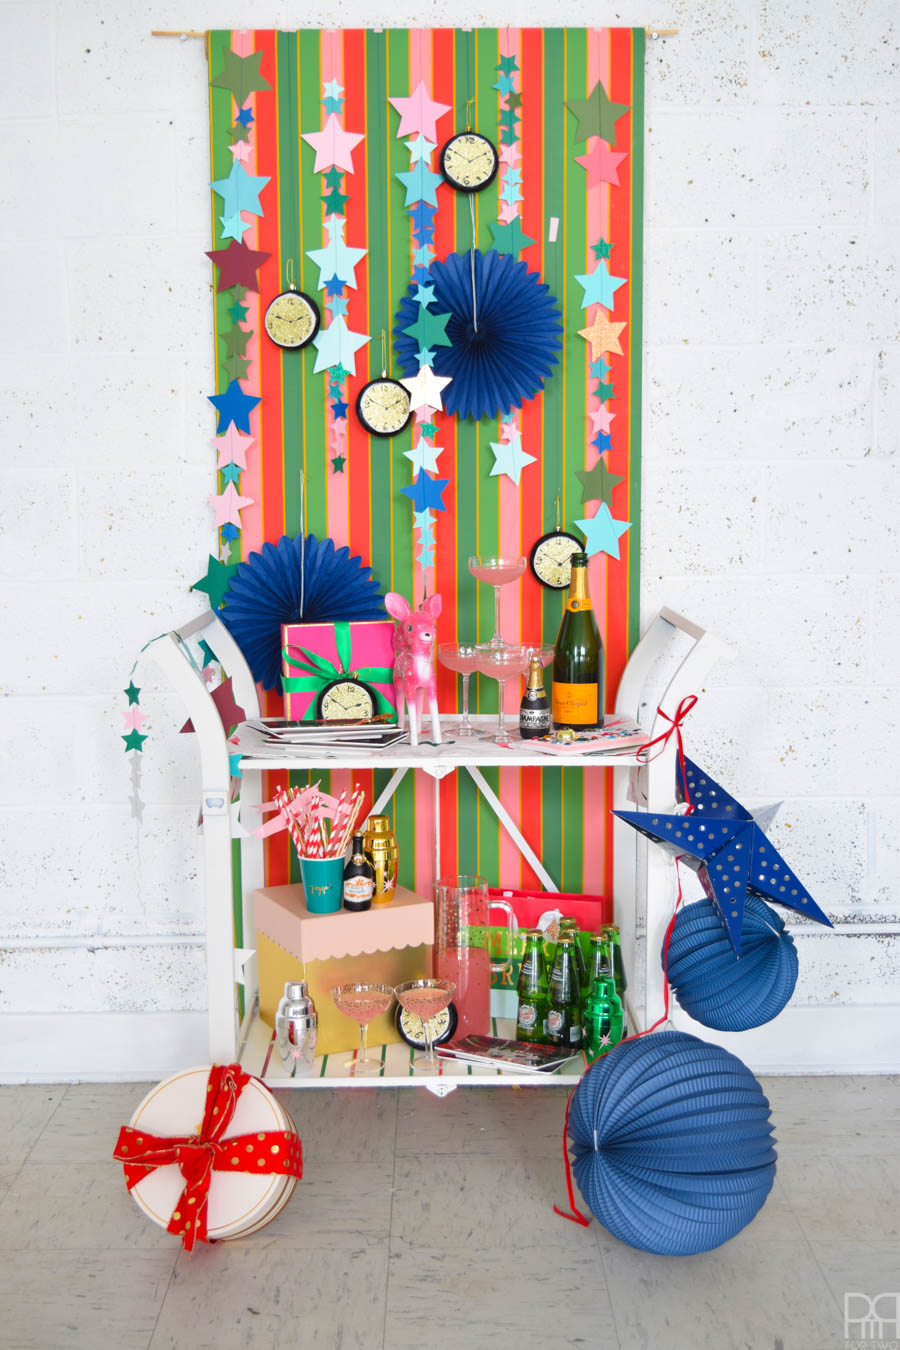
Y’all remember my Hot Cocoa Bar right? // here // Well for NYE I wanted to do something fun so I create a backdrop for our champagne / cocktail bar, and decked-out some of our plates and shakers for the occasion. Using the magic of my Cricut Explore Air 2, paper, and vinyl I created a colourful NYE Party Backdrop + Cocktail Bar that is sure to WOW at our NYE celebrations.
*Cricut sponsored this post, but all thoughts are my own. Thank you for supporting the brands that make PMQ for two possible.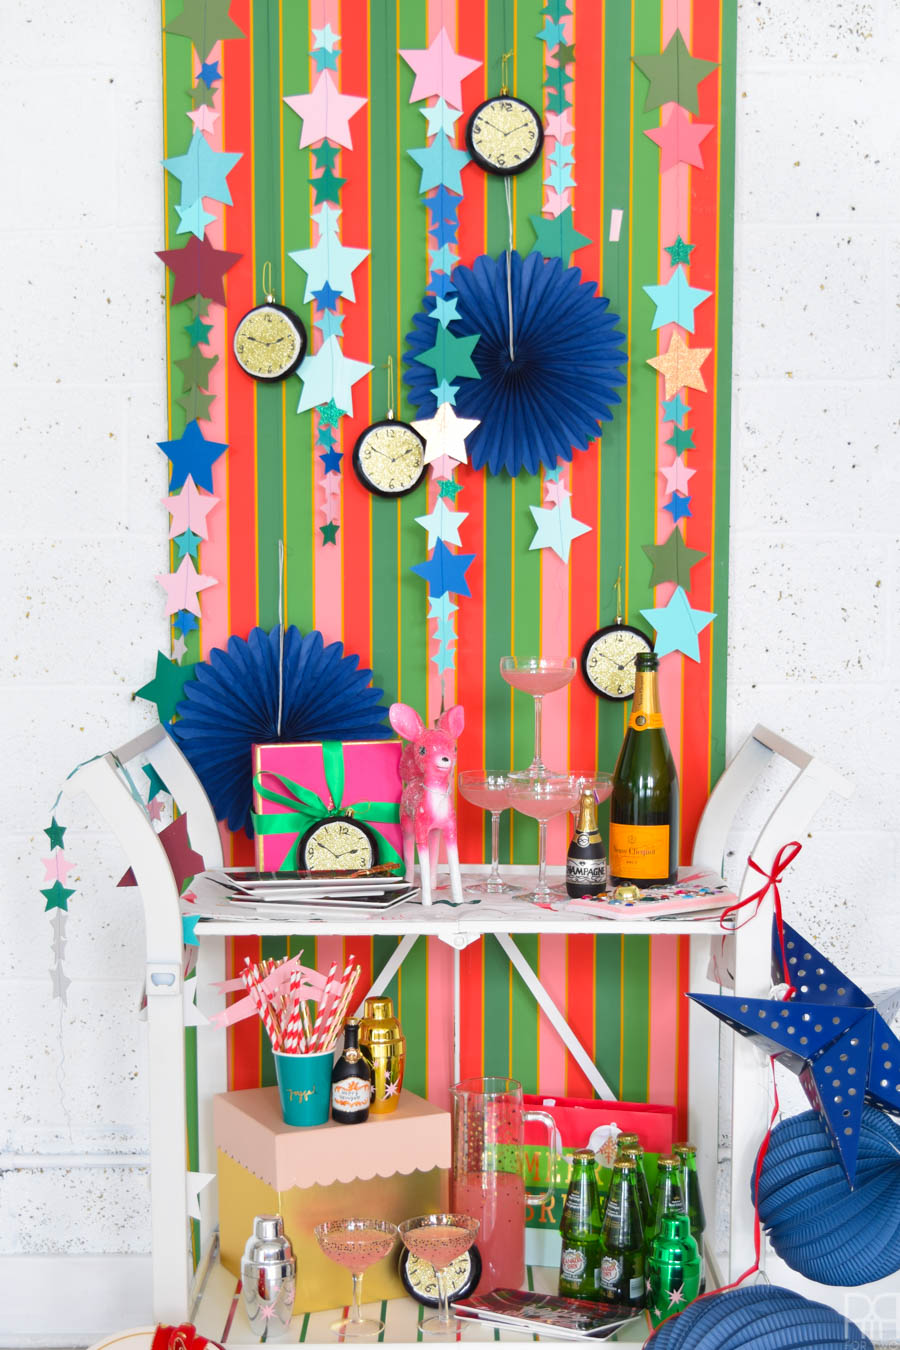

This NYE Party Backdrop + Cocktail Bar is actually super easy to set-up, you just need a few things and a little bit of time. I would not be exaggerating when I say that I put this whole thing together in an hour while we cleared-out my home office and moved it to a new location. I was literally weeding vinyl in the truck while Dan drove, and was sewing while the guys brought everything in. If that’s not amazing I don’t know what is!?
*The following product links are affiliate things. Thank you for supporting the brands that make PMQ for two possible.
Materials for NYE Party Backdrop + Cocktail Bar
- Cardstock of all kinds – I actually used the left over pieces from previous projects. I have a whole bin of scraps, so they were the stepping off point.
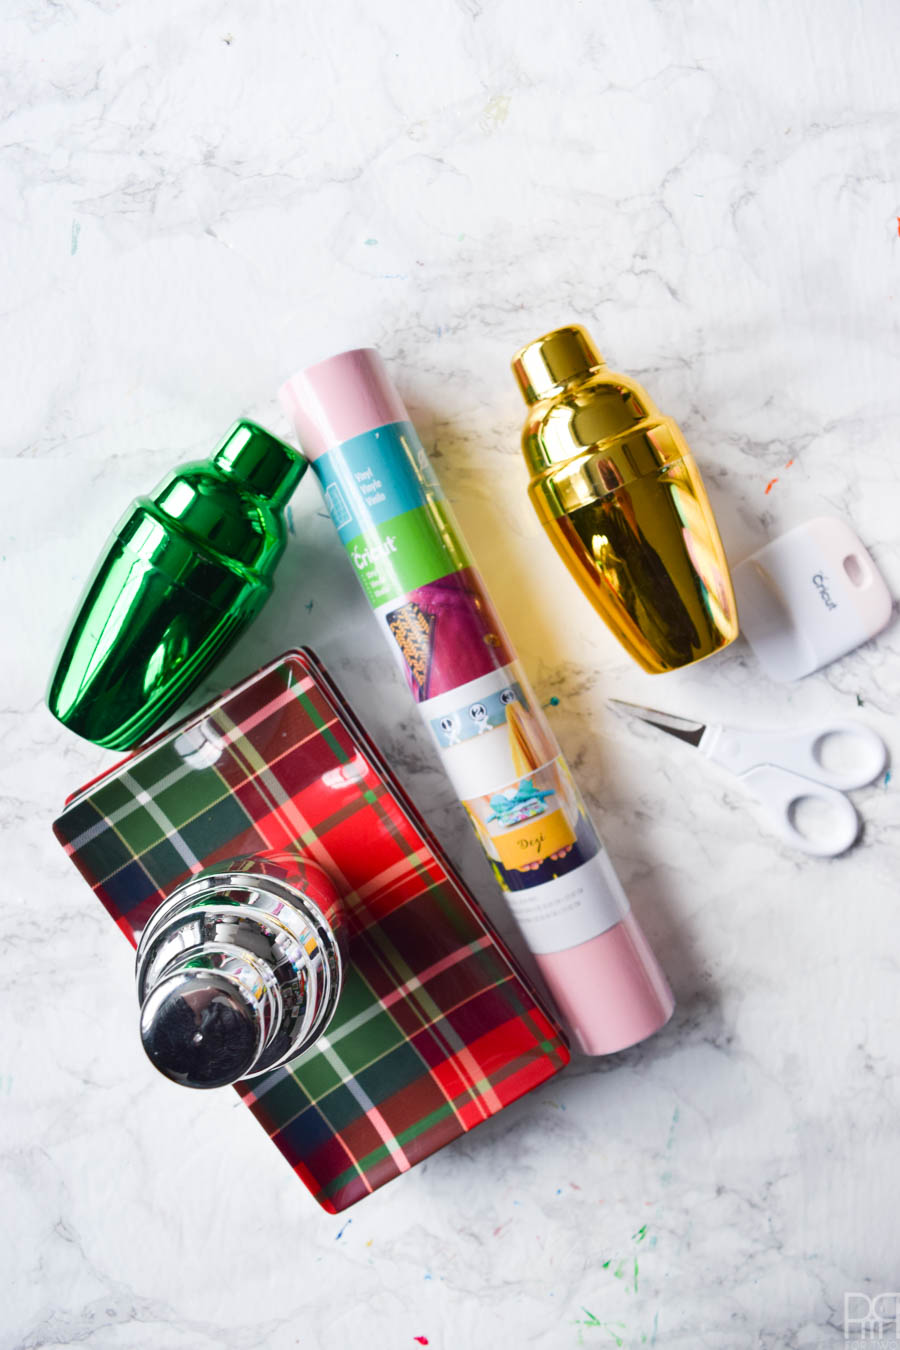
- 1 Roll of Wrapping paper
- Sewing Machine
- Cricut Explore Air

- Cricut Cutting Mats
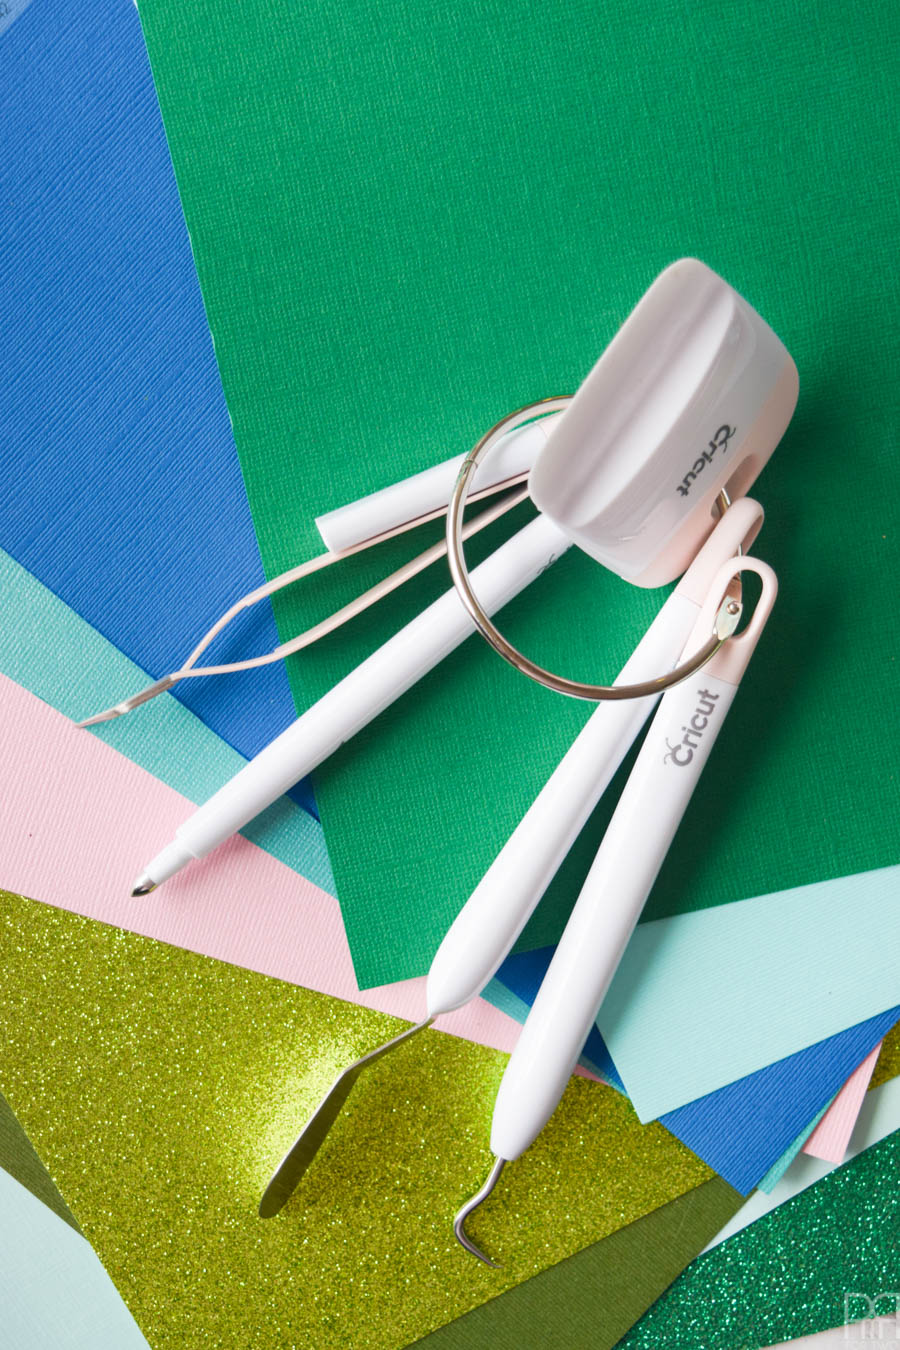
- Cricut Tools
- Cricut Vinyl
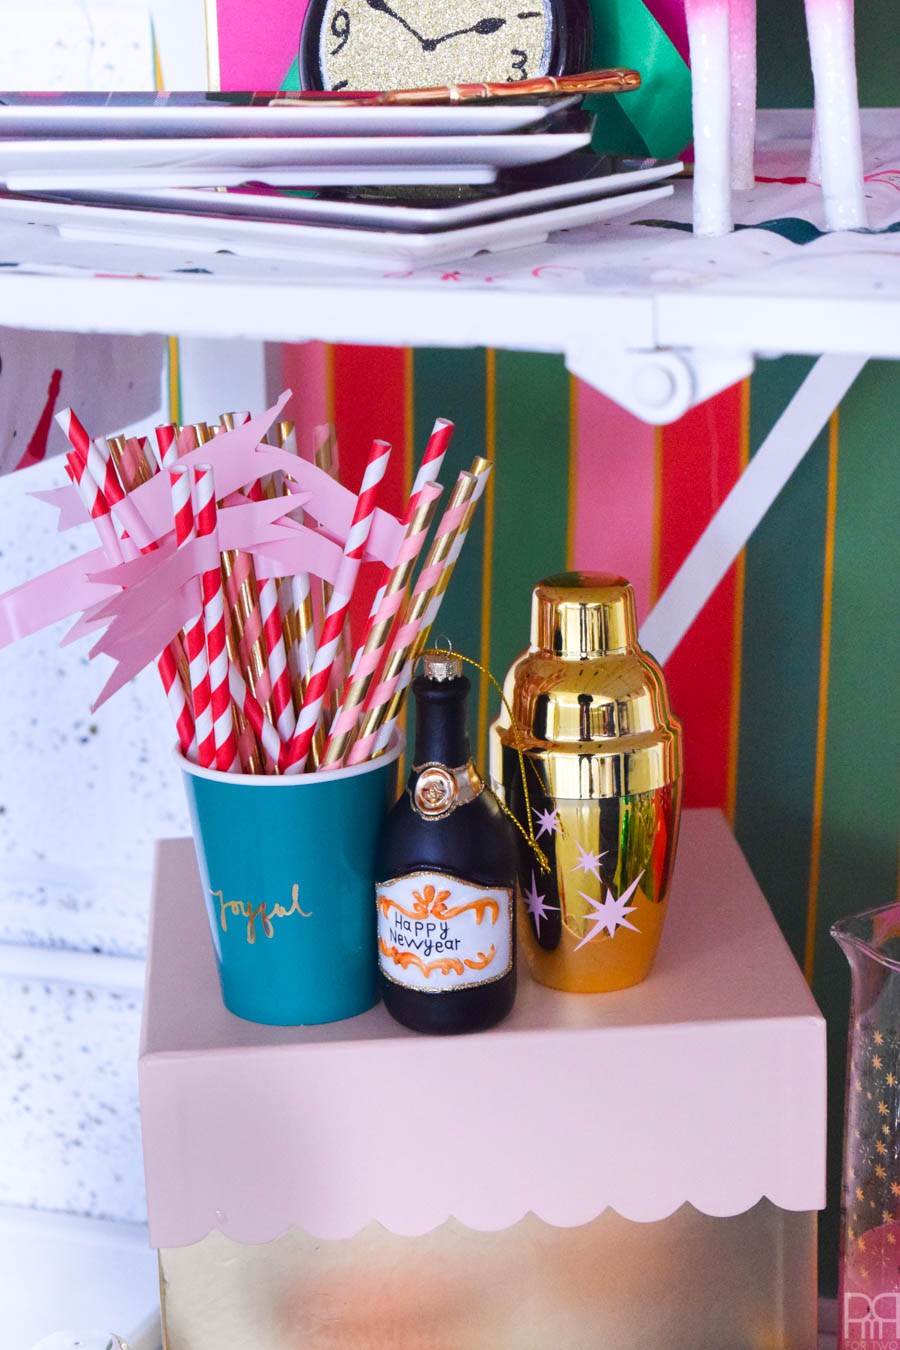
- Plastic Plates & Serving Dishes
- Happy New Year Cricut Files (#M1C6A820) + Atomic Starburst Cricut Files (#MD7EB08) + Star Shape all loaded (#M36989A) // here //

To Make the backdrop:
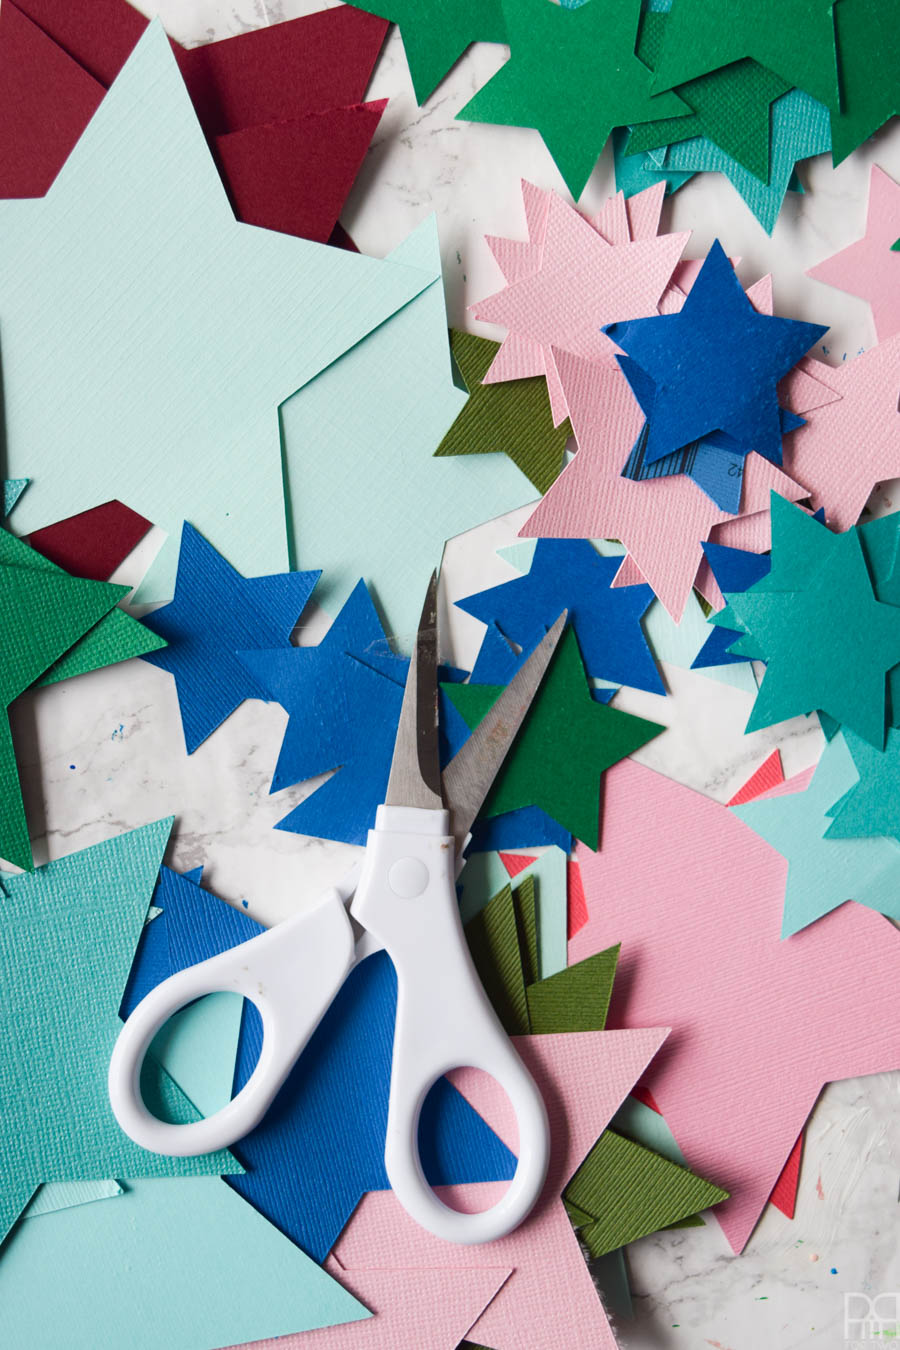
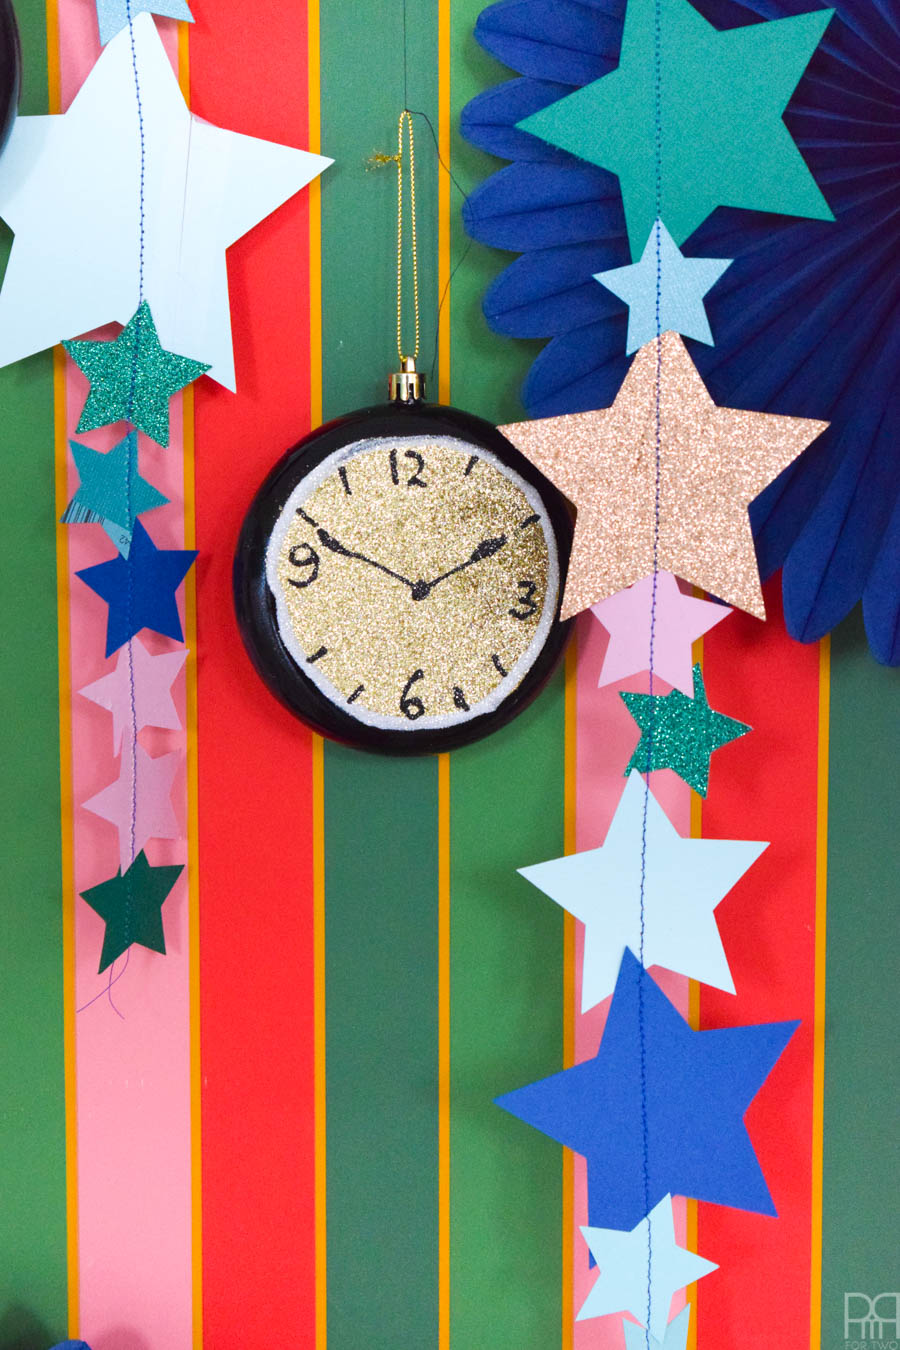
Step 1: Start by using your Cricut Explore Air 2 to cut a whole bunch of stars. I used the generic star available in the shapes, and just scaled them to various sizes to fit the scraps of cardstock I had. I used everything from standard card to heavy glitter, and the machine cut through them all perfectly.
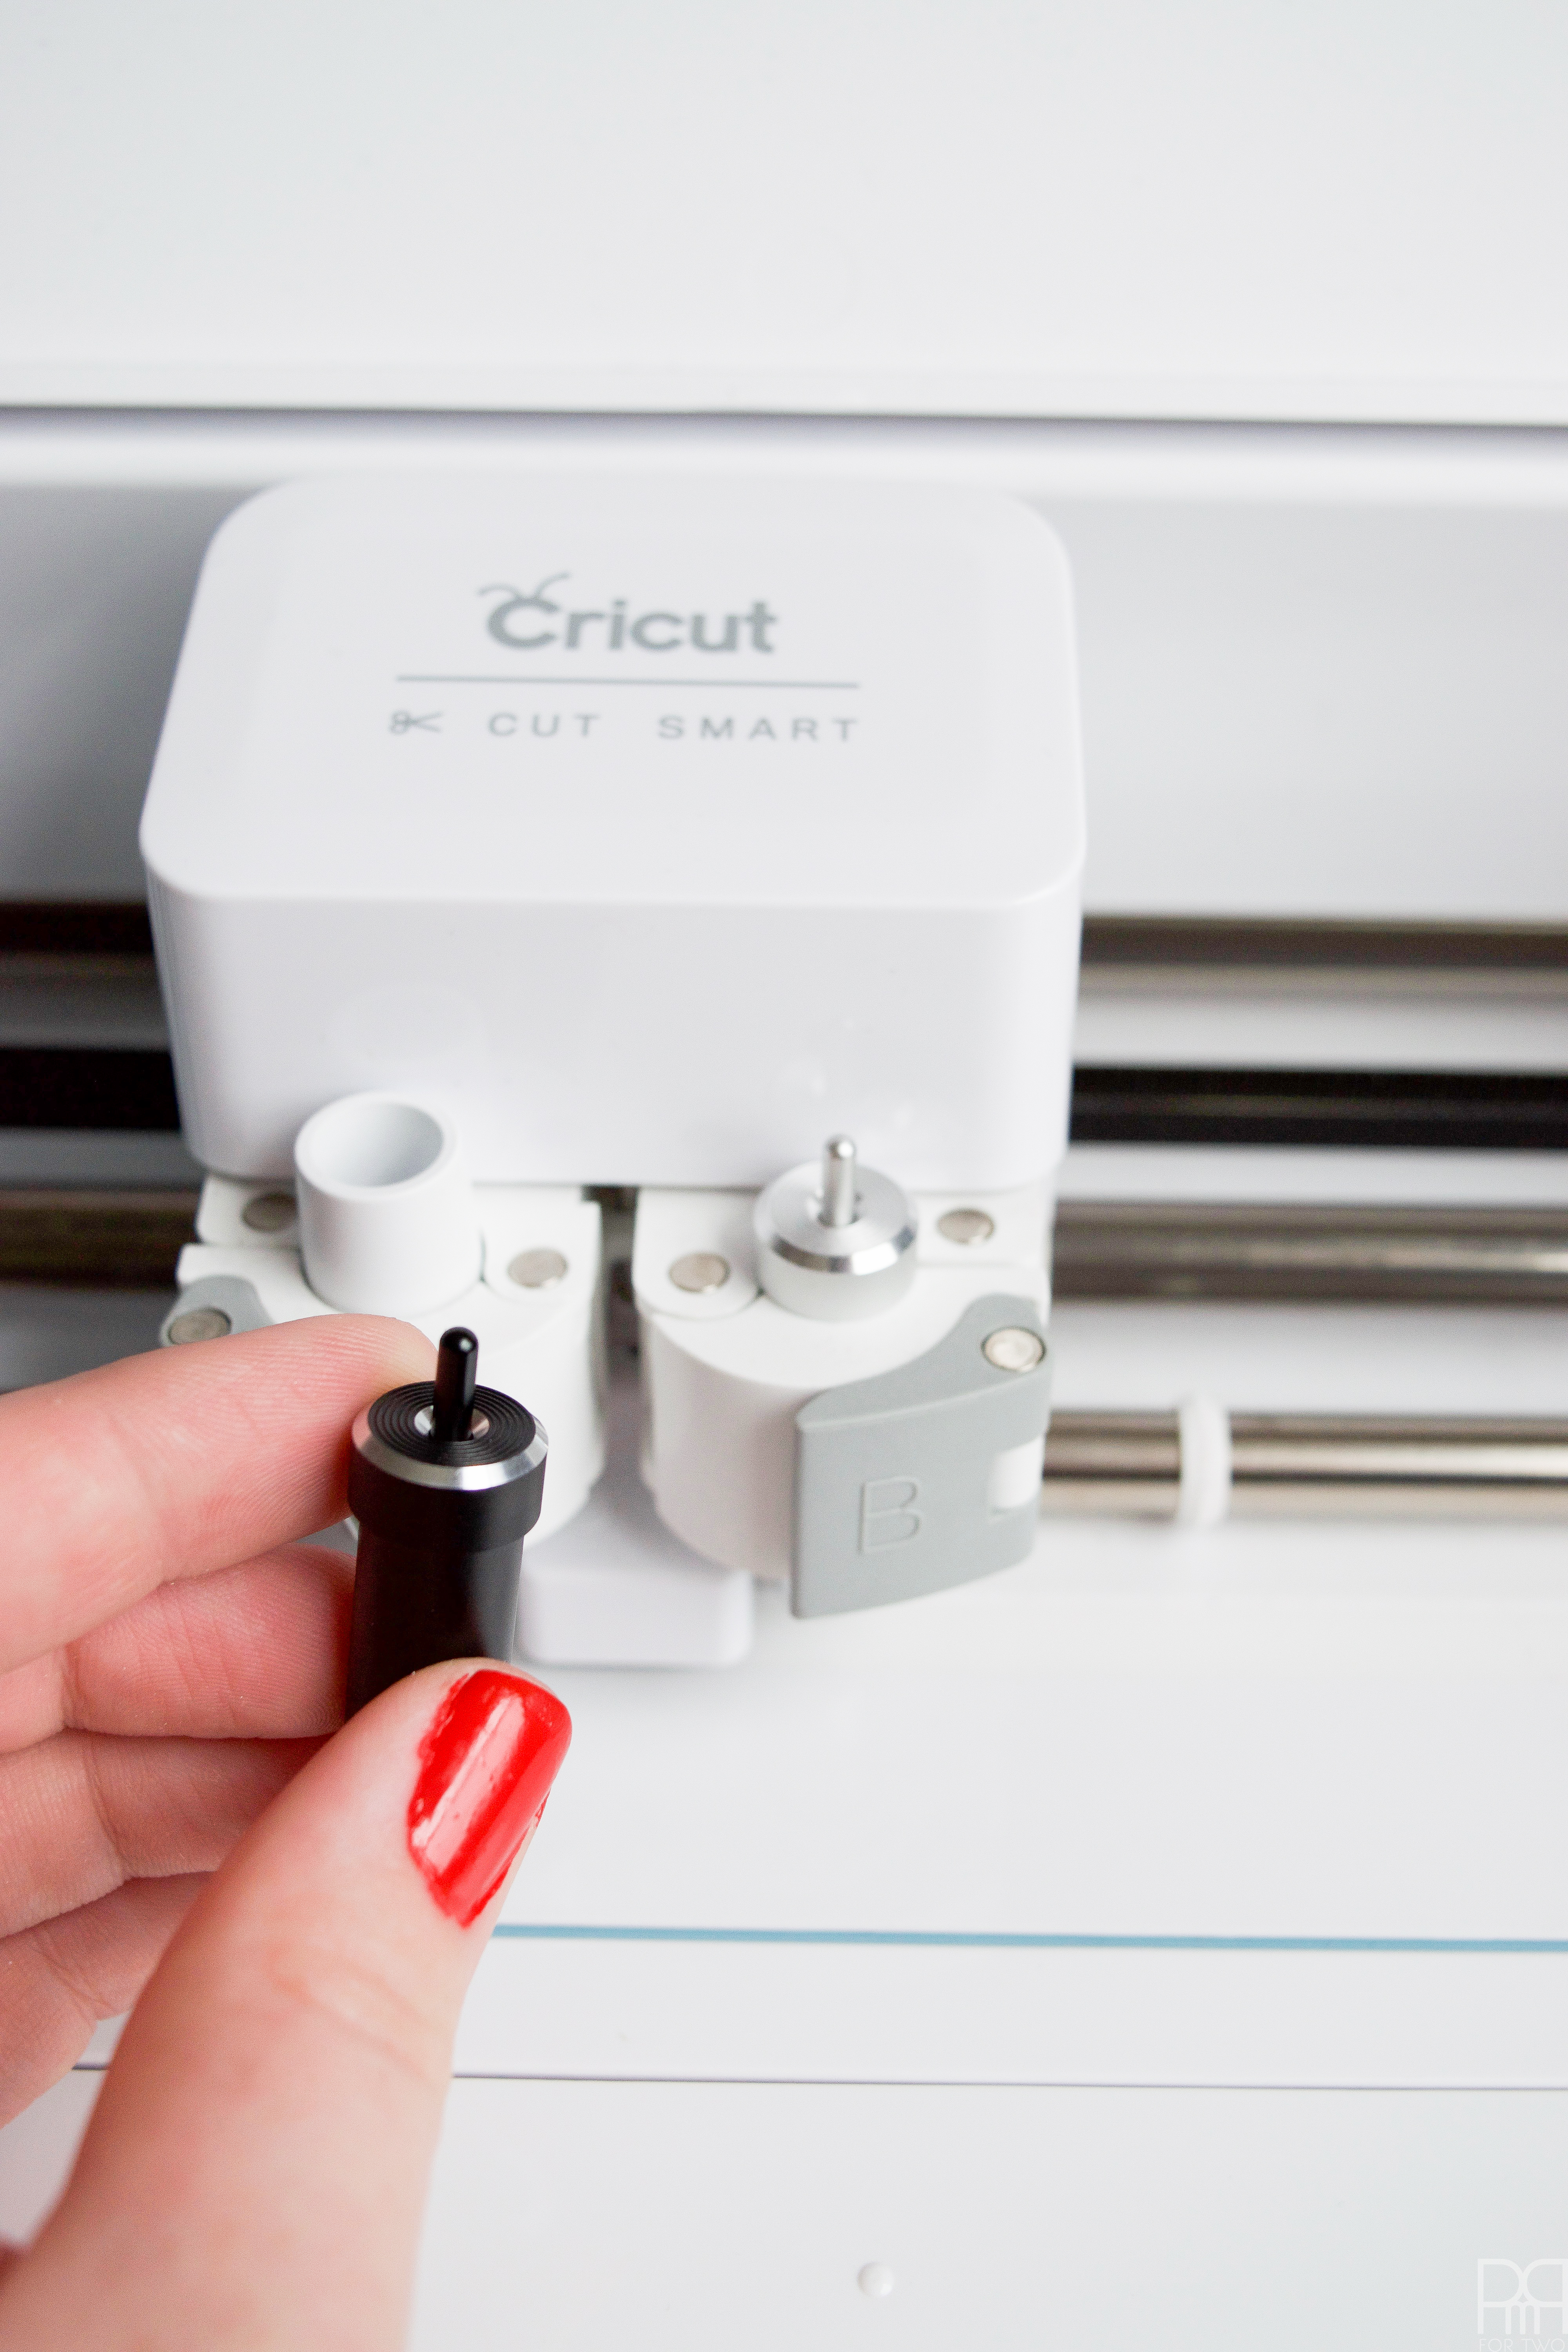

Make sure you change the settings dial on your machine accordingly. Like I said above, the heavy cut blade makes all the difference when cutting through heavy cardstock and glittery cardstock – we all know how much I love my glitter, so having the extra blade // here // makes all the difference.
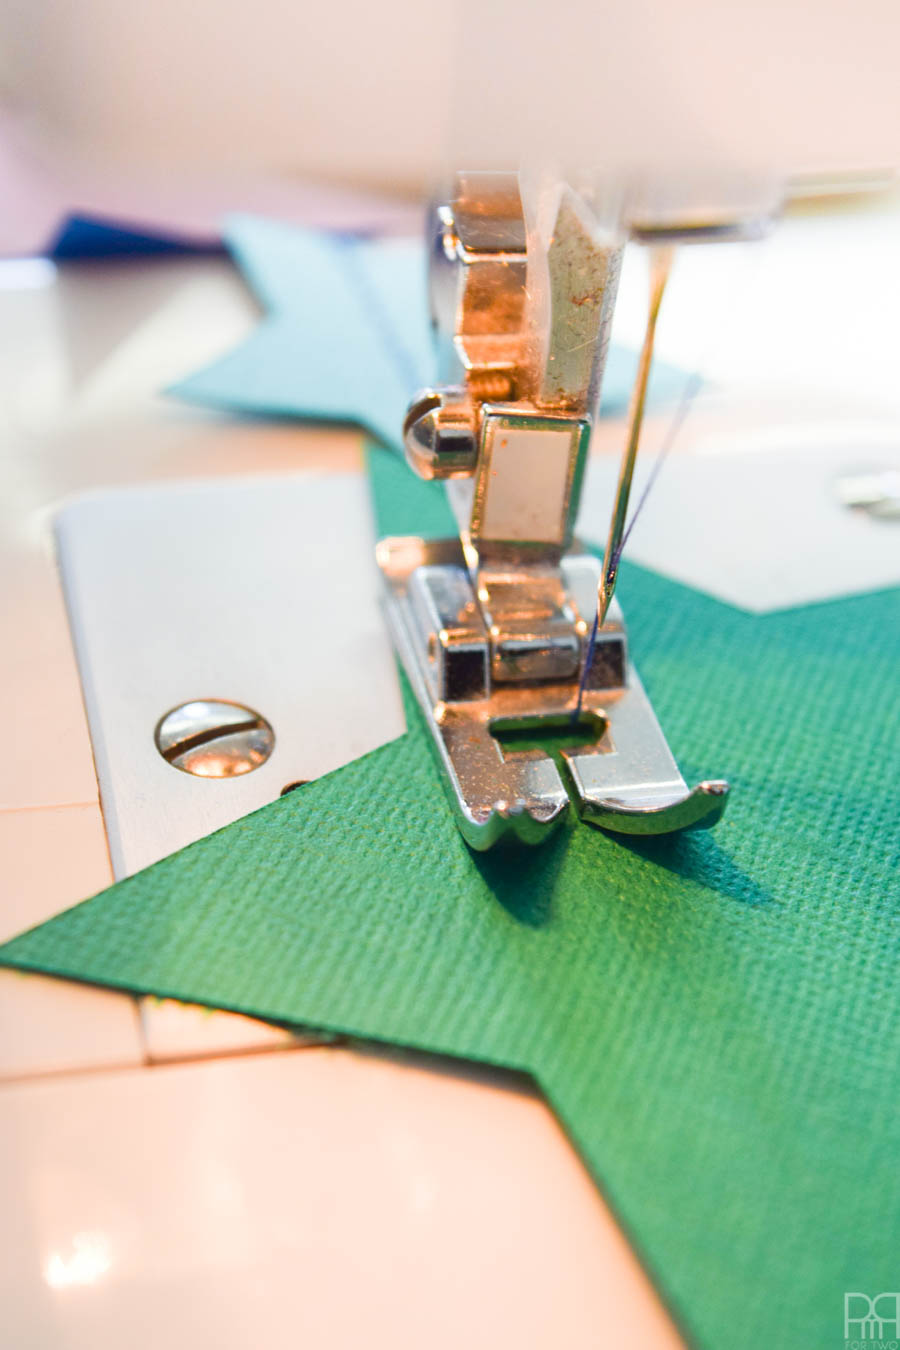
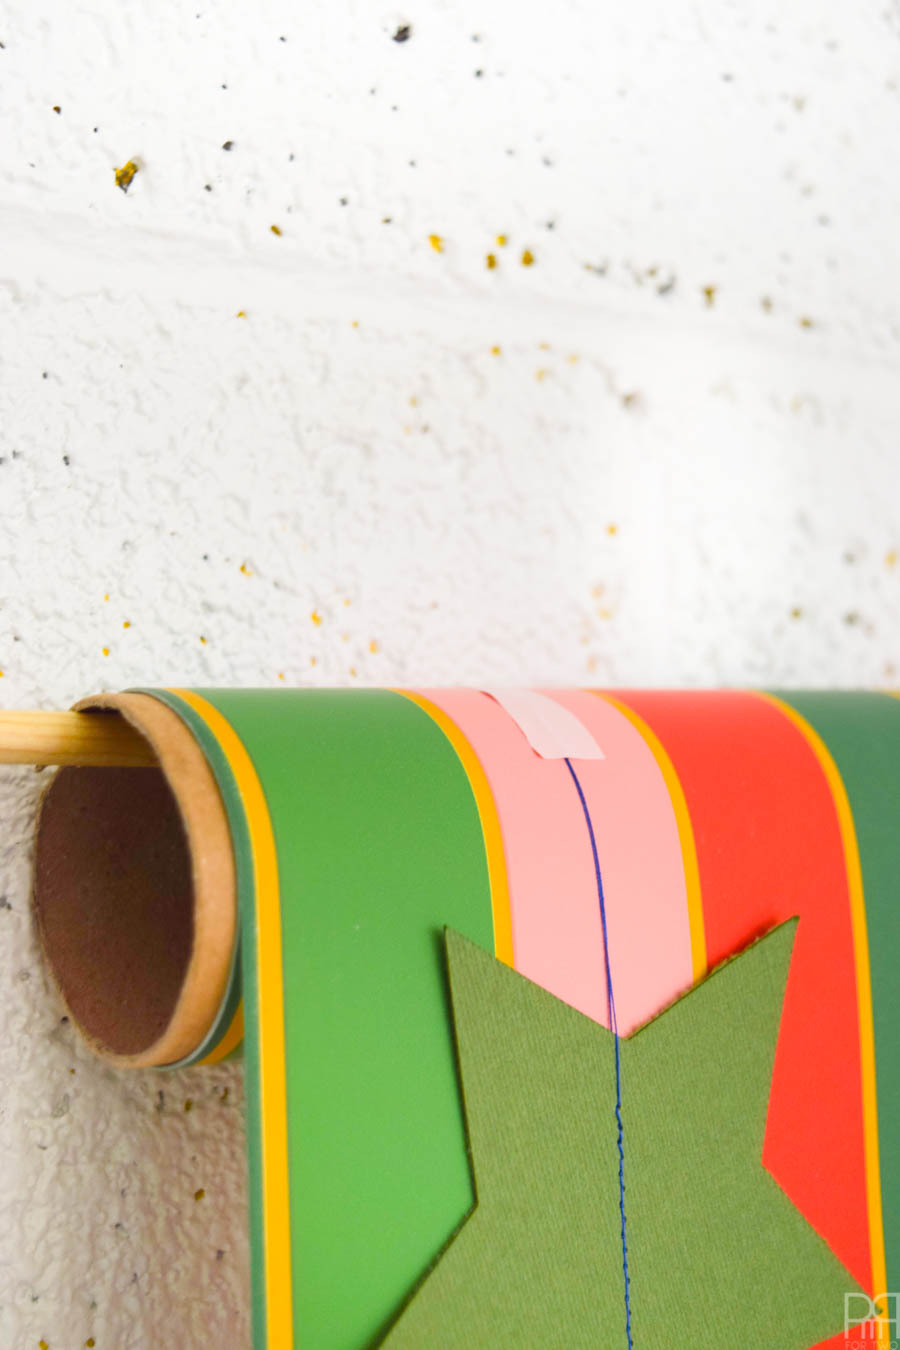
Step 2: Using your sewing machine – YES your sewing machine – start sewing the stars together in a length. I lined them up one after the other and made sure that I alternated between sizes and colours so that it would look like a cascading stream of beautiful stars. Make sure you leave a length of thread at the end of each strand so that you can easily tape them to your backdrop.
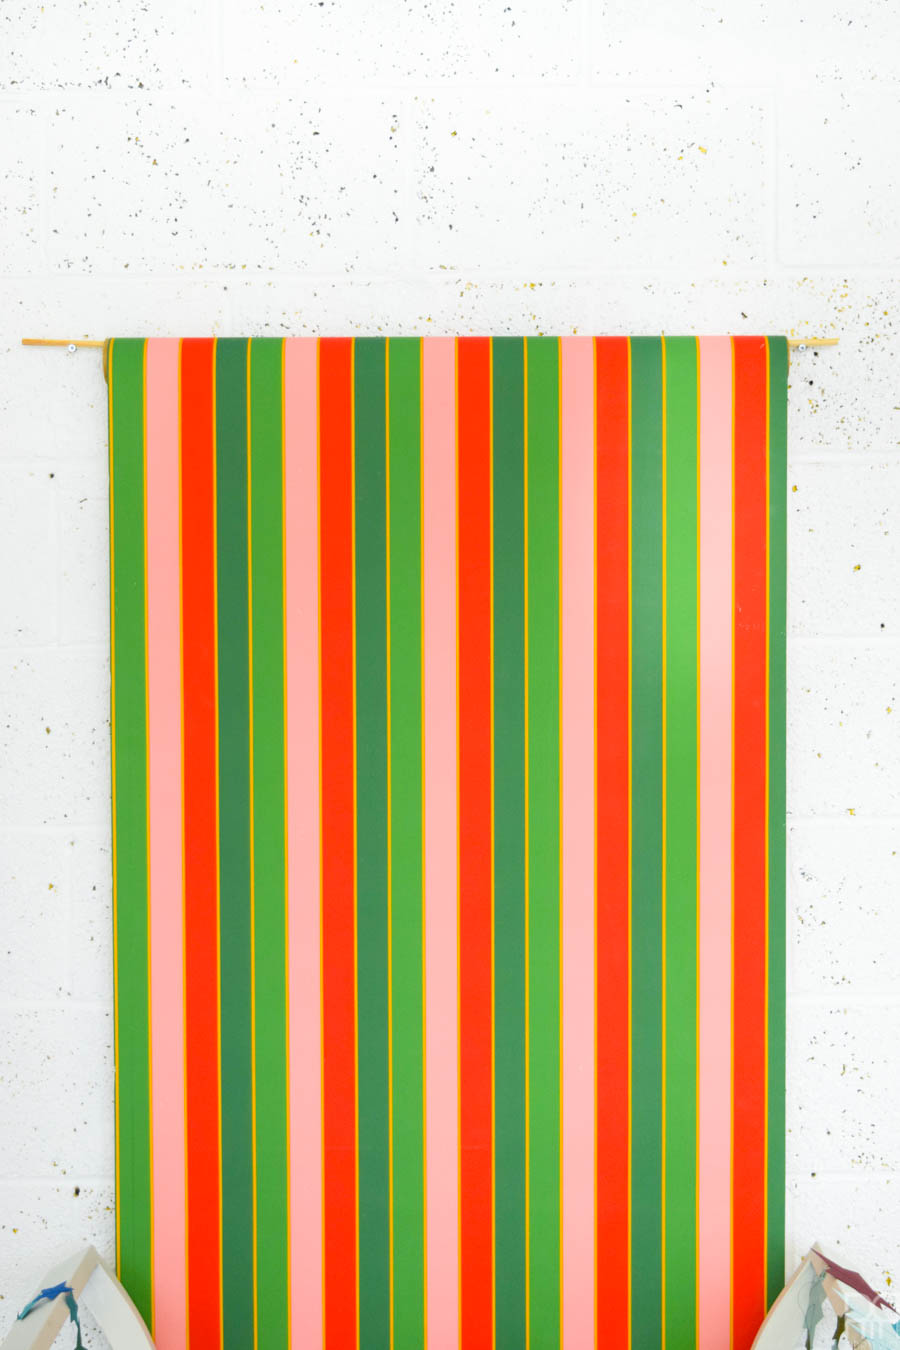
Step 3: Hang a roll of wrapping paper for your backdrop. You can hang the entire sheet or just unfurl a roll until it hits the floor – up to you!
Step 4: Start taping the strands along the top of the paper. I used little bits of vinyl that matched a colour on the paper.
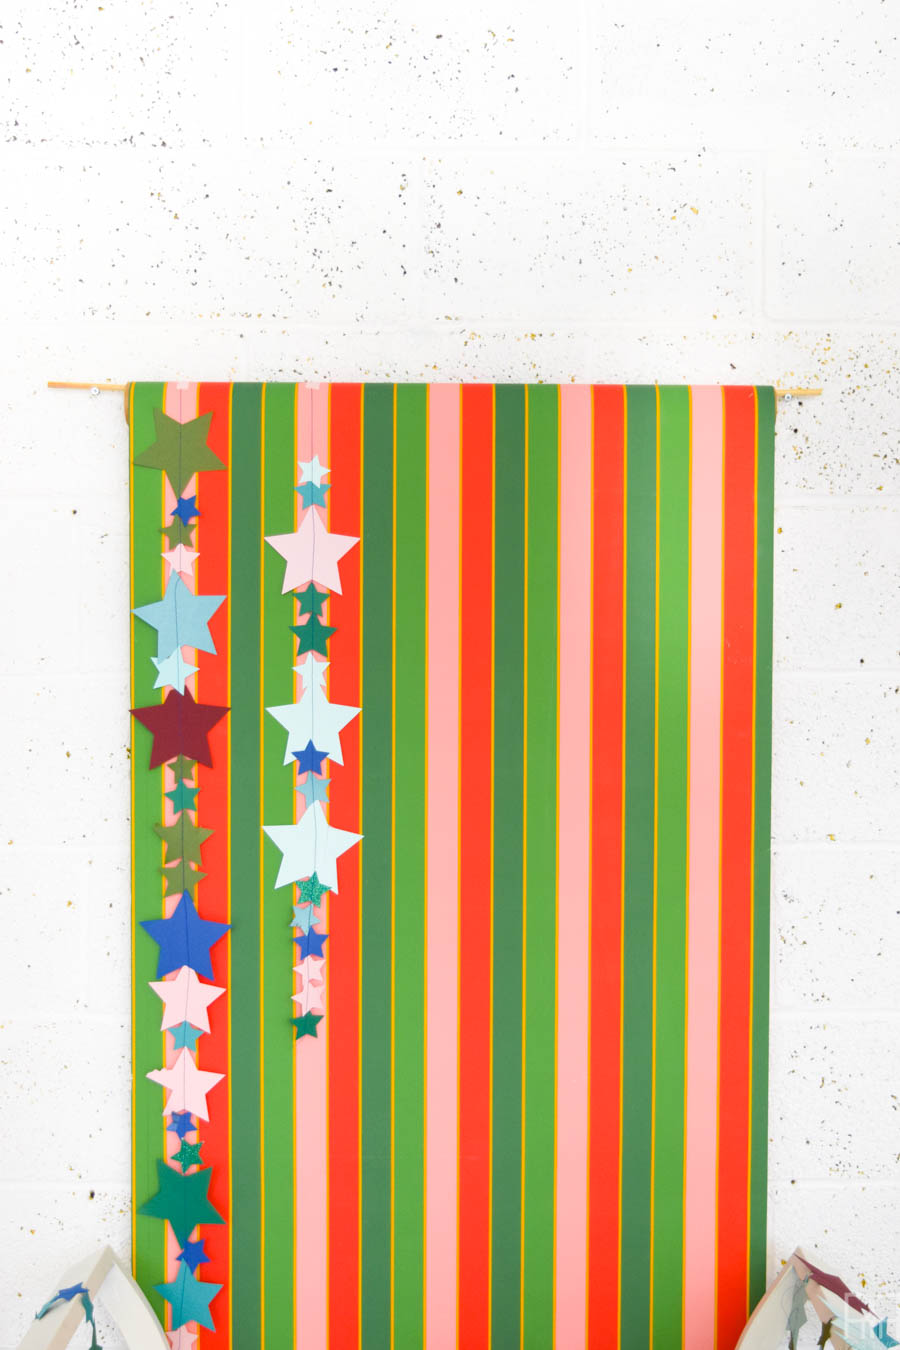
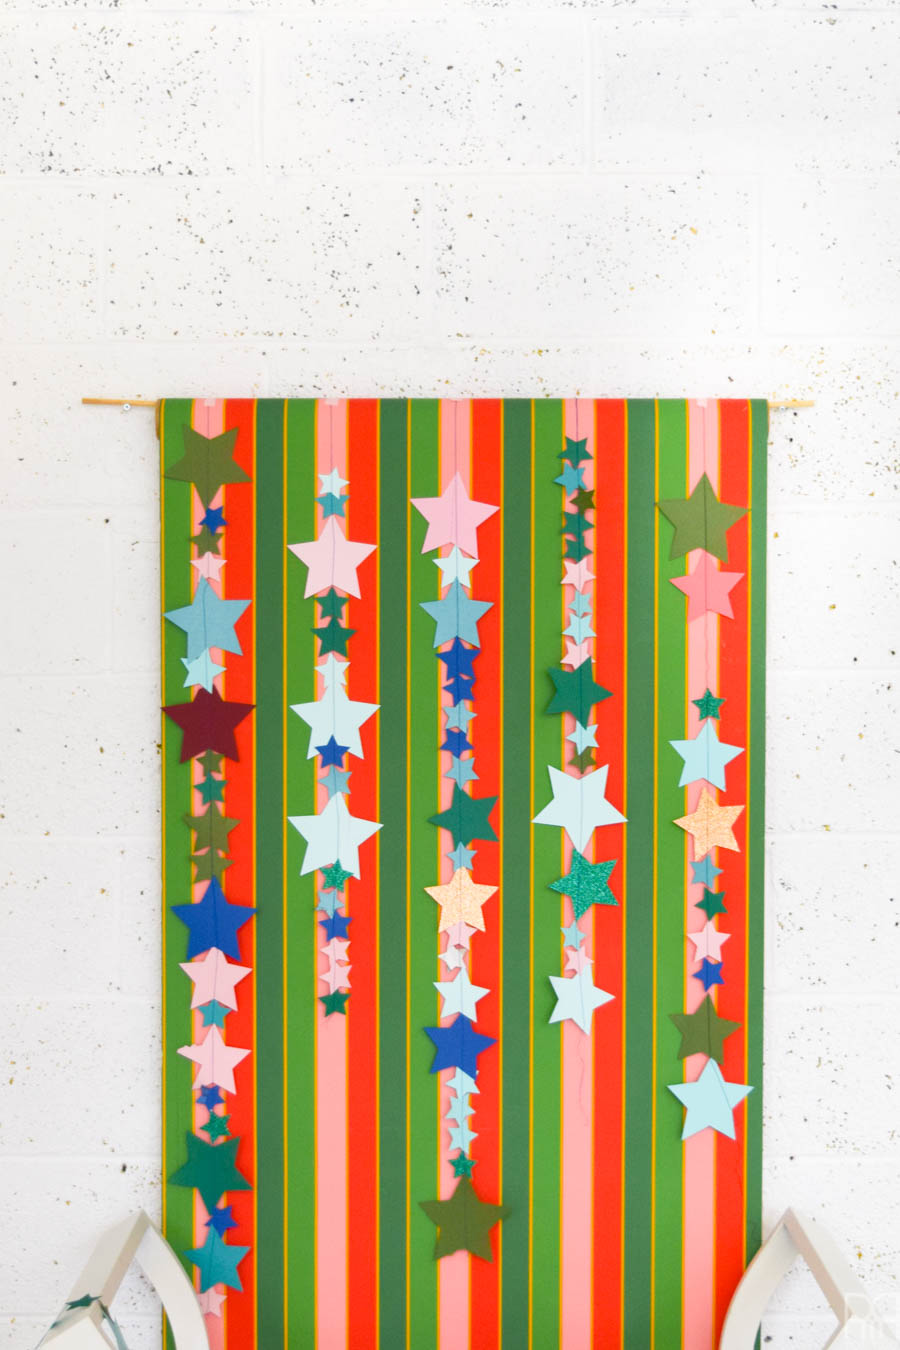
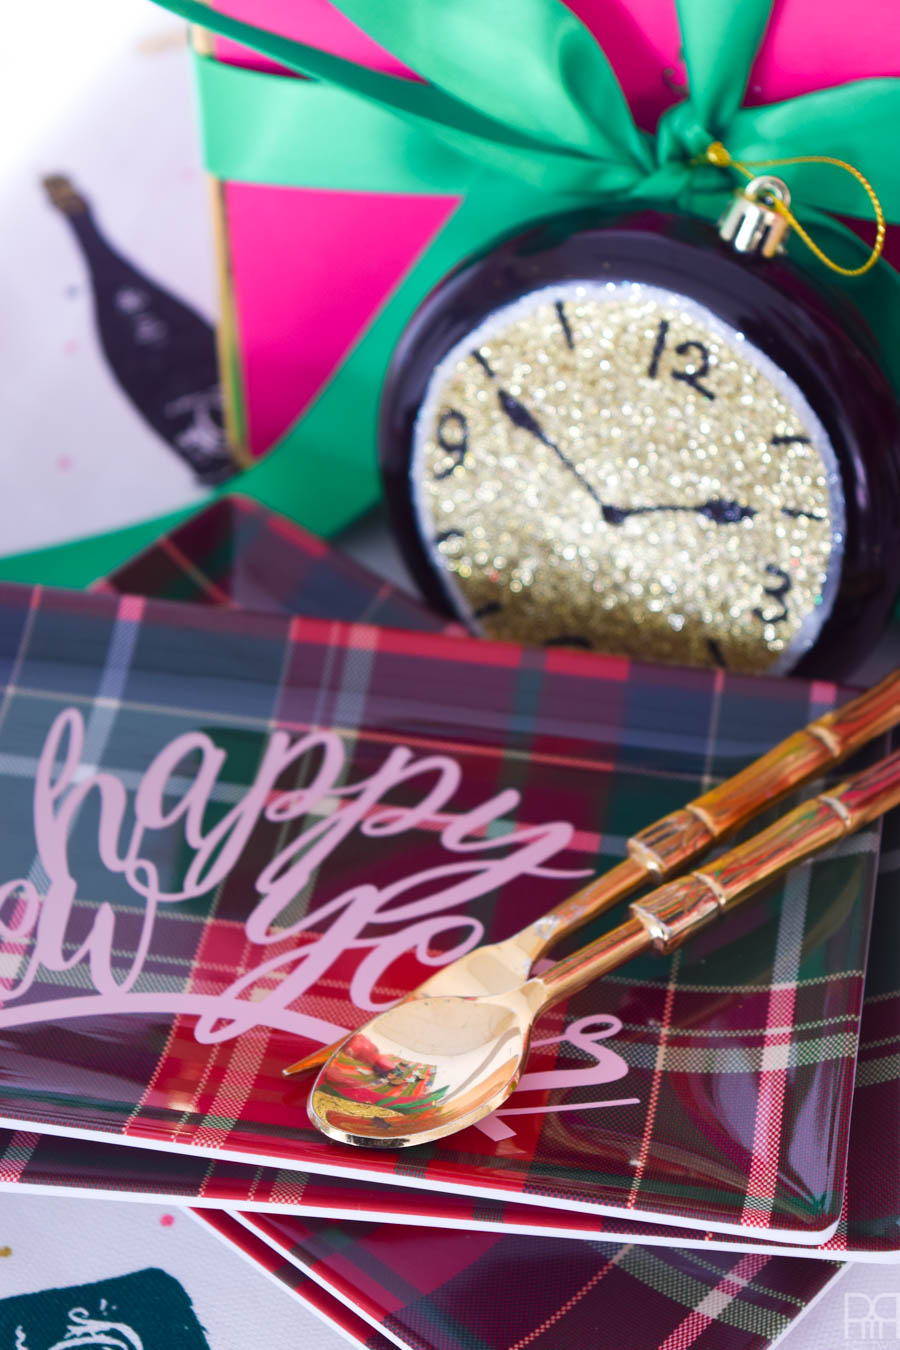
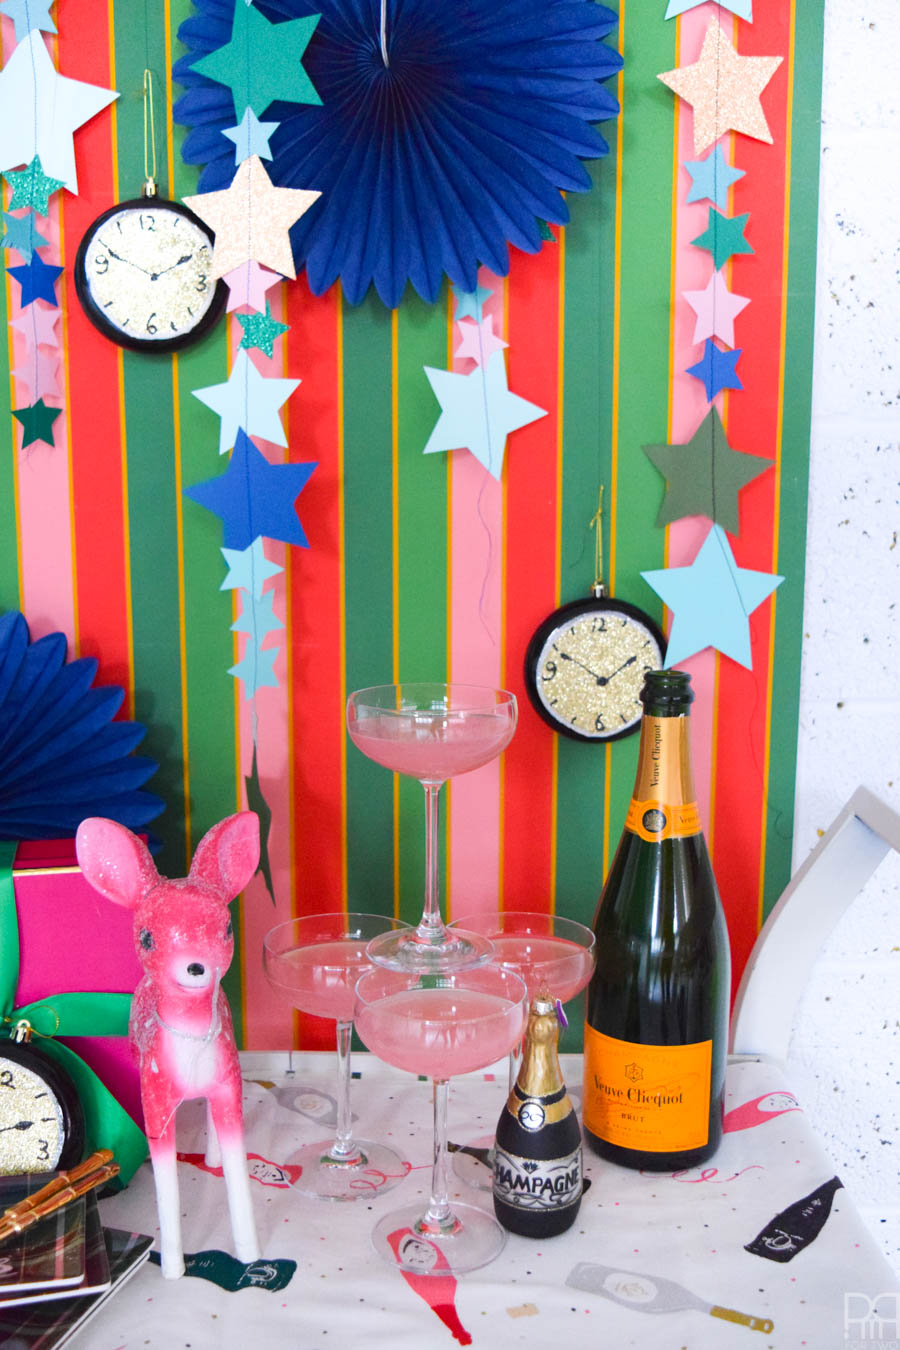
Step 5: You can stop at this point, or add a whole bunch of fun clock faces to the backdrop. I had purchased a few ornaments with a clock face, but you can actually make some using your Cricut and file # XXXXXXX

To embellish your plates and servingware
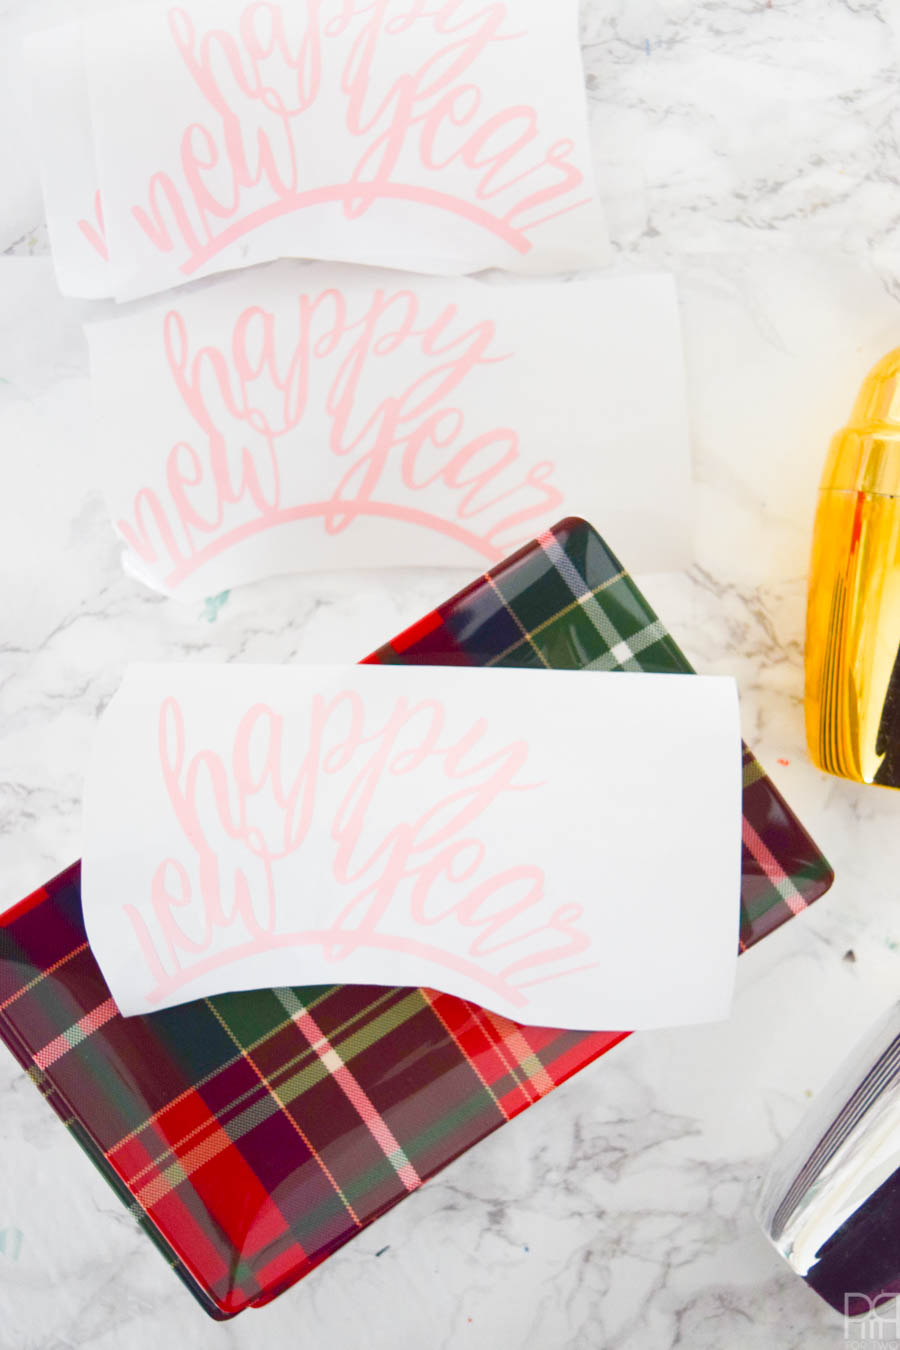
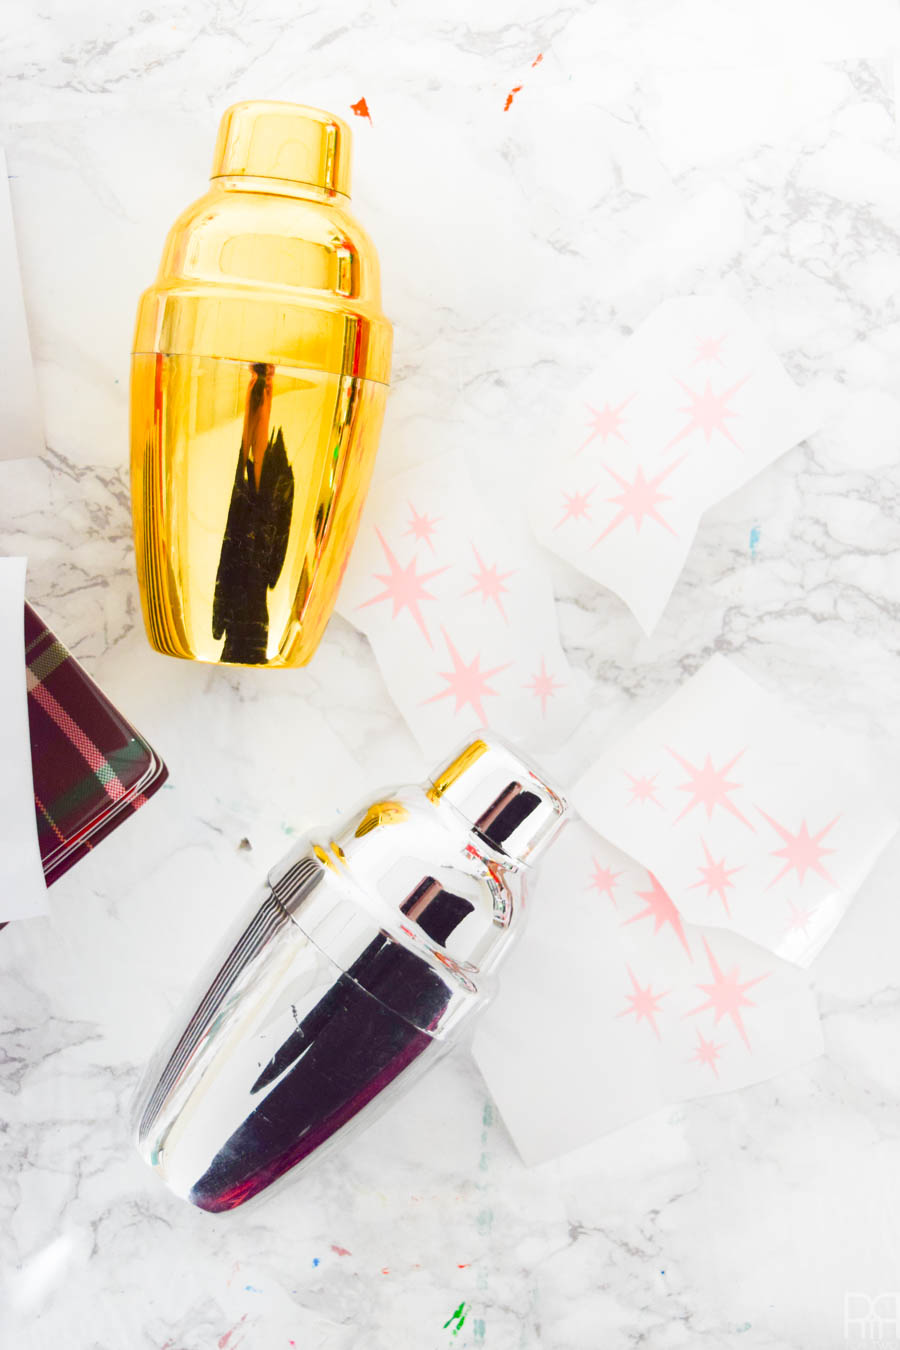
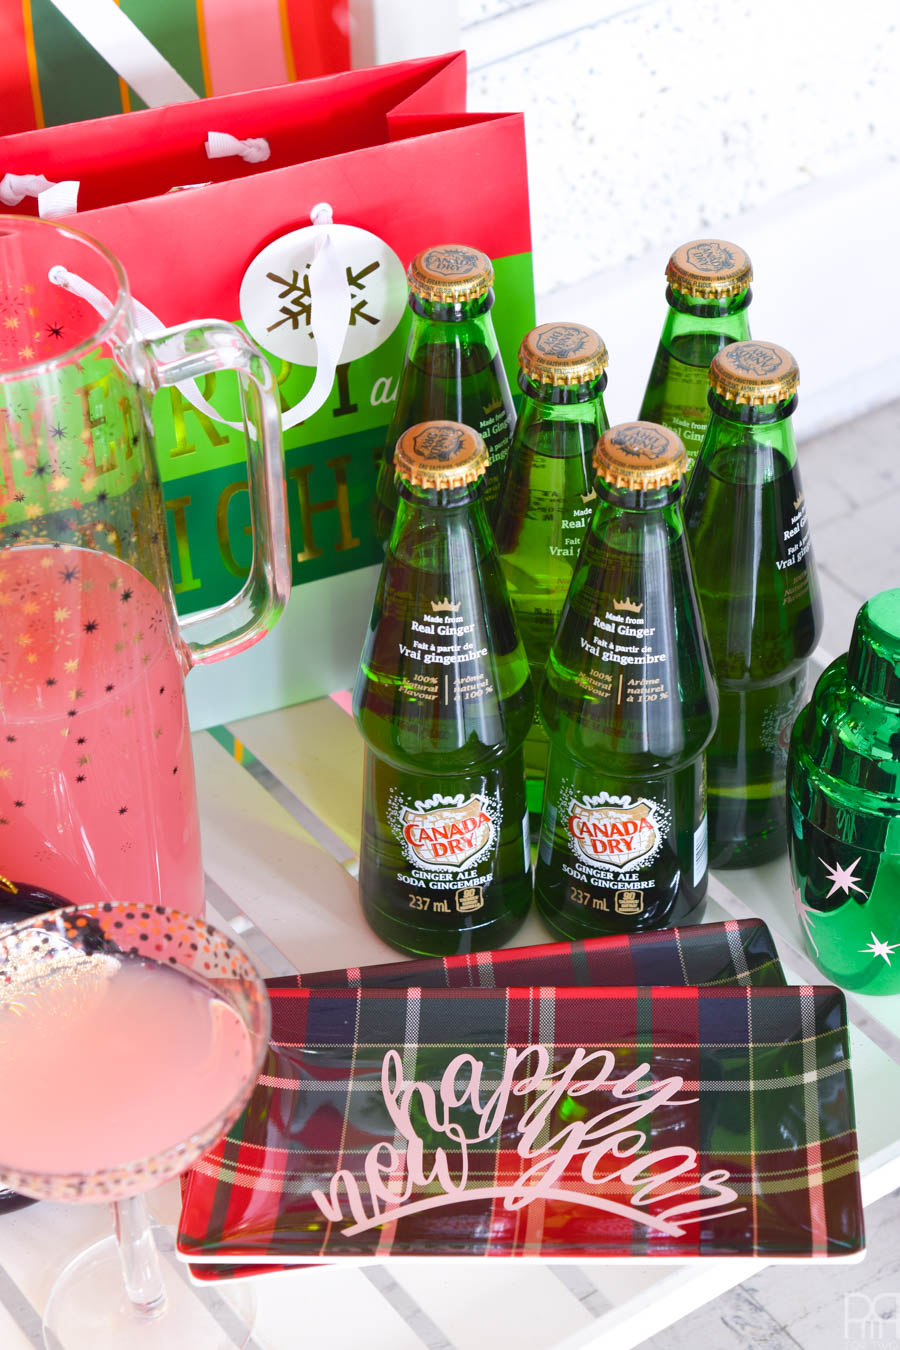
Step 1: Pick a few images to cut and use for embellishment. I chose the “Happy New Year” file, and my favourite “atomic stars” file.
Step 2: Cut and weed your vinyl before using transfer tape to apply them to your items. I used some Christmas plates that I had purchased for our Christmas party, and some little mini cocktail shakers that I found for just this occasion.
Step 3: Enjoy! This part of the NYE Party Backdrop + Cocktail Bar is actually the easiest.
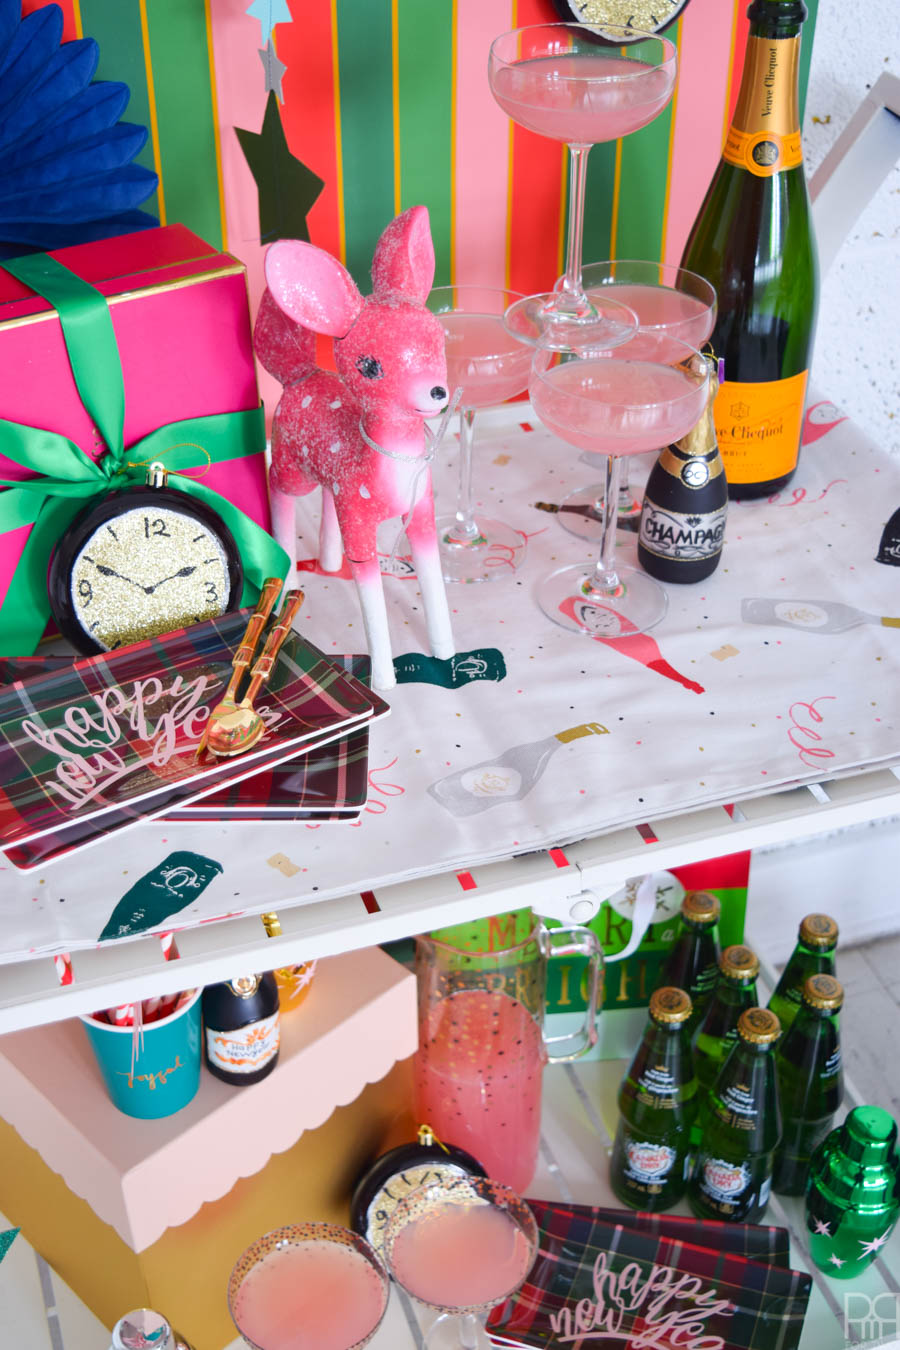
With a little bit of styling and some cocktail mixings, I put together our NYE Party Backdrop + Cocktail Bar in a flash! It’s colourful, unique, serves it purpose, and was super budget friendly. You can’t beat that!


Enter below for a chance to win:


This is a sponsored conversation written by me on behalf of Cricut. The opinions and text are all mine.