


Let’s talk about how to pickle & can vegetables. I always like to have a hostess gift for holiday events. Whether it’s an invite to a late-fall dinner, spur of the moment cocktails and bonfire, or when staying with family and friends on a road to somewhere. I grew up being told that you brought a small gift if someone was throwing a larger get-together, if they were accommodating you i.e you were staying the night, or just because! It doesn’t need to be fancy, or expensive, and it’s usually just the thought that counts.
*first published Sept 16 2016
Check out my other fall hostess & entertaining ideas for some inspiration
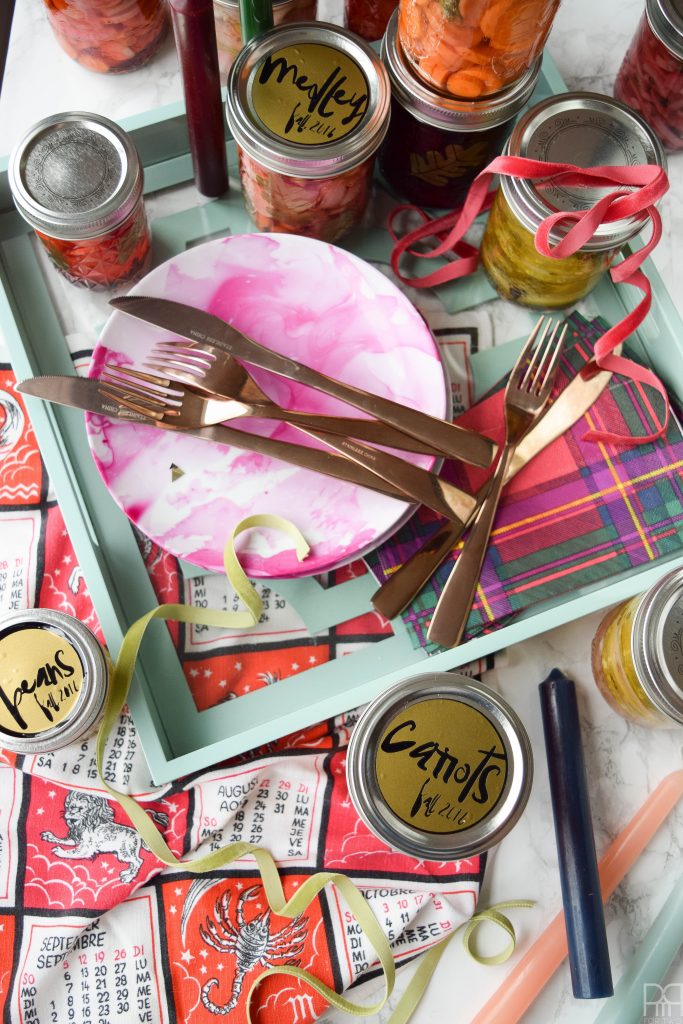
Grab the tutorial for my custom canning jar labels


In the past I’ve done small grab bags of cookies or jam, but this year I wanted something a little more colourful, something that would remind us of the last days of summer when we’re savouring them as the temperature drops.
Choosing Vegetables to Pickle
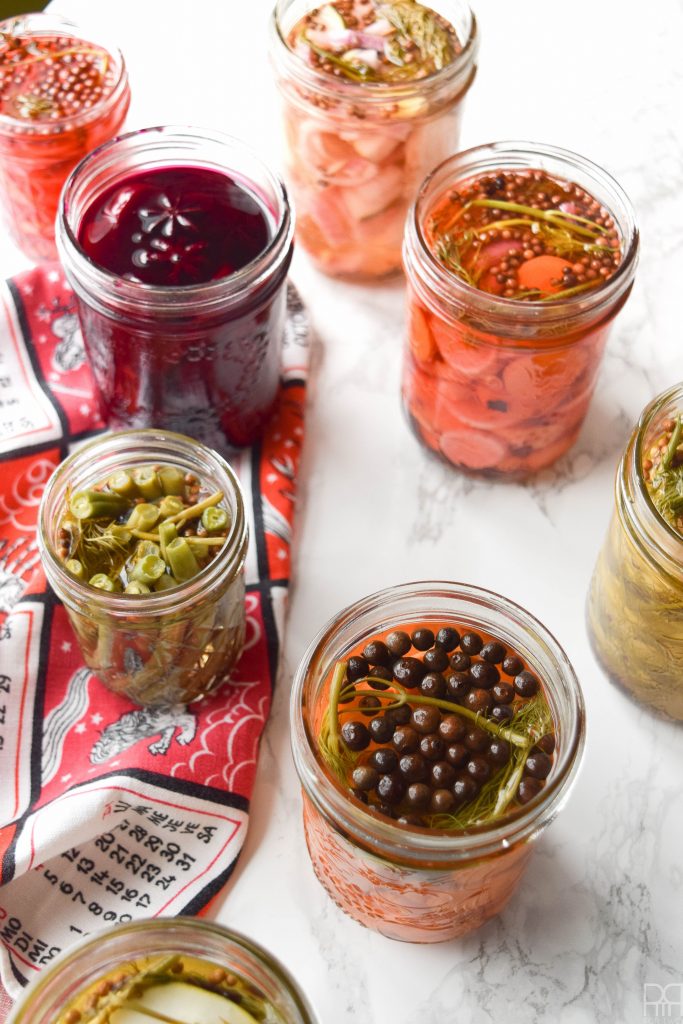
I’ve opted to do green beans, carrots, radishes, beets, field cucumber, red onion, and a medley. They’re fresh, local, and available from the great big farms in the area so I get to support local.

What you need to pickle vegetables
- Glass jars – available everywhere from the hardware store to the thrift store. Prices may vary
- Lids, for said jars
- green beans, carrots, radishes, beets, field cucumber & red onion – all should be fresh and still have a snap to them.
- White vinegar
- Two bunches of fresh dill
- Star of annis, whole allspice, pickling spice mix (available at local bulk barn – otherwise you can google a mix!)
- Per 4 large jars: 2 cups of vinegar, 2 cups of water, 2 tbsp of kosher salt, 5 tbsp of sugar
How to Prep Vegetables for Pickling
Trim all the vegetables after giving them a thorough wash.

Put dill and pickling spice mix seed into each jar and then pack or layer the vegetables into the jar, adding more pickling spice as needed.


Making Pickling Solution
Bring water, vinegar, salt, sugar to a boil. Reduce to simmer for 3 minutes. Pour the brine into each jar, leaving 1cm at the top of the jar.
Let cool on the counter before closing with lids and refrigerating or placing in cool cellar. These are best enjoyed after 12hrs, but get better with a few extra days.
** This recipe lasts up to 3 weeks – so start giving ’em away like hot cakes!


Make sure you check out my tutorial on how to make labels for your canning jars and lids using your Cricut.

