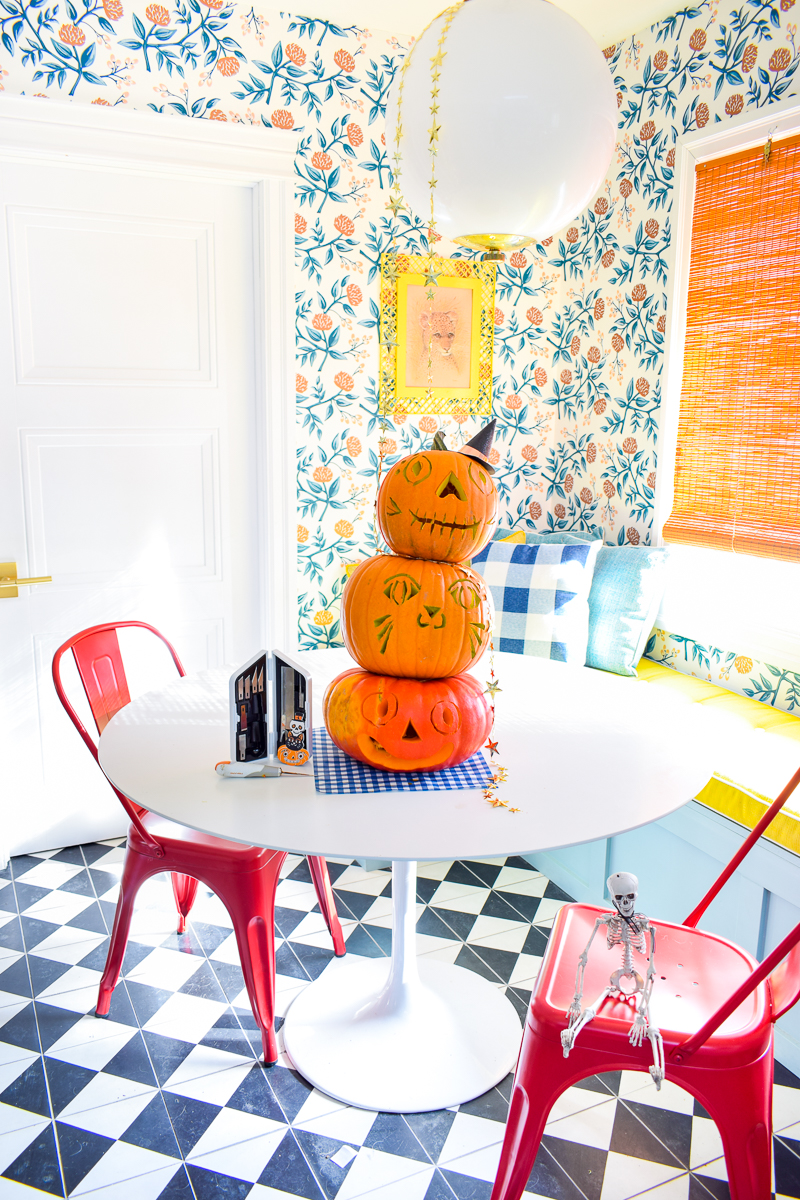
I couldn’t help myself, I’ve been dying to get into pumpkin decor this year for one reason or another. Maybe it’s because it’s so effortlessly fall & halloween, maybe it’s because it’s a fun way to incorporate colors and shapes into existing decor. Either way, I got around to my first carved display of the year, and it’s a beaut. Using Fiskars’ Heavy-duty Easy Change Detail Knife Set (with 11 blades) I’m gonna show you how to make a stacked pumpkin topiary.
Check out my other Pumpkin DIYs & projects, and my other Fiskars projects.
*Fiskars sponsored this post, but all thoughts are my own. Thank you for supporting the brands that make PMQ for two possible.

Carved Pumpkin Topiary
Now, I didn’t want to just use faux pumpkins (even though I love them), so I went looking for some lovely real ones at our local farms and grocery stores. Found ’em!
Last year I purchased these little diecuts from Michael’s and LOVED the stacked design with the skull, cat face, and jack-o-lantern, so I went about recreating that using Fiskars’ Heavy-duty Easy Change Detail Knife Set . Your local store may have some diecuts this year, so go give them a look!
Fiskars’ Knife Set
I’ve used this knife set before, and have been impressed with the results. So when it came to carving through pumpkins I wanted to test things out. Turns out, with the right blade it’s like slicing through butter with a hot blade.
This was also probably helped by the fact that the pumpkins weren’t freezing when I tried to cut through them, so I’ll mention that. I loaded the long serrated knife into the handle, and got to prepping the pumpkins. Gotta cut an entry and then gut them.
Once the pumpkins were prepped, I traced the designs onto the pumpkins, and began cutting.
Carving Pumpkins
Because the Fiskars blades are strong, you don’t need to worry about breaking them while maneuvering them for the more detailed cuts. I was able to easily carve circles, fine lines, and more using the knife.
When it came to carving the eyes on my pumpkins, I created two parentheses to imitate the shape of the eye, so that I might cut-out a pupil and have the whole thing actually work.
Stacking Pumpkins
In as much as you’re going to stack the pumpkins, you want to make sure that you’ve got the right sizes and bases so that they can actually stand on their own.
This means you’ll need to cut an opening at the top that isn’t too big that it’ll swallow the pumpkin above, but also in a way that it creates the perfect resting place for the pumpkin.
And as with all things stacked, start with the widest at the bottom and the narrowest at the top. Don’t worry about venting them or anything, because the design you’ve cut into the pumpkins will allow for plenty of oxygen to get in, and keep your candles burning. LED tea lights work just as well!
Stacked Pumpkin Topiary
Once it’s done, you can place the stack inside an urn, a bowl, or a wide-mouthed vase. It’s really up to you! I’ve got mine perched on the kitchen table because I absolutely LOVE how it looks against the blues and yellows in the kitchen.
Check out my retro glam kitchen
p.s Mr. Bones is how I feel after a marathon cluster feed with June.
