Phew!
No other way to start that off.
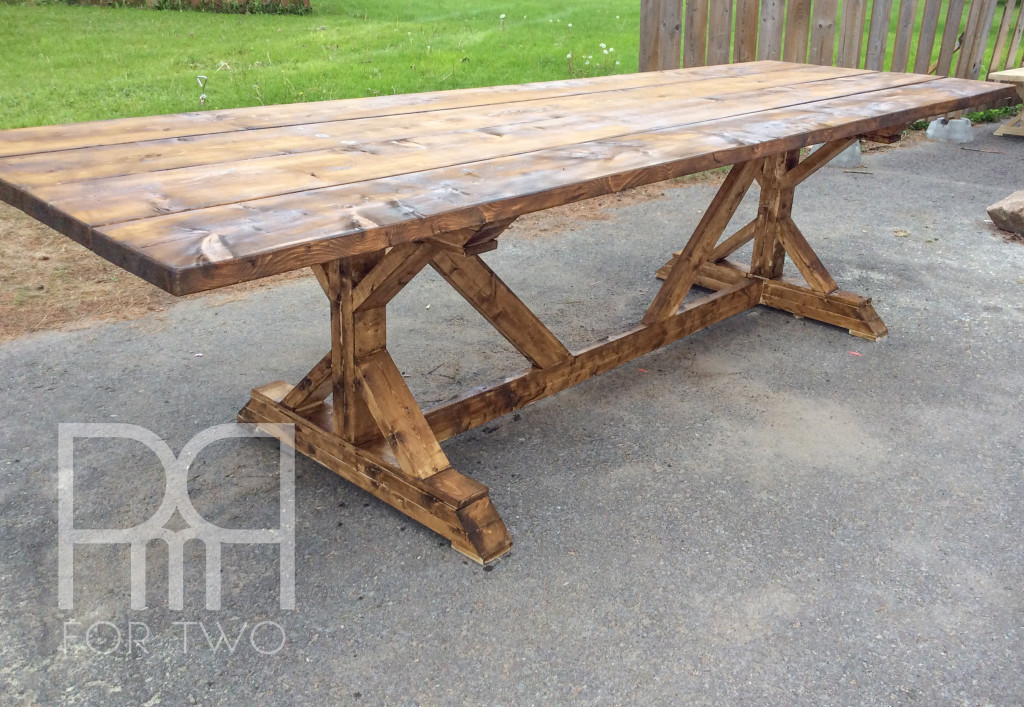
This past weekend DH and I built our very own harvest table and matching benches. Are you ready for a doozie of a post? Grab your coffee, ladies.
Photo disclaimer: for one, we’re not done staining the table, and we still have to sand and stain the benches. We have a very long friday ahead of us. Why friday? Well, it’s been raining since sunday evening and will continue to rain until friday at which point we have to finish everything because our annual summer BBQ is the next day!
That’s right folks, next week you’ll get the full rundown on our annual BBQ: from style to kitchen and everything else that went into making our shindig sensational!
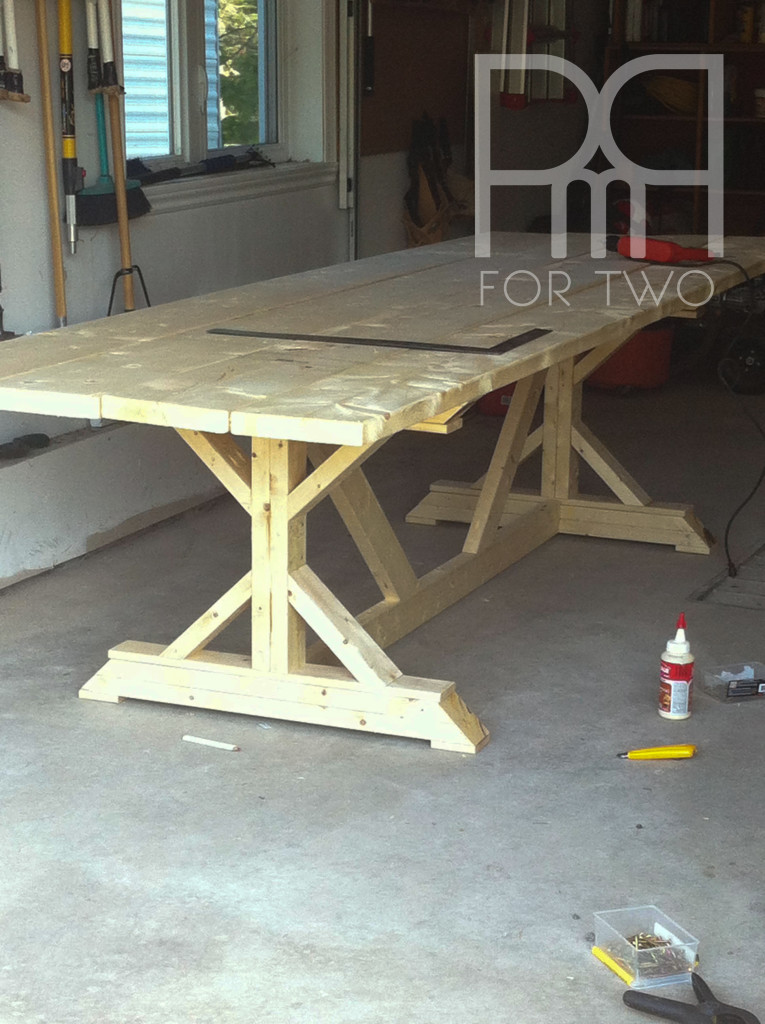
The harvest table journey began back in March when I found the plans on Pinterest while looking for a weekend friendly project. See, our backyard table – although great for what it is – is for 4 people (on the small side for how many we usually entertain) and covered in spray paint because I’ve made a few miscalculations when it comes to spray paint removal. We needed a bigger and simpler table.

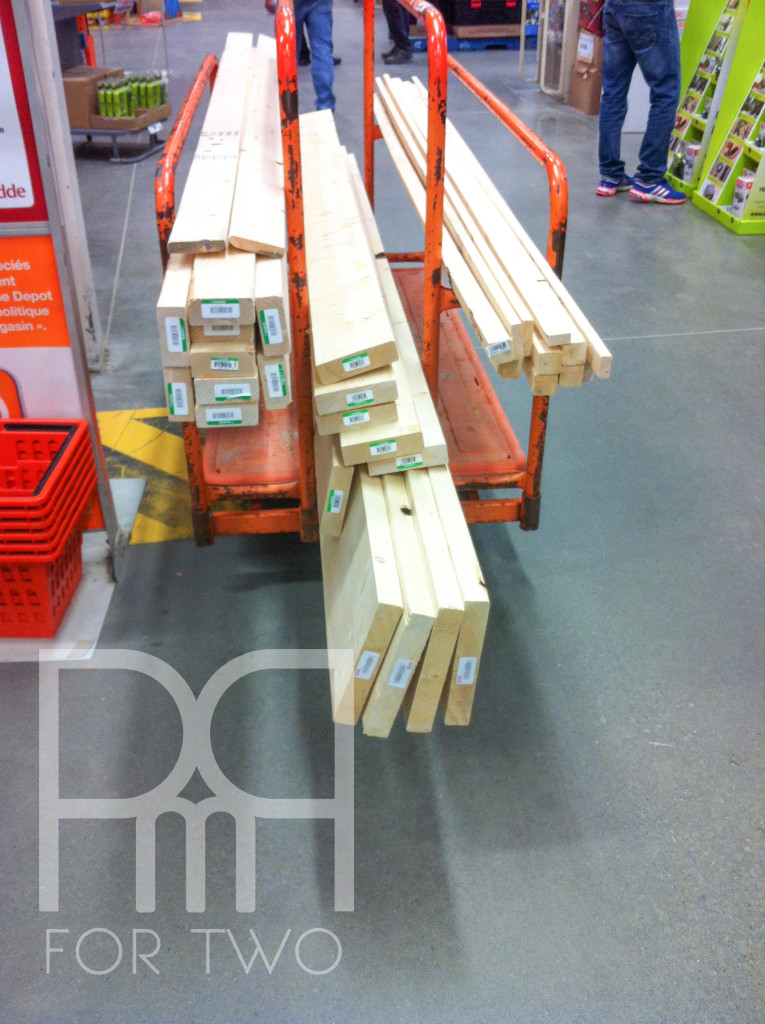
I showed DH the plans and he said it was a doable project. Fast forward to 3 months later and we find ourselves planning a trip to Home Depot.
Much like anything for outdoors, buying what we wanted from a store would cost about 5x the price it would to build it. By doing it ourselves we were also able to fit it to our requirements. We wanted a 10 foot table instead of an 8 foot table – easy fix. We wanted a set of 8 feet benches with more support, instead of 6 feet – done.
This project was not as easy as 1,2,3 but it was definitely made easier by the fact that Anna White has the plans to the table on her website. There you can see other people’s versions and read any notes they might have had. Much like on allrecipes.com, you can see how other people tweaked designs to make them better. The plans to the benches are found on Shanty 2 Chic’s website, but done in collaboration with Anna white.
Our friends very graciously offered us their garage and tool collection for the weekend and we got to work. We definitely needed a table saw for this project and we are o-so-thankfull to our friends for letting us use theirs. We did invest in a Kreg Jig though. They mention it a couple of times in the instructions, and it’s worth acquiring. It’s a little widget that will allow you to counter-sink your screws and offer greater stability. It cost 26.98$ and will definitely come in handy for future projects.


Now, you may have seen the advertised price for all this lumber on the two sites. Anna White says you can do the table for 65$, and Shanty 2 Chic says it cost her 35$ per bench. We spent 205$ on the lumber for the table and the two benches, keeping in mind inflation, the exchange rate and the fact that we built everything a good 2 feet longer, the prices add up in my books.

Come saturday afternoon we were building! and by “we” I mean DH. To avoid having too many cooks in the kitchen, I let DH spearhead this project. He also took shop class way back in high school and is not a complete stranger to a table saw, and he knows what the word “countersinking” means. He had to explain that last one to me about three different times.
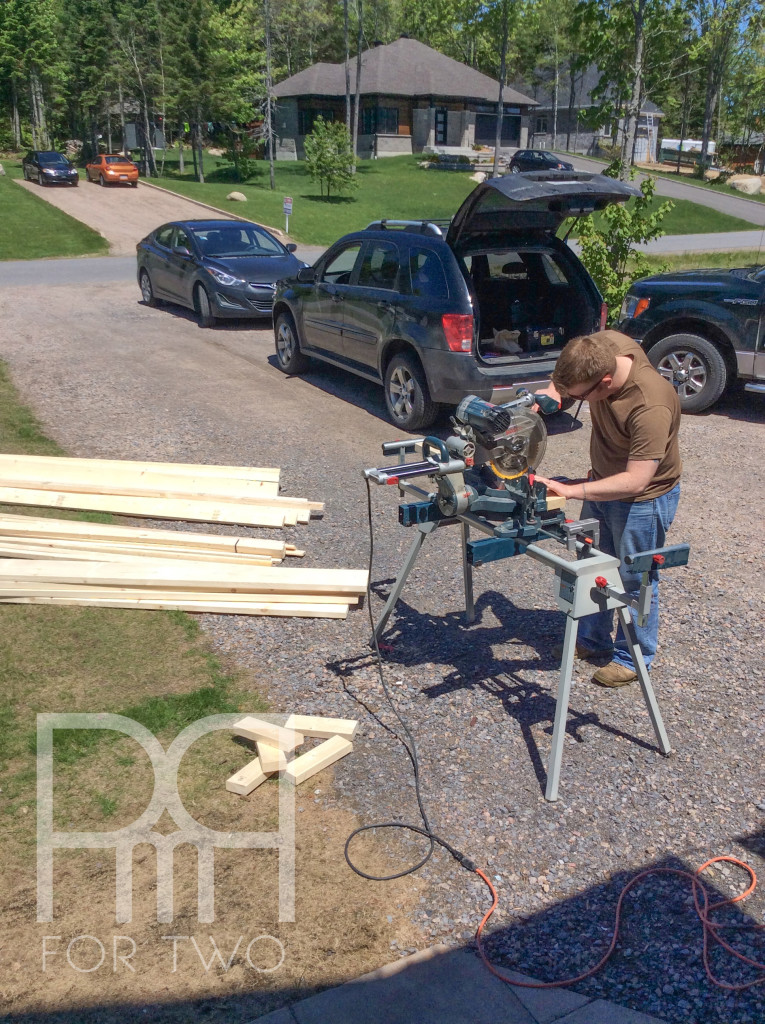

Having completed the construction of all three pieces in about 10 hours over two days, this is easily a weekend project if you have an intermediate skill level. This might be a long weekend or bank holiday project if you’ve never used a table saw before.
A couple of pointers for anyone building a table for themselves:
– Bevel the edges of the table top (top, bottom and corners). It will save your wrists, your guests forearms and avoid any boo boos for small kids sitting at the table – we all know how they jerk uncontrollably. This can be done with a low grit sandpaper during the sanding phase with little effort.
– If you make your table an extra 2 feet long, consider adding an extra brace under the table top at each end. With an extra foot on each end the stability and support isn’t as good without the extra brace.
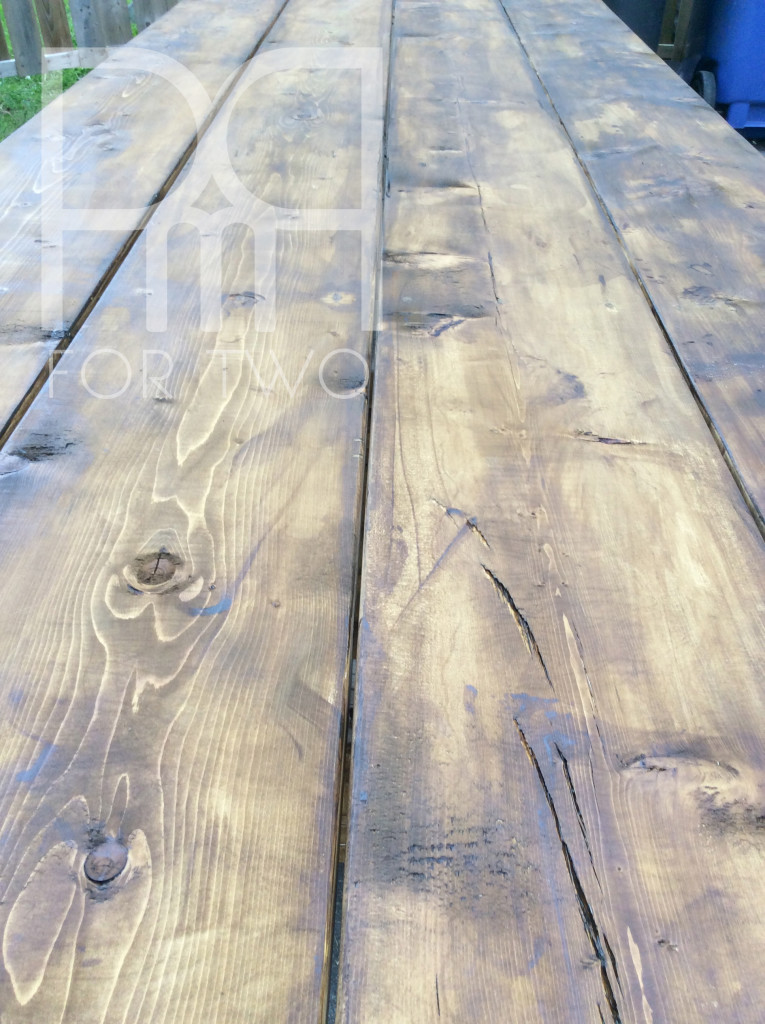
– Don’t forget to leave a 1/8th of an inch in between the top boards when bracing them. It will allow water to drain, and for the boards to expand and contract with the temperature without warping the table.
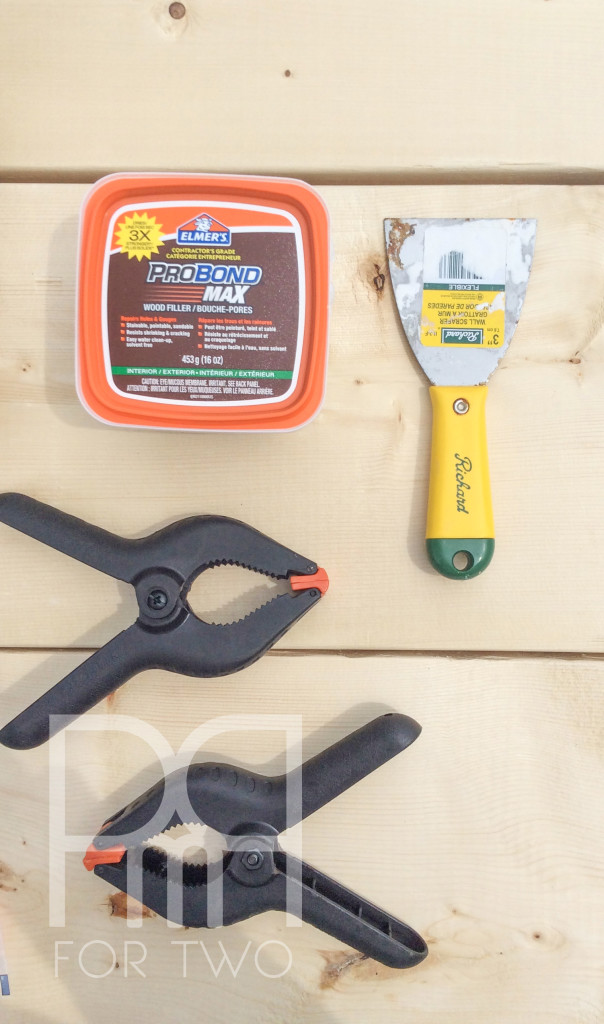
– Remember to use wood filler on the screw holes! It will help seal and protect your table and benches come winter. It will also look nicer the big ol’ screw holes.

I will say this for myself though, I sanded and stained the table all on my own! No small feet when using 3 different grits of paper and having to get all the nooks and crannies. I looked like a beer pong troll under the table staining away and cursing like a sailor every time a mosquito flew near me. It was nothing like watching Nicole Curtis restore wood. Nothing.
The stain we chose is very similar to the one used by Shanty 2 Chic, but ours is a touch warmer. The stain will be the single most expensive piece you buy for the project. Because we didn’t use anything fancy like reclaimed wood, rather plain old lumber from Home Depot, we wanted protect the wood for the harsh winters and give it a nice colour too.
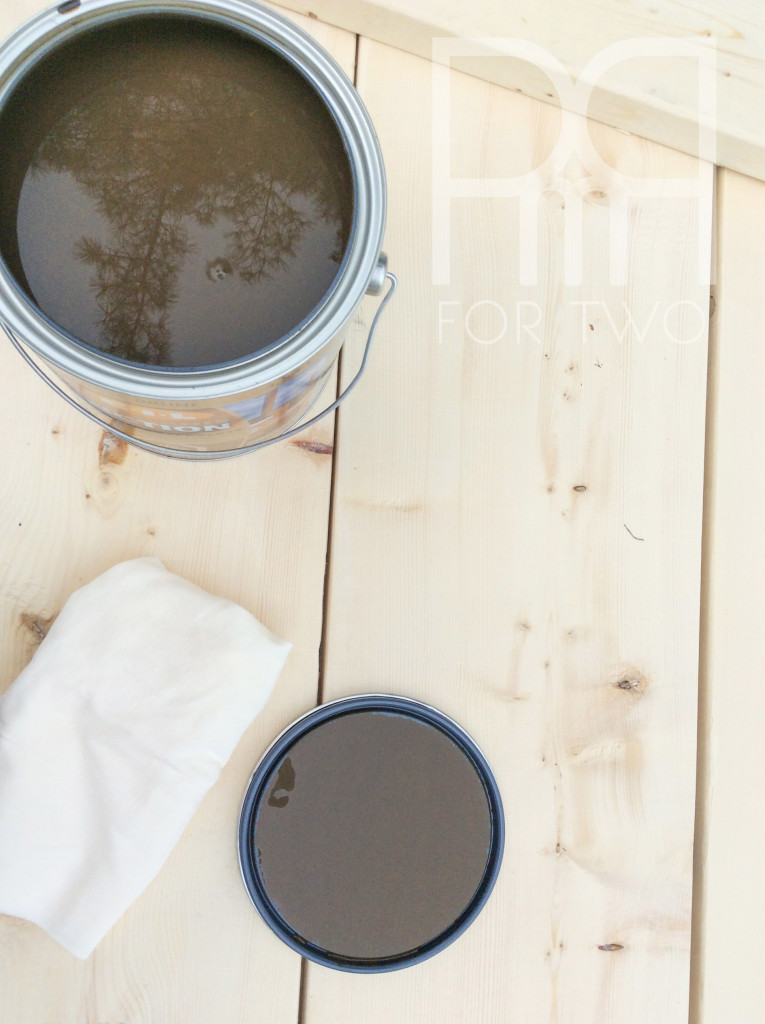

The better the stain, the more protection it offers: stain is essentially a mix of oil and water. The higher the oil to water ratio, the better seal and protection it offers (oil repels water – duh). After 15 minutes of hmming and hawing in the paint section at Home Depot, we went with the CIL brand for a couple of reasons:

– They had four levels of stain offering four different water to oil ratios with varying price points. We went with the 2nd best level of protection 70% oil and 30% water for 52$ a can. With these kinds of numbers we didn’t need to buy a sealing agent, which would have added 30$ to our bill.
– The colours available from the CIL line were exactly what we were thinking of, and it gave us the option to have the stain be opaque (showing no grain) or semi translucent (showing some grain).
– We were able to buy a big enough can of stain to do the table and the benches with two coats if needed.
Remember to use latex gloves and rags to apply the stain. The gloves will save you from having really dark hands after.


The table is simply massive, I’ll make sure to get some photos that show its scale. The benches will also solve our fire-side seating issues as we’ll now be able to cram a couple of people on there instead of offering them some pillows for the ground.

Believe it or not, I only have one photo of the benches, and it’s not particularly great one. I will have more by the end of the week! I promise!