

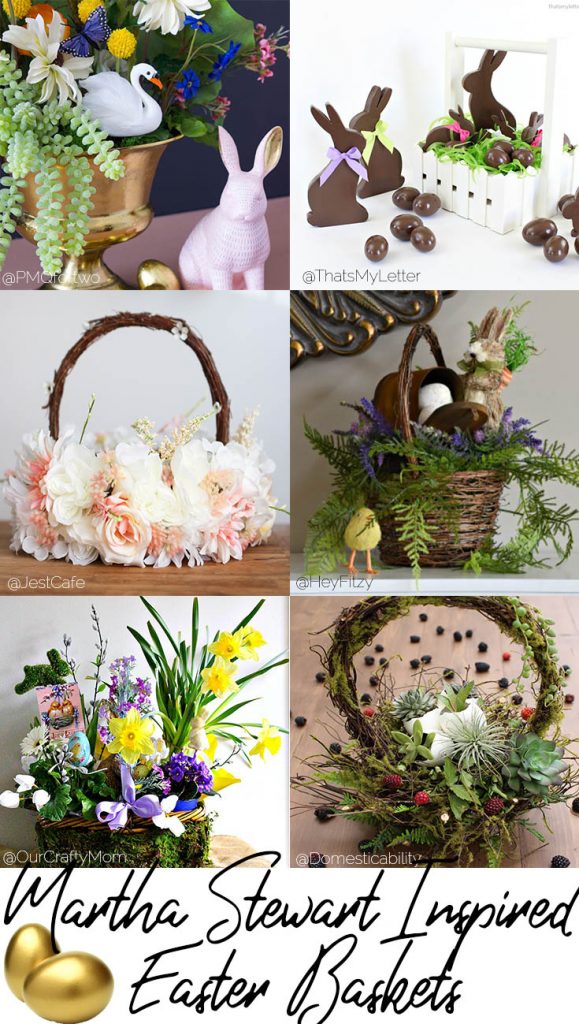
Over the past year floral arranging has become one of my favourite things to do. The rules are more flexible, new shapes and designs are always au-courant, and the quality and hues of silk flowers are unrivalled these days. I was trying to think of what else I might do for my Easter decor this year, and then I remembered the classic Easter baskets that Martha Stewart puts together every year. A few years ago (before I really embraced Pinterest) I used to buy Martha Stewart Living, and that particular year they had released a retrospective on her Easter baskets throughout the years. My jaw dropped and I was captivated by the shapes, colours and breadth of styles.
p.s if you like those little hand-painted easter eggs you can your own // here //
*Afloral sponsored this post, but all thoughts are my own. Thank you for supporting the brands that make PMQ for two possible.

Much like my own home decor, I’ve accepted and embraced the fact that seasonal decor doesn’t have to fall into a mold. So I did when any blogger with a good idea does – I put out a call for other bloggers who may want to tempt their hand at Martha-esque Easter baskets or centrepieces and called it a blog hop! The lovely thing about these beautiful floral easter baskets is that they double as centrepieces with ease. After all, a beautifully constructed arrangement will draw the eye and capture attention no matter what it’s doing.
When it came to this arrangement there were no special tricks or illusions, it was really as simple as inserting the stems into the floral foam in the urn and then twisting them to fit my visual preference.
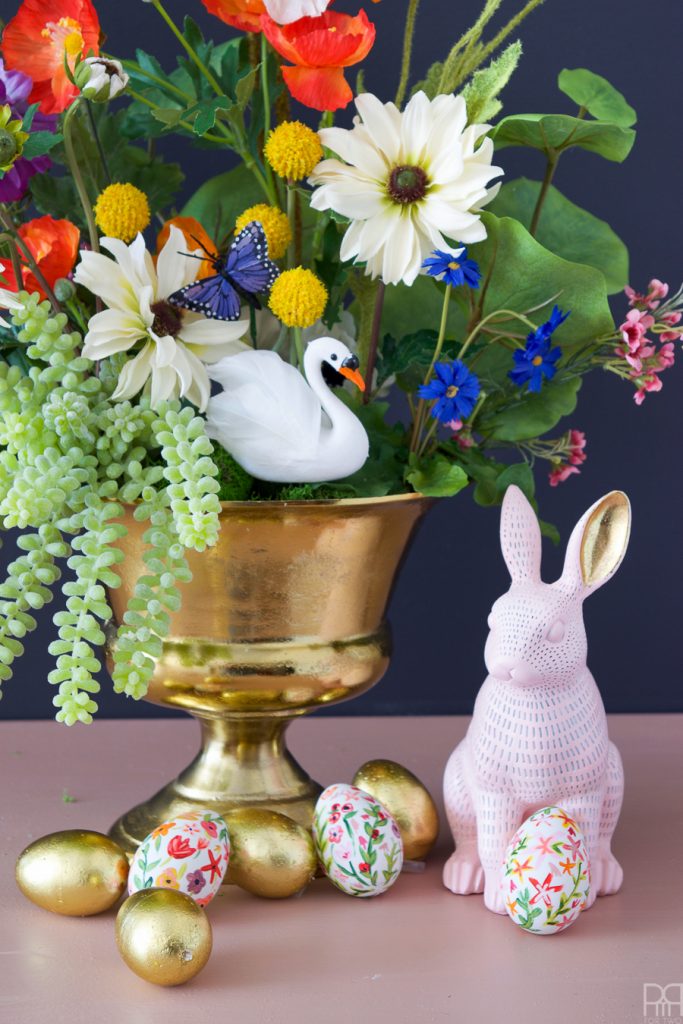
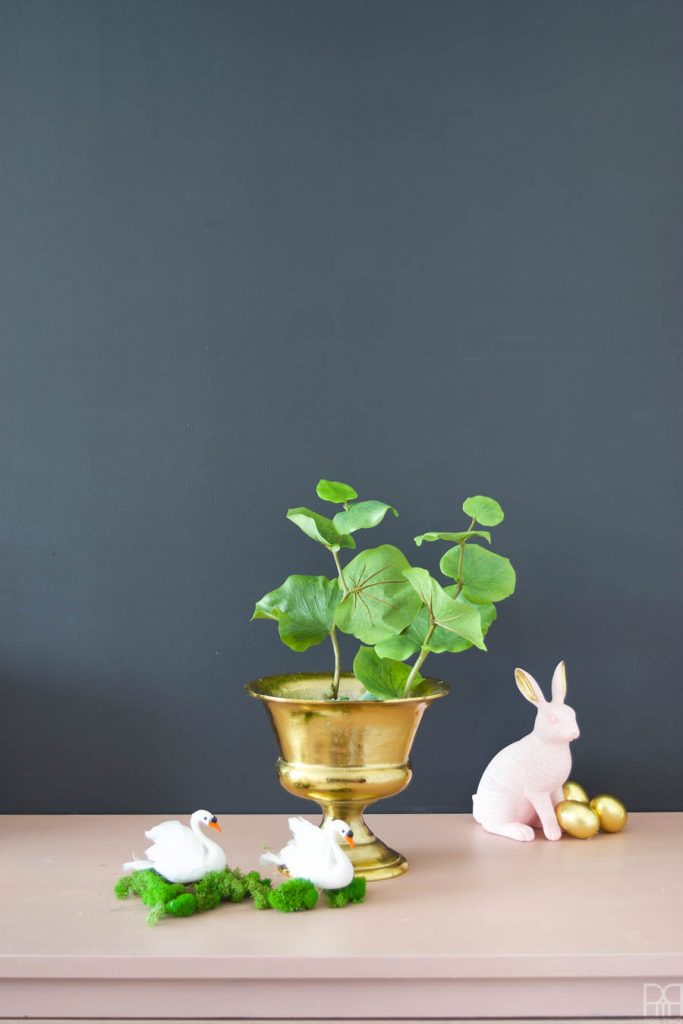
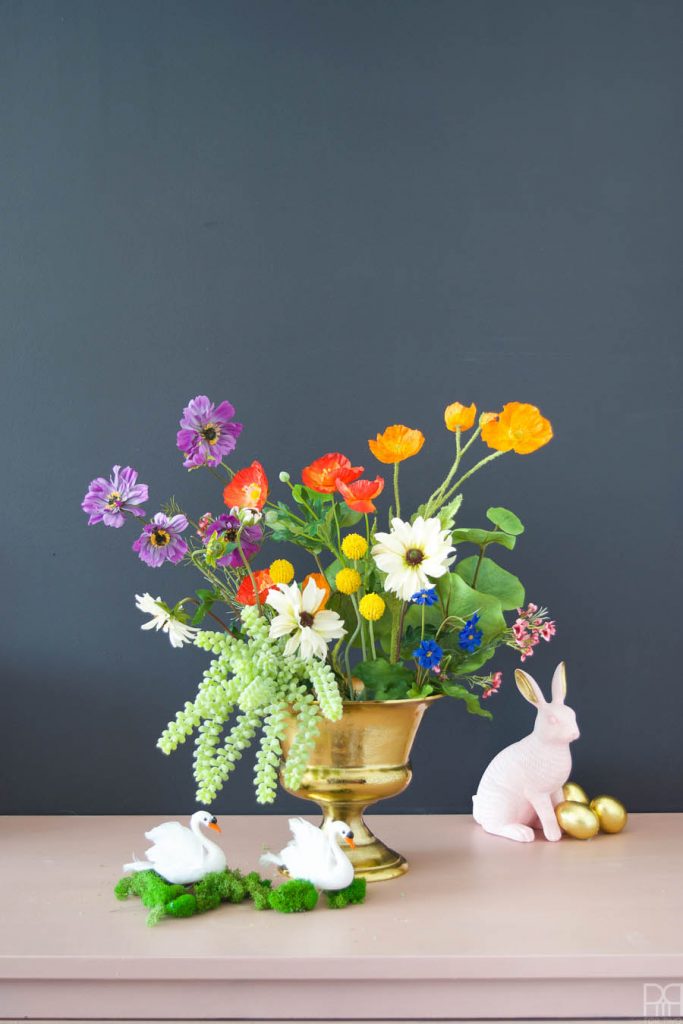
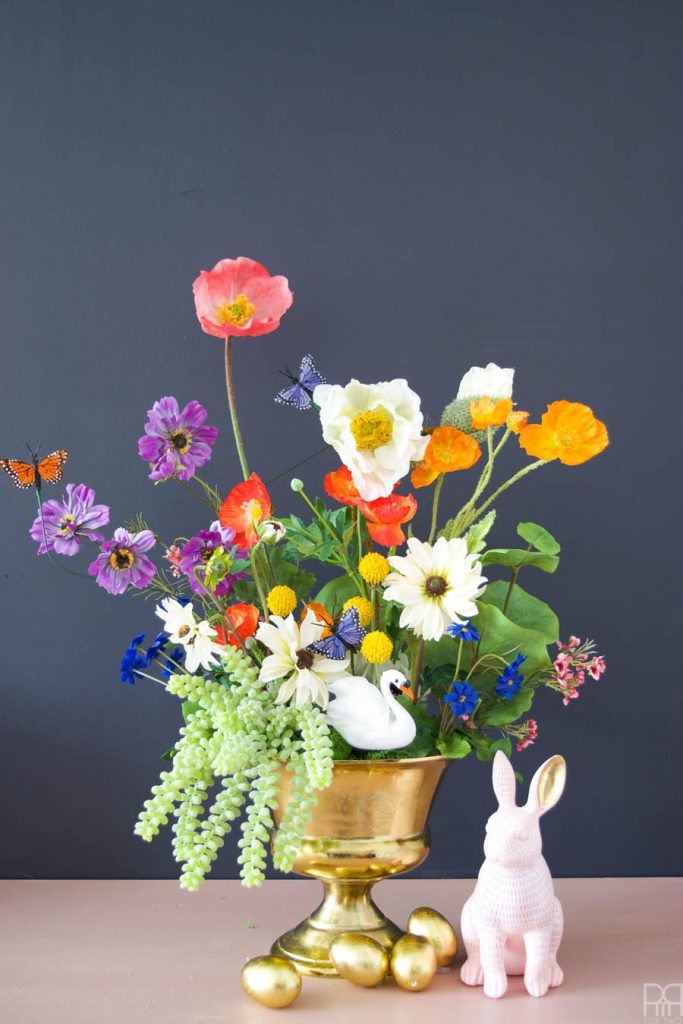
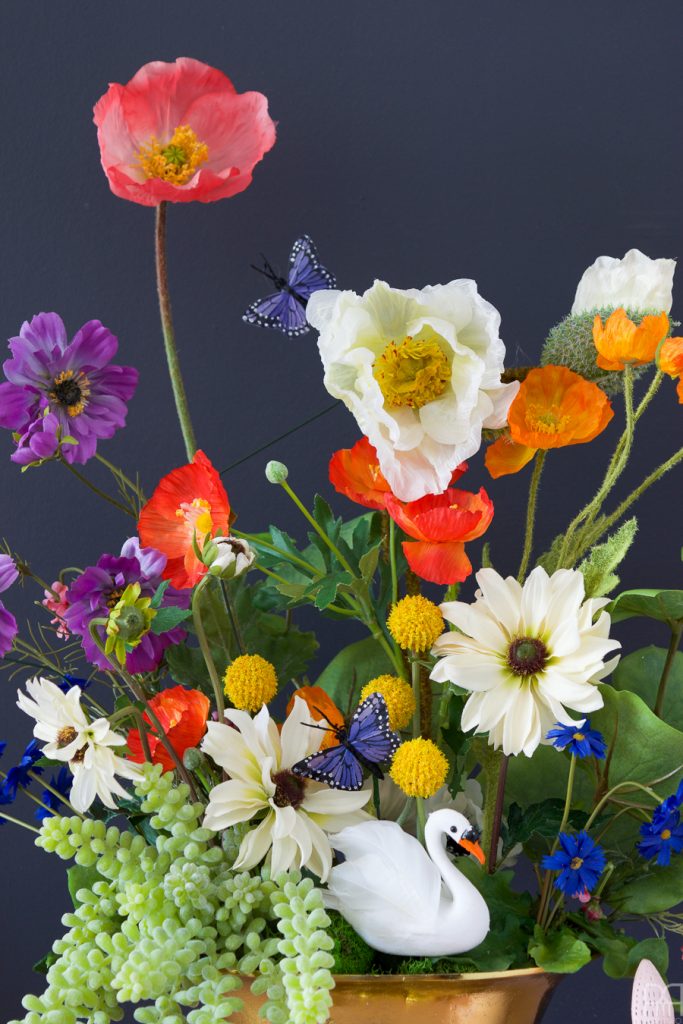
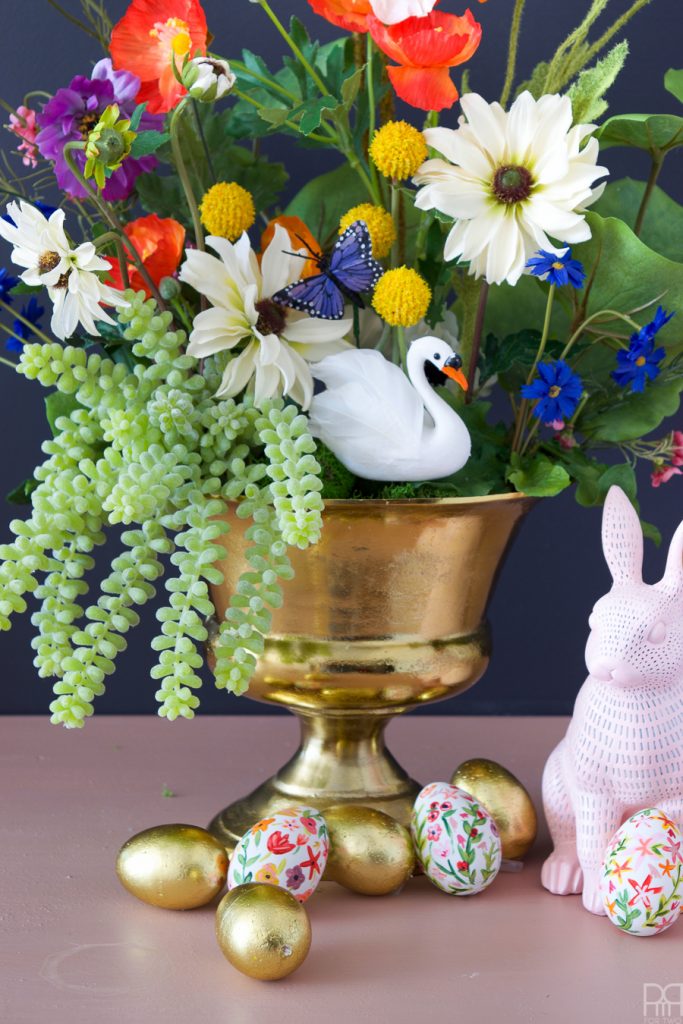
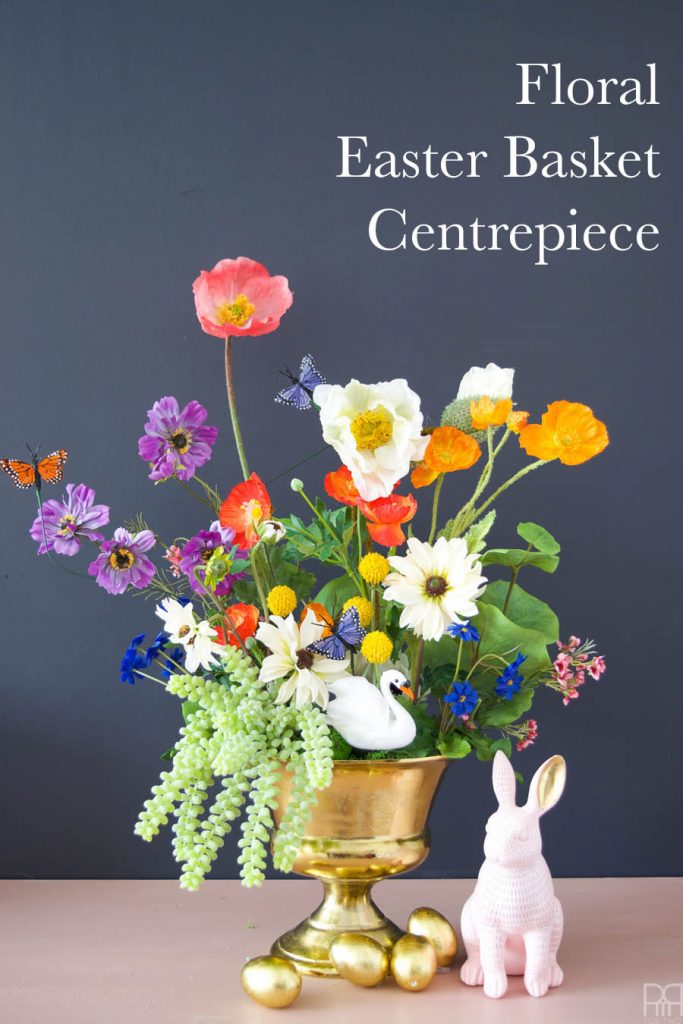
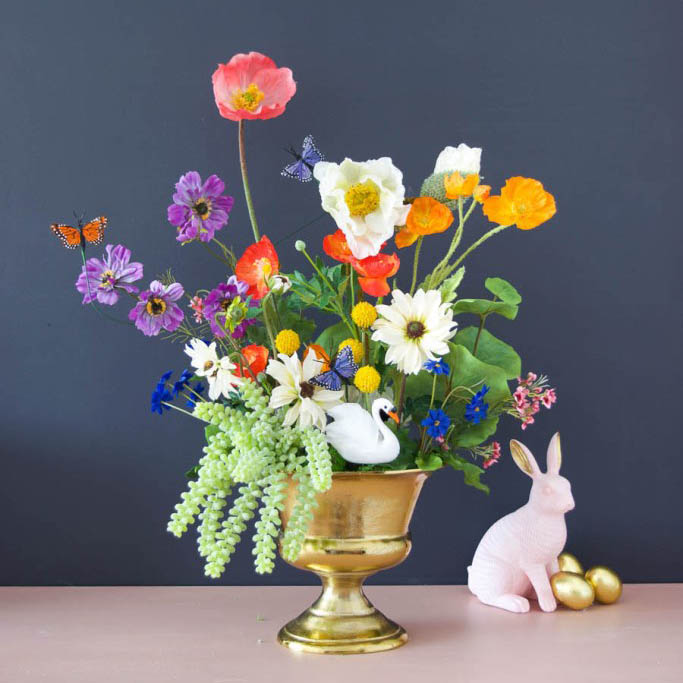
In constructing my floral easter basket centrepiece, I wanted to play off the swan basket that Martha did a few years ago. I wanted mine to look like a beautiful pond with a swan nestled in amongst the reeds and flowers at the water’s edge.
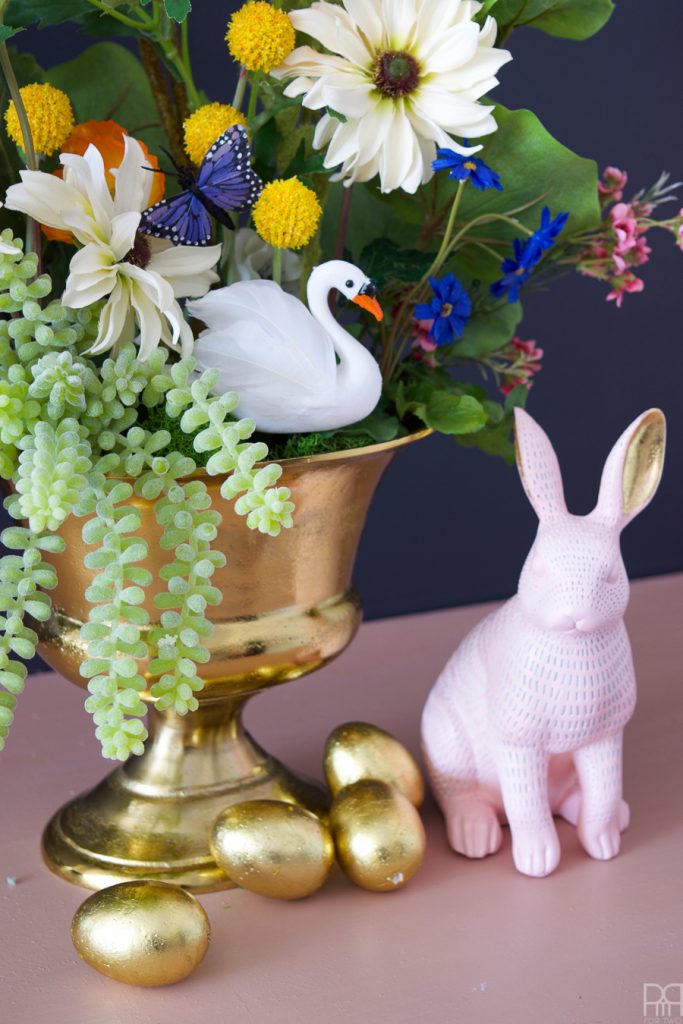
I searched high and low for a black swan about the right size for the urn, but couldn’t find one. I eventually found a set of two white ones on Etsy and then went about picking my florals.
The following product links contain affiliate links. Thank you for supporting the brands that make PMQ for two possible. For my full policies click // here //
Materials
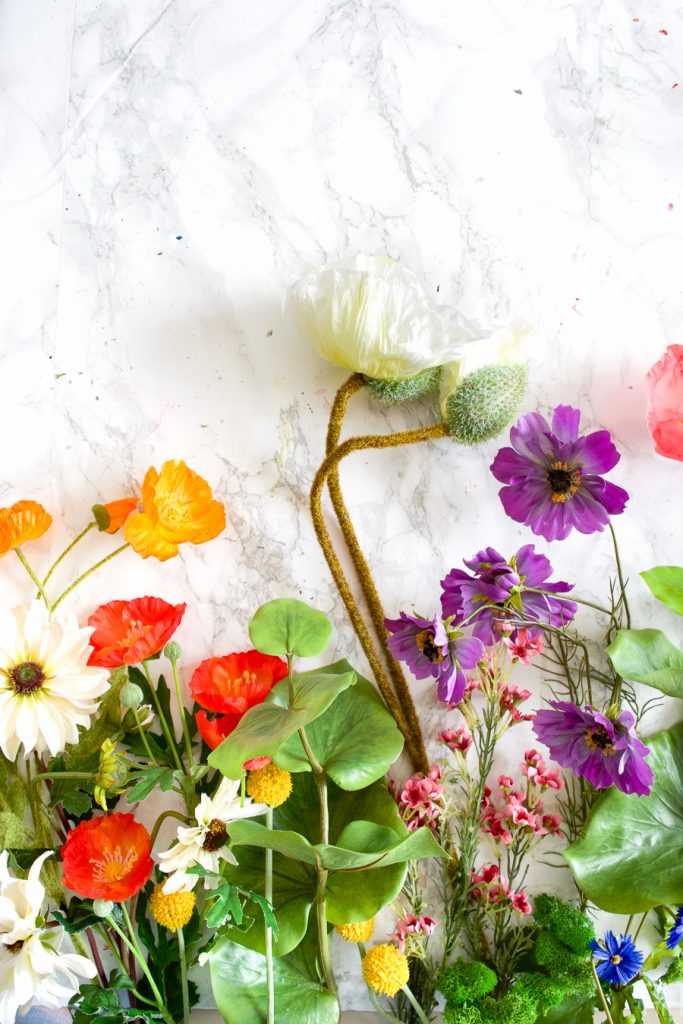
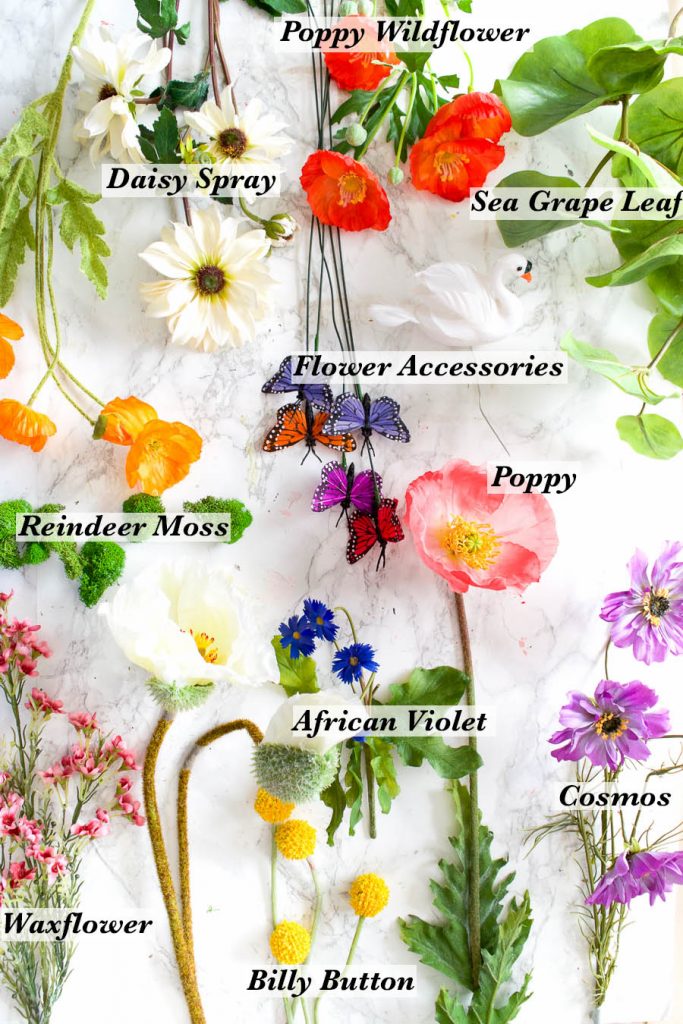
- Silk Florals from Afloral.com: Daisy Silk Flower Spray // Faux California Poppy in Creme // Mini Blossom Silk Bush in White // Reindeer Moss in Spring Green //Mini Faux Daisy Bush in Light blue // Artificial Waxflower Spray in Mauve Pink // Artificial Sea Grape Tropical Leaf // Silk Cosmos Spray in Purple // Silk Poppy Stem in Pink 30″ // Artificial Yellow Billy Button Spray // Artificial Poppy Flower Spray in Orange // Poppy Silk Wildflower Spray in Orange //
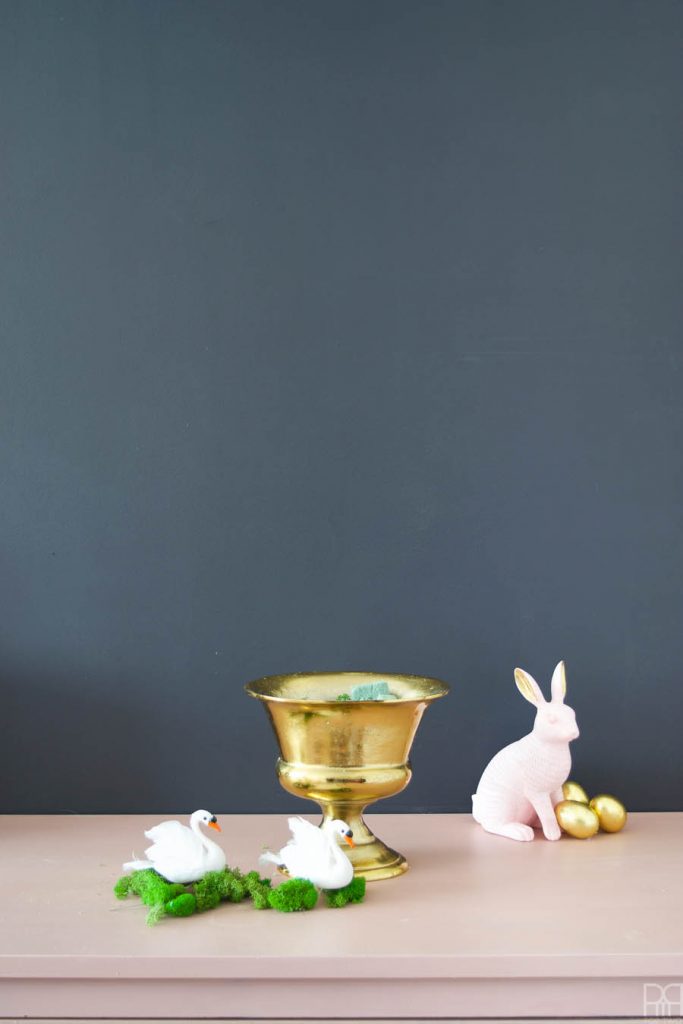
- Metal Prestige Floral Urn in Antique Gold 9″ Round
- Floral Foam Bricks
- Set of Floral Pick Swans

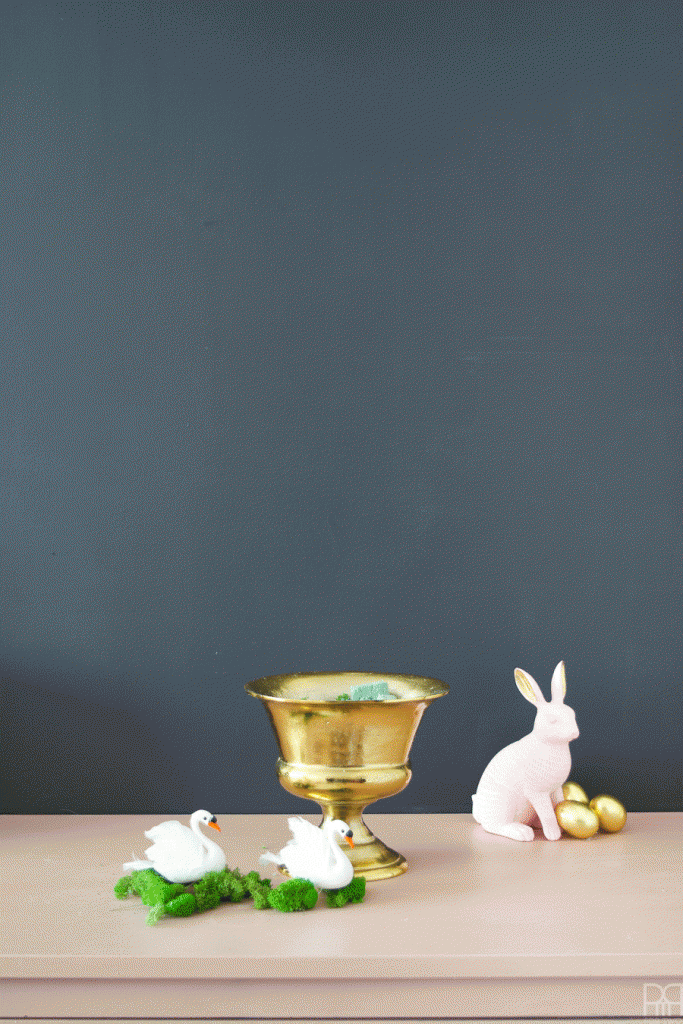
Step 1: Cut the brick of floral foam to fit neatly inside the gold urn. It will leave little crumbs everywhere so keep a vacuum handy!
Step 2: I start my flower arrangements by placing the big greenery and filler florals first. It provides a backdrop against which to place the more colourful blooms without worrying that they will be obstructed at a later point. The leaves on the sea grape are large and voluminous, so they went in first.
Step 3: Once the greenery and colour base are in, I start adding whole sprays, and then cut away one stem to add slightly to the side, not obviously part of the main spray.
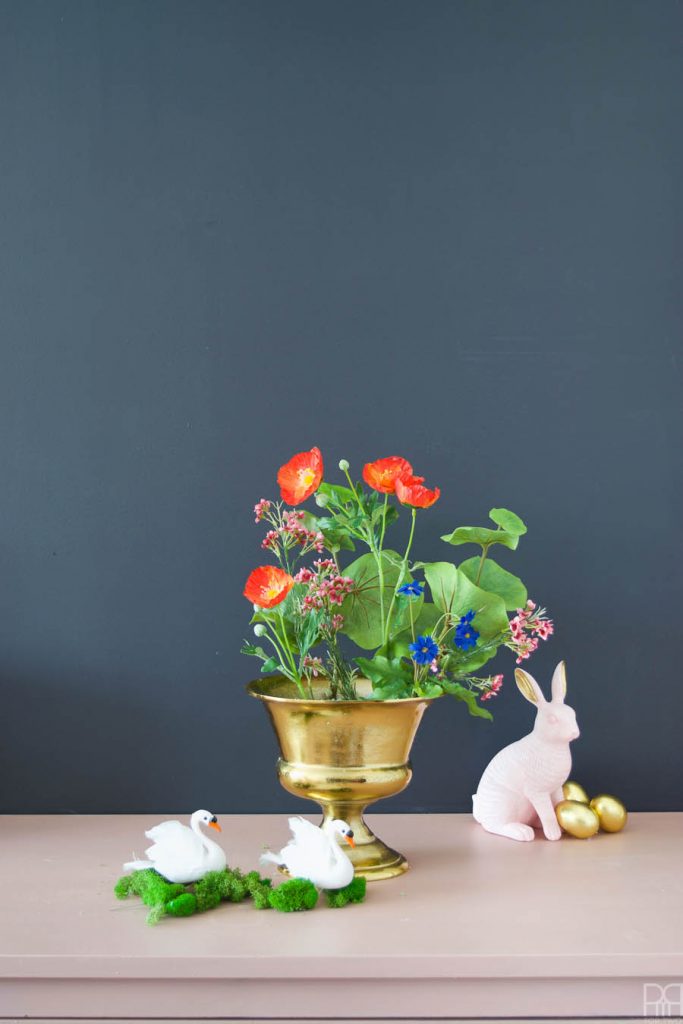
Step 4: Repeat step 3 until you’re down to the more stand-out blooms and stems.
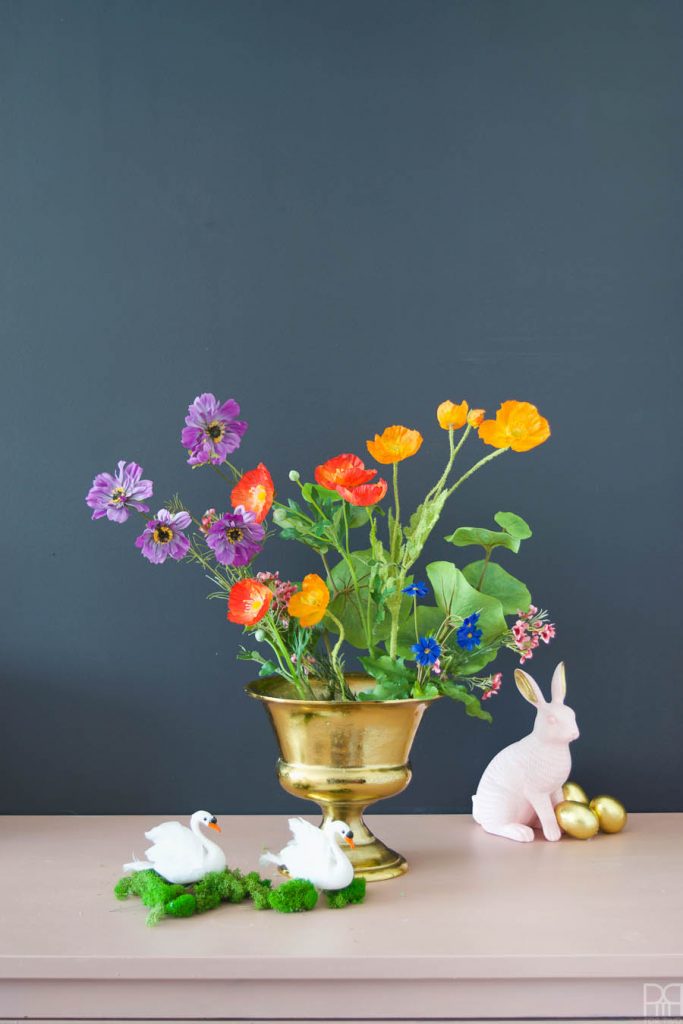
Step 5: Start filling the visible gaps with fuller more impactful blooms like the daisies & billy button I’ve chosen here.
Step 6: I added the large succulent to add more 3D texture to the rim of the urn and create a visual element that went downwards instead of upwards.
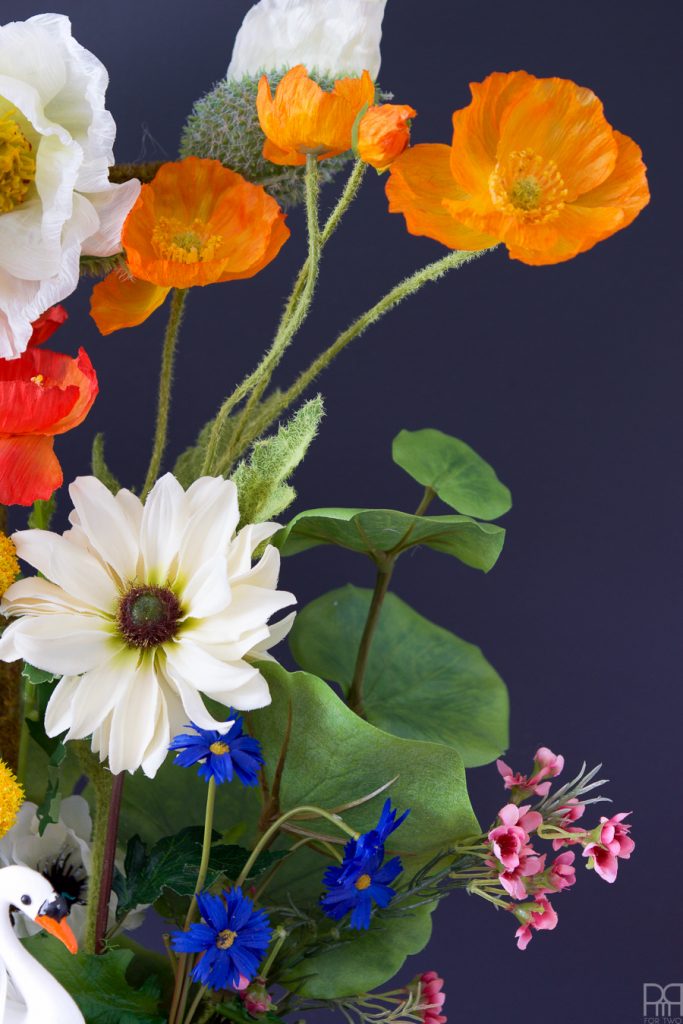
Step 7: Add your last floral elements for height. These stand-out poppies are stunning and full of texture and life.
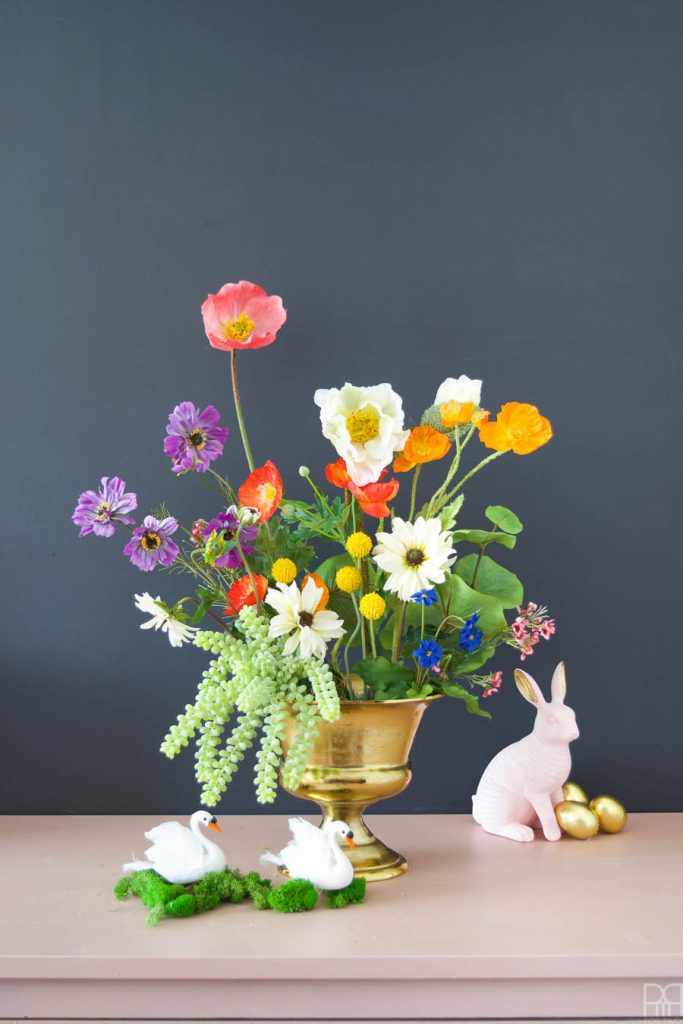
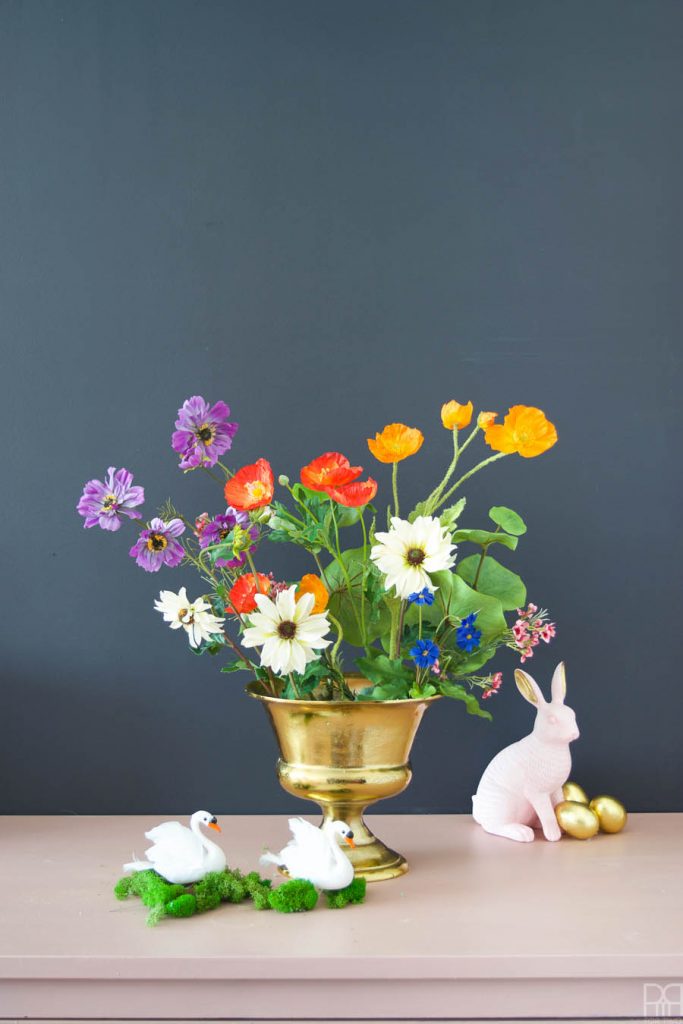
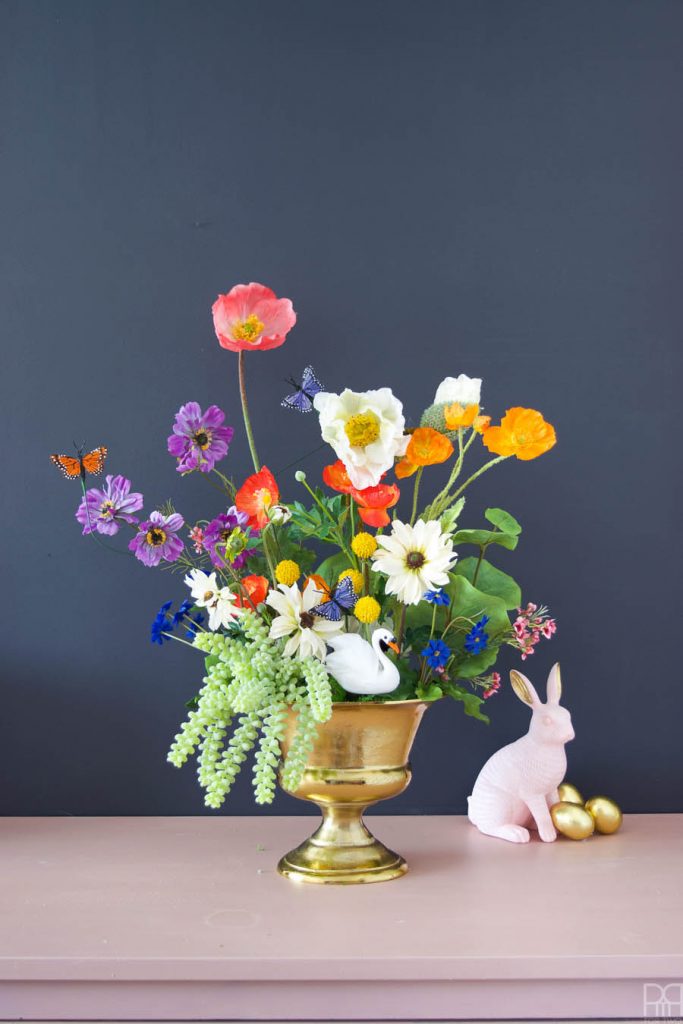
Step 8: Add the reindeer moss in and around the base of the stems to cover the foam and stems. Then add your swan(s) to the mix. I had originally done 2 swans, but one looked cleaner and more refined.
I then added some butterflies to create a more natural look. I chose complimentary colours and tried to bend their wires to create movement in non-linear plains.
If all of that was too much work you can always catch that on 2x speed below:


PMQ for two // That’s My Letter // Jest Cafe // Hey Fitzy // Our Crafty Mom // Domesticability

Floral Easter Basket Centrepiece

Create a beautiful floral Easter basket inspired by Martha herself!
Materials
- Daisy Silk Flower Spray
- Faux California Poppy
- Mini Blossom Silk Bush
- Reindeer Moss
- Mini Faux Daisy Bush
- Artificial Waxflower Spray
- Artificial Sea Grape Tropical Leaf
- Silk Cosmos Spray in Purple
- Silk Poppy Stem
- Artificial Yellow Billy Button Spray
- Artificial Poppy Flower Spray
- Poppy Silk Wildflower Spray
- Metal Prestige Floral Urn
- Floral Foam Bricks
- Set of Floral Pick Swans
Tools
- Scissors
Instructions
- Cut the brick of floral foam to fit inside the gold urn.
- Place the big greenery and filler florals first.
- Add whole sprays, and cut away one stem to add slightly to the side.
- Repeat step 3 until you are happy with the placement.
- Fill any visible gaps with more impactful blooms like the daisies & billy button.
- Add the large succulent to the front.
- Finish with your last floral elements for height.

