It’s September 1st! Cue the falling leaves and pumpkin spice muffins, and of course all the fall wreathes! If you’ve been into a craft store in the past month you’ll have noticed that fall is here (apparently) and that Christmas is just around the corner (or so they’d have you believe). From where I’m sitting, it’s August 30th – too early for this. But here we are and I’ve just made a beautiful Modern & Moody fall wreath. Stick around till the end of the post to see the other amazing 16 wreaths in the blog hop!

If you’ve been following the blog for a while you’ll remember that last year I did a fall wreath blog hop, and because I’m a slave to tradition in some respects, I’m doing it again this year!
To see last year’s fall wreath click // here // and then send me a PM so that we can talk about how far I’ve come. Guys, what was I thinking? There’s not even a tutorial for that post. Just like, “here – a fall wreath.”
This year’s Modern & Moody fall wreath is full of sultry hues and tones that will carry into the holiday season.
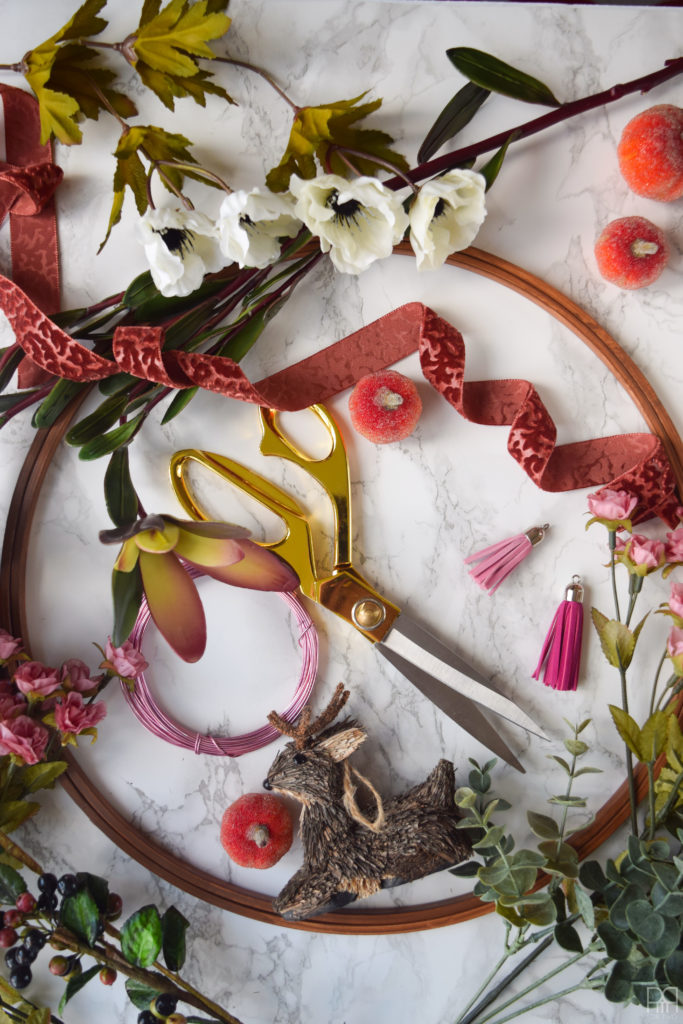
Materials for a modern & moody fall wreath
- Silk flowers, faux berries, faux greenery – all available at you local craft store.
- Wire cutters + Scissors
- Velvety ribbon
- Wood embroidery hoop (I’ve already stained this one, otherwise they come in a natural wood finish)
- Jewelry/craft wire – I chose dusty rose y’all
- Suede Tassels – found these at a one-of-a-kind boutique in Toronto. You can make your own using whatever you have though.
*A note about silk florals: they’re crazy expensive, but like everything in life, there is a scale.
You can buy florals at Dollarama, Walmart, Michaels, or online at places like afloral.com
How to make a modern & moody fall wreath
Stain your embroidery hoop
And pick some ribbon to match. I found both of these ribbons in the clearance bin at Fabricville and haven’t looked back since.
I used some awesome wood stain cloths from the hardware store. Think baby wipes, with stain in them, that are disposable. I love them for small projects like this.
Assemble your florals
For those who are interested, I purchased my florals on summer clearance at Michaels. The bouquet includes white anemones, pink rose buds, hypericum berry sprays, eucalyptus, and some weird plush flower thing that I can’t find the name for.
Trim the flowers
Using tin snips or wire cutters, trim the flowers and 2″ of stem off the main branch. Cut enough for two little bouquets.
Group your stems into little bouquets.
Keep in mind the orientation of the buds. You want to layer the greenery below the flowers, and then add a stand-out piece or two at the centre!
Remember, you’re not placing flowers to be seen from above like in a vase, rather from one side when bound to a wreath. The back side of your arrangement doesn’t need to be pretty, no one will see it.
Bind the stems together tightly
wrapping down and up the length of the little bouquet, using floral wire.
Fun tip: if you need certain flowers to be angled in a specific way, when you’re binding the stems together, run the write up into the bouquet to fix things in place.
Make sure to trim any excess stem, otherwise it’ll be hassle to bind it to the hoop.
Wrap your first bouquet to the hoops using wire.
Once it’s securely in place, add the second bouquet so that the flowers cover-up the bound stems of the first bouquet. The stems from the second bouquet should fit nicely underneath the flowers of the first. Think of Yin and Yang.
Cover the remaining exposed stems and wire with your ribbon.
You can do a classic bow with like 8 loops, a simple Colonel Sanders bow, or a very simple loop (pictured below) that is fastened together with two tassels.
I ran a piece of wire through the loops on the two tassels and then wound the wire together behind the ribbon.
Do any minor adjustments as needed. Chances are good that something will have shifted while you affixed everything.
Get your fiddling done before you hang it!
You now have a beauty Modern & Moody fall wreath.
And now, for the other participants in the Fall Wreath Blog hop!
The DIY Mommy // A Home To Grow Old In // Jennifer Priest
Up to Date Interiors // Hey Fitzy // Monica Wants It
Lura Lumsden // PMQ for two // Cottage in the Oaks
Our Crafty Mom // Nourish and Nestle // Twelve on Main
Architecture Of A Mom // Three Mint Balloons // AttaGirlSays
KS Craft Shack // Paint Yourself A Smile
