

If that title is confusing and misleading you wouldn’t be the only one. I’ve been toying with how to make my life easier this fall, and cutting-out the little things was top of my list. Between travelling back and forth to see my parents, running my own business, and attending social events with my friends, something has to give, and it’s the pies!
I love to bring a beautiful contribution to any dinners or meals we’re invited to, and when in doubt I bring booze. Since fall is traditionally a season of pies, I thought I’d see if I could make a store bought pie look amazing so that I have something to offer with the bottle of wine. Everyone has got a version of this hack for cakes and cupcakes, but let’s level with pies, shall we?
Also, I did this upgrade in under 15 minutes, so if you aren’t already heading for HomeSense and the grocery store, quick! Pull a U-turn.
*HomeSense sponsored this post, but all thoughts are my own. Thank you for supporting the brands that make PMQ for two possible.


No, this recipe is not straight out of Gourmet or Julia Child’s cookbook, it’s straight from the mean streets o the internet! Okay so if this post is landing in front of you at the right time then make sure you share! I’m hoping to hit everyone heading into a weekend of dinners, so make sure you spread the word.
And don’t forget to check-out the Canadian Bloggers Fall Home Tour and my post // here //
Materials
- Store bought pie
- Store bought pie crust (un-cooked)
- Cookie Cutters
- Sprinkles and decorative dust
- Eggwash
- Cookie tray, silpat, oven etc.
**Pre-heat oven to whatever you need for the pie crust.
Step 1: Lightly flour a surface and roll-out your pre-made pie crust, or simple unfurl it if you use the same version I do. Using cookie cutters – in this case stars of two sizes – cut a bakers dozen of each shape.

Step 2: Place on cookie sheet, apply egg wash, and bake in over until golden brown. Don’t leave them in too long or they’ll burn and you’ll have to start all over again!

Step 3: Using the large pieces, place them around the crust of the pie. You can use a little dob of icing to help hold them there, or just wedge them into the pie a little as you do.

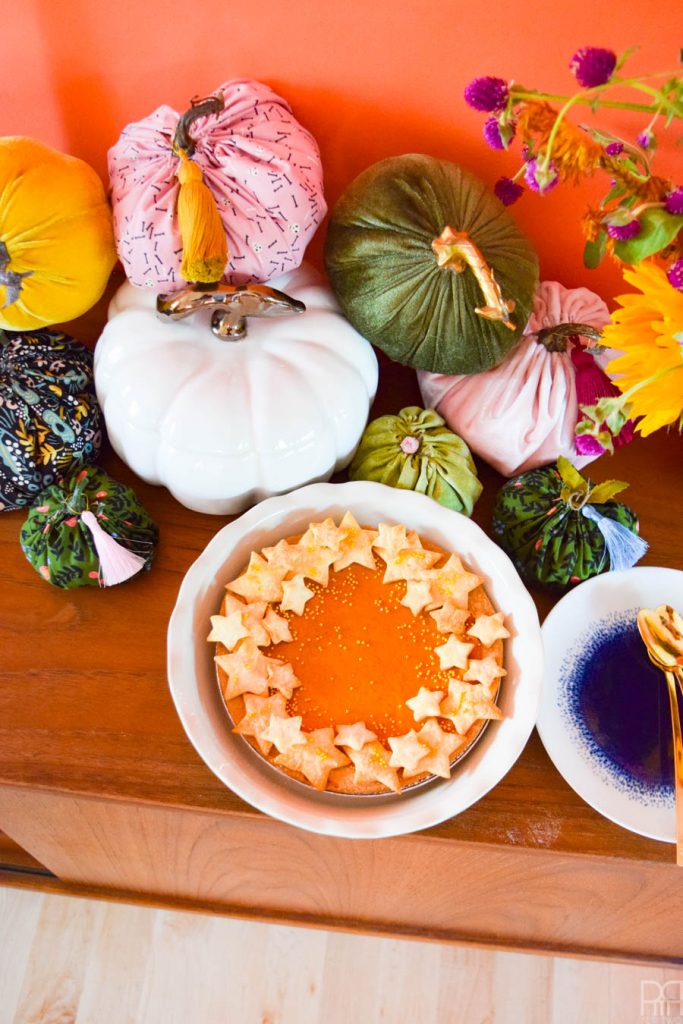
Step 4: Once you’ve been around the pie once, add the remaining large pieces in a scattered fashion before moving on to the smaller stars. Remember to keep the middle open, the whole point is to hide the plain crust of the pie and make it look super fancy.

Step 5: This is the fun part! Time for sprinkles, non-pareilles or glitter dust. I have quite a few pearls from HomeSense’s baking section. They’ve got a very decent selection of baking items including the silpats I use, the splatter enamelware cookie sheet, and Emile Henry pie plate that the pie sits in.
I just drizzled mine around the edge, but you could add a simple syrup wash around a few of the stars so that the sprinkles will stick.

The key to really selling the idea that you made this pie you are now kindly offering to the people who have invited you to dinner, is to put it in a cute pie plate. If you leave it in the metal dish they come in, that’s fine, just make sure you disguise it!
HomeSense has a variety of pie plates in all shapes, colours, depths and styles, but this green one by Emile Henry spoke to me. Something tells me you’ll be seeing a heck of a lot more of it soon 😉

p.s if you love these pumpkins you’ll love them even more knowing they’re hand-made! I DIYed these suckers and you can catch the tutorial // here //

And that’s all folks! That’s how you fake a hand-made pie – with store-bought everything and a trip to HomeSense for some glitzy essentials.
Share your best fall time-saving hacks with me please! <3

