


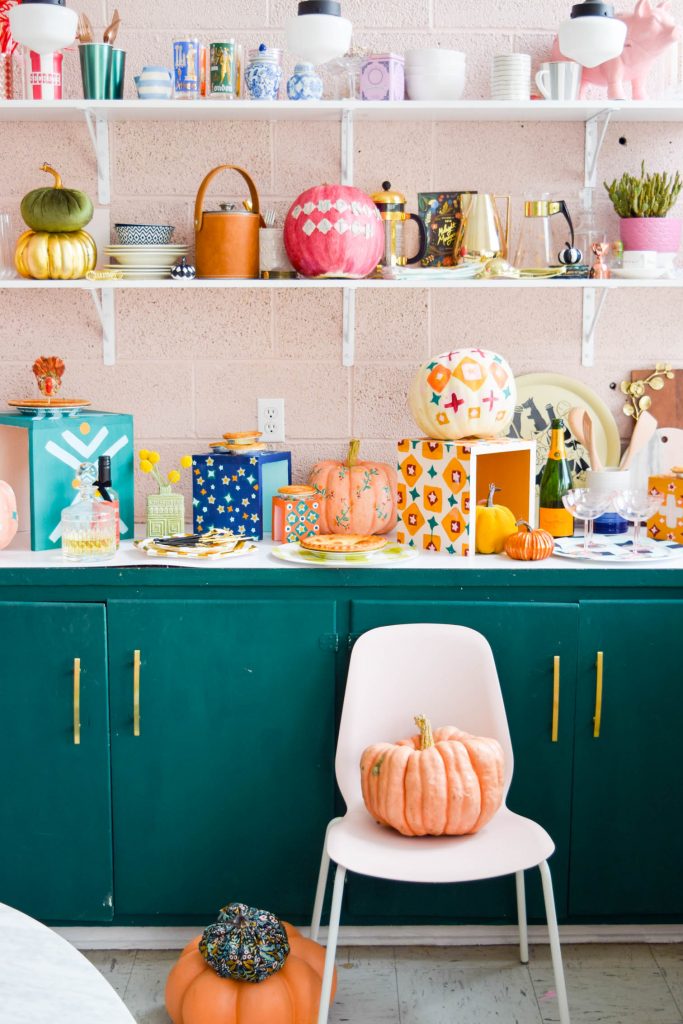
Who needs a DIY Pie Bar? You need a DIY Pie Bar. Most importantly, I now have a DIY Pie Bar just in time for all my fall entertaining shenanigans. I used some simple wood risers from Crates & Pallet, and Fusion Mineral Paint to create some beautifully patterned pieces for fall.
*Crates & Pallet sponsored this post, but all thoughts are my own. Thank you for supporting the brands that make PMQ for two possible.


Why do you need a pie bar?
Well that’s a silly question – everyone needs/loves pie (even if you think you don’t), so it’s only natural that you make it easy to serve and display your handy work.
I don’t know about you, but I didn’t inherit the “Julia Child gene,” so most of my pies are store bought and embellished (like when I faked a homemade pie last fall). But if you’re the baking type, you’ll want to check out the Pedantic Foodie’s rosemary peach harvest pocket pies.
Let’s paint a DIY Pie Bar
Sure, you could buy or thrift a bunch of vintage pie dishes, but that takes time, resources, and a place to store them all. Even though I now have space to store a dozen pie dishes, I still want to create a storage friendly option. These nesting 5 pk of Square Wood Risers from Crates & Pallet check off all the boxes on my list for this DIY pie bar.
I could have done some sort of wood burning, or vinyl decal (like my DIY Fall Vinyl Decals), but I wanted to paint them and create a bold pattern. I had some Fusion Mineral Paint kicking around, so I thought I’d use that.

Painting pattern on wood risers
This part is less of a tutorial, and more of a suggested “how to,” and you’ll see why. I picked a colour palette and worked backwards from there. See, I had painted some more pumpkins (just because), and had created a fun pattern in the process. I used some stamping sponges from Michaels, and wanted to use them again.

SO, I picked base colours and painted the outside of the risers in those. I did a pretty even split between warms and cools, and then planned to accent in contrasting or complimentary shades. I painted the inside of each rise in a complimentary colour, just to make them pop even more.

Once the bases were ready, I started creating patterns. I did everything from stars, to geometric patterns, and polka dots. These patterns are layered, so which each shape I was creating a new dimension to the pattern.

Once the base was dry, I used a smaller sized sponge to add a fun detail or pop of colour. And so on, and so forth, until I was satisfied with each riser.
I specifically did not create a detailed step by step for the patterns, but only because I know you guys a) don’t want that b) will do something of your own c) will find great inspiration from mine, but don’t plan on recreating them exactly.

Assembling your DIY Pie Bar
Once everything was dry (I let them be overnight just in case), I displayed them along my kitchen counter, and started displaying my pies! What I love about the wood risers from Crates & Pallet, is that they come in different sizes.


No pie is created to be the exact same size as the others (even if you try), and especially not during a thanksgiving potluck, or Sunday brunch. Having 5 different sizes to chose from when putting together my DIY pie bar, means that no matter how big or small, there’s a riser that fits for it! Wahoo!


Don’t you just want a piece of pie now? I sure do. Sadly none of it is Keto! Thankfully, you can also use the risers to display pumpkins on your sideboard or mantel. Ultimately it doesn’t matter what you’re displaying, as long as you do it with love.
Check out The Lazy Girl’s Guide to Keto


