The penultimate edition of the 2015 Canadian Home Decor and DIY blogger Christmas gift blog hop is today! Today I’m featuring my DIY Glitter Bird Garland, a beautiful addition to your christmas boughs or trees and the perfect gift for the lover of all things plush and glittery.
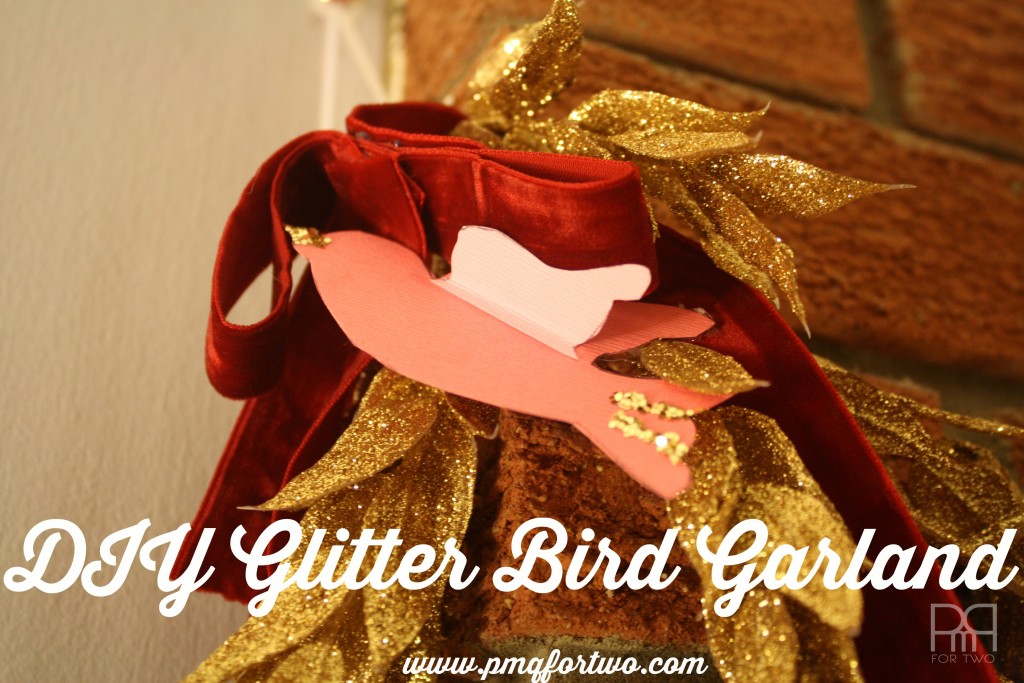

Isn’t it beautiful? The whole thing cost about 20$ to make in materials, but that’s a guesstimation considering I owned the ribbon and glitter.
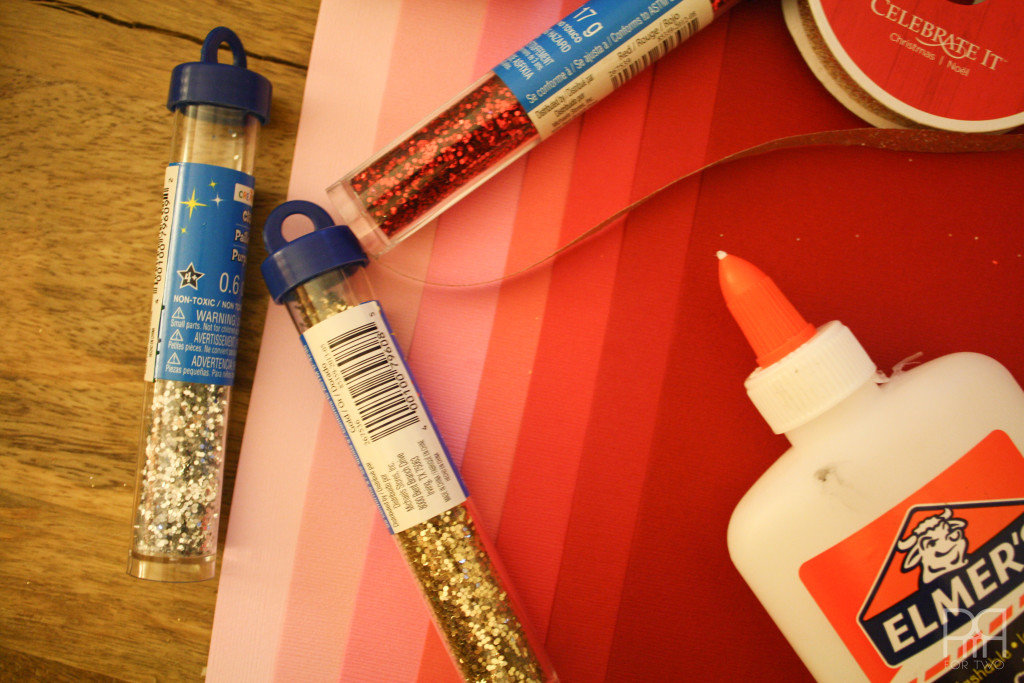
Materials
Scrap book card stock about 1.73$ a sheet x 7
Hot glue gun
Elmer’s school glue
Glitter
cutout of bird

Directions
Step 1: Line-up your materials and start tracing the outline of the bird on your scrap book card stock. Cut as many birds as you need.
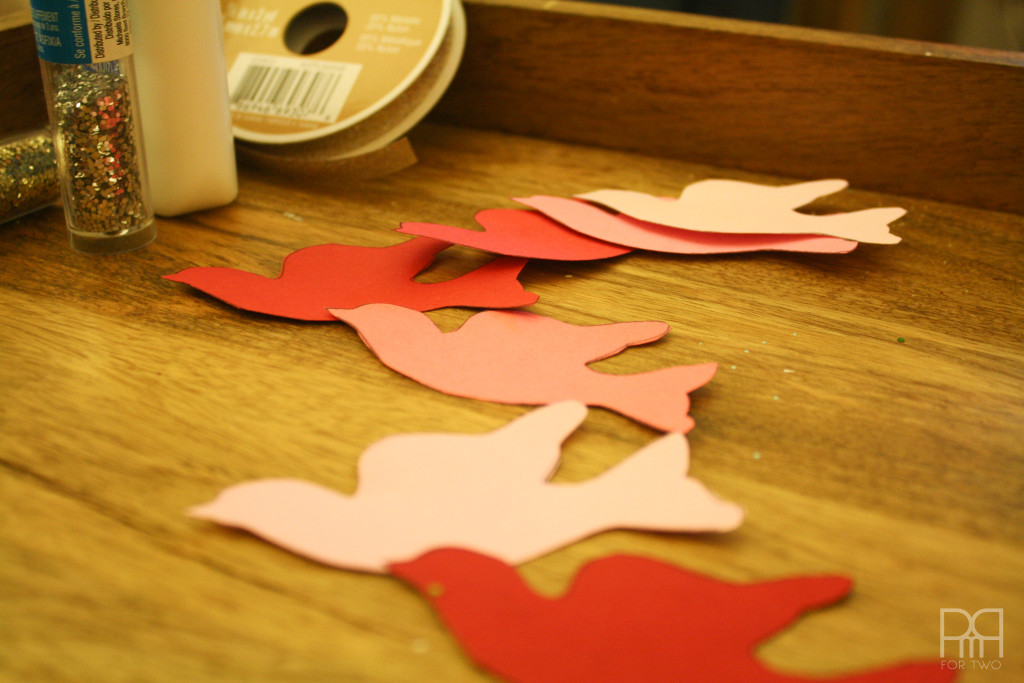
I had seven (7) shades of paper so I cut two birds from each colour. I needed 14 birds for my 74″ garland. You could make more or less depending on how long a garland you need.
Step 2: Trace the outline of the wing from the bird shape on all the scrap book card stock. You’ll need one wing per bird. Cut them out.
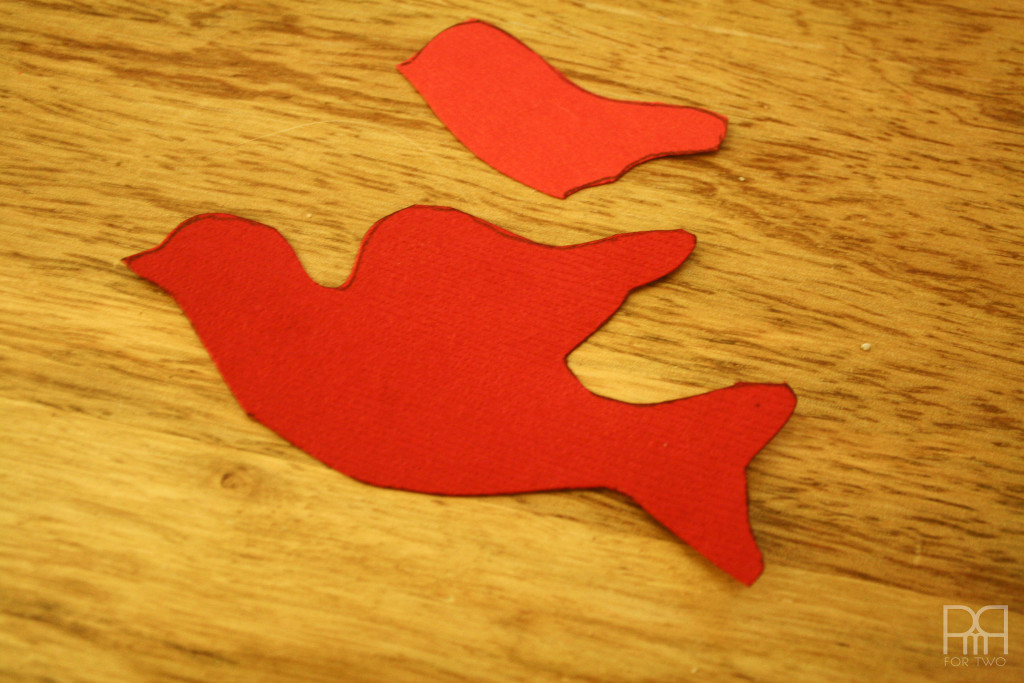
Step 3: Bend the long flat edge of the wing a little bit. I don’t have a precise measure because it depends on how big your bird and wing are. The little bend will create a flap to glue to the bird cutout.
step 4: Line the edge of the wing with white school glue and affix to the bird as if adding a second wing.

Because I wanted an ombre effect with the girds I decided to alternate the colour of the wings on the bird so as to create a contrast. I think it looks delightful, but you can easily just match the colour of the wing to the bird.
Step 5: Let dry
Step 6: Using white school glue, dot the beak and then add lines if glue in the tail area, cover in glitter. I used gold because of the colours in our decor.
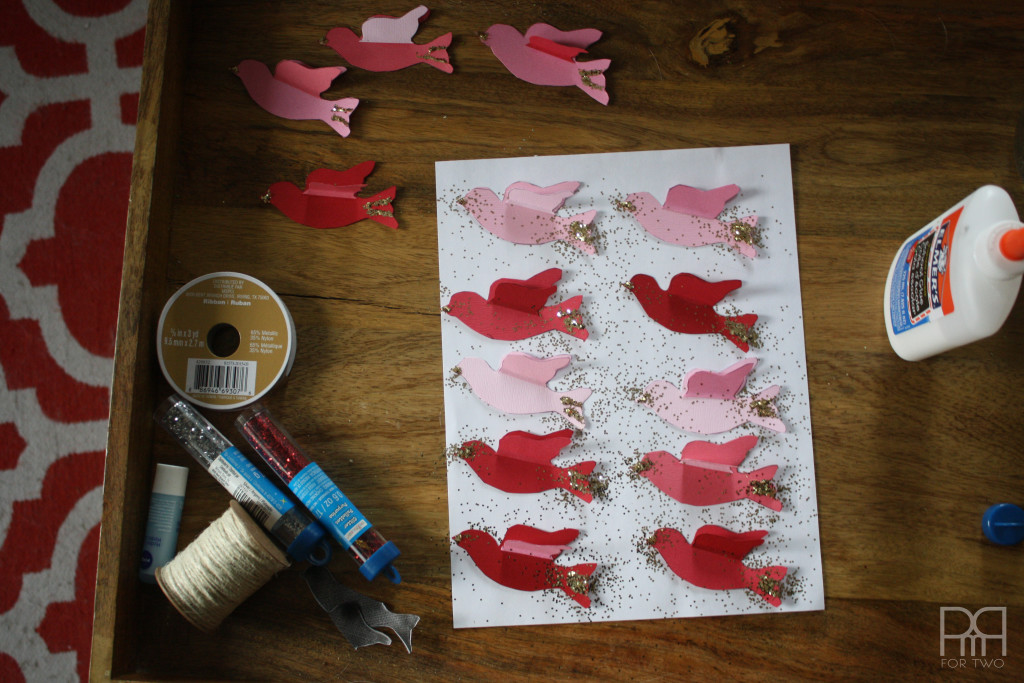
Step 7: Let dry.
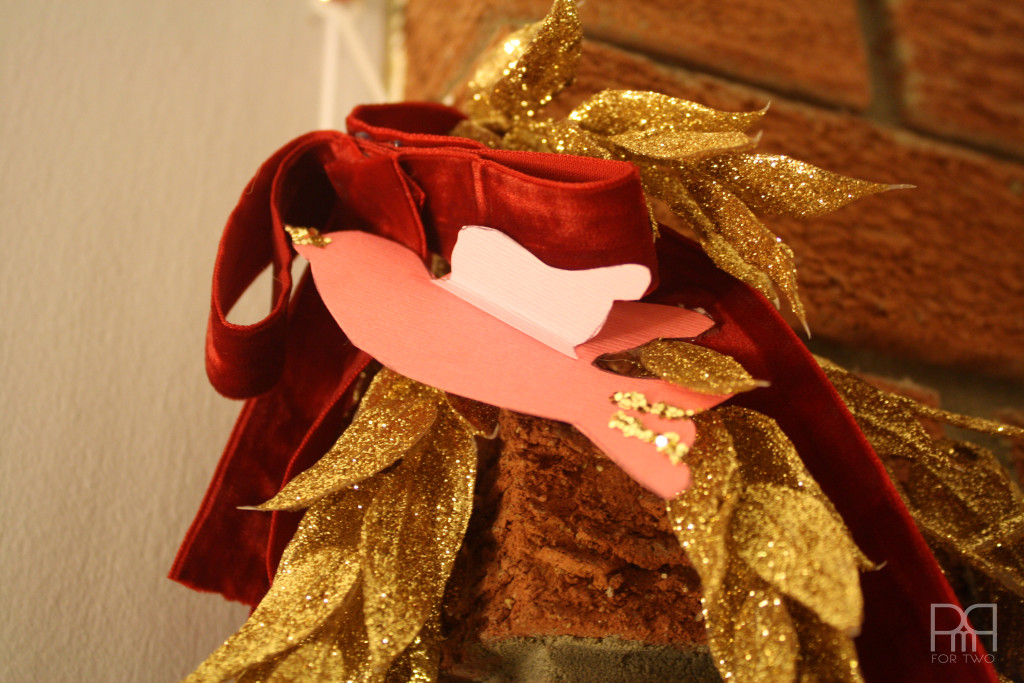
Step 8: Measure ad cut the length of your garland in ribbon. I used a crushed red velour ribbon for my garland.
Step 9: As an extra detail I added two big red bows, created with the same red ribbon, and added them at the fixture points where I hang the garland. The big bow will hide the hooks on the wall!
Step 9: Start gluing your birds to the garland. I had 14 birds places every 5.5″ along the garland. I glued them at the tip of the top wing, but you could glue it any which way, it just depends on your preference.
Step 10: Let dry.
Step 11: Hang and admire!
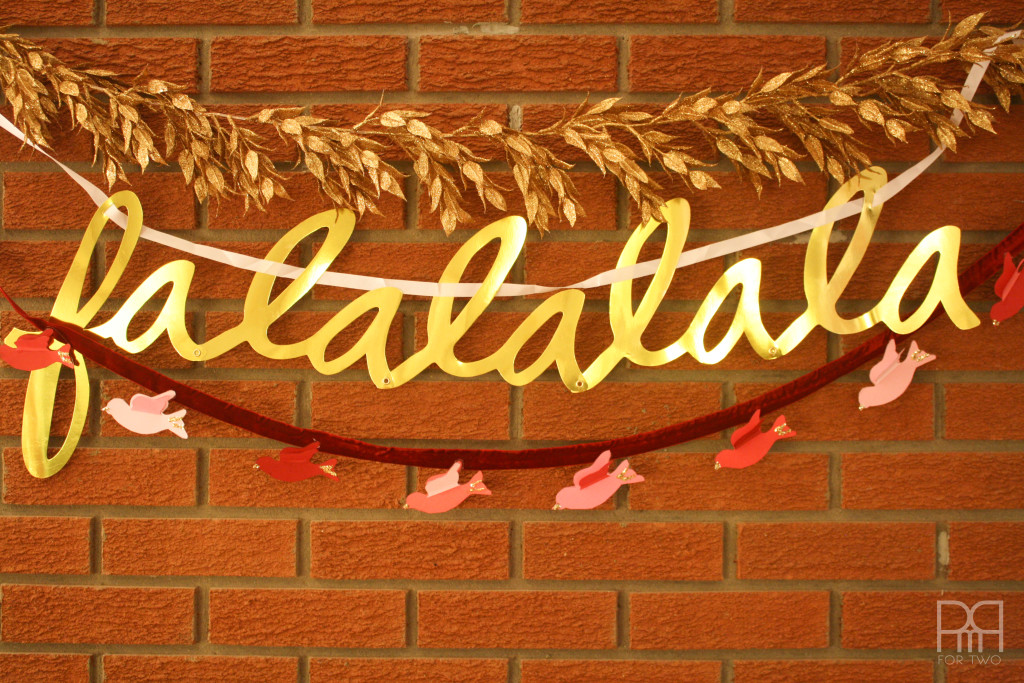
falalalala! The BEST Target find – ever
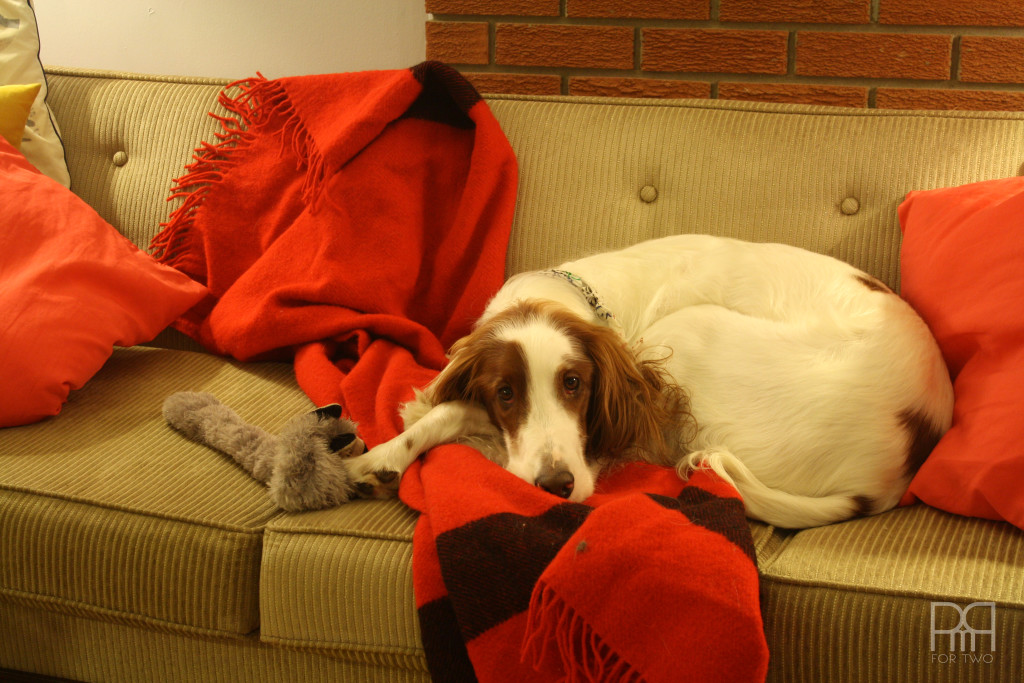
Look at that face!
Bruce agreed to participate in this photo shoot by laying on the blanket with his pet raccoon. He looks so sad but is actually quite happy.
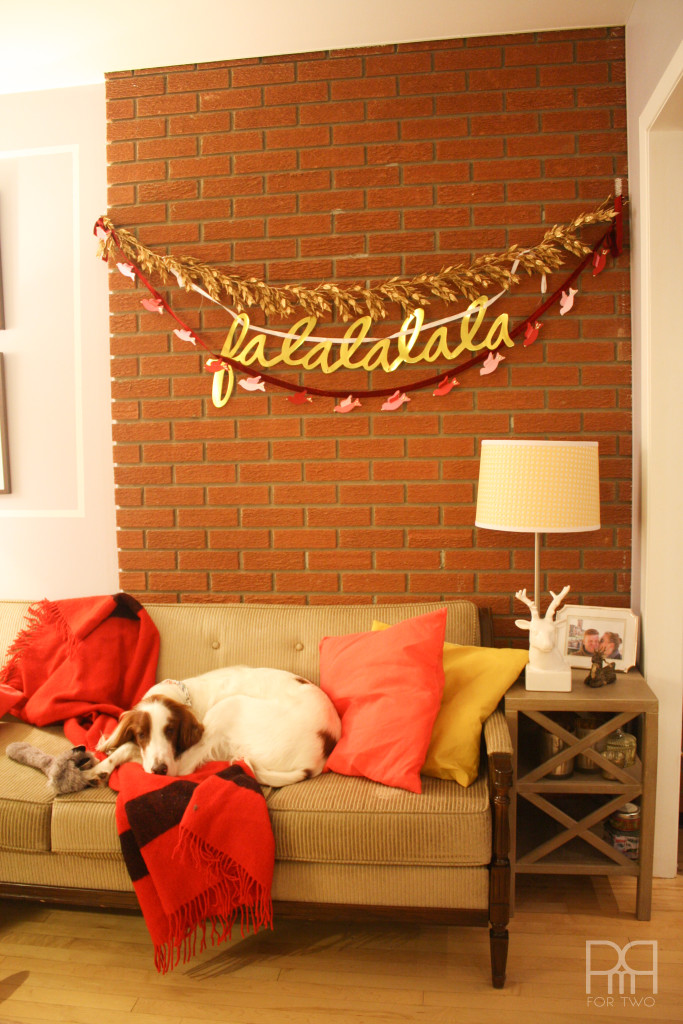

So there you have it, a DIY glitter bird garland using colourful scrap book card stock and crushed red velvet ribbon! Can’t wait to see what you make.
Live boldly.
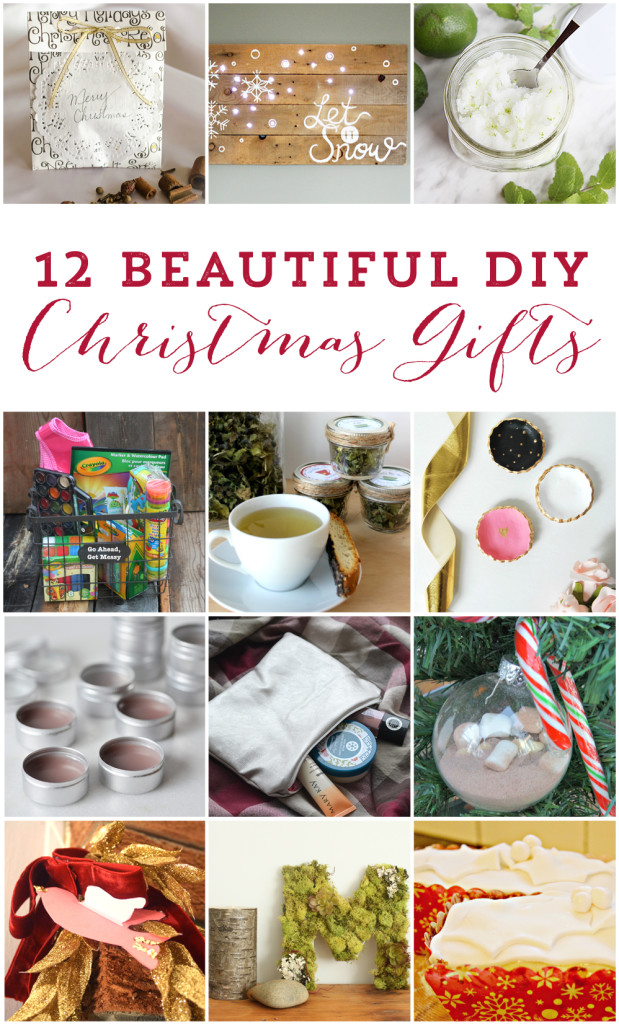
Now it’s time for some more DIY Christmas gift ideas from my Canadian blogging friends. Get ready for some wonderful handmade gift inspiration for your holidays!
From the top, they are:
Christmas Scented Paper Sachet DIY Gift Bag from Time With Thea
DIY Holiday Pallet Sign from Fresh Crush
DIY Lime Mint Sugar Scrub from Setting for Four
Go Ahead, Get Messy Family Gift from The Inspired Home
Homemade Peppermint Tea from Love Create Celebrate
DIY Clay Jewelry Bowls from The Sweetest Digs
Homemade Honey Lip Balm from Lifeovereasy
DIY Metallic Pouch from The DIY Mommy
Hot Chocolate Ornament for One from Bette Creek
DIY Glitter Bird Garland PMQ For Two <– That’s me!
Traditional Fruitcake from New House New Home New Life

If you want to see the last two editions click on the images below: