Let’s make a Martha Stewart Inspired DIY Easter Basket Centerpiece! I went to Michael’s and got everything I needed, and pulled-out my Fiskar’s tools to get the job done. Follow along below!
P.S You’ll remember my first take on a Martha-inspired basket with my lakeside swan easter floral arrangement
*Michaels & Fiskars sponsored this post, but all thoughts are my own. Thank you for supporting the brands that make PMQ for Two possible.
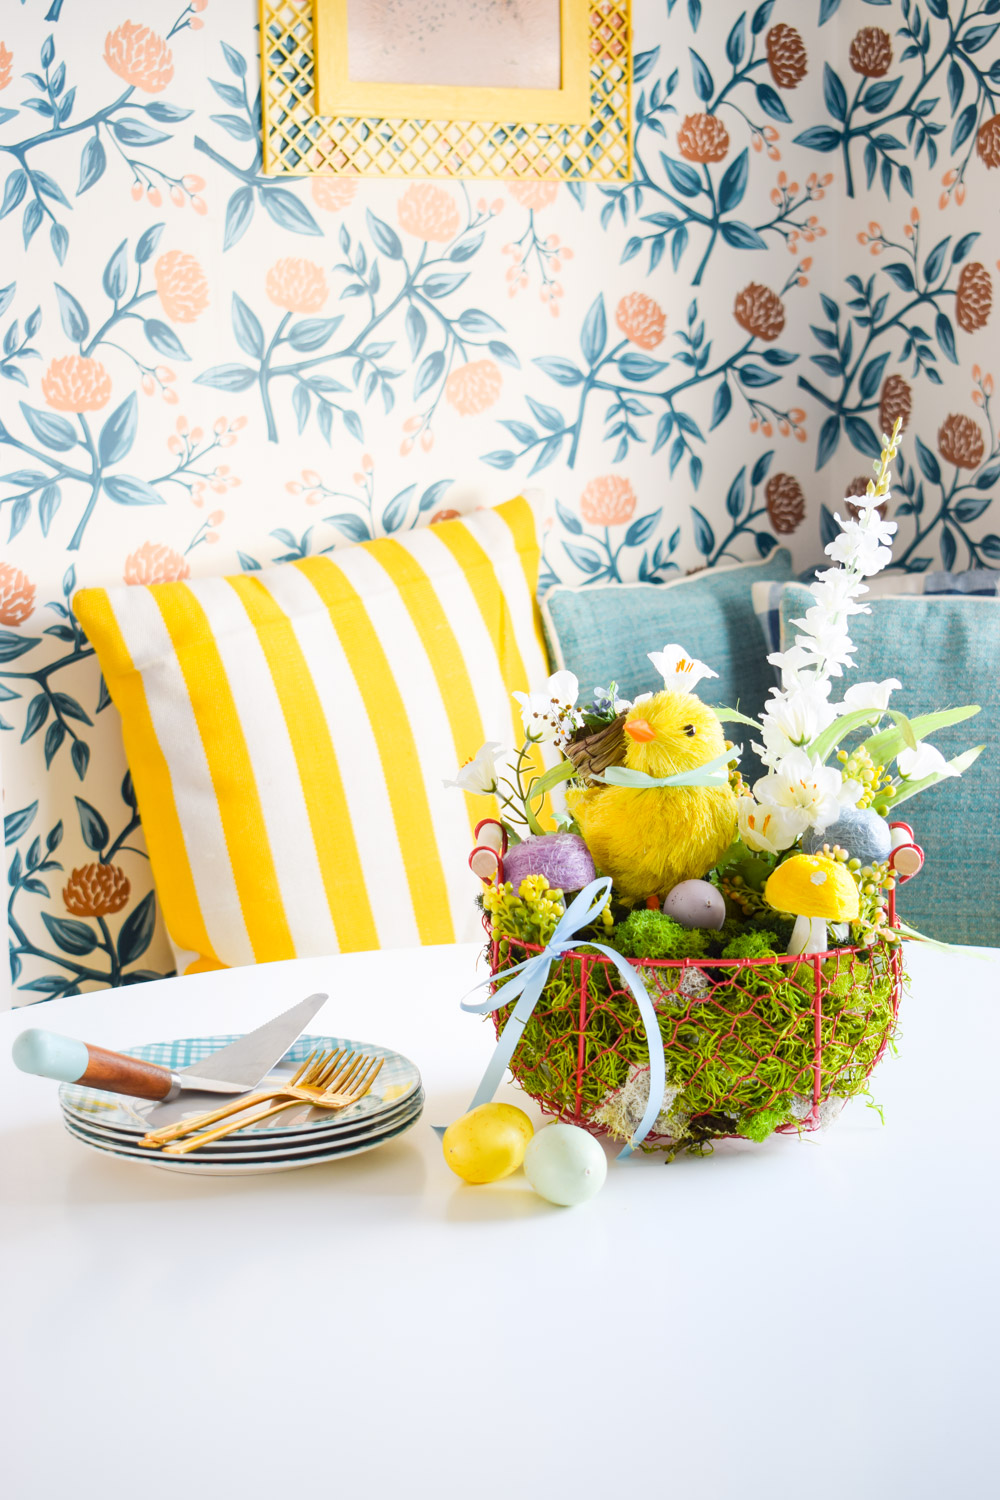

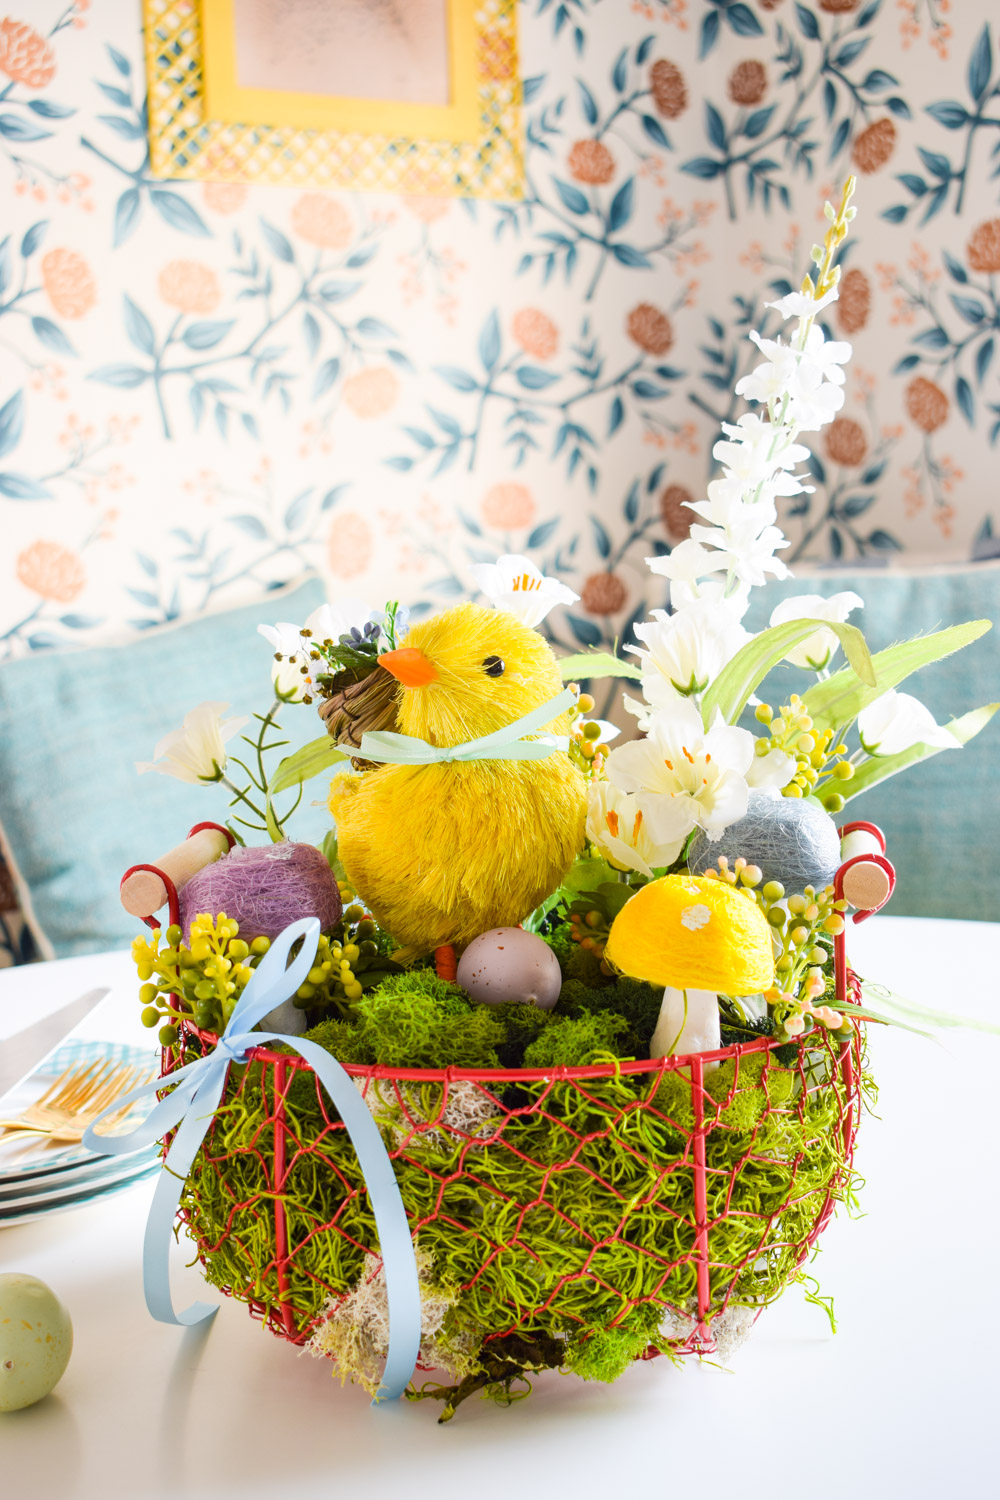
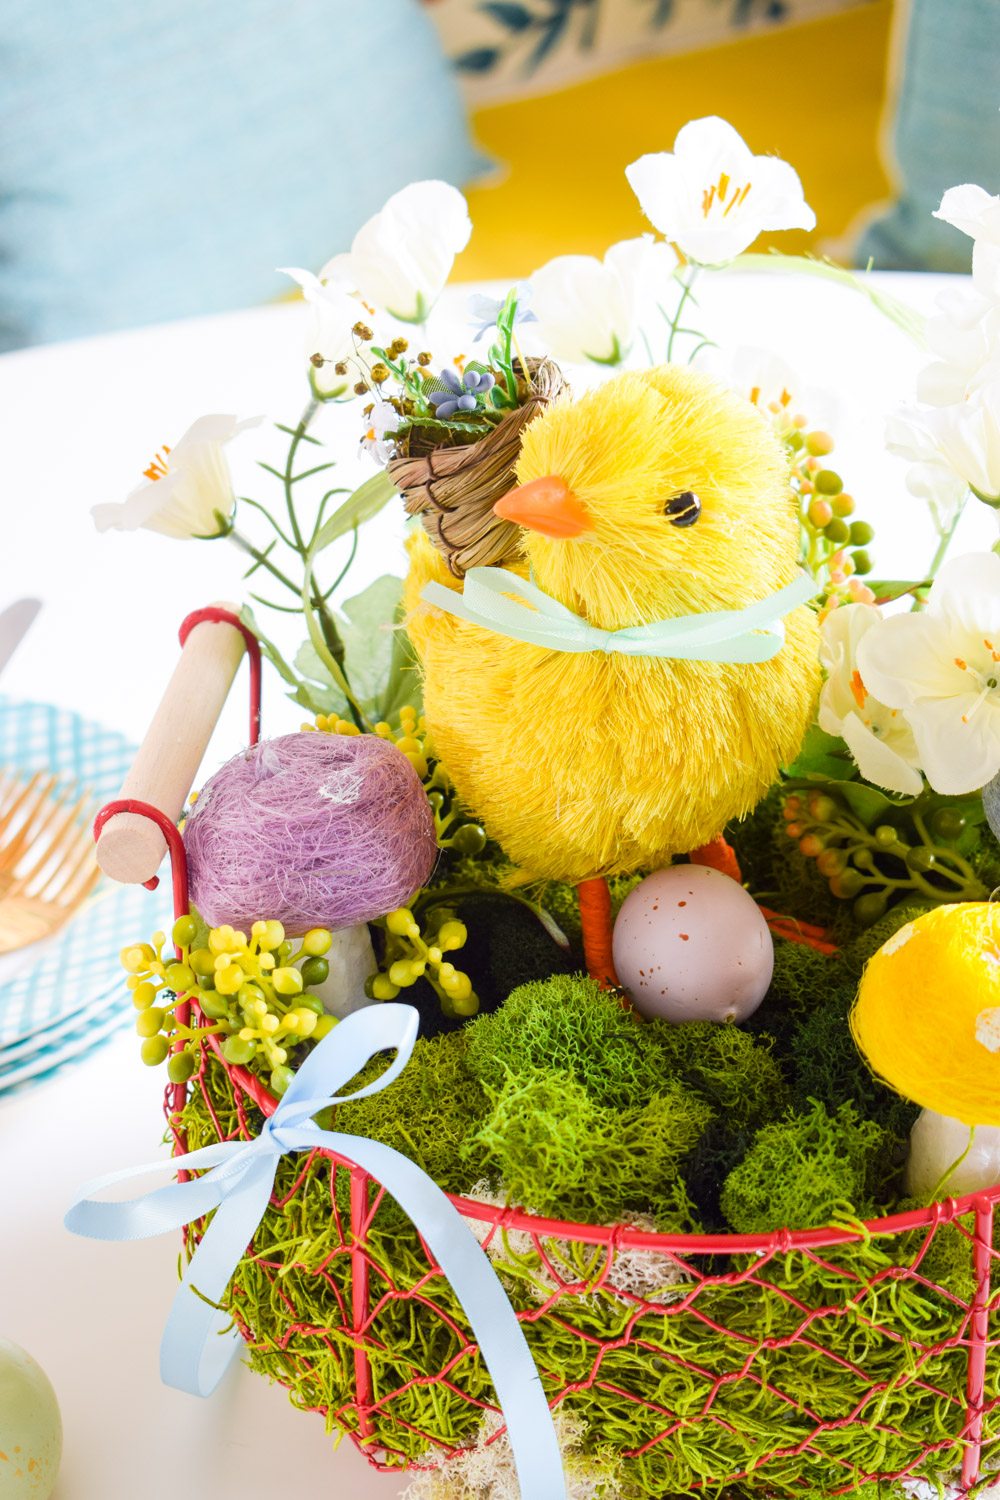
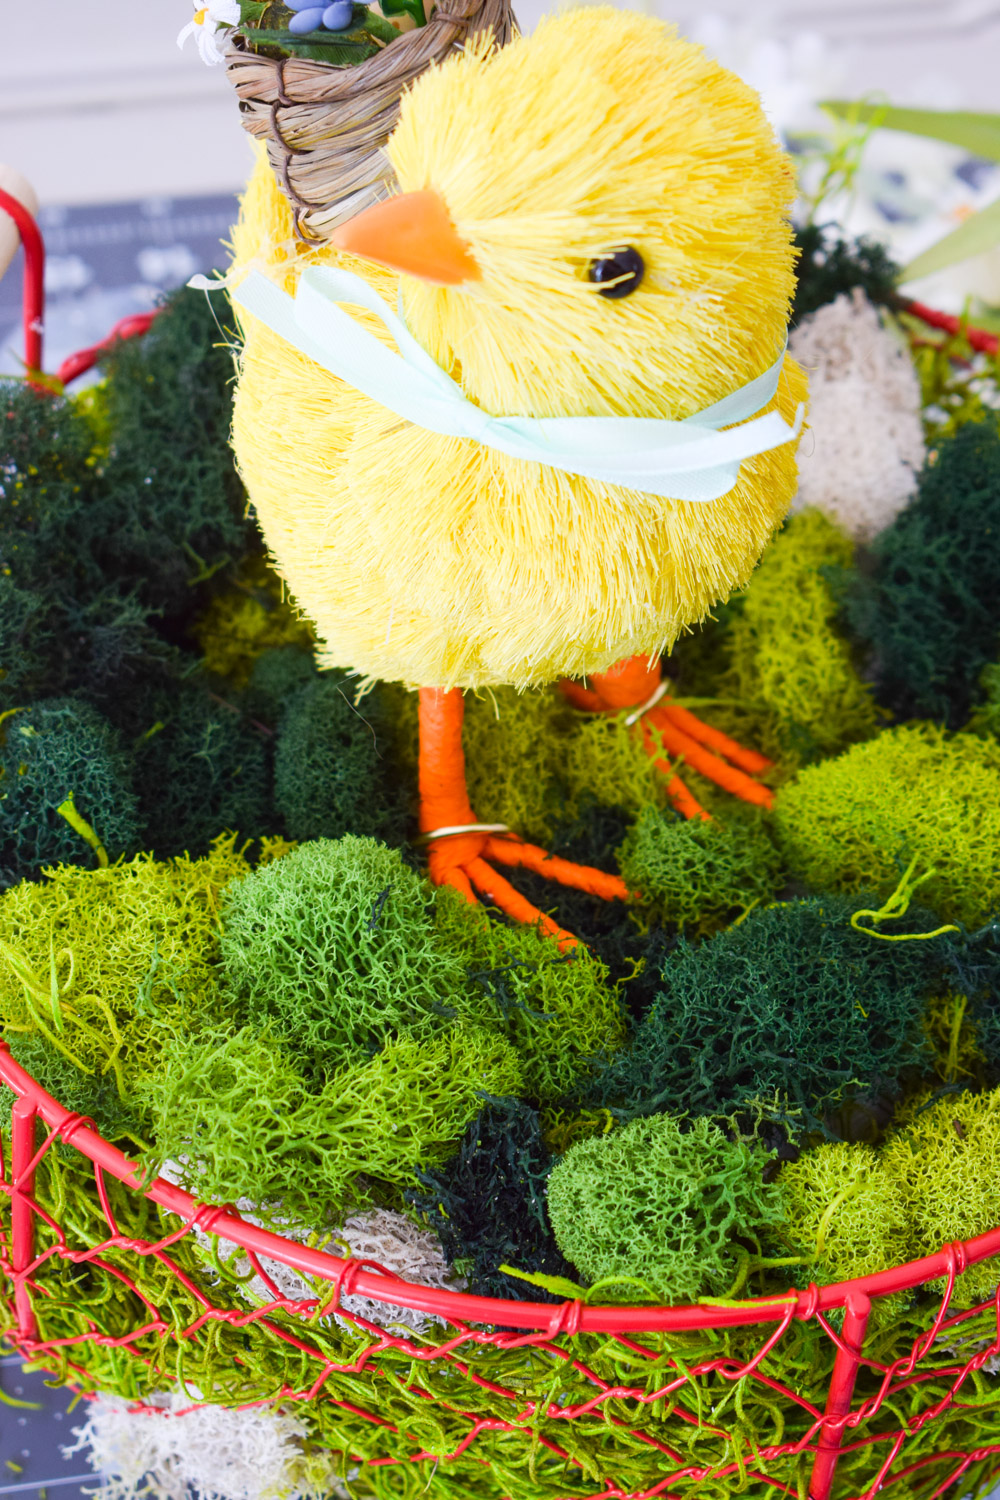
I went cute and simple with this year’s basket. I wanted to utilize the red chicken wire basket I found in one of their spring collections, and I knew that meant lots of lush green moss, some toadstool mushrooms (from their Easter garlands) and a sisal animal. Can’t forget the flowers!
What do you need to make a DIY Easter Basket Centerpiece?
As I mentioned above, you can get everything you need at Michael’s in store – or online – as well as the Fiskars tools I used.


DIY Easter Basket Centerpiece
Assembling the centerpiece is actually pretty straight forward, but only with the right tools. It seems like a lot of moving parts, but it’s worth the finicky bits with the moss, for the beautifully completed scene.
You can also watch this video of the class I did for Michael’s.

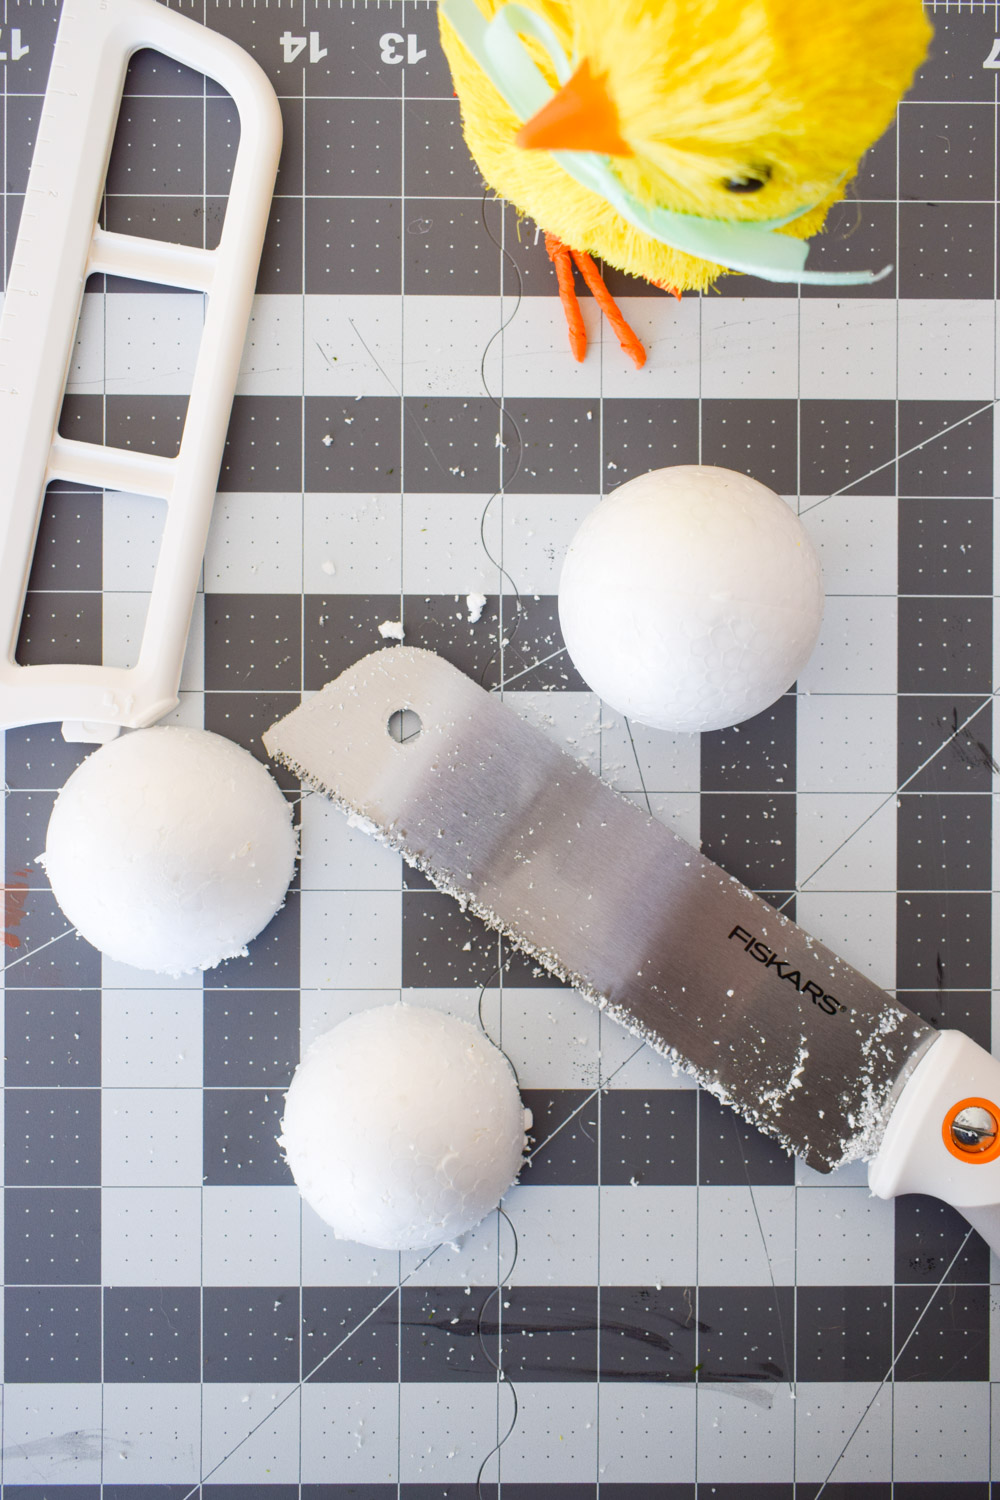
Start by creating the foam base that your moss and floral pics will sit in. I cut down the cake form by about an inch, and then cut in half using the Fiskars precision hand saw.

I always cut on my mat to avoid scuffing up the table below, but also for an easier clean-up.
As you can see, I’ve filled the center of the red basket with foam balls. This will give me something to dig the floral and floral wire into for stability. Next step, hiding it all with moss! No one wants to see the white foam at the easter table.
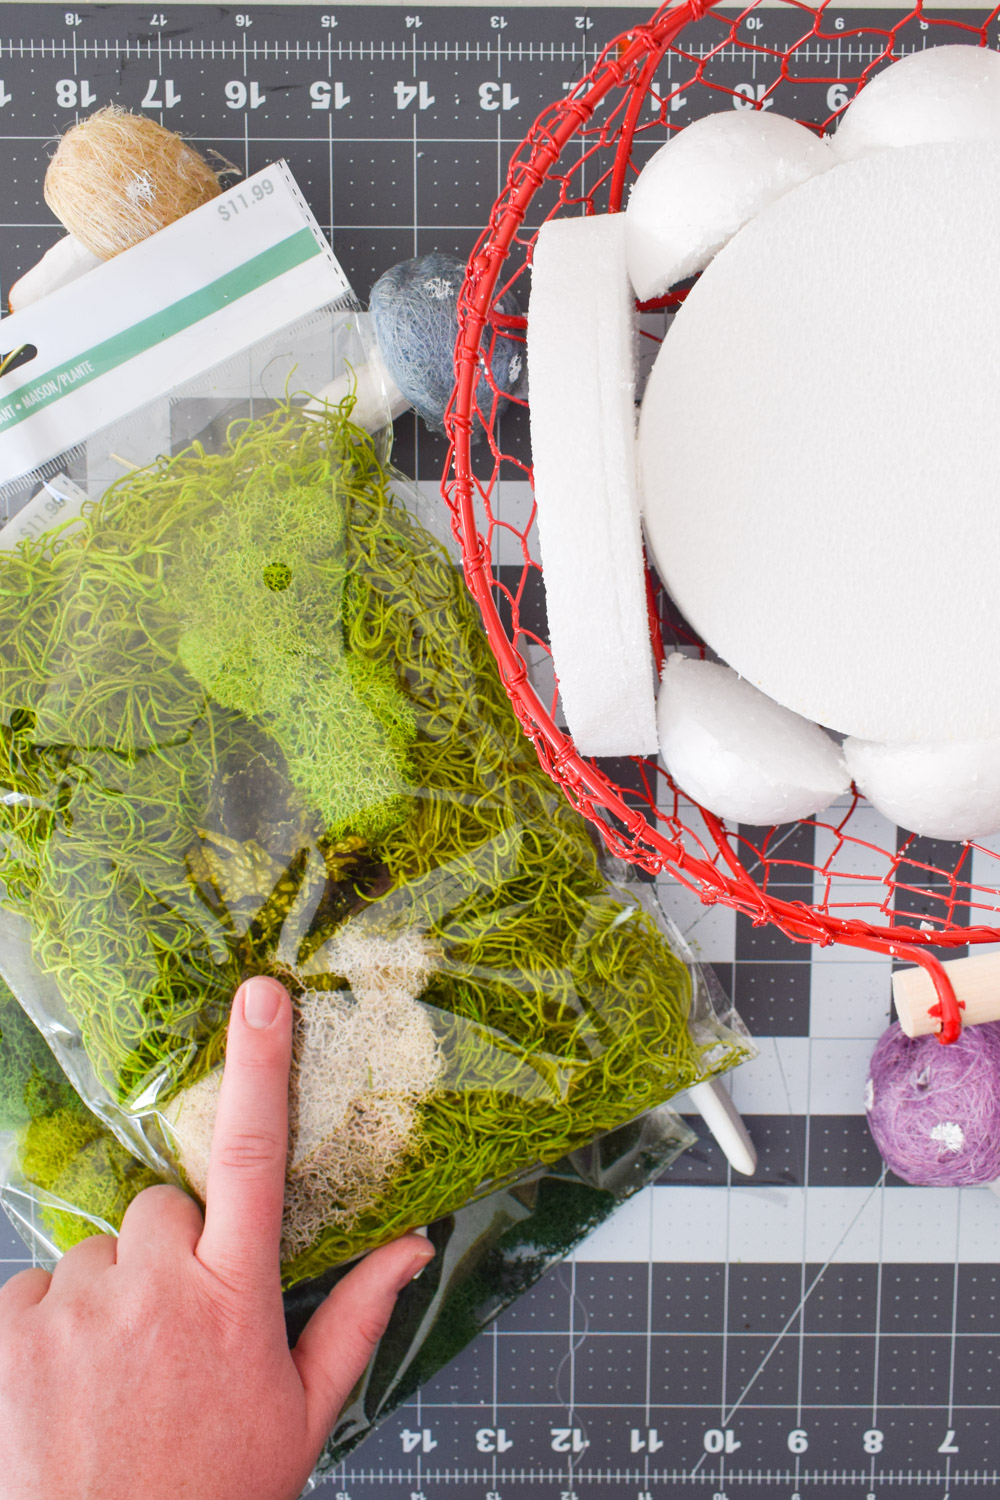
I placed a moss layer around the edge of the basket, and then added all my foam back into it. I then used a small piece of floral wire to poke extra pieces of reindeer moss into place from the side, for extra coverage. In the process of adding the foam back in, bits and pieces of moss will shift around, so be prepared to fix things.
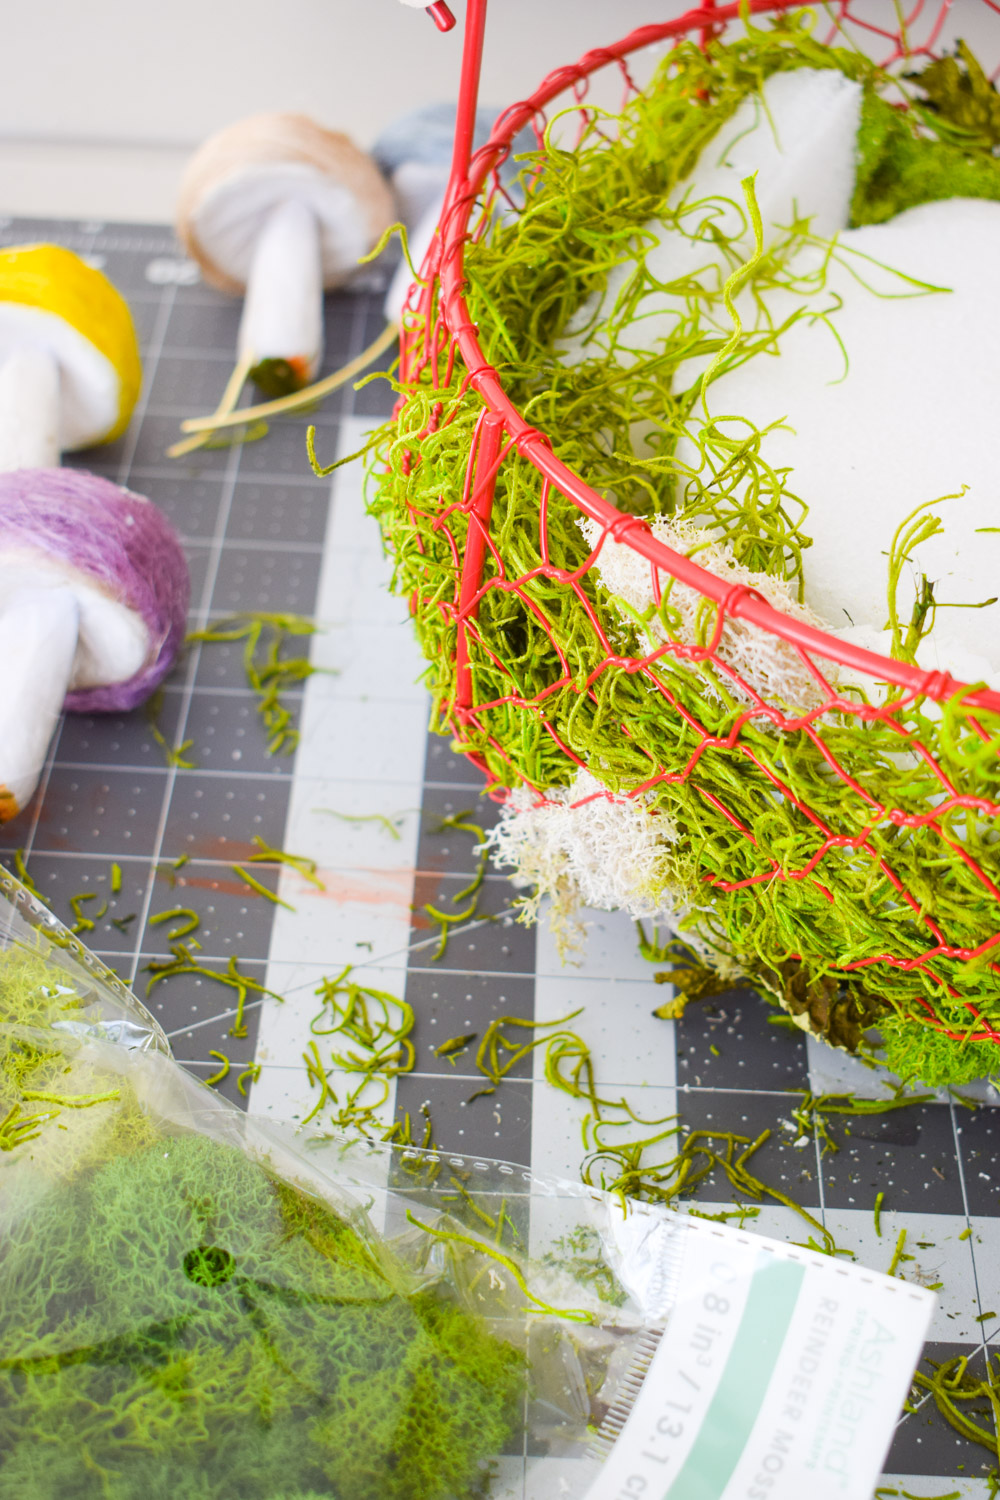
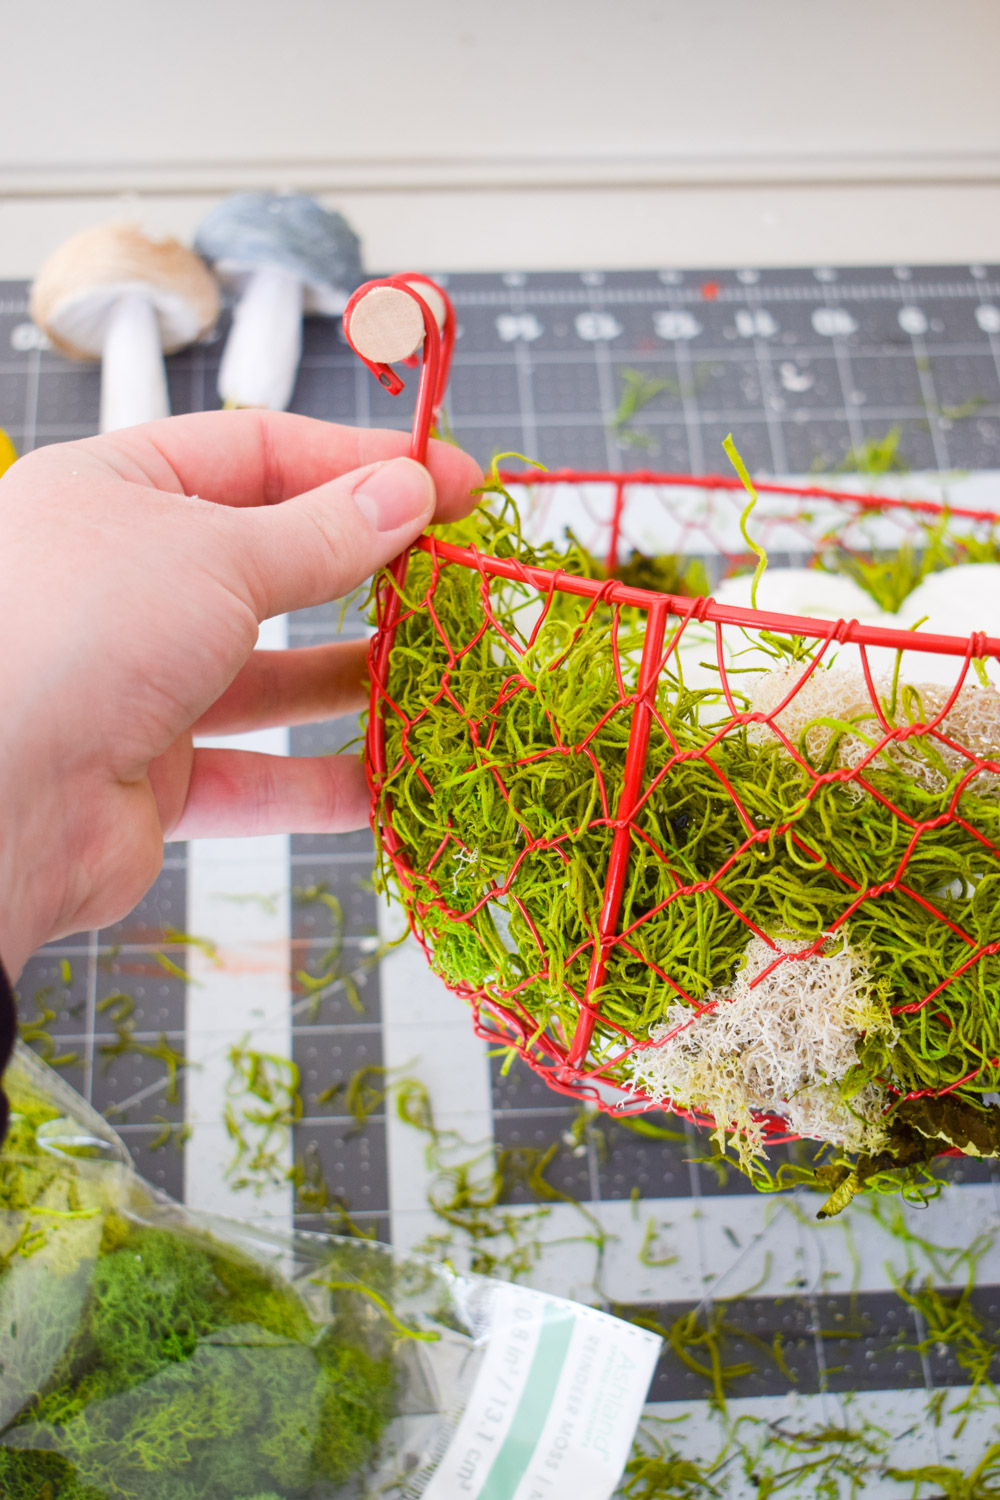
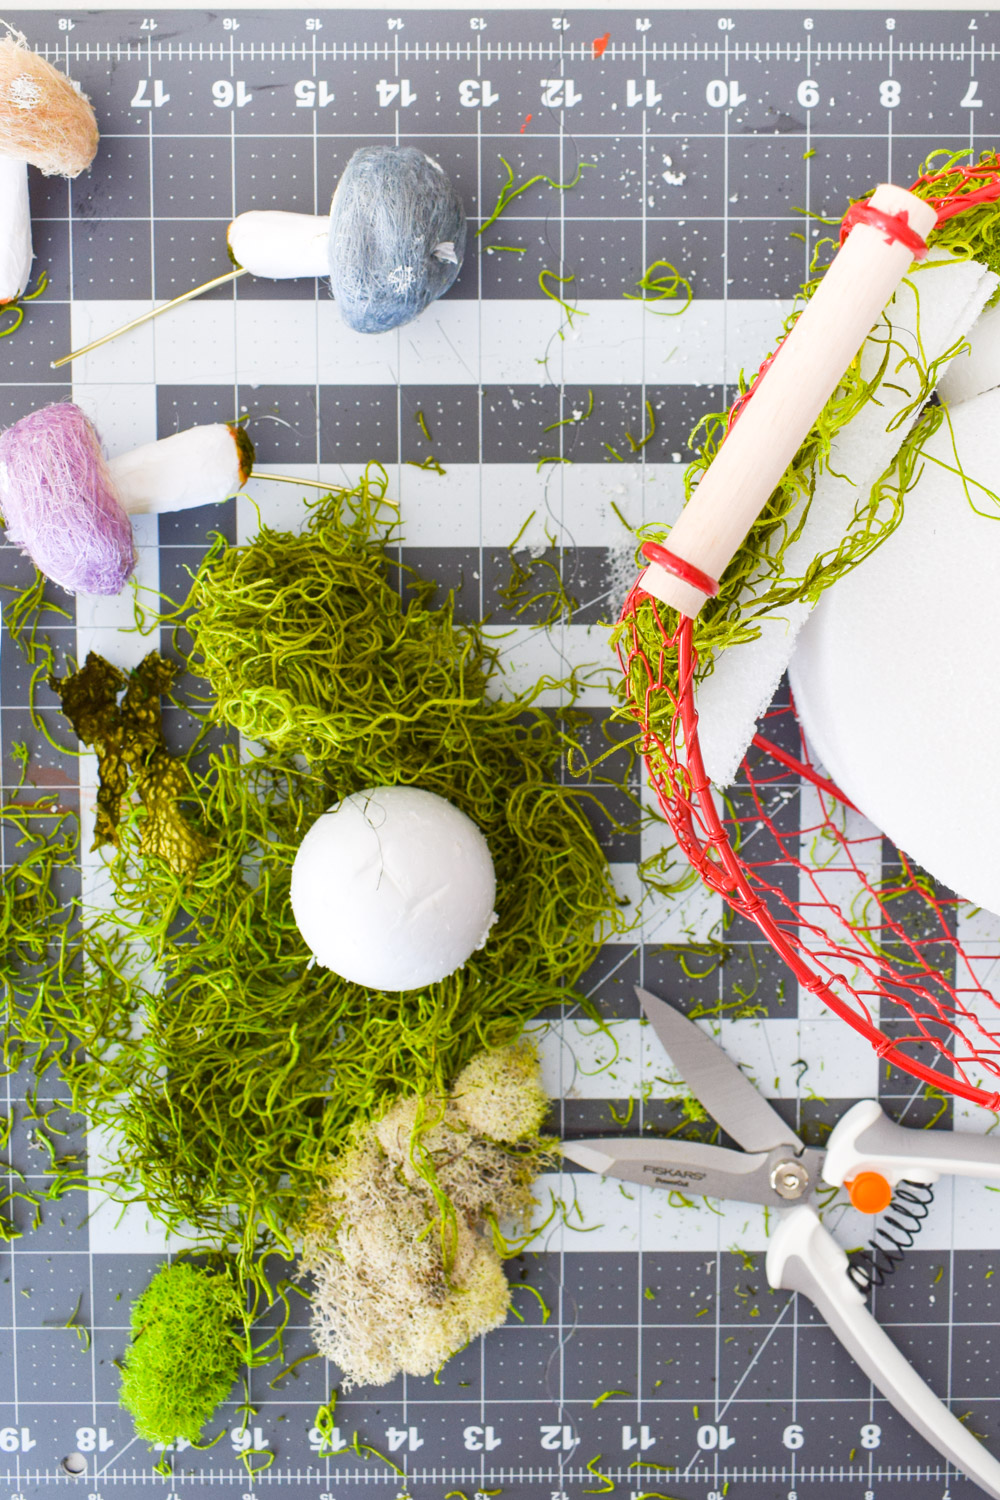
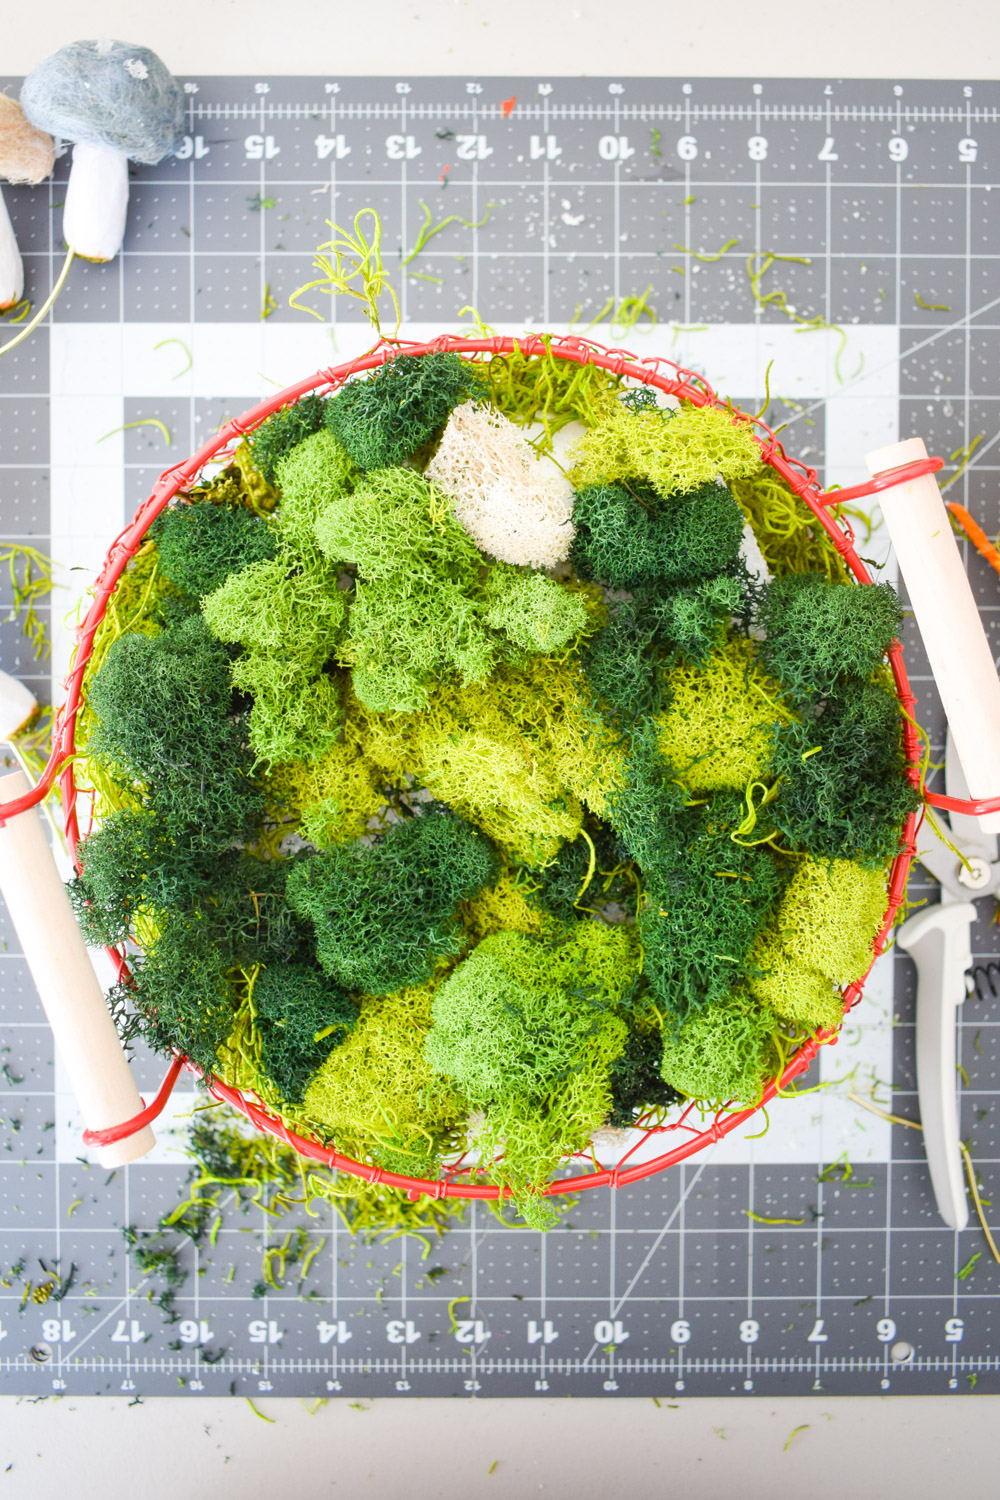
Once the sides of the basket are covered, add an entire pack of reindeer moss to the top of the basket. You’ll be setting your scene here, so make sure it’s lush and verdant.
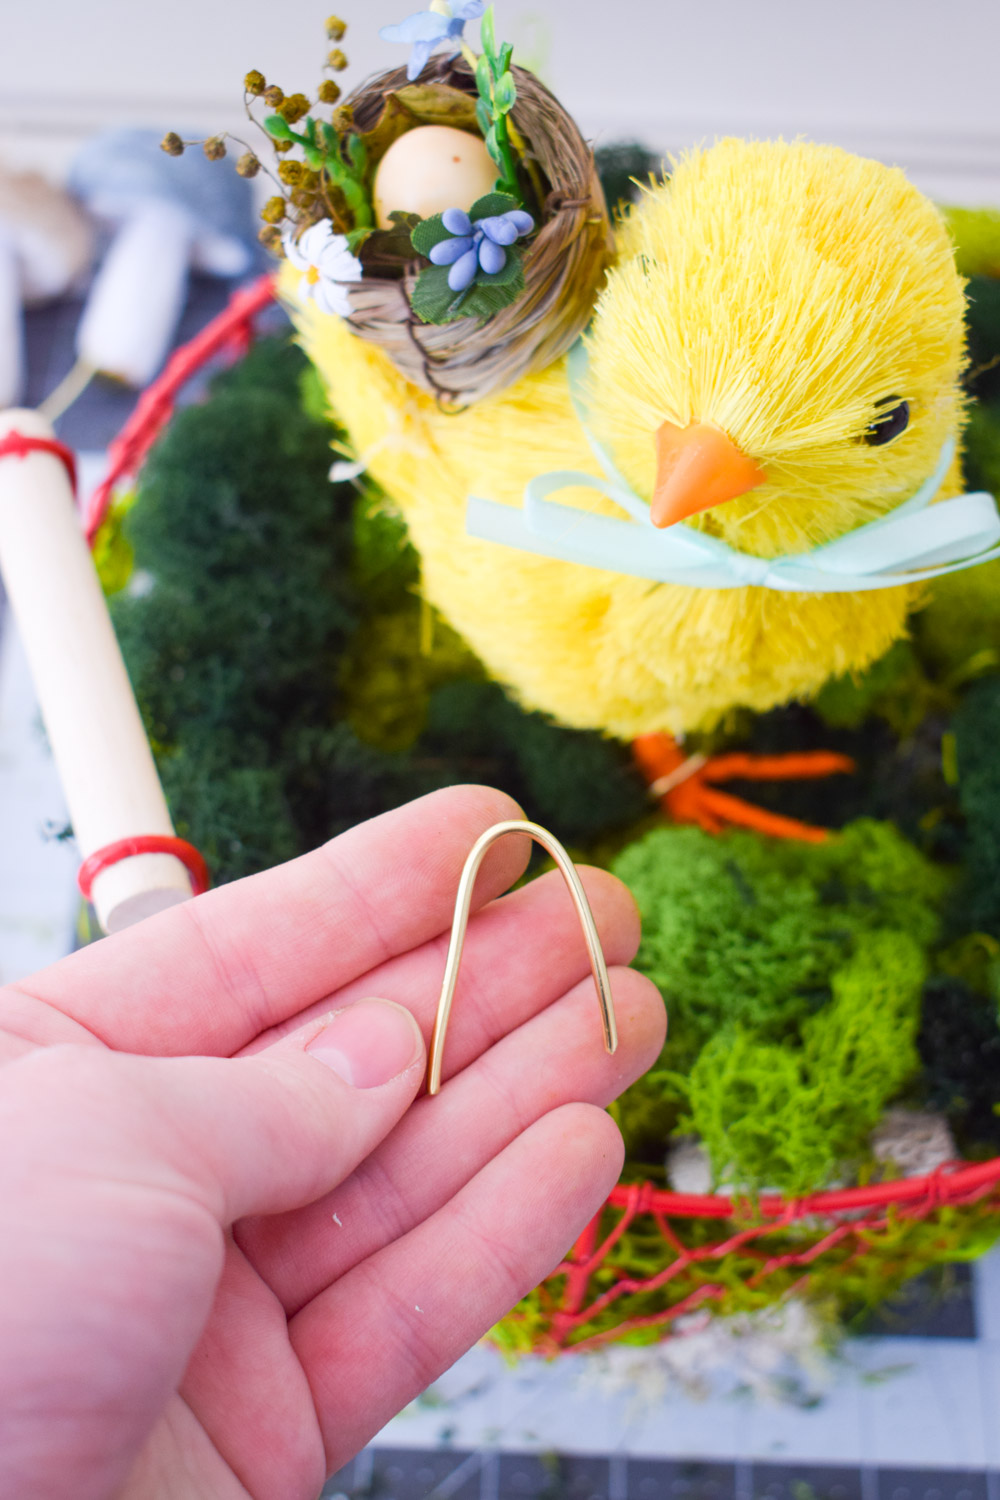
I used two pieces of floral wire – bent into Us, and snipped with my Fiskars Powercut snips – to secure the feet of the chicken at the center on the top of the cake form.
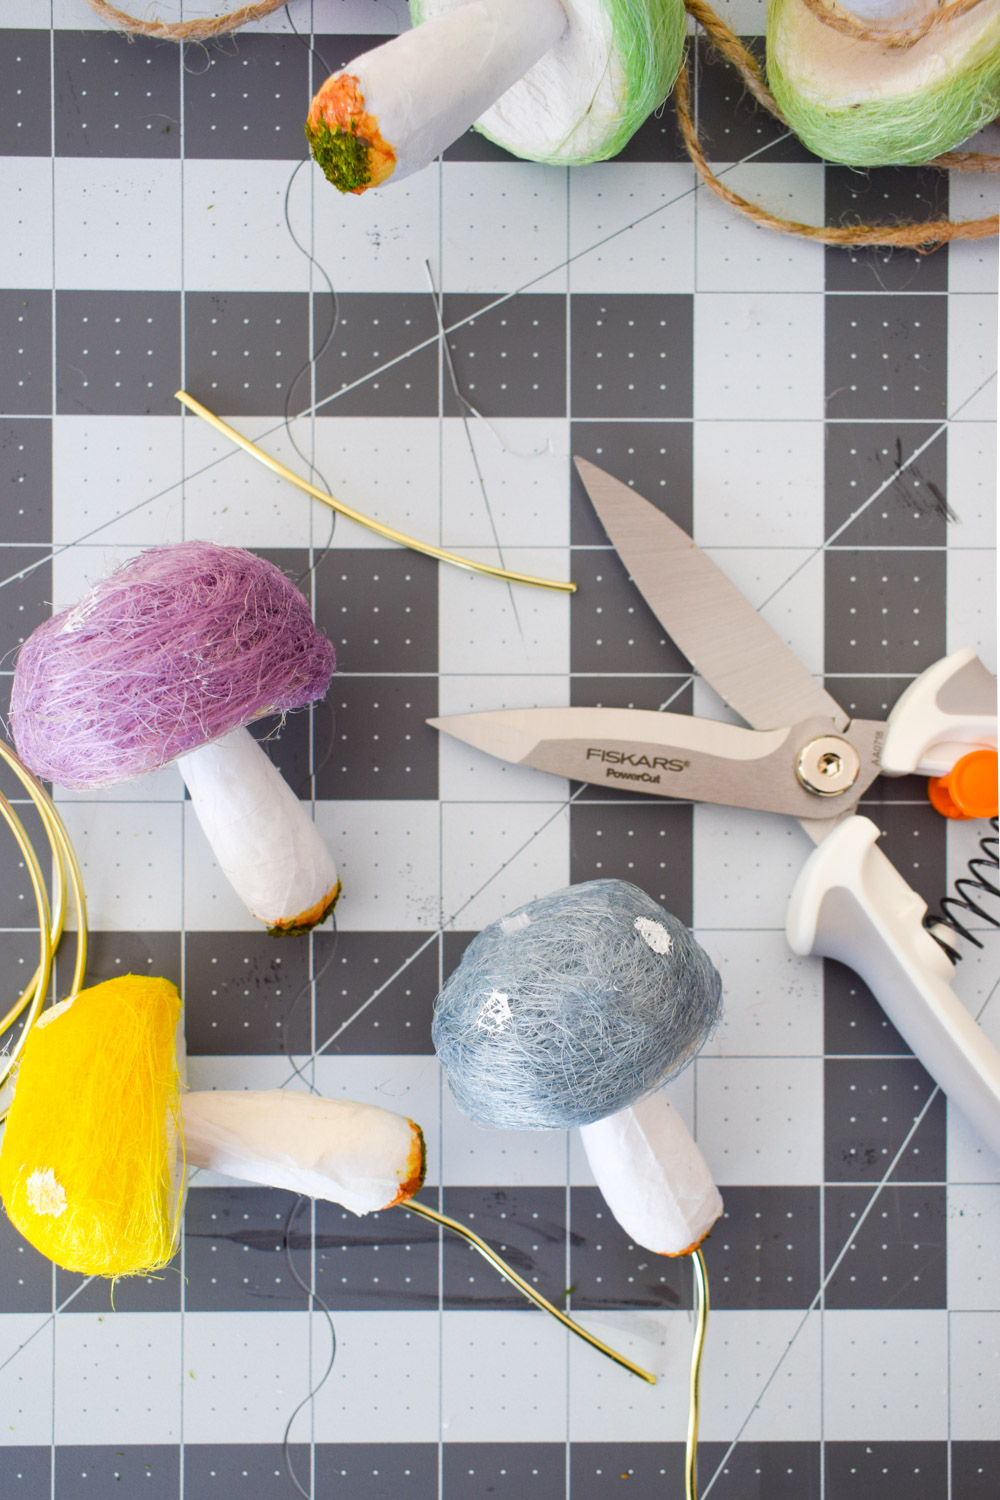
Now it’s the fun part! Creating the mushroom pics from the garland, using the floral wire and my powercut snips.
I removed the toadstools from the garland, and then cut 4-5″ lengths of the gold wire. I then carefully inserted those lenghts into the base of the mushrooms, leaving 2-3″ exposed, then secure them into place on the arrangement.
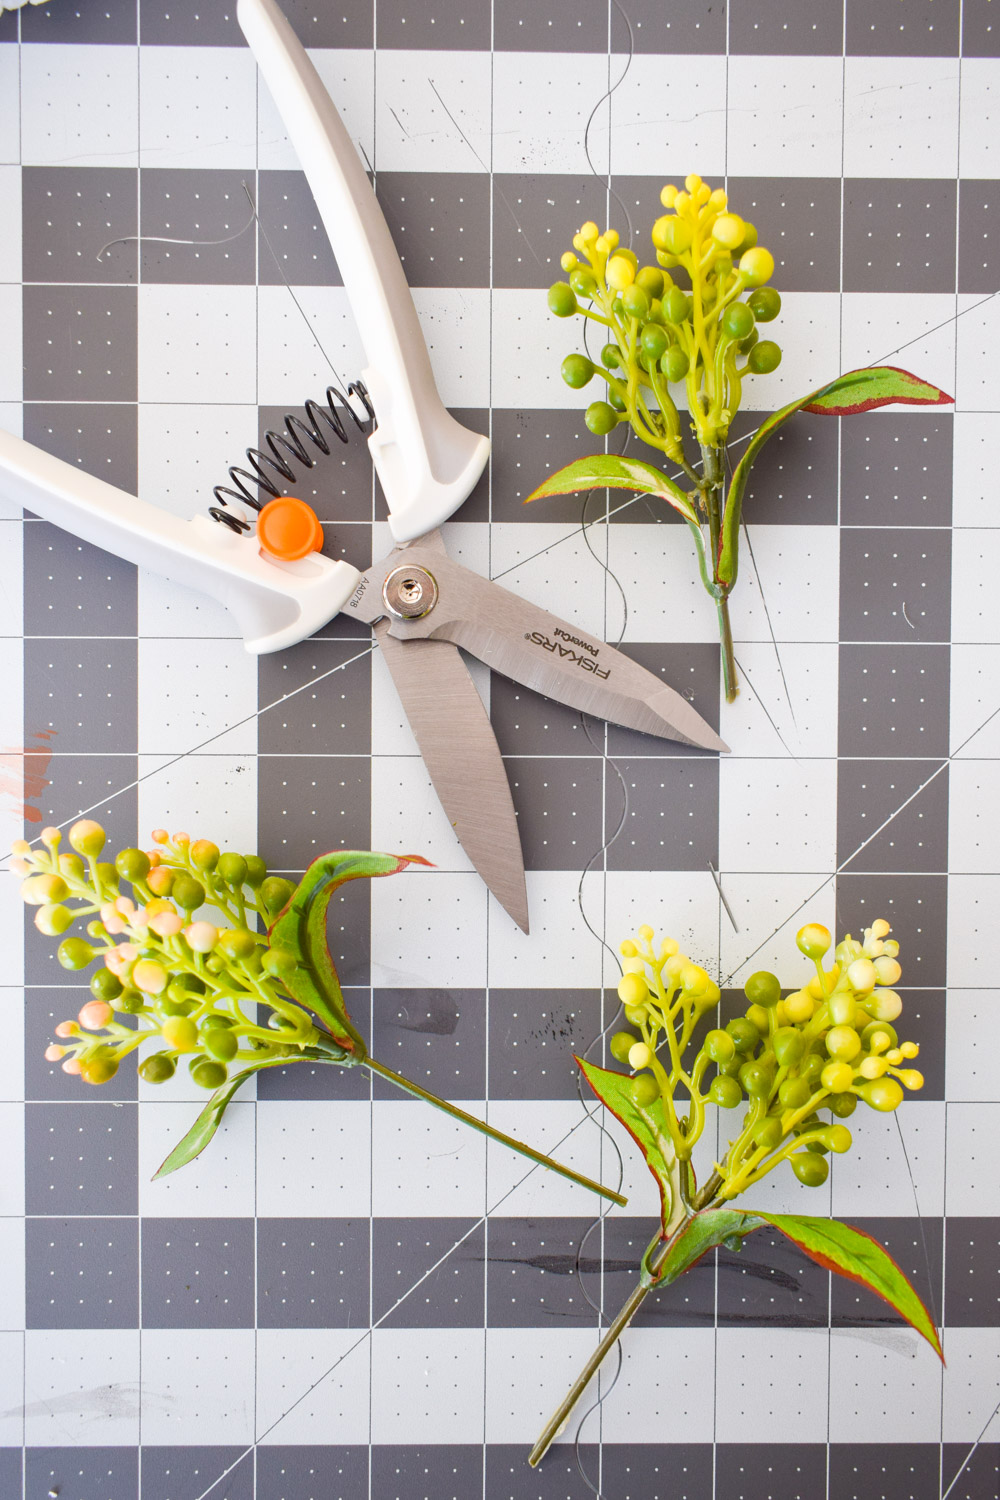
Before you do that, you’ll want to prep your florals. I absolutely love the spring floral selection at Michael’s, and was tickled to see so many adorable varieties this year. I kept the colour scheme very simple with white flowers so as to not distract from the colourful mushrooms and egg.
Check out my DIY Rifle Paper Co. Inspired 3D Floral Art.
I trimmed each stem off the arrangement using my power cut snips. They cut through floral wire like a dream!
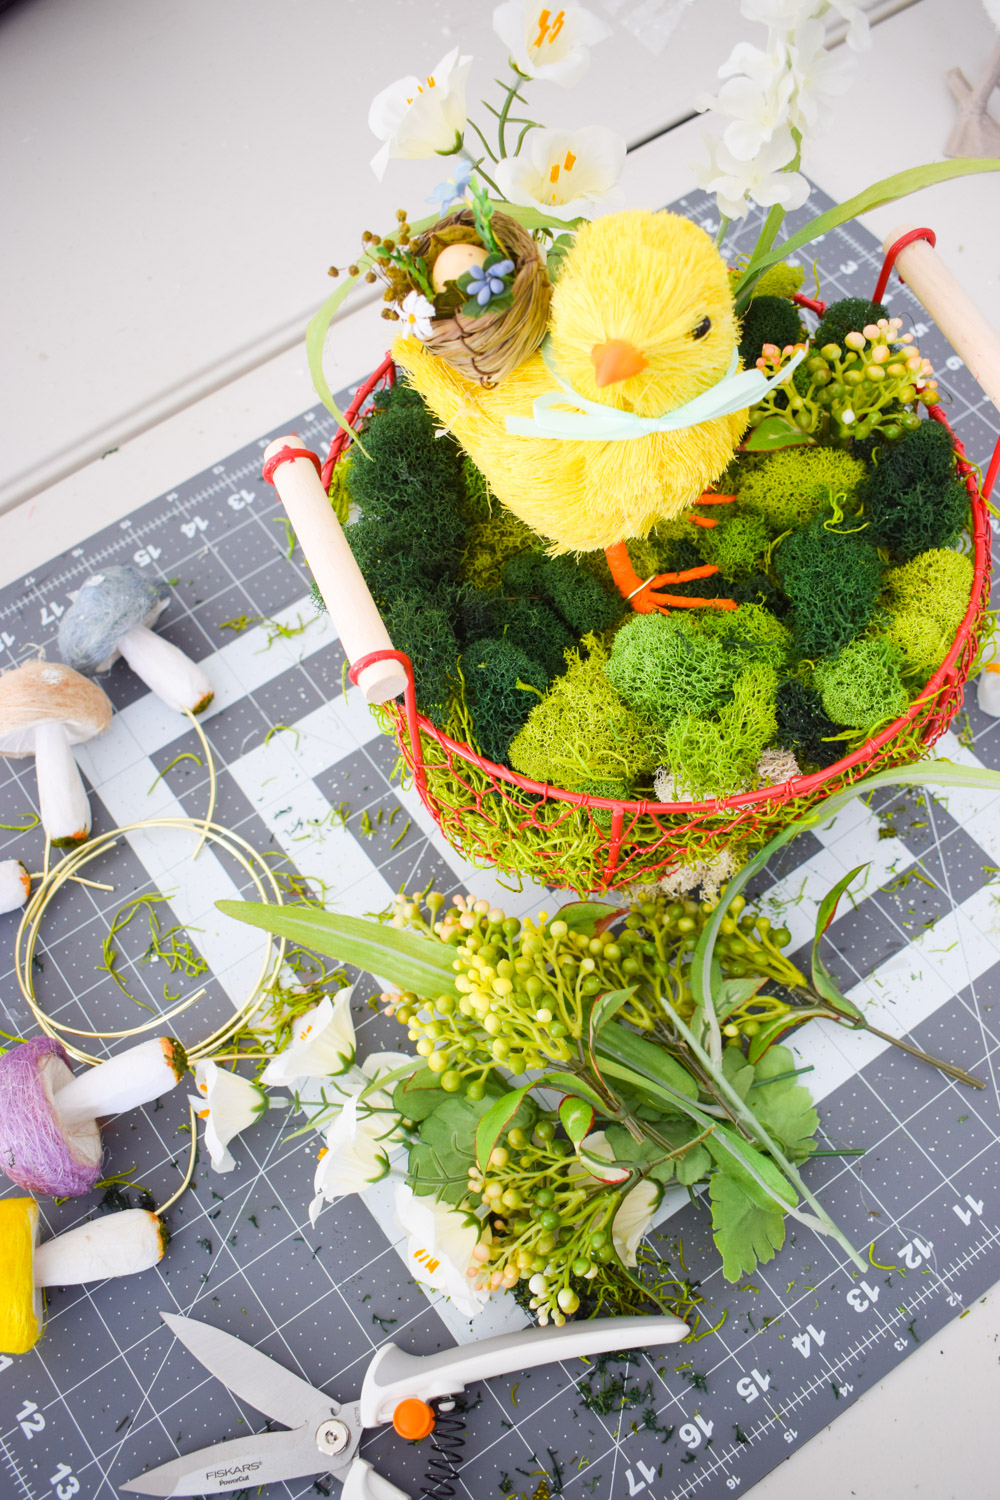
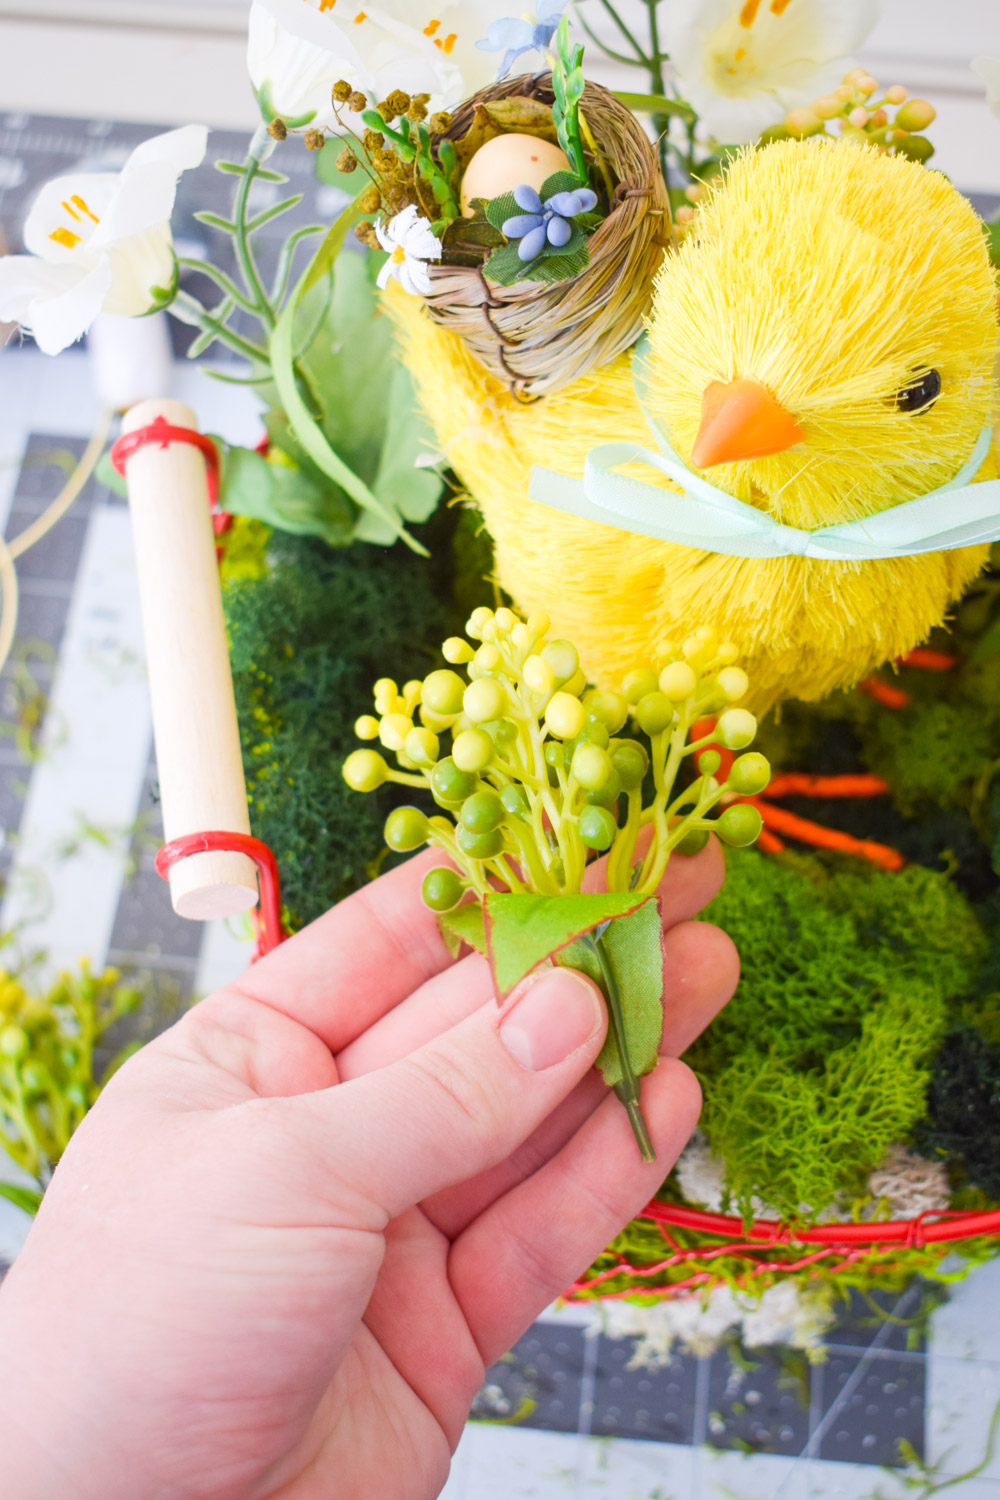
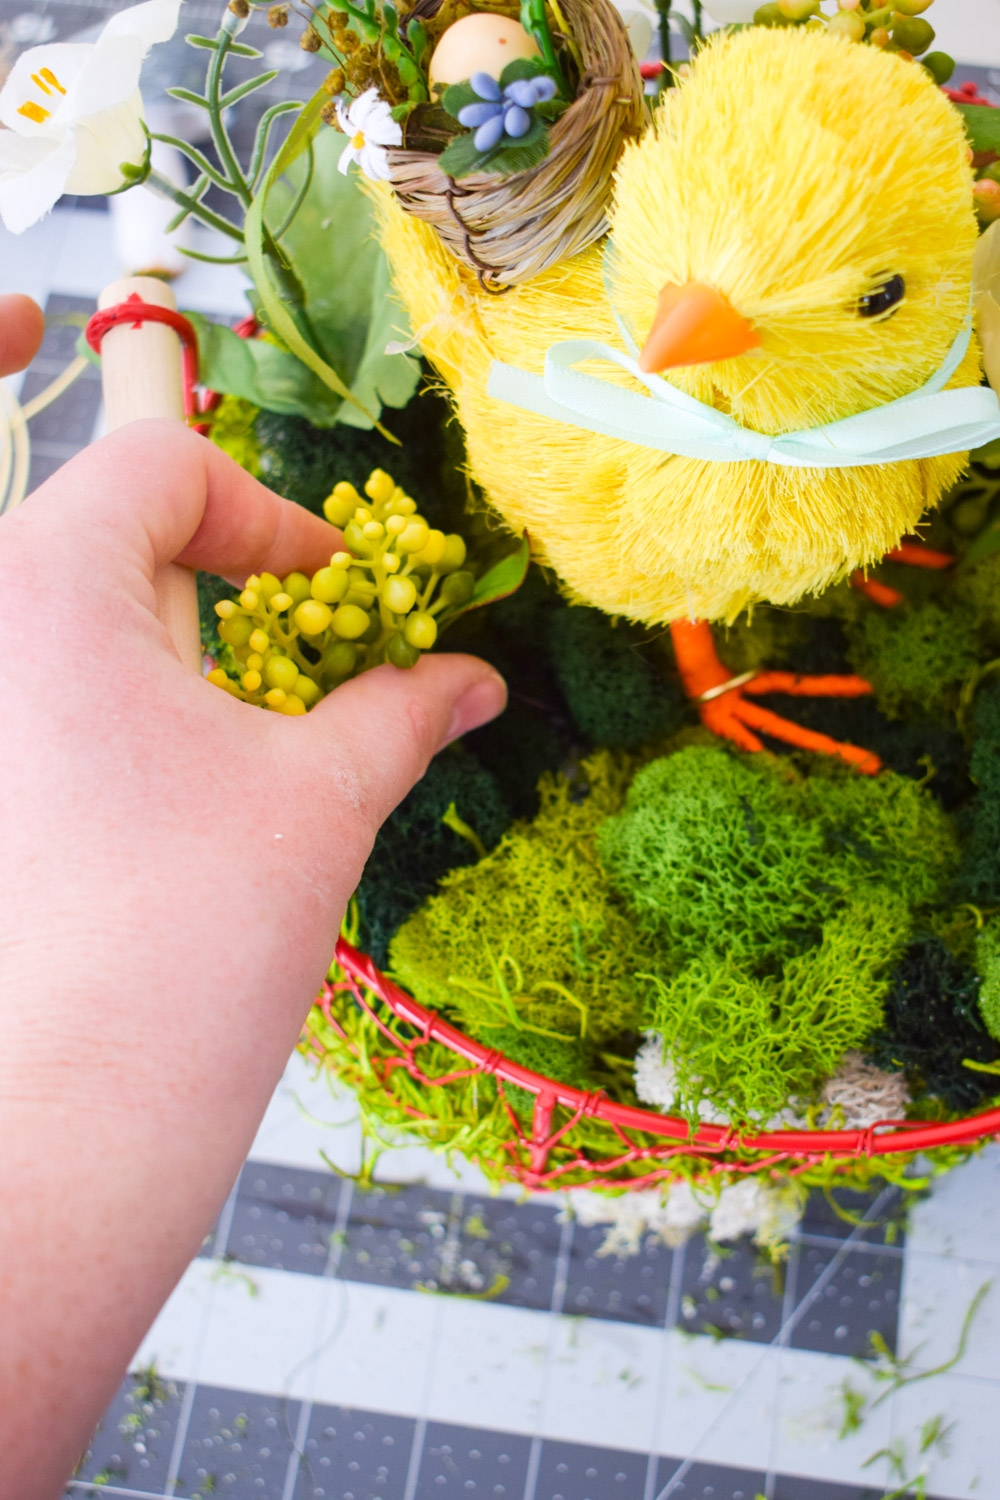
Because I spent some time with the foam below the moss, it was super easy to insert the floral stems. No fiddling, no fussing. They just went straight in. I then added the mushrooms where a pop of colour was needed. Almost done!
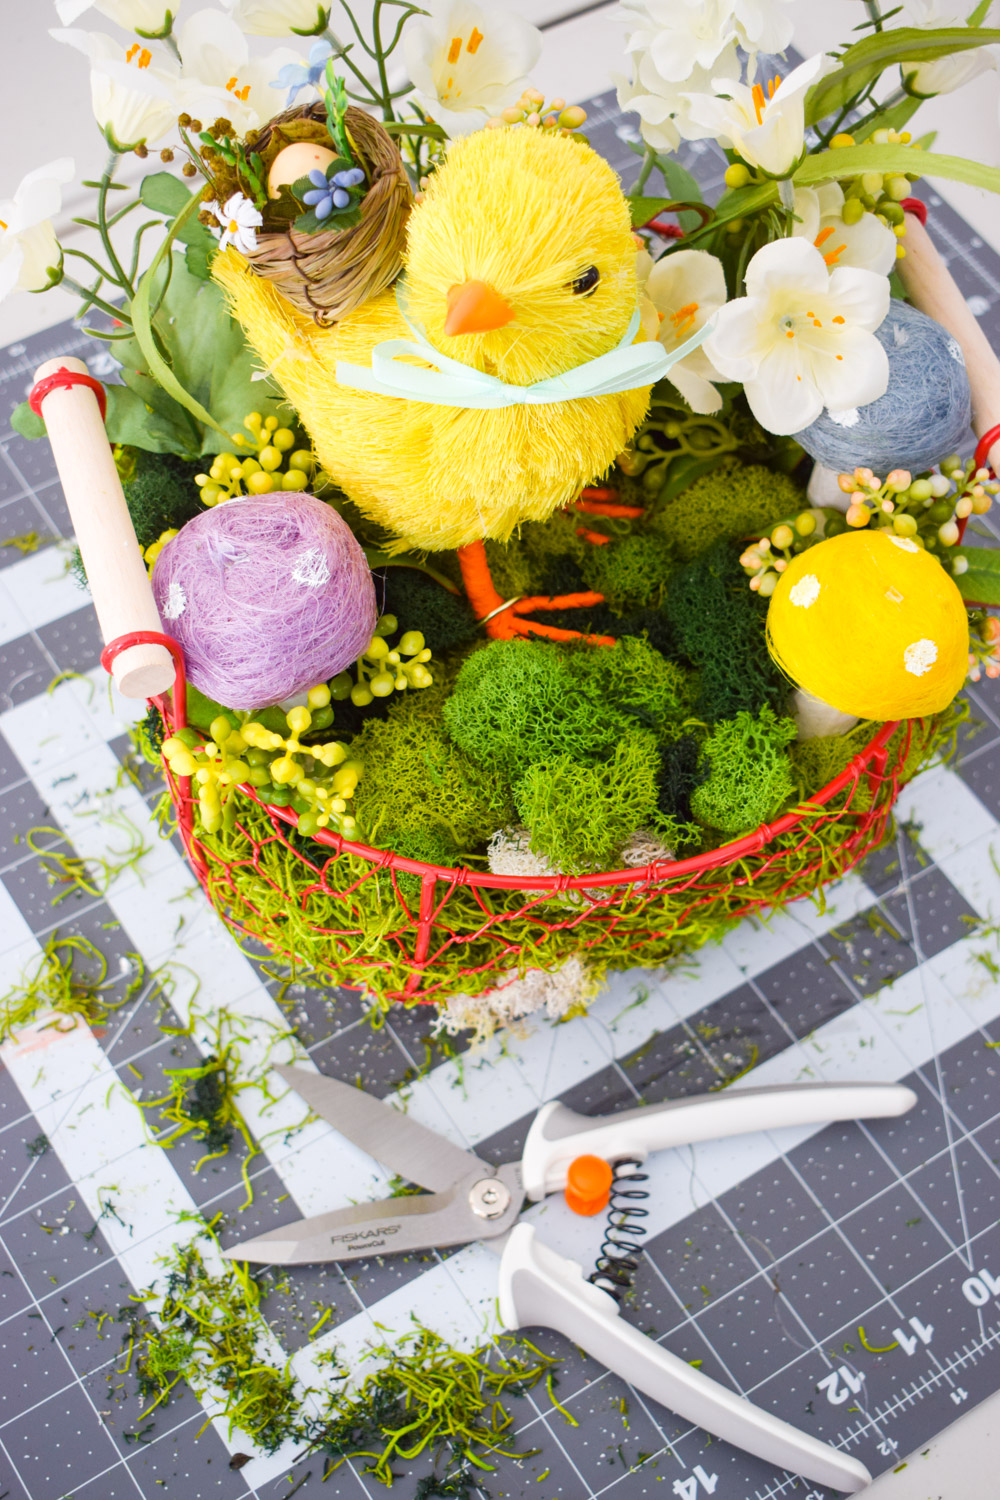
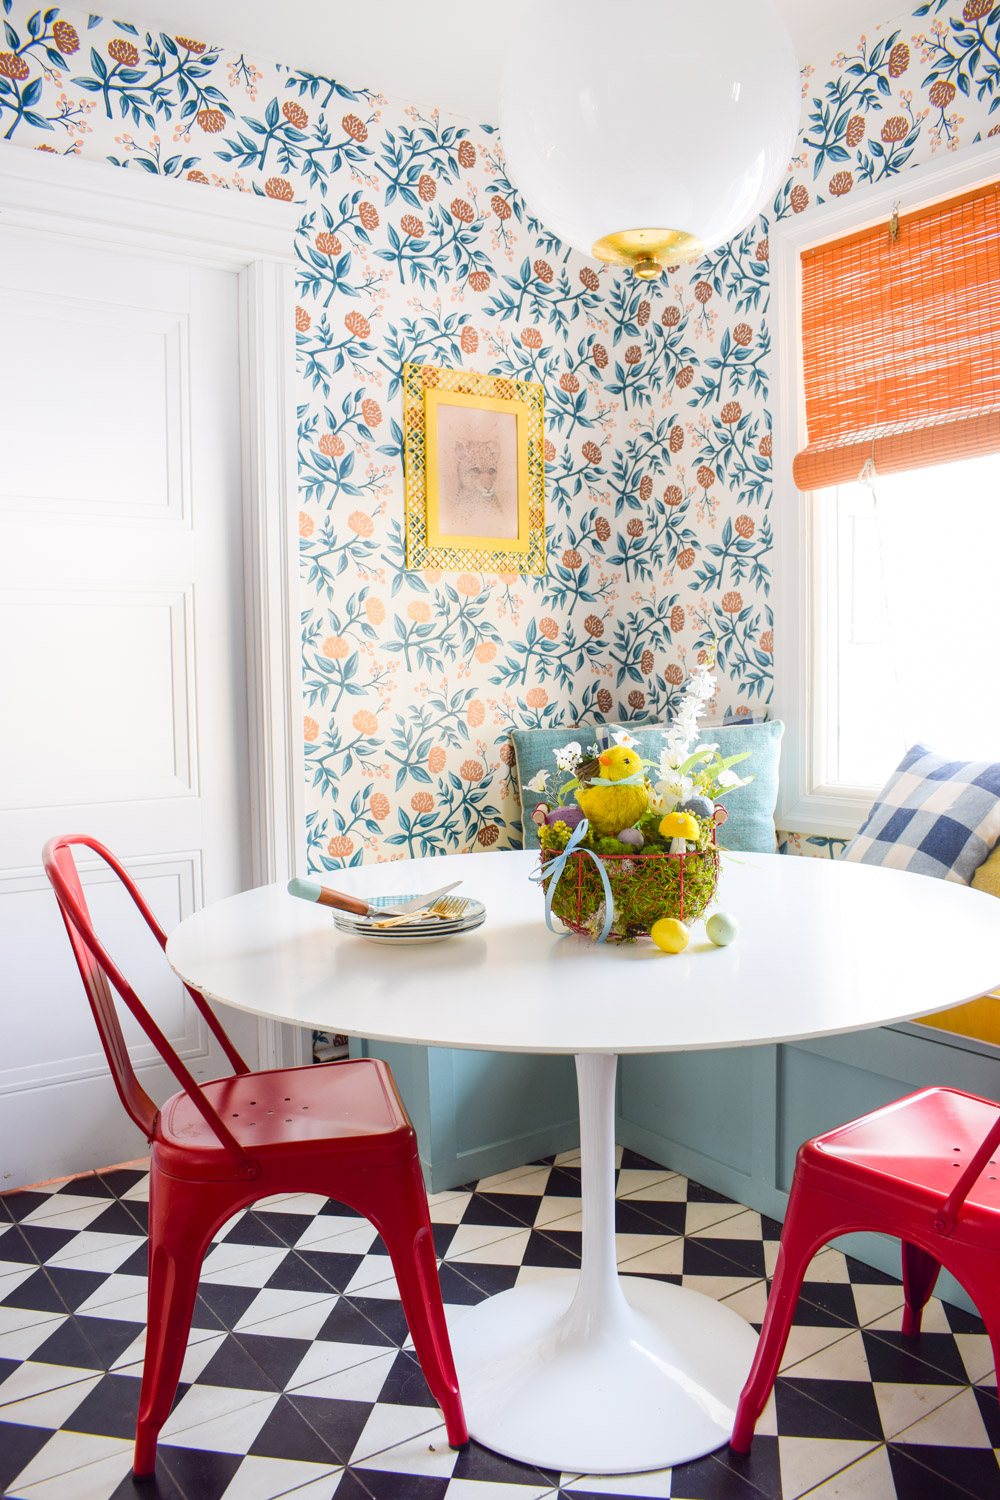
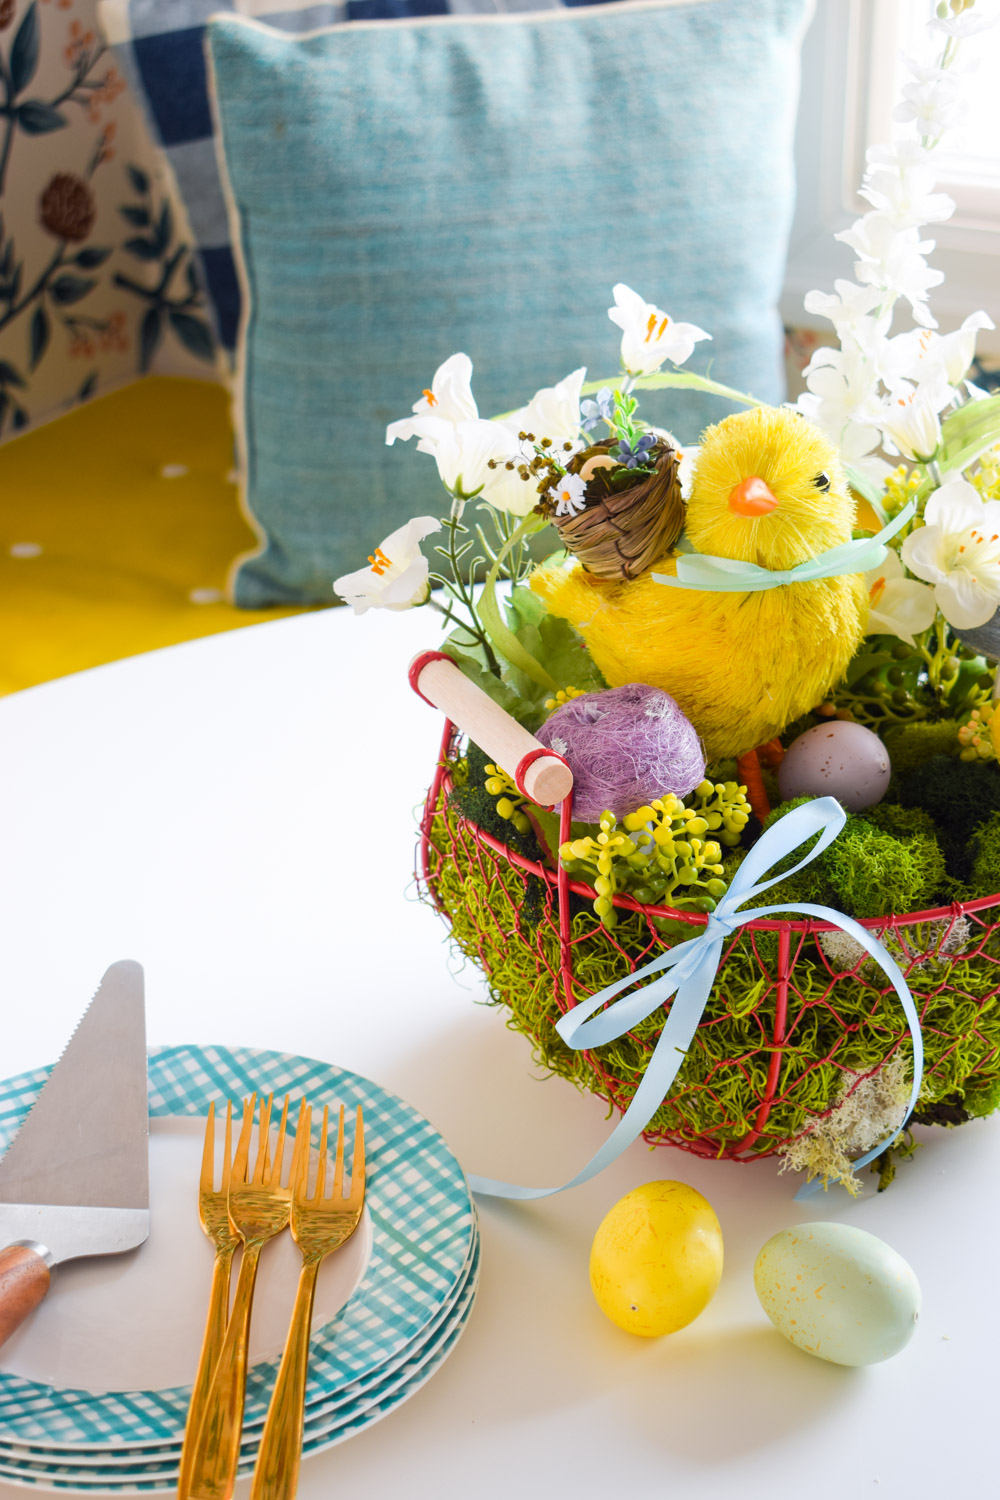
Don’t forget a cute blue bow off one of the handles, before dispalying. This will at the center of our family dinner on easter, and I look forward to seeing the look my daughter’s face when she lays eyes on it for the first time.