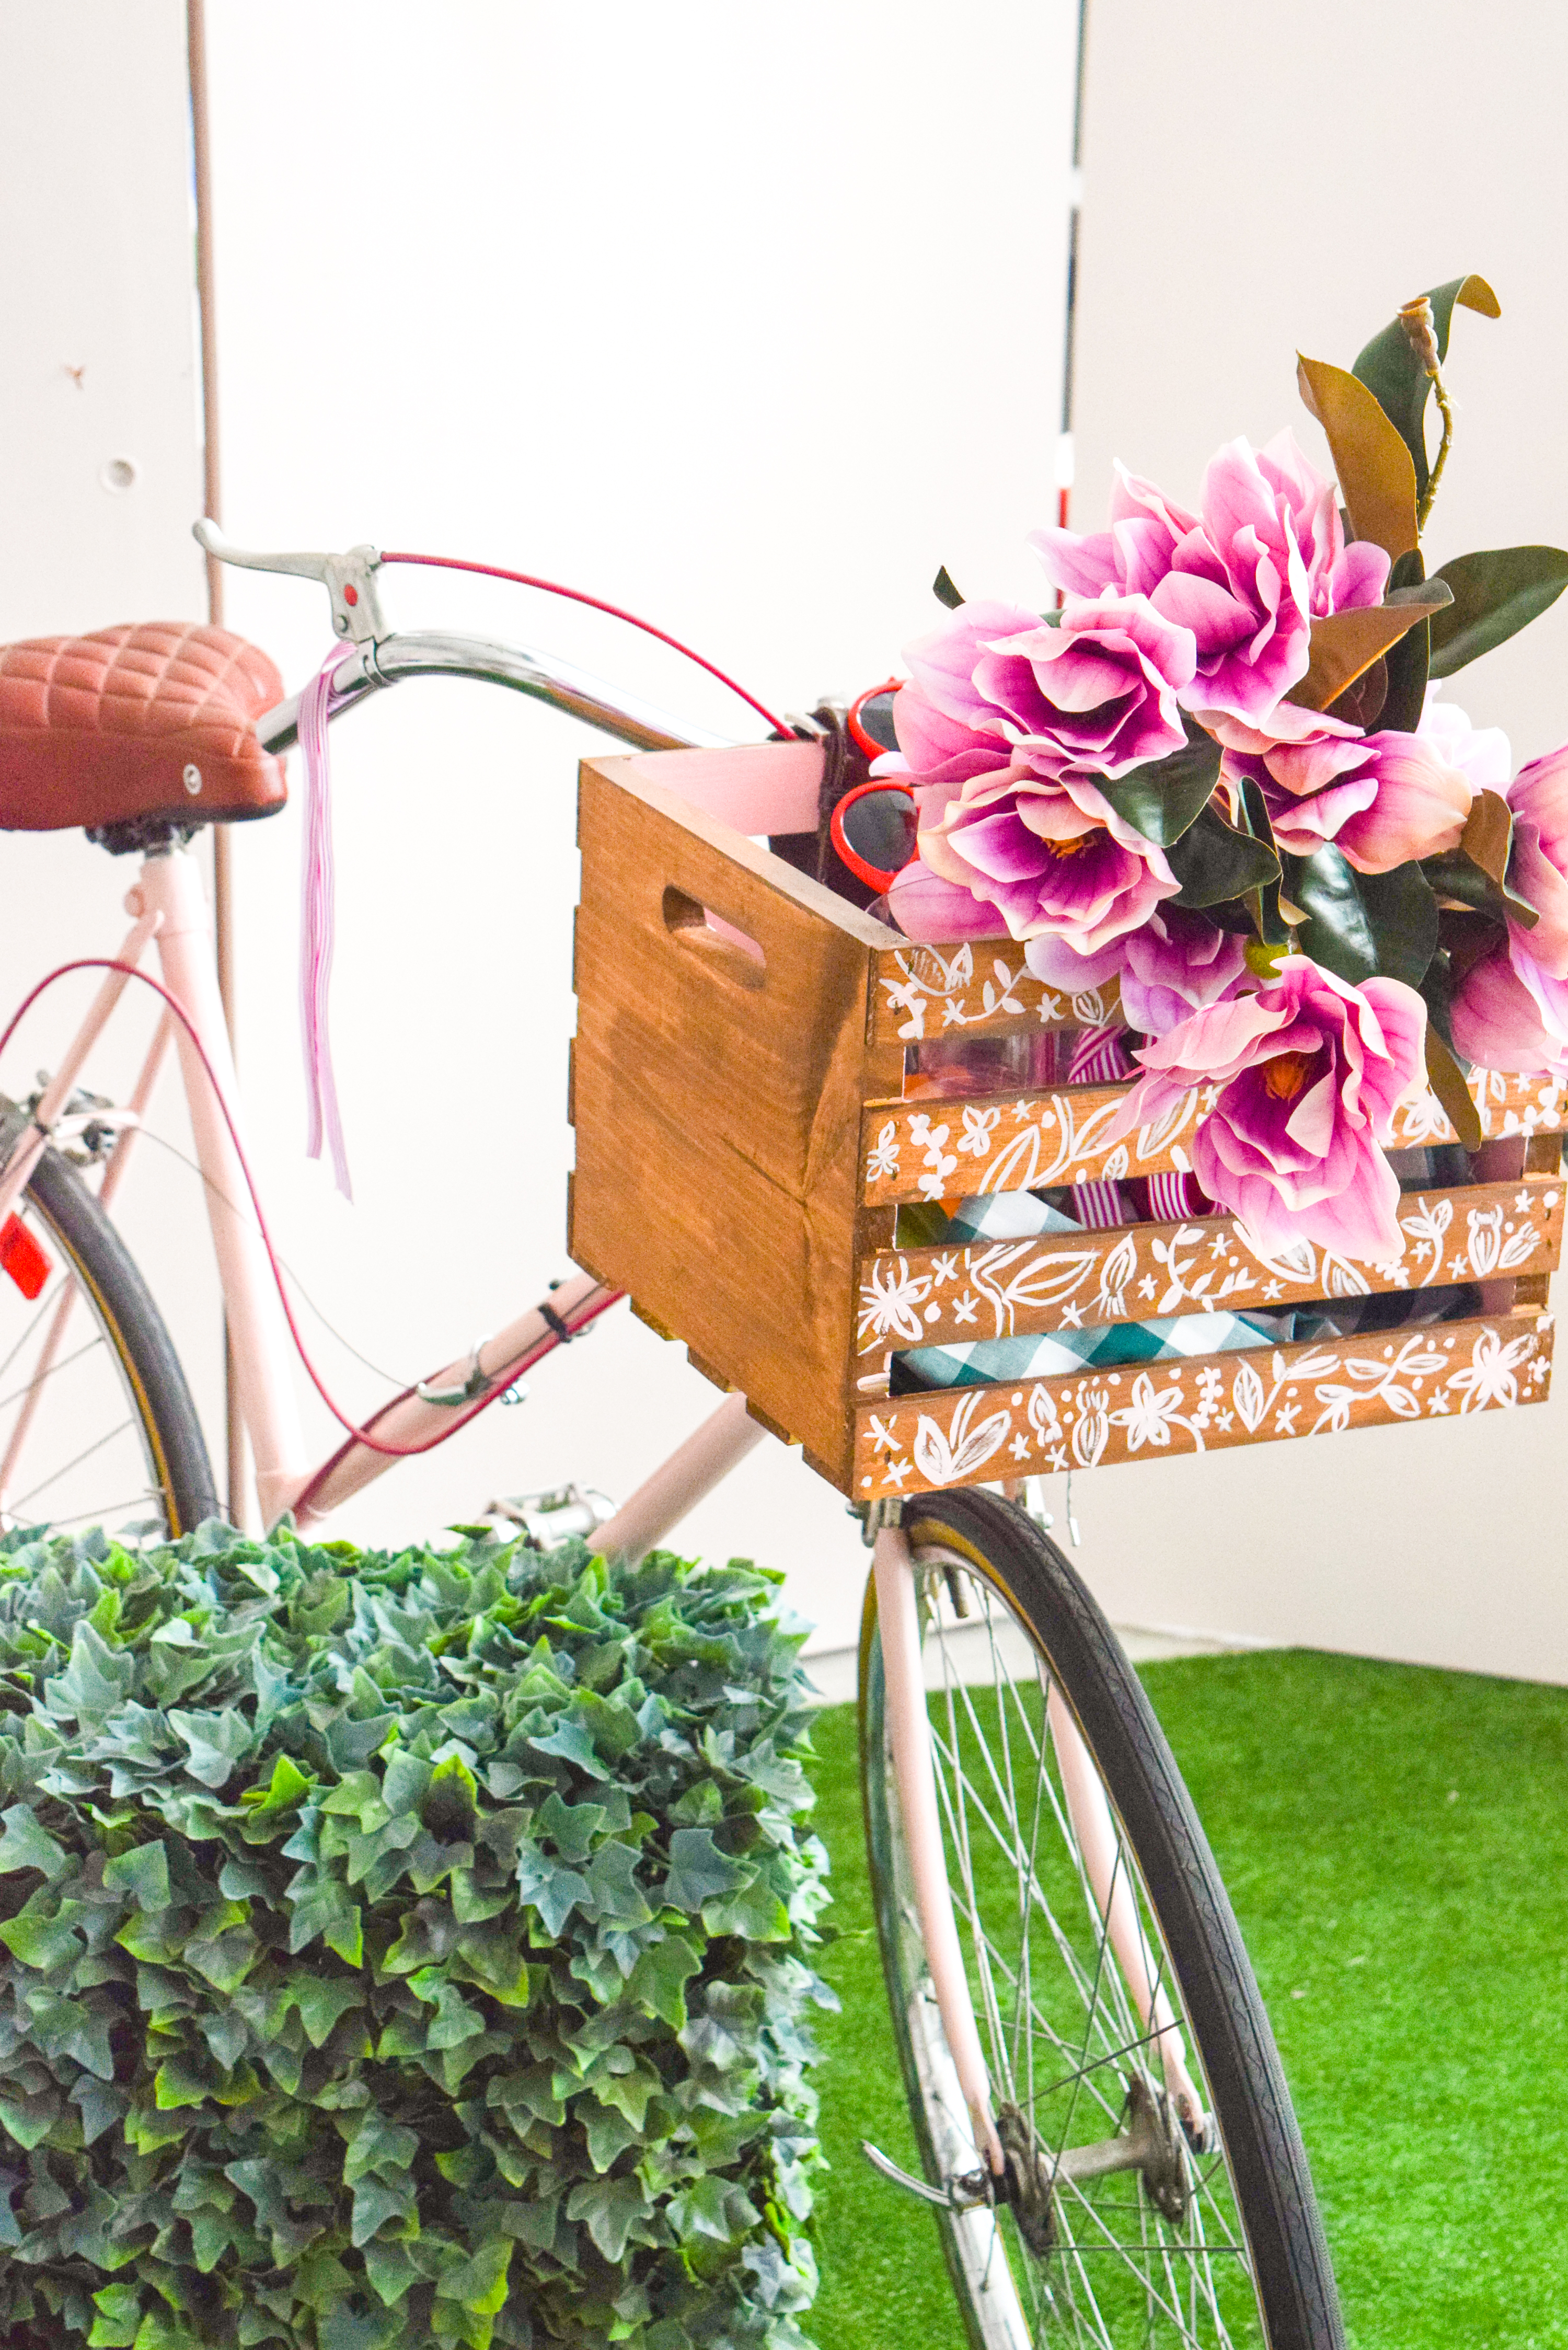
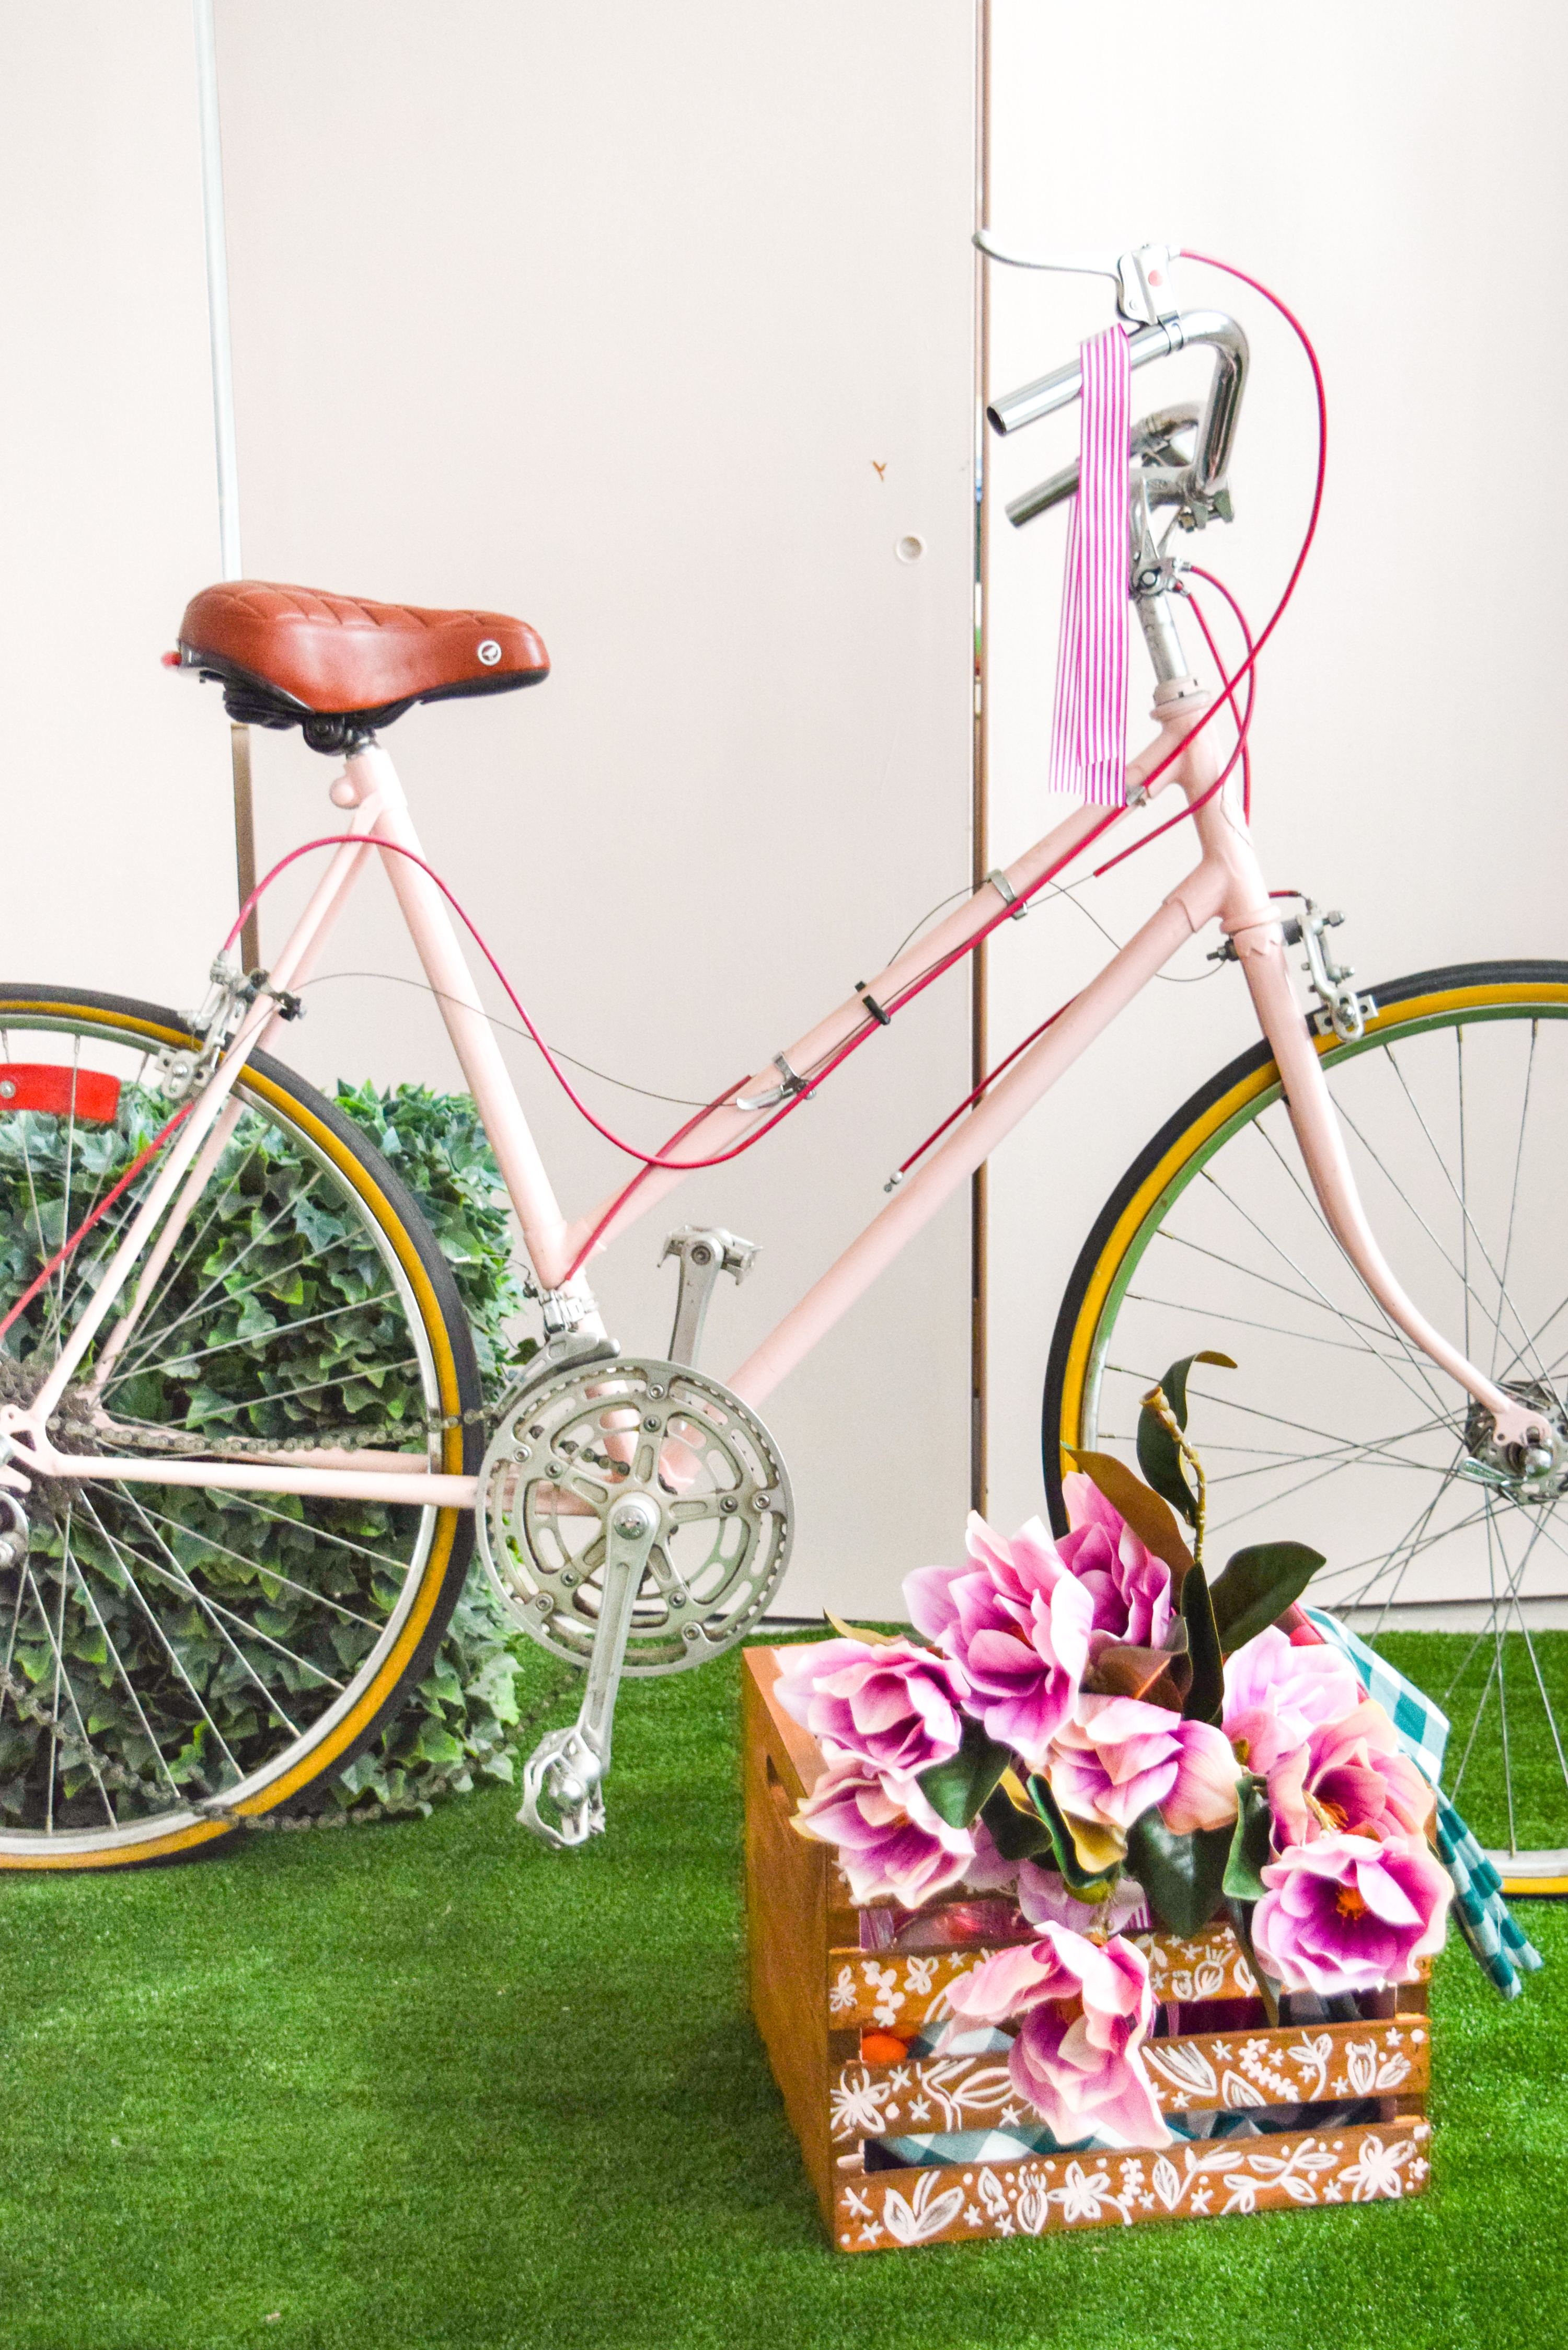
Remember our spray paint bike makeovers from last summer? You can see my bike // here // & Dan’s bike // here //. Well, mine has survived the winter (barely) and I wanted to get it road ready with a fun summer essential – a DIY bike picnic crate! While we don’t do many picnics, we have been known to enjoy some. Last summer we had some delicious lobster rolls picnic style, while in Martha’s vineyard, and with this DIY I’ve got a few more planned.
*Crates & Pallet sponsored this post, but all thoughts are my own. Thank you for supporting the brands that make PMQ for two possible.

This DIY Bike Picnic Crate is also a fabulous crate to have on hand for trips to the market, a nice ride across town, and just general errand running. It’s easy to put on the bike, and just as easy to take it off, so you don’t have to worry about being stuck with it when you need to go for speed.
Sure, I could have just purchased a basket and called it a day, but I like making things, and the prospect of customizing mine was too good to pass up.
*The following product links are affiliate things. Thank you for supporting the brands that make PMQ for two possible.
Materials required for a DIY Bike Picnic Crate
- Wood Crate from Crate & Pallet which you can snag // here // or // here //
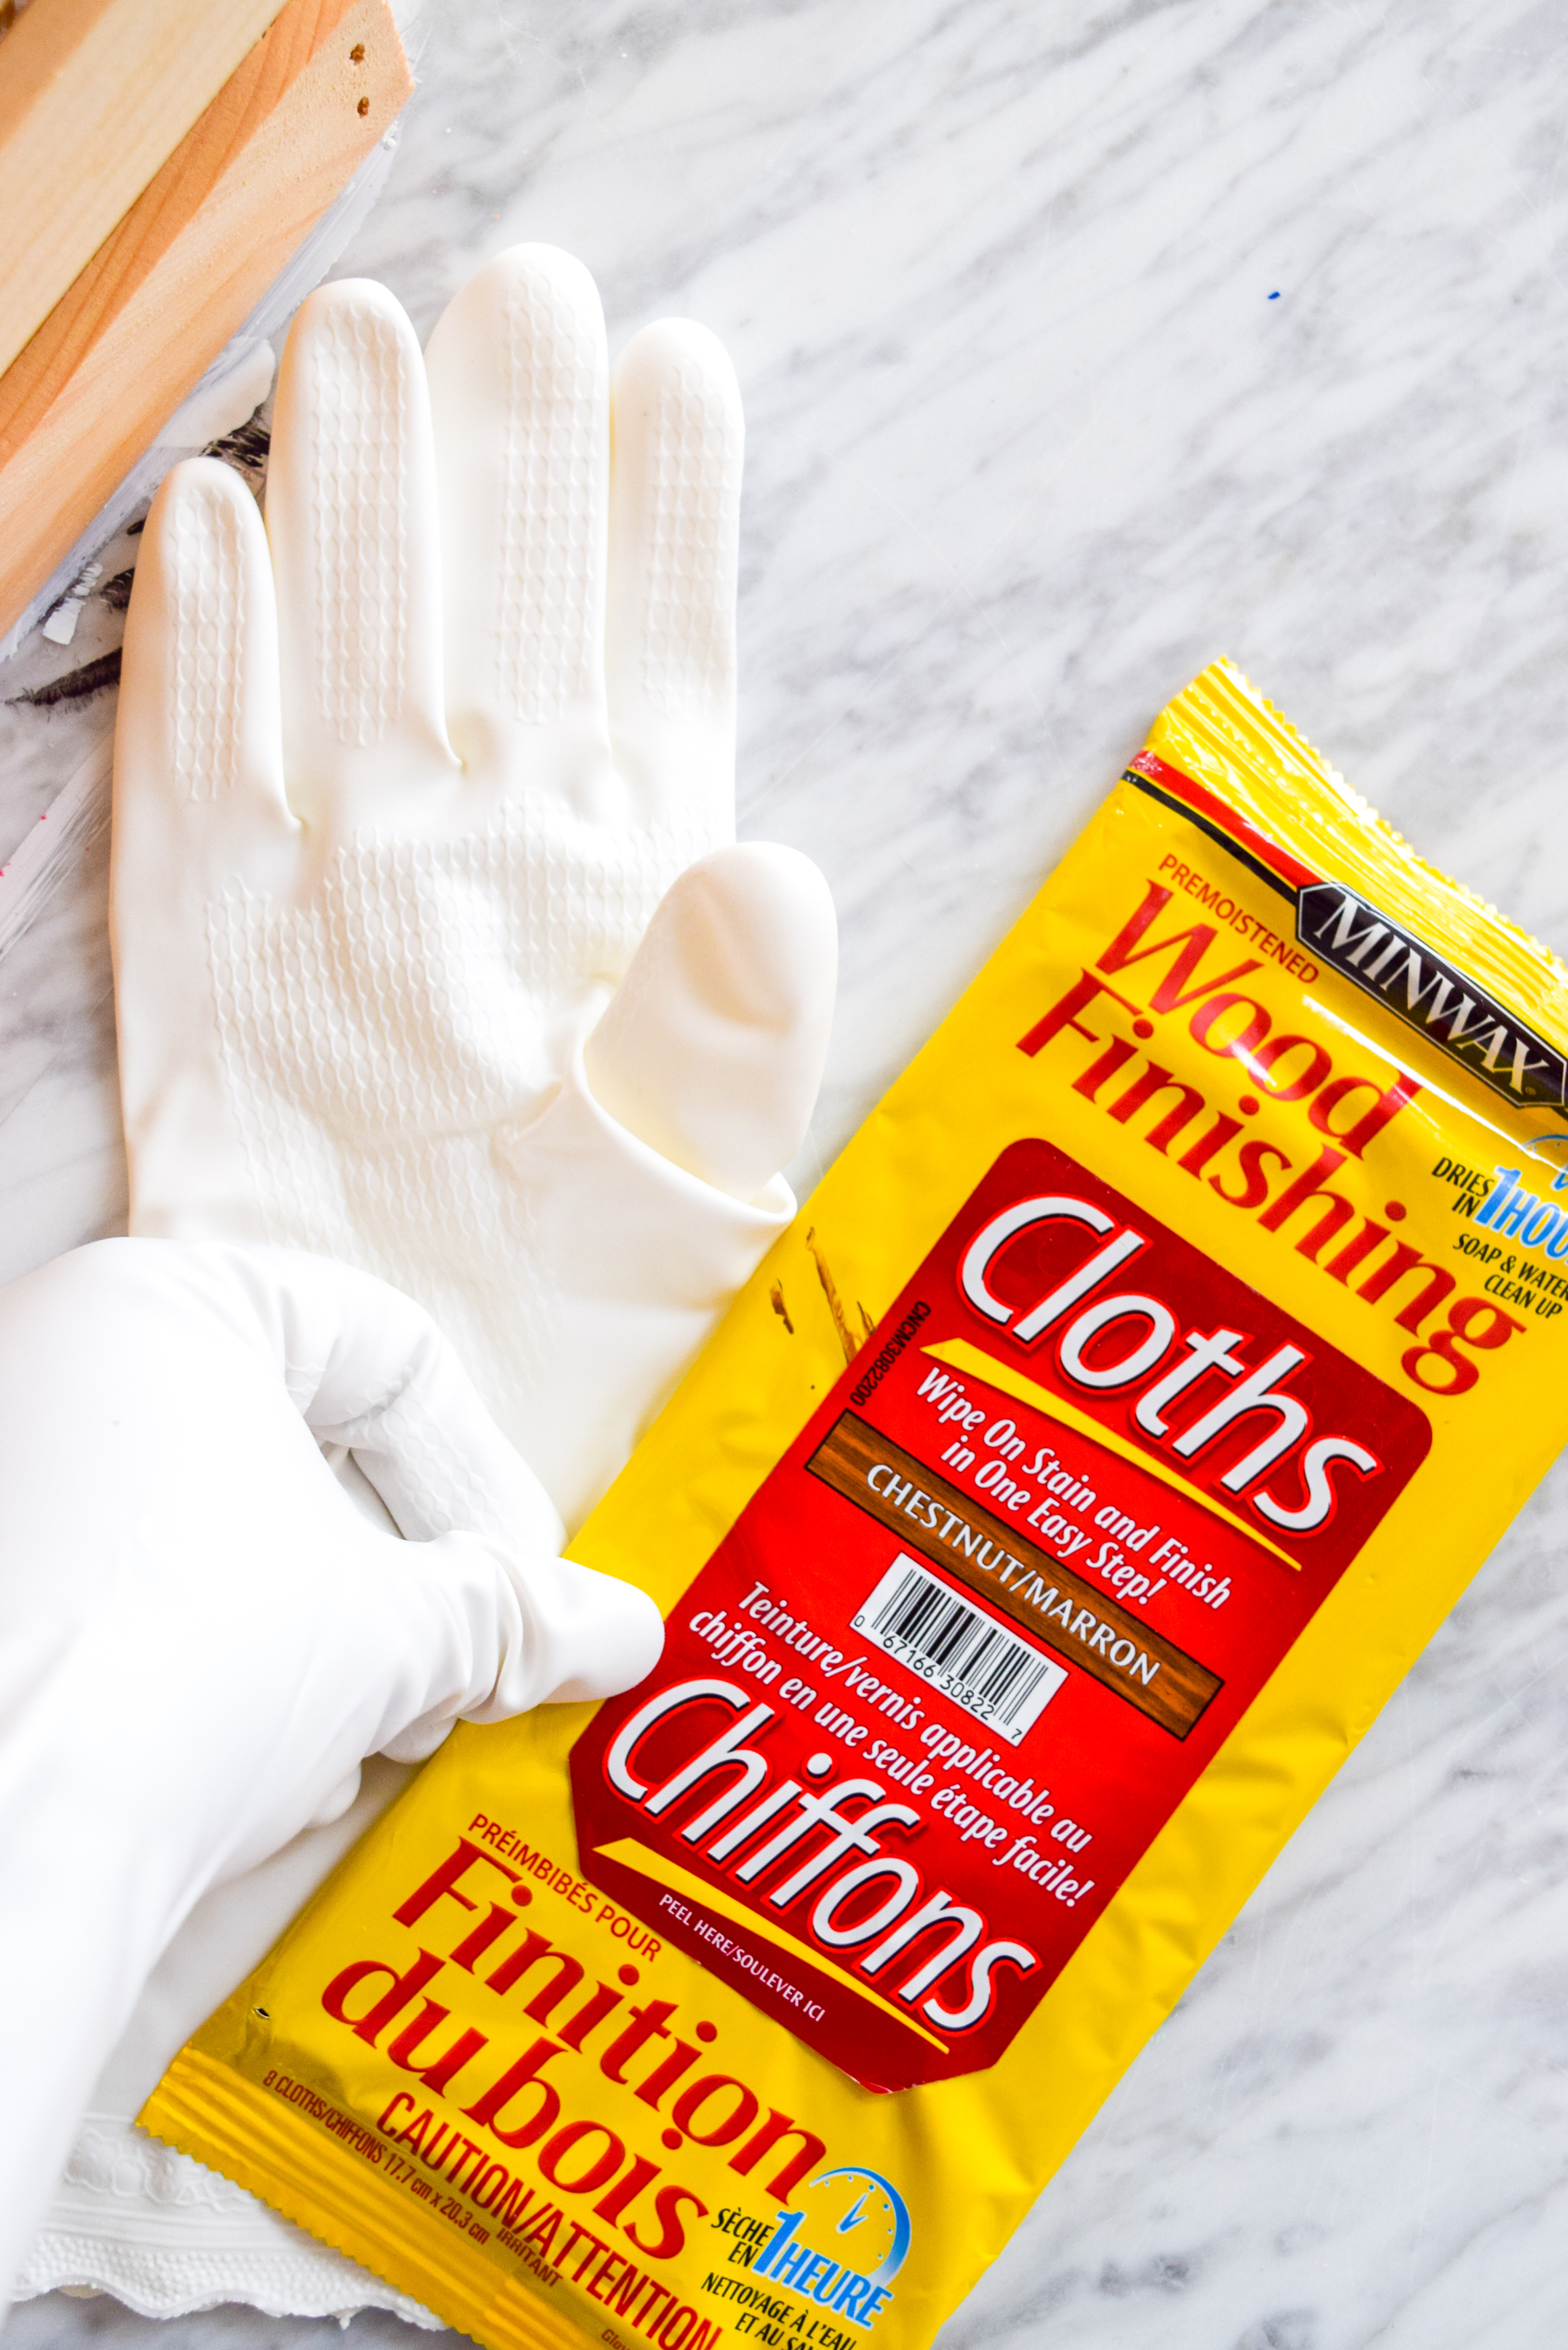
- Minwax Wood Stain Cloths – I used Chestnut as the colour since it matched the seat on my bike.
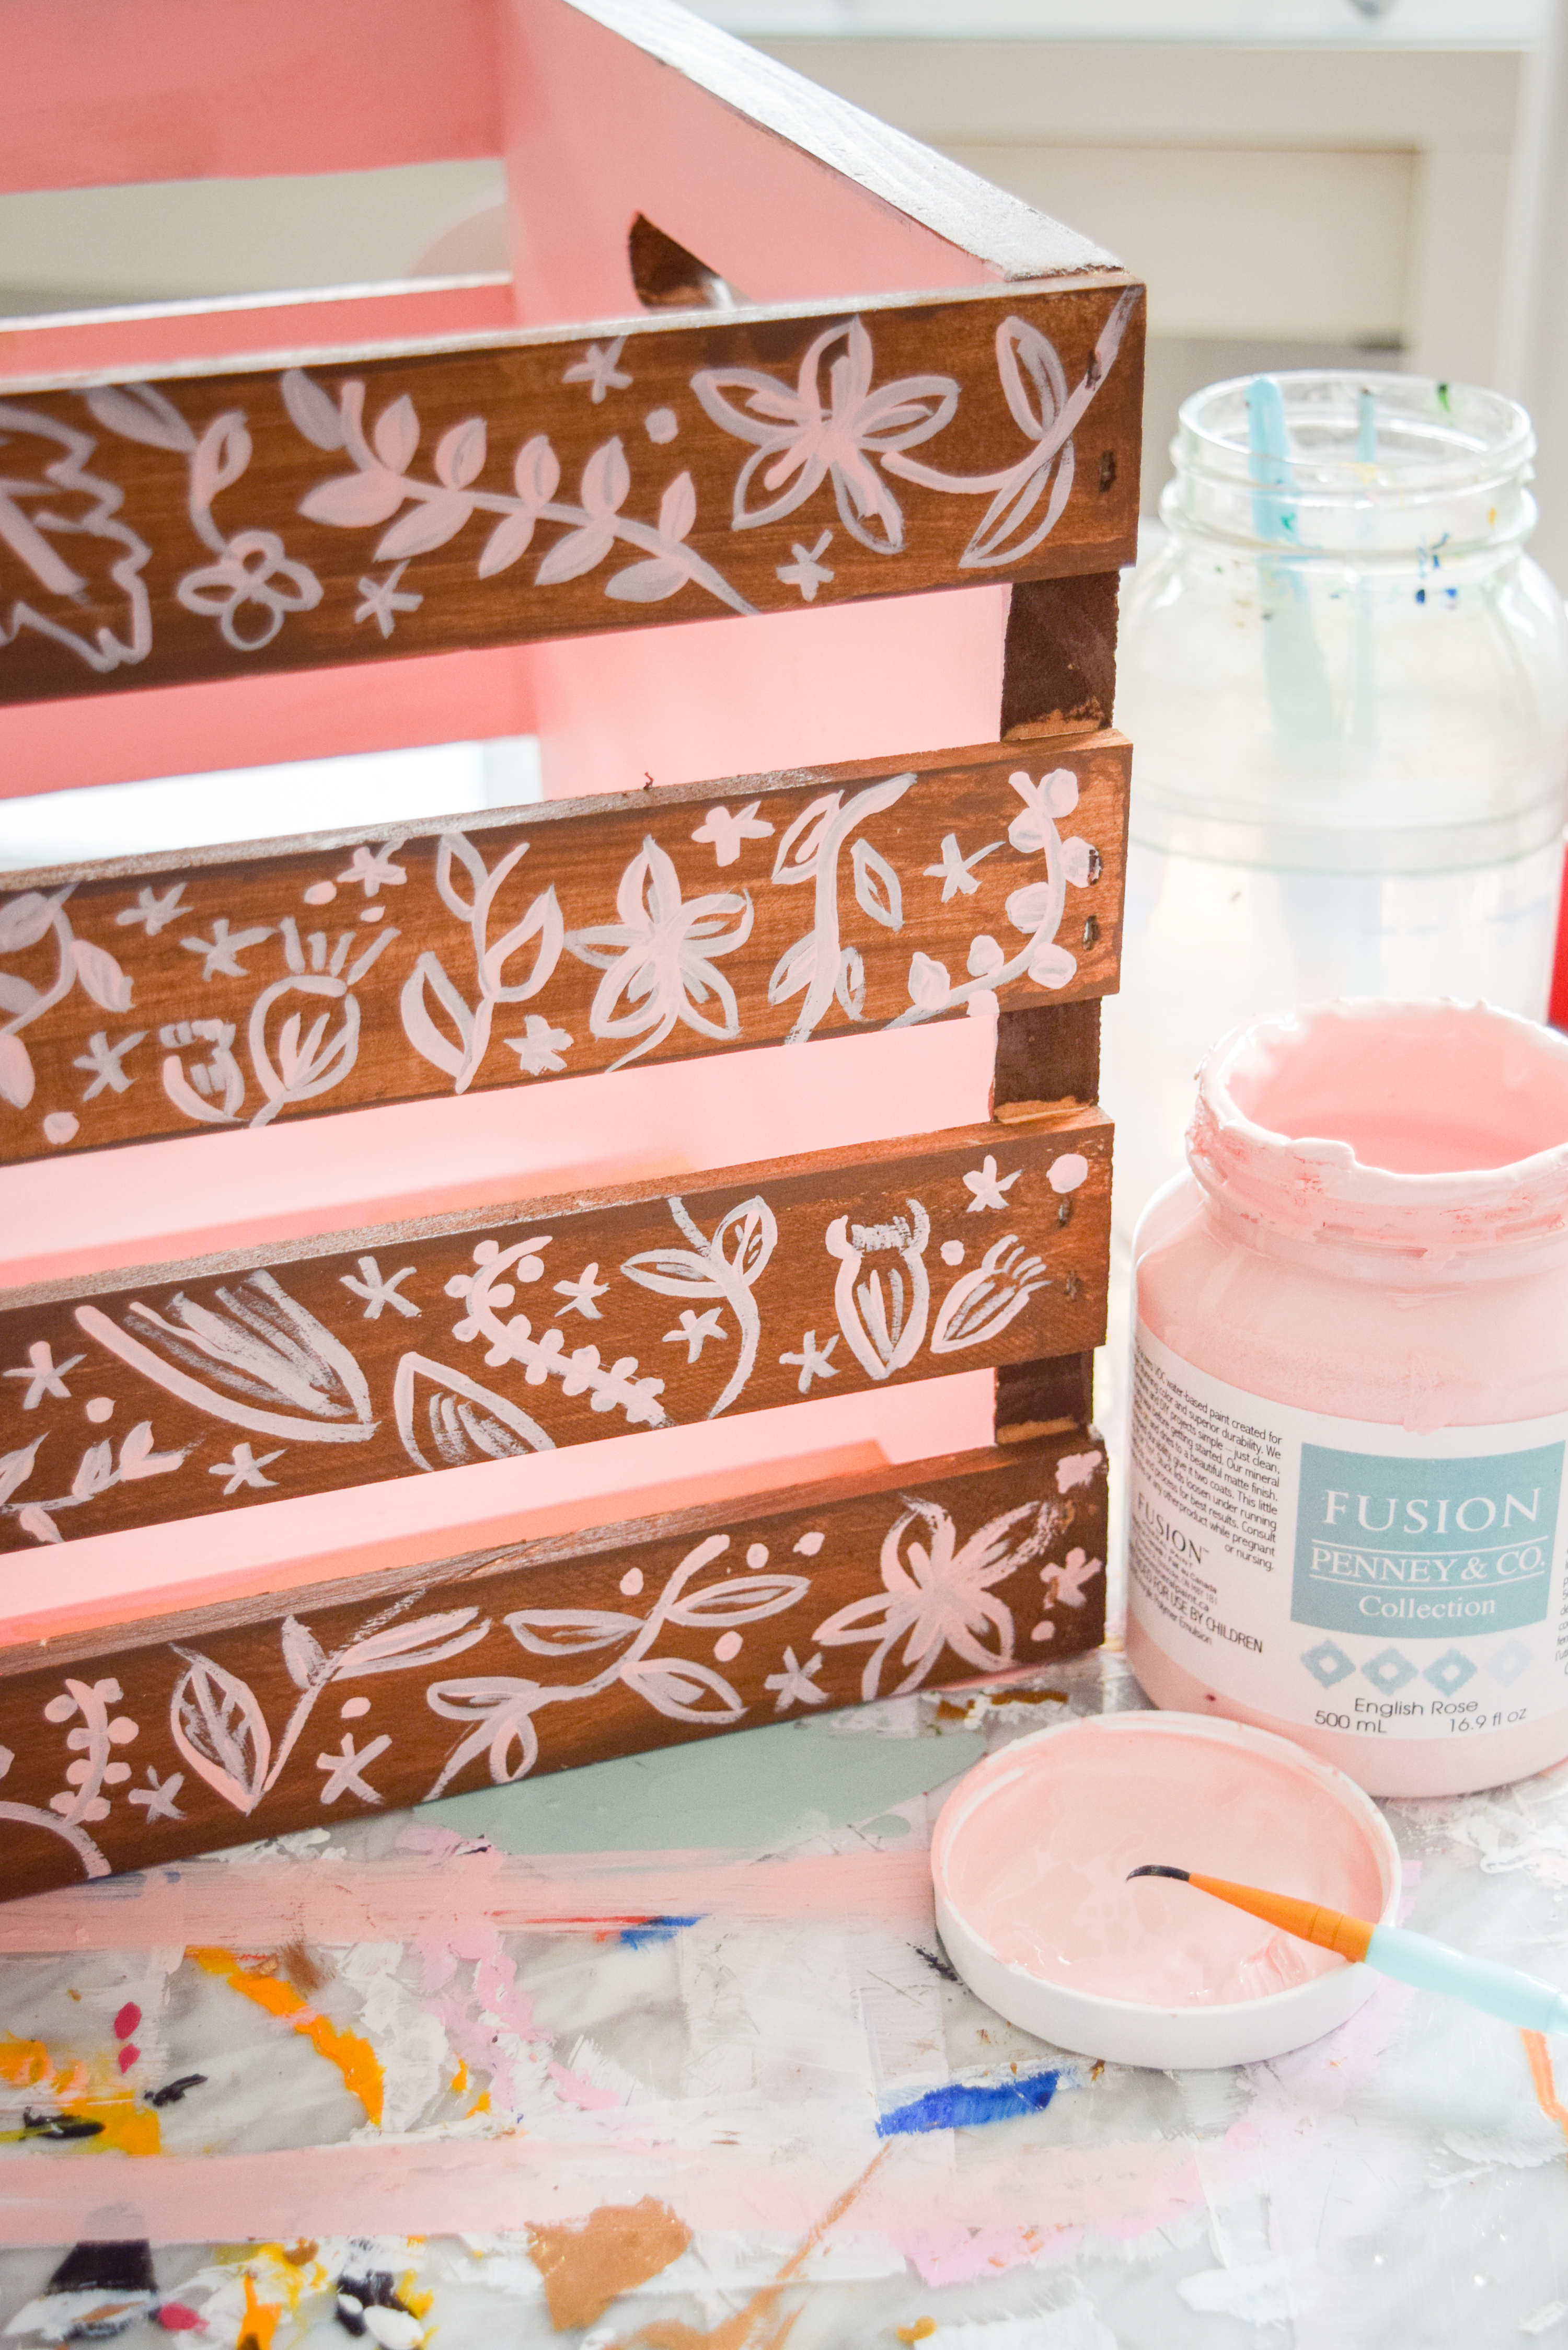
- Fusion Mineral Paint in English Rose
- Bristle brush and detail brush
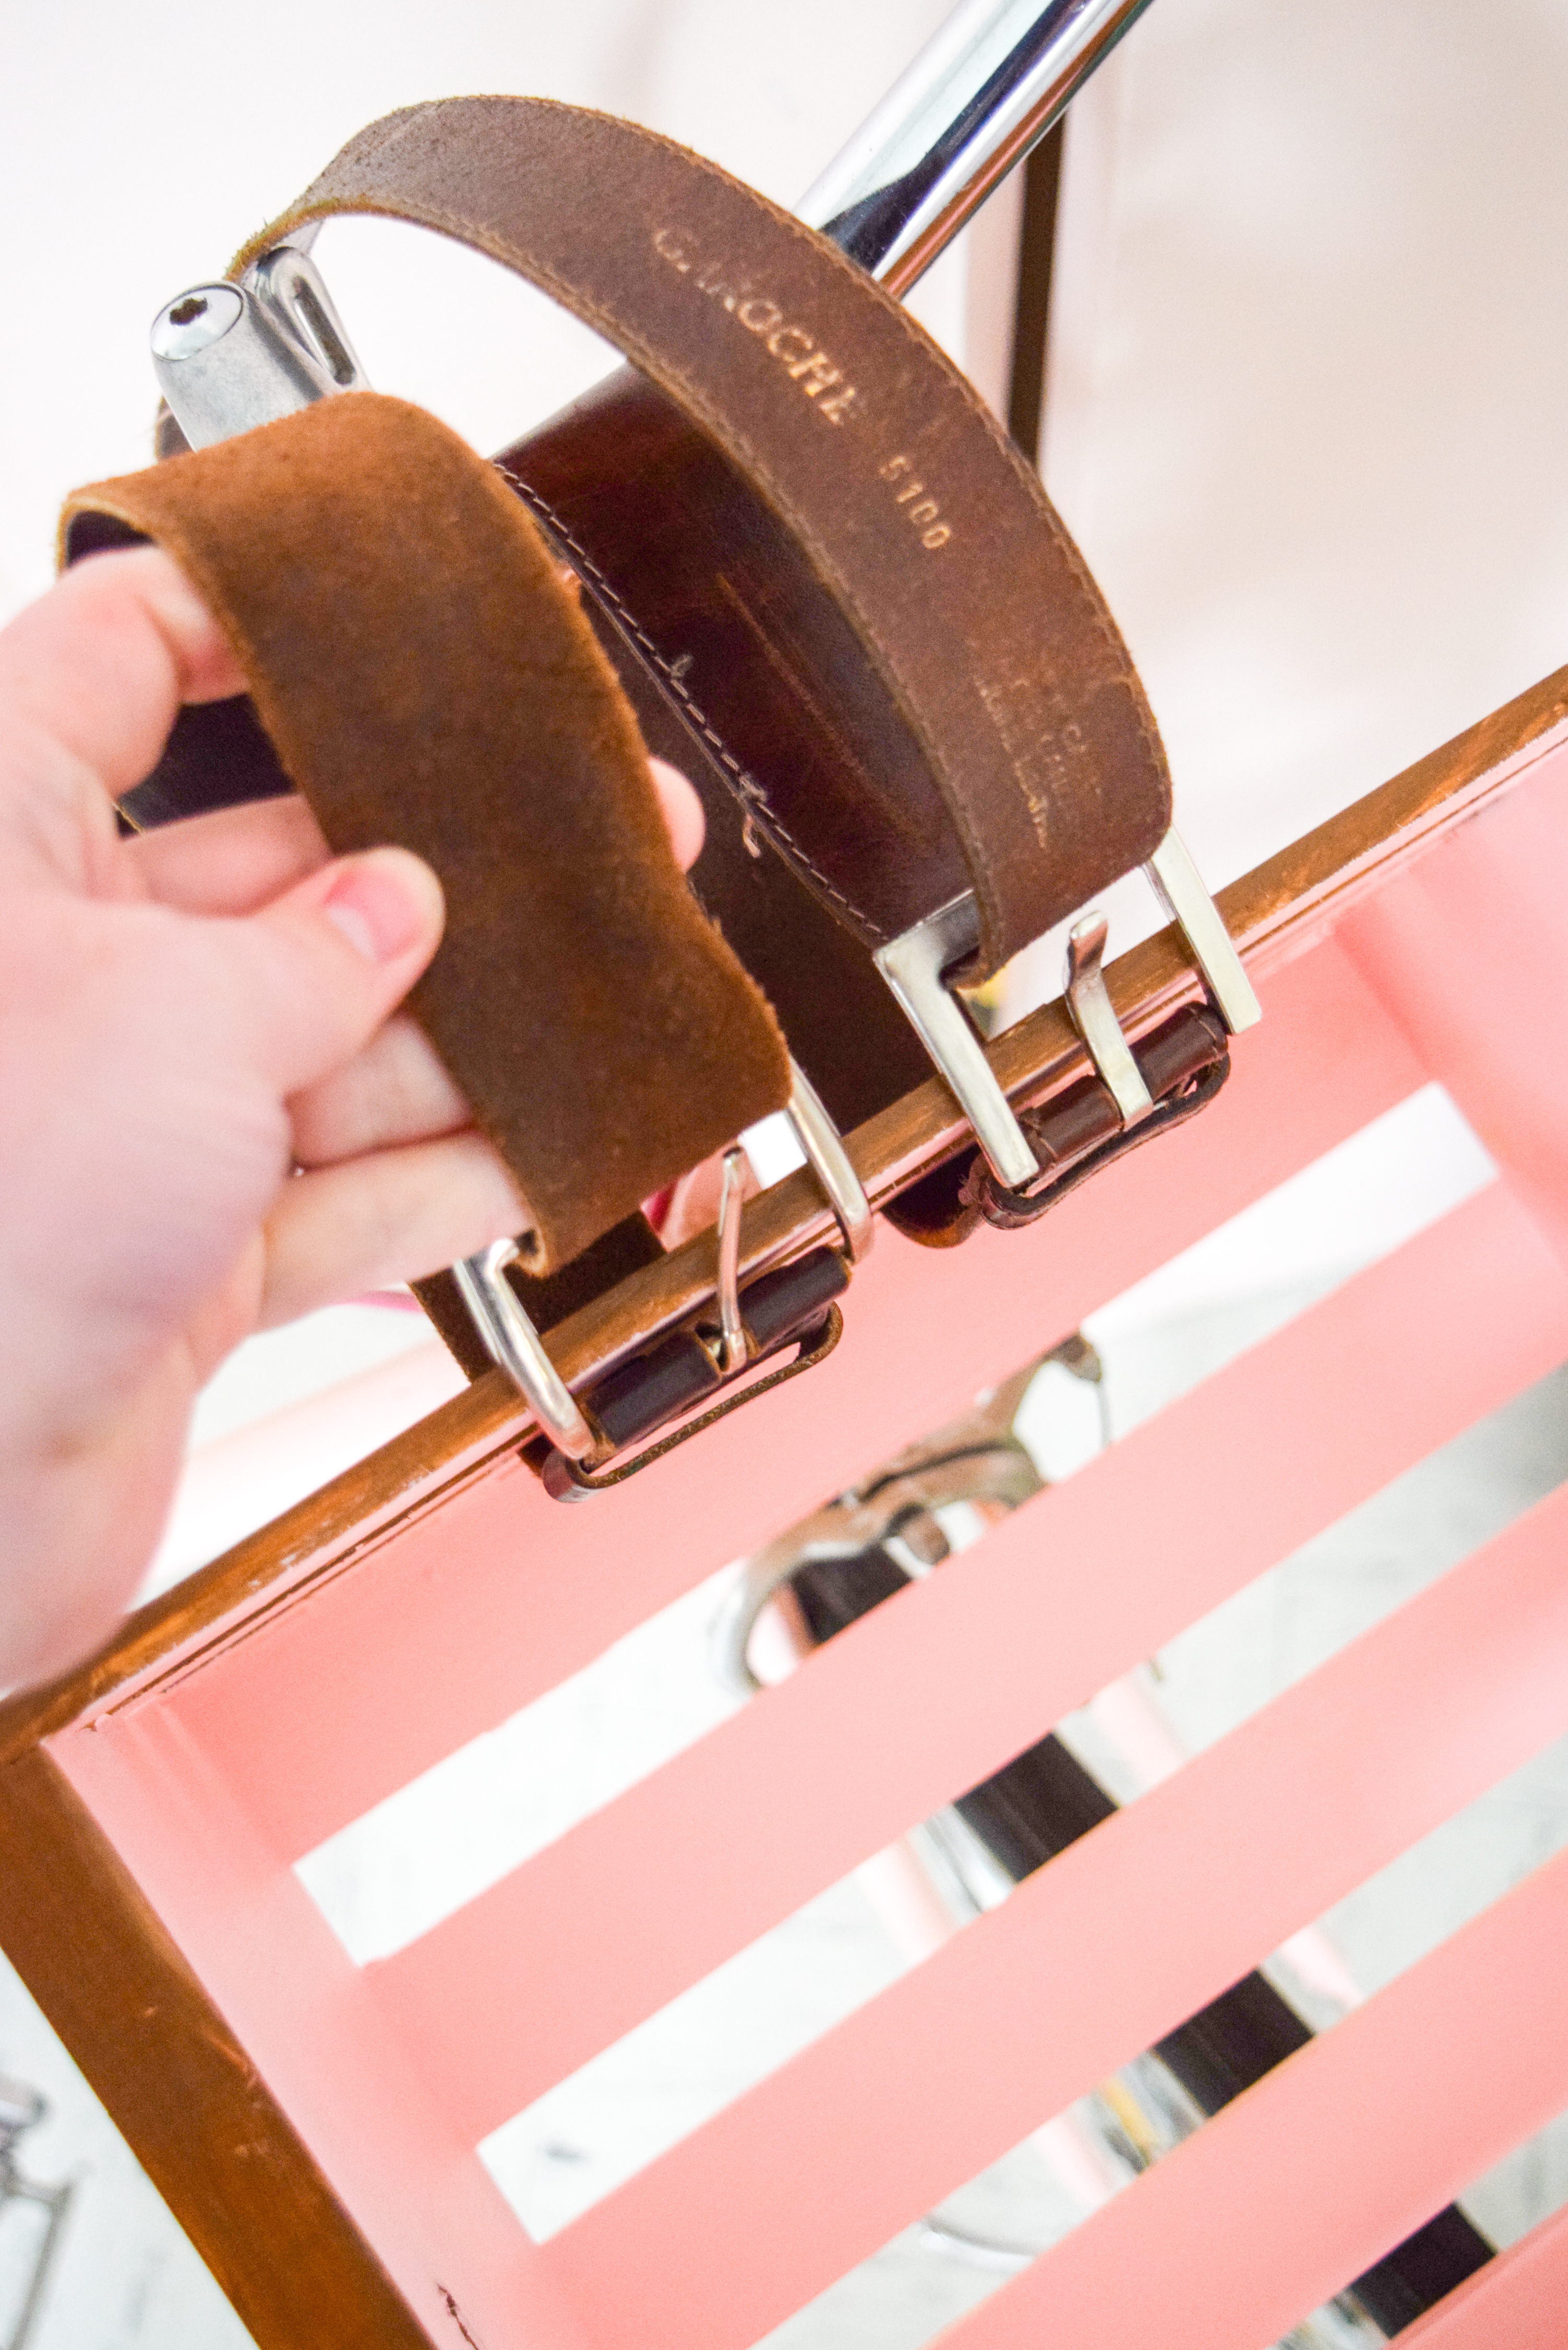
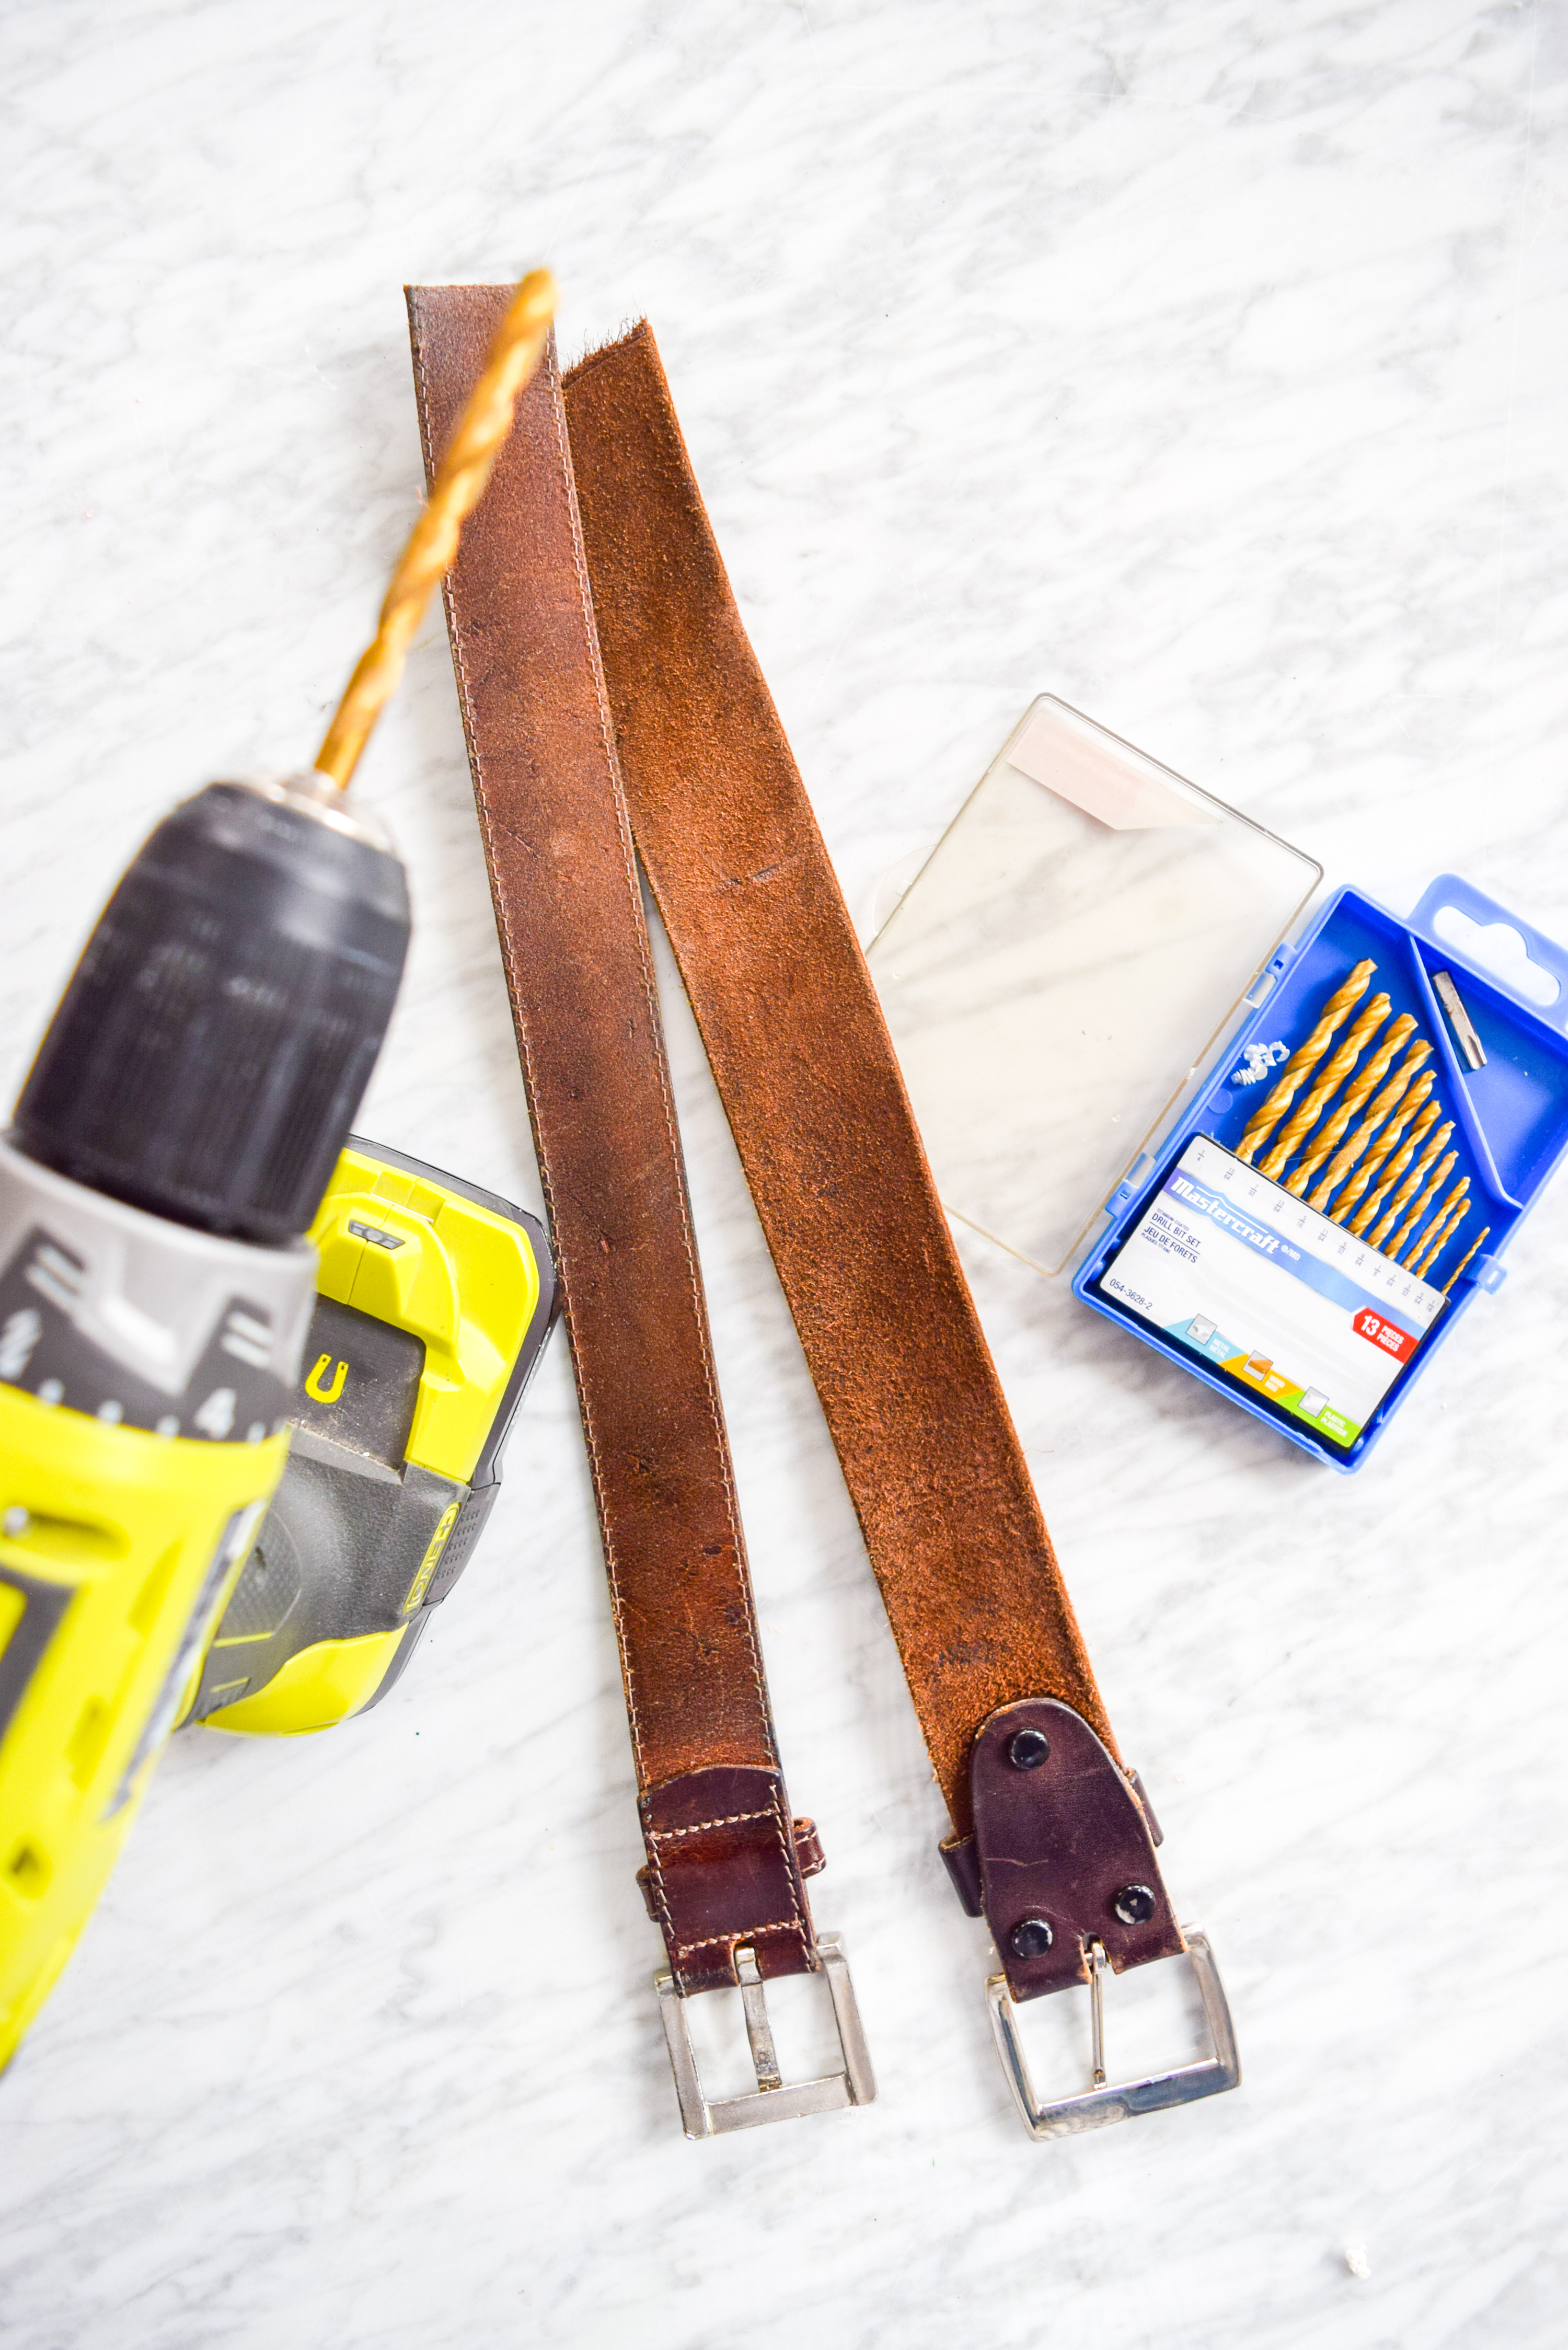
- Two old leather belts that I thrifted
- Drill + Drill bit
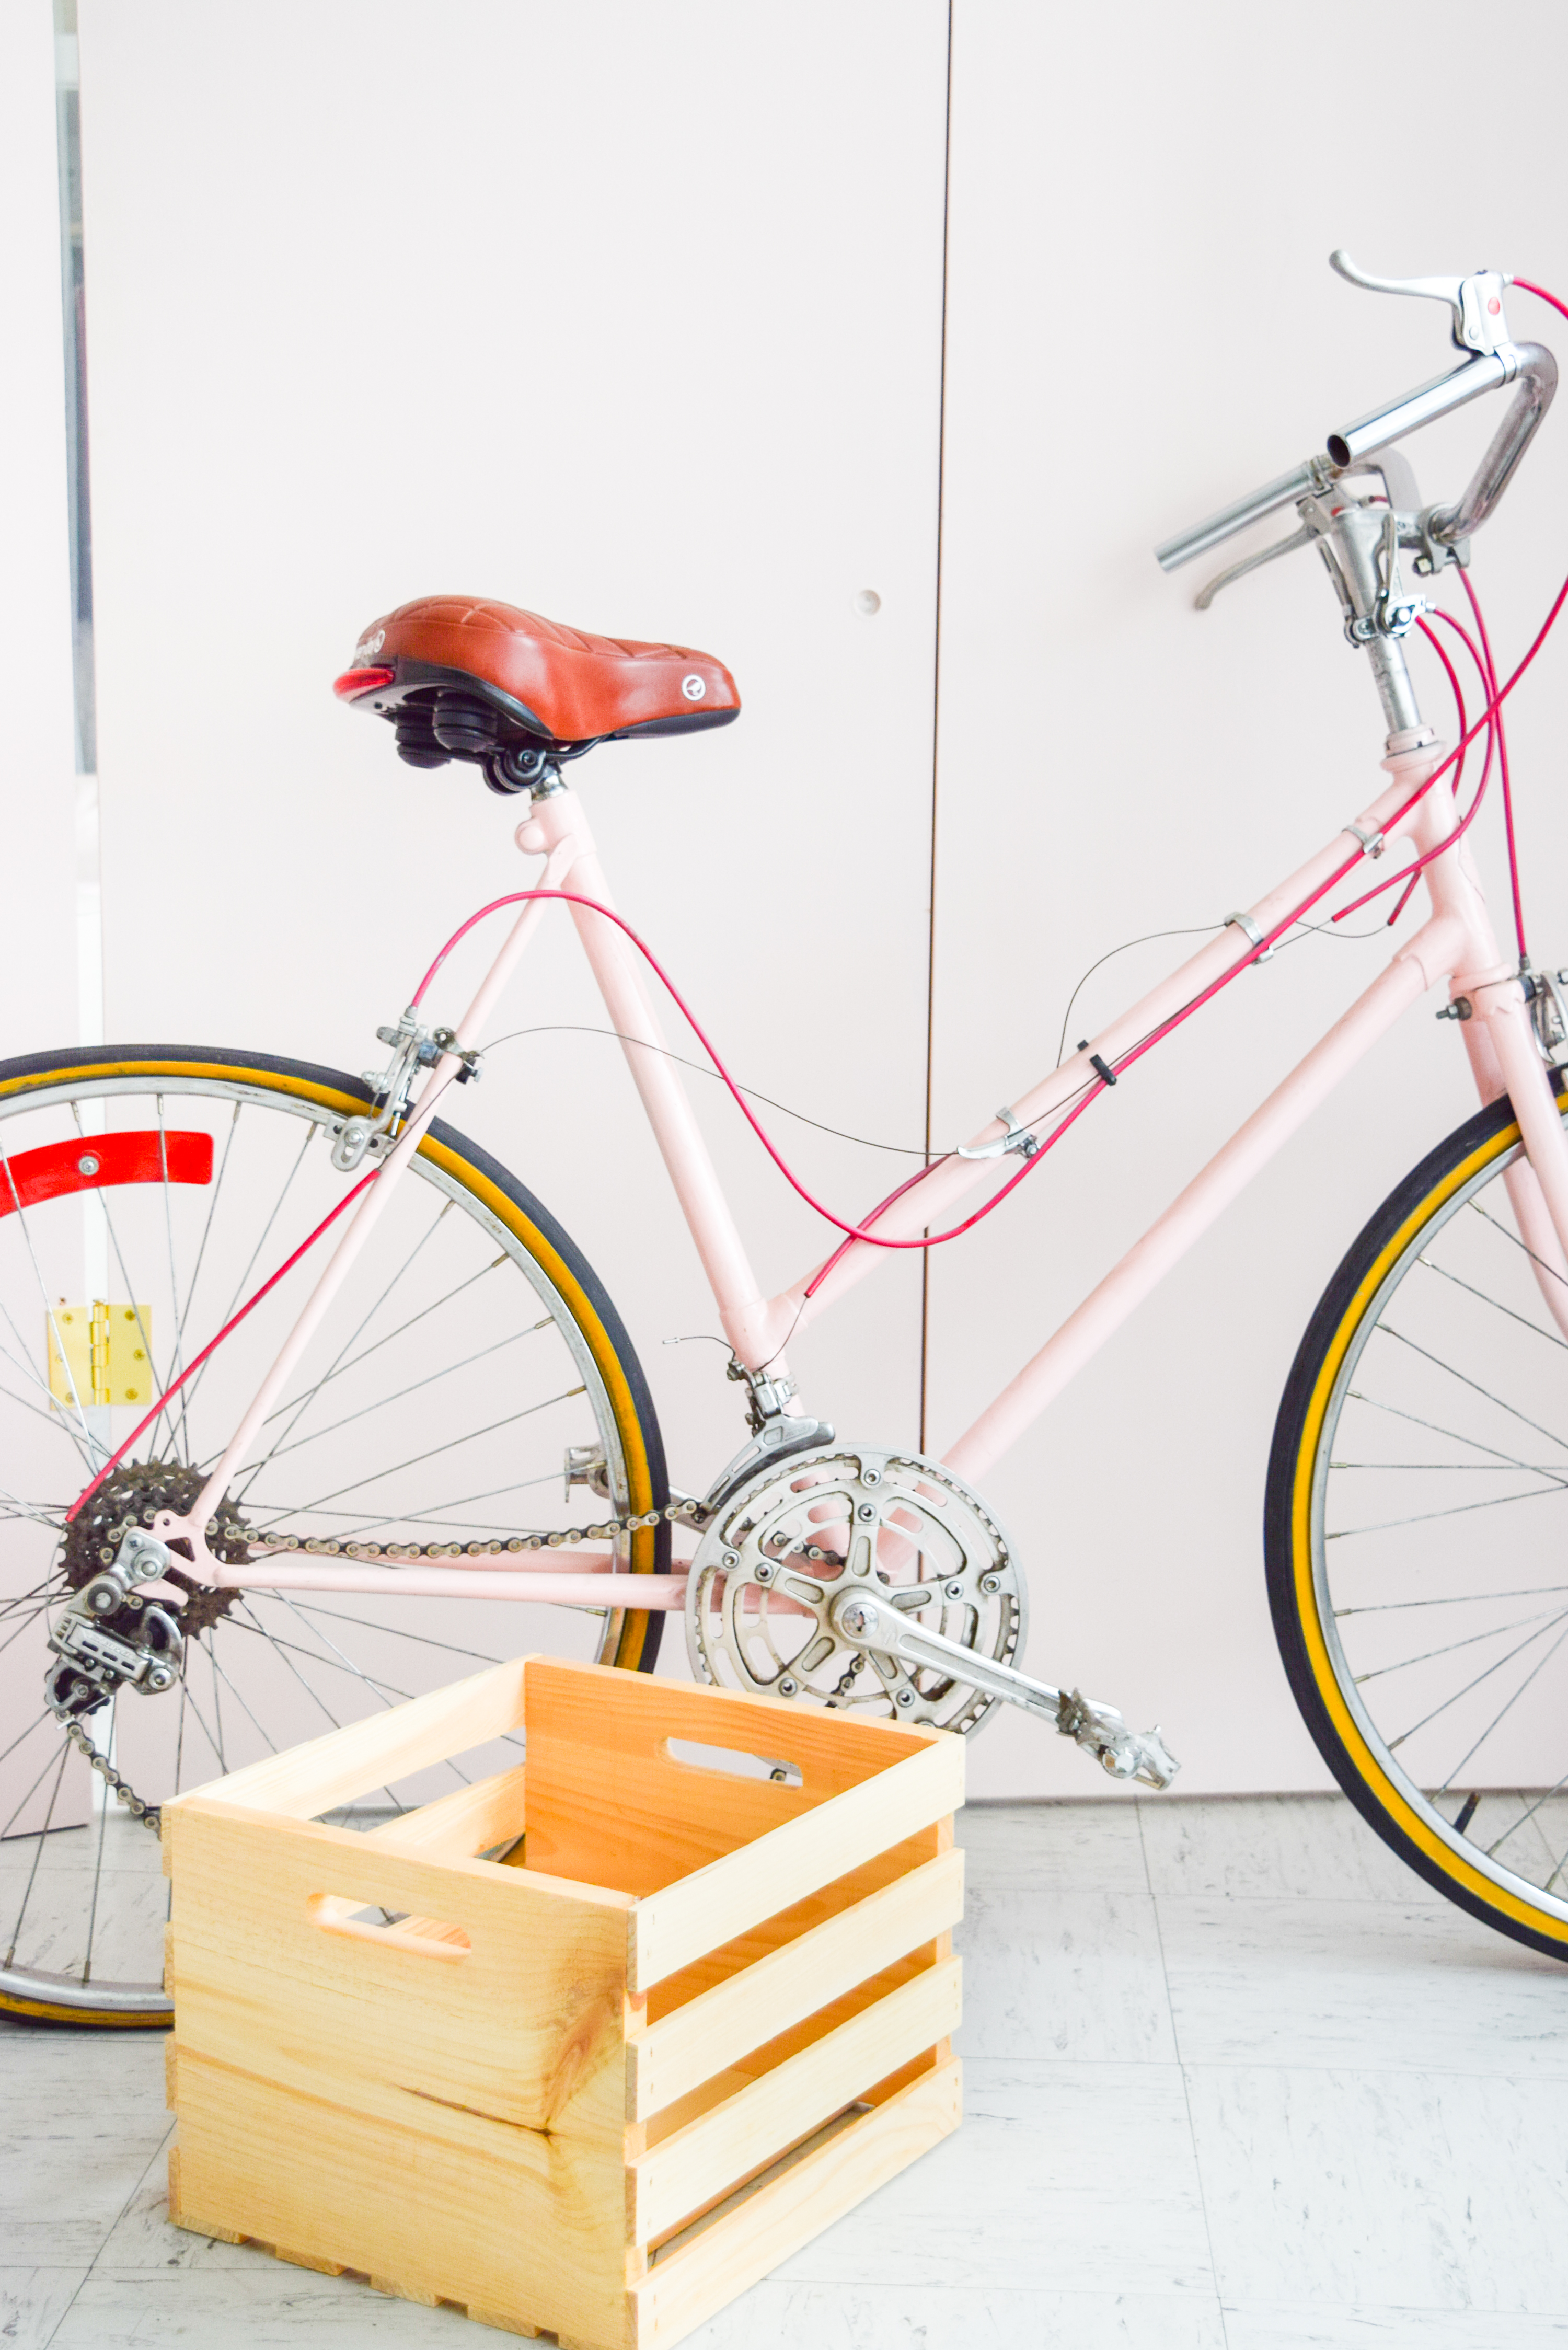
Step 1: Start by staining the outside of the crate. I love how the crate is already ready to go, I didn’t need to sand anything or prime the wood. The Minwax staining cloths also make it easy, since I can just wipe it on. Nothing complicated.
Step 2: Once the outside of the crate is stained, you’re going to paint the inside of the crate. You could stain the inside as well, but I wanted a punch of colour to match the bike frame. I used pink paint to add some life inside.
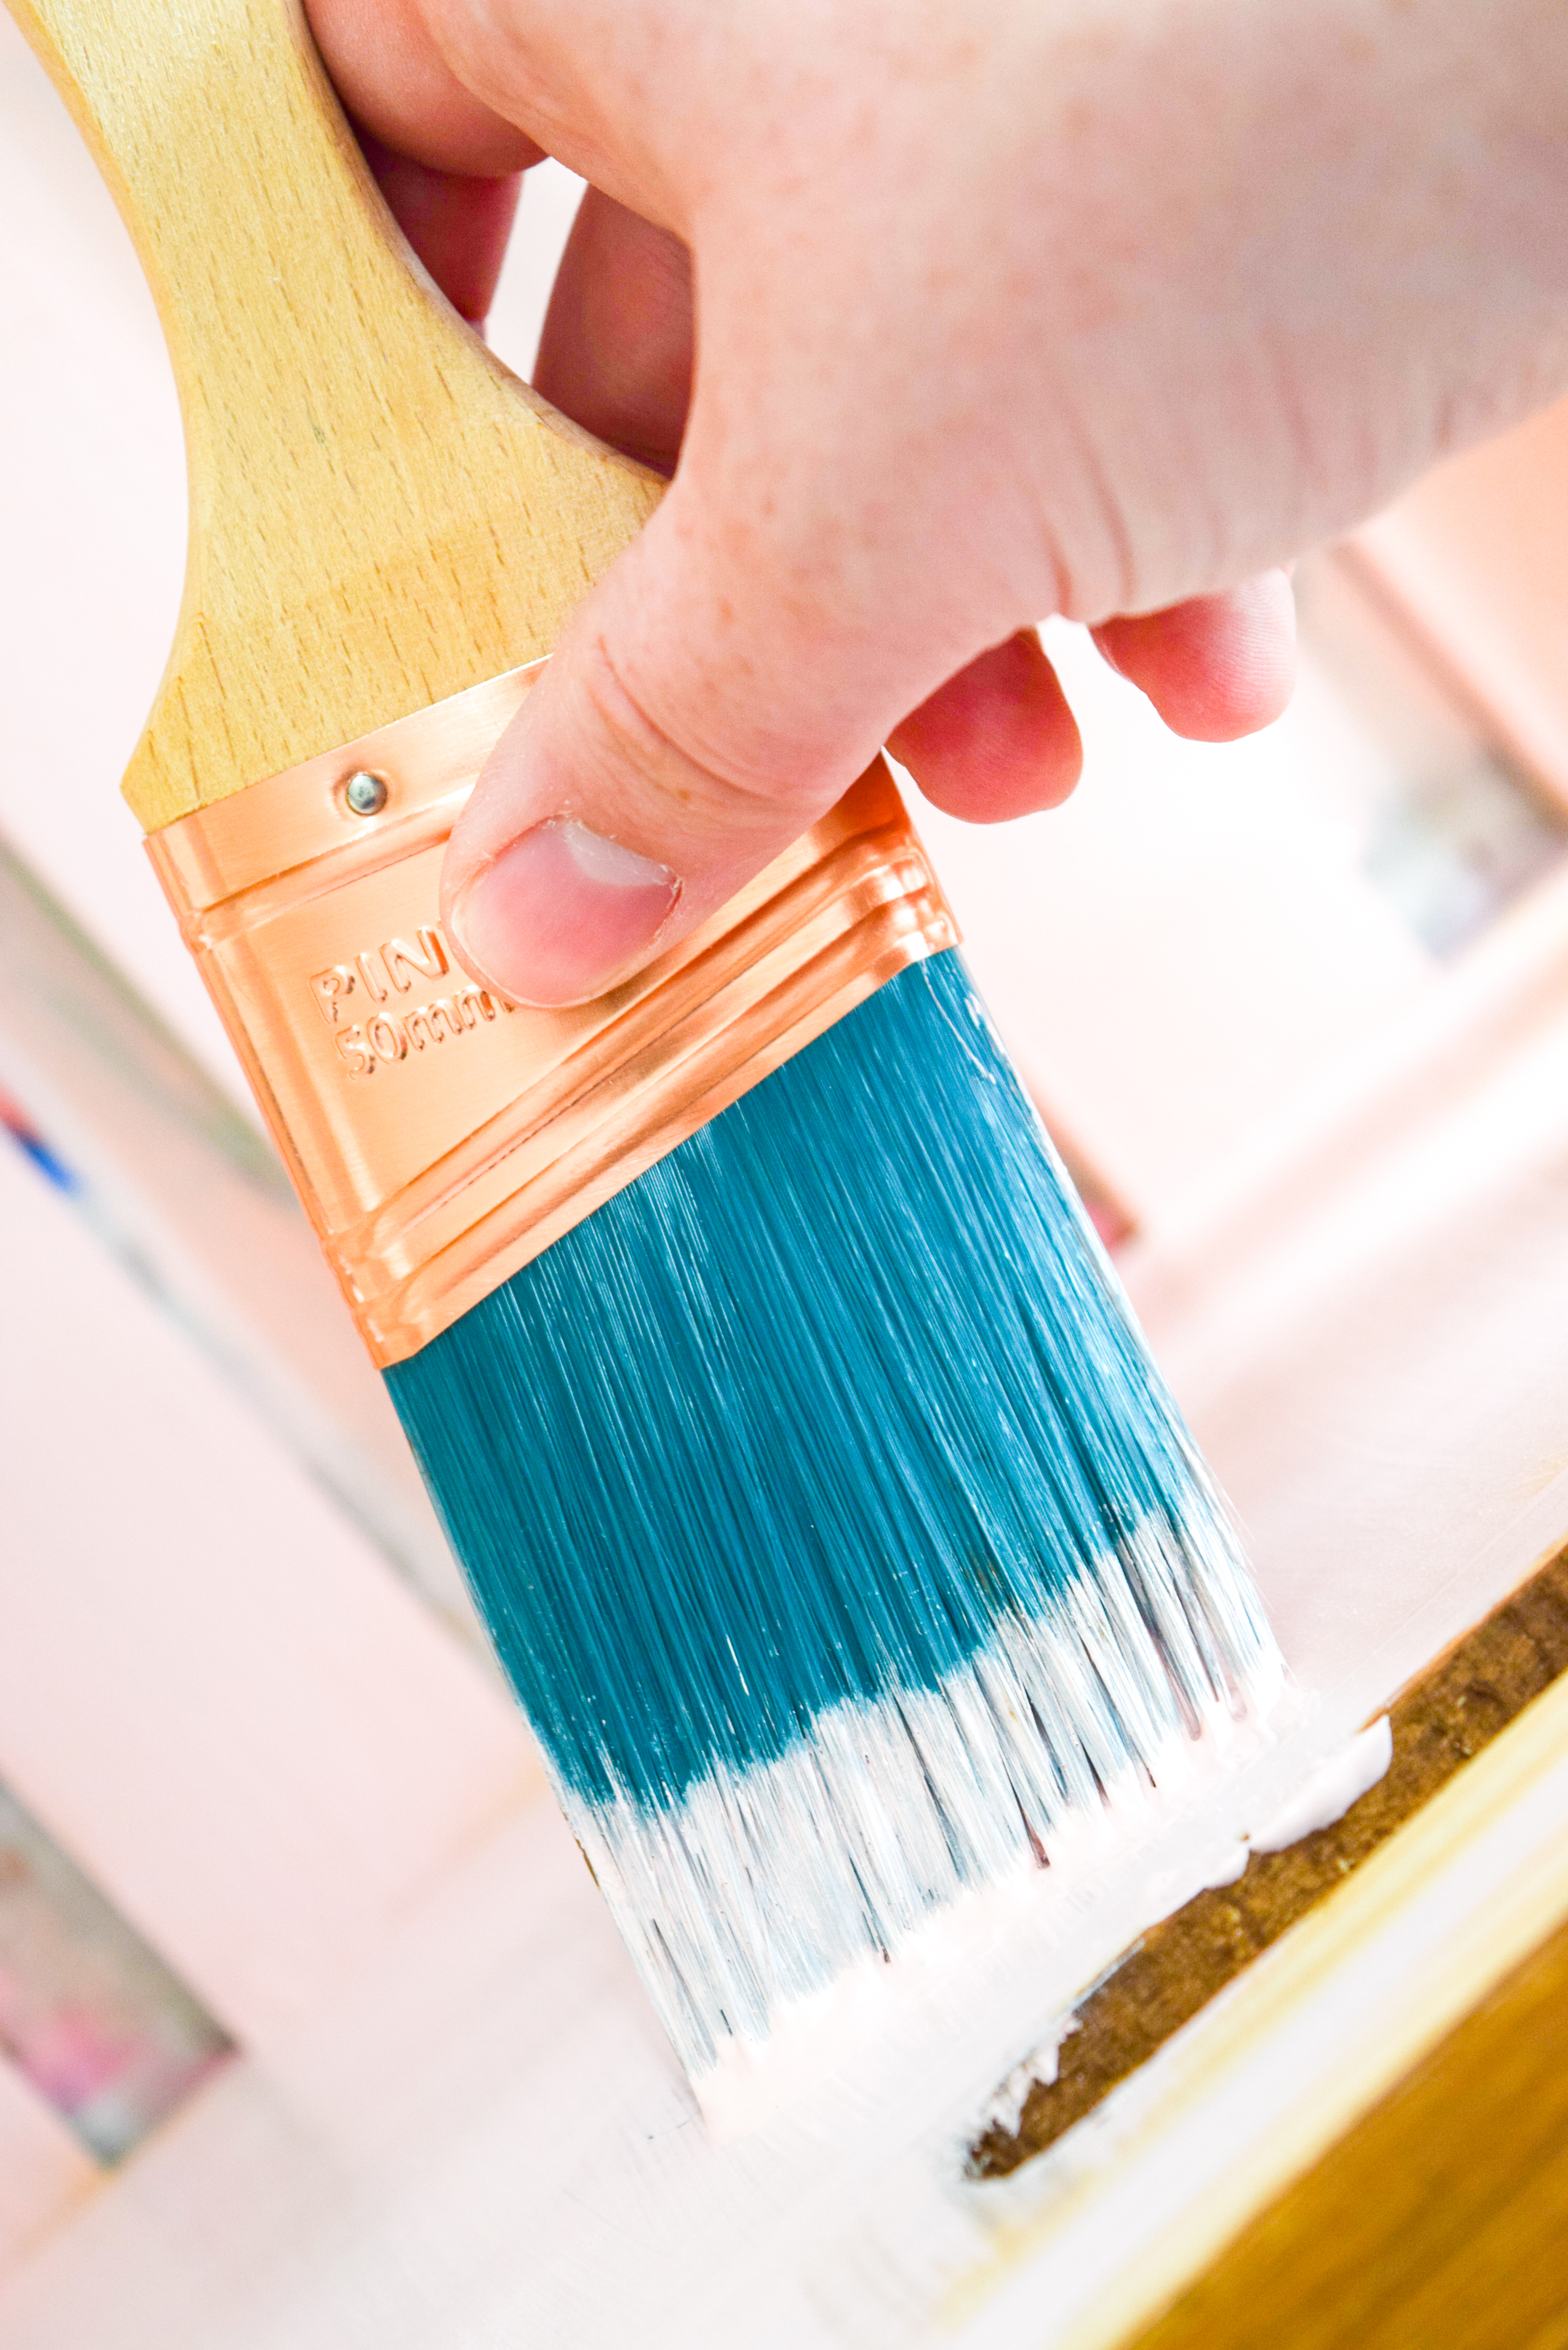
Step 3: Using a fine tipped brush, paint a floral and leaf pattern on the front of the crate. You can paint all around it, just the sides, or just the front. I figured I’d only paint one side so that it would really stand-out.
I’ve got some great tutorials on painting florals with these projects, so I won’t re-hash them: DIY Chinoiserie Lamp // DIY Floral Pumpkins // DIY Floral Christmas Ornaments.
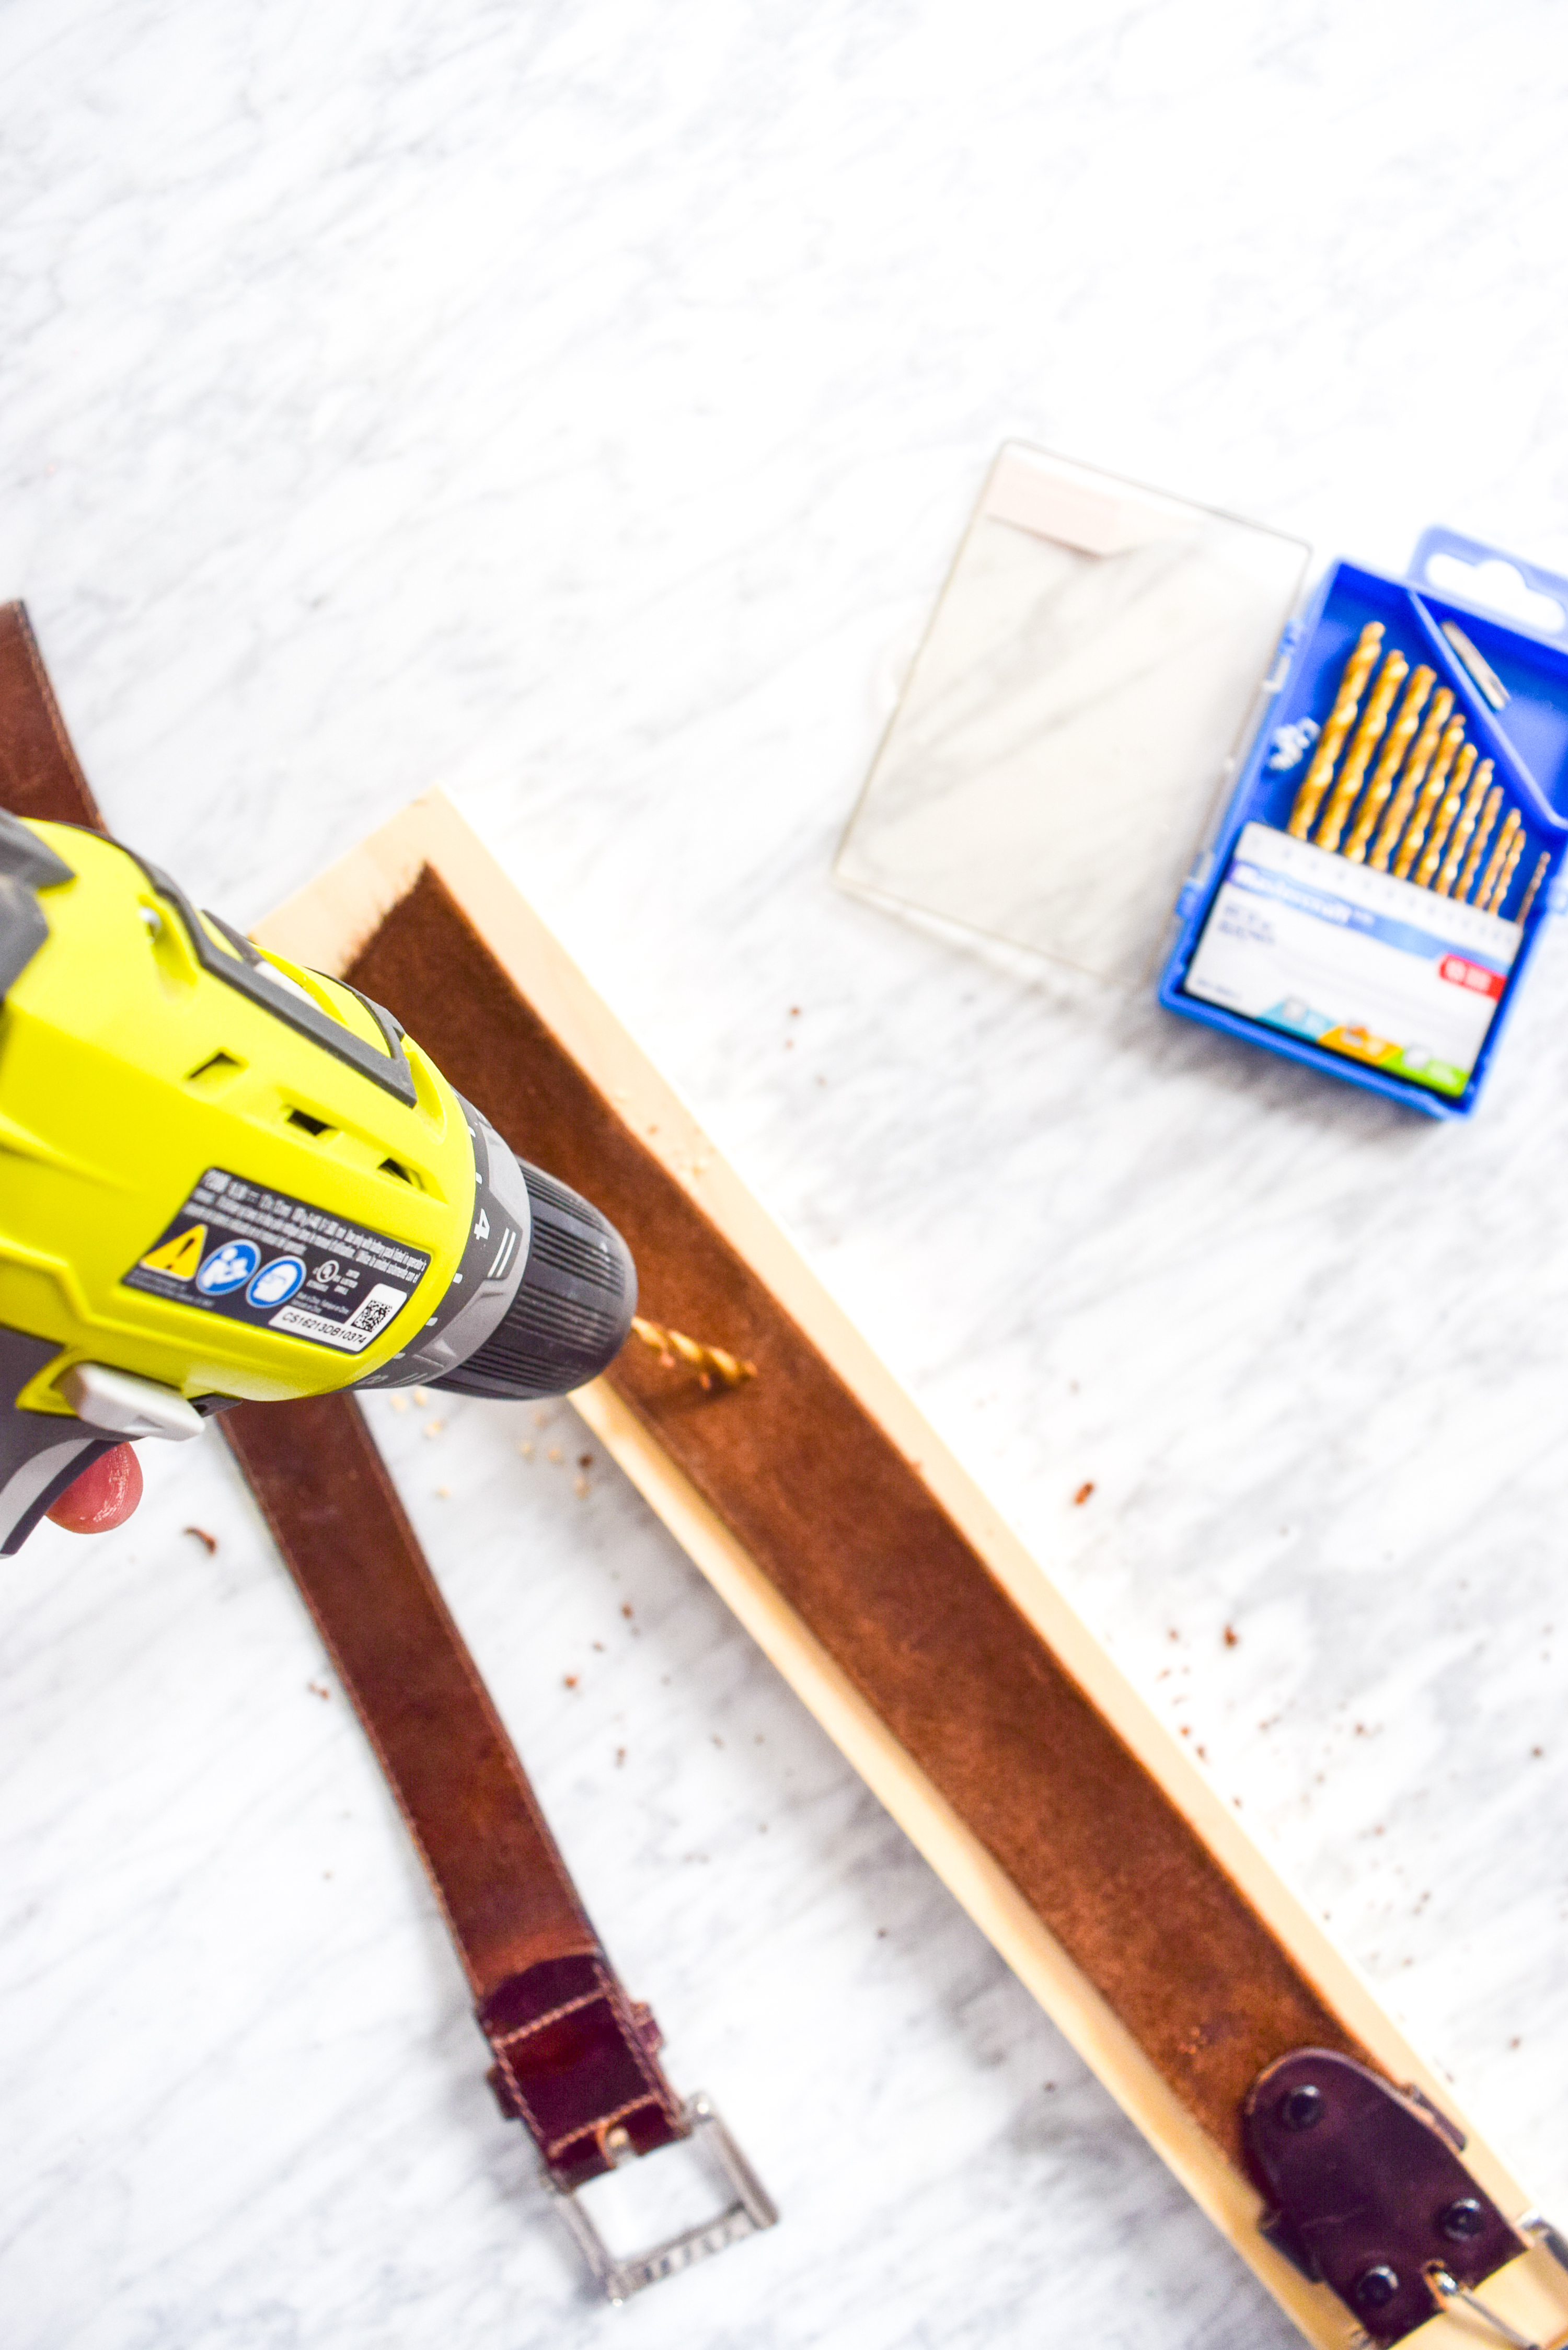
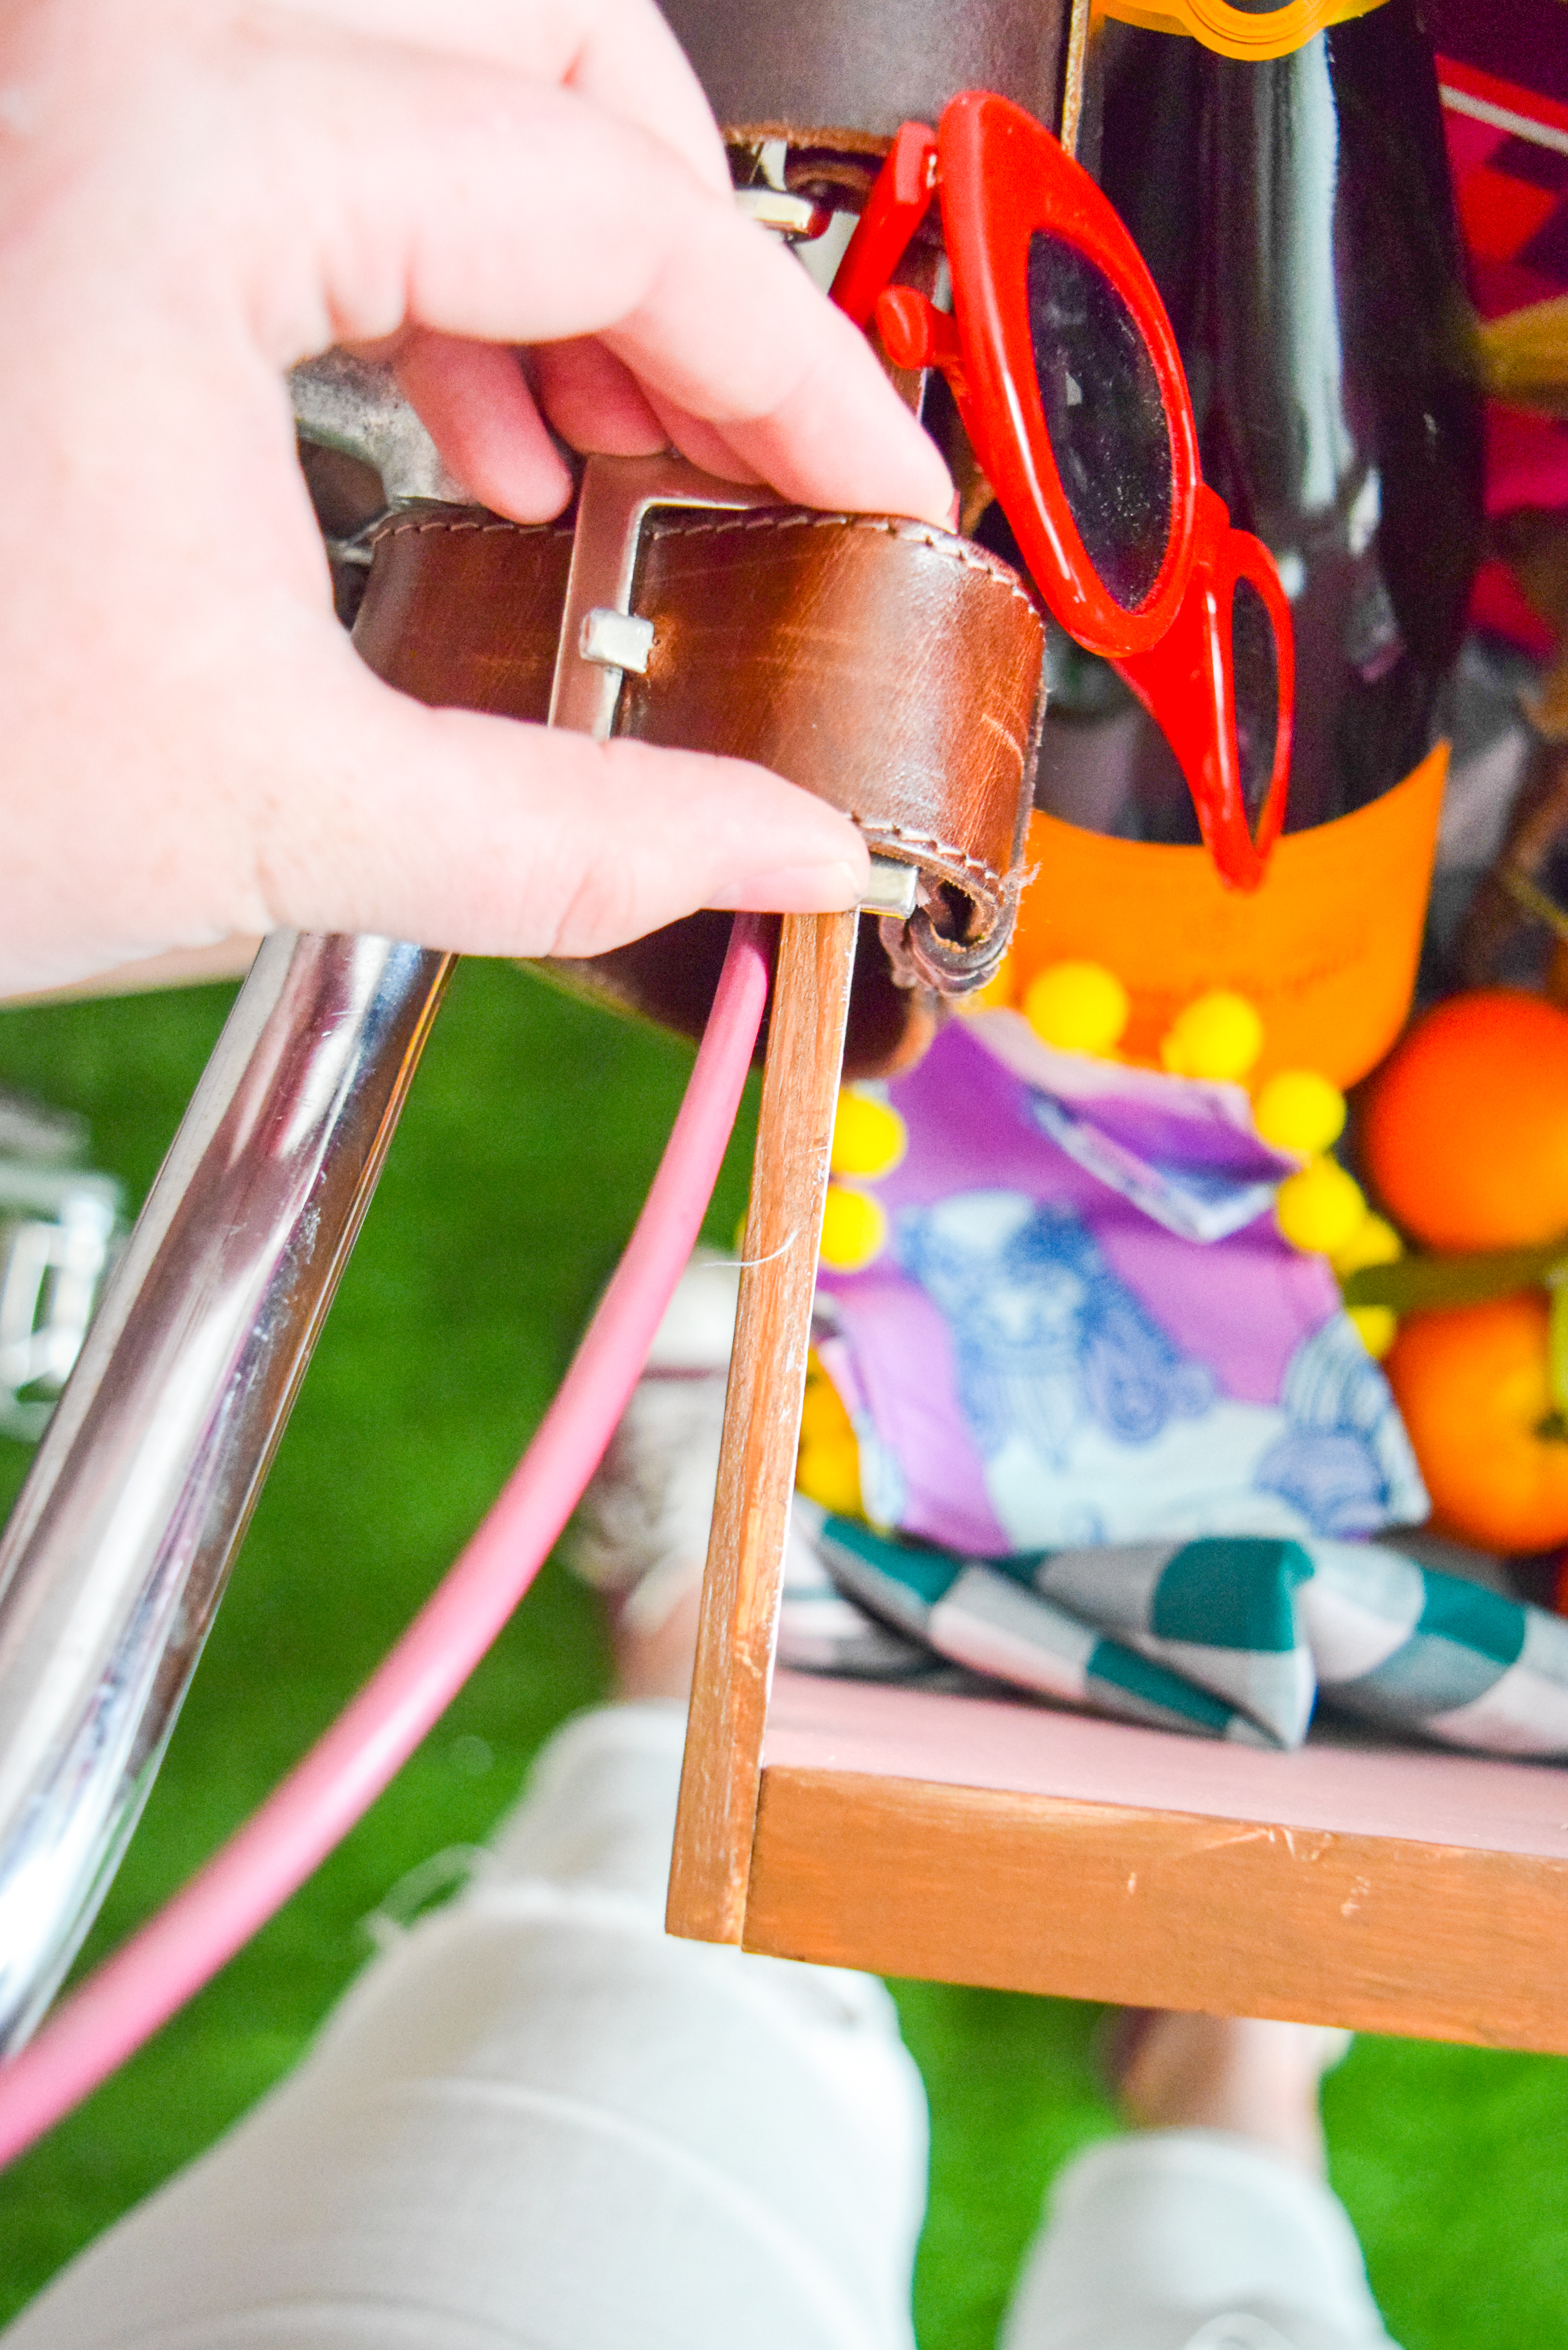
Step 4: You can permanently attach your picnic crate to the bike, but I like the flexibility of being able to take it on and off the bike. I used two old leather belts to do just that. Attach the crate to the bike using them, and mark where you need to trim them, as well as where you need to add a new notch.
Step 5: Using some tin snips, trim the excess belt lengths. Then, using a drill to add a new hole. I placed the belts on a piece of wood to give some traction to the bit, and to make sure I didn’t accidentally drill into my fingers.
Step 6: With the two belt straps complete, you are now ready to go! Attach the DIY Bike Picnic Crate to your bike, and off you go.


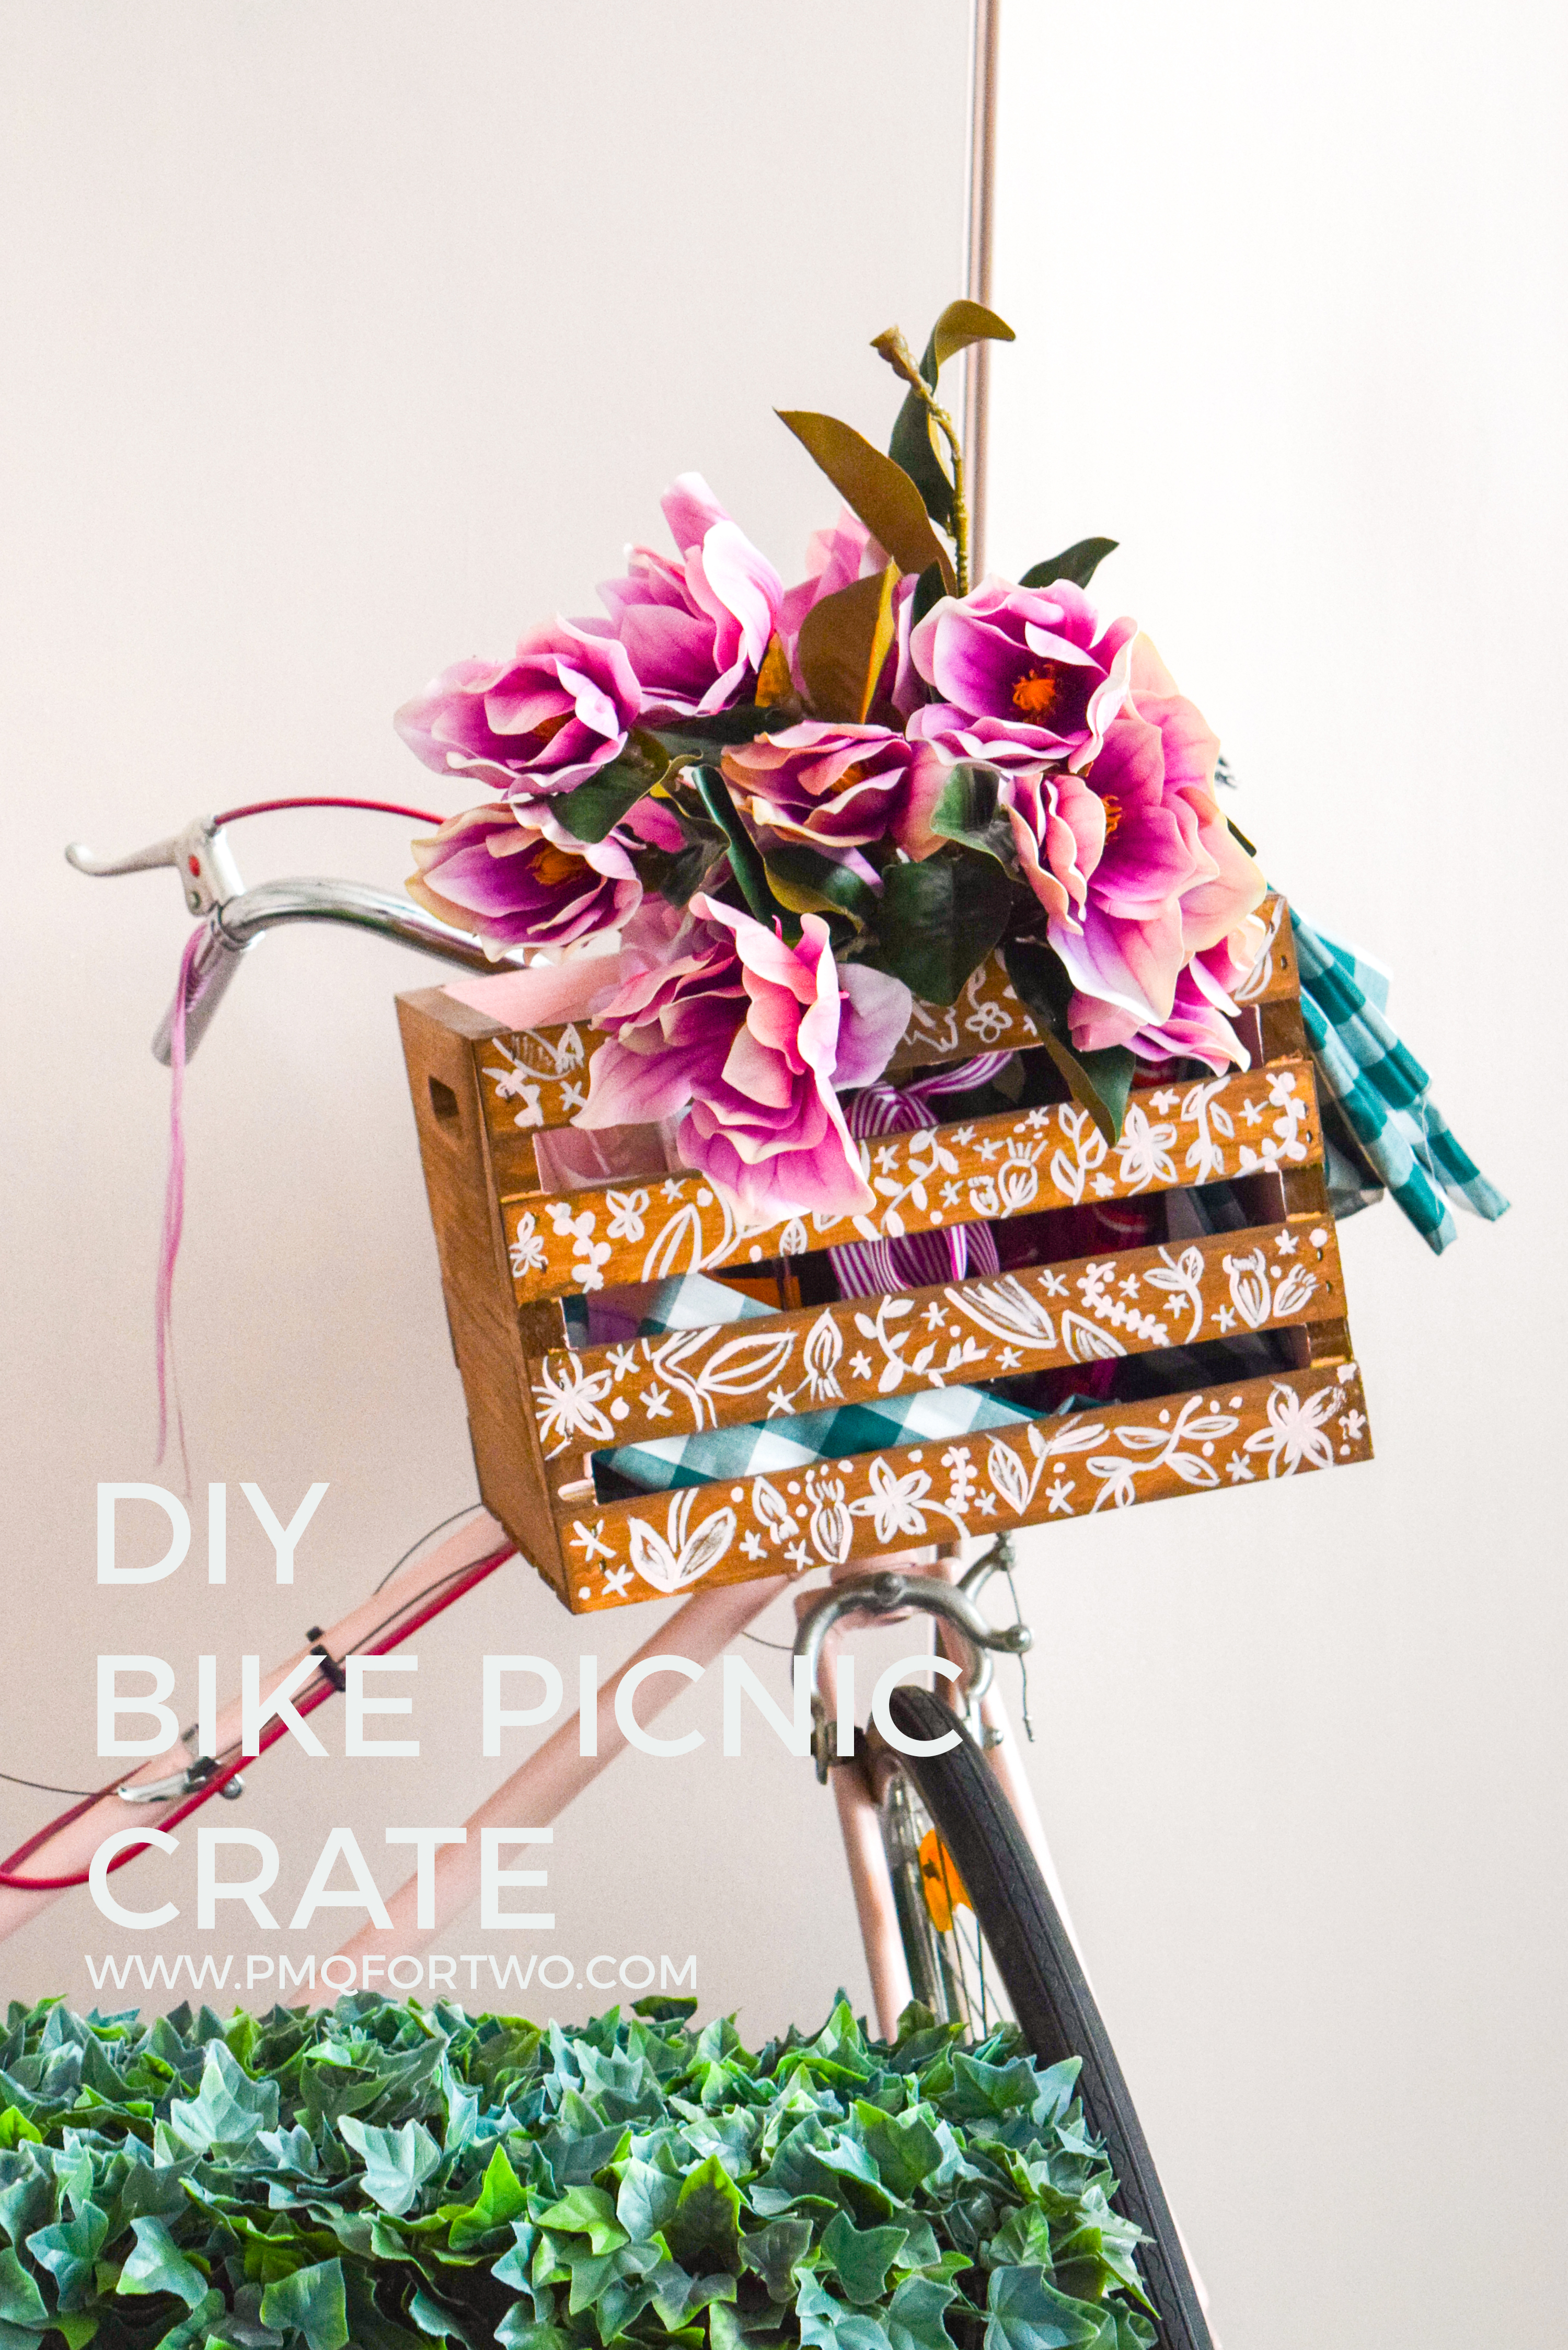
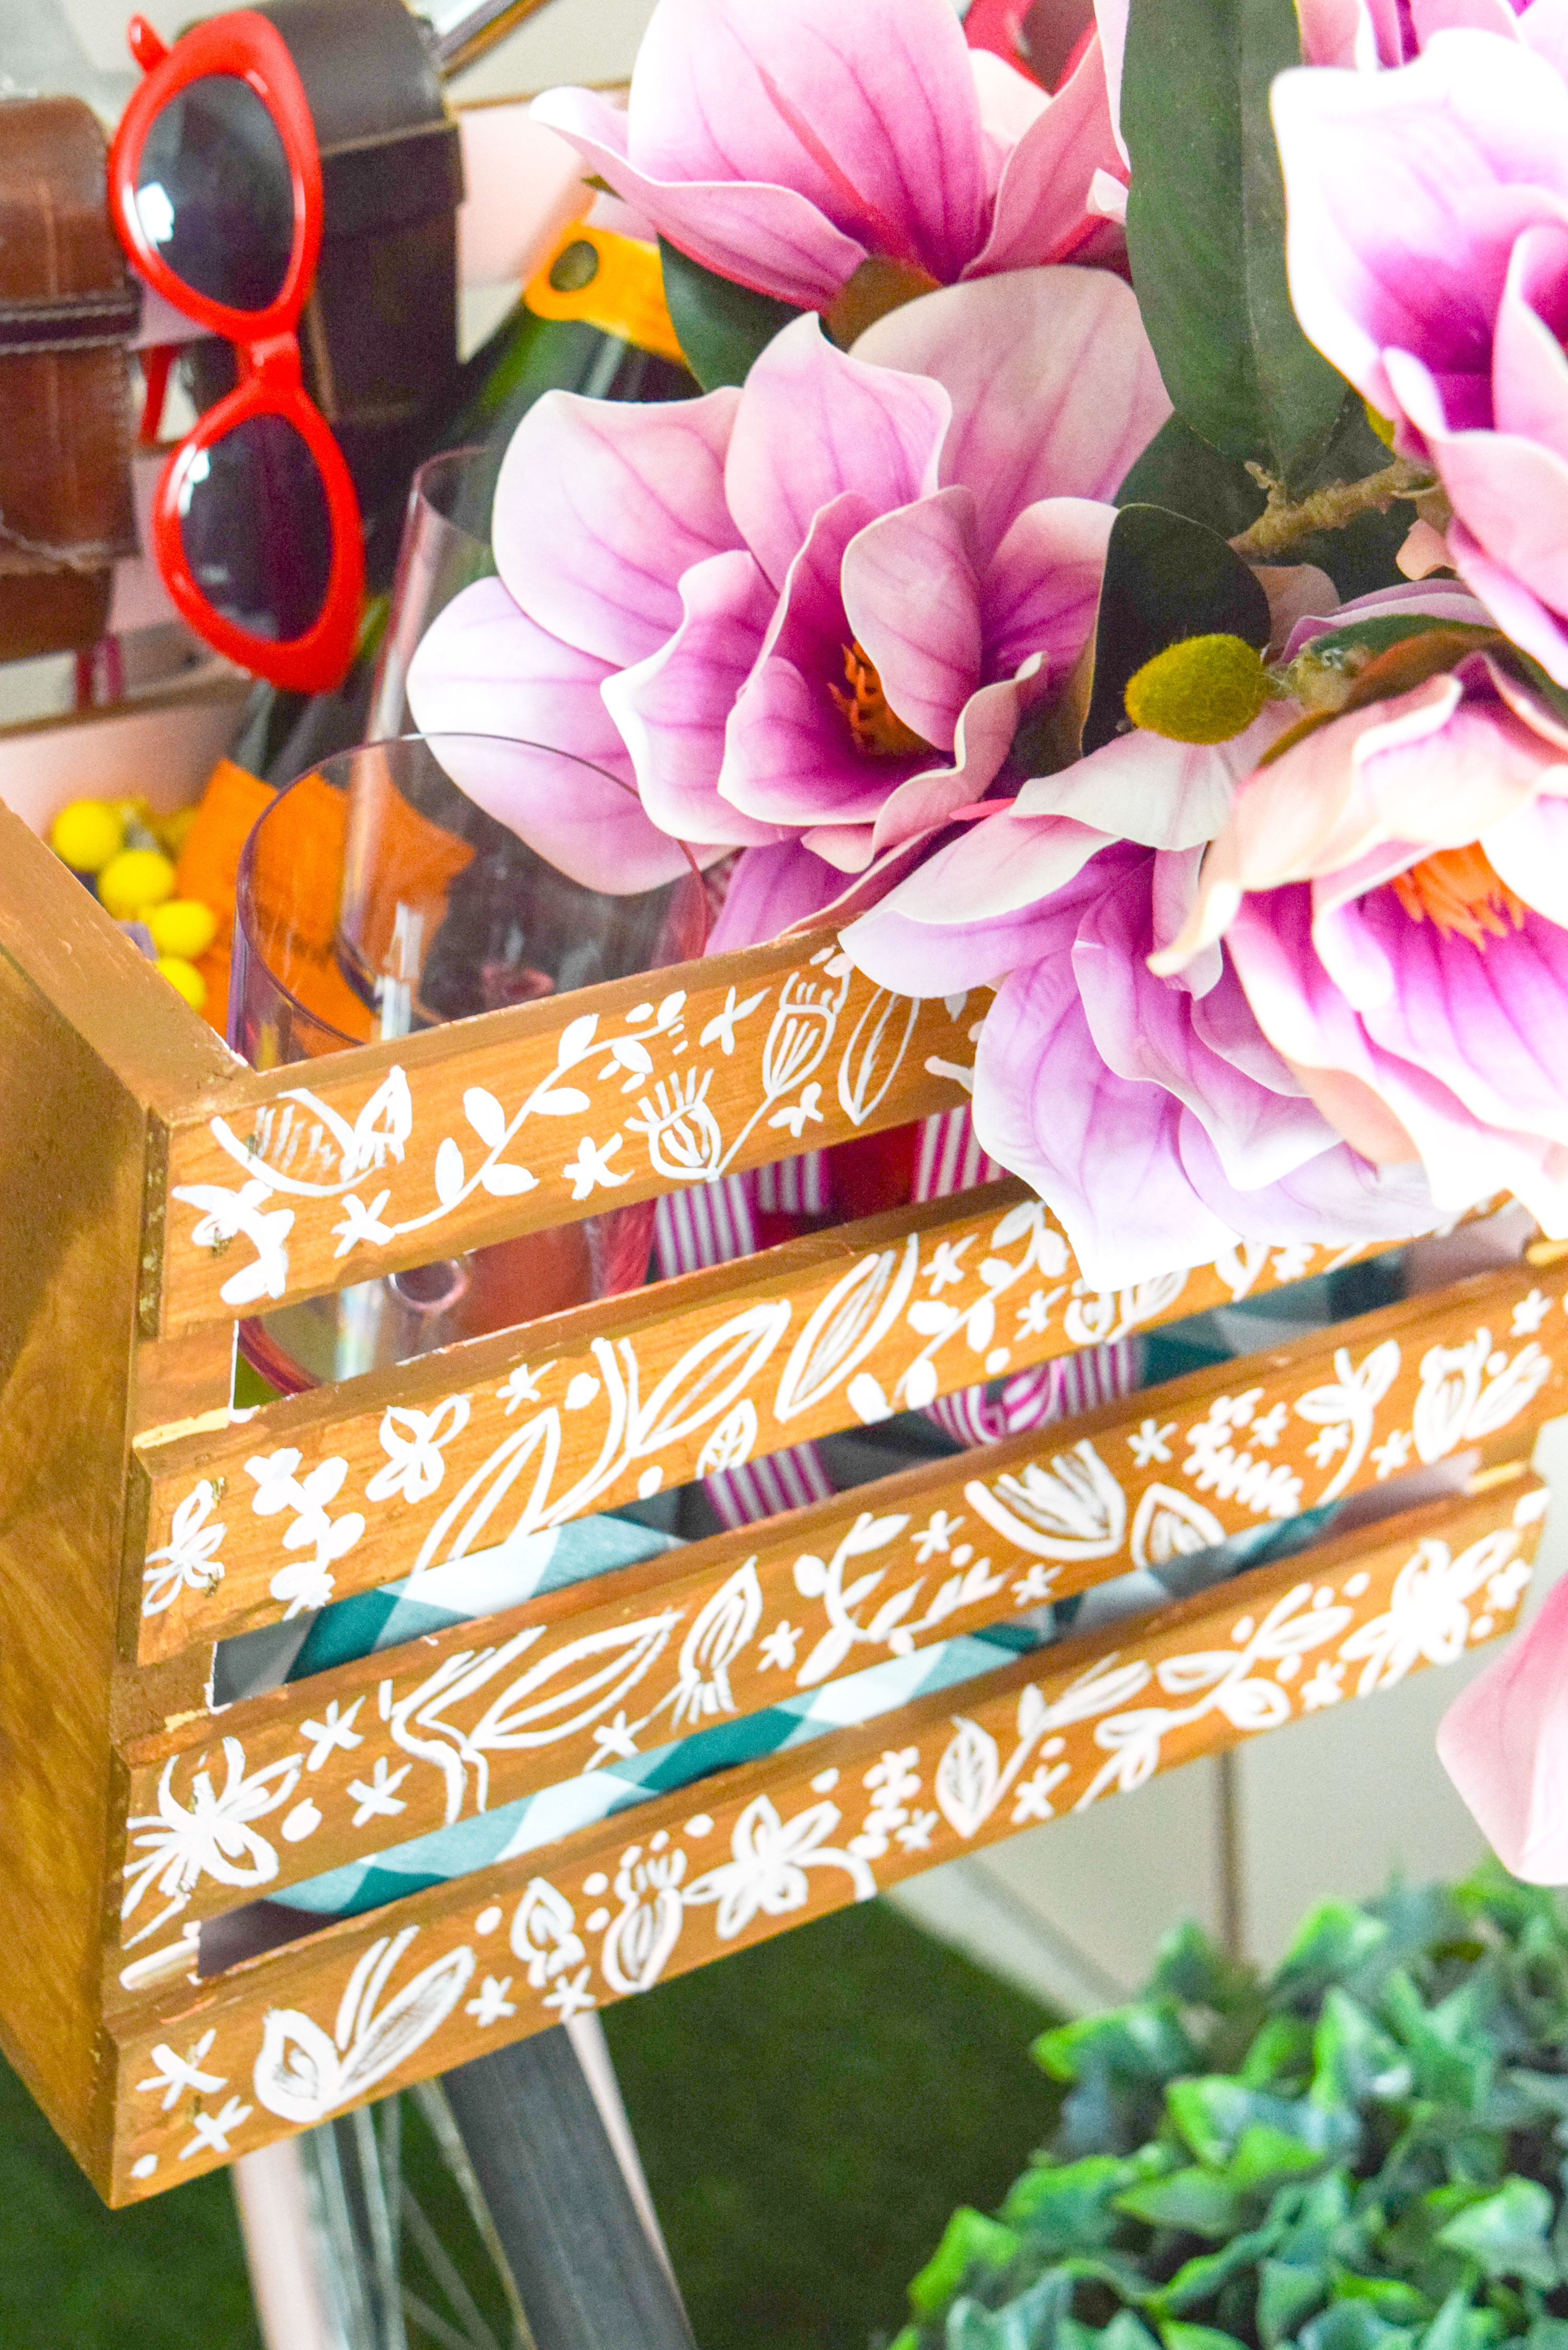
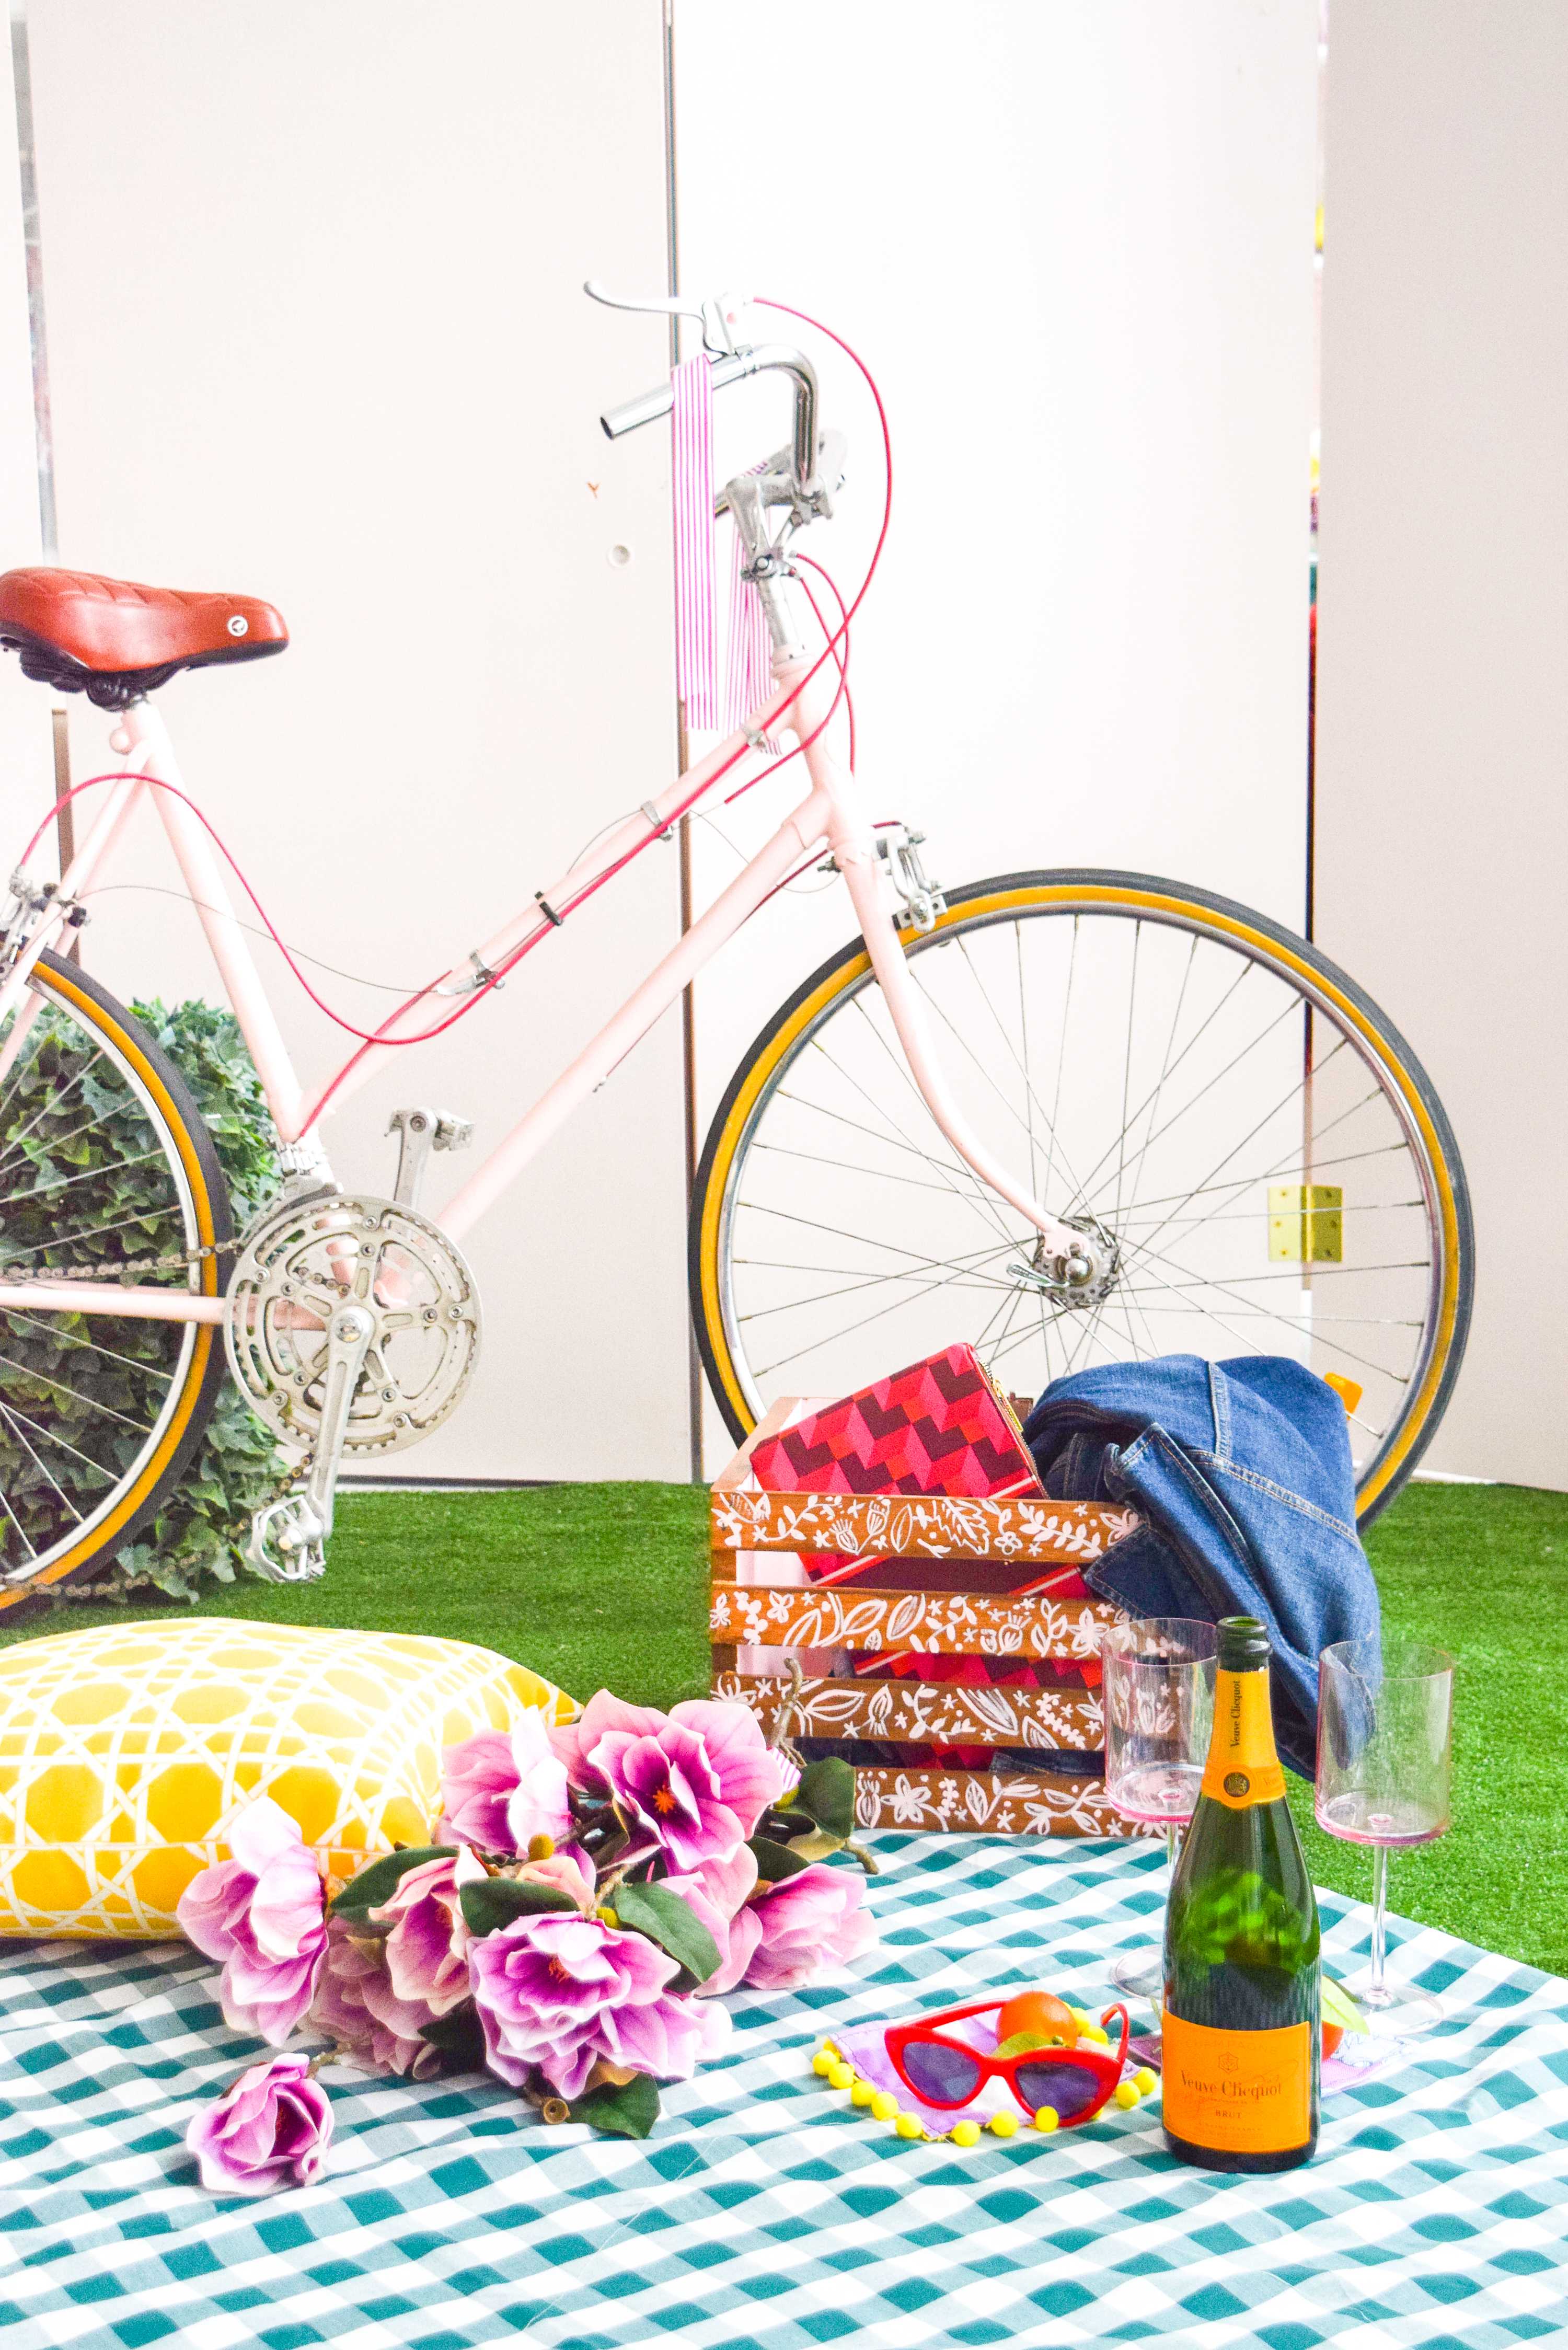
You know that I packed mine with some champagne, a cute picnic blanket, and of course some lovely florals. I’d also bring some cheese (because I eat a lot of that these days), and some fine dark chocolate, but that’s just how I roll now.

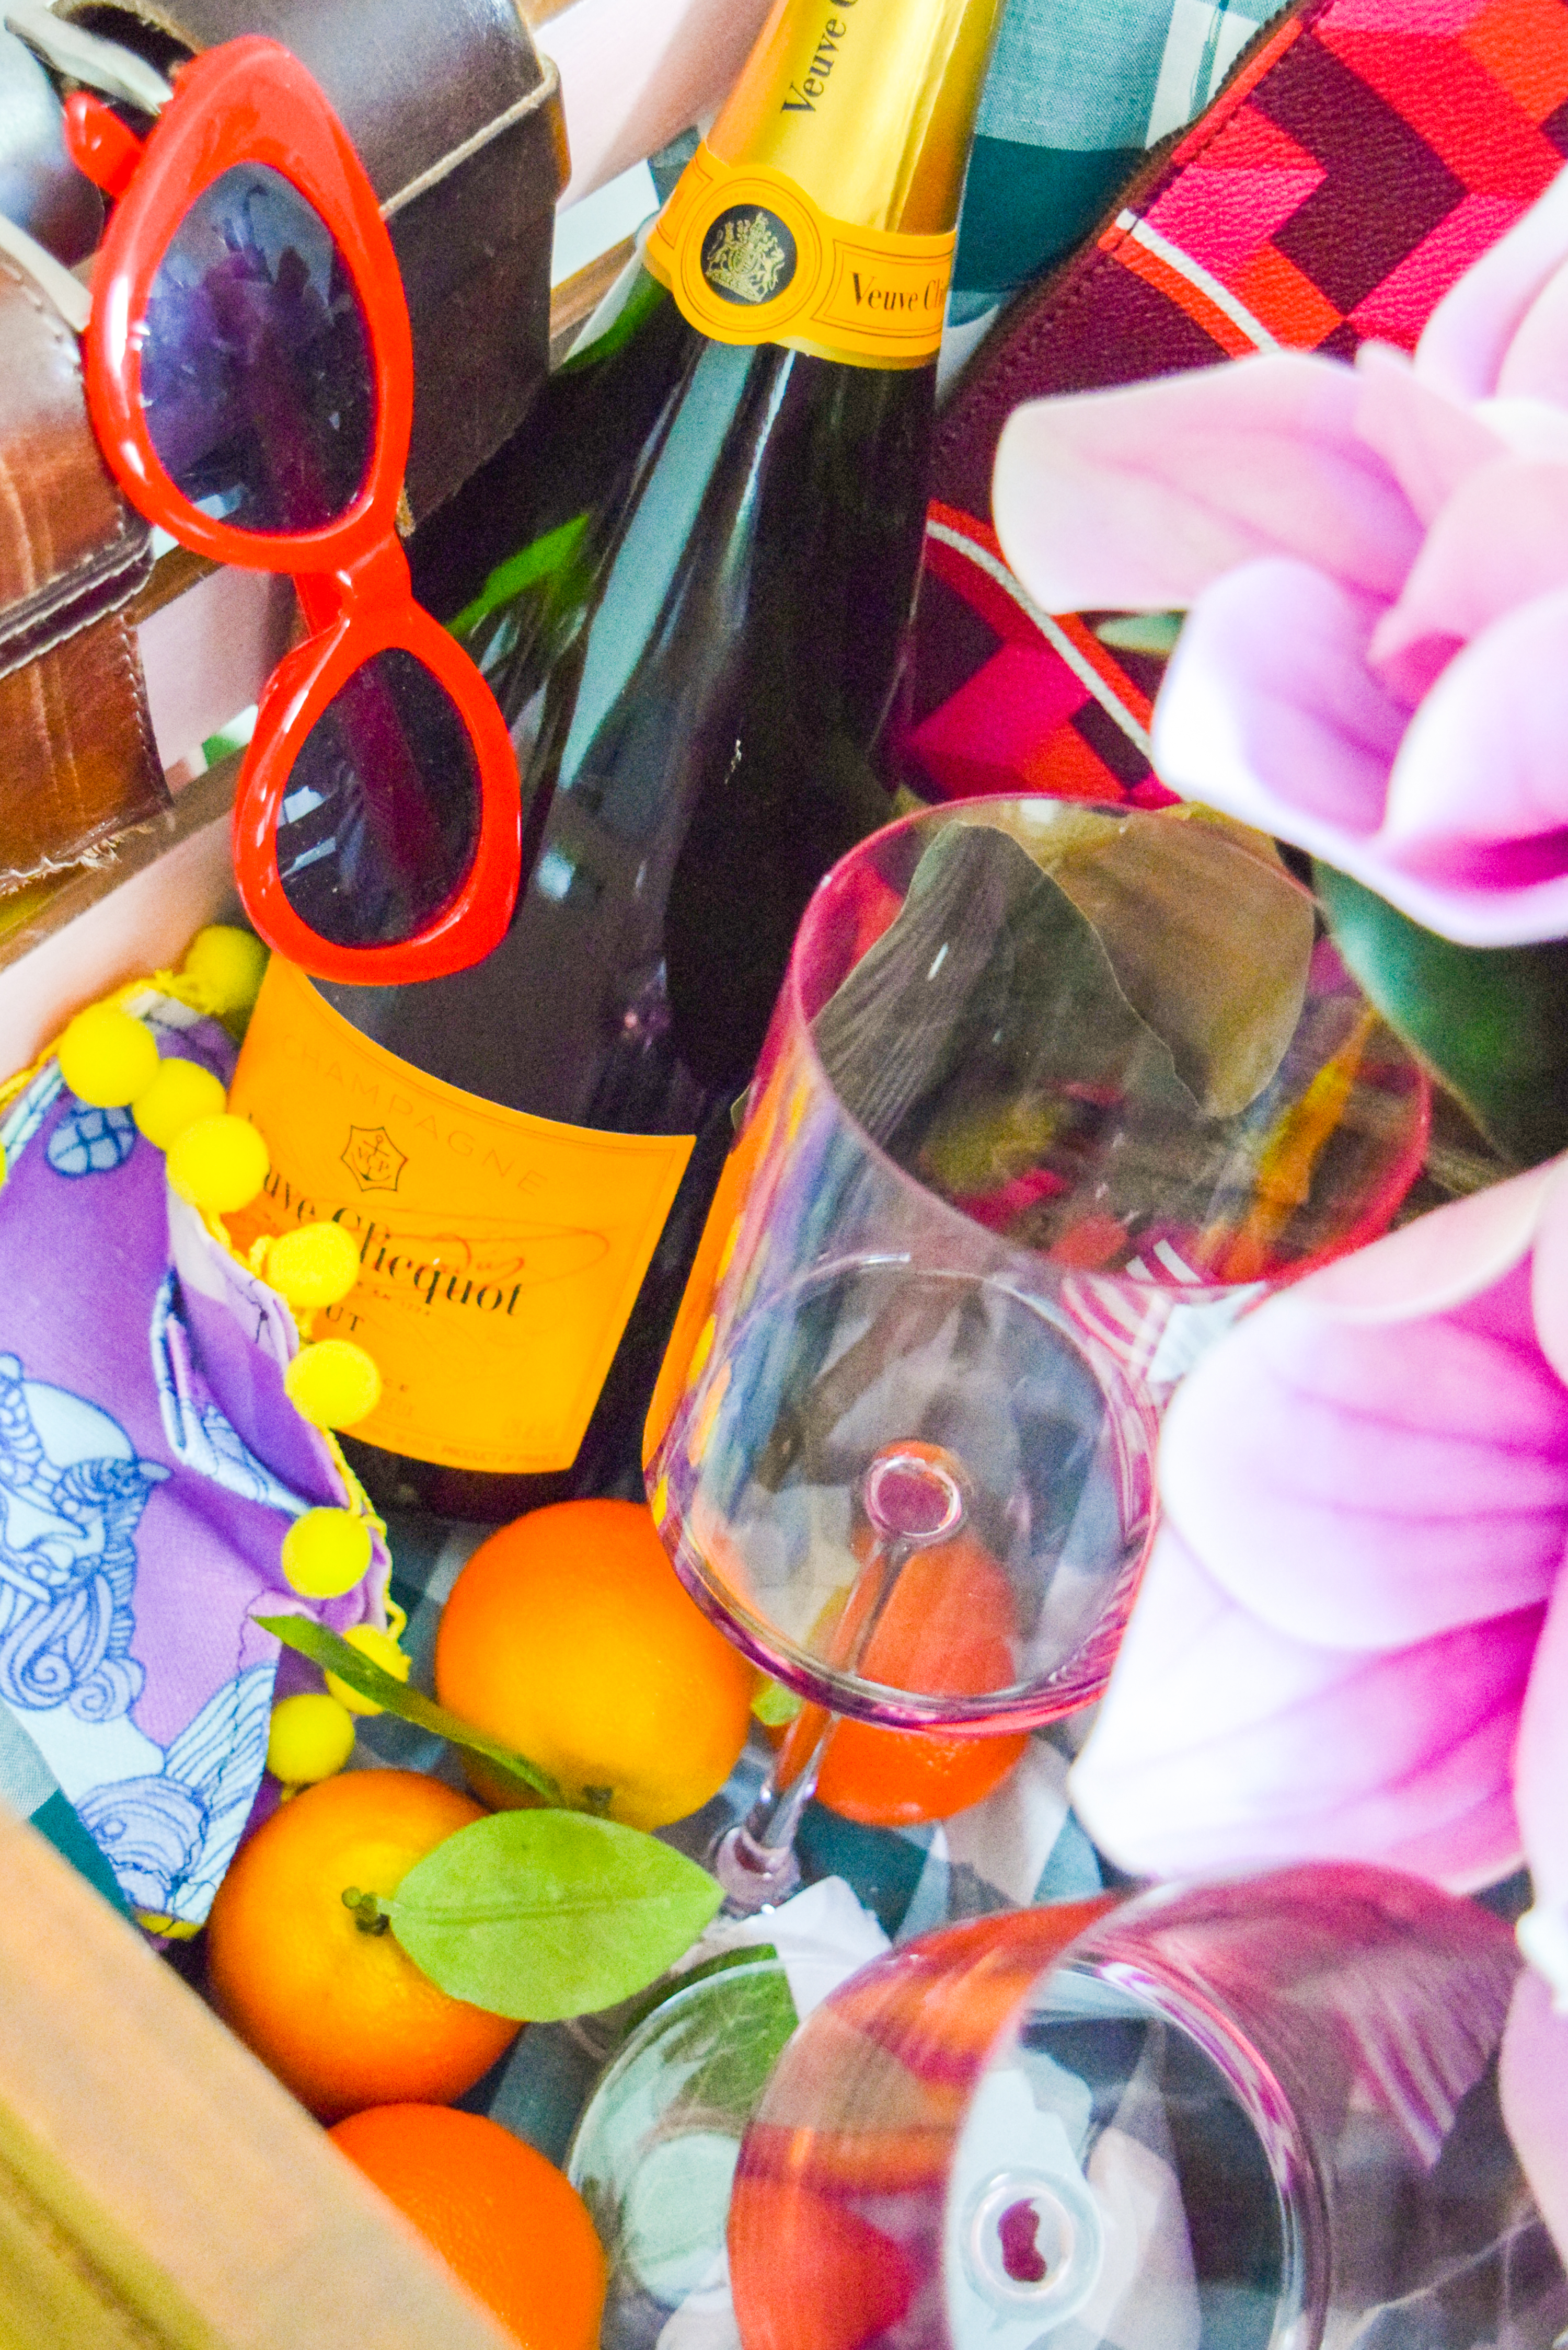
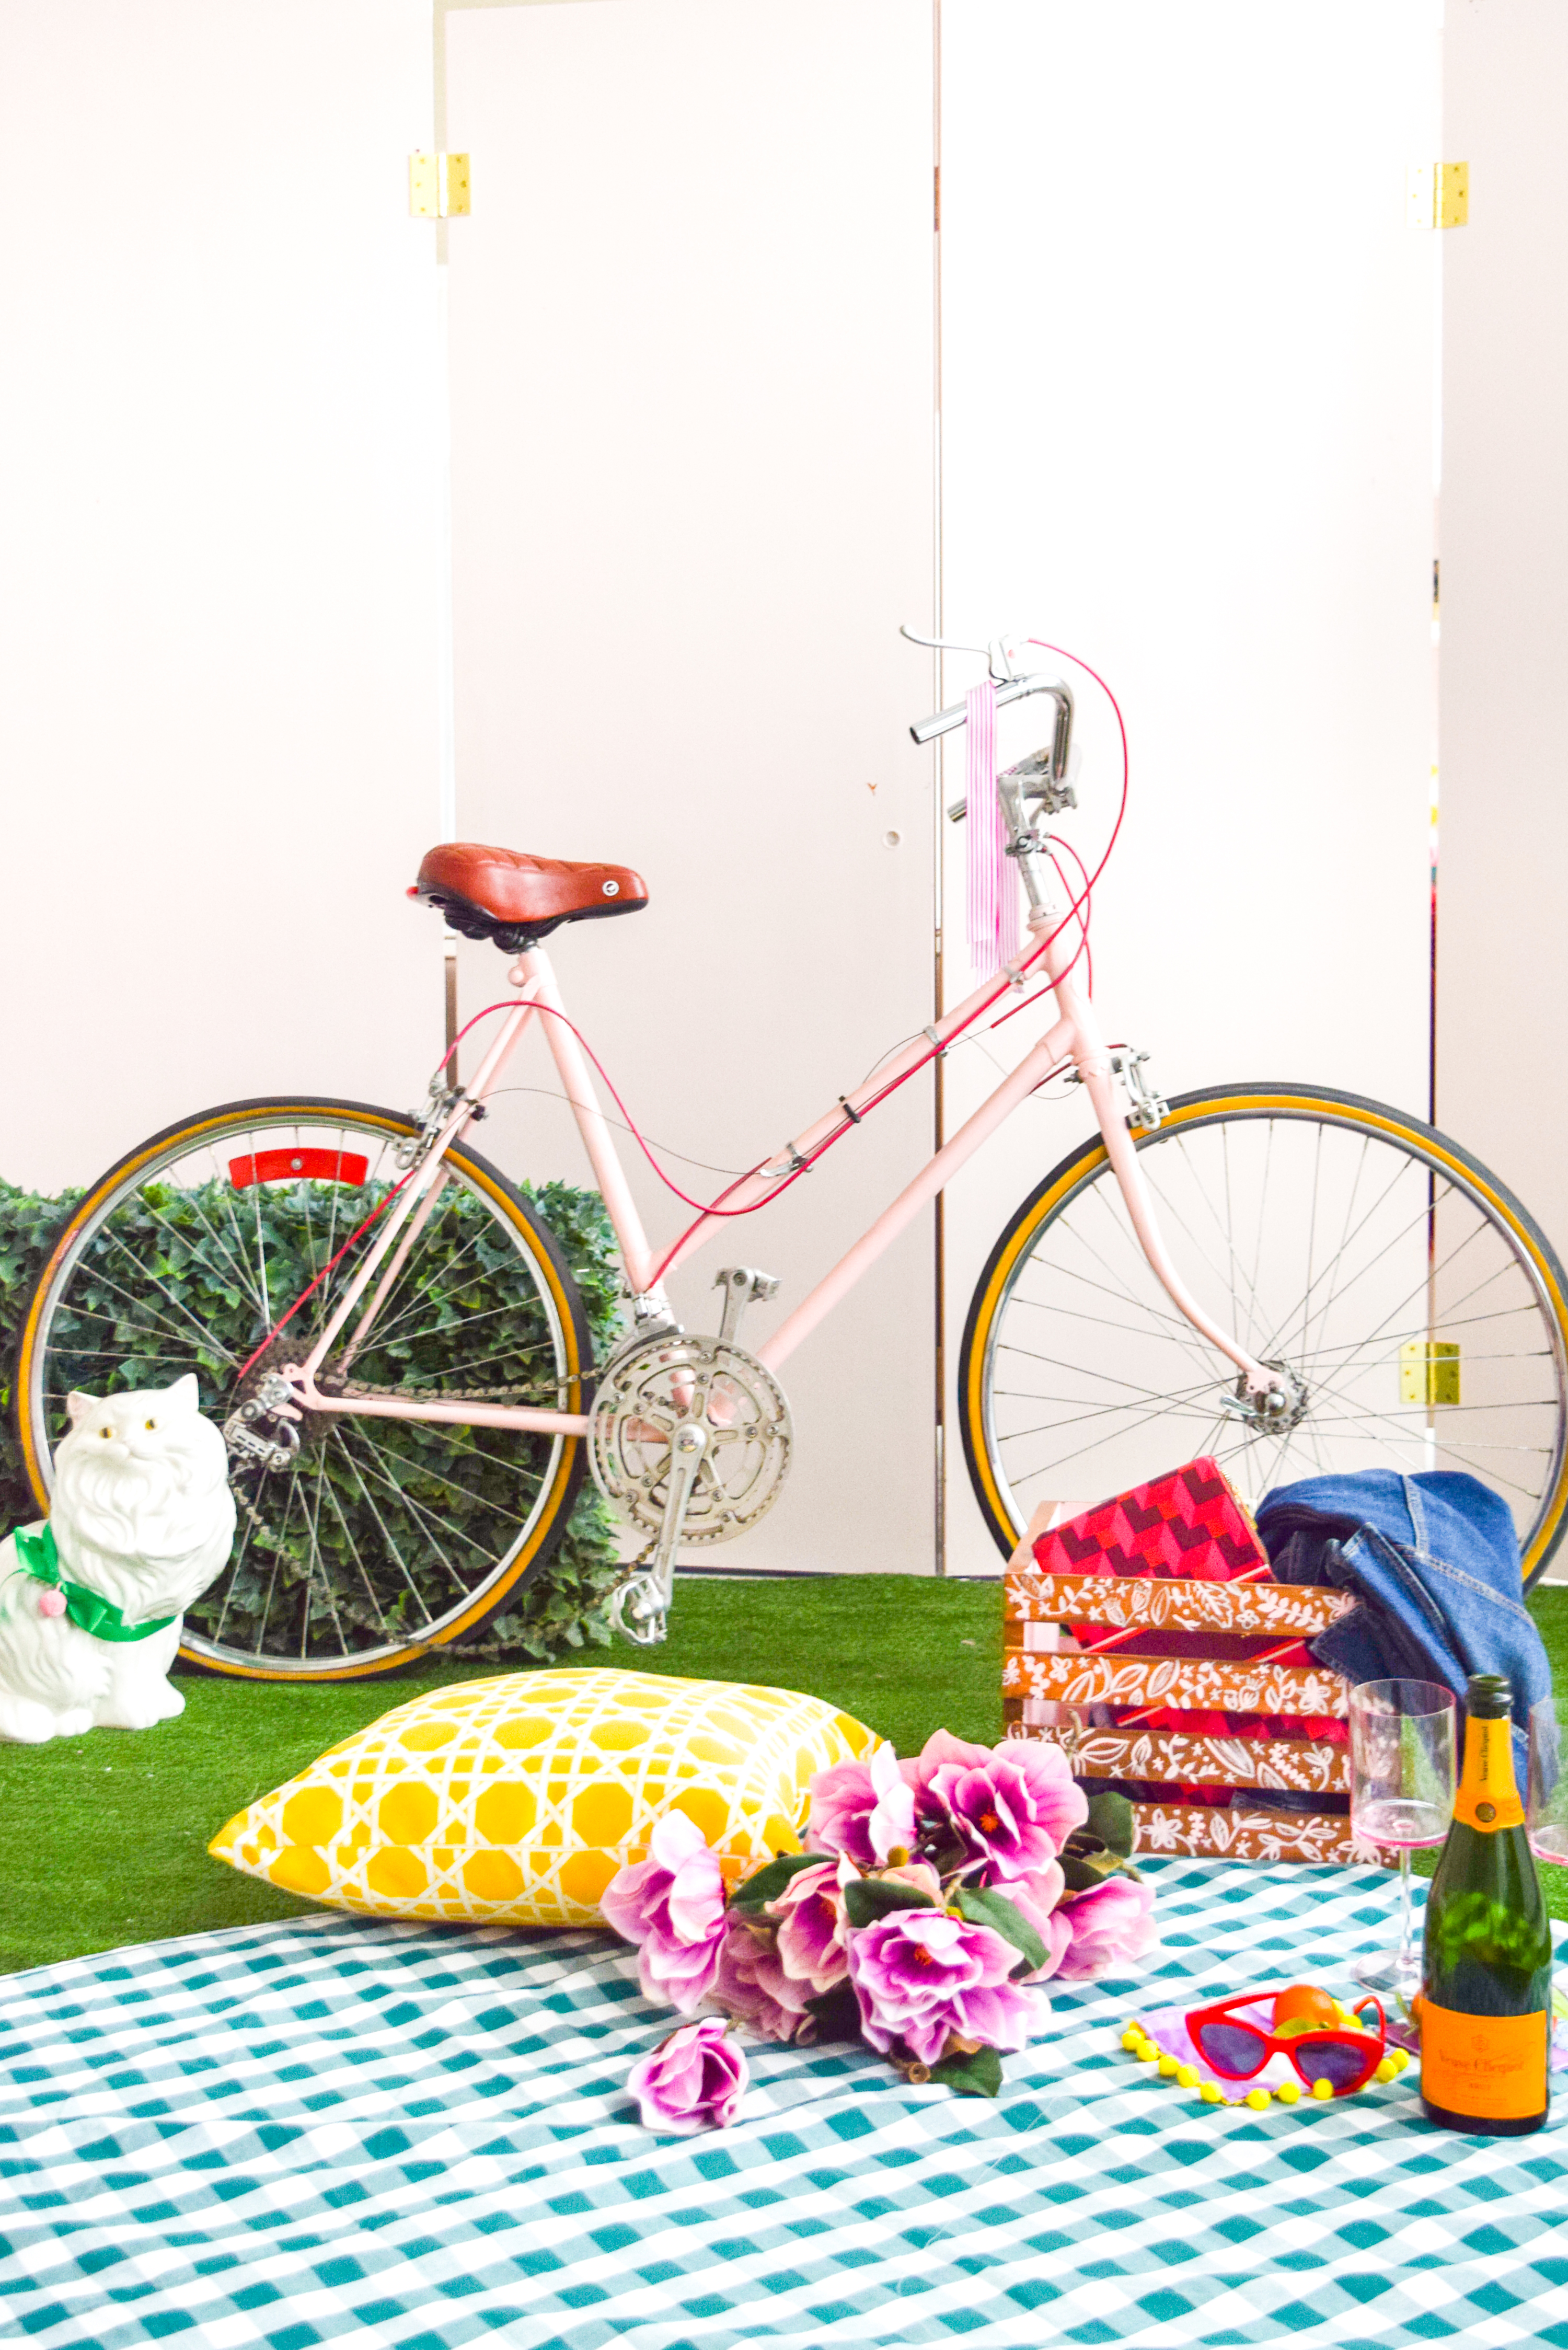
If you spot my adorable summer cocktail napkins you are correct! I couldn’t not bring them along with me on my fictitious first picnic in the studio.