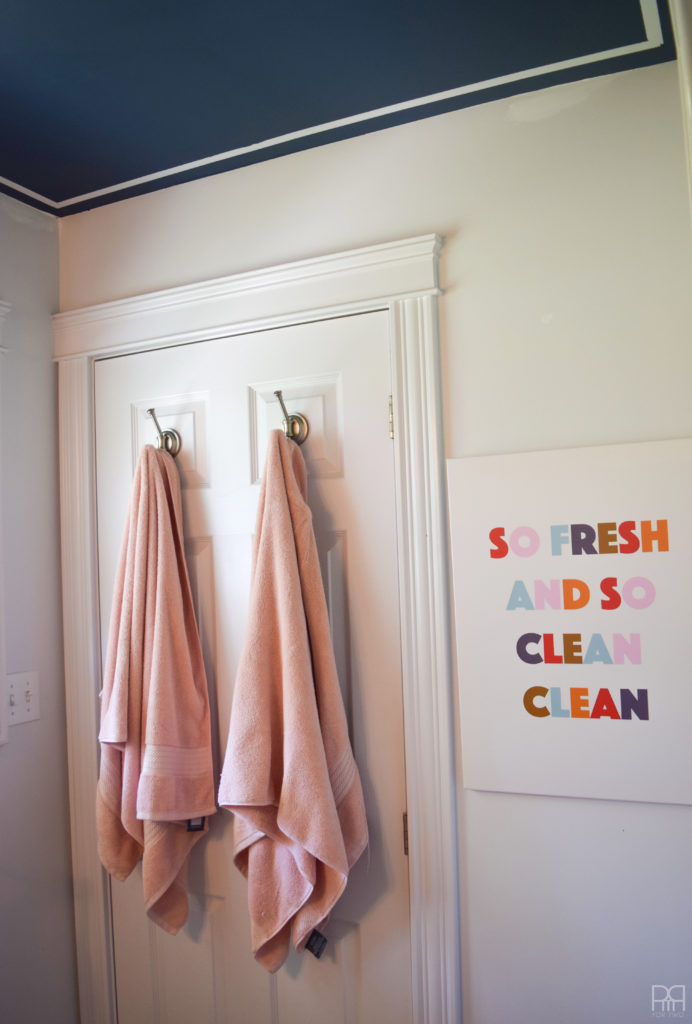
Our main floor bathroom is now complete and I’m hard at work on the second floor bathroom. I’ve had the bulk of the space put together since the first week we got here, but I always felt like I was missing something in the space behind the door. Enter my DIY bathroom sign!
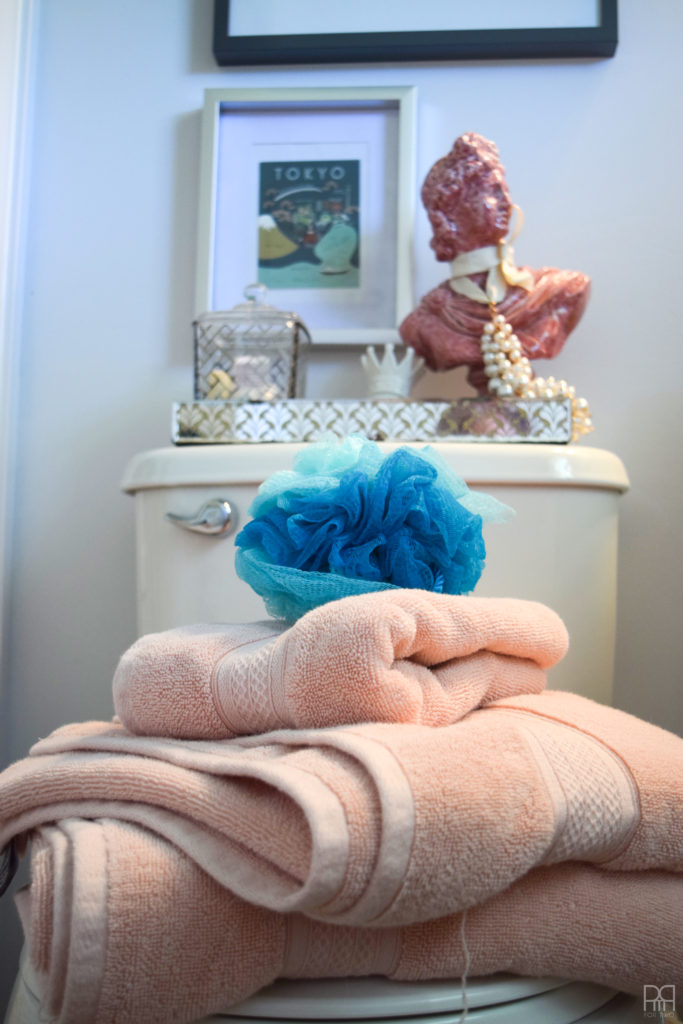

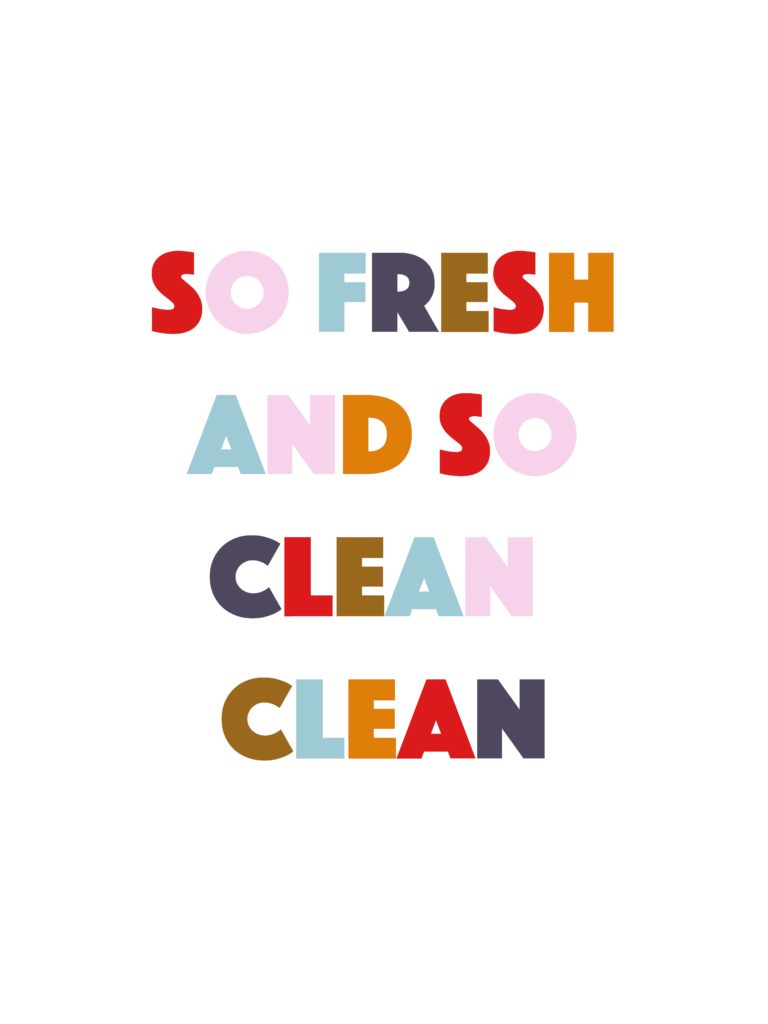
The space is big enough to hang something and too big to leave it empty. My friend Joan from Woman In Real Life made a funky canvas print for her daughter’s room, and it gave me the idea to do a canvas print for the tiny space. I wasn’t looking for the standard bathroom fare with bathtubs and bubbles and toothbrushes. In true form I went searching through my rap game for appropriate bathroom lyrics. Outkast was the answer – So Fresh and So Clean Clean.


I wanted to make the print myself; so using photoshop and my basic skills, I put the diy bathroom sign together using colours that were mature, not too seasonal, and would cary well from bathroom to bathroom. Needless to say, I’m in love with it.
Materials
- Basic knowledge of Photoshop, Illustrator or Photo editing software
- Time and Patience
- Colour inspiration (Check-out my I N S P I R A T I O N board on Pinterest or create your own!)
- Canvasndecor account (free to sign-up!)
Step 1: Decide on your canvas size. The space I wanted to fill can hold an 18″ x 24″ print, so that’s what I went with.
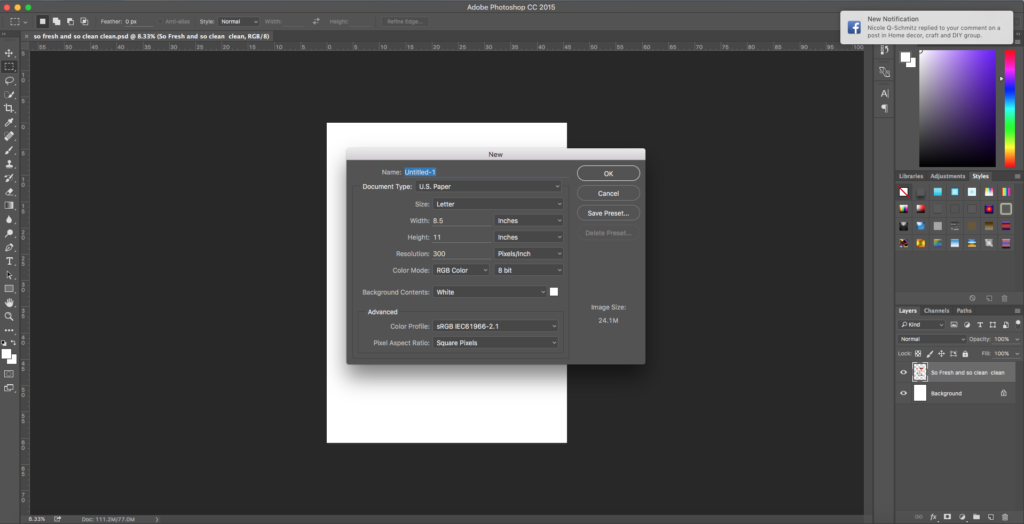

When working in photoshop you have the option to create an image in the dimensions you want. Since I almost aways view my vies at 10% – it gives me a better view of the photo as a whole – it’s not like I’m editing a massive file and have to keep scrolling around to see everything.
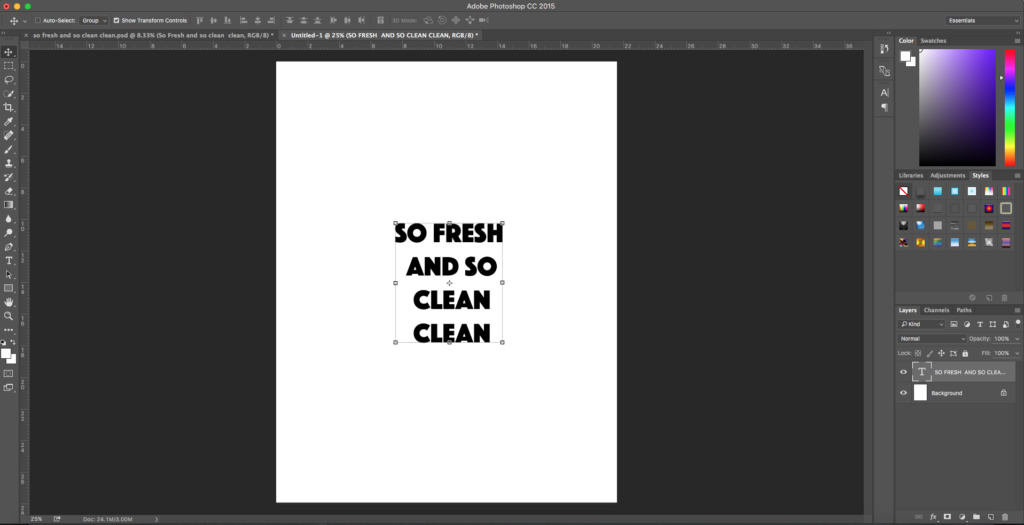
Step 2: In a font you like – in this case I chose Phosphate solid – write-out your saying. I went with “So Fresh And So Clean Clean.”

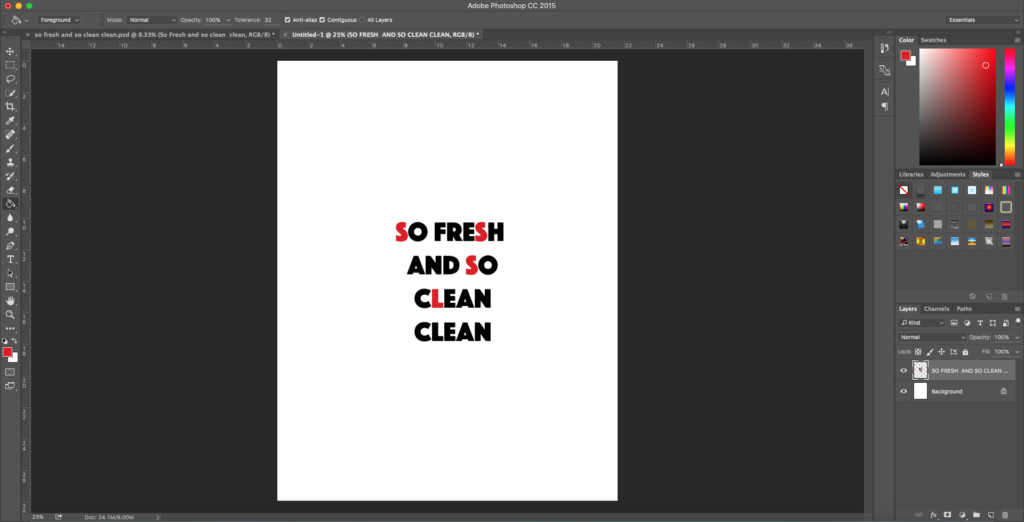

The red is #dc1c1
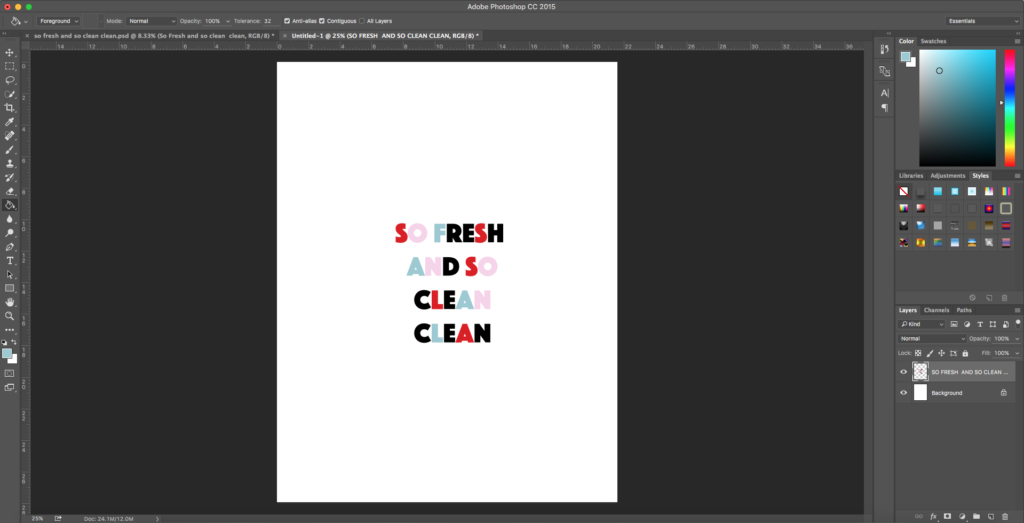

The pink is #f6d3ea, the blue is #9cc9d3
The mauve is #4d475d
The brown is #99681d, the Orange is #e17d0a
I would stick to 4-5 colours for one sign – no more – otherwise it gets too cluttered.
Step 4: Once you’ve checked, double checked, gone away and come back only to check again that there are no spelling mistakes and that you’re happy, go to Canvasndecor.ca to upload your print.
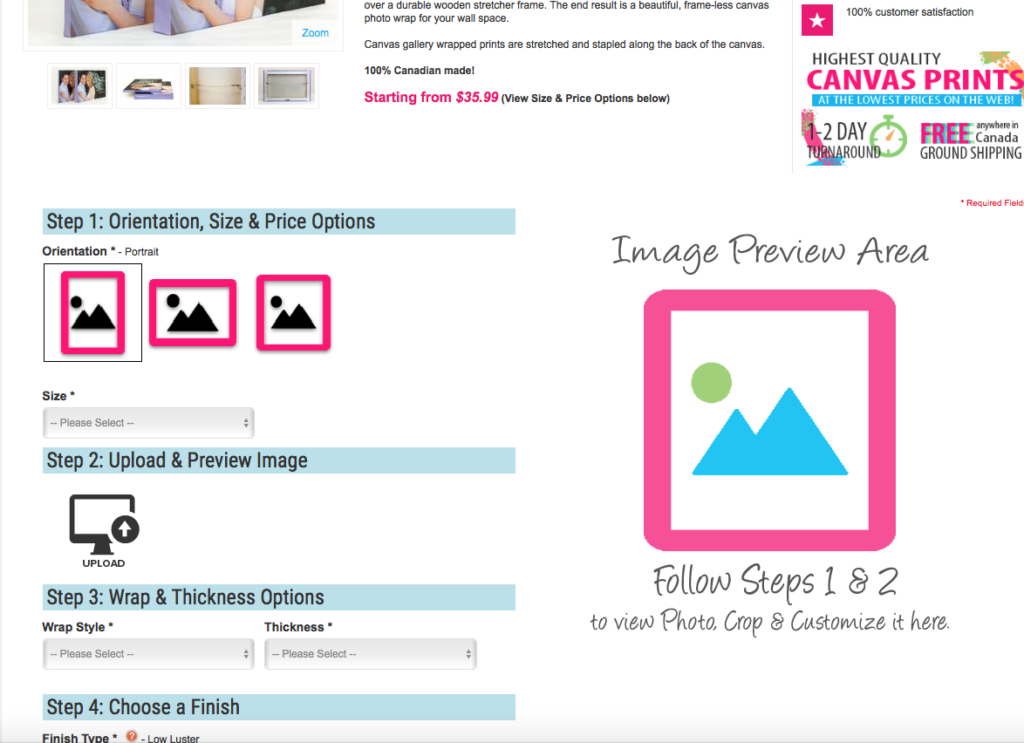

You can pick from all kinds of customized options like the sheen of the canvas, the wrap (whether it comes on a wood frame or not) etc.
Step 5: They ship within 48hrs, so if you’re in a hurry (like I always seem to be!) it’s totally worth it. They also ship for free in Canada! Hooray! It seems like with each move the shipping rates become more and more ridiculous, so I’m all about free shipping. Who’s with me?!

Step 6: Hang and enjoy!
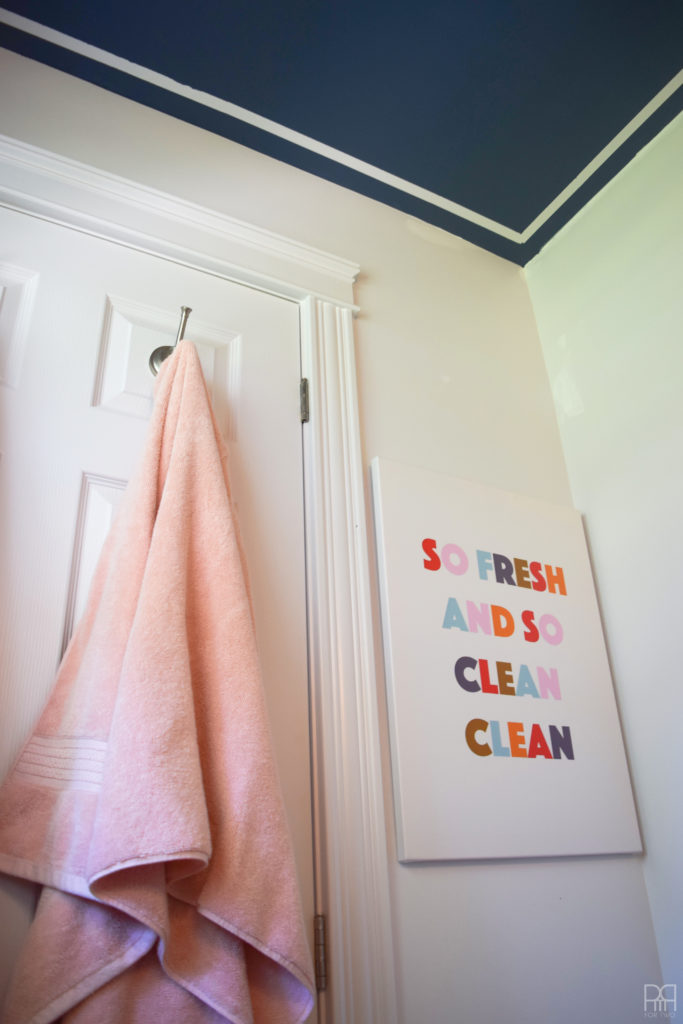
If you’re interested in how I did the ceiling trim check out my post –> here <–

And if you’re interested in our colour selection in the new house, click –> here <– for a guide and colour numbers.

Later this week I’m sharing our bathroom reveal, instead of just snippets – so stay tuned!
If you followed me on snapchat you’ll have watched me flip flop, wiggle and woggle all over the place trying to nail down what I was going to do with this print, so make sure you follow me to watch further nonsense unfold!
*CanvasnDecor provided the product for review, but all thoughts are my own. Thank you for supporting the brands that make PMQ for two.