

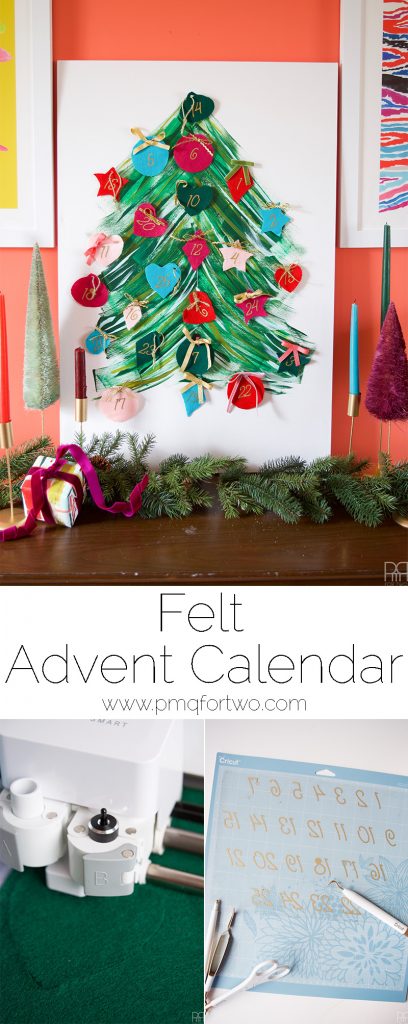
I am so excited about this post. This is another one of those ideas that’s been ruminating in the back of my head since August when I really started putting together Christmas. Using my Cricut I cut felt and iron-on vinyl to create a one-of-a-kind advent calendar. That’s right! You heard me! The Cricut cuts felt too (in case you didn’t know). I made mine in a day, and then had way too much fun playing around with it in our dining room.
*Cricut sponsored this post, but all thoughts are my own. Thank you for supporting the brands that make PMQ for two possible.
Want to see other projects I’ve made using my Cricut? Check-out my Atomic Starburst Ornaments // here // Check-out my Otomi Vinyl Chargers // here //
See all the Free Projects in Cricut Design Space


You see, there are tons of amazing advent calendars out there, but I always want to eat all the chocolate ones well before their appropriate day, and there’s enough chocolate once you give in an open the entire week at once. There are tons of other cool ones that don’t involve chocolate, but I find they’re tailored towards kids, and less about decor. Since we don’t have kids and I love my decor, I made one for myself – something that would make me happy as I go to add an ornament to our advent tree.
*The following product links contain affiliate links. Thank you for supporting the brands that make PMQ for two possible. For my full policies click // here //
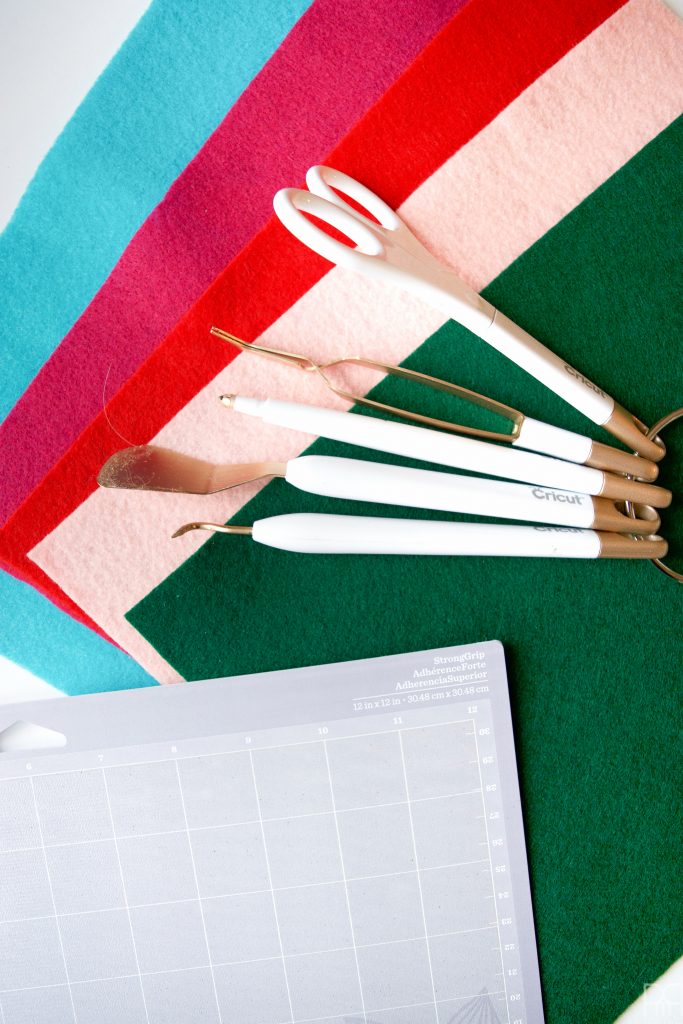
Materials
- 24 x 36-Inch Canvas
- DecoArt Maxx Gloss paint in Poblano Pepper
- Felt in 5 colours: I went with pink, raspberry pink, and red (Assorted Color Felts
- Gold ribbon in varying styles + any velvet ribbon scraps you have kicking around
- Cricut Explore Air

- Cricut Explore® Deep Cut Blade With Housing
- Cricut® Tools Basic Set
- Cricut 12″ x 12″ StrongGrip Adhesive Cutting Mat + Cricut® 12″ x 24″ StandardGrip Adhesive Cutting Mat, 2-pack
- Iron-on Lite, Gold
- Round Magnets 50 pcs.
- Scissors


Step 1: Create you tree. I did not photograph this process as it would be too complicated. Instead, I encourage you to paint something you like! I wanted lots of contrast in my greens, so I have three different shades and a light blue to provide contrast.
Make sure it’s big enough to cover most of the canvas and hold 25 ornaments.
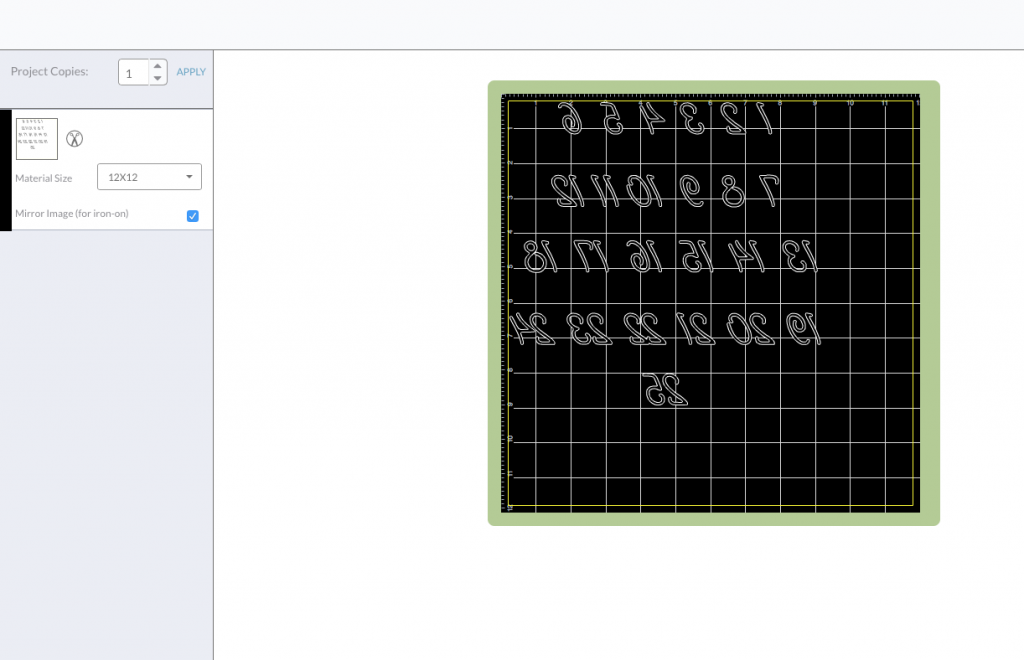
Step 2: While your painted tree dries, lay-out your ornaments in the Cricut Design Space. You can purchase as many styles as you’d like, but I kept it simple and used the existing shapes available from the “insert shapes” tab.
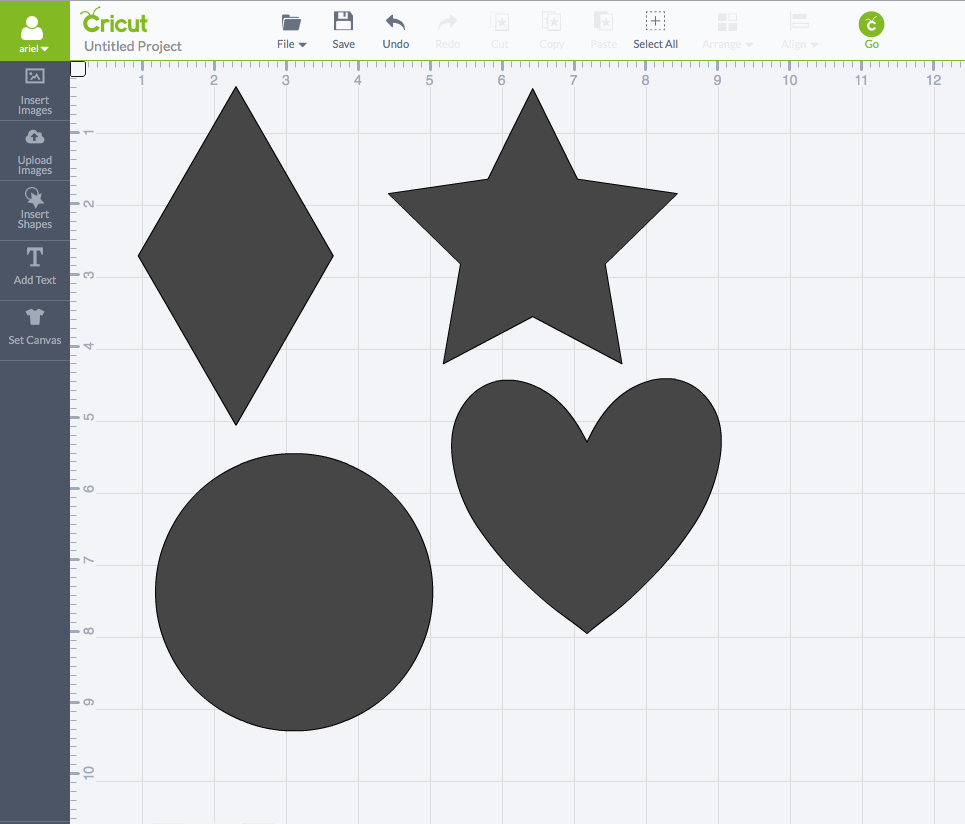

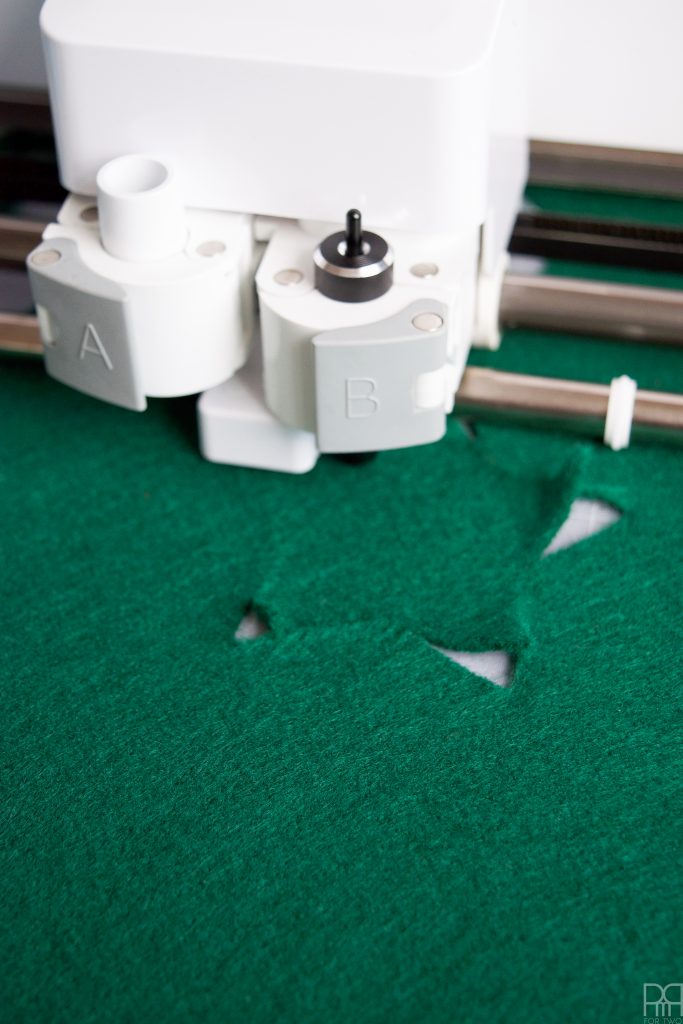
Step 3: Using your deep cut blade and strong grip mat, cut-out your ornament shapes with the Cricut.
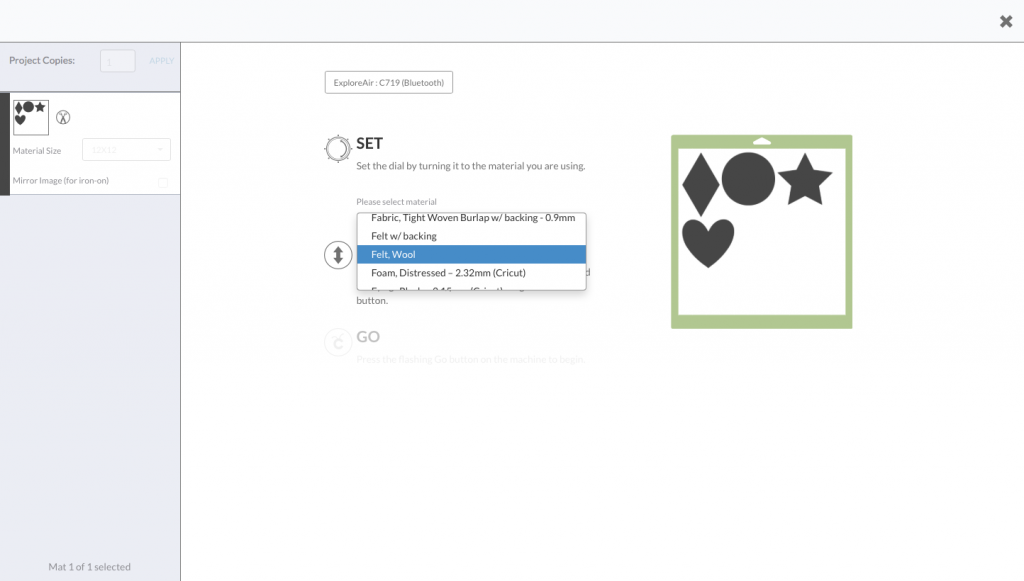
ATTENTION: The Cricut can cut BONDED fabric using the deep cut blade and strong grip mat. You will have a lot of difficulty if your fabric is not bonded. You can put your fabric on transfer tape to help stabilize it, or buy a bonding agent from your local craft store.
First, you’ll have to swap-out your regular blade for the deep cut blade. If you purchase a blade for this, remember to purchase the housing for it as well.
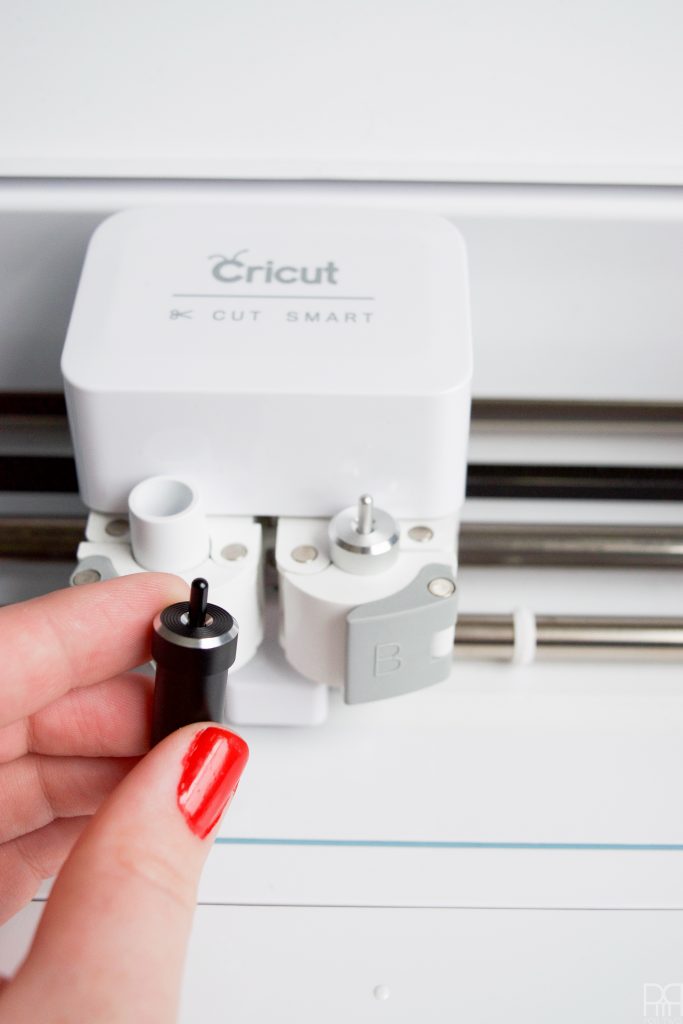
Before you hit cut, remember to set your material dial to “custom” and then chose from the drop down menu

Step 4: I ran each colour of felt through these cuts, and then I cut a final shape from each piece of felt to make 25 ornaments.
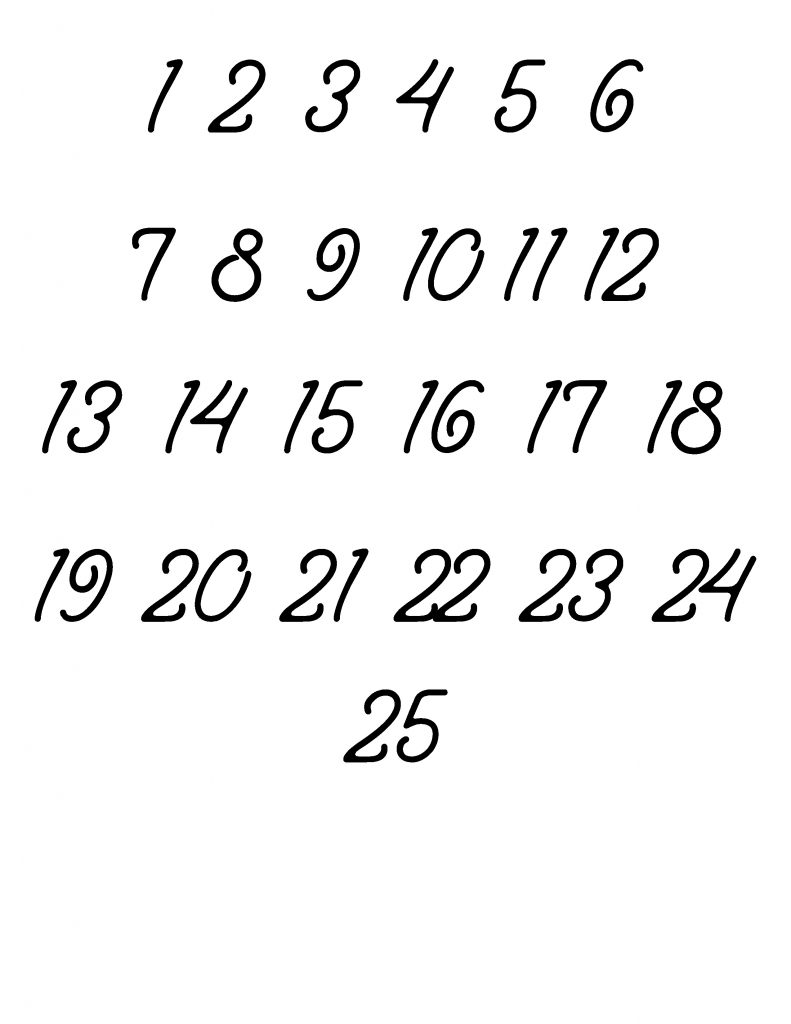
Step 5: Time to cut your numbers! I went with an existing font I owned, and laid-them all out in a photoshop doc before uploading it to the Design Space as a cut file. You’re welcome to use this one below.

Step 6: When cutting the iron-on vinyl, you have to place the “shinny” side down on the mat and mirror your image before hitting go.
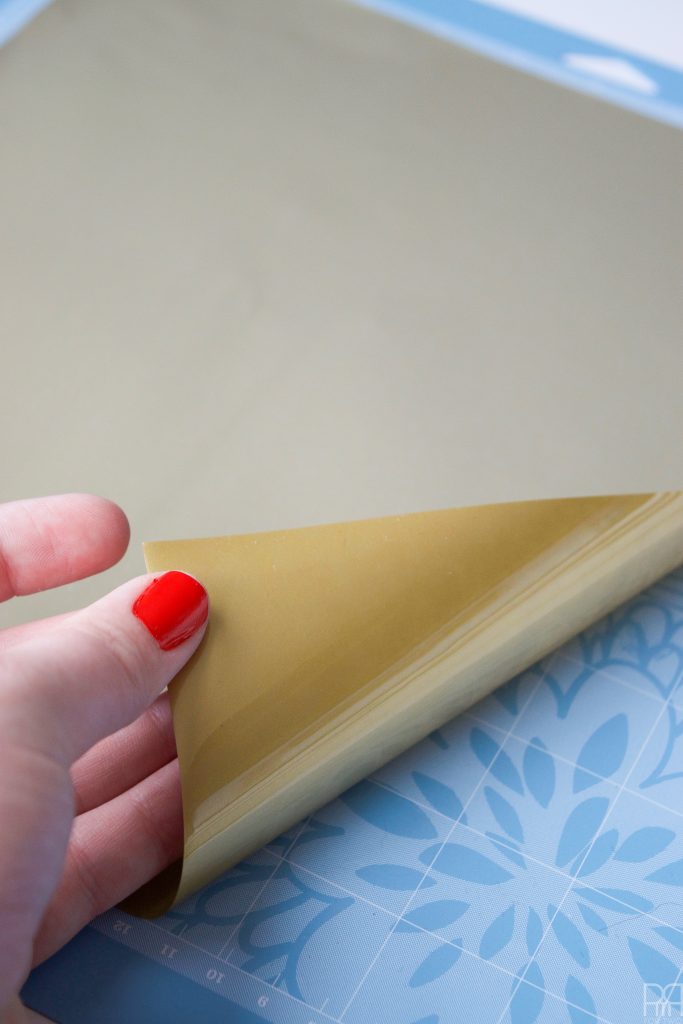

Step 7: One the numbers are cut carefully peel away the excess vinyl. You should have gold numbers, backwards, left on a clear piece of sticky paper on your mat.
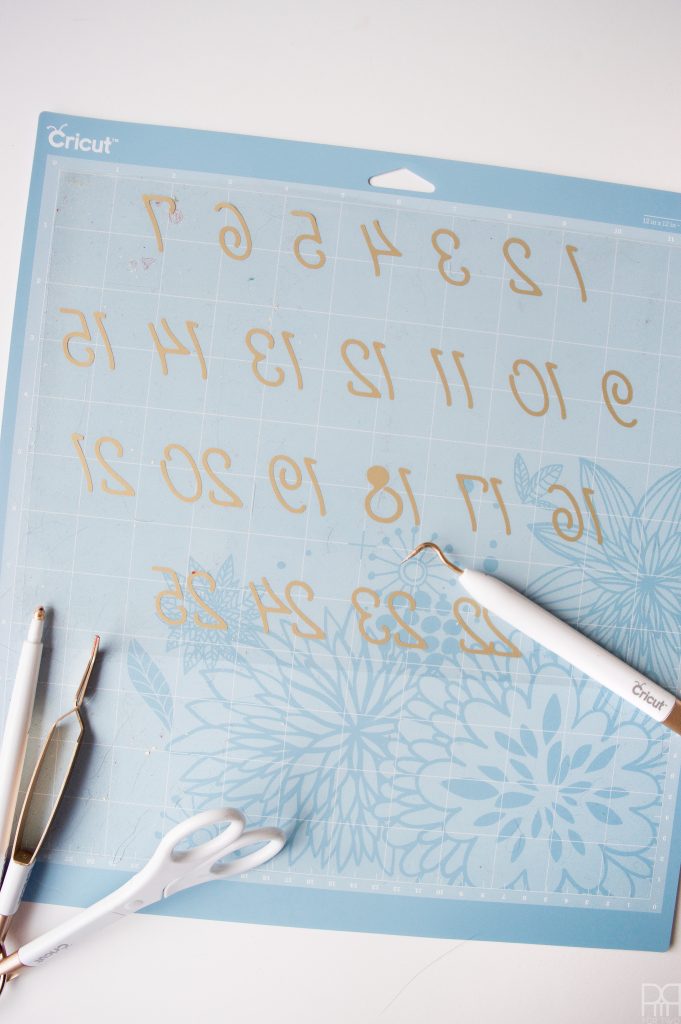

Once that’s done, lift off the clear sheet and cut your numbers into squares. The clear sheet is your iron transfer sheet.


Your iron should be set for wool, with no steam.
To apply the numbers to your ornaments, iron the felt ornament first for 10 seconds, then apply the numbers so that the plastic sheet is between them and the iron – that is to say, right side up. Hold the iron there for 30 seconds, flip the ornaments over and iron for another 30 seconds.
Only remove the clear sheet when the ornaments are cool to the touch.
Step 8: Using a hot glue gun and some ribbon, apply decorative touches to your felt ornaments.
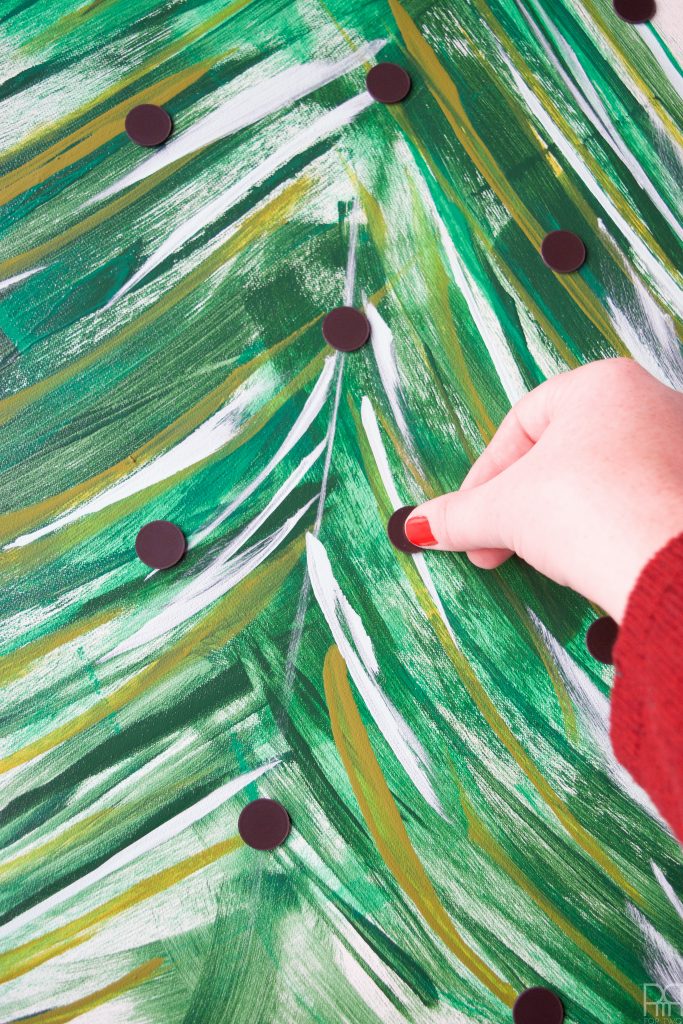
Step 9: Apply 25 magnets to the tree. The other 25 will be glued onto the back of the felt ornaments.
Step 10: Now that everything is set and ready to go, you can instal your advent calendar and wait till December 1st!


Do you love the wrapping paper on that box? Well you can check-out the tutorial // here //


And there you have it! An advent calendar made with your Cricut machine!


This is a sponsored conversation written by me on behalf of Cricut. The opinions and text are all mine.