Did you know that 2017 is the 150th anniversary of Canada as a country?! That’s right! We’re either crazy young or crazy old as a country, it all depends on how you look at it. You can read more about that // here // When I was in Toronto back in February I almost purchased a large silk-screen print of Ontario’s crest silhouetted against a green background. It was too big to easily find a frame for, and I was running low on my “fun money” for that trip. I left it where I found it, and told myself that I’d make my own version.
When // Cricut // invited Canadian bloggers to create something using their Cricut in honour of Canada’s 150th I jumped at the occasion! A chance to create something distinctly Canadian, but also distinctly me. In true form, it’s a little rough around the edges, got some pink, and is bold. I am tickled with the results and will have to try it again on a bigger scale.

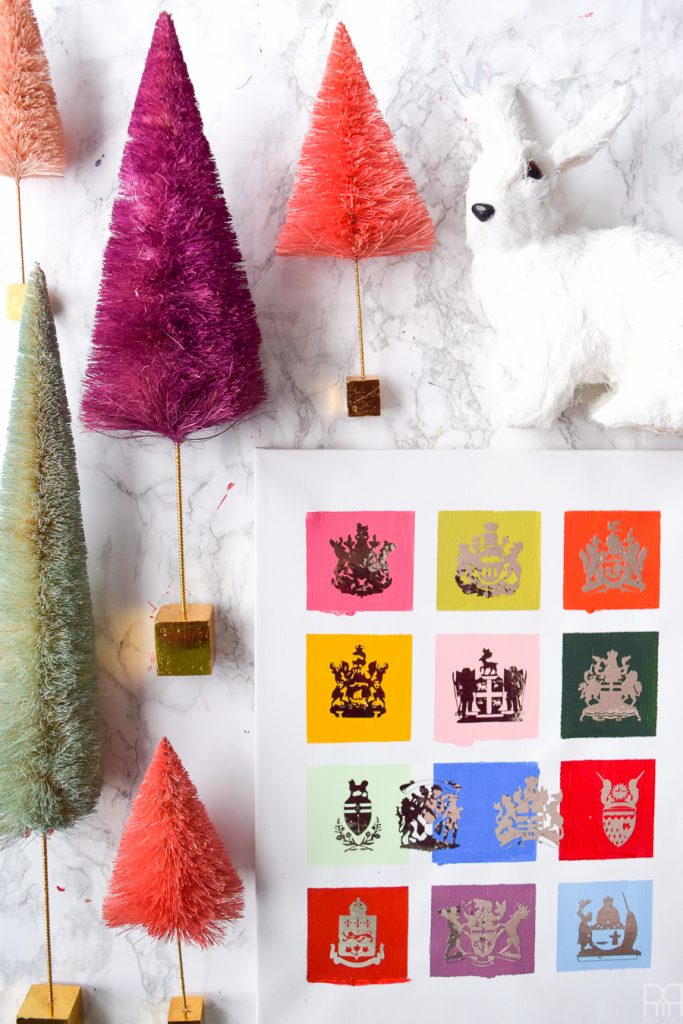
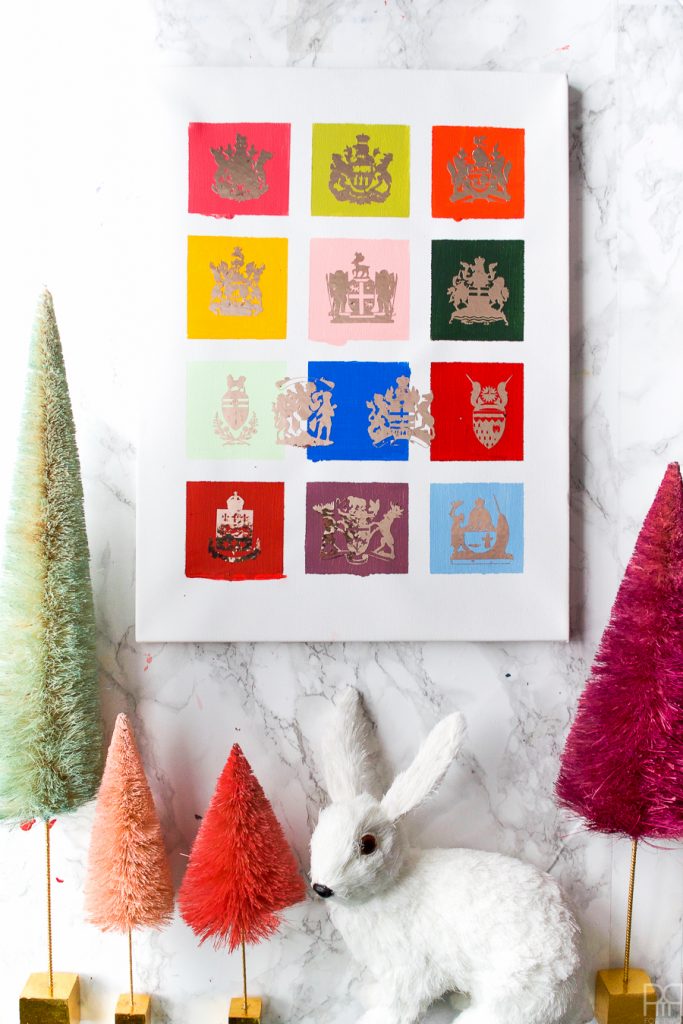
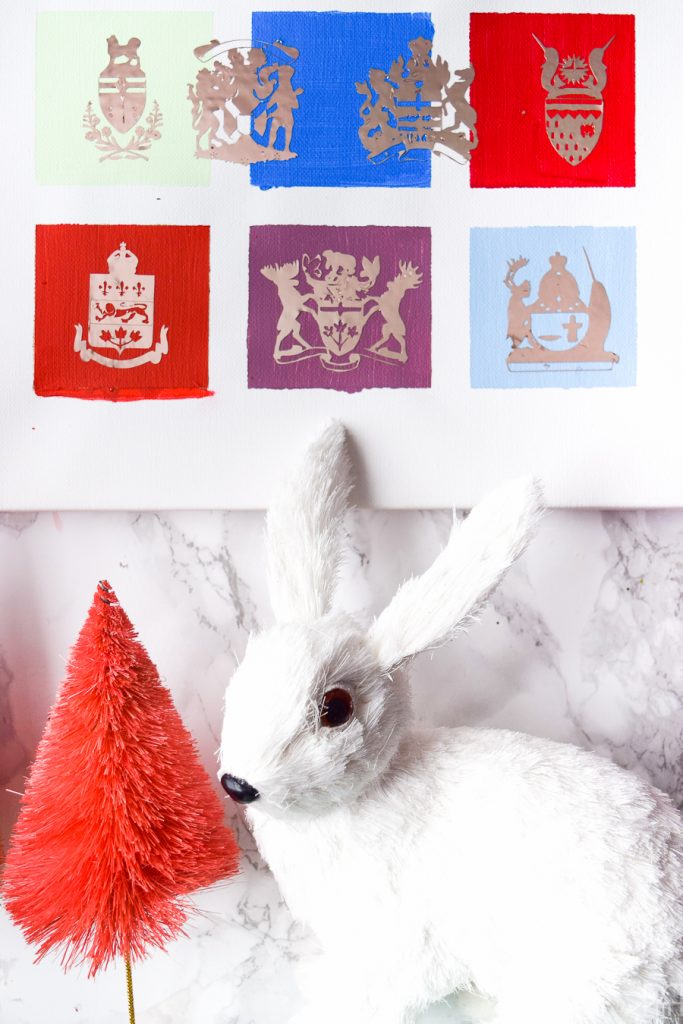
For those of you who don’t know, Canada has 13 Provinces and Territories. I, like a complete dummy, only counted the provinces when I made the boxes on the canvas. So when I sat down to create the cut files of the crests and remembered the 13th, I felt like a real winner. Too late to turn back now, I decided to roll with it. The somewhat scattered nature of the crest placement and the few instances where paint bled under my washi-tape border all feel 100% right.
Canada is not neatly divided into boxes, our distinct regional cultures don’t stop at the provincial borders and they certainly work together to form the // Canadian Cultural Mosaic //. I think this piece is a definite reflection of that – I’ve created the Canadian Vinyl & Paint Mosaic.
The following product links contain affiliate links. Thank you for supporting the brands that make PMQ for two possible. For my full policies click // here //
Materials
- DecoArt Paints (available online and at Michaels): Boysenberry Pink
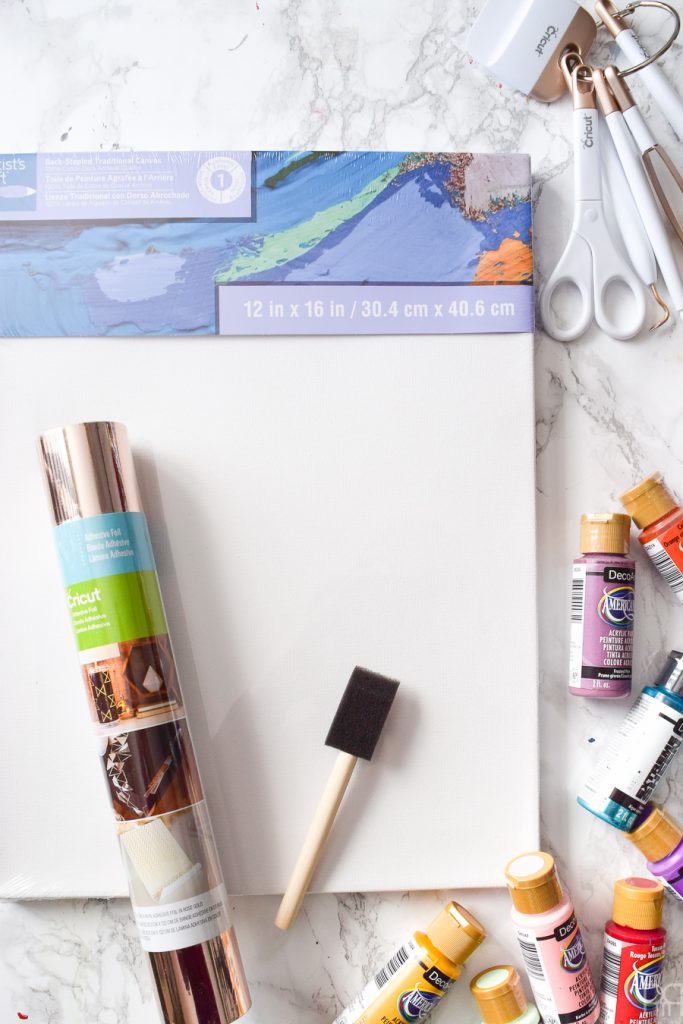
- 11x14inch Stretched Canvas, 2-Pack
- Washi tape (or painter’s tape)
- Cricut Explore Air

- Adhesive Foil Stainless Gold
- ricut® Cutting Mat Variety 3 pack
- Cricut® Tools Basic Set
- Cricut Design Space


Step 1: Using your washi tape (or painter’s tape) create the grid you’d like for the crests to sit in. *Don’t do what I did and create 12 when there are 13. Add a 14th and put Canada’s crest too!*

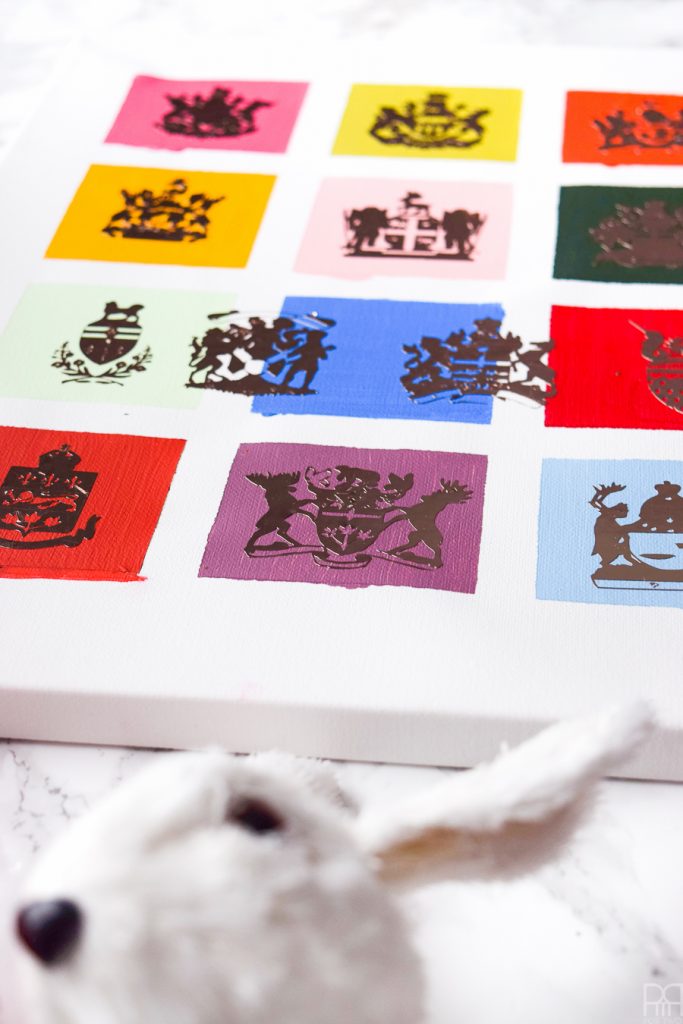
Step 2: Chose which colours are going to go where. I placed mine in a grid first so that I’d see how they all looked in context.
I went for variations on the Hudson Bay Company’s classic Red, Blue, Green and Yellow. It’s those colours in various shades!
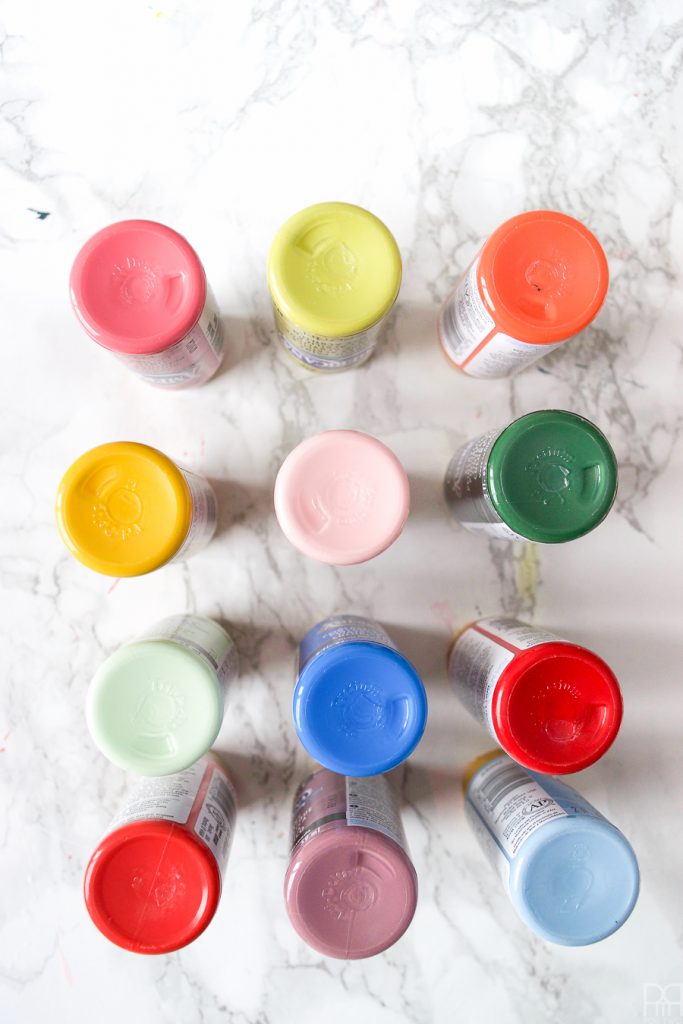
Step 3: Get your first coat on! I didn’t want to use all my brushes doing this, so I tried to do all the reds at once, then the blues, the the pinks, greens etc.
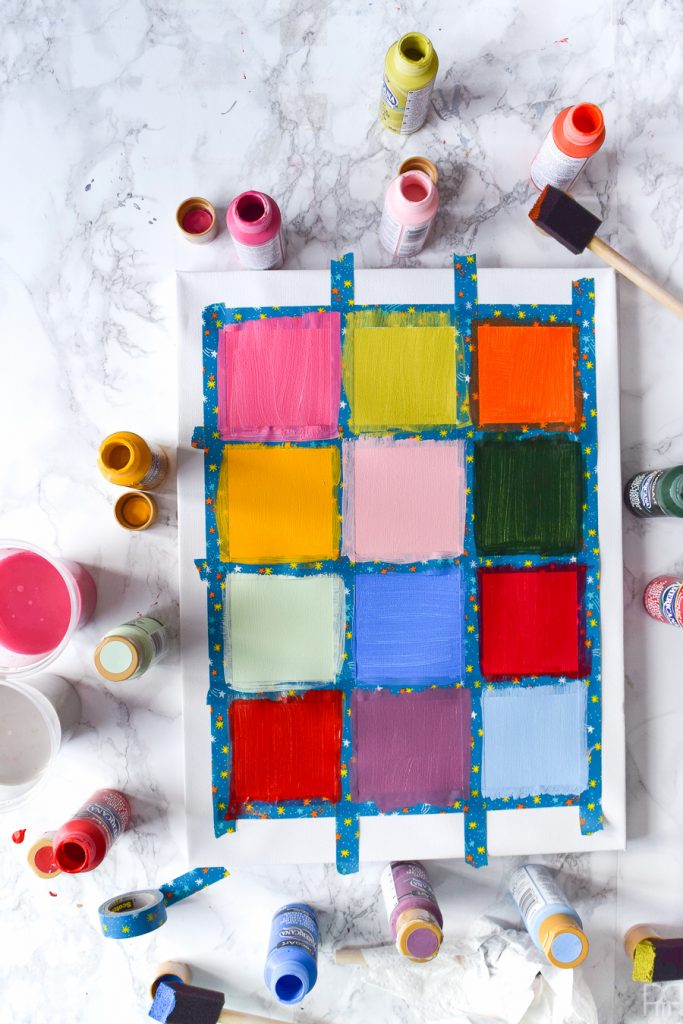
Add your second coat! Make sure you leave enough time for everything to dry. I can’t stress this enough when working with paint. If you apply too soon you run the risk of smudging partly dried layers – it’s never a good look.
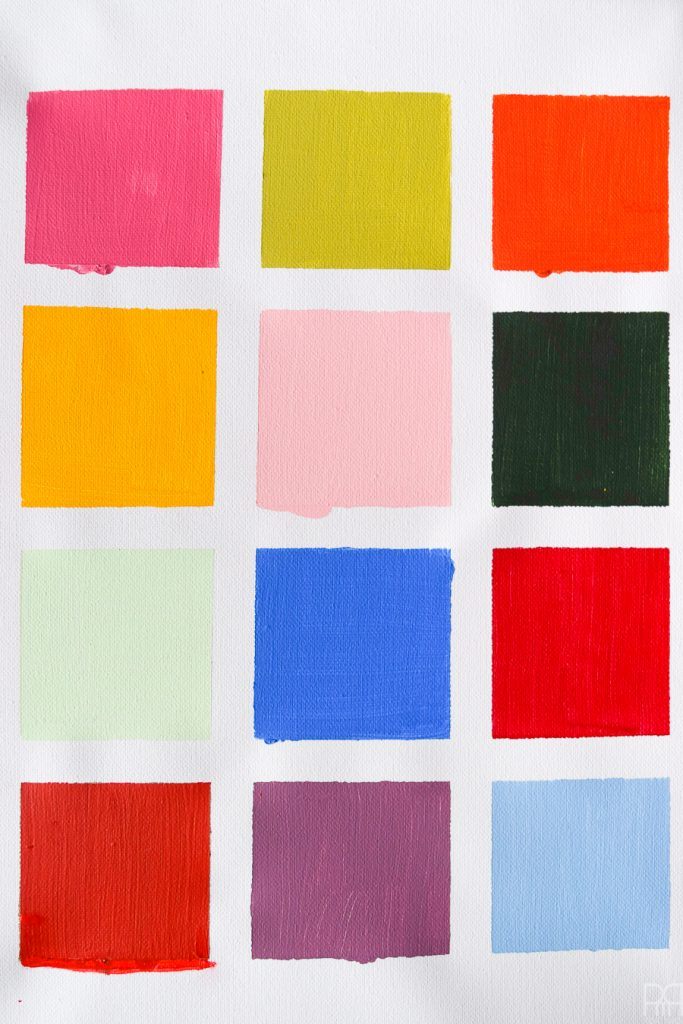
Step 4: Once everything is dry, peel back the tape! Here you’ll see a few places where my washi tape didn’t hold, but that’s ok. Like I said in my intro, I actually kind of like it. I think it would have looked too precious if everything was straight and clean.
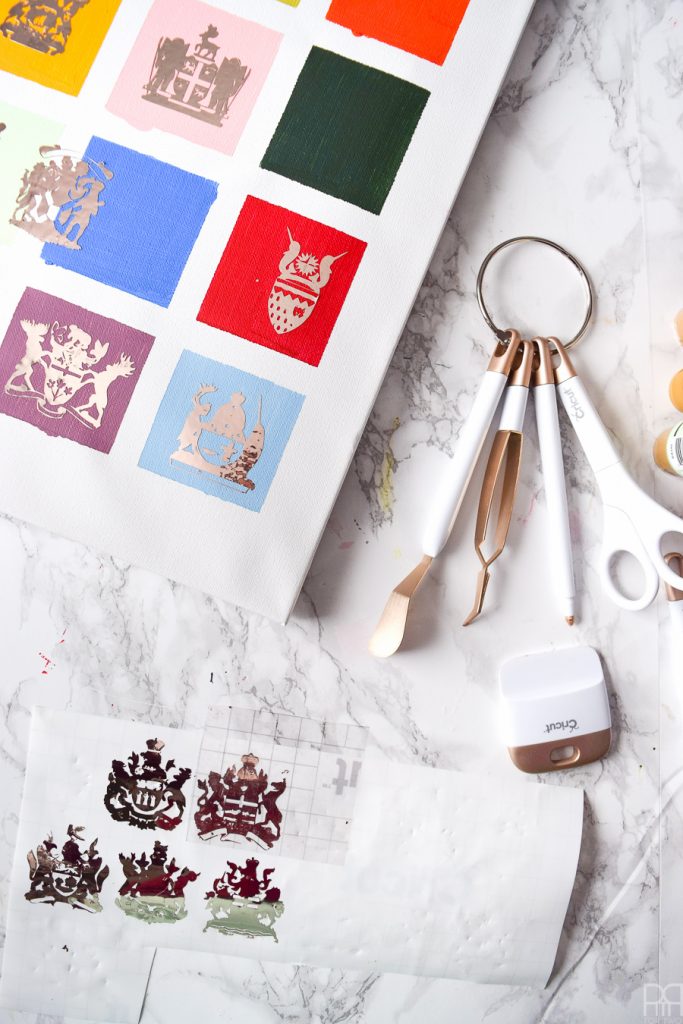
Step 5: Using your Cricut Design Space account, upload all 13 crests of the Canadian provinces and territories, and if you want an even number, add Canada’s crest too. I used this image // here // It will take a while to upload each image, delete the negative spaces and then save as cut files. Trust me. It only really took 10-15mins but it felt like forever. Well worth it though.
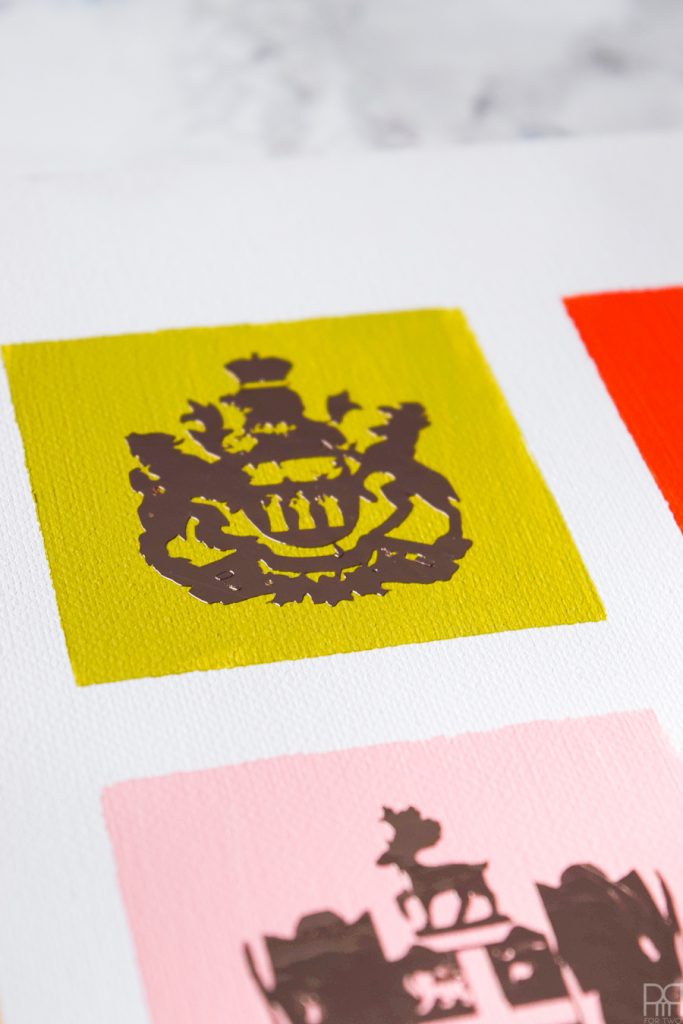
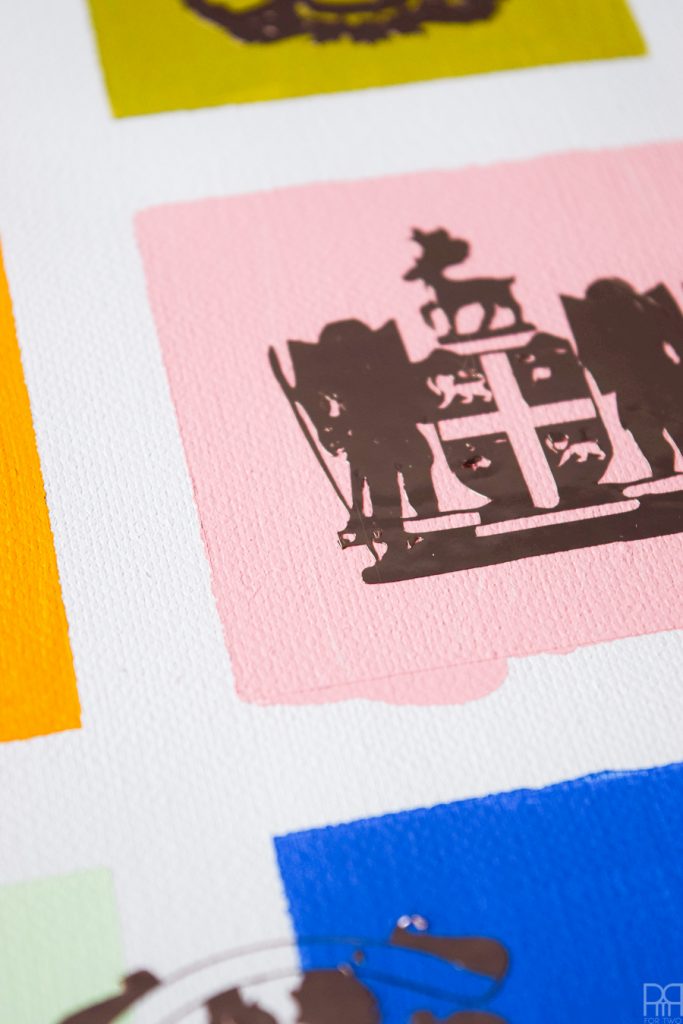
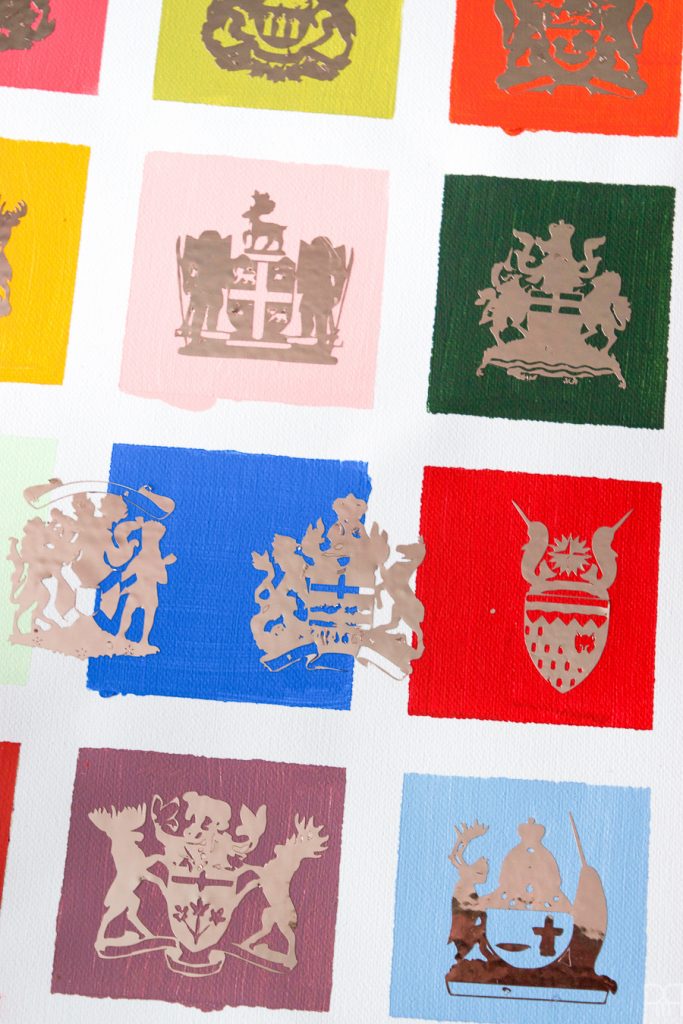
*REMEMBER: The more details you add, the more weeding you’ll have to do. Given the size of the canvas I used, the crests came out under 2″ wide and under 2″ tall, so all those details were tricky to weed-out and I didn’t get ’em all.
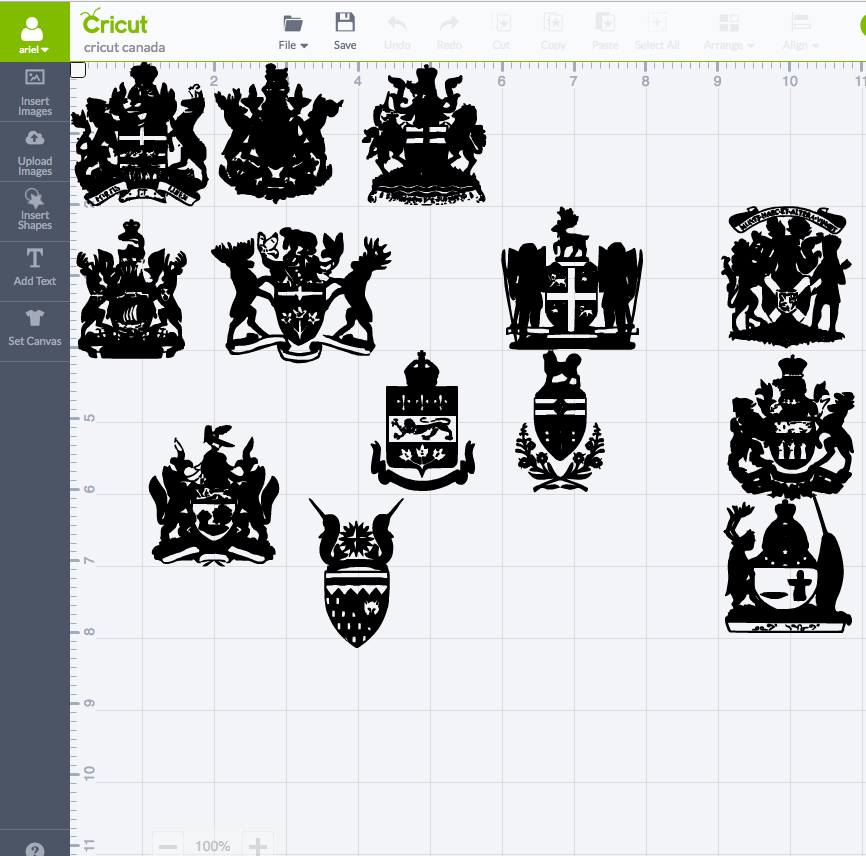

Step 6: Size each crest for the size of the squares you’ve got in your grid. Like I said above, mine needed to be just under 2×2.” I then applied my rose gold foil to my cutting mat and went about cutting the crests.
Given the amount of detail on each crest, this also took a while. Use it as an excuse to tidy-up the paint you just used.

Step 7: Once the crests are done, take your time weeding the foil. I went crest by crest and tried to get as many of the little details as I could without ruining the crests.

It’s hard to take a straight shot of the foil, but given that it is reflective you’re always bound to catch the light and the shadow. It’s a beautiful shade of rose gold though.
Step 8: Using your Cricut transfer tape, start applying the crests to the squares on the canvas. I did this in no particular order. I tried to place crests on squares that I thought would compliment each other.
To handle the issue of the extra crest/my stupidity, I added four to a row and had them sort of overlap on squares etc.
Step 9: Admire! I was really pleased to see how it came together. This was an afternoon craft that was thoroughly engaging and tons of fun- and not just because I got to look at crests for 15 minutes!
NB Did you know that when I worked at the museum on base here in Gagetown 3 years ago, I had to learn about crests and all the elements that compose them in order to better accession all the unit patches we received. It was super interesting, if a bit tedious. If you’ve got a minute I recommend you look into it.